Notification Settings
Disclaimer: This guide refers to using the Element Matrix clients, Element Web or Element Desktop apps
Accessing Notification Settings
You can change your Matrix account settings by clicking your profile icon in the top left of the Element client. By default, this will be a colored circle with the first letter of your Matrix ID. From the presented drop-down menu, you'll be able to jump into specific settings straight away, or access All Settings. Clicking All Settings will take you first to General settings, click Notifications in the vertical navigation menu on the left to open Notifications settings.
Info: The below setting layout / order may change in subsequent client updates, however generally most settings will still perform the same function.
Notification Settings
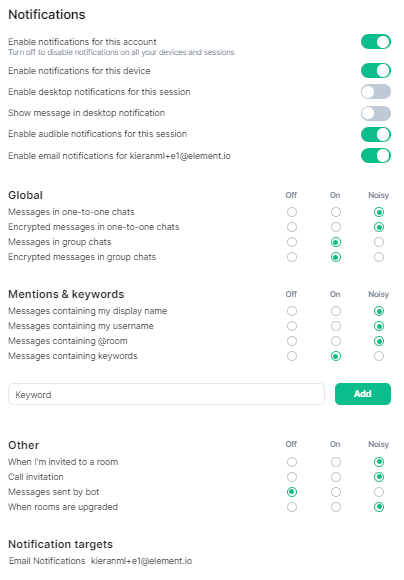
Notification settings allow you to customize default notification settings which are synced to your account, however you are also able to customize whether you receive notifications for this specific device. Note: A device is per client, using both a web-based Matrix client and a Desktop client on the same physical device will still appear as two separate devices.
Desktop Notifications
To enable desktop notifications from your client, you can enable the toggle 'Enable desktop notifications for this session', you can also customize these notifications to also display the message that triggers the notification using the 'Show message in desktop notification' toggle. When using a web-based Element client, you will also need to accept permissions allowing the client to display notifications.
Notification types explained
Notification settings allow notifications to be set as either 'Off', 'On' or 'Noisy'.
- Off: You won’t be notified when the selected event happens.
- On: You will get a message popping up when the selected event happens, but no sound.
- Noisy: You will get a visual highlight (red badge and/or text highlight), a sound and/or vibration (depending on the device) when the selected event happens.
For finer tuning, you can easily configure per room notification setting from the context menu you get by clicking on the ... icon that appears when hovering over the room name in the room list. You can use this to temporarily mute a room, or make sure you’re not missing anything from a given discussion. You can select the following options:
- Mute: You won’t be notified, even if your name or a keyword is mentioned.
- Mentions only: You will only be notified for the items that are meant to be ‘noisy’, i.e. your name and keywords.
- All messages: You will get a (silent) notification for every message happening in the room; your ‘noisy’ events (e.g. your name being mentioned) will still be noisy (red badge and sound).
- All messages (Noisy): every message will make a noise on top of the visual notification. Your noisy events will still be differentiated by a red badge.
Keyword Notifications
From the notification settings you can also add additional keywords to listen for to trigger a notification. You can directly specify how a notification triggered from these keywords responds in the 'Mentions & keywords' section.