Managing a Room: Room Settings
Disclaimer: This guide refers to using the Element Matrix clients, Element Web or Element Desktop apps
You can access Room Settings by either clicking Room settings from the Room info pane:

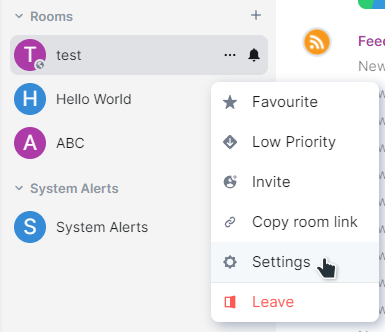
Or by hovering over the room name from the room list, clicking the 3-dot menu, then selecting Settings:
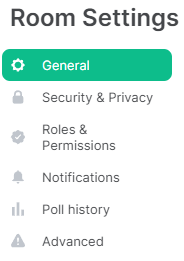
You will be presented with the Room Settings screen, and various navigation options, for details on each of these screens, see the below sections:
General
From this section, you can customize how your room looks and is accessed:
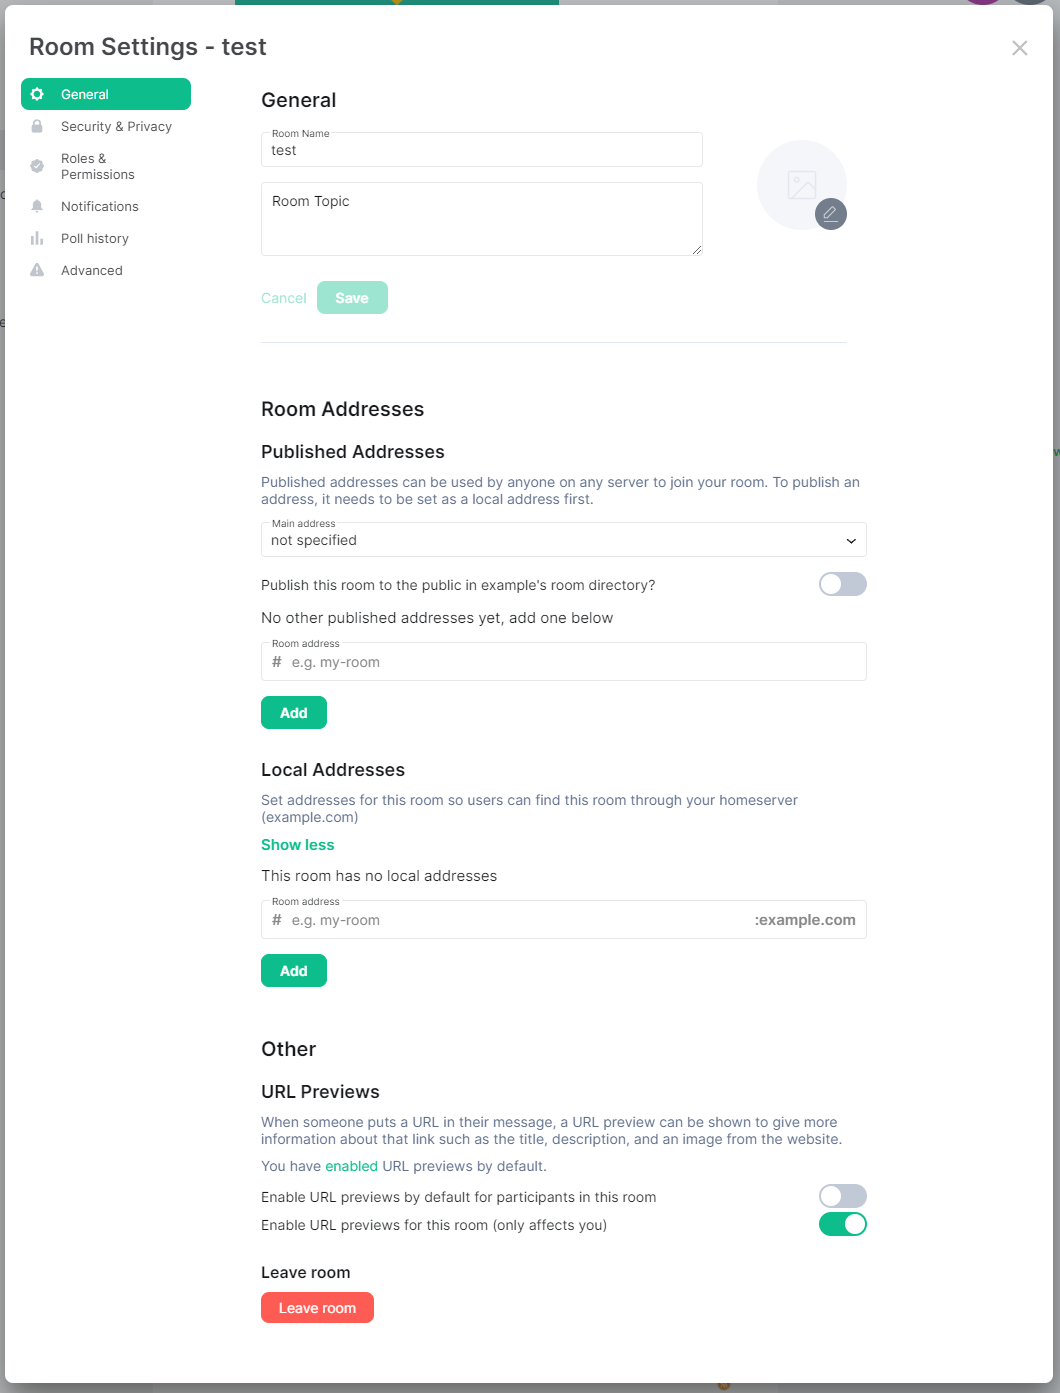
General
- Room Name - The name of your room as it appears within a users' room list.
- Room Topic - A description of the room, present along the top bar when viewing the room.
- Avatar - An icon for the room, change by clicking the
Pencilicon and uploading your desired image.
Check the FAQ Entry for details on What is the preferred resolution for room and space icons?
Room Addresses
Published Addresses
Published addresses can be used by anyone on any server to join your room. To publish an address, it needs to be set as a local address first.
- Main Address - from this dropdown you can select which local address you would like to be the main address to your room from external homeservers. Once a local address is first set, this will default to that address, however you can remove the main address by selecting
not specifiedfrom the dropdown. - Publish this room to the public in example's room directory - toggling this will allow your room to be discoverable by user's with access to the homeserver.
- Room Address - you can also publish other addresses in addition to the main address by adding other local addressed here and clicking
Add.
Local Addresses
Set addresses for this room so users can find this room through your homeserver.
- Room Address - Provide the address that users can use to access your room, creating your first Room Address will automatically set it as the
Main AddressunderPublished Addresses
Other
-
URL Previews - When someone puts a URL in their message, a URL preview can be shown to give more information about that link such as the title, description, and an image from the website. You can enable this for the room just for you, or as the default for participants in the room.
-
Leave room - Here you can opt to leave the room:
If you are the only person in a room, if you leave, no one will be able to join in the future, including you. If you are the sole user with Admin rights to a room and you intend to leave, you should increase the power level of an active member to allow for room management.
Security & Privacy
From this section, you can turn on Encryption if not already on, confirm who can join and the historical messages they can read.
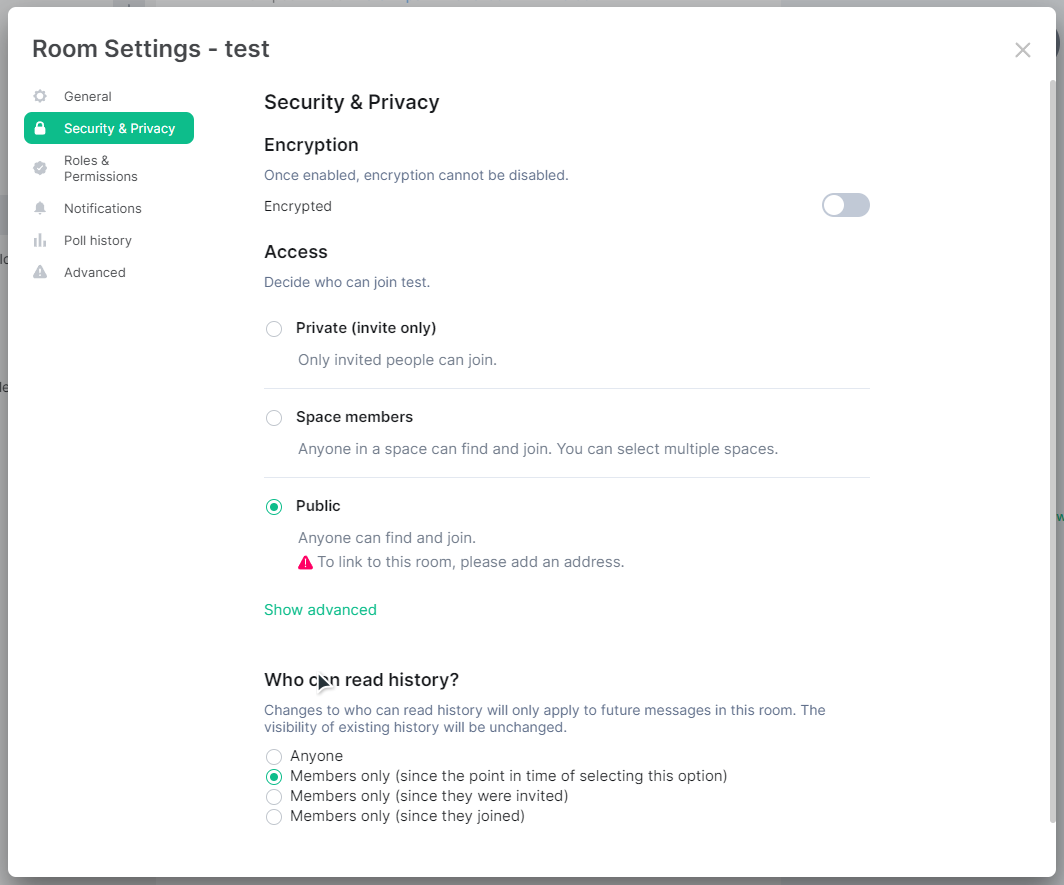
Access
-
Private (invite only) / Public - Select your desired access level, note to link to a public room, you will need to publish an address. You can do so from the
Generalsection.-
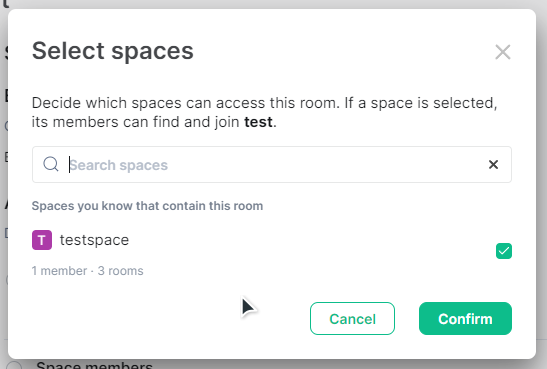
Space members - To use this option, ensure your room is in a space, then select and confirm all spaces that members of those spaces should be able to join.

-
-
Guest Access - Available only when
Public, by default, people with supported clients will be able to join the room without having a registered account. You can disable this behavior by clickingShow Advancedthen switching off via the toggle button.
Who can read history?
Changes to who can read history will only apply to future messages in this room. The visibility of existing history will be unchanged.
From here the options are self-explanatory, simply change as desired to meet your requirements.
Roles & Permissions
From this section, you can manage who can access, who can manage and who can administer your room.
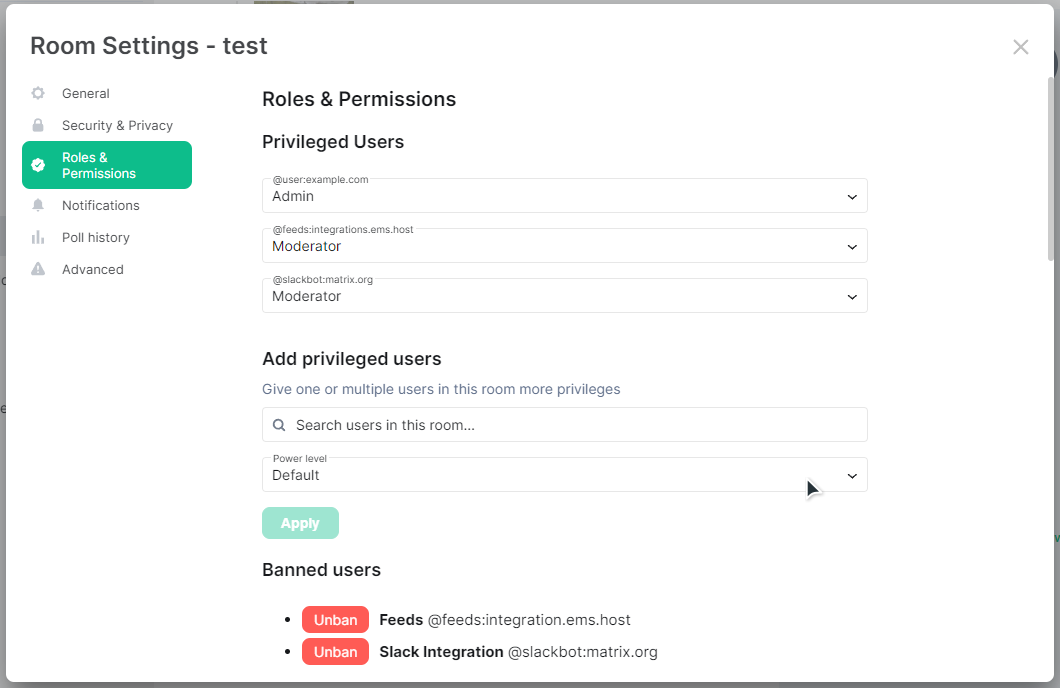
Management of a room is generally handled by it's admins and moderators, however under-the-hood, rooms make use of power levels. A users' power level is a number between 0 and 100 where the higher the number, the more access you have. The default power levels for the admin and moderator roles are 100 and 50 respectively, however you can specify any custom power level for specific actions.
Privileged Users
Setting a user from this list to Default will remove them as a Privileged User
If the only Admin for a room is demoted, you will not be able to manage the room, be careful when applying changes to permission levels
Here you can manage all Privileged users for the room, and the power level they have. You can select either Default, Moderator, Admin or Custom Level.
Add privileged users
From this section you can search existing members of the room and specify a desired power level to elevate them as a Privileged User.
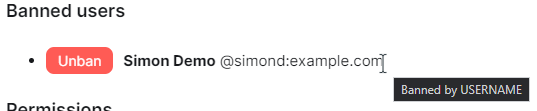
Banned Users
A list of banned users, and the option to revoke the ban will be presented here if any bans have been made. You can identify who banned each specific user by hovering over the banned user.
Permissions
From here you can see a list of all actions possible within a room, and control the required power level to perform those actions.
Actions and Default Power Levels
- Default role: Default (0)
- Send messages: Moderator (50)
- Invite users: Default (0)
- Change settings: Moderator (50)
- Remove users: Moderator (50)
- Ban users: Moderator (50)
- Remove messages sent by others: Moderator (50)
- Notify everyone: Moderator (50)
- Change room name: Moderator (50)
- Change permissions: Admin (100)
- Change history visibility: Admin (100)
- Change main address for the room: Moderator (50)
- Change room avatar: Moderator (50)
- Upgrade the room: Admin (100)
- Change server ACLs: Admin (100)
- Enable room encryption: Admin (100)
- Change topic: Moderator (50)
- Send m.room.pinned_events events: Moderator (50)
- Send reactions: Default (0)
- Remove messages sent by me: Default (0)
- Send org.matrix.msc3401.call events: Moderator (50)
- Send org.matrix.msc3401.call.member events: Moderator (50)
- Modify widgets: Moderator (50)
- Voice broadcasts: Moderator (50)
Notifications
This section configures your personal notification settings and isn't a management option applicable to all room users. To start learning the basics of creating and using rooms, check our 'Getting Started' series of docs on the subject, starting with Creating a Room and specifically Using a Room for notification configuration.
Poll History
This section is another way to access Poll History, you can also access simply via the Room Info pane. To learn more, check the Room Info doc from our 'Managing a Room' series.
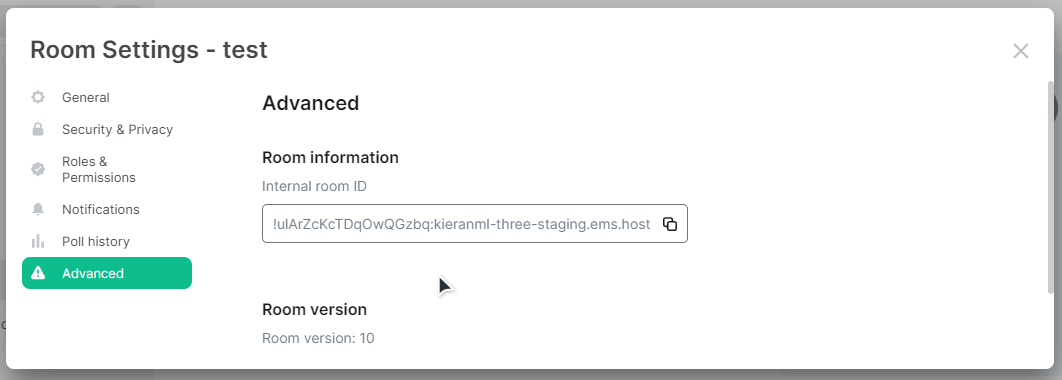
Advanced
From this section, you can confirm the current room version as well as the Internal Room ID.
What's Next?
Advanced Room Management
Now you've mastered this section, try the next in the Matrix Rooms: Managing a Room series, Advanced Room Management, for details on available room settings.