Using the Admin Tab
Users Section
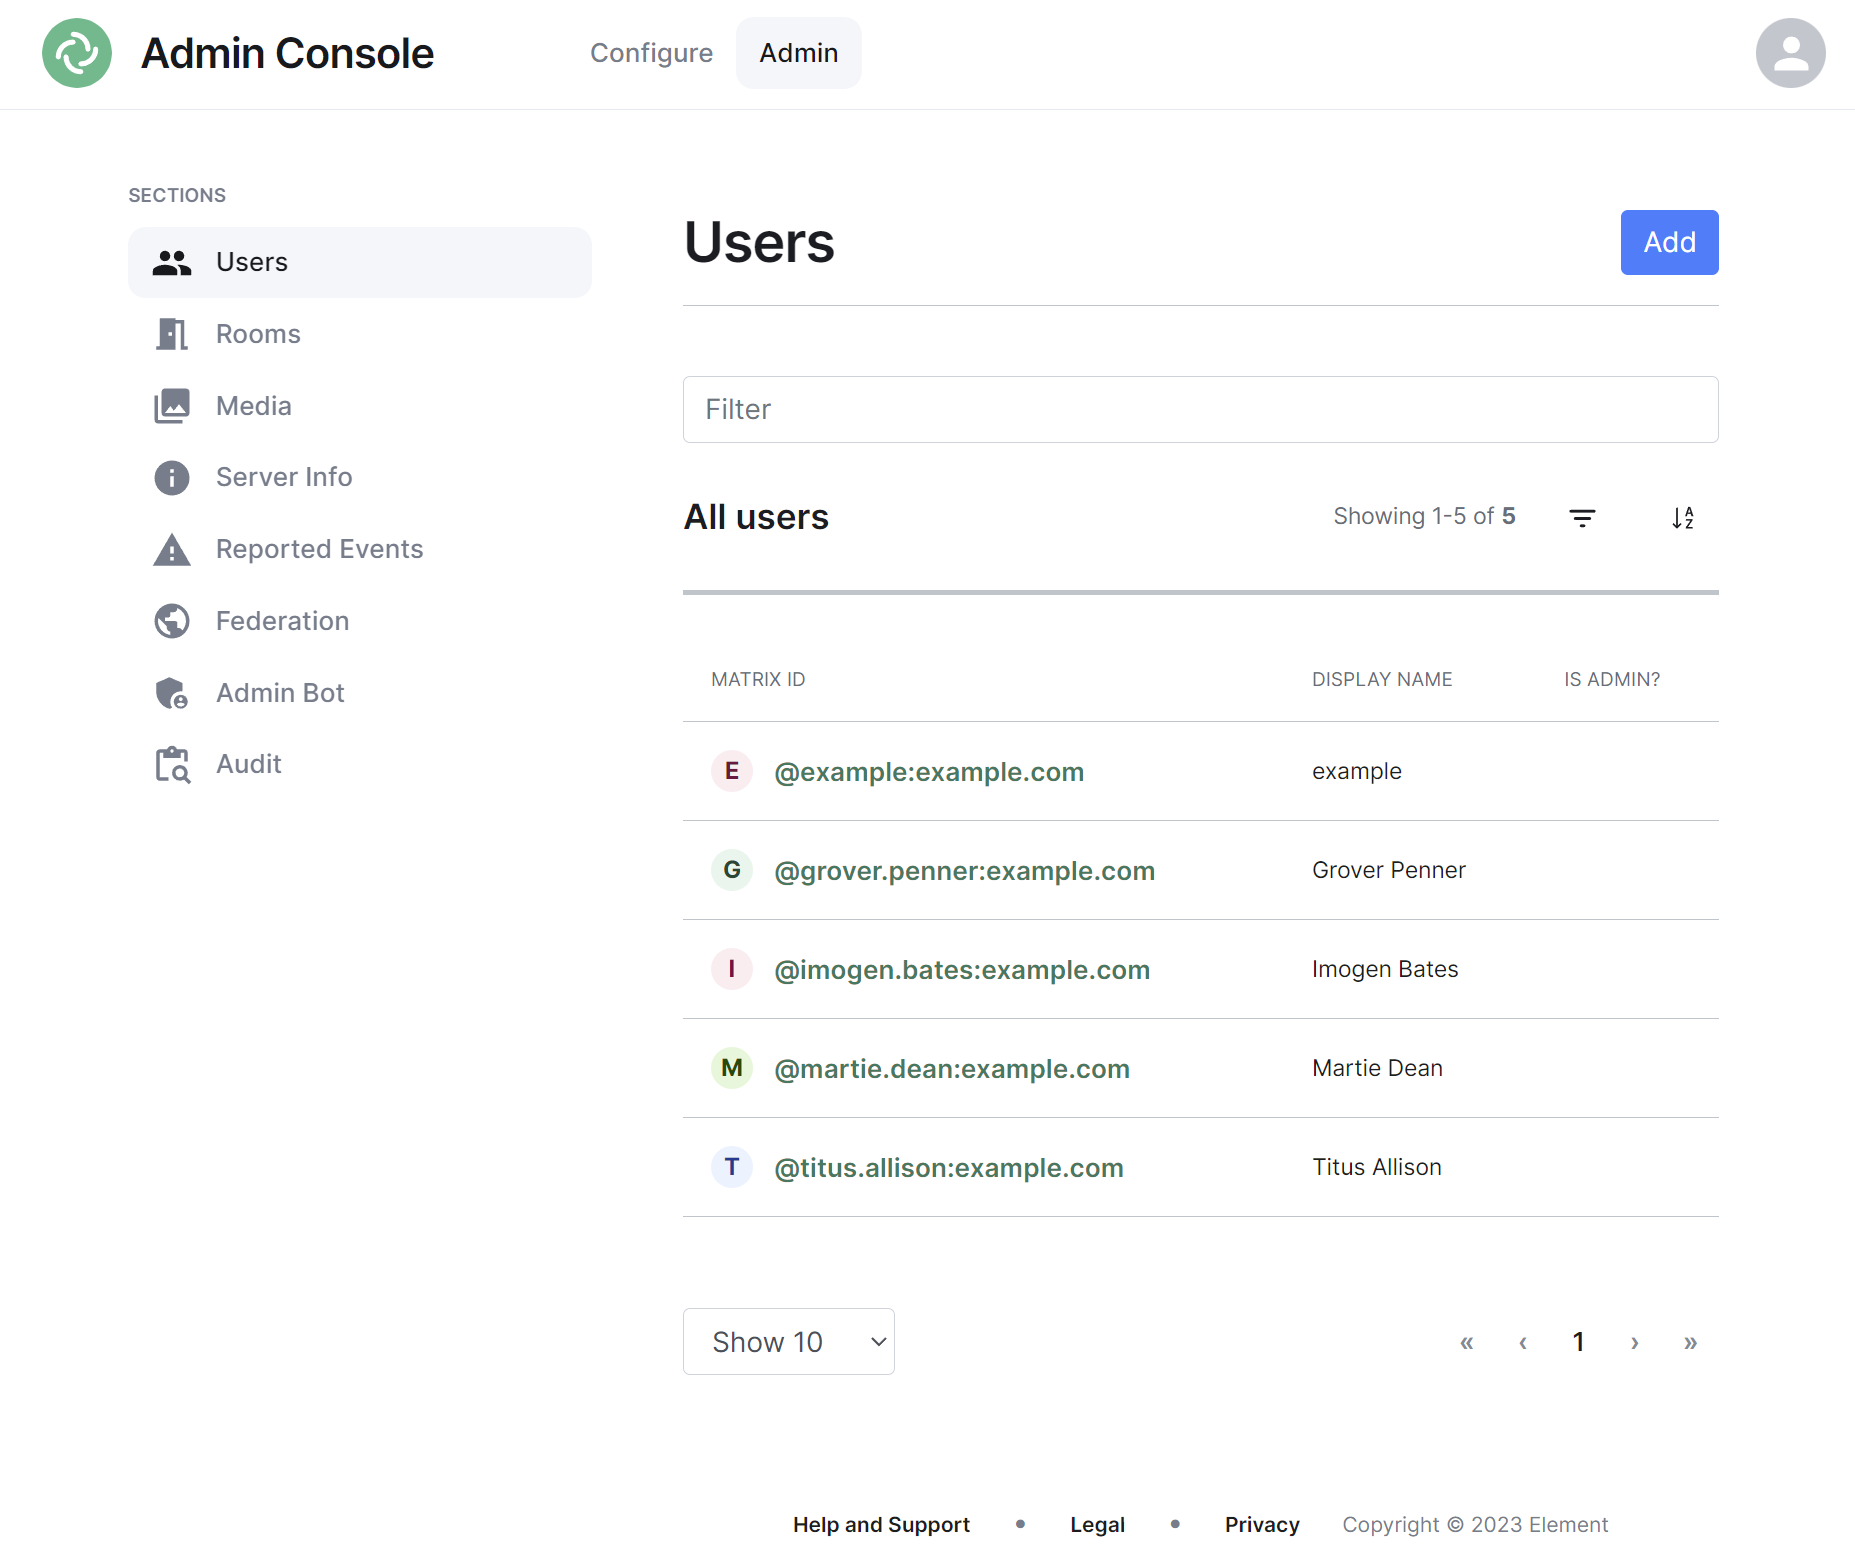
By default the users section will display all active user accounts present on your homeserver, listing their Matrix ID followed by their Display Name and whether the user is a Synapse Admin.
Navigating
Users will be displayed in a list, defaulting to a maximum of 10 users per page, you can show more users per page using the drop found at the bottom left of the list.

Sorting and Filtering
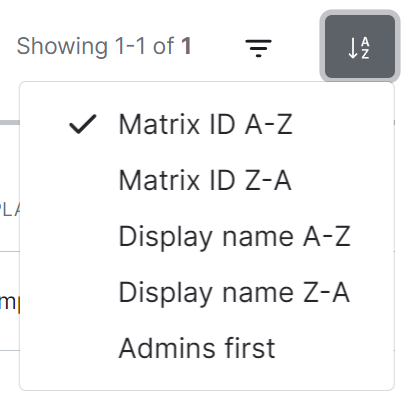
The default view of users can be adjusted using the available sorting and filtering options.
To sort, select the sort button and select how users should be organised, options include by Matrix ID (A-Z or Z-A), by Display Name (A-Z or Z-A) and displaying Admins first.
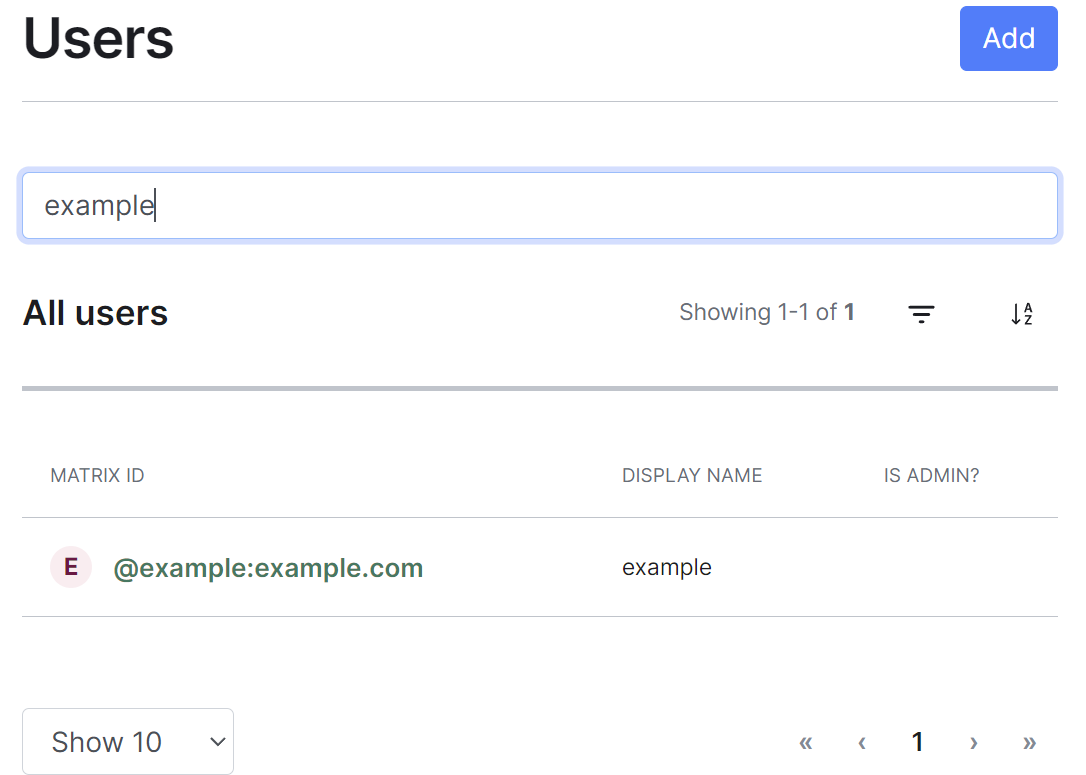
To search for users specifically, you can use the filter search box found above the list of users. Simply enter your search term and the list will be filtered for matches.
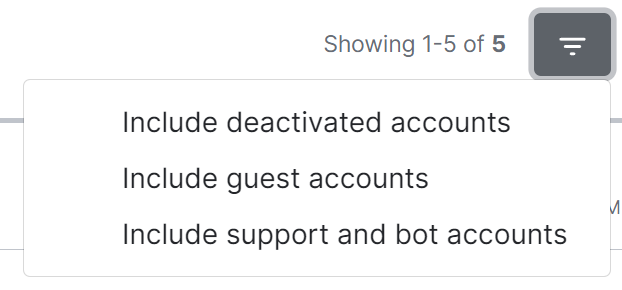
By default a number of account types are excluded from the list of users, these are deactivated accounts, guest accounts, support accounts and bot accounts. You can include these accounts by selecting the filter button then choosing the appropriate option.
To remove these includes, you can click the 'x' icon next to the filter added just above the list view.

Adding Users
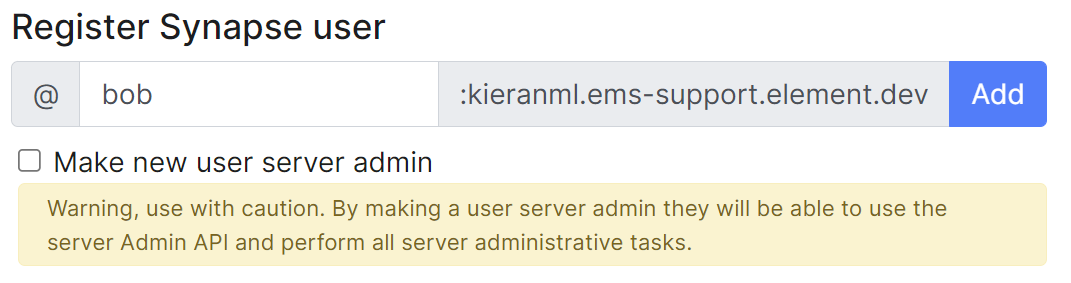
You can add user accounts manually by clicking the Add button found at the top right of the admin interface. This will take you to a page where you can register a new Synapse user.

Note, if your homeserver has a Terms of Service, users added in this way will need to accept those terms after logging in. This differs from the usual flow of users who create their account themselves, accepting the terms during the sign up process.
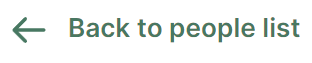
Once any additional user/s have been added, simply click the 'Back to people list' button to return to the user list.
Adding a single user
Provide the required username of the new user, if the user should be made a Synapse admin you should check the 'Make new user server admin' checkbox, then press the Add button. A new user will be added and their password will appear on screen.
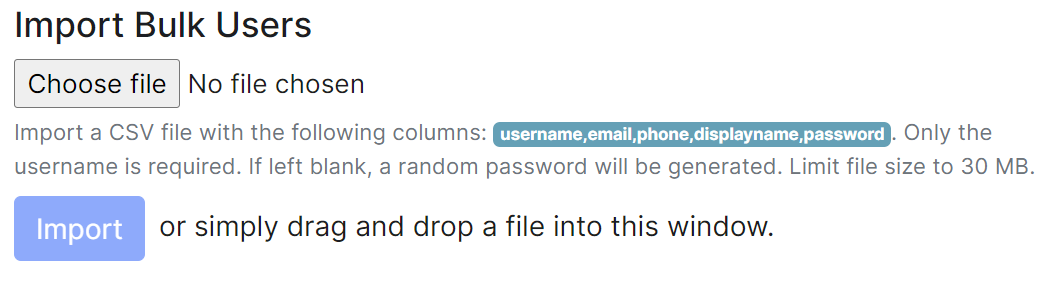
Adding multiple users at once
You are also able to import bulk users at once, either click the username,email,phone,displayname,password button, or manually create a csv file with those headings. Only the username is required and if the password is left blank, a random one will be generated. The CSV should be limited to no more than 30MB, you can see an example below:
username,email,phone,displayname,password
grover.penner,,,Grover Penner,grover
titus.allison,,,Titus Allison,titus
martie.dean,,,Martie Dean,martie
rachyl.dpears,,,Rachyl Spears,rachyl
imogen.bates,,,Imogen Bates,imogen
Either drag the CSV file into the window, or using the 'Choose file' button and press 'Import' to create the users. You will receive confirmation the users have been created.
Managing Users
You can manage an existing user by clicking on their account from the user list. You will then be presented with a view where you can manage the account.
Note, you can quickly copy the accounts Matrix ID by clicking on it, you will see a tooltip confirm the ID has been copied.

You can make a user a Synapse admin by checking the 'Admin' checkbox found to the right of the Matrix ID. Clicking this checkbox will cause a confirmation prompt to appear to confirm the action.
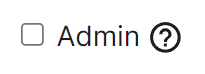
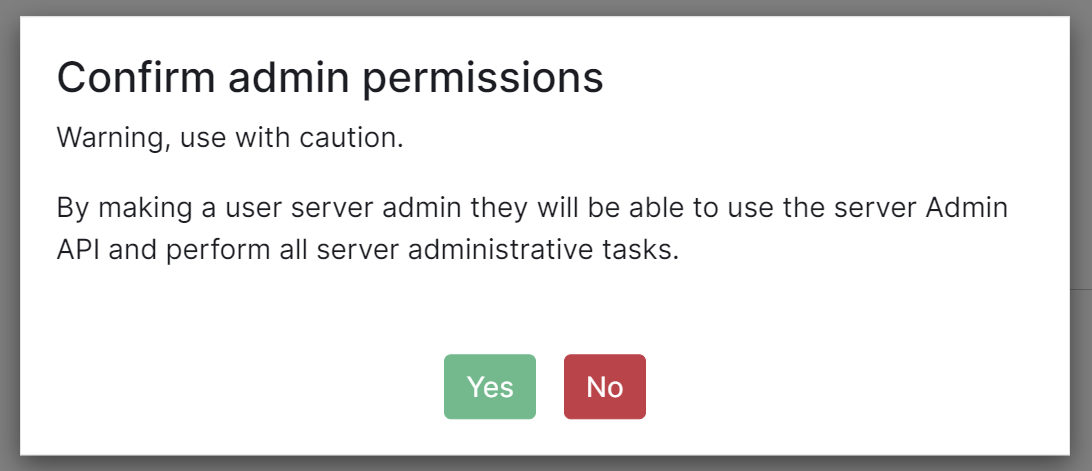
Note, this does not currently give any additional permissions in Element clients. It grants permission to use the Synapse Admin API
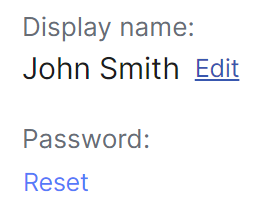
You can edit the users' existing Display Name by clicking the 'edit' button found following their existing Display Name, and you can reset the users' password by clicking the 'Reset' button.


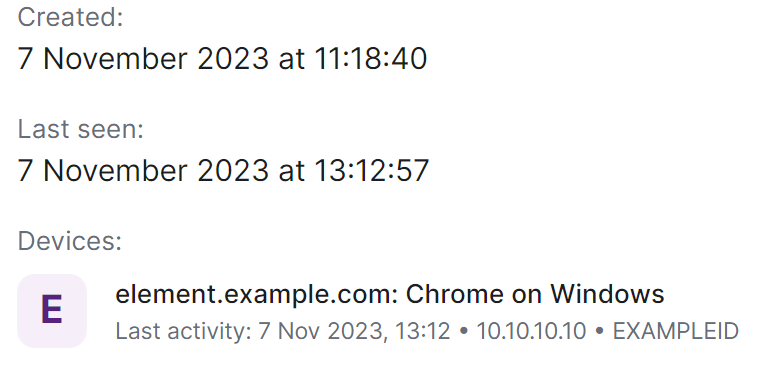
From this view you can also see when a user was last logged in and a list of their currently active devices (i.e. sessions).
Finally you are also able to manually deactivate the account by clicking the 'Deactivate account' button, this will cause a confirmation prompt to appear to confirm the action.
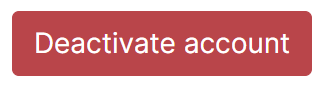
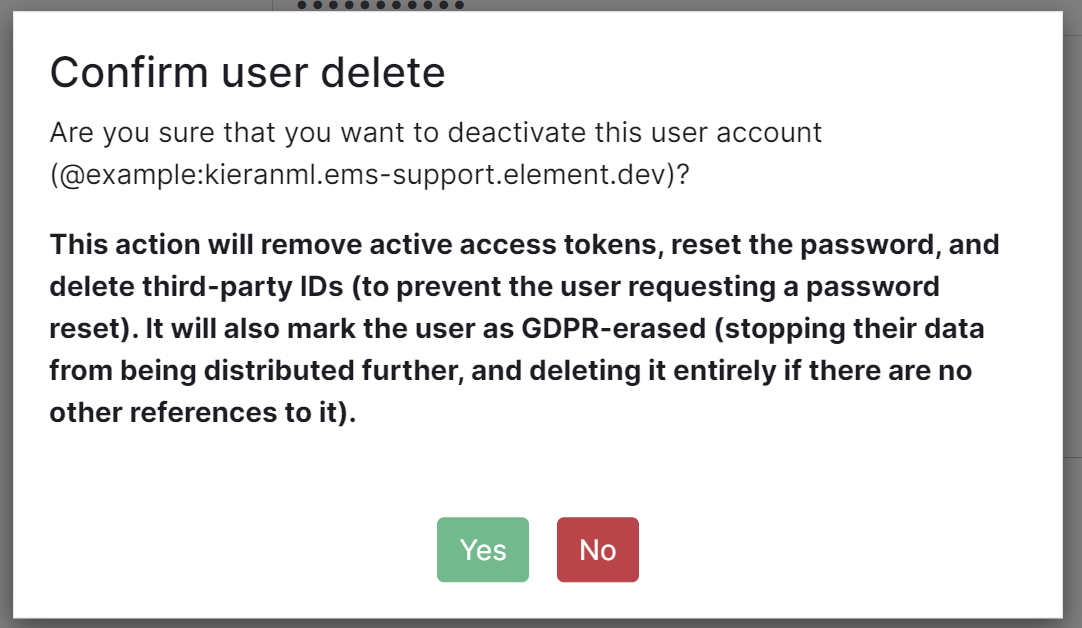
Note, this action will remove active access tokens, reset the password, and delete third-party IDs (to prevent the user requesting a password reset). It will also mark the user as GDPR-erased (stopping their data from being distributed further, and deleting it entirely if there are no other references to it).
Rooms Section
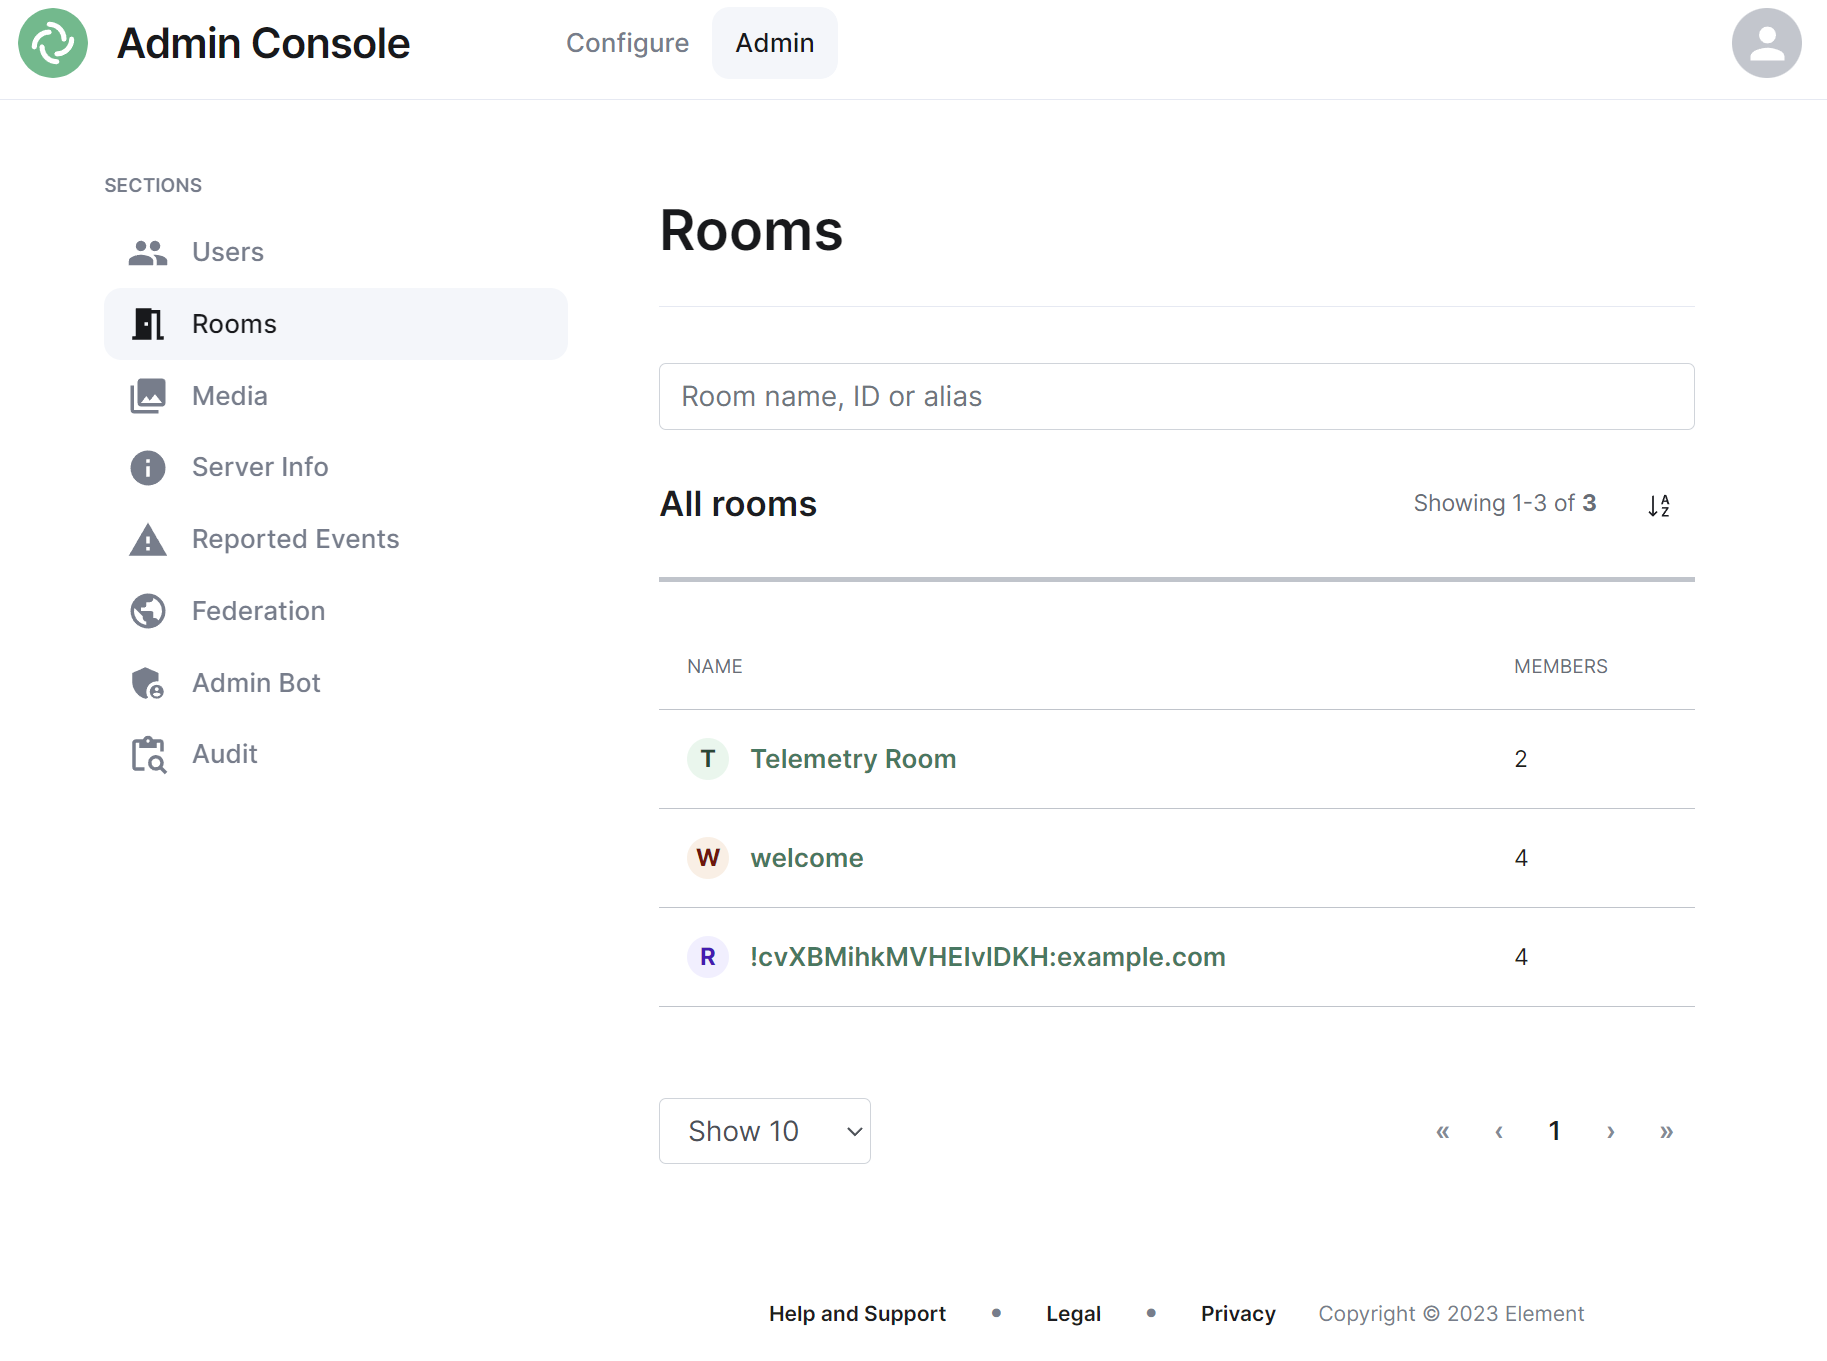
By default the rooms section will display all rooms present on your homeserver, listing their room name, or ID if not applicable, followed by the member count.
Navigating
Rooms will be displayed in a list, defaulting to a maximum of 10 rooms per page, you can show more rooms per page using the drop found at the bottom left of the list.
Sorting and Filtering
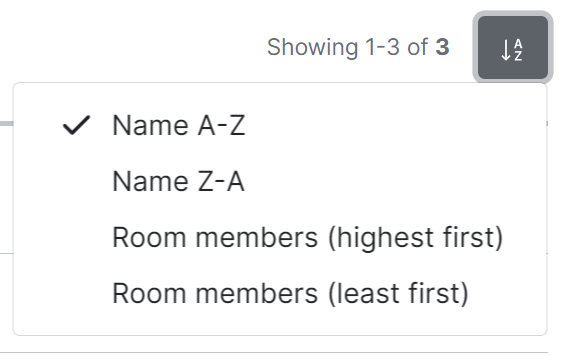
The default view of rooms can be adjusted using the available sorting and filtering options.
To sort, select the sort button and select how rooms should be organised, options include by Name (A-Z or Z-A) and Room Members (highest first, least first).
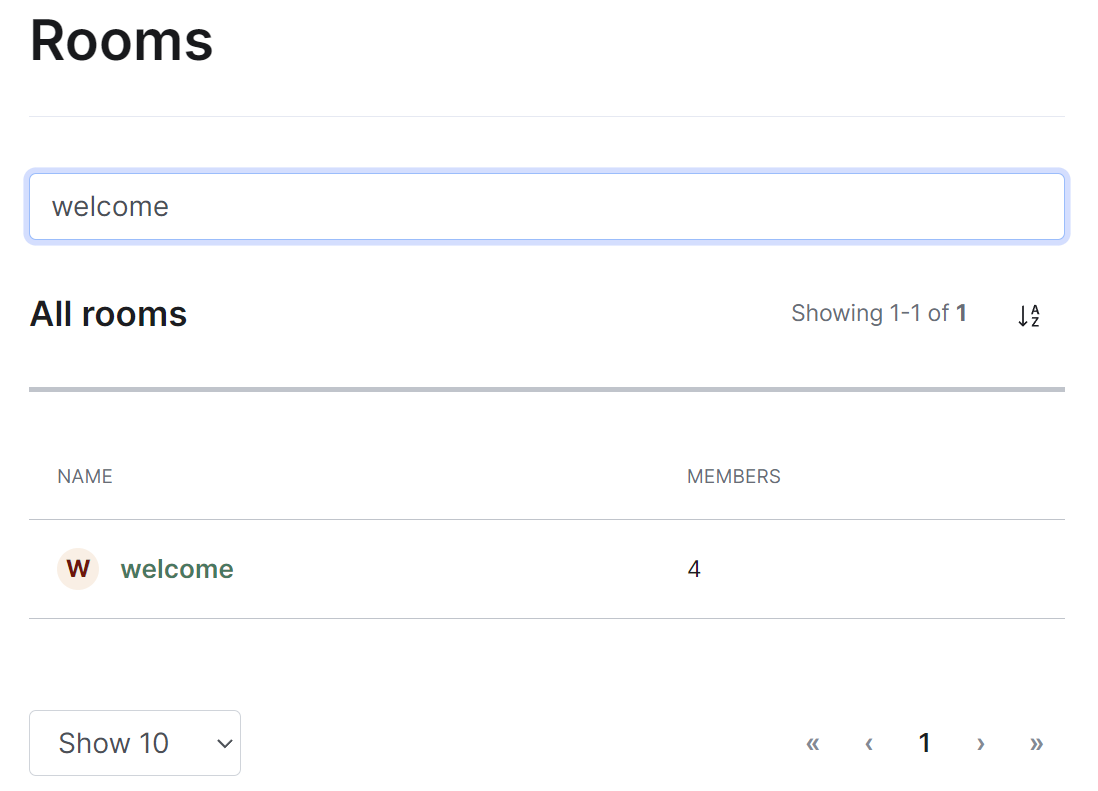
To search for rooms specifically, you can use the filter search box found above the list of rooms. Simply enter your search term and the list will be filtered for matches.
Managing Rooms
You can manage an existing room by clicking on its name from the room list. You will then be presented with a view where you can manage the room.
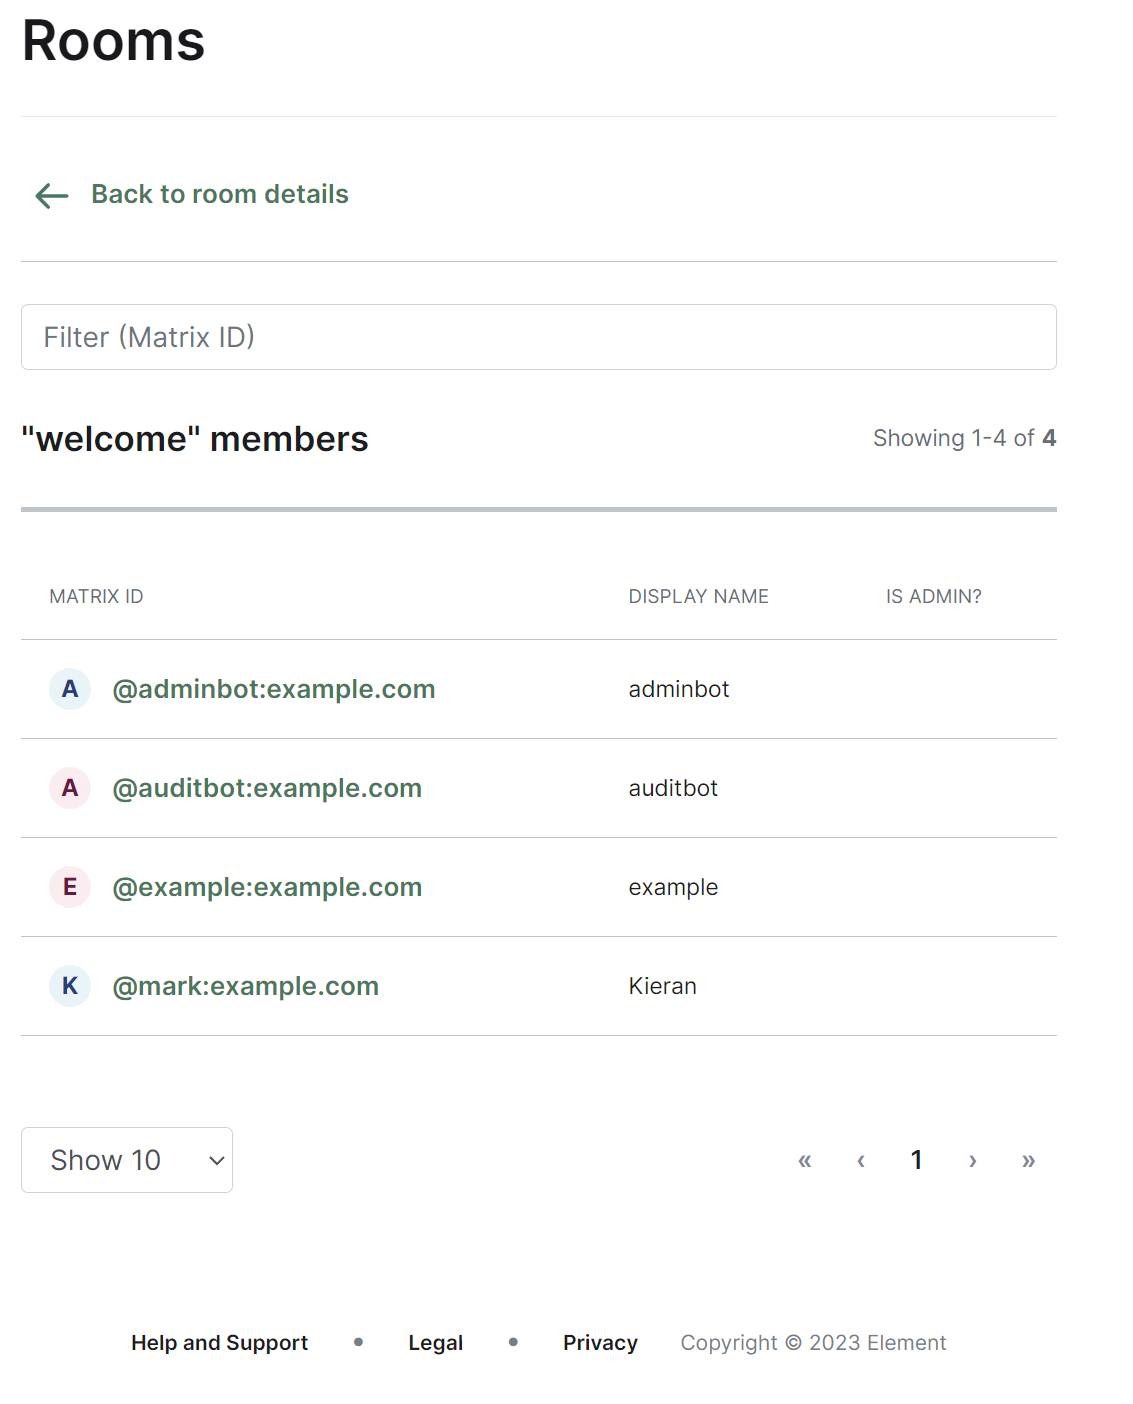
From this view you can view information about the room, including the room name and topic, room ID, members and alias etc. To view the members of the room, you can click the 'View list' link next to the member count to be taken to a view of all accounts within the room.
You can control whether the room is visible in the public directory by toggling the 'Show room in directory' checkbox.

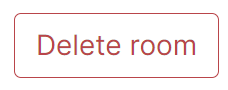
You are also able to delete the room by clicking the 'Delete room' button at the bottom of the page, doing so will cause a confirmation prompt to appear to confirm the action.
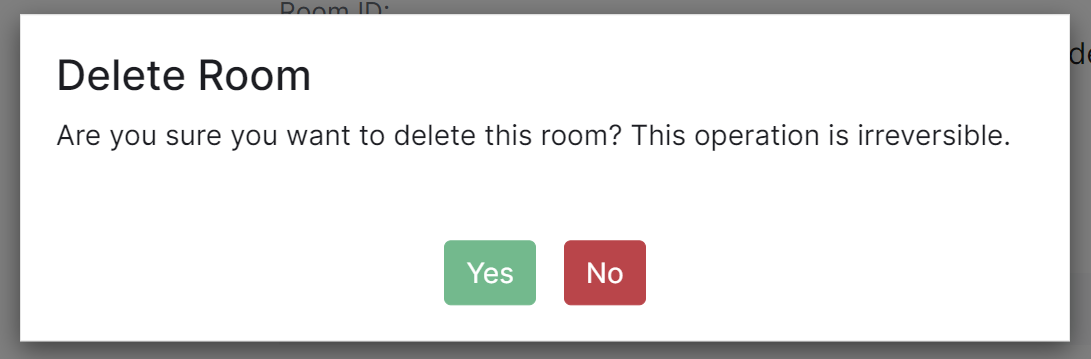
Note, this operation is irreversible.
Media Section
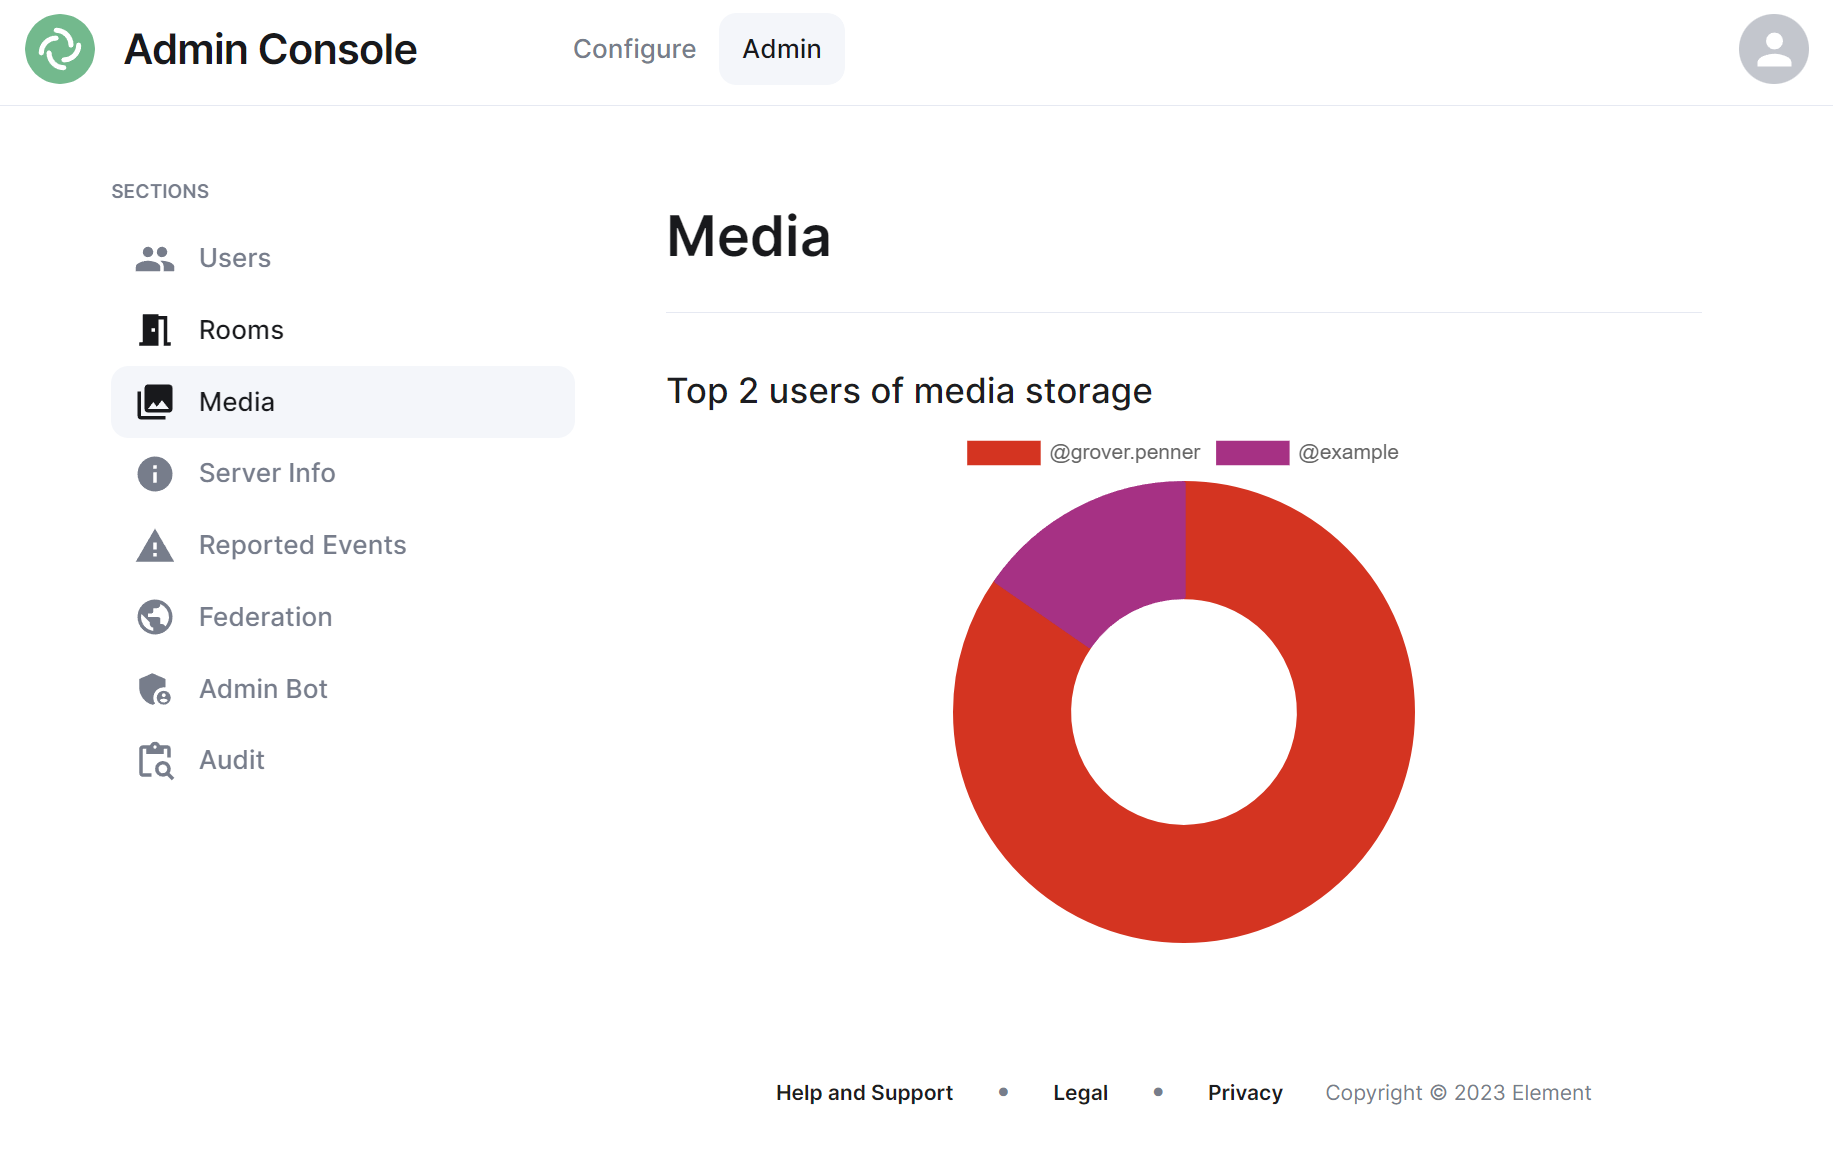
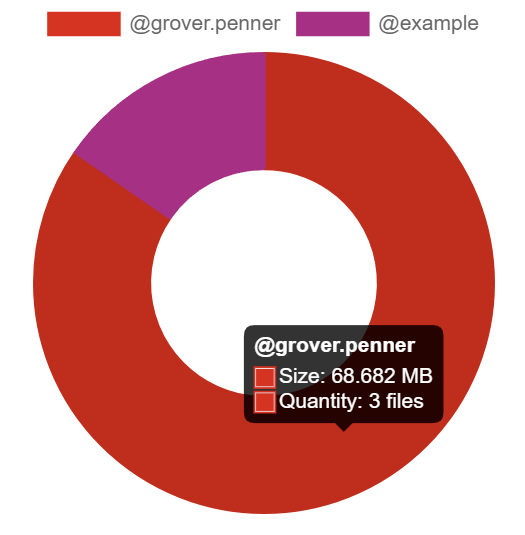
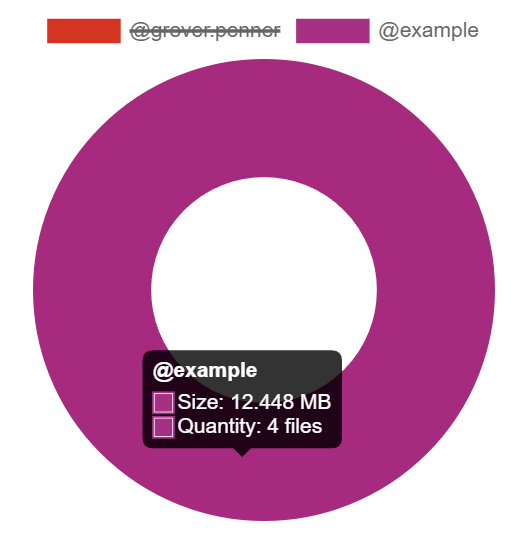
The Media section shows your a pie chart visualisation of the top users of media storage on your homeserver, you can click the individual Matrix IDs from the key to include / exclude those users from the visualisation. You can also hover over the pie chart segments to see a tooltip highlighting the size of storage used by the specific user as well as the quantity of items.
Server Info Section
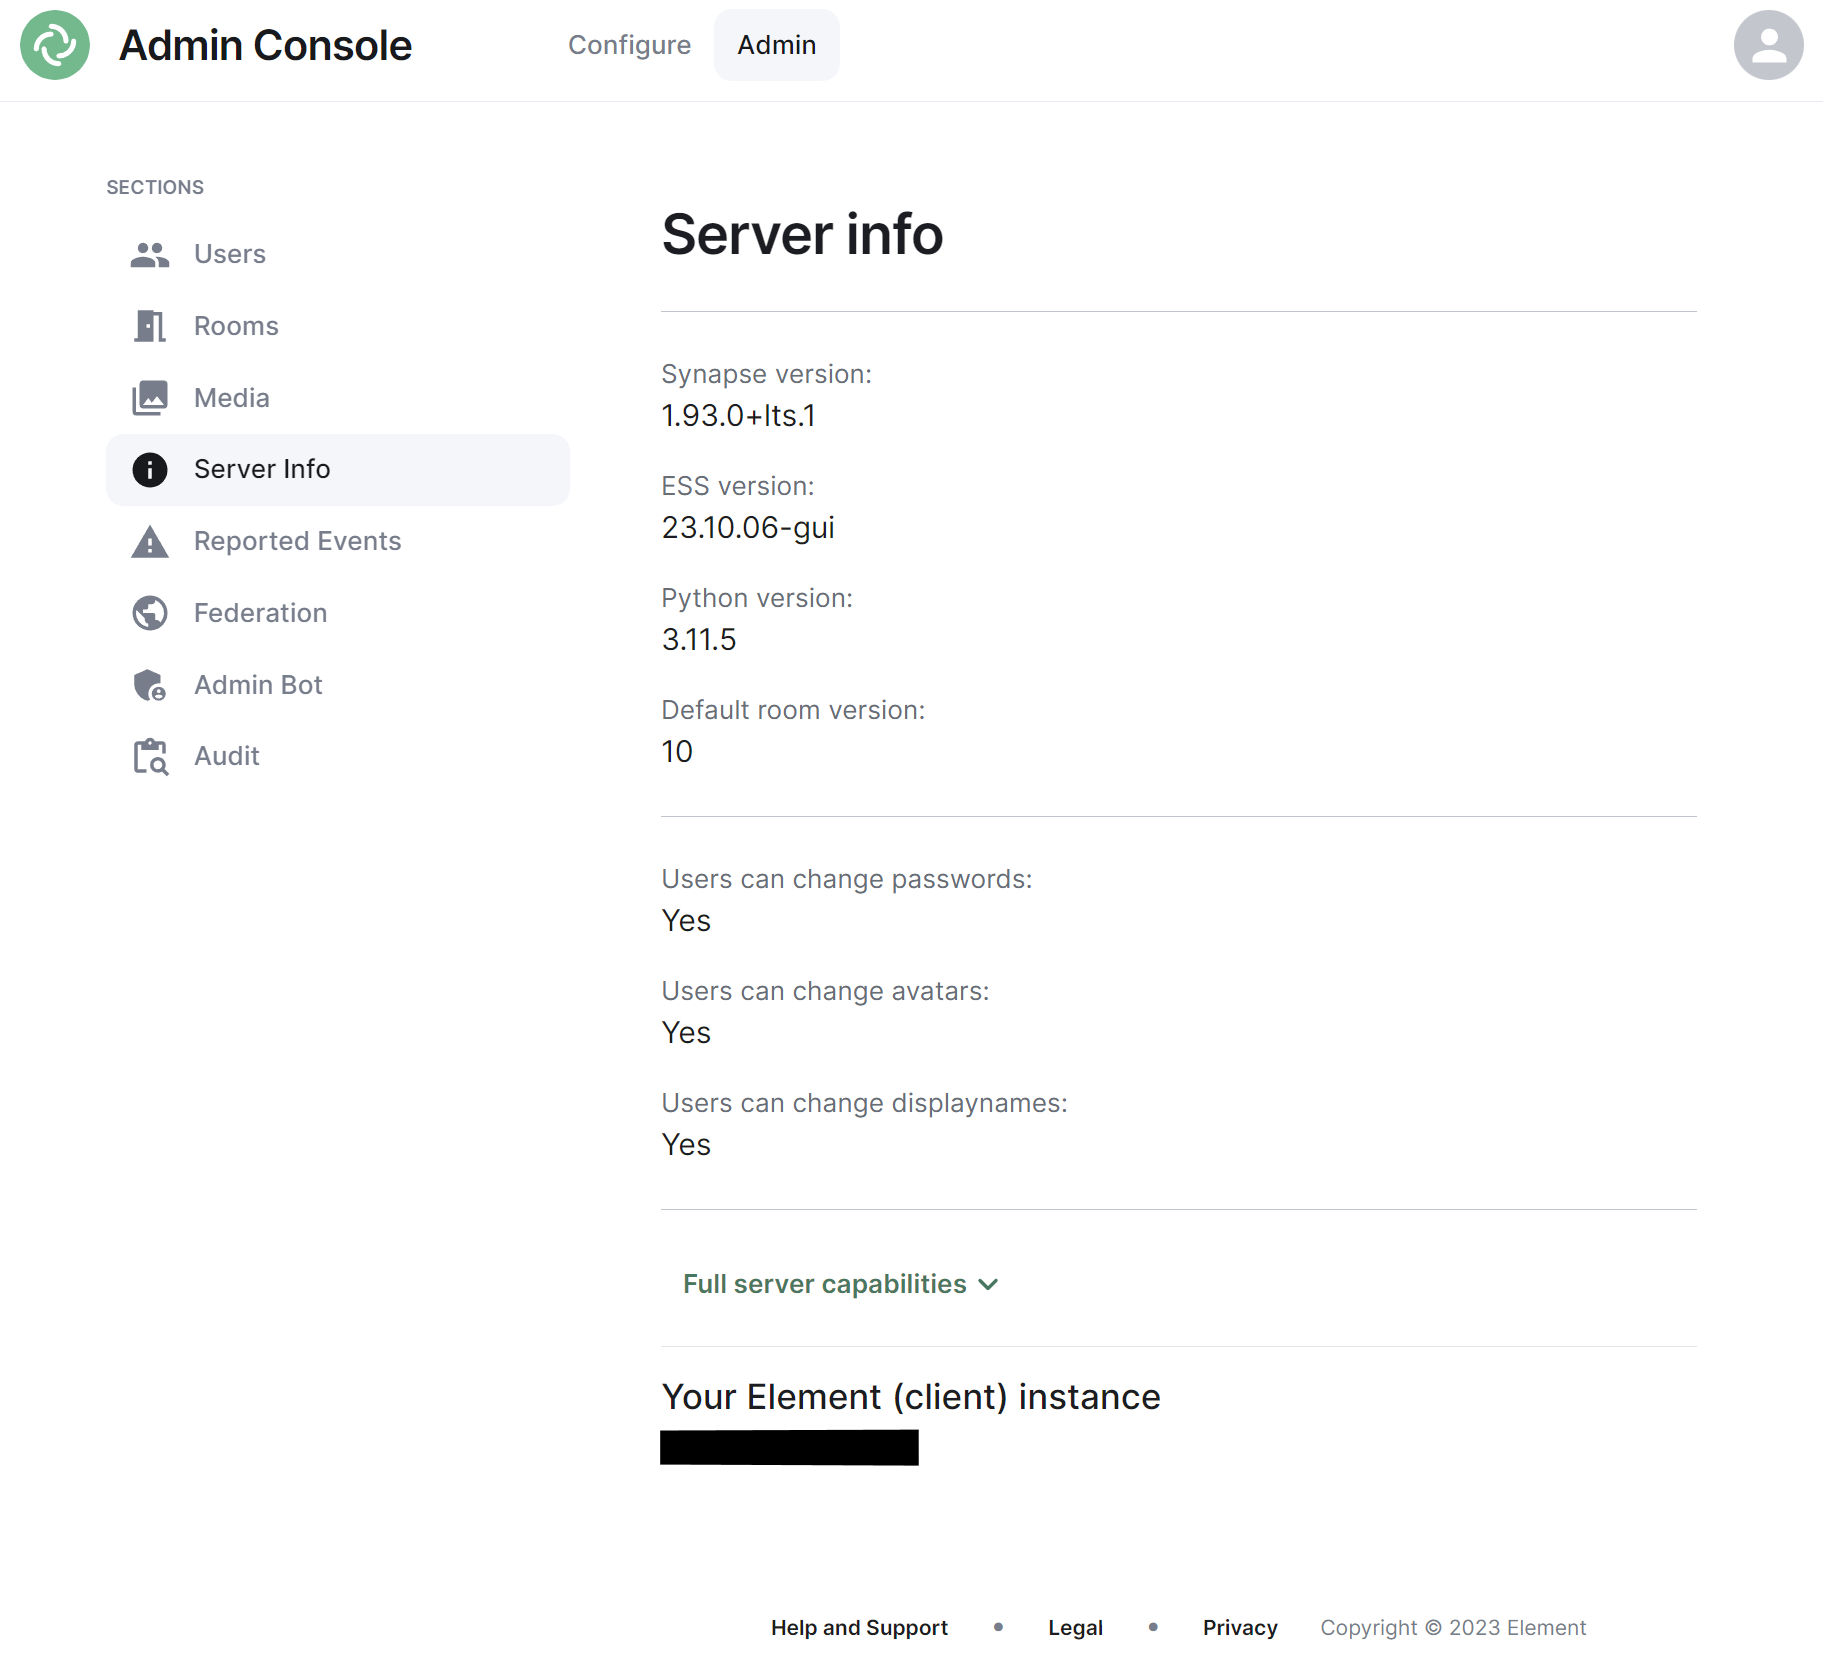
This section allows you to see version specific information about your homeserver, including Synapse version, ESS version, Python version and the default room version.
The view also highlight user access rights to change passwords, avatars and display names as well as a JSON output of the full server capabilities.
Finally it will identify the version of your hosted element client instance.
Reported Events Section
Federation Section
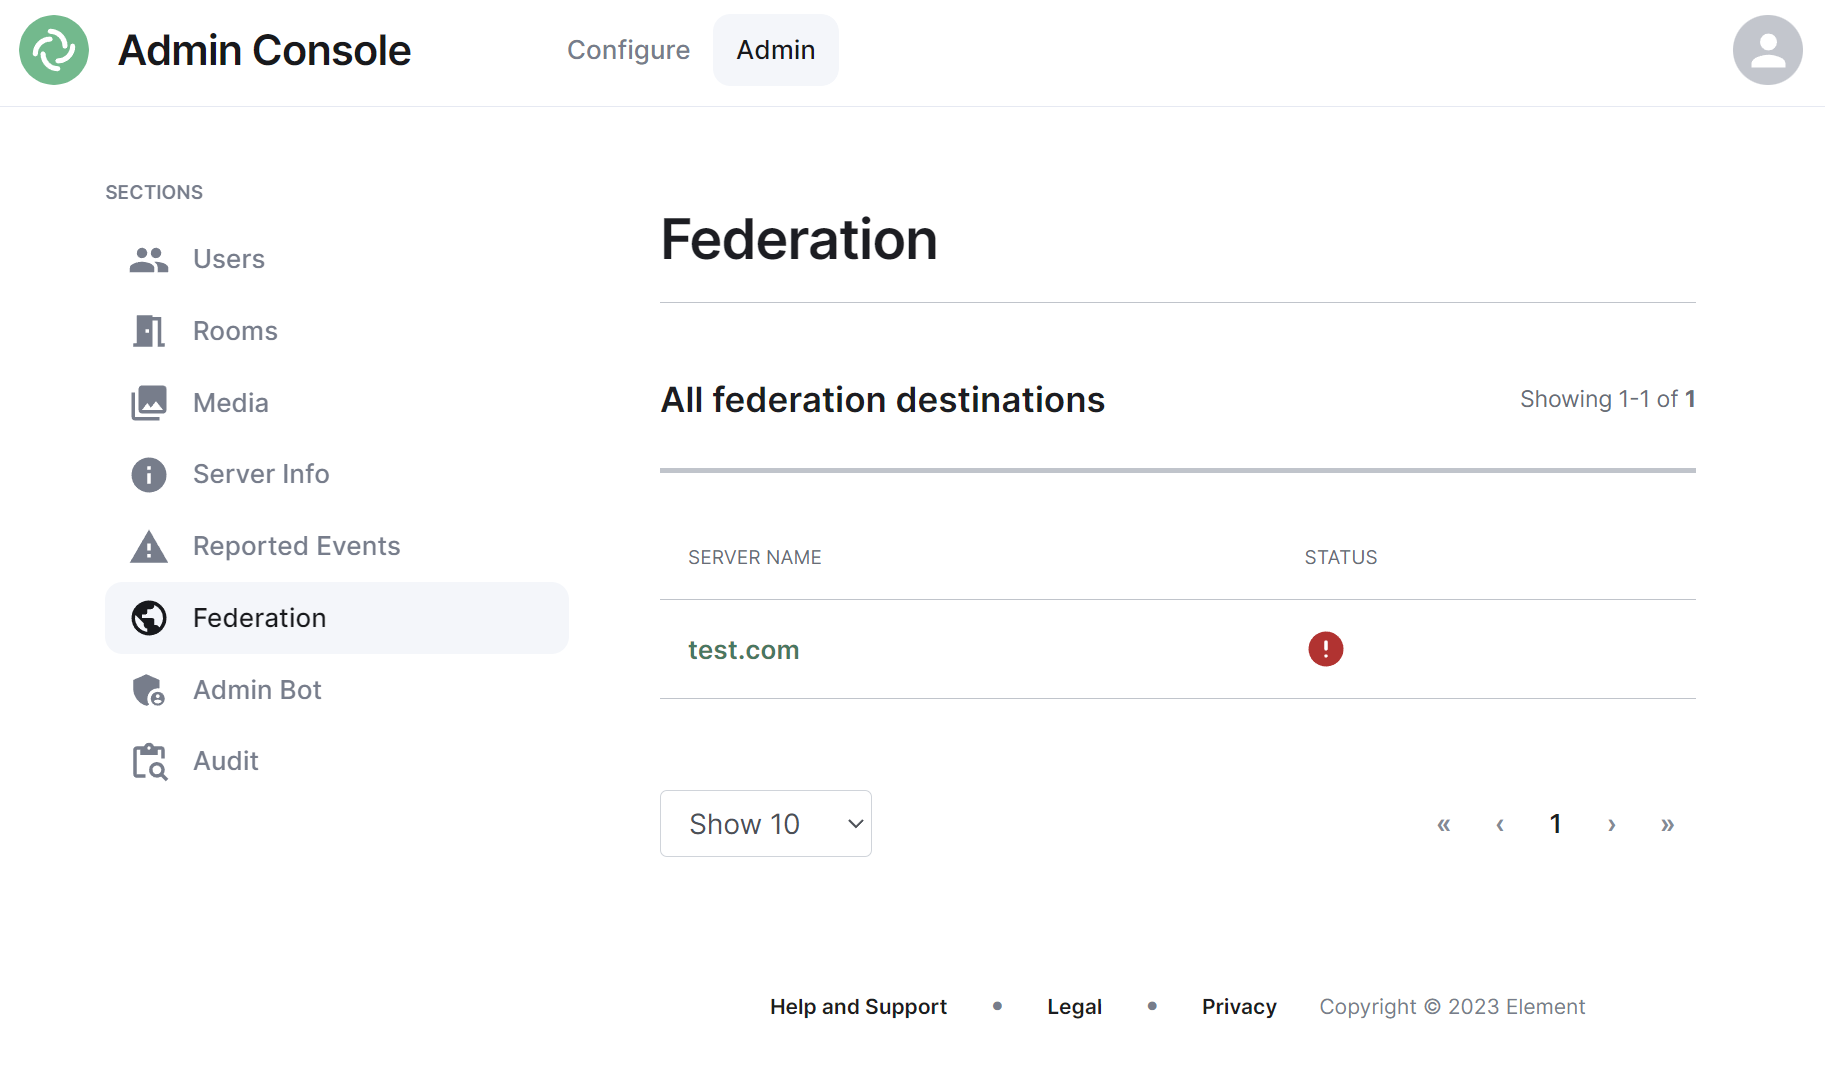
The Federation section shows all homeservers your homeserver is federating with, i.e. which homeservers users from your homeserver share a room with followed by it's current status.
Navigating
Homeservers will be displayed in a list, defaulting to a maximum of 10 homeservers per page, you can show more honeservers per page using the drop found at the bottom left of the list.
Managing Individual Homeserver Federation
You can manage an existing federation destination (homeserver) by clicking on its name from the room list. You will then be presented with a view where you can view the latest status of the federation as well as a list of the federated rooms.
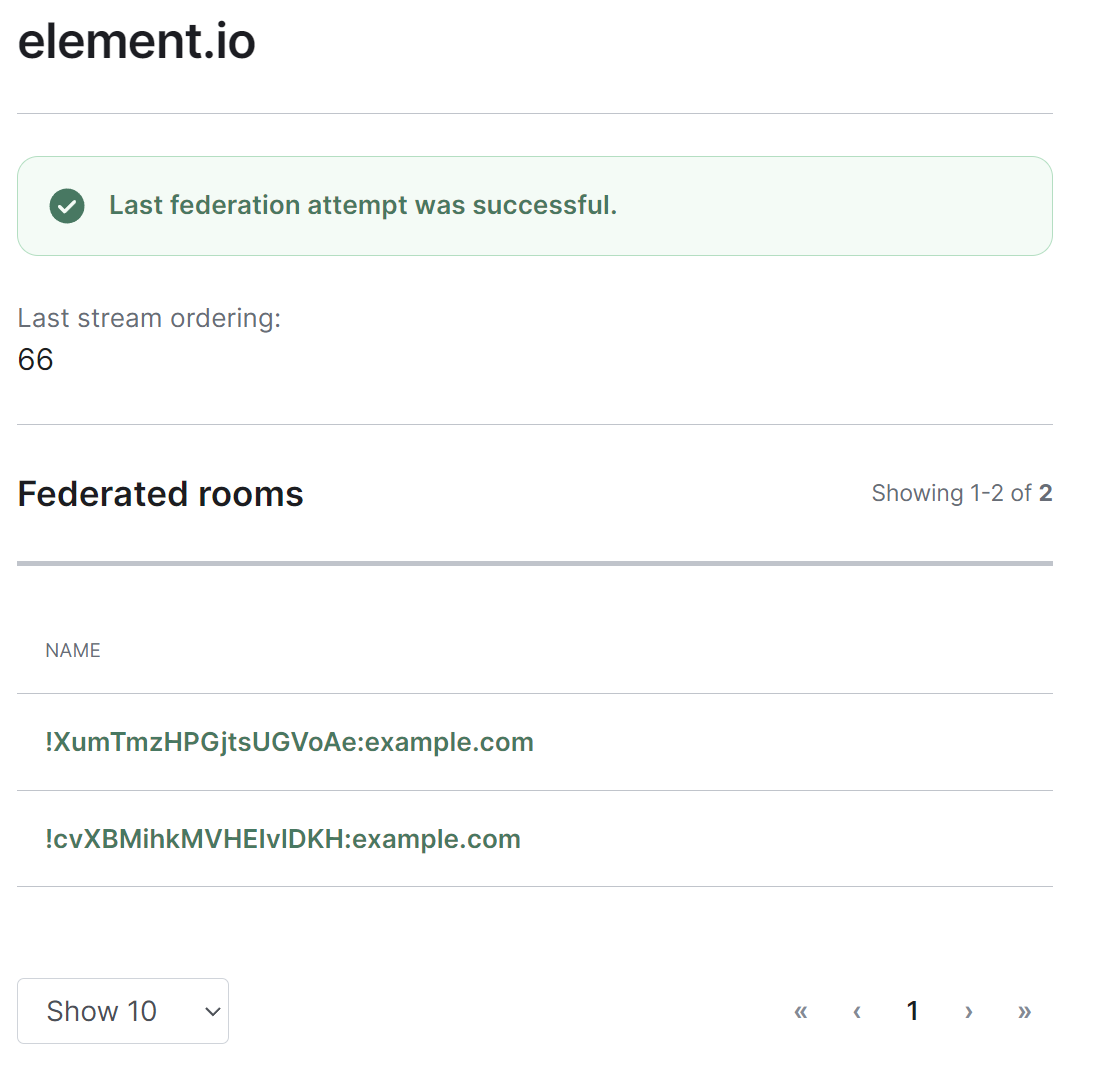
Clicking on any of the rooms from the list, will allow you to manage the specific room via the Rooms section.
Admin Bot Section
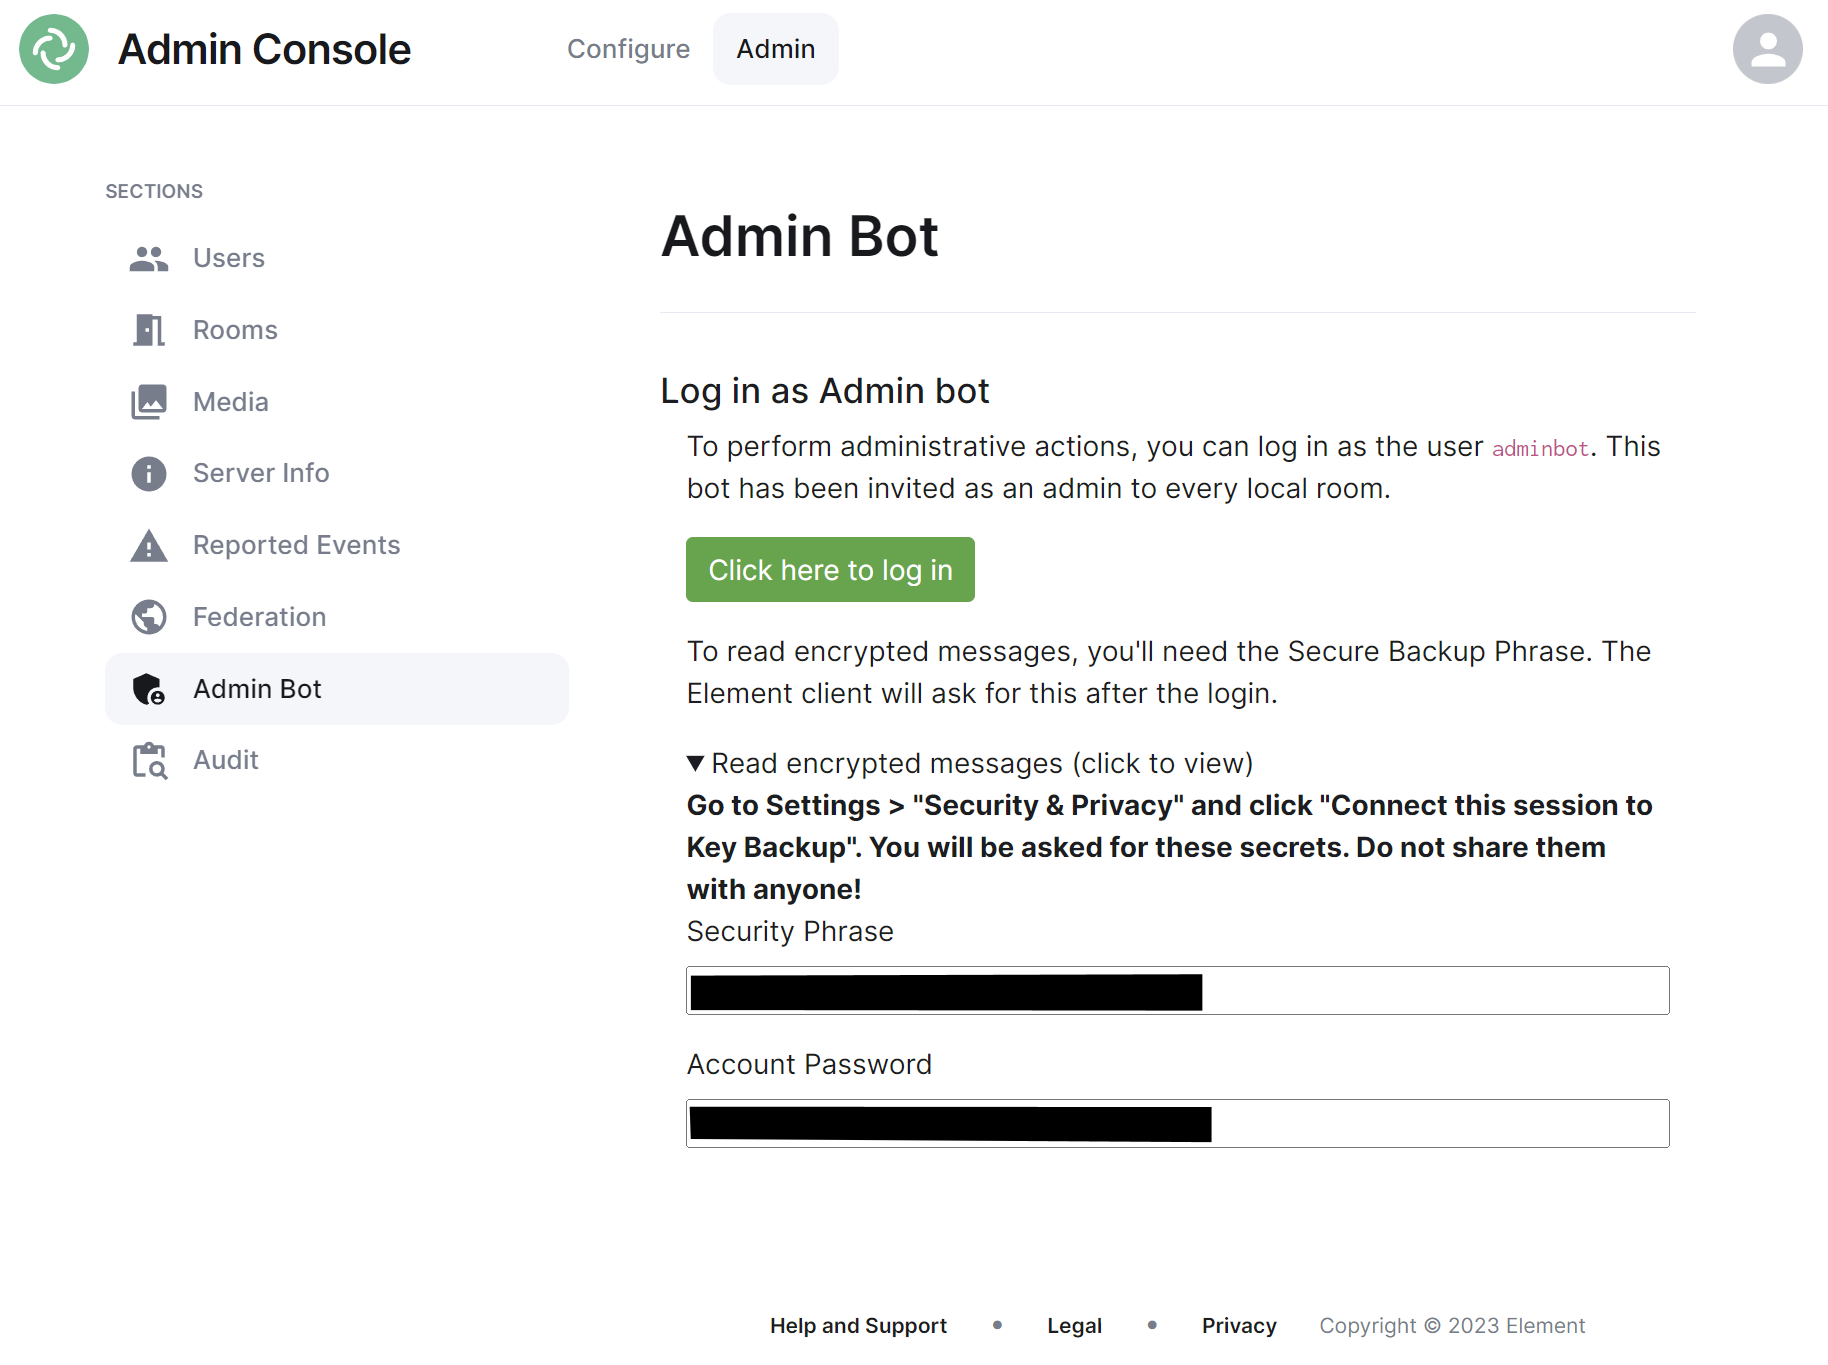
If you make use of Admin Bot you will be able to use this section to log in as the configured Admin Bot user. Click the 'Click here to log in' button to log in and following the instructions provided to read encrypted messages (if required).
Audit Section
If you make use of Audit Bot you will be able to use this section to perform audit tasks on your homeserver.