Single Node Installations
Installing a Standalone Server
Overview
Our installer can handle the installation of environments in which only one server is available. This environment consists of a single server with a microk8s deployment in which we deploy our Element Server Suite to, resulting in a fully functioning version of our platform.
To get started with a standalone installation, there are several things that need to be considered and this guide will work through them:
- Operating System
- Postgresql Database
- TURN Server
- SSL Certificates
- Extra configuration items
Once these areas have been covered, you’ll be ready to install your standalone server!
Operating System
To get started, we have tested on Ubuntu 20.04 and Red Hat Enterprise Linux 8.7 and suggest that you start there as well. For x86_64, you can grab an Ubuntu iso here:
https://releases.ubuntu.com/20.04.3/ubuntu-20.04.3-live-server-amd64.iso
or you can get Red Hat Enterprise Linux 8 with a Developer Subscription
https://developers.redhat.com/content-gateway/file/rhel-8.7-x86_64-dvd.iso
Note that future references in this document to EL reference Enterprise
Linux.
Ubuntu Specific Directions
Make sure to select docker as a package option. Do set up ssh.
Once you log in, please run:
sudo apt-get update
sudo apt-get upgrade
The installer requires that you run it as a non-root user who has sudo
permissions. Please make sure that you have a user who can use sudo. If
you wanted to make a user called element-demo that can use sudo, the
following commands (run as root) would
achieve that:
useradd element-demo
gpasswd -a element-demo sudo
EL Specific directions
Make sure to select "Container Management" in the "Additional Software" section.
Once you log in, please run:
sudo yum update -y
sudo yum install podman-docker python-pip python3-devel make gcc -y
sudo yum install https://dl.fedoraproject.org/pub/epel/epel-release-latest-8.noarch.rpm -y
sudo update-alternatives --config python3
The installer requires that you run it as a non-root user who has sudo
permissions. Please make sure that you have a user who can use sudo. If
you wanted to make a user called element-demo that can use sudo, the
following commands (run as root) would
achieve that:
useradd element-demo
gpasswd -a element-demo wheel
Migrating from our older installer
NOTE: If you are running an installation installed with version 2023-02.01 and earlier, you cannot use the GUI installer today. We are working to make a migration path available soon and will update this section once it is available. For older documentation on the installer, please see our archived documentation repository.
If you have not used our installer before, you may safely ignore this section.
Network Specifics
Element Enterprise On-Premise needs to bind and serve content over:
- Port 80 TCP
- Port 443 TCP
microk8s needs to bind and serve content over:
- Port 16443 TCP
- Port 10250 TCP
- Port 10255 TCP
- Port 25000 TCP
- Port 12379 TCP
- Port 10257 TCP
- Port 10259 TCP
- Port 19001 TCP
For more information, see https://microk8s.io/docs/ports.
In a default Ubuntu installation, these ports are allowed through the firewall. You will need to ensure that these ports are passed through your firewall.
For EL instances with firewalld enabled, the installer will take care of opening these ports for you.
Further, you need to make sure that your host is able to access the following hosts on the internet:
- api.snapcraft.io
- *.snapcraftcontent.com
- gitlab.matrix.org
- gitlab-registry.matrix.org
- pypi.org
- docker.io
- *.docker.com
- get.helm.sh
- k8s.gcr.io
- cloud.google.com
- storage.googleapis.com
In addition, you will also need to make sure that your host can access your distributions' package repositories. As these hostnames can vary, it is beyond the scope of this documentation to enumerate them.
Network Proxies
We also cover the case where you need to use a proxy to access the internet. Please see this article for more information: Configuring a microk8s Single Node Instance to Use a Network Proxy
Postgresql Database
The installation requires that you have a postgresql database with a locale of C and UTF8 encoding set up. See https://github.com/matrix-org/synapse/blob/develop/docs/postgres.md#set-up-database for further details.
If you have this already, please make note of the database name, user, and password as you will need these to begin the installation.
If you do not already have a database, then the single node installer will set up PostgreSQL on your behalf.
Beginning the Installation
Head to https://ems.element.io/on-premise/download and download the latest installer. The installer will be called element-enterprise-graphical-installer-YYYY-MM.VERSION-gui.bin. You will take this file and copy it to the machine where you will be installing the Element Server Suite. Once you have this file on the machine in a directory accessible to your sudo-enabled user, you will run:
chmod +x ./element-enterprise-graphical-installer-YYYY-MM.VERSION-gui.bin
replacing the YYYY-MM.VERSION with the appropriate tag for the installer you downloaded.
Once you have done this, you will run:
./element-enterprise-graphical-installer-YYYY-MM.VERSION-gui.bin
replacing the YYYY-MM.VERSION with the appropriate tag for the installer you downloaded, and this will start a web server with the installer loaded.
You will see a message similar to:
[user@element-demo ~]$ ./element-enterprise-graphical-installer-2023-02.02-gui.bin
Testing network...

Using self-signed certificate with SHA-256 fingerprint:
         F3:76:B3:2E:1B:B3:D2:20:3C:CD:D0:72:A3:5E:EC:4F:BC:3E:F5:71:37:0B:D7:68:36:2E:2C:AA:7A:F2:83:94

To start configuration open:
        https://192.168.122.47:8443 or https://10.1.185.64:8443 or https://127.0.0.1:8443
At this point, you will need to open a web browser and browse to one of these IPs. You may need to open port 8443 in your firewall to be able to access this address from a different machine.
If you are unable to open port 8443 or you are having difficulty connecting from a different machine, you may want to try ssh port forwarding in which you would run:
ssh <host> -L 8443:127.0.0.1:8443
replacing host with the IP address or hostname of the machine that is running the installer. At this point, with ssh connected in this manner, you should be able to use the https://127.0.0.1:8443 link as this will then forward that request to the installer box via ssh.
Upon loading this address for the first time, you may be greeted with a message informing you that your connection isn't private such as this:
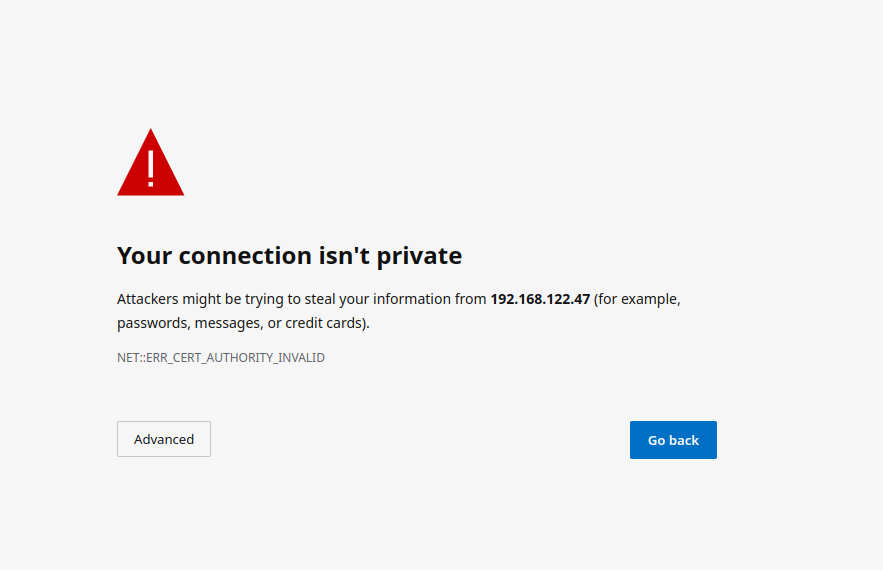
In this case, you'll need to click "Advanced" and then "Continue to
The Hosts Screen
The very first page that you come to is the host screen.
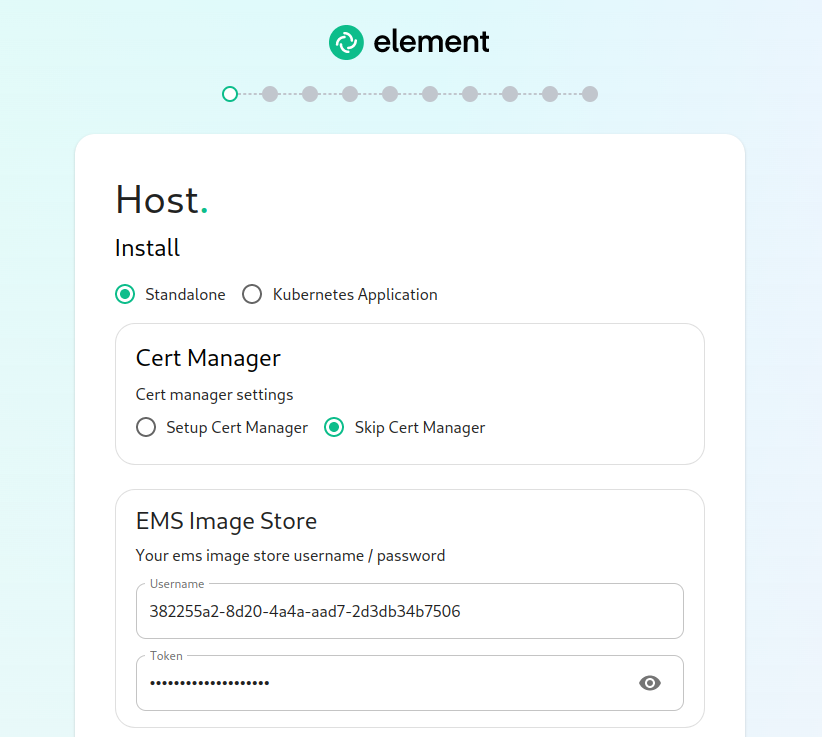
The very next prompt that you come to is for an EMS Image Store Username and Token. These are provided to you by element as access tokens for our enterprise container registries. If you have lost your token, you can always generate a new token at https://ems.element.io/on-premise/subscriptions.
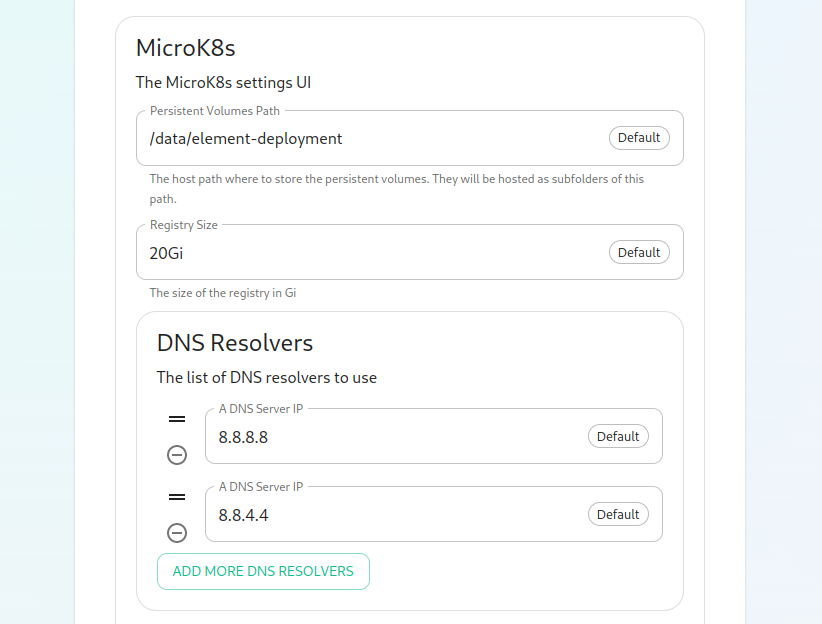
The next option that you have is for microk8s. By default, microk8s will set up persistent volumes in /data/element-deployment and will allow 20GB of space to do this. For most installations, this is fine and can be left alone, but if you'd like to customize those options, you can do that here.
Next, we have DNS resolvers. The default DNS resolvers are Google (8.8.8.8 and 8.8.4.4). If you need to use your company's DNS servers, please change these values appropriately.

Next, we get the option to either have the installer install Postgres in your cluster or to use an external postgresql server. The Postgres in cluster option is only supported for our standalone installation and you should read our storage and backup guidelines for this configuration. At any rate, if you use the in cluster postgres, you will see that the installer defaults to /data/postgres and has generated a random password for your postgresql admin account. You can use the eye to see the password and you can certainly change this to whatever you'd like.
The final options on the hostpage are related to connectivity. For this guide, we are assuming "Connected" and you can leave that be. If you are doing "Airgapped", you would pick airgapped at this point and then please see the section on airgapped installations.
You are presented with the option to provide docker hub credentials. These are optional, but if you do not provide them, you may be rate limited by Docker and this could cause issues pulling container images.
The Domains Screen
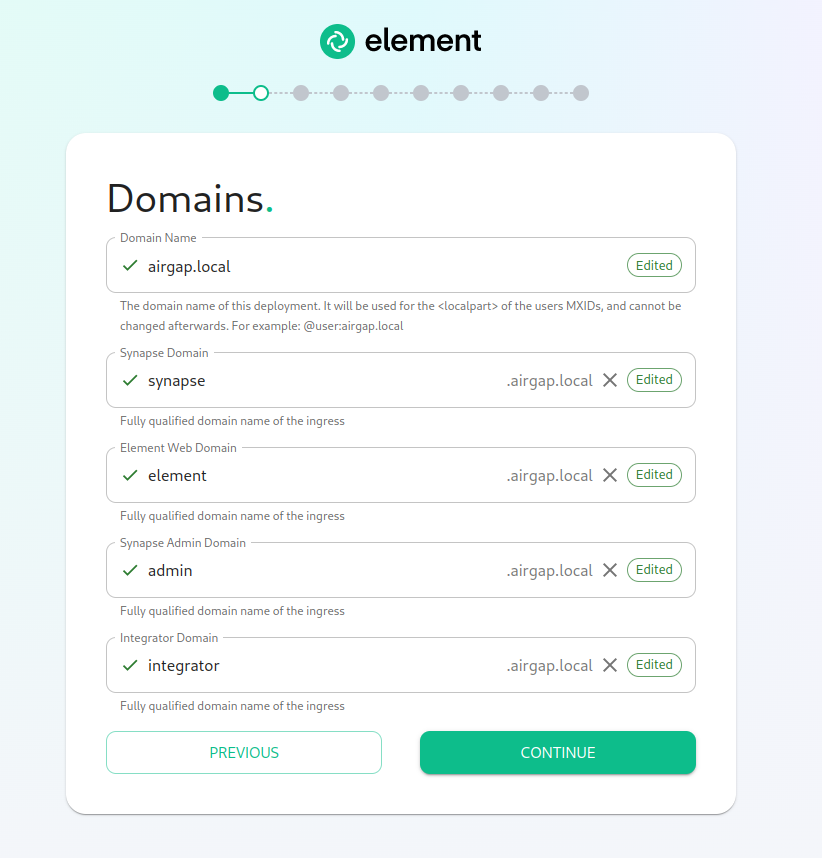
On this page, we get to specify the domains for our installation. In this example, we have a domain name of airgap.local and this would mean our MXIDs would look like @kabbott:airgap.local.
Our domain page has checking to ensure that the host names resolve. Once you get green checks across the board, you can click continue.
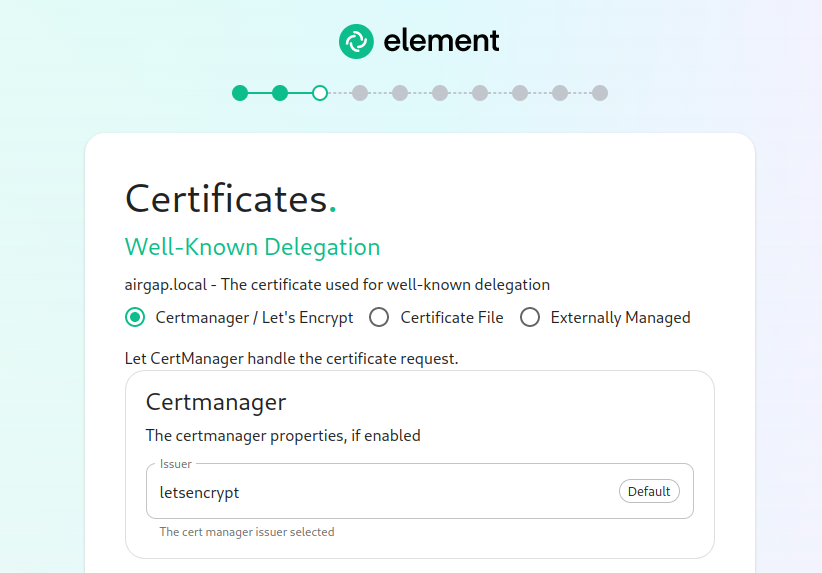
The Certificates Screen
On the Certificates screen, you will provide SSL certificate information for well-known delegation, Synapse, Element Web, Synapse Admin, and Integrator.
If you are using Let's Encrypt, then each of the sections should look like:
If you are using certificate files, then you will see a screen like:
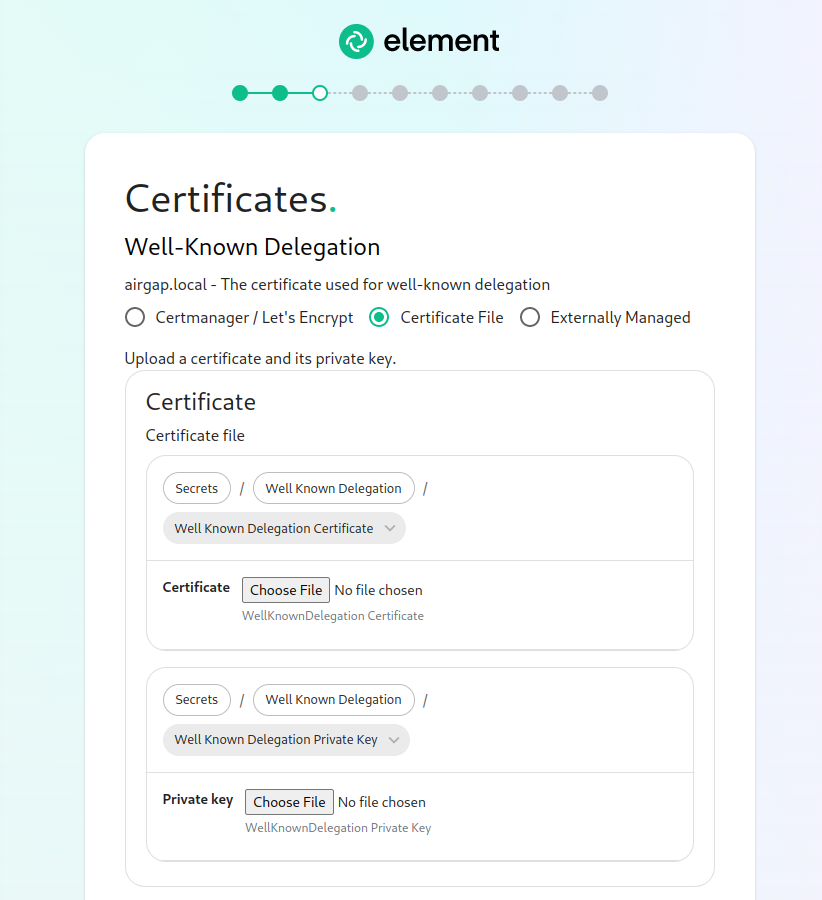
which allows you to upload a .crt and .key file for each host. These files must be in PEM encoding. Our installer does accept wildcard certificates.
Once you have completed the certificate section for each host on the page, you may click continue.
The Database Screen
If you have elected to have the installer configure PostgreSQL for you, then you will not see this screen and can skip this section.
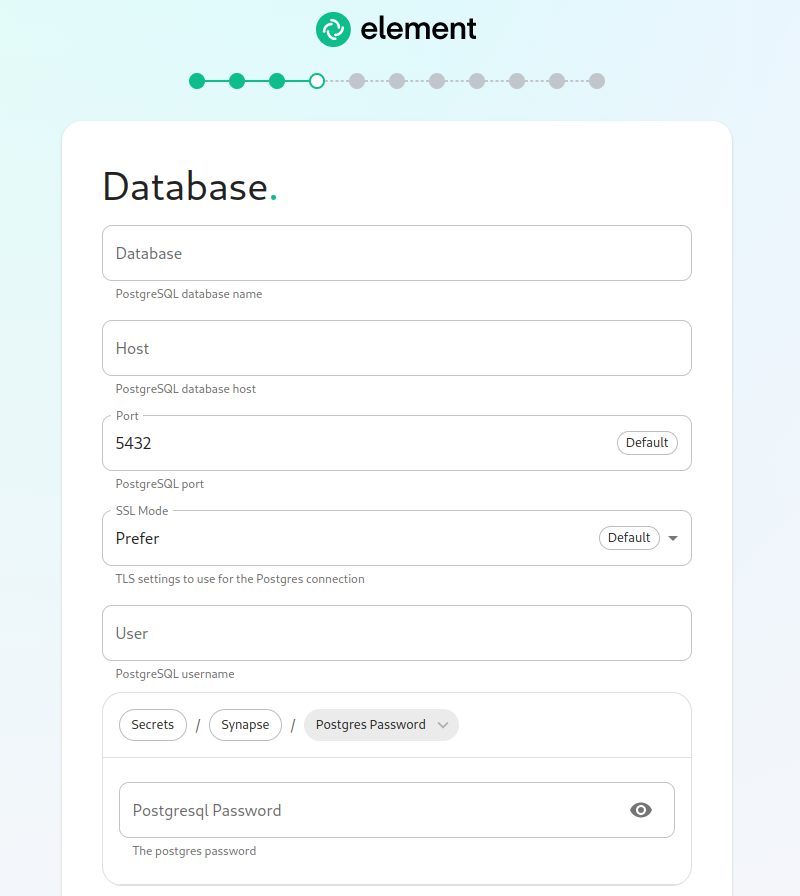
If you are using an external database, then you will see this page, where we provide the option to specify the database name, the database host name, the port to connect to, the SSL mode to use, and finally, the username and password to connect with. Once you have completed this section, you may click continue.
The Media Screen
On this page, you can specify the size of your synapse media volume. Please leave "Create New Volume" checked and specify the size of the volume that you wish to allocate. You must have this space available in /data/element-deployment or whatever you specified back on the hosts screen. If you wish to create a 50G volume, you would need to specify 50Gi for the Volume size.
The Cluster Screen
Most deployments can ignore this, however, if you want to change any microk8s cluster parameters, this is where to do it.
If you are in an environment where you have self-signed certificates, you will want to disable TLS verification, by clicking "Advanced" and then scrolling down and unchecking Verify TLS:
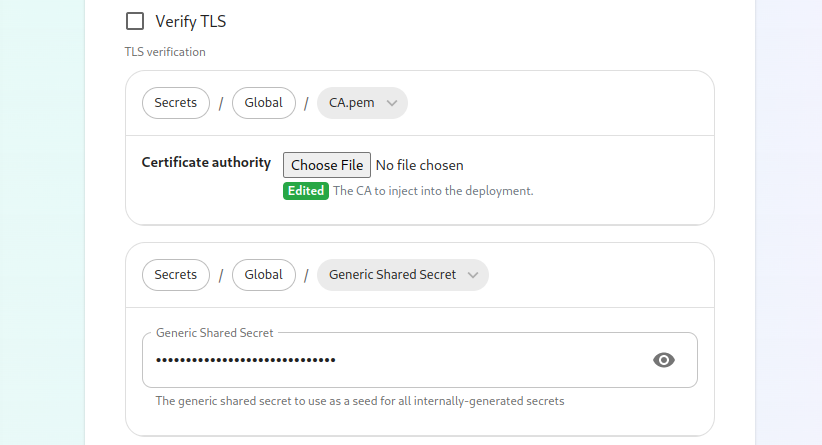
Please bear in mind that disabling TLS verification and using self-signed certificates is not recommended for production deployments.
If your host names are not DNS resolvable, you need to use host aliases and this can be set up here. You will also click "Advanced" and scroll down to the "Host Aliases" section in "k8s". In here, you will click "Add Host Aliases" and then you will specify an IP and host names that resolve to that IP as such:
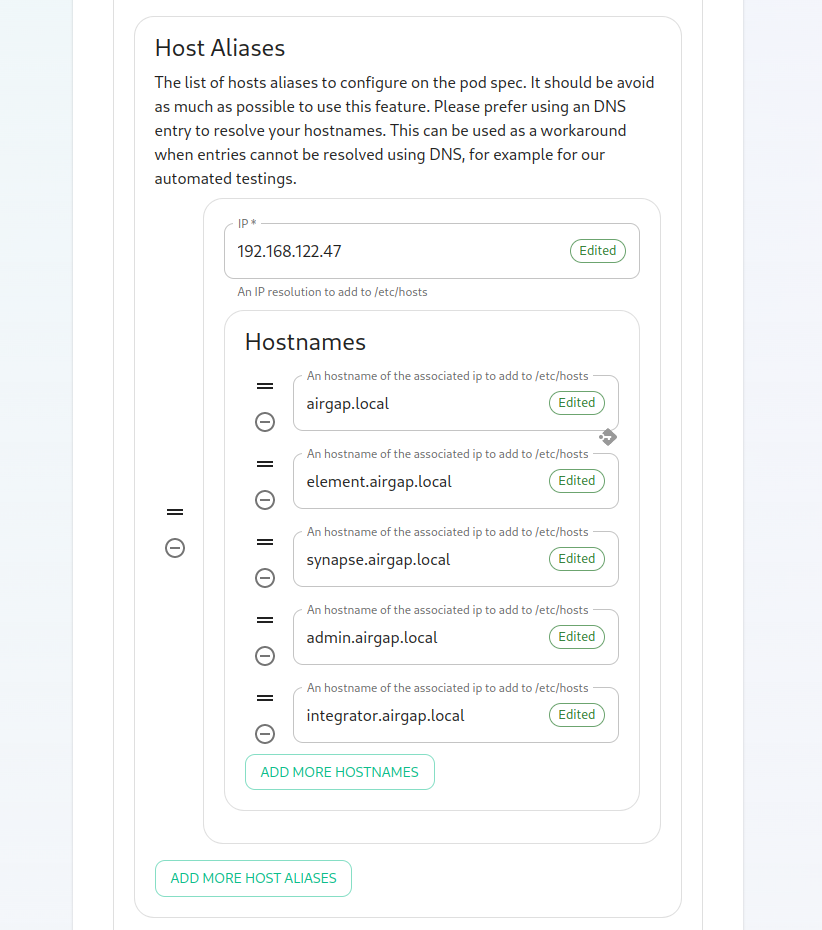
When you are finished with this page, you can click continue.
The Synapse Screen
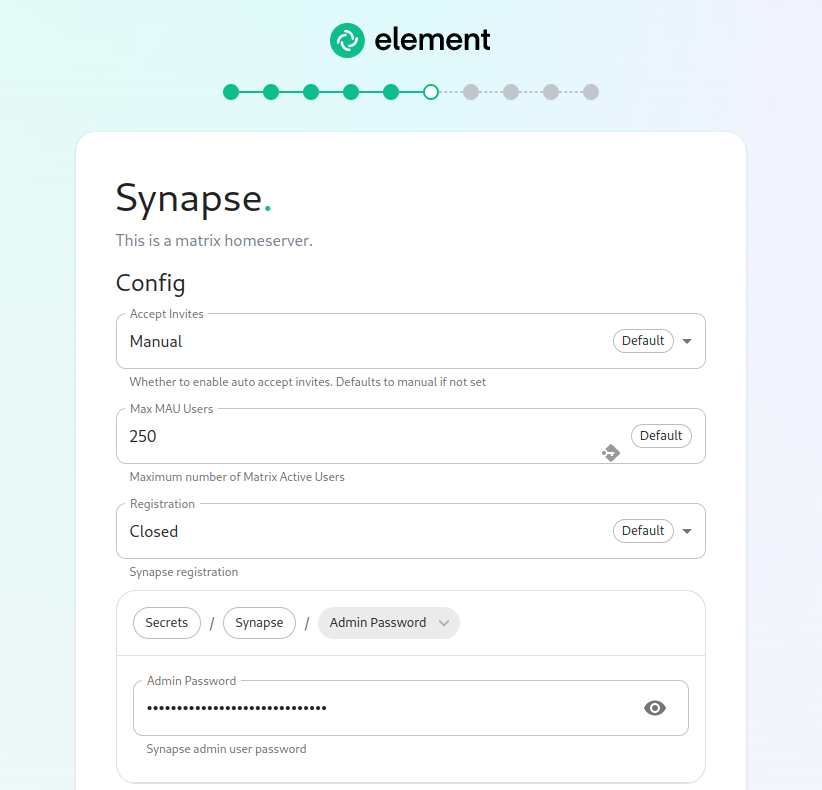
The first setting that you will see is whether you want to auto accept invites. The default of "Manual" will fit most use cases, but you are welcome to change this value.
The next setting is the maximum number of monthly active users (MAU) that you have purchased for your server. Your server will not allow you to go past this value. If you set this higher than your purchased MAU and you go over your purchased MAU, you will need to true up with Element to cover the cost of the unpaid users.
The next setting concerns registration. A server with open registration on the open internet can become a target, so we default to closed registration.
After this, you will see that the installer has picked an admin password for you. You will want to use the eye icon to view the password and copy this down as you will use this with the user onprem-admin-donotdelete to log into the admin panel after installation.
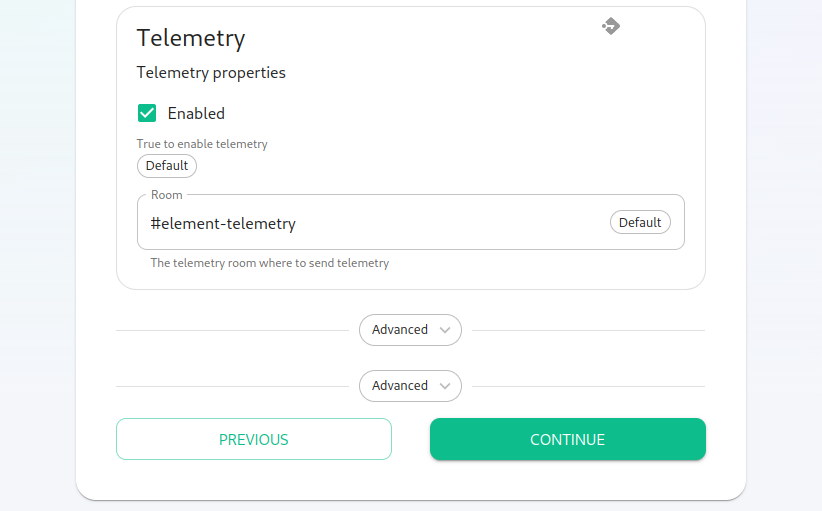
Continuing, we see telemetry. You should leave this enabled as you are required to report MAU to Element. In the event that you are installing into an enviroment without internet access, you may disable this so that it does not continue to try talking to Element. That said, you are still required to generate an MAU report at regular intervals and share that with Element.
For more information on the data that Element collects, please see: What Telemetry Data is Collected by Element?
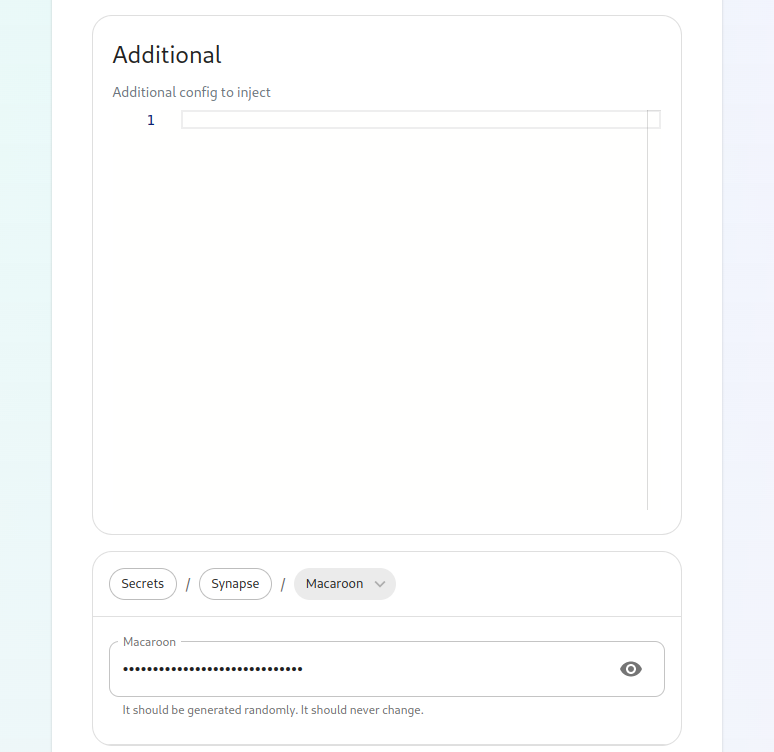
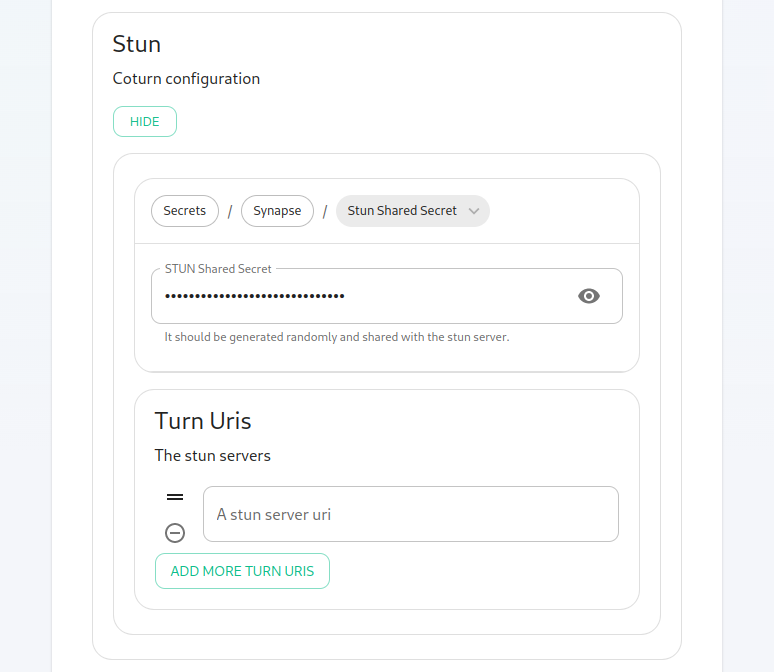
Next, we have two advanced buttons. The top one is for synapse and gives you a text box to inject additional synapse configs (homeserver.yaml), access to the macaroon, registration shared secret, and signing key. Further, you can add and configure multiple synapse workers, external appservices, and federation. These topics are presently beyond the scope of this install guide, but we will write them up in due time. Further, you also have the ability to set a STUN shared secret and set TURN URIs for any existing TURN servers that you may have in your environment.
The second advanced button allows you to explicitly set any microk8s cluster settings that you would like just for the synapse pods. Most users will be able to ignore this.
You can hit continue to go to the next screen.
The Element Web Screen
Most users will be able to simply click "Continue" here.
The Advanced section allows you to set any custom element web configurations you would like (config.json).
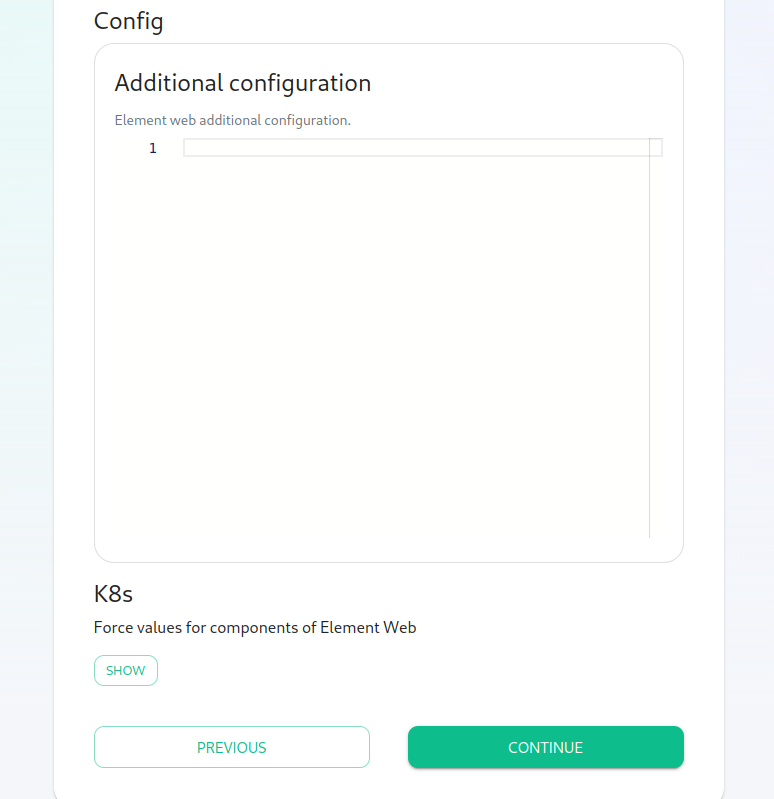
A common custom configuration would be configuring permalinks for Element, which we have documented here: Setting up Permalinks With the Installer
Further, it provides access to the k8s section, allowing you to explicitly set any microk8s cluster settings that you would like just for the element-web pod.
The Enterprise Admin Dashboard
Most users will be able to simply click "Continue" here. The Advanced section allows you to explicitly set any microk8s cluster settings that you would like just for the synapse-admin-ui pod.
The Integrator Screen
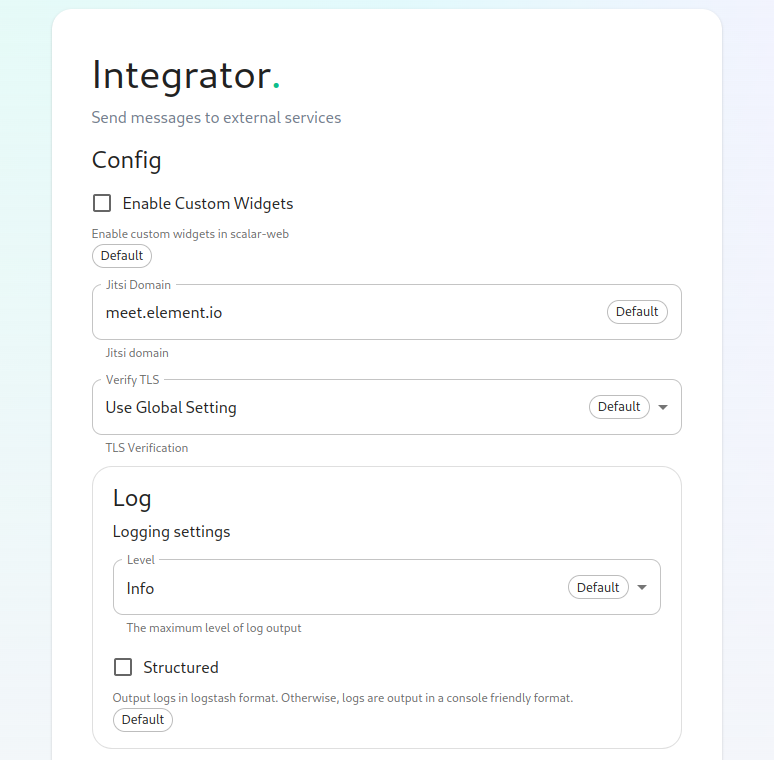
On this page, you can set up Integrator, the integrations manager.
The first option allows you to choose whether users can add custom widgets to their rooms with the integrator or not.
The next option allows you to specify which Jitsi instance the Jitsi widget will create conferences on.
The verify TLS option allows you to set this specifically for Integrator, regardless of what you set on the cluster screen.
The logging section allows you to set the log level and whether the output should be structured or not.
The Advanced section allows you to explicitly set any microk8s cluster settings that you would like just for the integrator pods.
Click "Continue to go to the next screen".
The Integrations Screen
This screen is where you can install any available integrations.
Some of these integrations will have "YAML" next to them. When you see this designation, this integration requires making settings in YAML, much like the old installer. However, with this installer, these YAML files are pre-populated and often only involve a few changes.
If you do not see a "YAML" designation next to the integration then this means that will use regular GUI elements to configure this integration.
Over time, we will do the work required to move the integrations with "YAML" next to them to the new GUI format.
For specifics on configuring well known delegation, please see Setting Up Well Known Delegation
For specifics on setting up Delegated Authentication, please see Setting up Delegated Authentication With the Installer
For specifics on setting up Group Sync, please see Setting up Group Sync with the Installer
For specifics on setting up GitLab, GitHub, and JIRA integrations, please see Setting up GitLab, GitHub, and JIRA Integrations With the Installer
For specifics on setting up Adminbot and Auditbot, please see: Setting up Adminbot and Auditbot
For specifics on setting up Hydrogen, please see: Setting Up Hydrogen
For specifics on pointing your installation at an existing Jitsi instance, please see Setting Up Jitsi and TURN With the Installer
If you do not have an existing TURN server or Jitsi server, our installer can configure these for you by following the extra steps in Setting Up Jitsi and TURN With the Installer
For specifics on configuring the Teams Bridge, please see Setting Up the Teams Bridge
For specifics on configuring the Telegram Bridge, please see Setting Up the Telegram Bridge
For specifics on configuring the IRC Bridge, please see Setting Up the IRC Bridge
For specifics on configuring the XMPP Bridge, please see Setting Up the XMPP Bridge
Once you have configured all of the integrations that you would like to configure, you can click "Continue" to head to the installation screen.
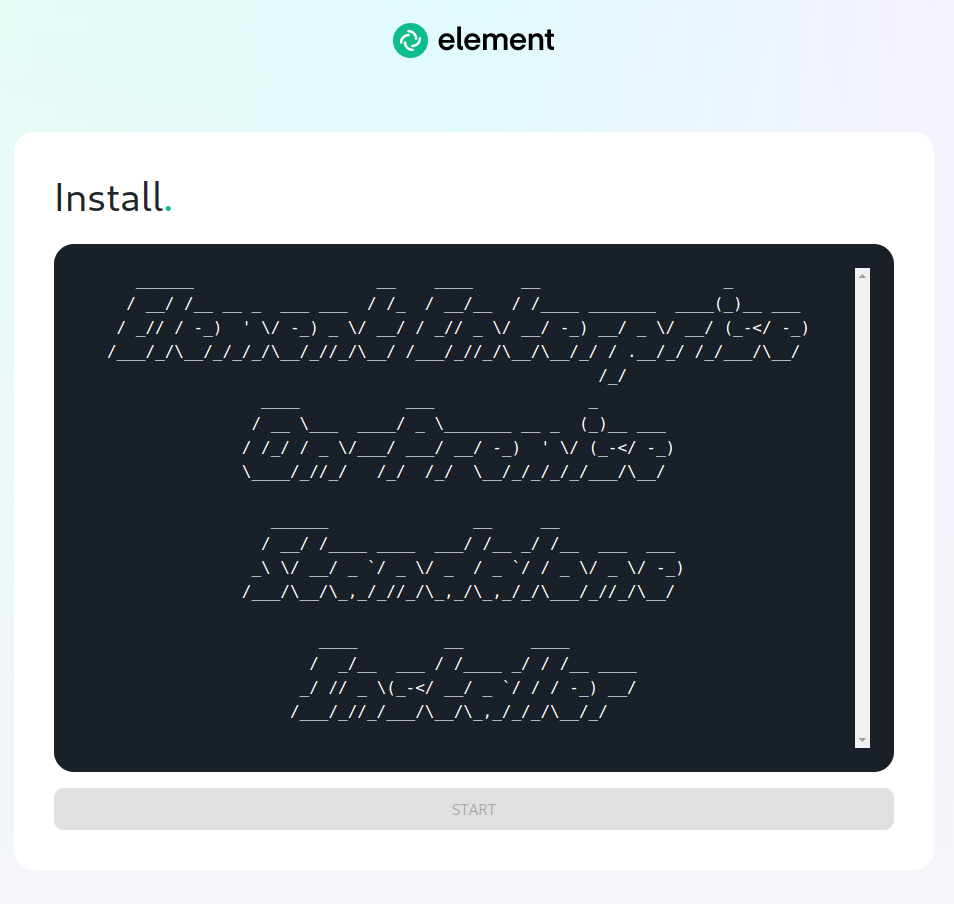
The Installation Screen
On the installation screen, you should see a blank console and a start button:
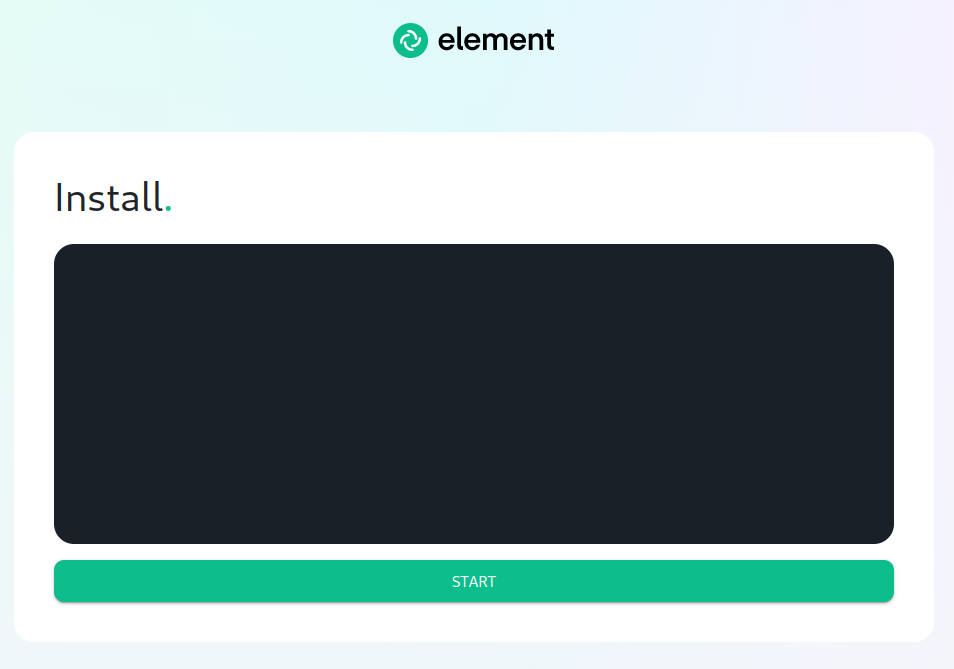
Click Start.
After a moment, you will notice the installer hang. If you go back to the prompt where you are running the installer, you will see that you are being asked for the sudo password:
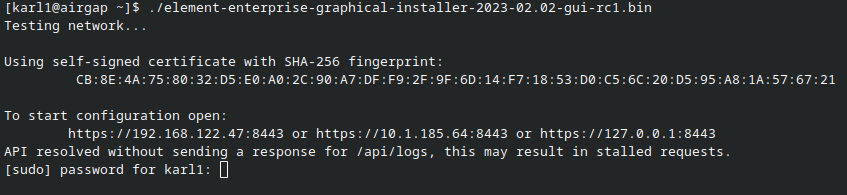
Go ahead and enter the sudo password and the installation will continue.
On the very first time that you run the installer, you will be prompted to log out and back in again to allow Linux group membership changes to be refreshed. This means that you will need to issue a ctrl-C in the terminal running your installer and actually log all the way out of your Linux session, log back in, restart the installer, navigate back to the installer screen, click start again, and then re-enter your sudo password. You will only have to perform this step once per server.
Verifying Your Installation
Once the installation has finished, it can take as much as 15 minutes on a first run for everything to be configured and set up. If you use:
kubectl get pods -n element-onprem
You should see similar output to:
NAME                                        READY   STATUS    RESTARTS   AGE
app-element-web-c5bd87777-rqr6s             1/1     Running   1          29m
server-well-known-8c6bd8447-wddtm           1/1     Running   1          29m
postgres-0                                  1/1     Running   1          40m
instance-synapse-main-0                     1/1     Running   2          29m
instance-synapse-haproxy-5b4b55fc9c-hnlmp   1/1     Running   0          20m
Once the admin console is up and running:
first-element-deployment-synapse-admin-ui-564cbf5665-dn8nv 1/1 Running 1 (4h4m ago) 3d1h
and synapse:
first-element-deployment-synapse-redis-59548698df-gqkcq      1/1     Running                  1 (4h4m ago)   3d2h
first-element-deployment-synapse-haproxy-7587dfd6f7-gp6wh    1/1     Running                  2 (4h3m ago)   2d23h
first-element-deployment-synapse-appservice-0                1/1     Running                  3 (4h3m ago)   3d
first-element-deployment-synapse-main-0                      1/1     Running                  0              3h19m
then you should be able to log in at your admin panel (in our case https://admin.airgap.local/) with the onprem-admin-donotdelete user and the password that was specified on the "Synapse" screen.
A word about Configuration Files
In the new installer, all configuration files are placed in the directory .element-enterprise-server. This can be found in your user's home directory. In this directory, you will find a subdirectory called config that contains the actual configurations.
End-User Documentation
After completing the installation you can share our User Guide to help orient and onboard your users to Element!