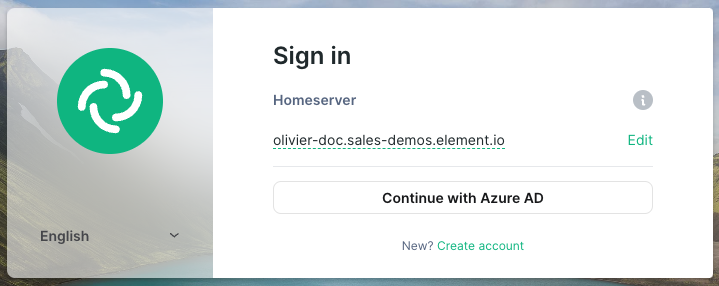
Setting up Delegated Authentication With the Installer
Delegated Authentication
At present, we support delegating the authentication of users to the following provider interfaces:
- LDAP
- SAML
- OIDC
- CAS
When enabling Delegated Auth, you can still allow local users managed by Element to connect to the instance
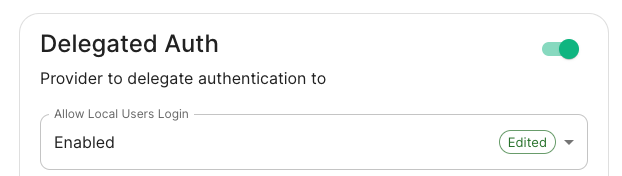
When Allow Local Users Login is Enabled, you can both connect to your instance using your IDP and the local database.

Different options are offered by the installer and you can combine two or more options on the same instance like enabling SAML and OIDC delegated authentication.
Setting up Delegated Authentication with LDAP on Windows AD
Setting up Delegated Authentication with OpenID on Microsoft Azure
Setting up Delegated Authentication with OpenID on Microsoft AD FS
Note: We are rapidly working to expand and improve this documentation. For now, we are providing screenshots of working configurations, but in the future, we will better explain the options as well. If you do not see your provider listed below, please file a support ticket or reach out to your Element representative and we will work to get you connected and our documentation updated.
LDAP with Windows AD
Base: the distinguished name of the root level Org Unit in your LDAP directory.The distinguished name can be displayed by selectingView/Advanced Featuresin the Active Directory console and then, right-clicking on the object, selectingProperties/Attributes Editor.
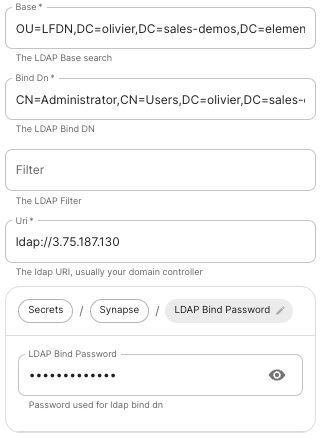
Base Dn: the distinguished name of the LDAP account with read access.Filter: anLDAP filterto filter out objects under the LDAP Base DN.Uri: the URI of your LDAP server.LDAP Bind Password: the password of the LDAP account with read access.

SAML

OpenID with Microsoft Azure
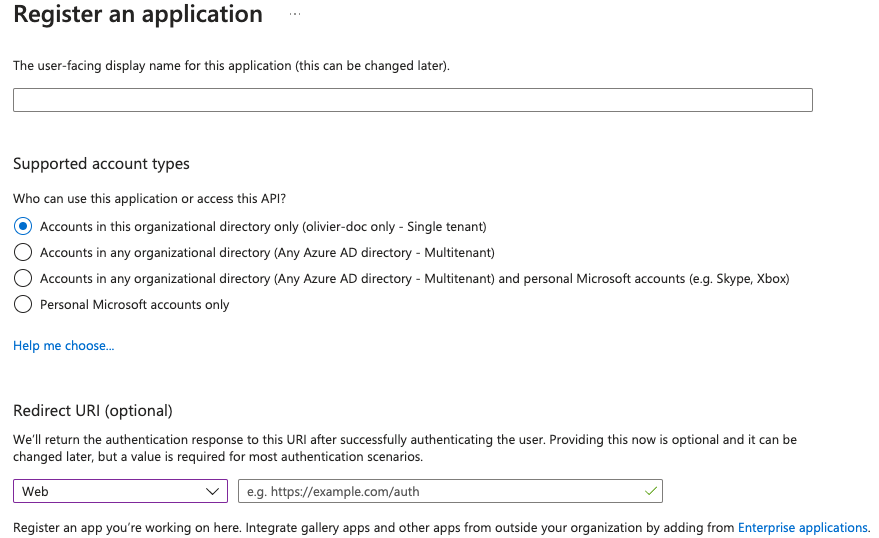
Microsoft Azure Active Directory
You need to create anApp registration.You have to selectRedirect URI (optional)and set it to https://matrix.your-domain.com/_synapse/client/oidc/callback
For the bridge to be able to operate correctly, navigate to API permissions, add Microsoft Graph APIs, choose Delegated Permissions and add
openidprofile
Remember to grant the admin consent for those.
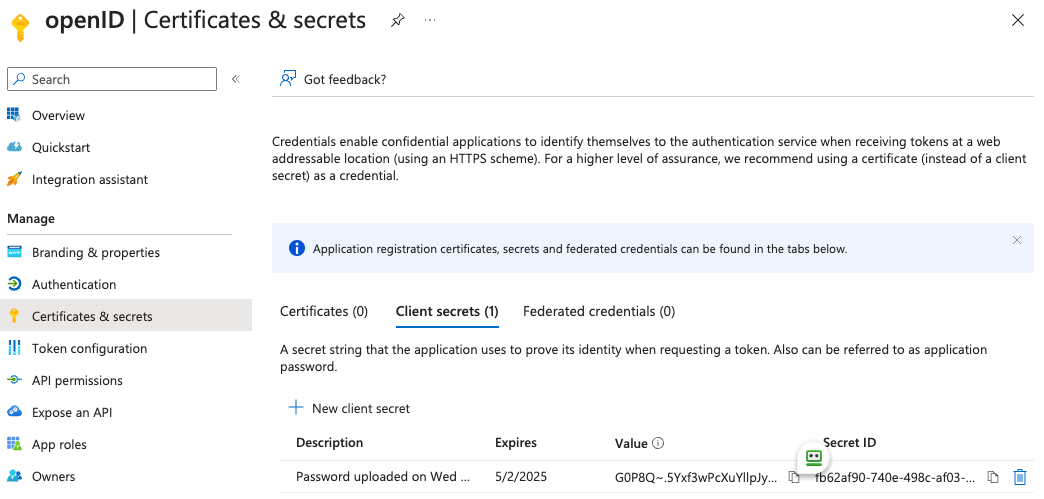
To setup the installer, you'll need
theApplication (client) IDtheDirectory (tenant) IDa secret generated fromCertificates & secretson the app.
In the installer, select:
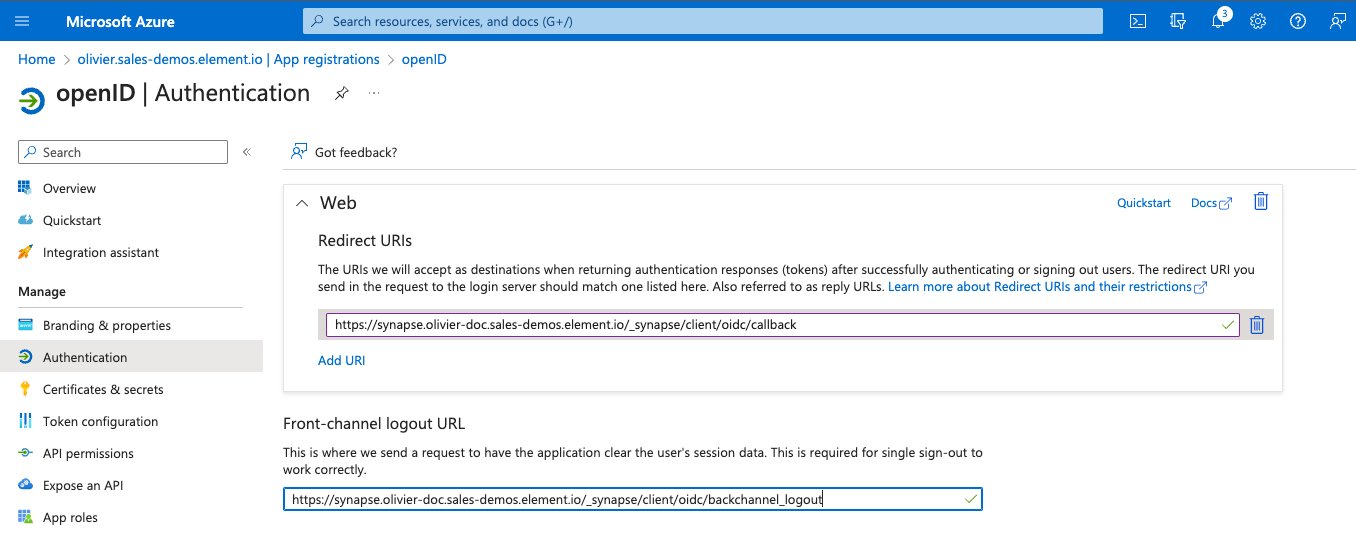
Allow Existing Users: if checked, it allows a user logging in via OIDC to match a pre-existing account instead of failing. This could be used if switching from password logins to OIDC.Authorization Endpoint: the oauth2 authorization endpoint. Required if provider discovery is disabled.https://login.microsoftonline.com/<Directory (tenant) ID>/oauth2/v2.0/authorizeBackchannel Logout Enabled: Synapse supports receiving OpenID Connect Back-Channel Logout notifications. This lets the OpenID Connect Provider notify Synapse when a user logs out, so that Synapse can end that user session. This property has to bet set tohttps://your-domain/_synapse/client/oidc/backchannel_logoutin your identity provider
Client Auth Method: auth method to use when exchanging the token. Set it toClient Secret Postor any method supported by your IdpClient ID: yourApplication (client) IDDiscover: enable/disable the use of the OIDC discovery mechanism to discover endpointsIdp Brand: an optional brand for this identity provider, allowing clients to style the login flow according to the identity provider in questionIdp ID: a string identifying your identity provider in your configurationIdp Name: A user-facing name for this identity provider, which is used to offer the user a choice of login mechanisms in the Element UI. In the screenshot bellow,Idp Nameis set toAzure AD
Issuer: the OIDC issuer. Used to validate tokens and (if discovery is enabled) to discover the provider's endpointshttps://login.microsoftonline.com/<Directory (tenant) ID>/v2.0Token Endpoint: the oauth2 authorization endpoint. Required if provider discovery is disabled.Client Secret: your secret value defined under "Certificates and secrets"
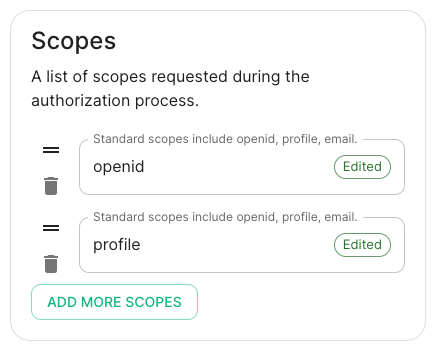
Scopes: add every scope on a different lineThe openid scope is required which translates to the Sign you in permission in the consent UIYou might also include other scopes in this request for requesting consent.
User Mapping Provider: Configuration for how attributes returned from a OIDC provider are mapped onto a matrix user.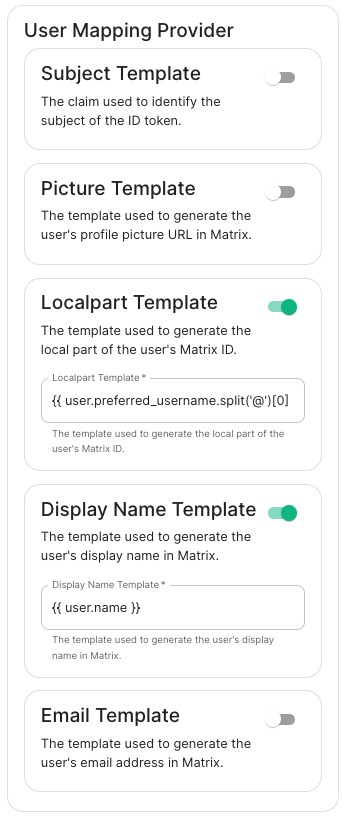
Localpart Template: Jinja2 template for the localpart of the MXID. Set it to{{ user.preferred_username.split('@')[0] }}for Azure ADDisplay Name Template: Jinja2 template for the display name to set on first login. If unset, no displayname will be set. Set it to{{ user.name }}for Azure AD
Other configurations are documentedhere.OpenID with Microsoft ADFS on-premBefore starting the installation, make sure:your Windows computer name is correct since you won't be able to change it after having installed AD FSyou configured your server with a static IP addressyour server joined a domain and your domain is defined under Server Manager > Local serveryou can resolve your server FQDN like computername.my-domain.com
You can find a checklisthere.Steps to follow:Install AD CS (Certificate Server) to issue valid certificates for AD FS. AD CS provides a platform for issuing and managing public key infrastructure [PKI] certificates.Install AD FS (Federation Server)
Install AD CSYou need to install the AD CS Server Role.Follow thisguide.
Obtain and Configure an SSL Certificate for AD FSBefore installing AD FS, you are required to generate a certificate for your federation service. The SSL certificate is used for securing communications between federation servers and clients.Follow thisguide.Additionally, thisguideprovides more details on how to create a certificate template.
Install AD FSYou need to install the AD FS Role Service.Follow thisguide.
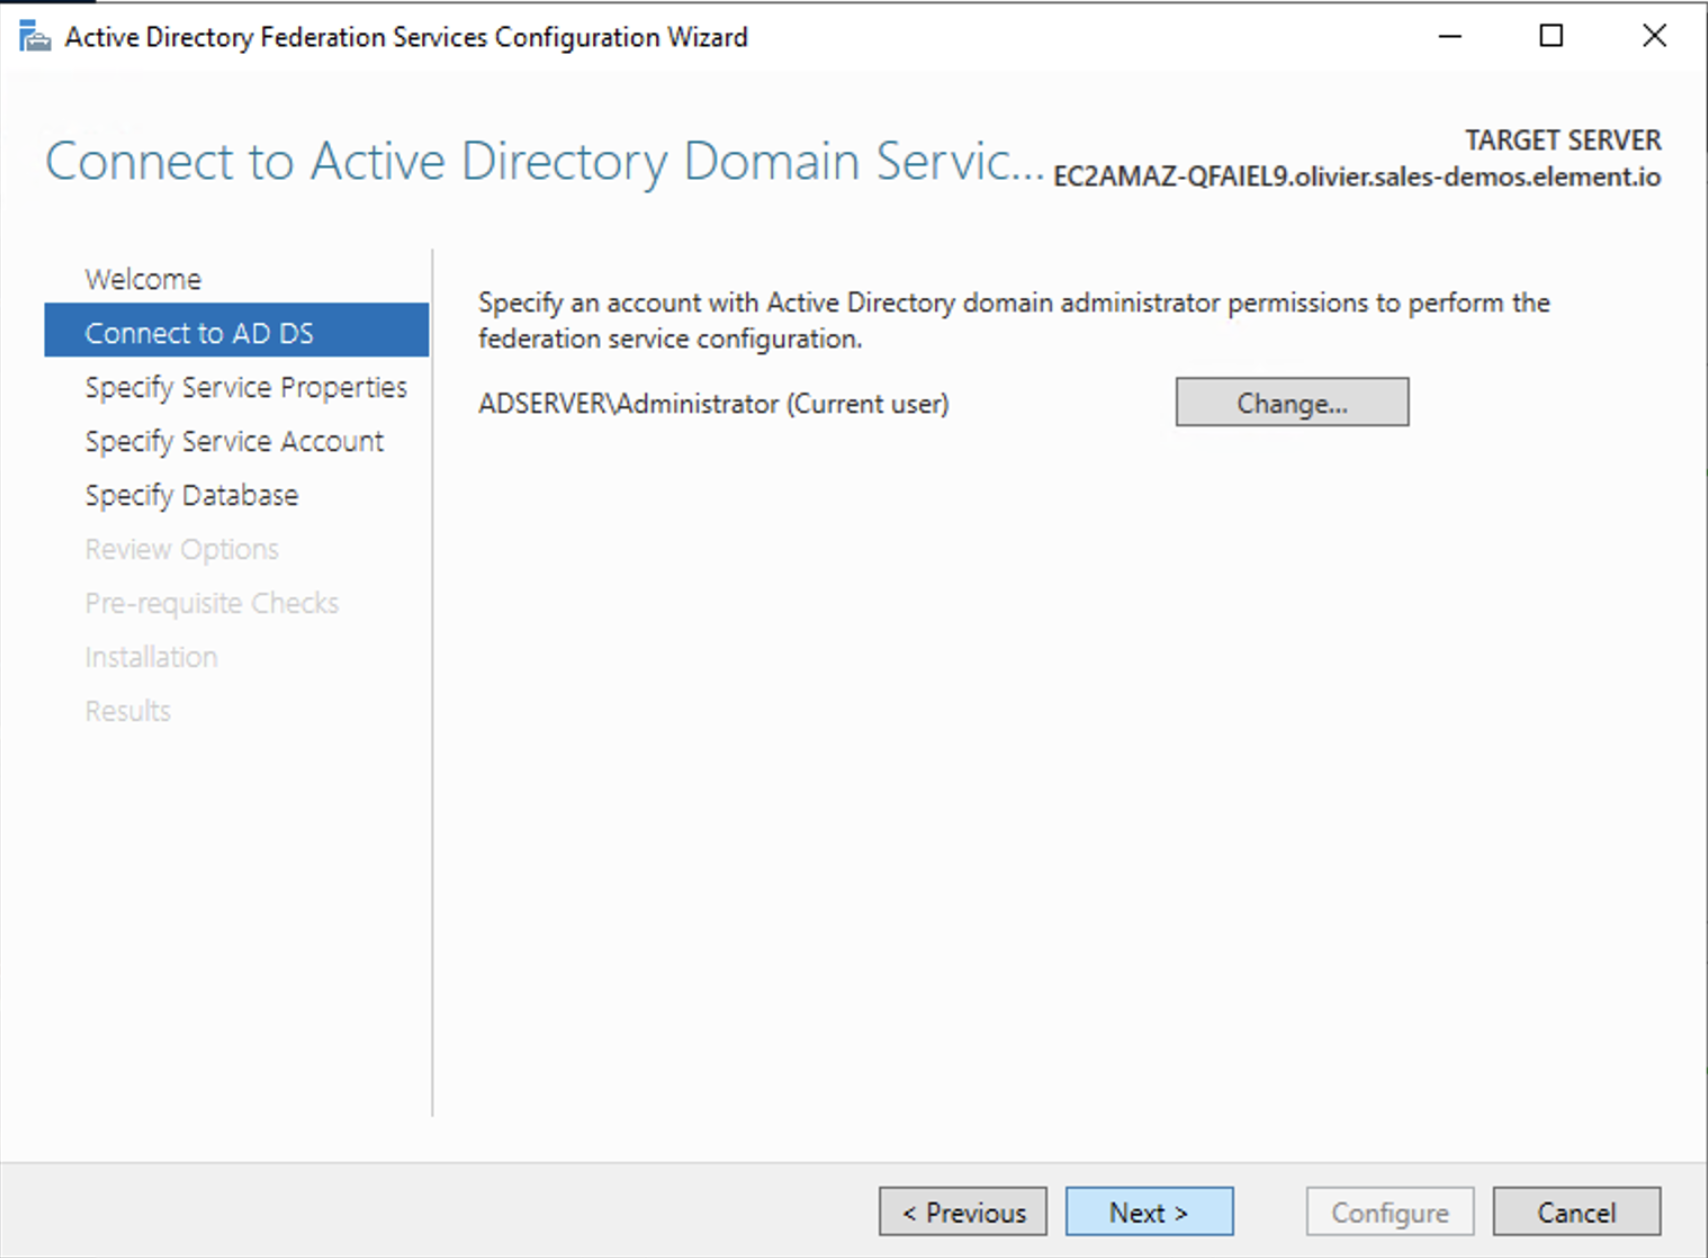
Configure the federation serviceAD FS is installed but not configured.Click onConfigure the federation service on this serverunderPost-deployment configurationin theServer Manager.EnsureCreate the first federation server in a federation server farmand is selected
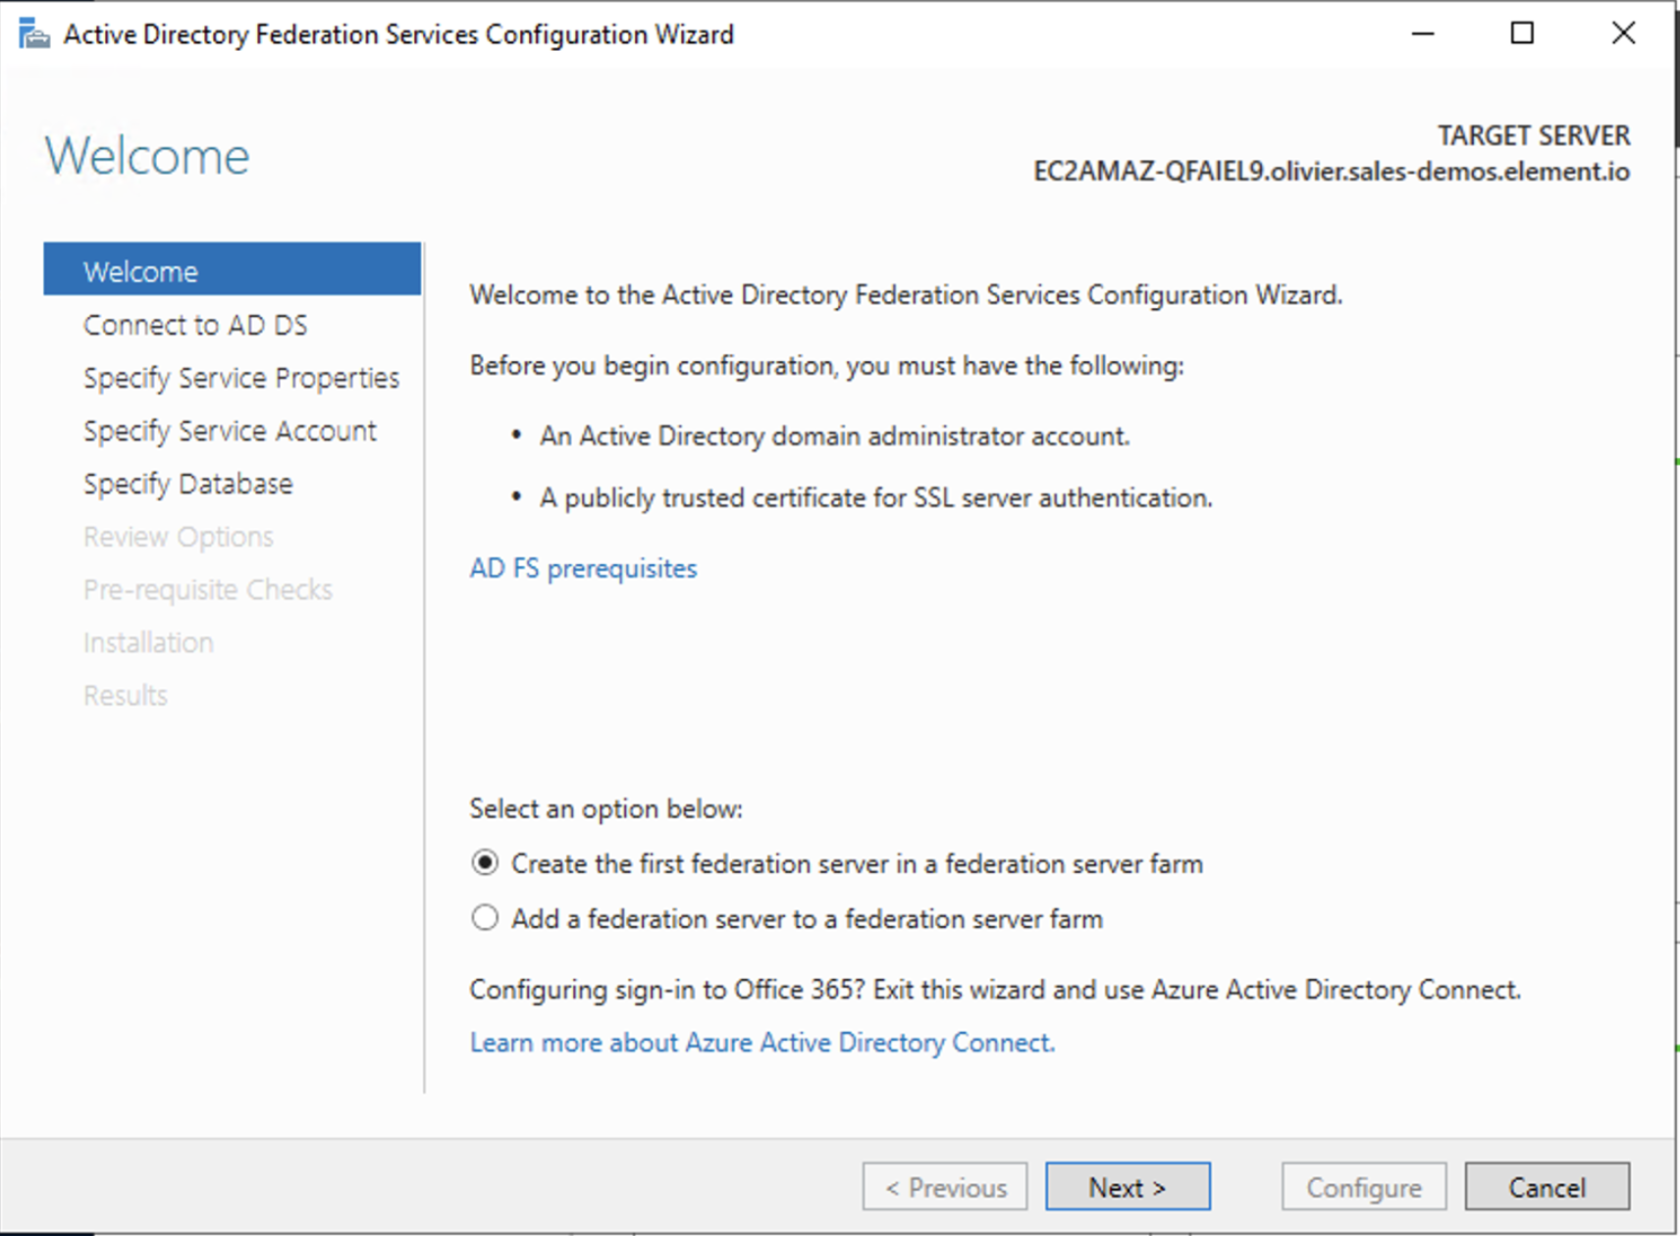
ClickNext

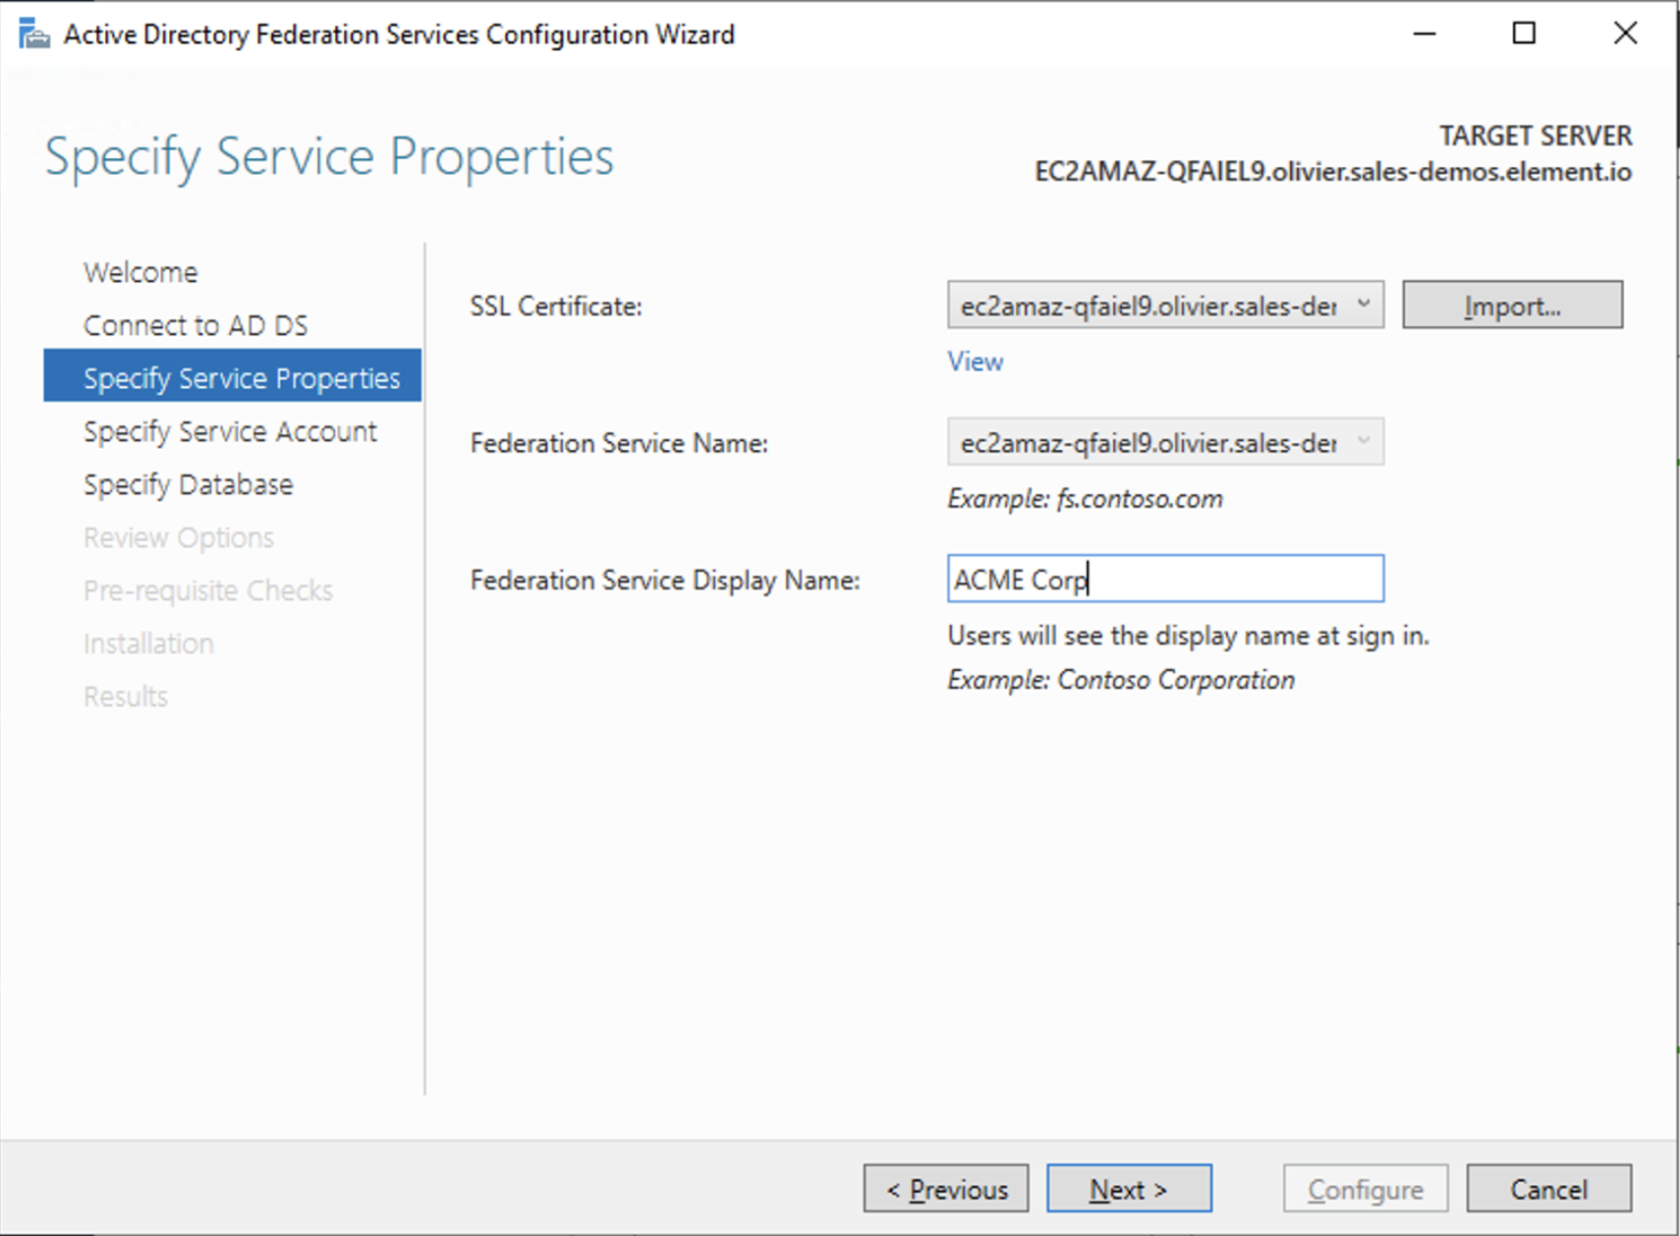
Select the SSL Certificate and set a Federation Service Display Name
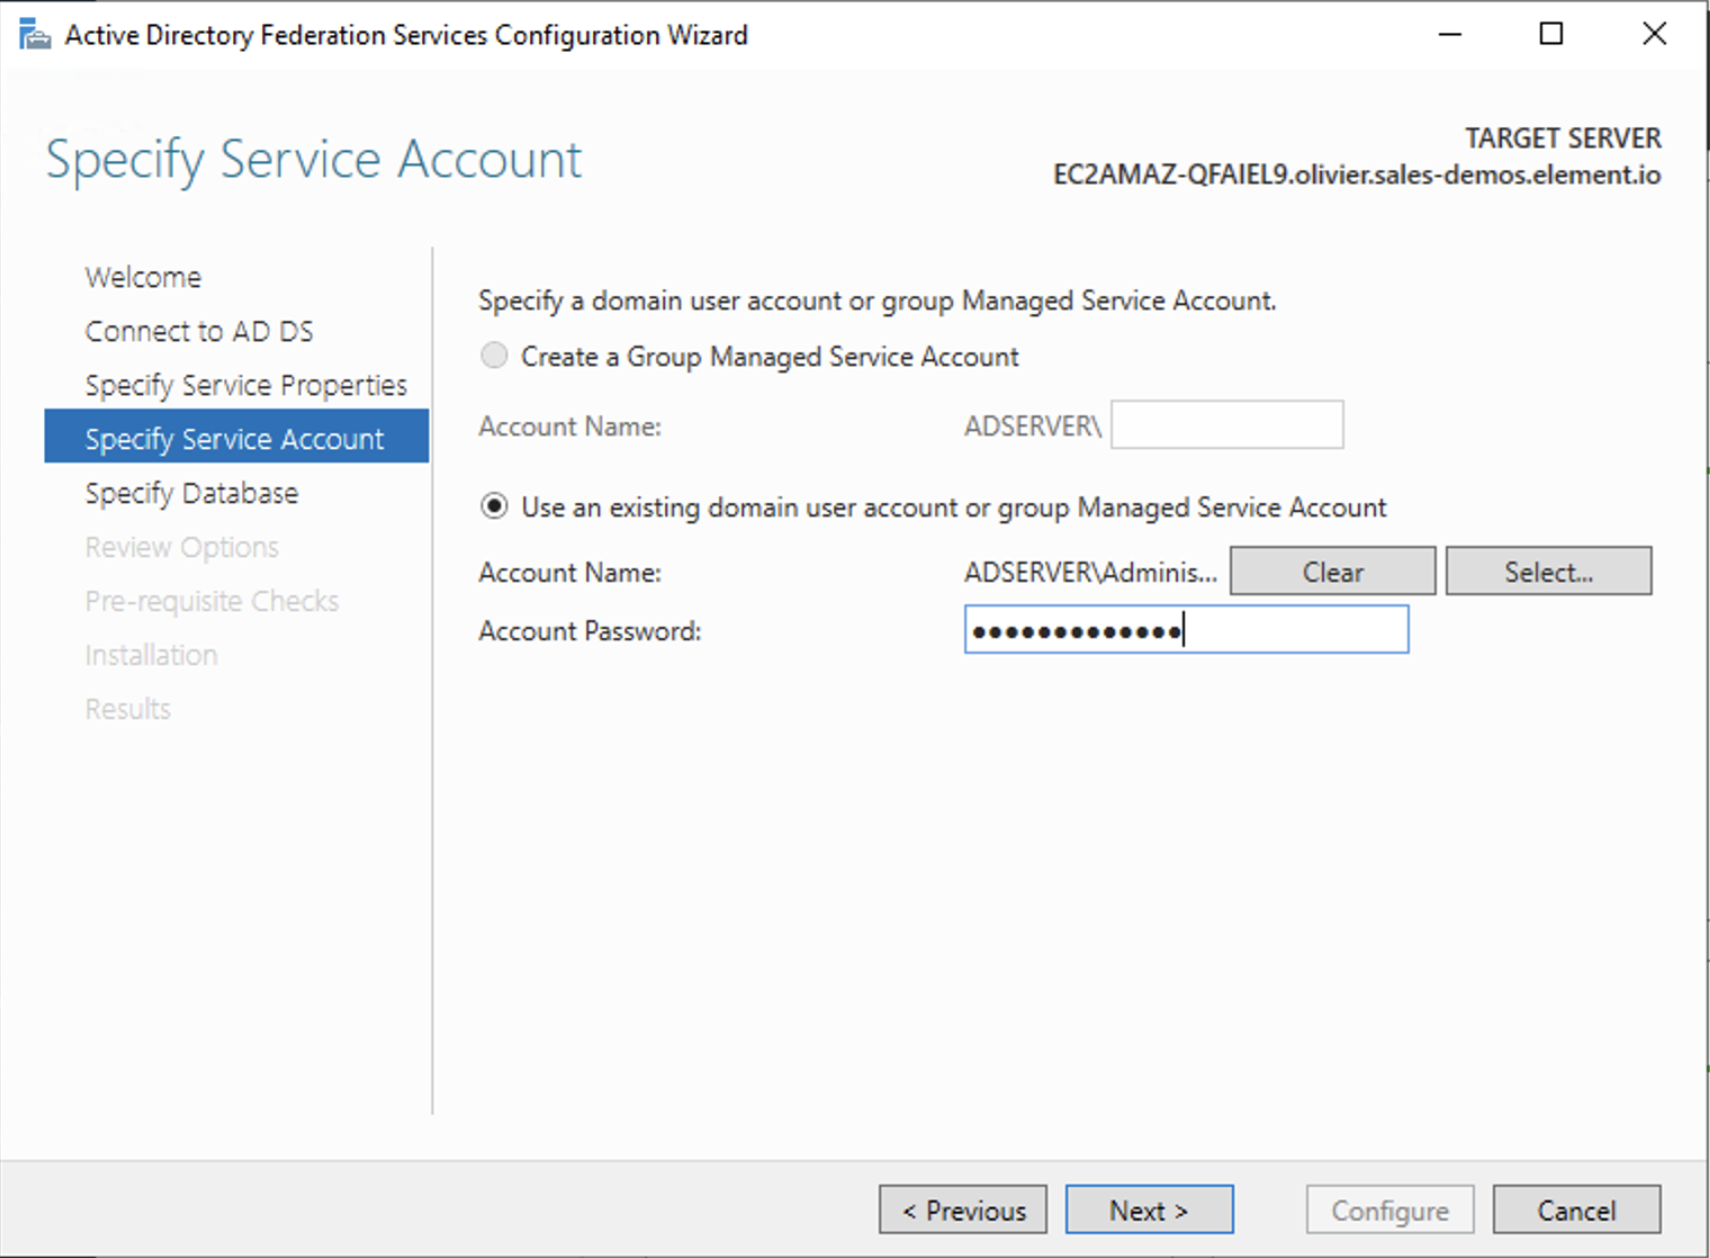
On the Specify Service Account page, you can either Create a Group Managed Service Account (gMSA) or Specify an existing Service or gMSA Account

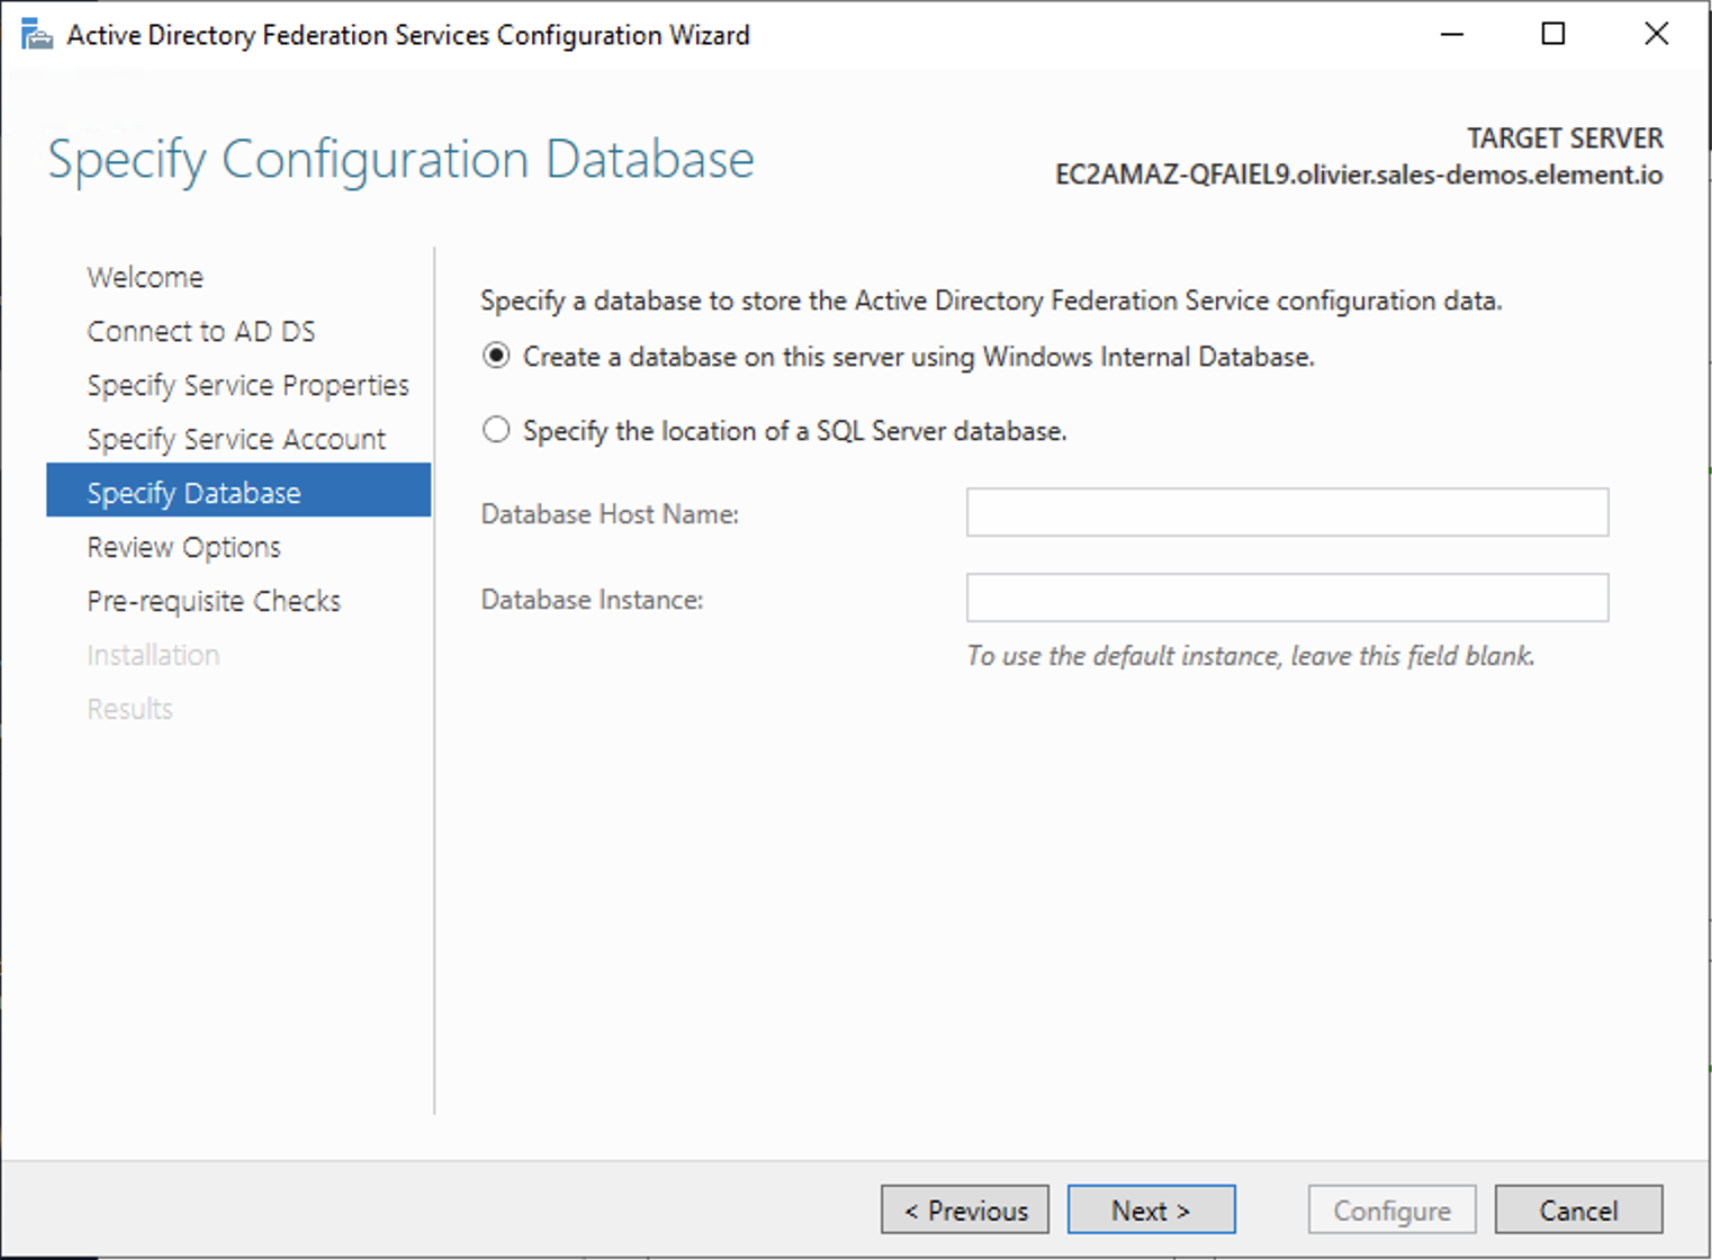
Choose your database

Review Options , check prerequisites are completed and click onConfigureRestart the server
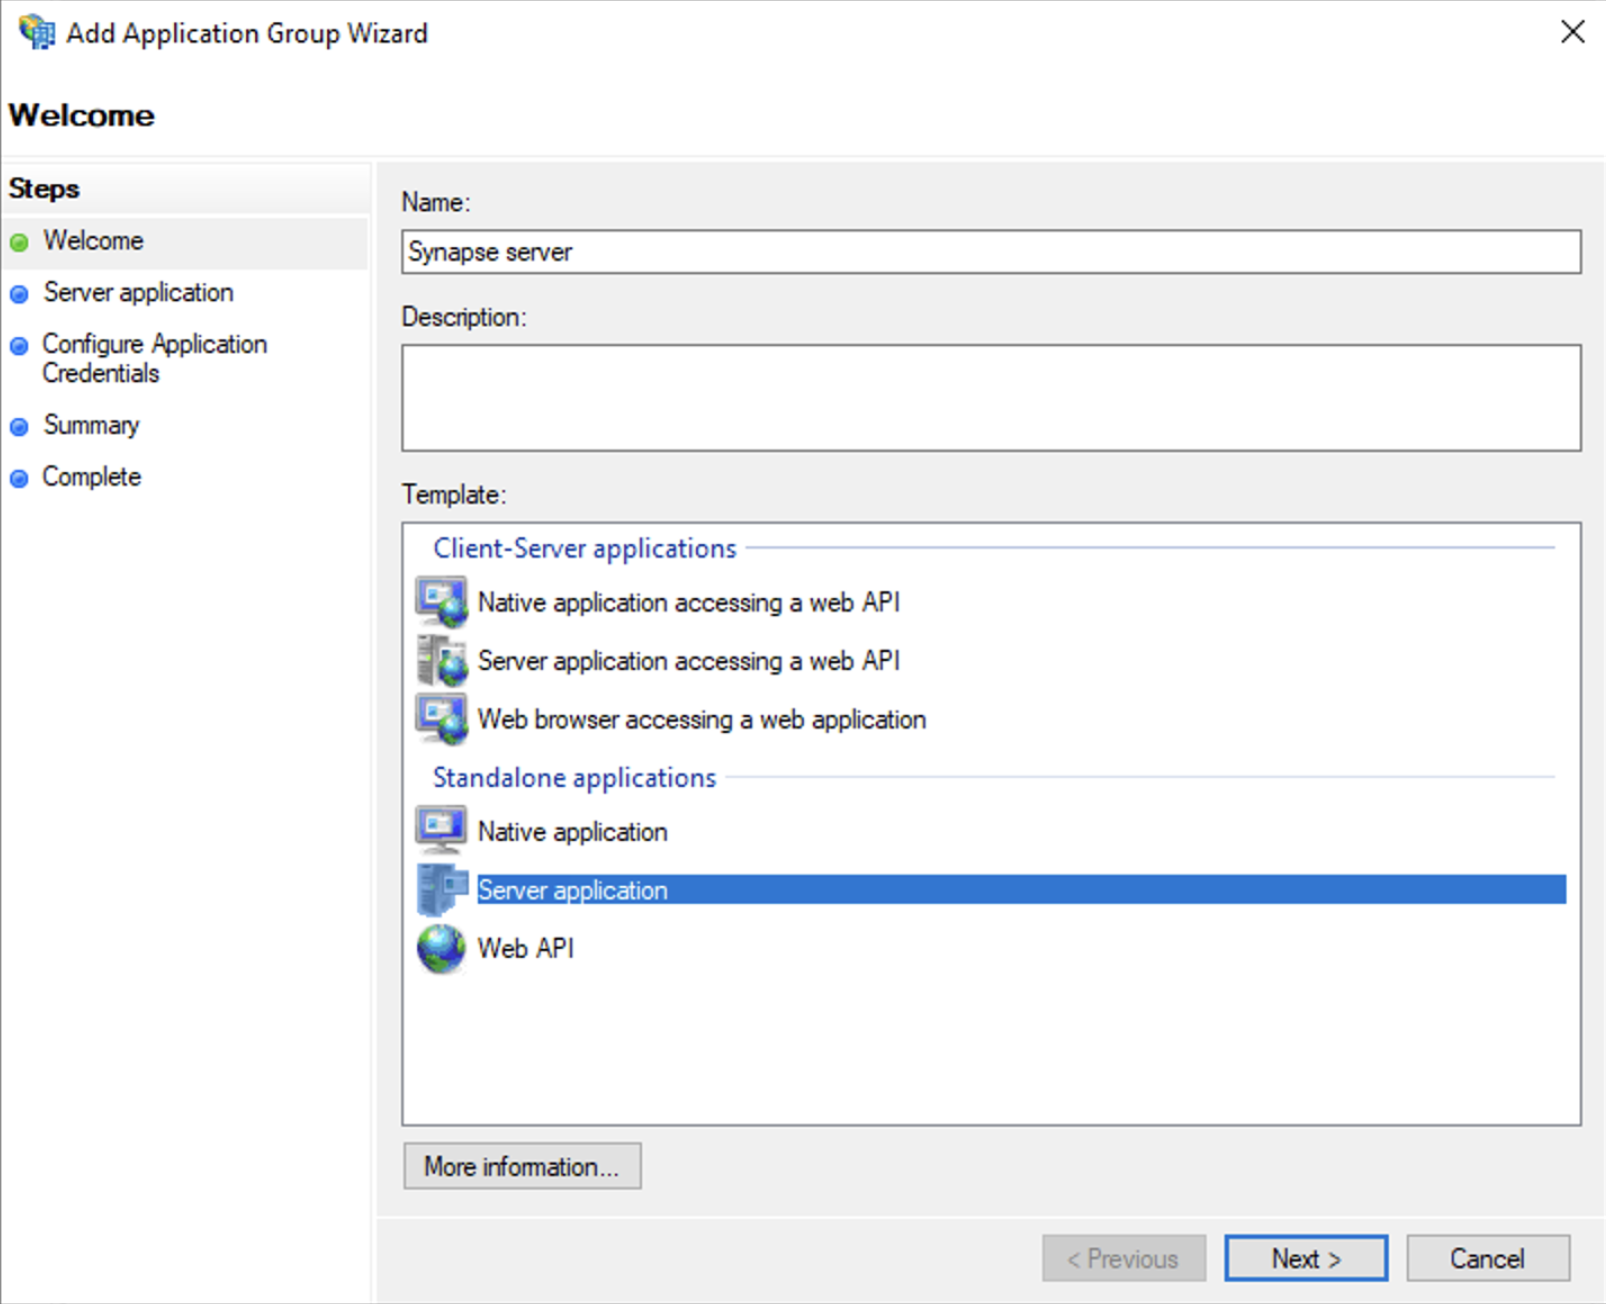
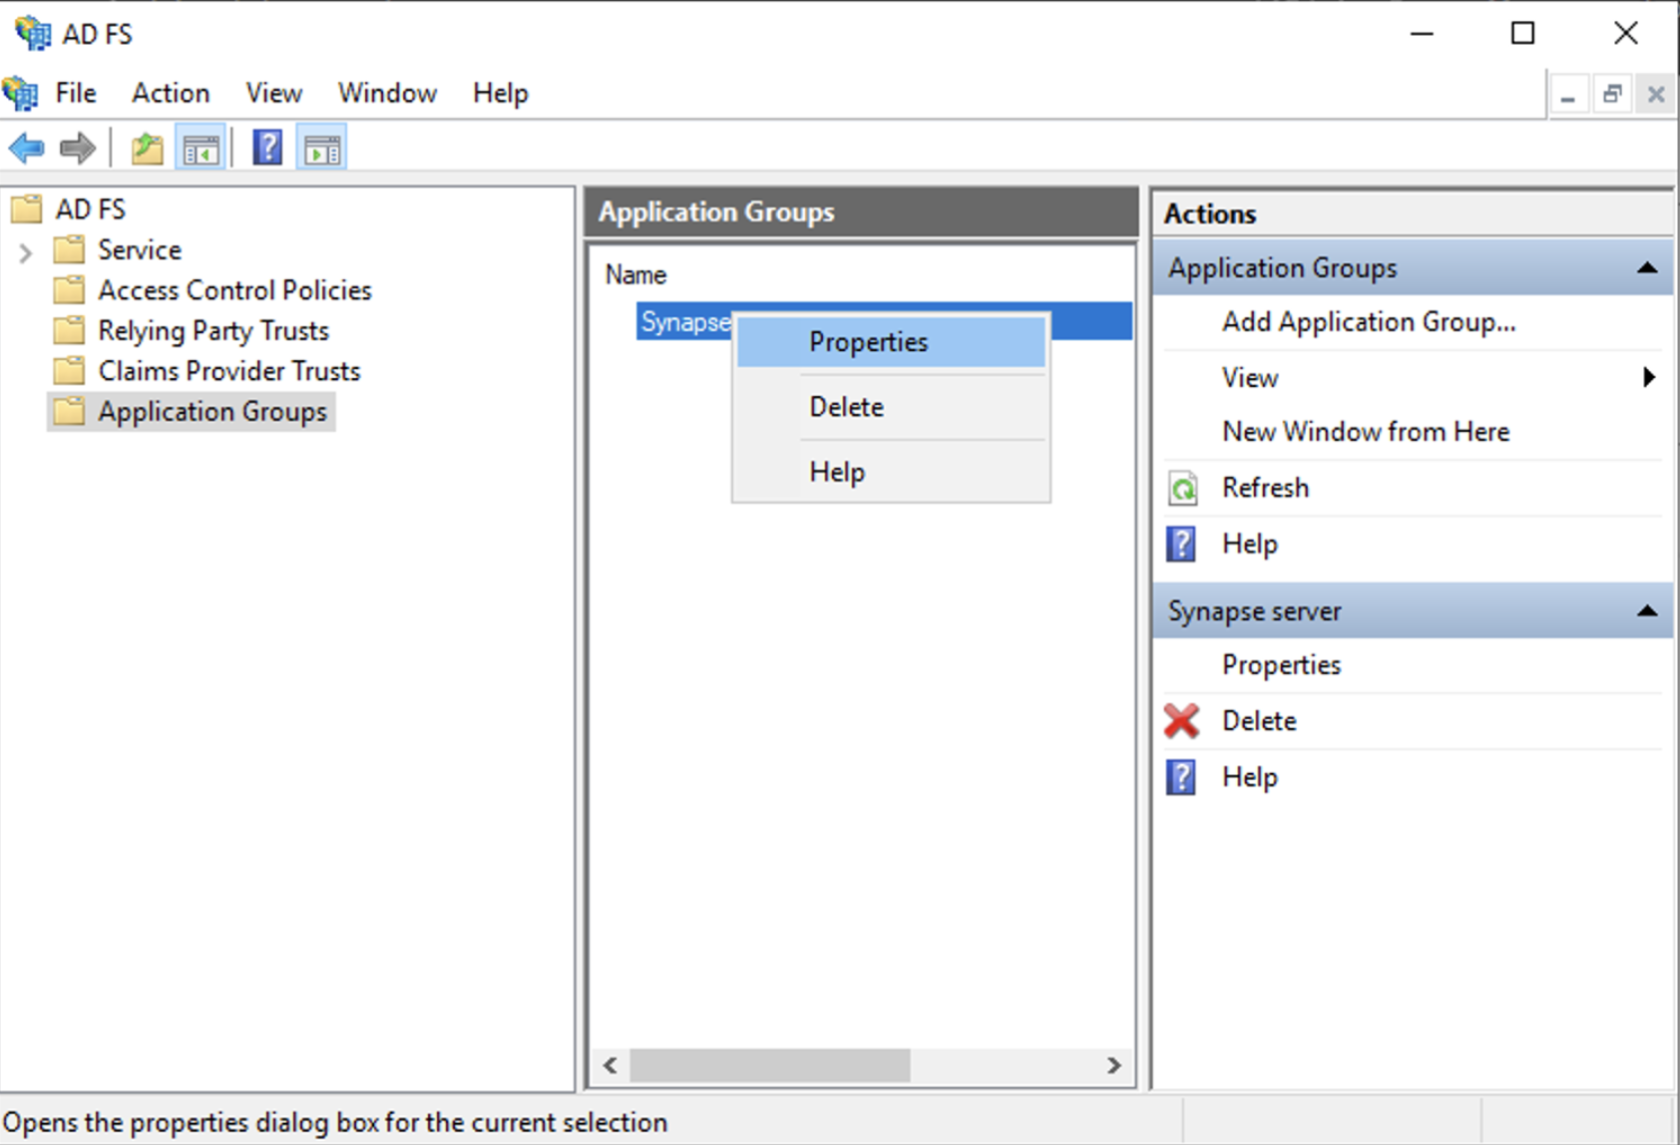
Add AD FS as an OpenID Connect identity providerTo enable sign-in for users with an AD FS account, create an Application Group in your AD FS.To create an Application Group, follow theses steps:InServer Manager, selectTools, and then selectAD FS ManagementIn AD FS Management, right-click onApplication Groupsand selectAdd Application GroupOn the Application Group WizardWelcomescreenEnter the Name of your applicationUnderStandalone applicationssection, selectServer applicationand clickNext

Enterhttps://<matrix domain>/_synapse/client/oidc/callbackin Redirect URI: field, clickAdd, save theClient Identifiersomewhere, you will need it when setting up Element and clickNext(e.g. https://matrix.domain.com/_synapse/client/oidc/callback)

SelectGenerate a shared secretcheckbox and make a note of the generated Secret and pressNext(Secret needs to be added in the Element Installer GUI in a later step)Right click on the created Application Group and select `Properties``
SelectAdd application...button.SelectWeb API