Setting up Delegated Authentication with OpenID on Microsoft AD FS
Install Microsoft AD FS
Before starting the installation, make sure:
- your Windows computer name is correct since you won't be able to change it after having installed AD FS
- you configured your server with a static IP address
- your server joined a domain and your domain is defined under Server Manager > Local server
- you can resolve your server FQDN like computername.my-domain.com
You can find a checklist here.
Steps to follow:
- Install AD CS (Certificate Server) to issue valid certificates for AD FS. AD CS provides a platform for issuing and managing public key infrastructure [PKI] certificates.
- Install AD FS (Federation Server)
Install AD CS
You need to install the AD CS Server Role.
- Follow this guide.
Obtain and Configure an SSL Certificate for AD FS
Before installing AD FS, you are required to generate a certificate for your federation service. The SSL certificate is used for securing communications between federation servers and clients.
- Follow this guide.
- Additionally, this guide provides more details on how to create a certificate template.
Install AD FS
You need to install the AD FS Role Service.
- Follow this guide.
Configure the federation service
AD FS is installed but not configured.
- Click on
Configure the federation service on this serverunderPost-deployment configurationin theServer Manager. - Ensure
Create the first federation server in a federation server farmand is selected
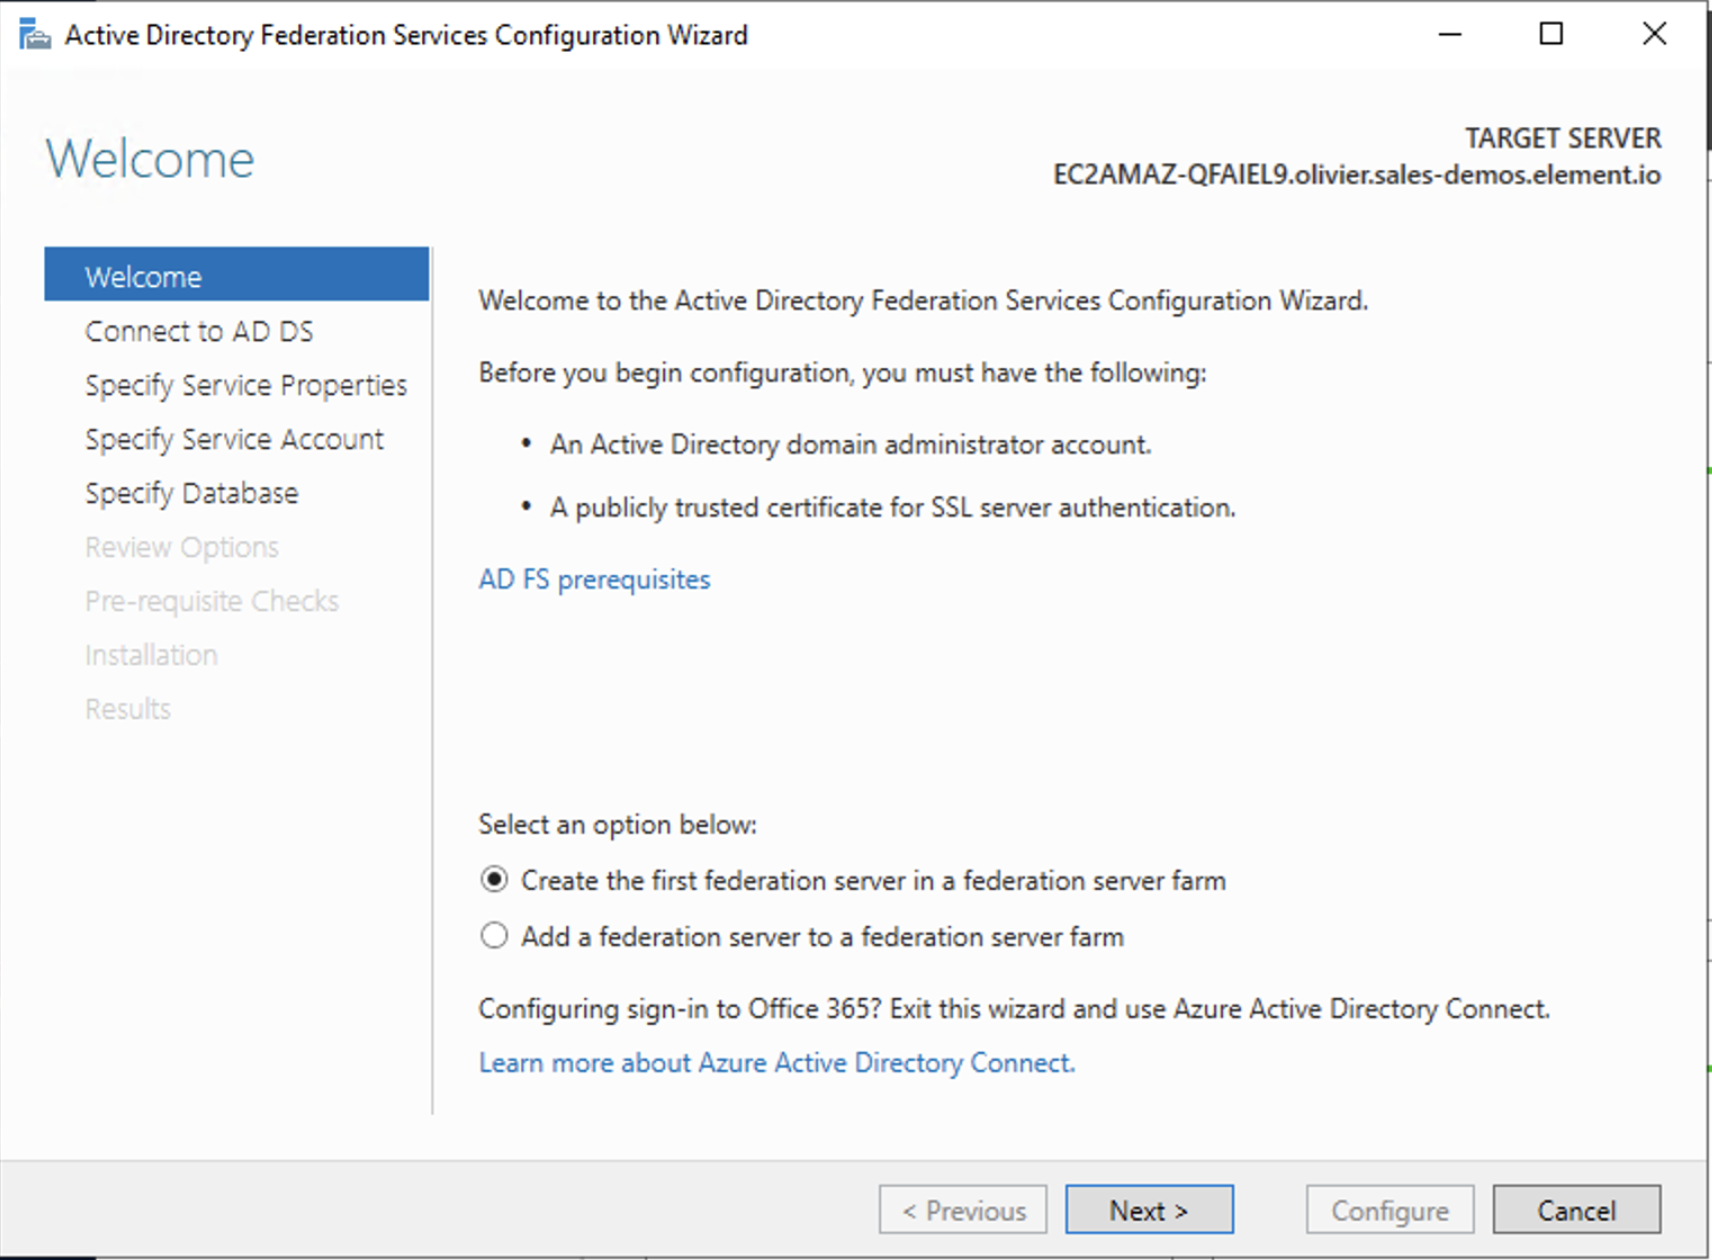
- Click
Next
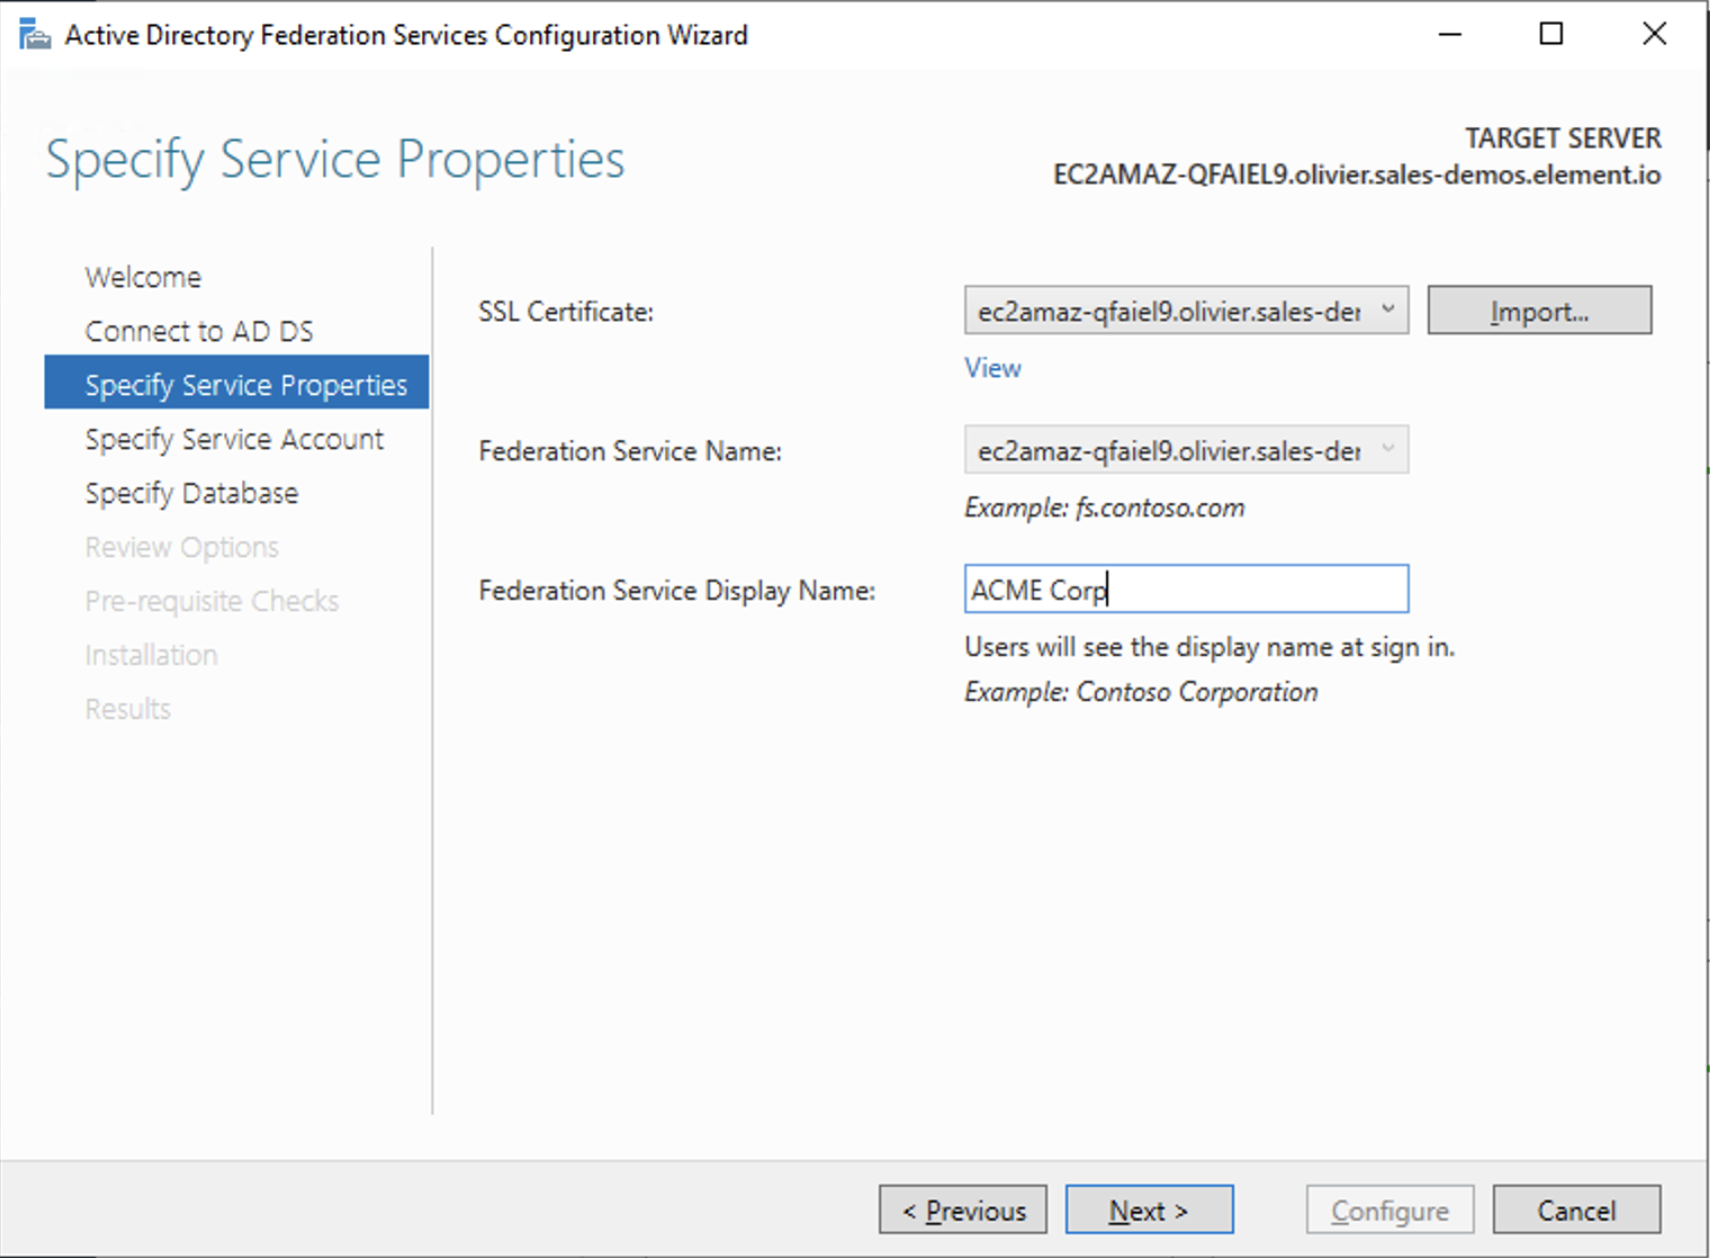
- Select the SSL Certificate and set a Federation Service Display Name
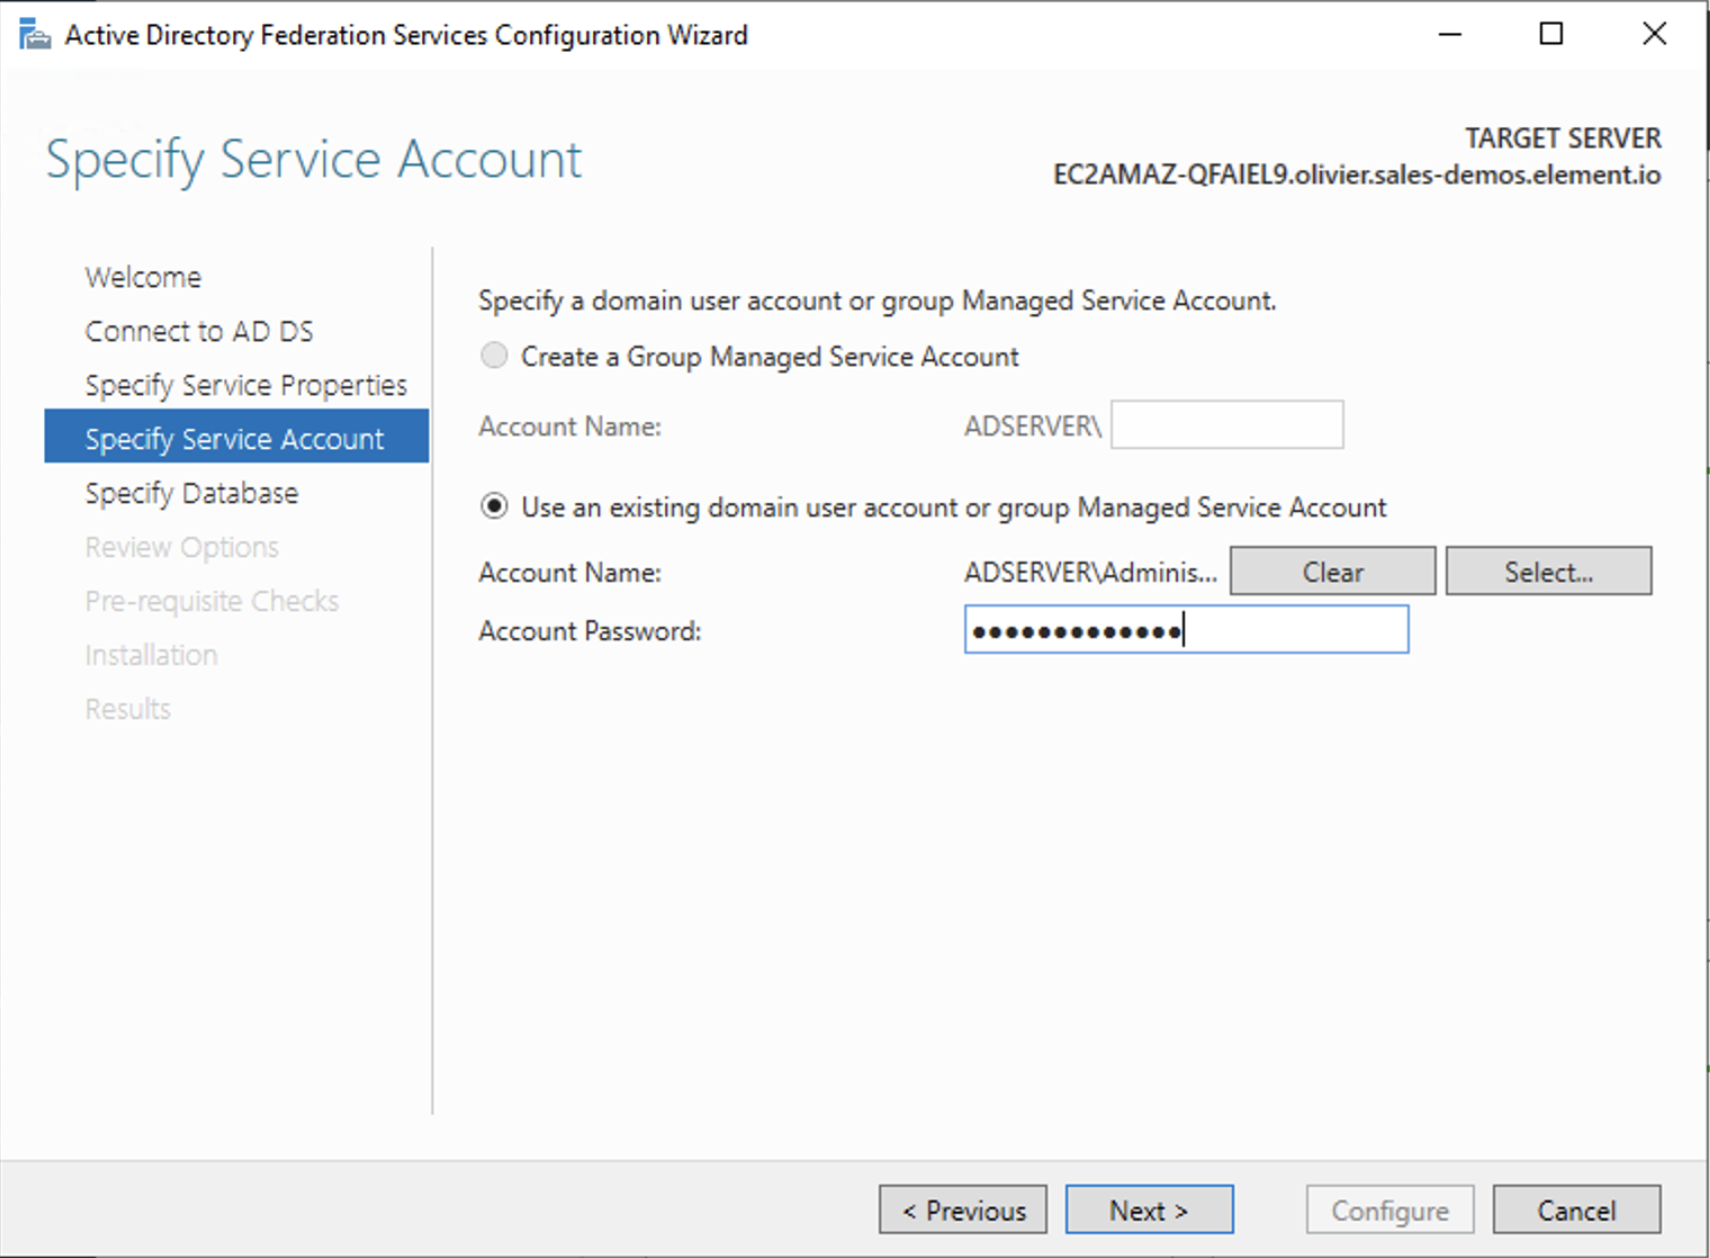
- On the Specify Service Account page, you can either Create a Group Managed Service Account (gMSA) or Specify an existing Service or gMSA Account
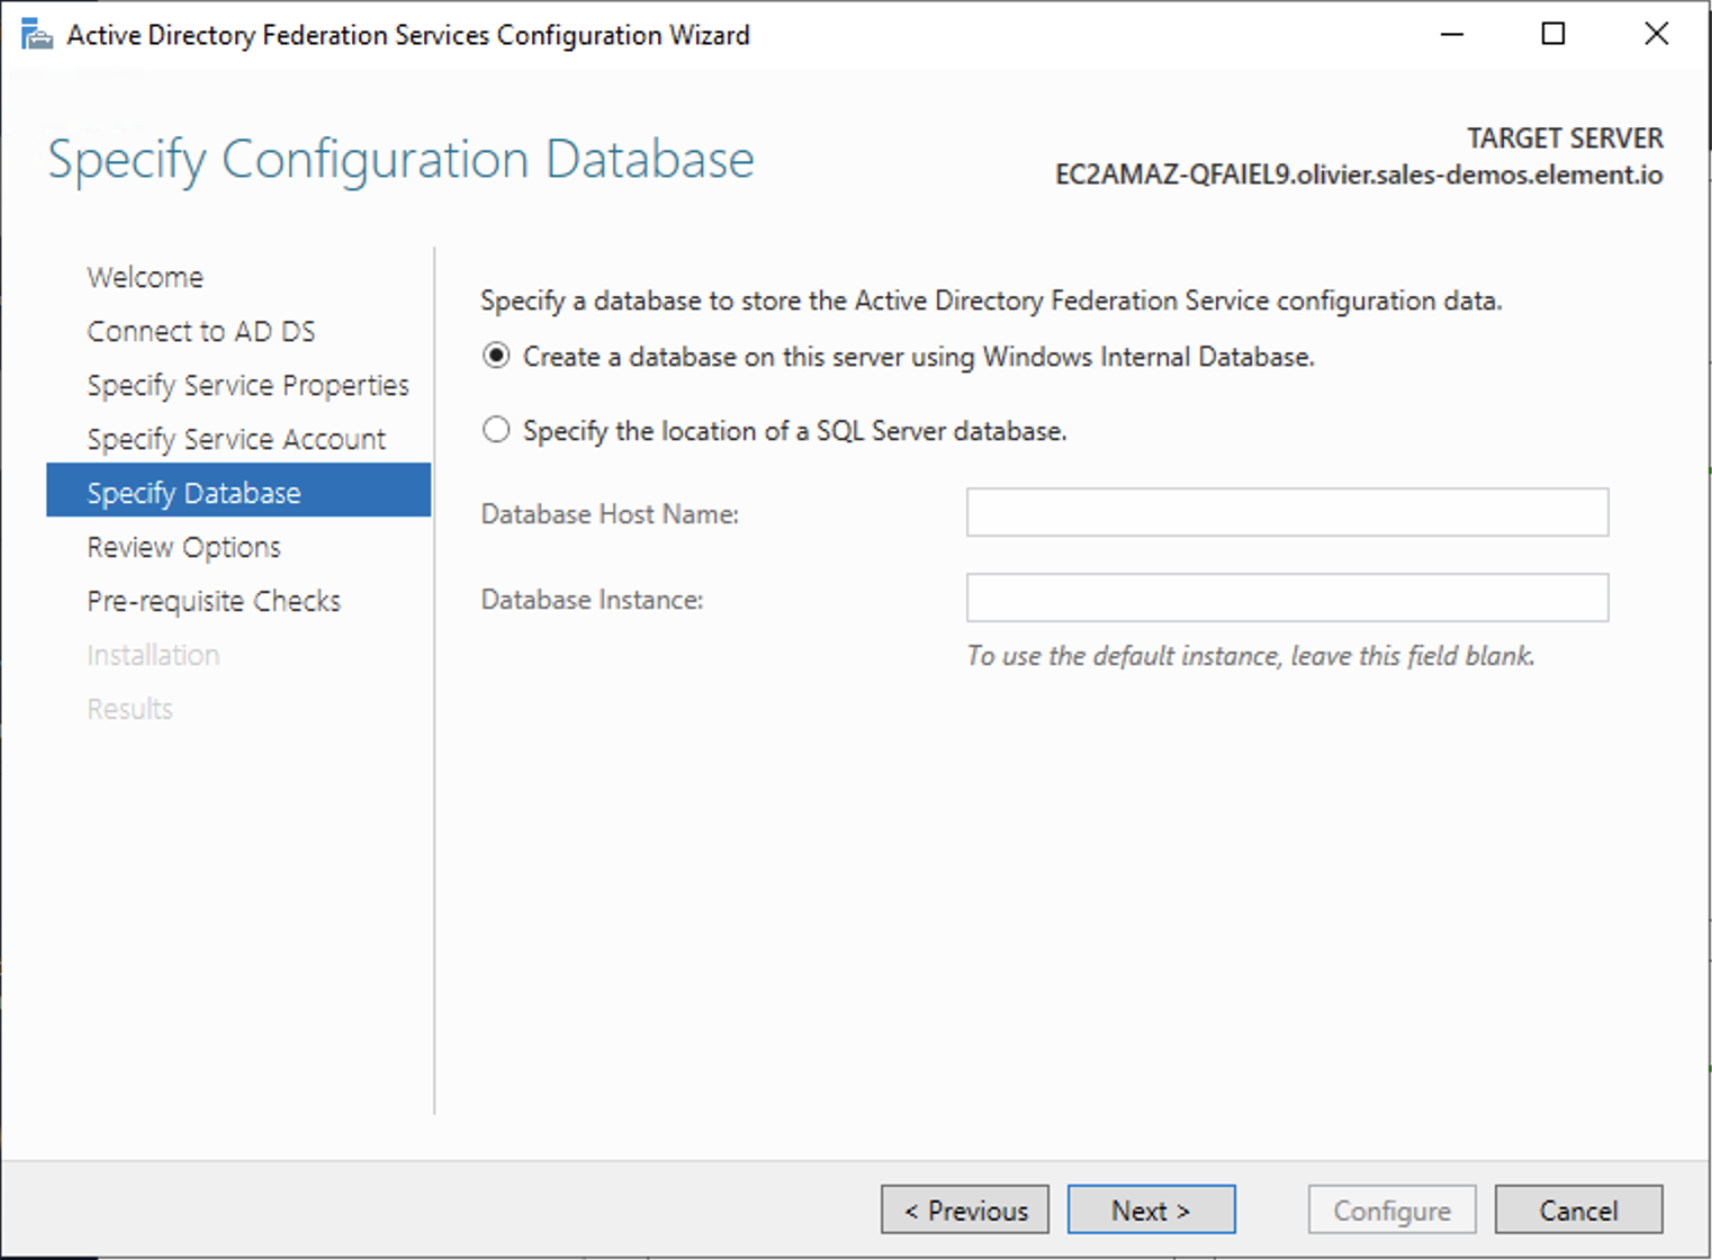
- Choose your database
- Review Options , check prerequisites are completed and click on
Configure - Restart the server
Add AD FS as an OpenID Connect identity provider
To enable sign-in for users with an AD FS account, create an Application Group in your AD FS.
To create an Application Group, follow theses steps:
- In
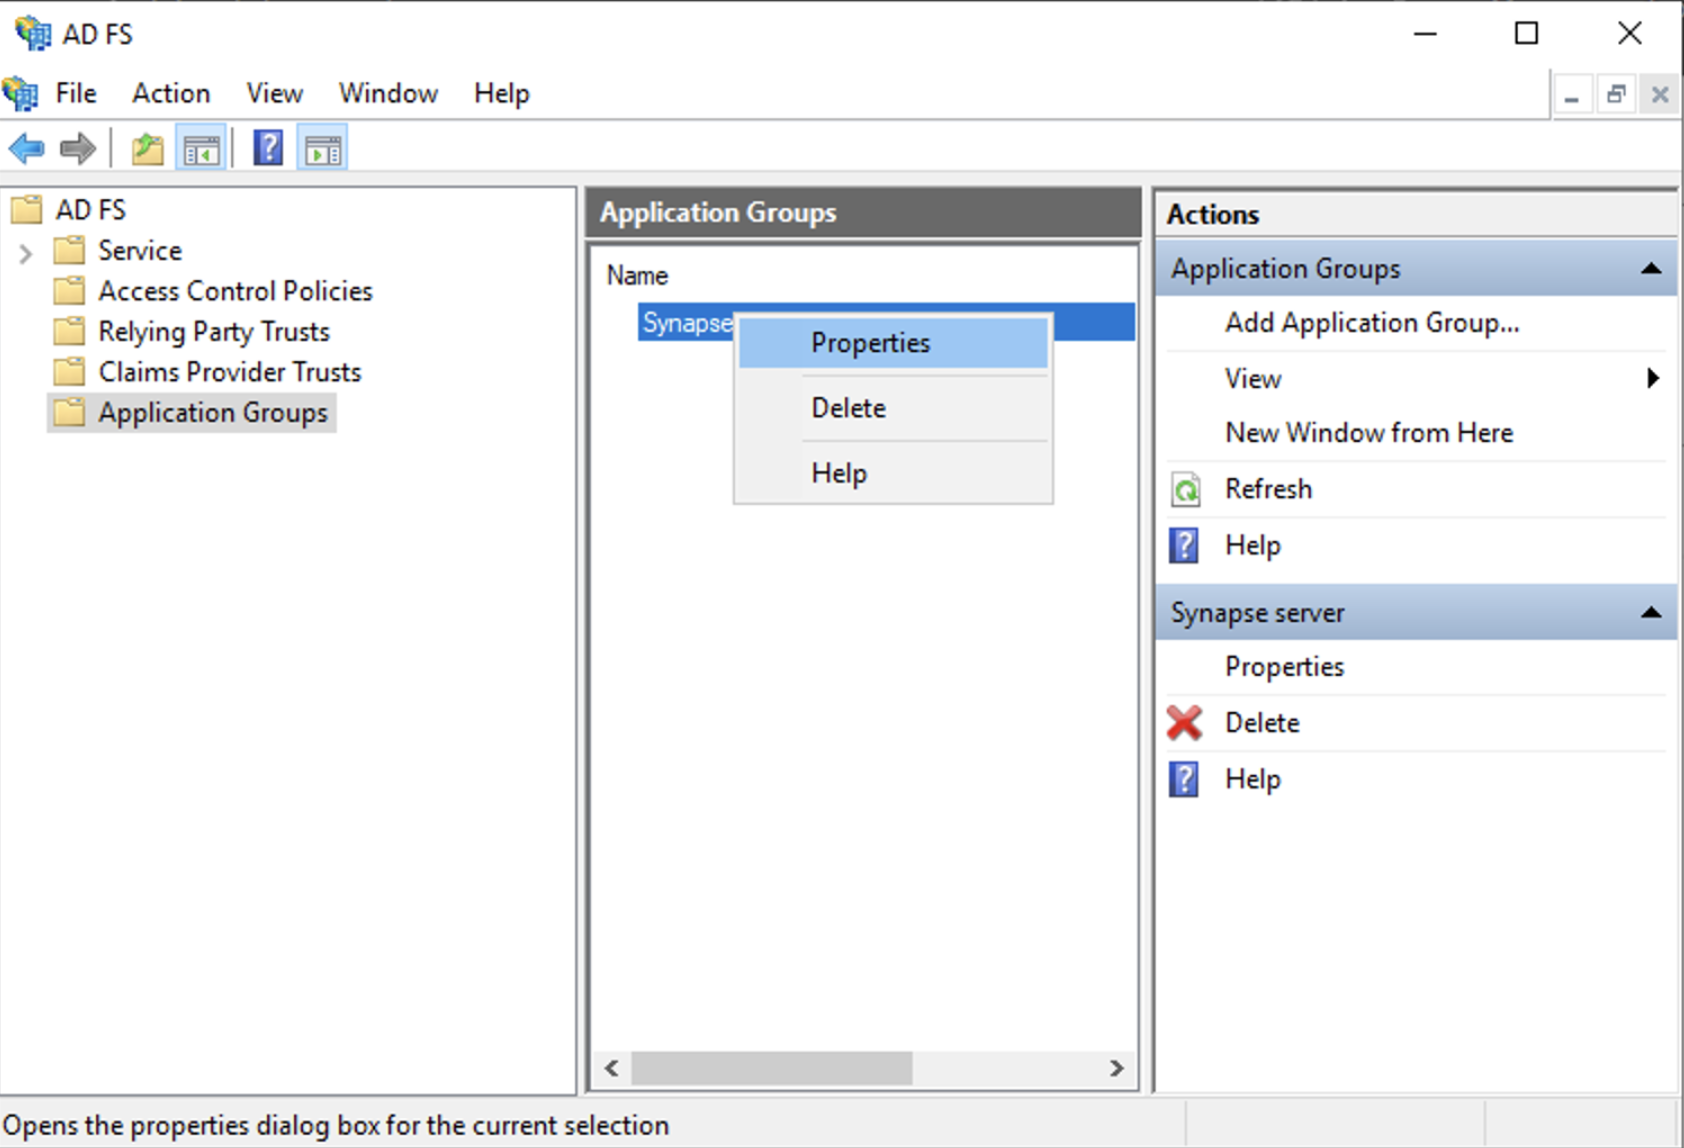
Server Manager, selectTools, and then selectAD FS Management - In AD FS Management, right-click on
Application Groupsand selectAdd Application Group - On the Application Group Wizard
Welcomescreen- Enter the Name of your application
- Under
Standalone applicationssection, selectServer applicationand clickNext
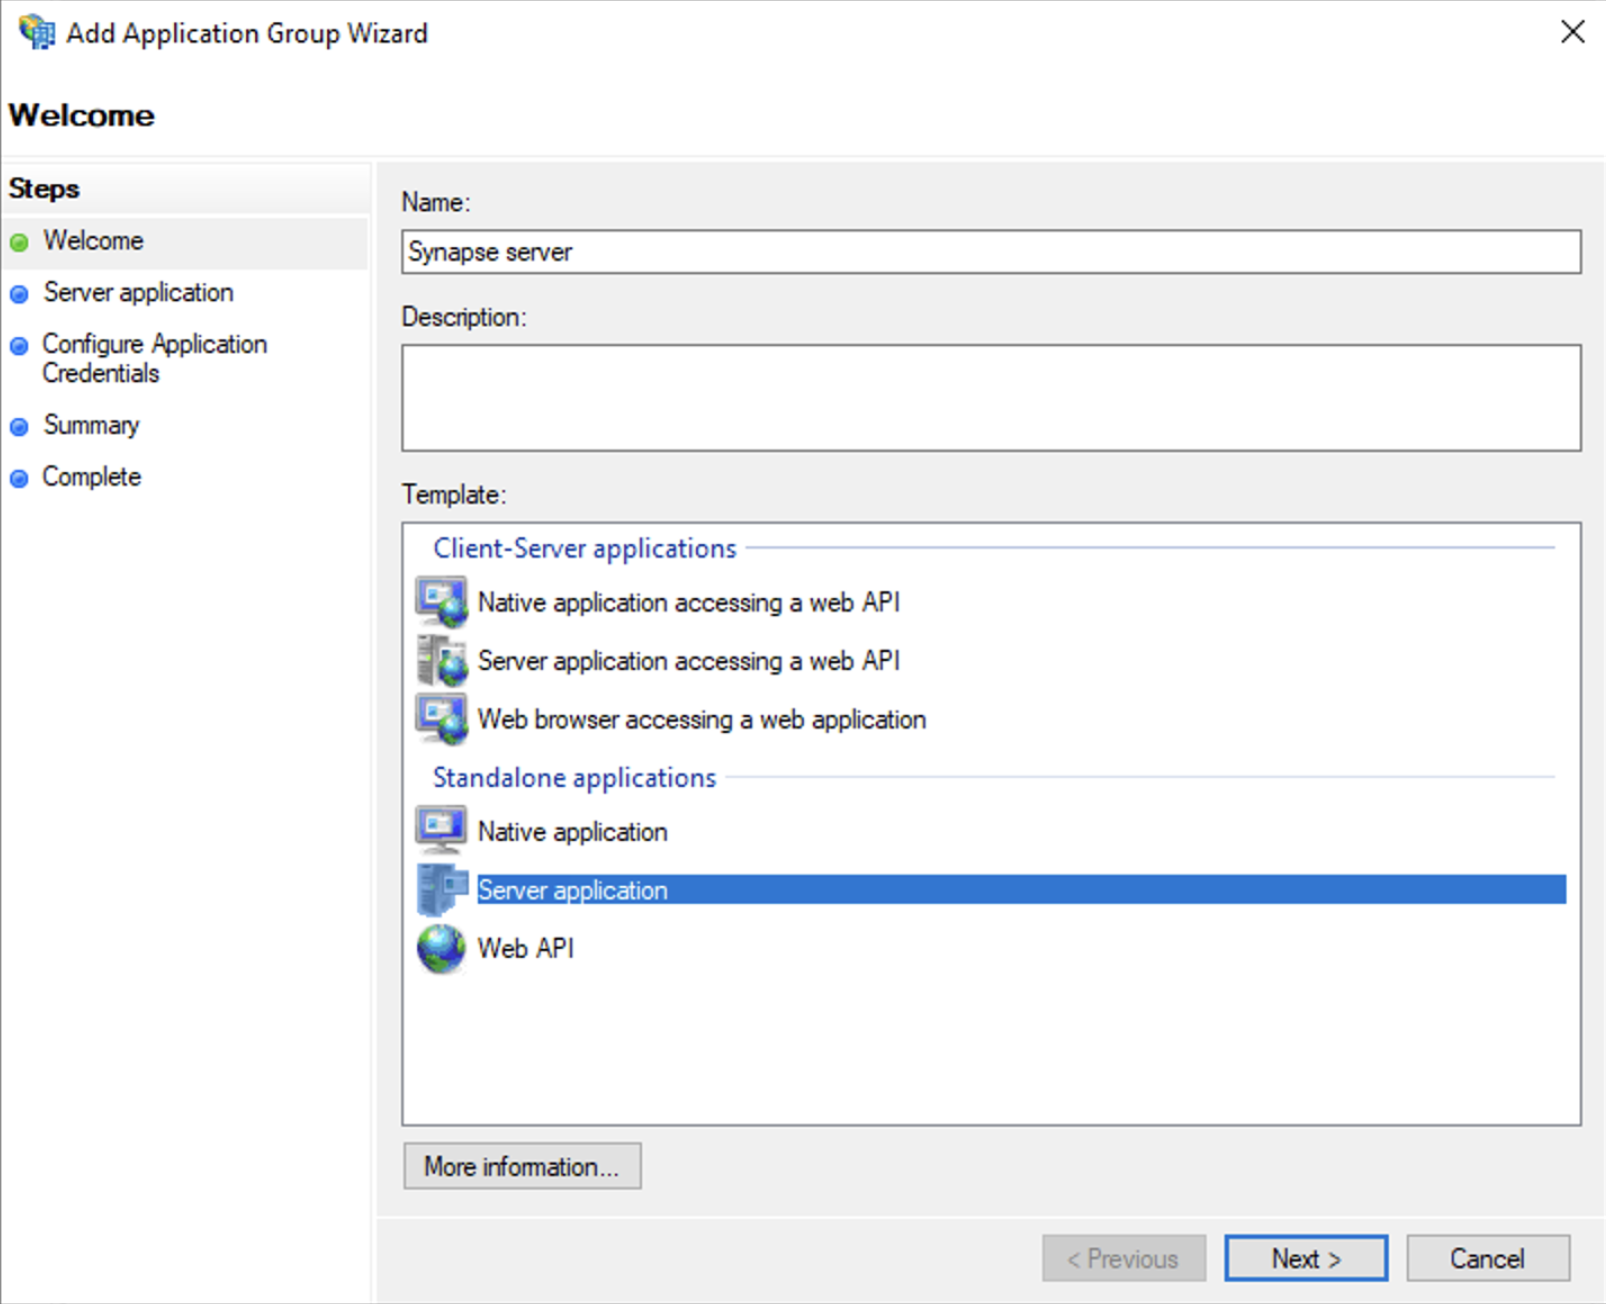
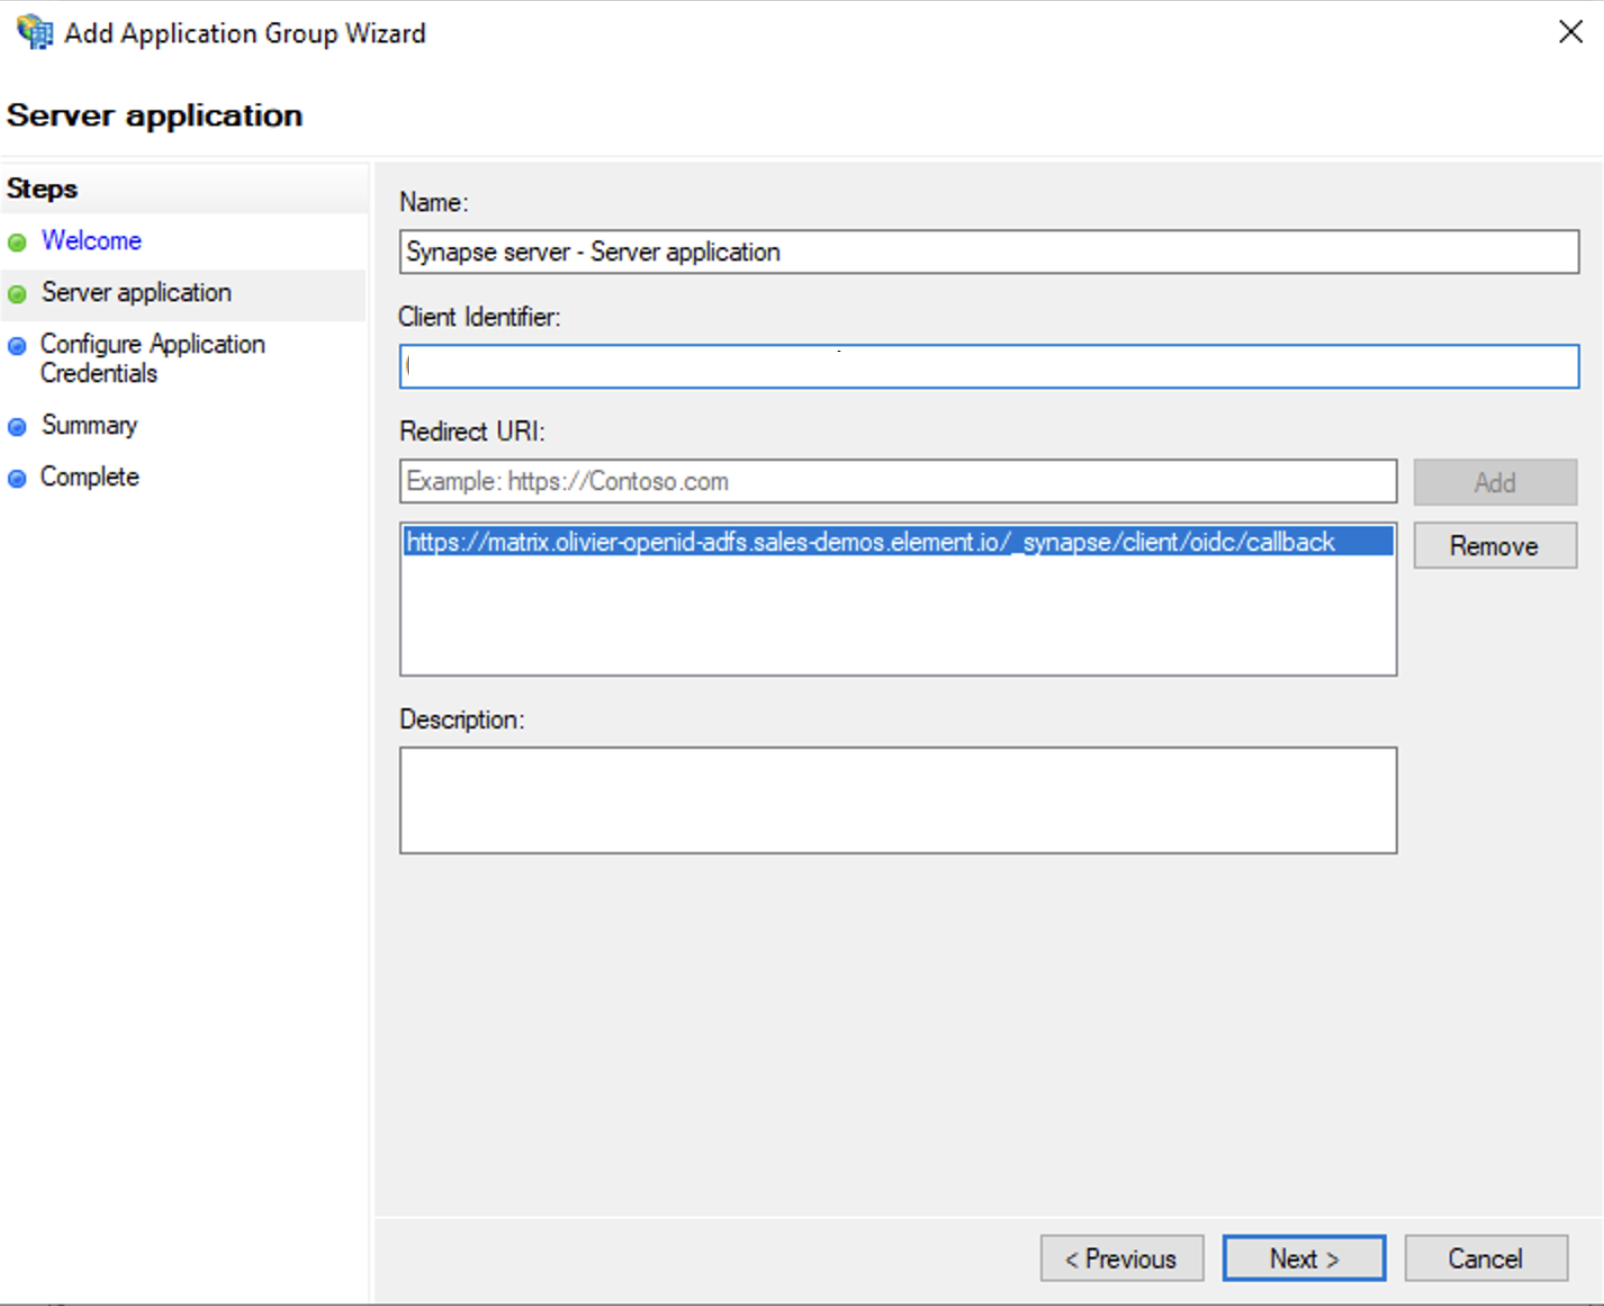
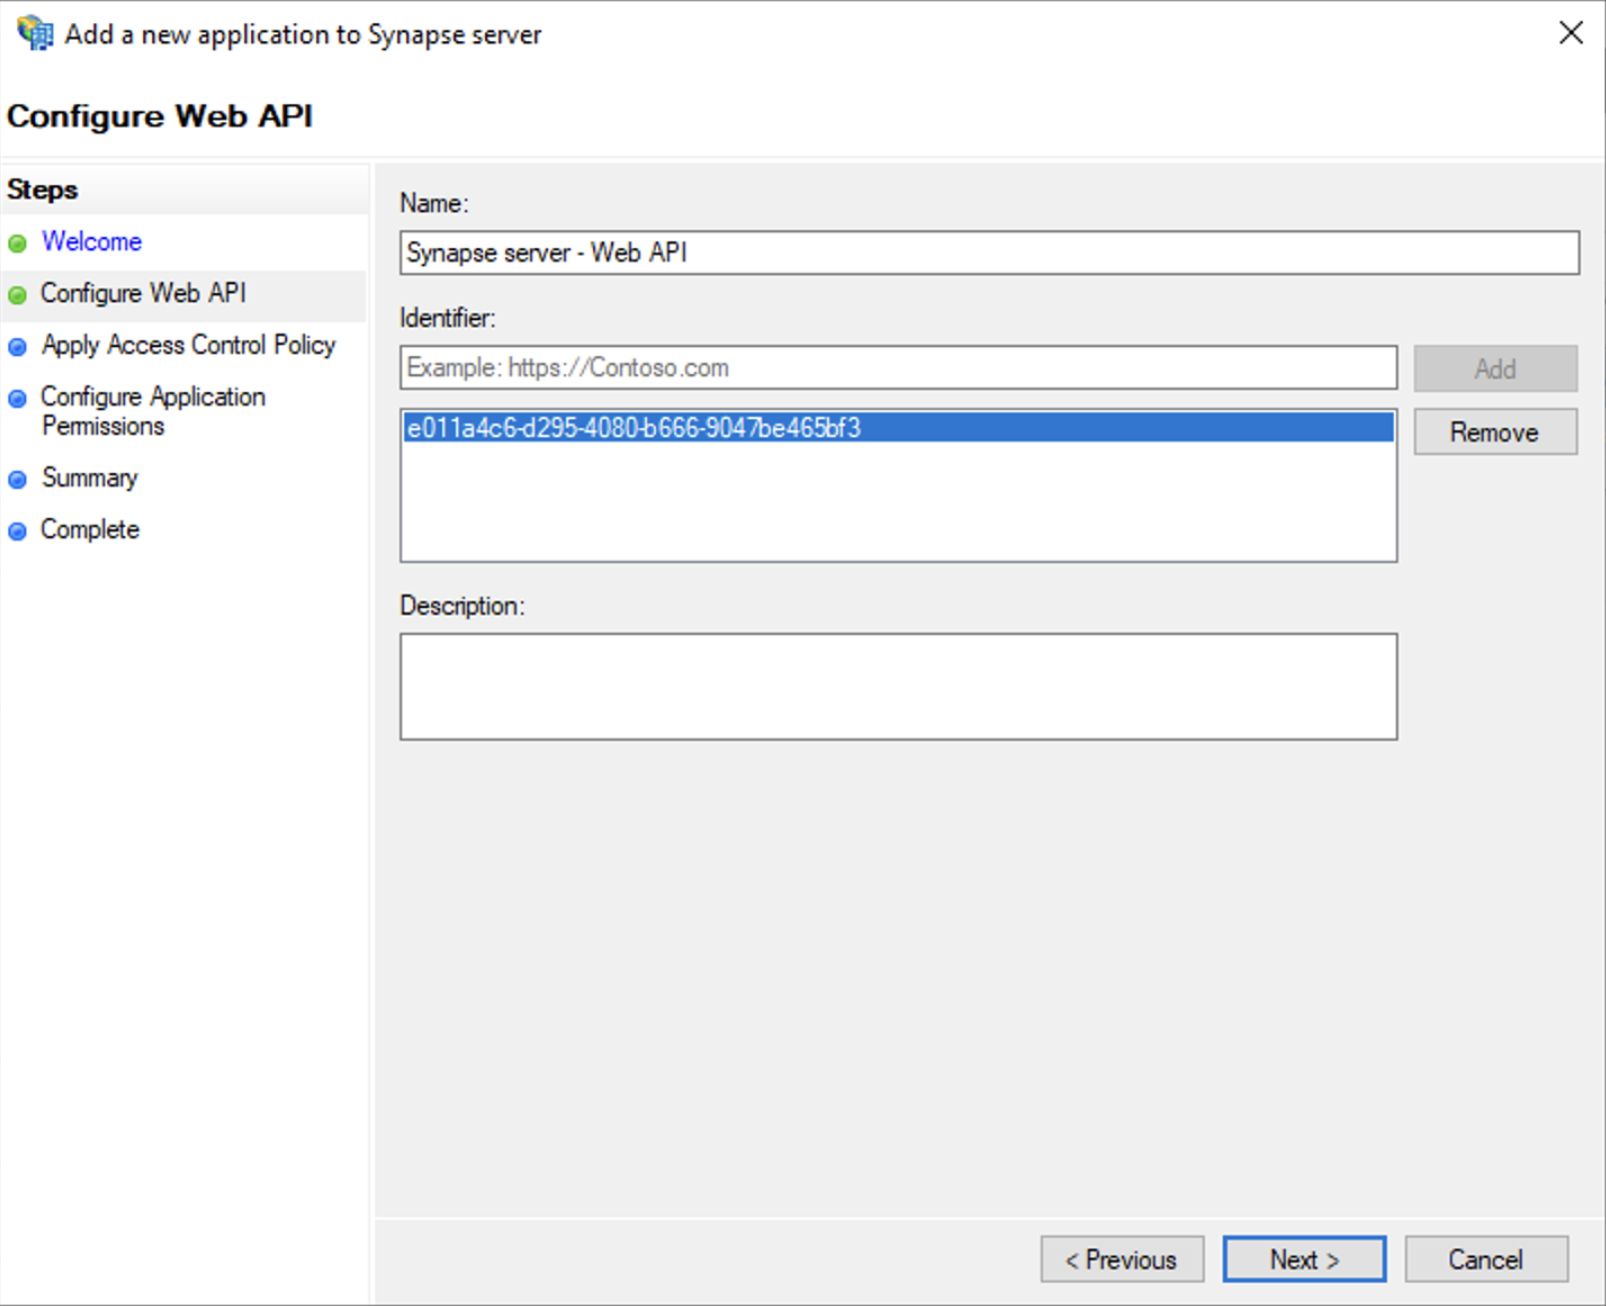
- Enter
https://<matrix domain>/_synapse/client/oidc/callbackin Redirect URI: field, clickAdd, save theClient Identifiersomewhere, you will need it when setting up Element and clickNext(e.g. https://matrix.domain.com/_synapse/client/oidc/callback)
- Select
Generate a shared secretcheckbox and make a note of the generated Secret and pressNext(Secret needs to be added in the Element Installer GUI in a later step) - Right click on the created Application Group and select `Properties``
- Select
Add application...button. - Select
Web API - In the
Identifierfield, type in theclient_idyou saved before and clickNext
- Select
Permit everyoneand clickNext - Under Permitted scopes: select
openidandprofileand clickNext
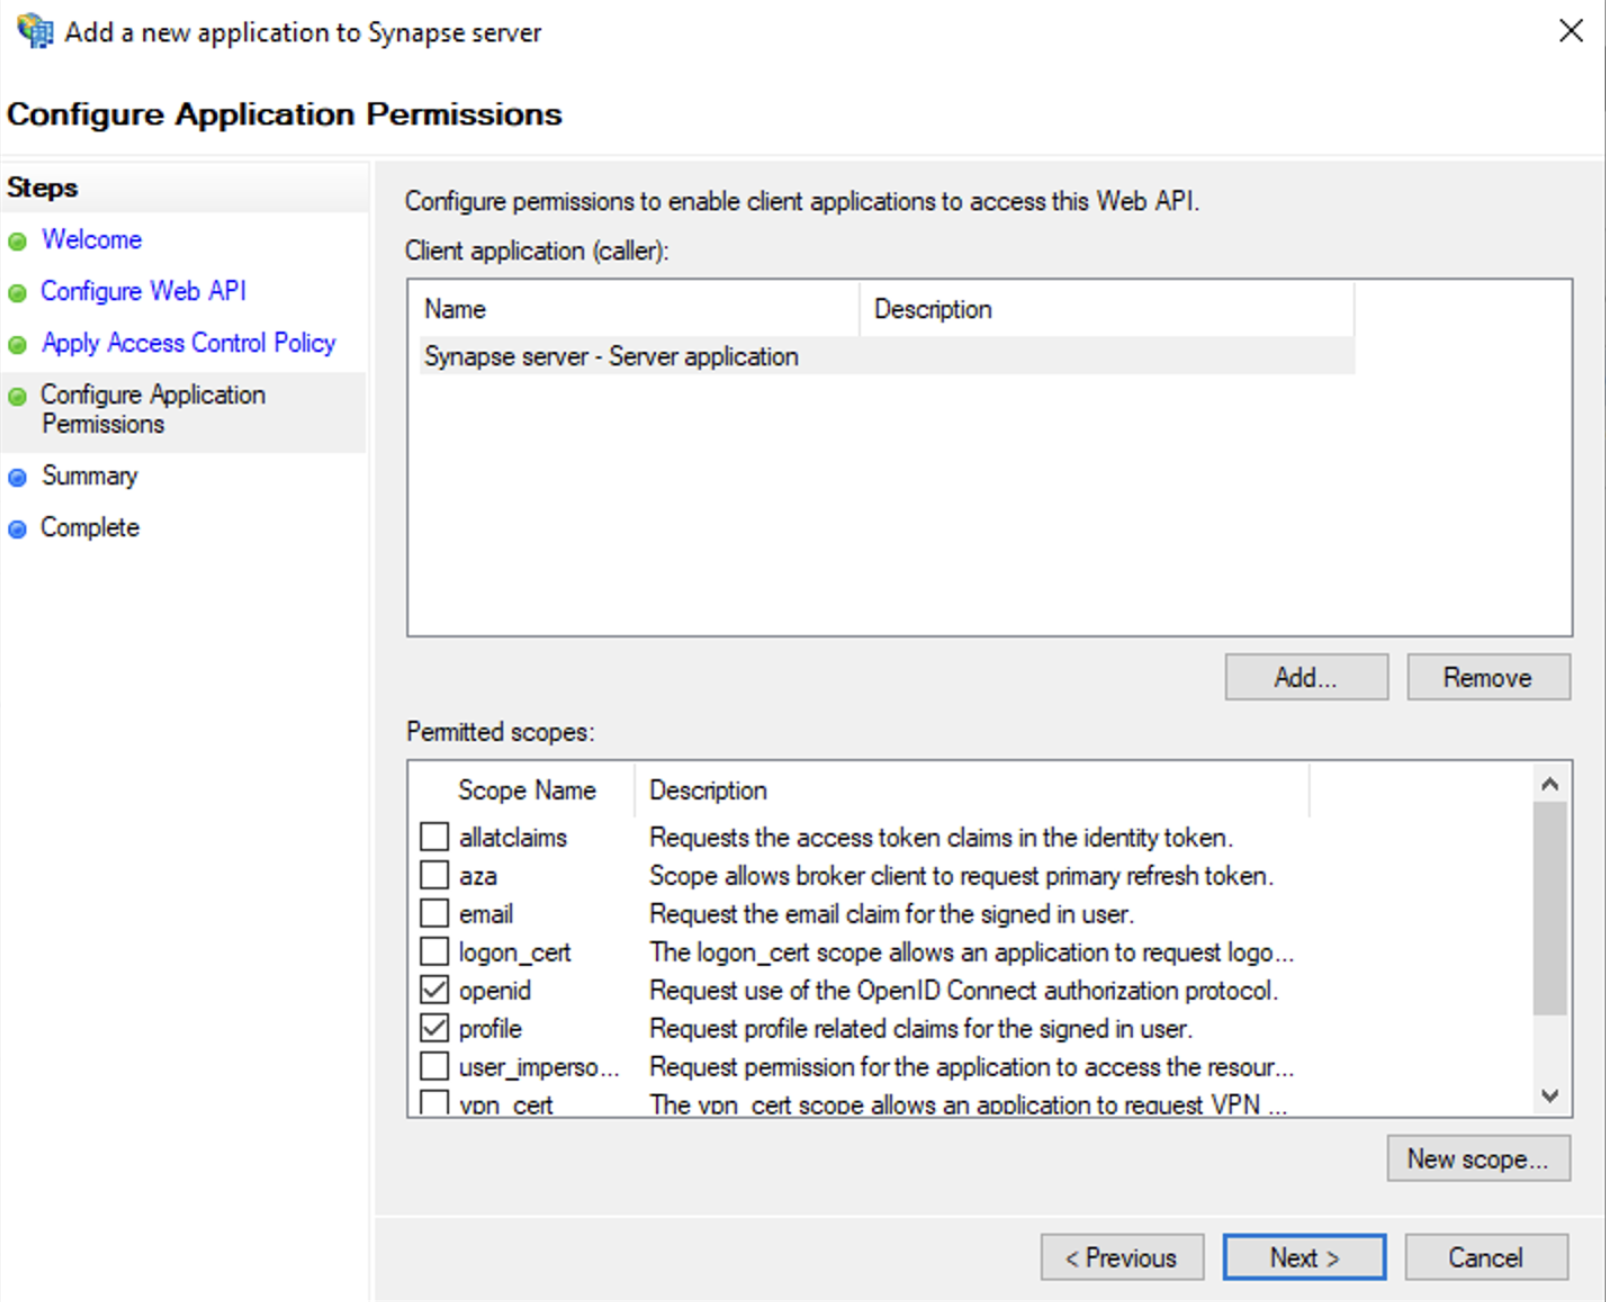
- On
Summarypage, click `Next`` - Click
Closeand thenOK
Export Domain Trusted Root Certificate
- Run
mmc.exe - Add the
Certificatessnap-in- File/Add snap-in for
Certificates,Computer account
- File/Add snap-in for
- Under
Trusted Root Certification Authorities/Certificates, select your DC cert - Right click and select
All Tasks/Export...and export asBase-64 encoded X 509 (.CER) - Copy file to local machine
Configure the installer
Add an OIDC provider in the 'Synapse' configuration after enabling Delegated Auth and set the following fields in the installer:
-
Allow Existing Users: if checked, it allows a user logging in via OIDC to match a pre-existing account instead of failing. This could be used if switching from password logins to OIDC. -
Authorization Endpoint: the oauth2 authorization endpoint. Required if provider discovery is disabled.https://login.microsoftonline.com/<Directory (tenant) ID>/oauth2/v2.0/authorize
-
Backchannel Logout Enabled: Synapse supports receiving OpenID Connect Back-Channel Logout notifications. This lets the OpenID Connect Provider notify Synapse when a user logs out, so that Synapse can end that user session. -
Client Auth Method: auth method to use when exchanging the token. Set it toClient Secret Basicor any method supported by your Idp -
Client ID: theClient IDyou saved before -
Discover: enable/disable the use of the OIDC discovery mechanism to discover endpoints -
Idp Brand: an optional brand for this identity provider, allowing clients to style the login flow according to the identity provider in question -
Idp ID: a string identifying your identity provider in your configuration -
Idp Name: A user-facing name for this identity provider, which is used to offer the user a choice of login mechanisms in the Element UI. In the screenshot bellow,Idp Nameis set toAzure AD
-
Issuer: the OIDC issuer. Used to validate tokens and (if discovery is enabled) to discover the provider's endpointshttps://<your-adfs.domain.com>/adfs/ -
Token Endpoint: the oauth2 authorization endpoint. Required if provider discovery is disabled. -
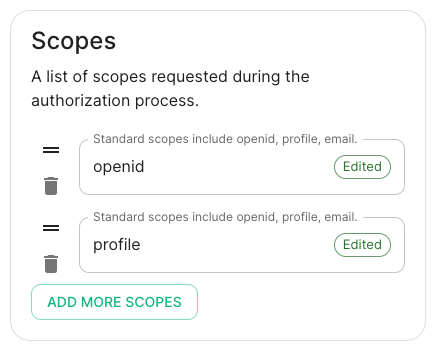
Client Secret: your client secret you saved before. - Scopes: add every scope on a different line
- The openid scope is required which translates to the Sign you in permission in the consent UI
- You might also include other scopes in this request for requesting consent.
- User Mapping Provider: Configuration for how attributes returned from a OIDC provider are mapped onto a matrix user.
-
Localpart Template: Jinja2 template for the localpart of the MXID. Set it to{{ user.upn.split('@')[0] }}for AD FS
-
Other configurations are documented here.