Installing Element Server Suite
First-time installation, Upgrading or Reconfiguring ESS? See here for advice on getting started.
Getting the Installer
Element Server Suite Download Page
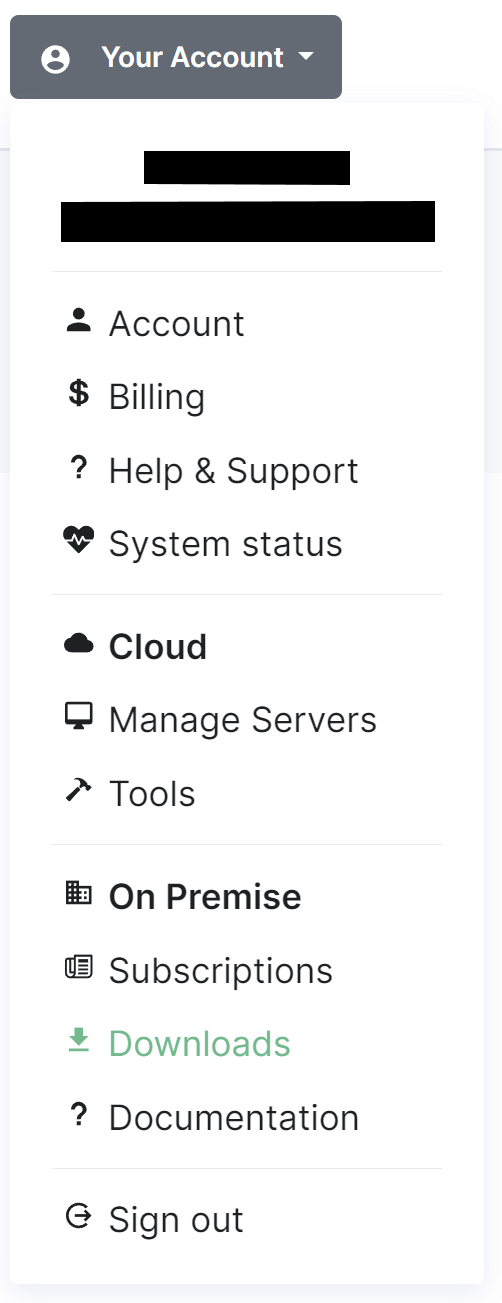
To download the installer you require a subscription tied with your EMS Account. If you are already logged in, click the link above to access the download page, otherwise login then click the You Account button found in the top-right of the page. Select Downloads under the On-Premise section.
 |
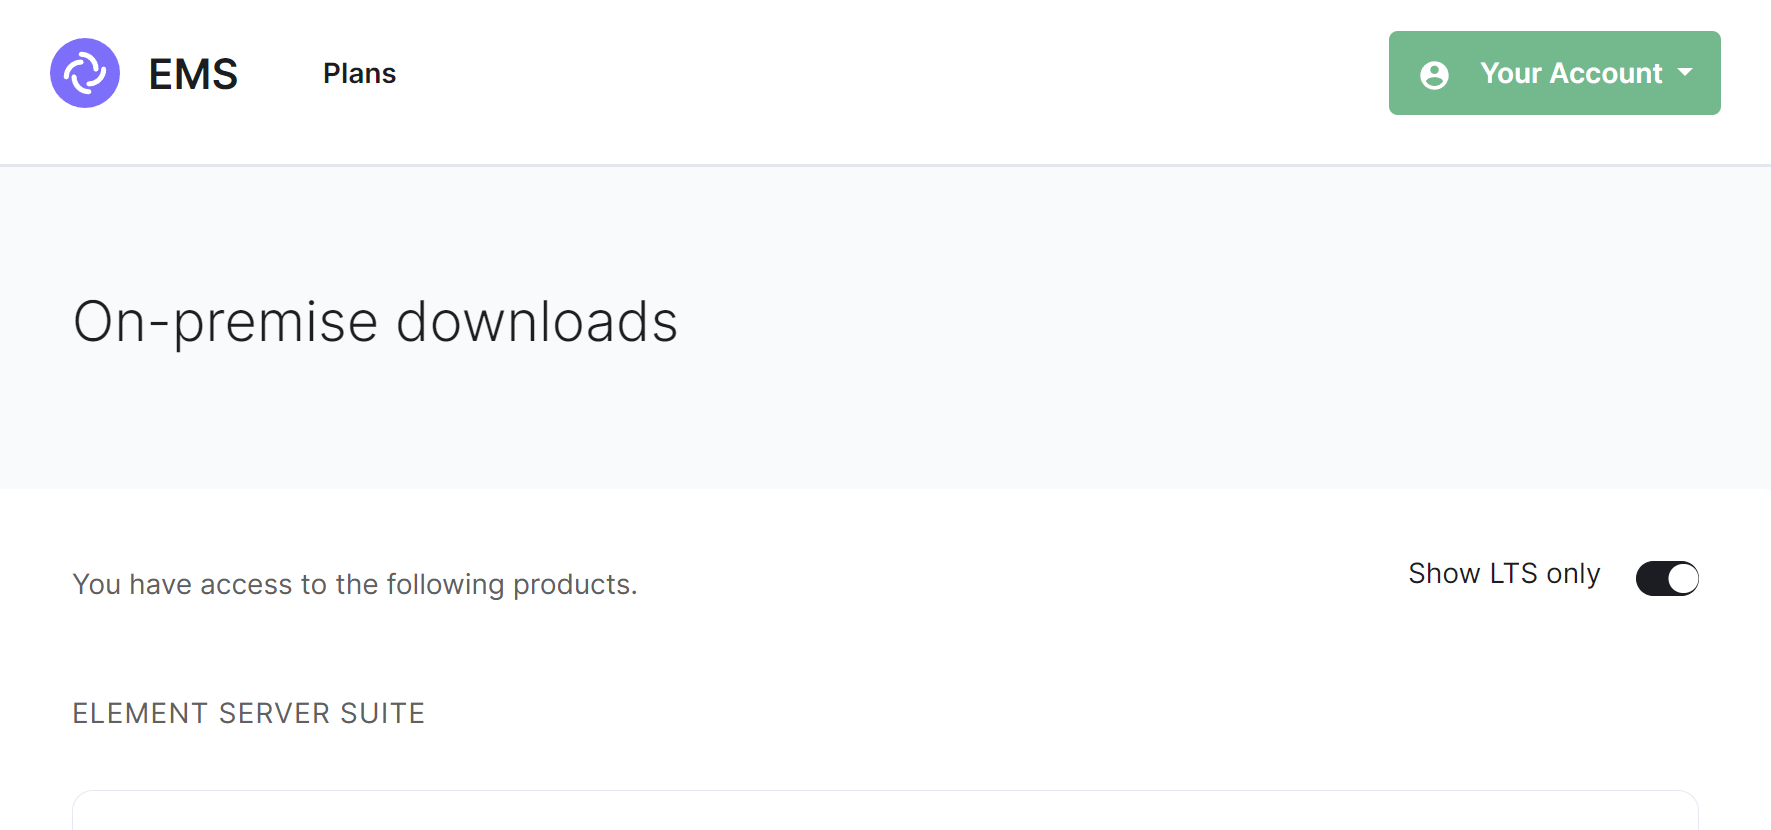 |
It is highly recommended that you stay on the latest LTS version, by default, only LTS release will be displayed however you can untick the Show LTS Only toggle to see our monthly releases.
Per release you will see download options for the installer, the airgapped package (if your subscription allows) and Element Desktop MSIs:
-
Installer.
element-installer-enterprise-edition-YY.MM.00-gui.bin
WhereYYis a year indicator,MMis the month indicator and00is the version. -
Airgapped Package.
element-installer-enterprise-edition-airgapped-YY.MM.00-gui.tar.gz
WhereYYis a year indicator,MMis the month indicator and00is the version. -
Element Desktop MSI.
Element 1.11.66 ia32.msi&Element 1.11.66.msi
Once downloaded, copy the installer binary (and the airgapped package if needed) to the machine in which you will be running the installer from. Remember to ensure you've followed the Requirements and Recommendations page for your environment and specifically the Operating System specific Prerequisites for your intended deployment method (Standalone or Kubernetes).
First-Time Installation
Make sure you've read the Requirements and Recommendations page so your environment is ready for installation.
Running the Installer
Once the binary is on the device you wish to run the installer from, make it executable using chmod +x then run it to begin:
chmod +x ./element-installer-enterprise-edition-YY.MM.00-gui.bin
Kubernetes Deployment Note
If you are performing a Kubernetes deployment and have multiple kubernetes clusters configured in your kubeconfig, you will have to export the K8S_AUTH_CONTEXT variable before running the installer, as per the Operating System notes from the Requirements and Recommendations page:
export K8S_AUTH_CONTEXT=kube_context_name
./element-installer-enterprise-edition-YY.MM.00-gui.bin

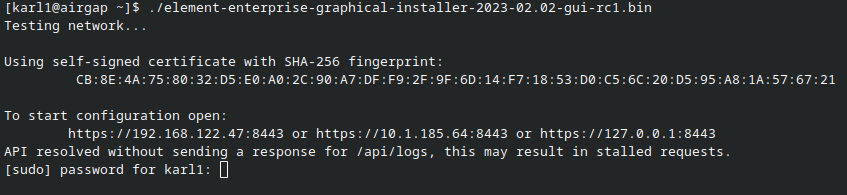
With the installer running you will need to open a web browser and browse to one of the presented IPs. You may need to open port 8443 in your firewall to be able to access this address from a different machine. If you are unable to open port 8443 or you are having difficulty connecting from a different machine, you may want to try ssh port forwarding in which you would run:
ssh <host> -L 8443:127.0.0.1:8443
Replacing host with the IP address or hostname of the machine that is running the installer. At this point, with ssh connected in this manner, you should be able to use the https://127.0.0.1:8443 link which will then forward that request to the installer box via ssh.
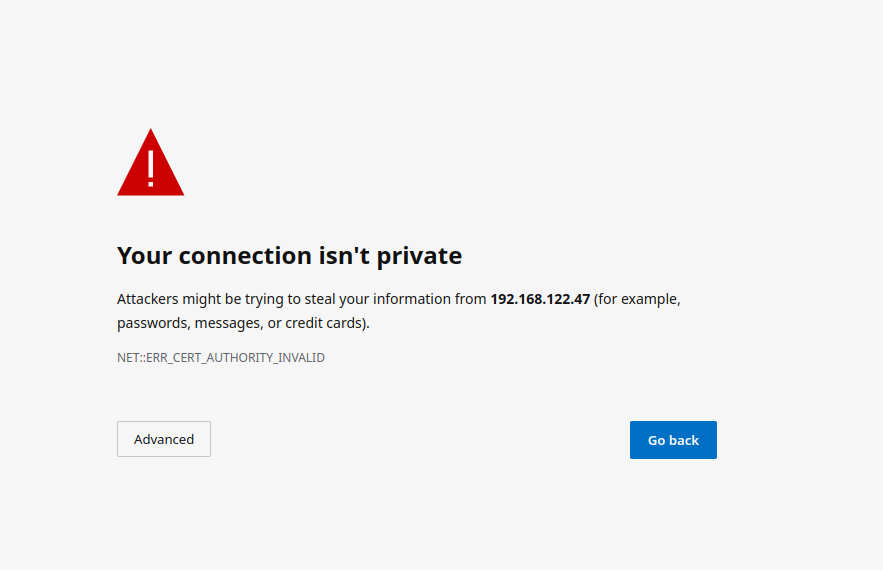
Upon loading this address for the first time, you may be greeted with a message informing you that your connection isn't private, this is due to the installer initially using a self-signed certificate. Once you have completed deployment, the installer will use a certificate you specify or the certficate supplied for the admin domain on the Domains Section.
To proceed, click 'Advanced' then 'Continue', exact wording may vary across browsers.
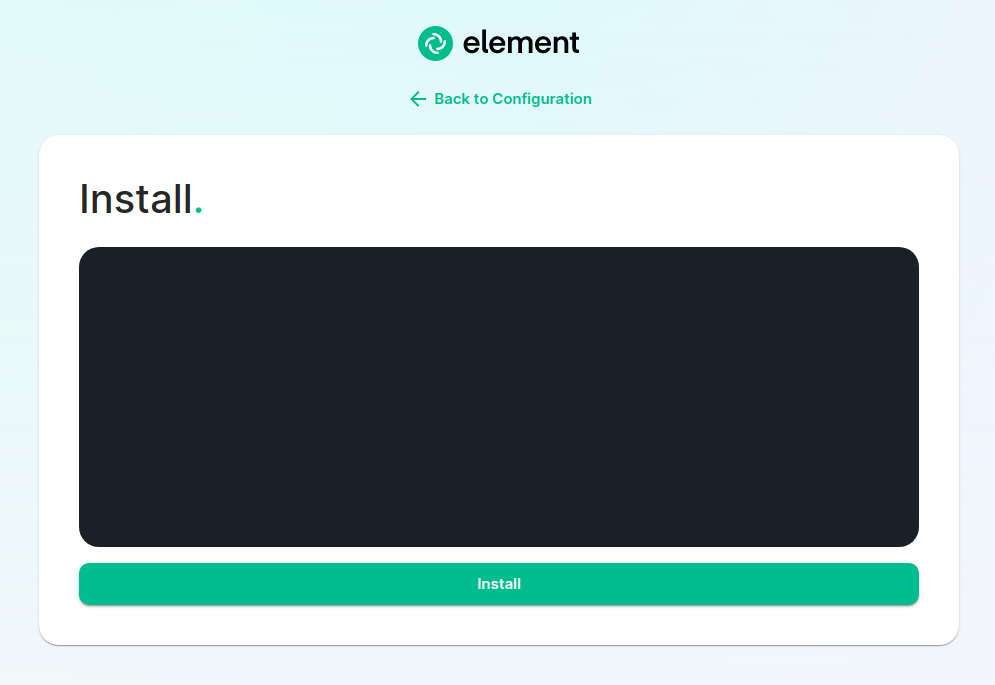
The Installer
With the installer running, you will initially be presented with a 'Welcome to Element!' screen, from here you can click the 'Let's Go!' button to start configuring your ESS deployment. The installer has a number of sections to work through to configure your config before starting deployment, below will detail each section and what you can configure.
You can click on any sections' header, or the provided link below it, to visit that sections' detailed breakdown page which runs through what each specific option in that section does - however do please note that not all setups will require changing from the default settings.
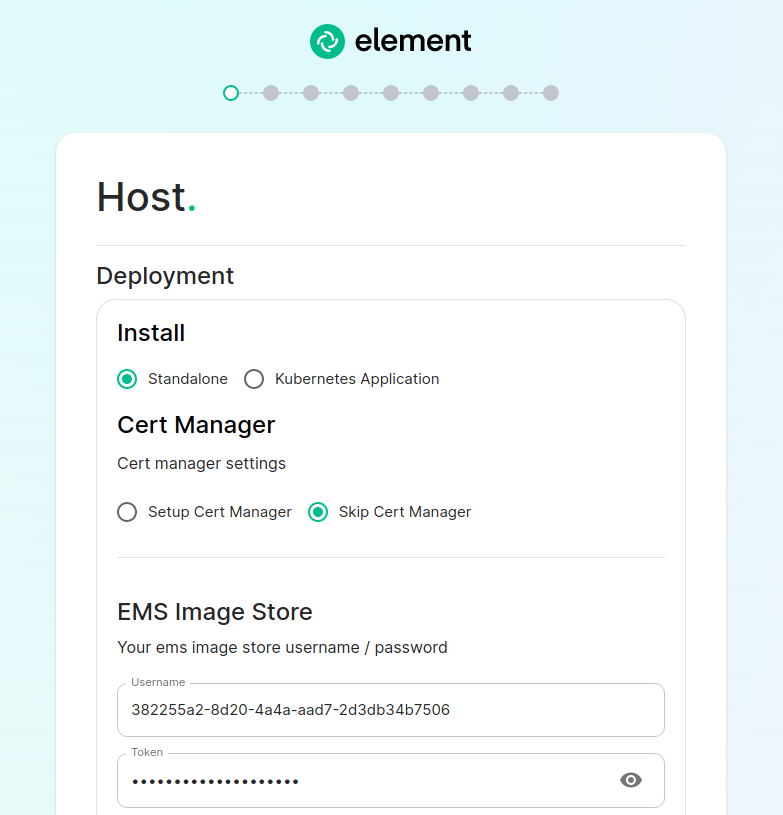
Host Section.
The first section of the ESS installer GUI is the Host section, here you will configure essential details of how ESS will be installed including; deployment type; subscription credentials; PostgreSQL to use; and whether or not your setup is airgapped.
For detailed guidance / details on each config option, check the Detailed Section Overview. Specifically for airgapped deployments, see the Airgapped notes.
Standalone Deployment
Ensure Standalone is selected, then if you are using LetsEncrypt for your certificates, you will want to make sure that you select Setup Cert Manager and enter an email address for LetsEncrypt to associate with your certificates. If you are using custom certificates or electing to manage SSL certificates yourself, then you will want to select Skip Cert Manager.
Provide your EMS Image Store Username and Token associated with your subscription, which you can find at https://ems.element.io/on-premise/subscriptions.
By default, microk8s will set up persistent volumes in /data/element-deployment and will allow 20GB of space to do this; ESS will configure the default DNS resolvers to Google (8.8.8.8 and 8.8.4.4); and a PostgreSQL database will be created for you. These defaults are suitable for most setups however change as needed i.e. if you need to use your company's DNS servers. If you elect to setup your own PostgreSQL database, make sure it is configured per the Requirements and Recommendations.
Kubernetes Deployment
Ensure Kubernetes Application is selected, then specify the Kubernetes context name for which you are deploying into. You can use kubectl config view to see which contexts you have access to. You can opt to skip the update setup or the operator setup, but unless you know why you are doing that, you should leave those options as default.
Provide your EMS Image Store Username and Token associated with your subscription, which you can find at https://ems.element.io/on-premise/subscriptions.
Domains Section.
The second section of the ESS installer GUI is the Domains section, here you will configure the fully-qualified domain names for each of the main components that will be deployed by ESS.
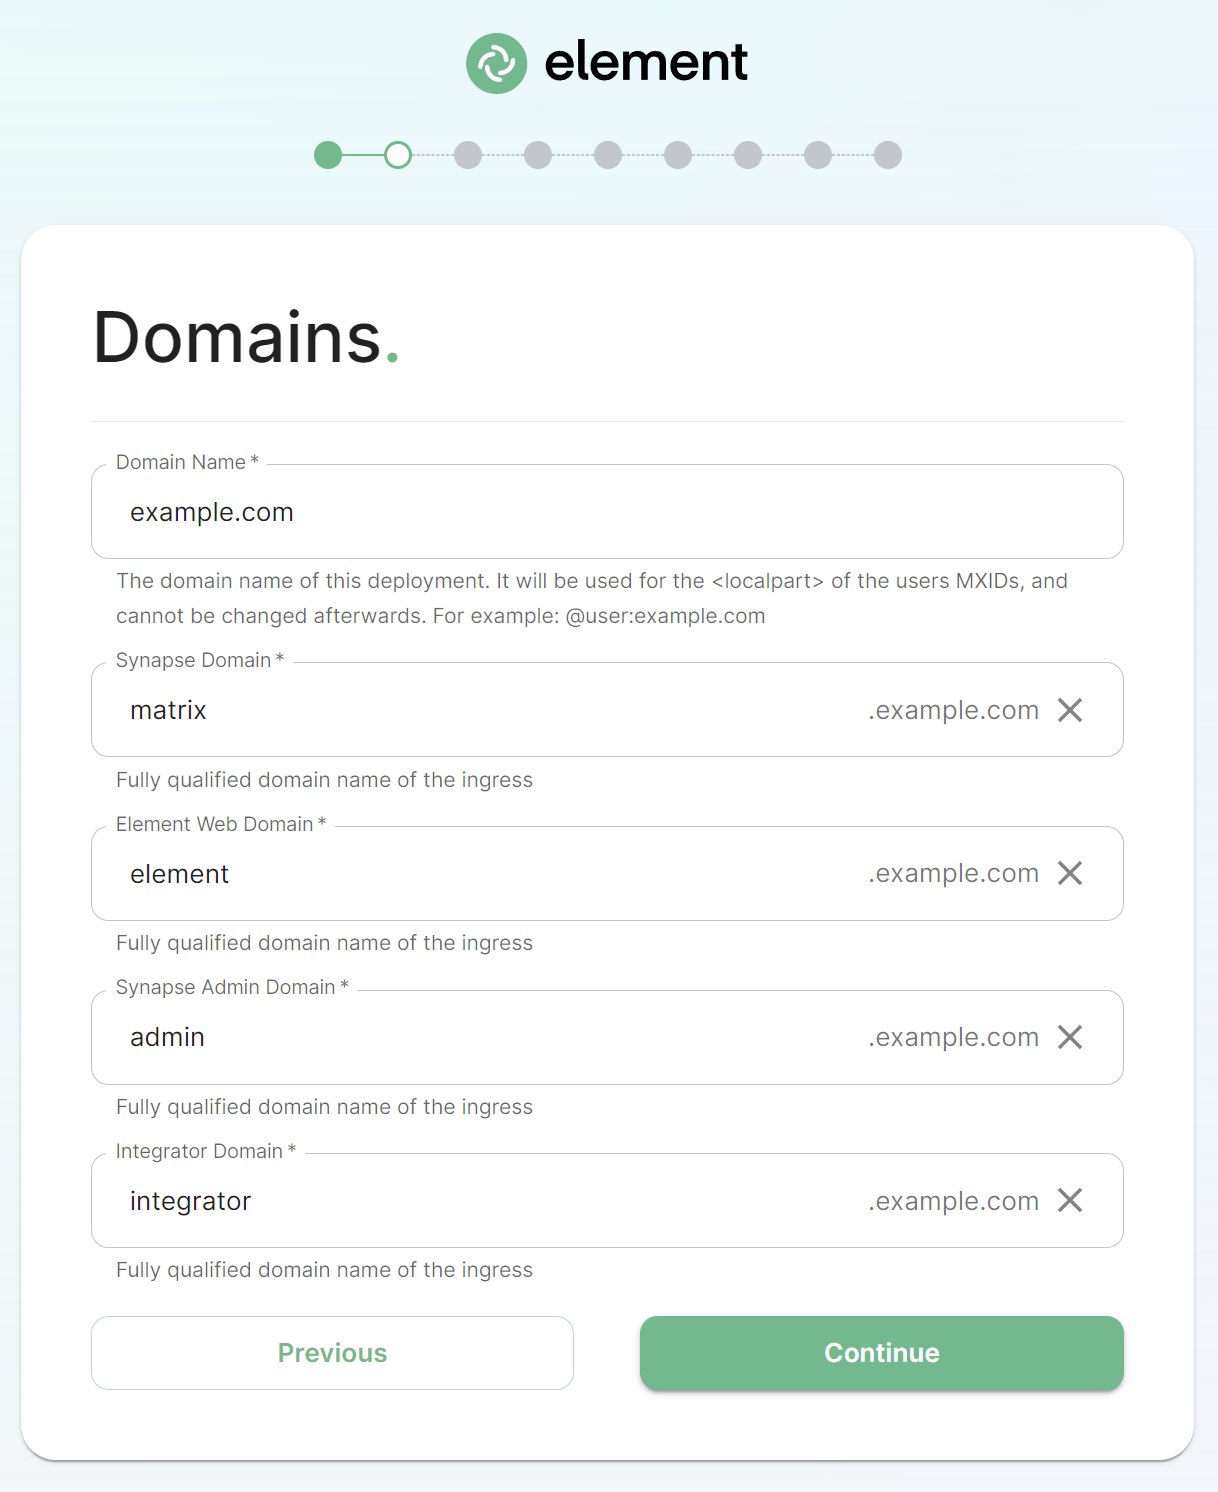
On this page, we get to specify the domains for our installation. In this example, we have a domain name of example.com and this would mean our MXIDs would look like @username:example.com.
The domain page performs a check to ensure that the host names provided resolve. Once you get green checks across the board, you can click continue.
For detailed guidance / details on each config option, check the Detailed Section Overview
Certificates Section.
The third section of the ESS installer GUI is the Domains section, here you will configure the certificates to use for each previously specified domain name.
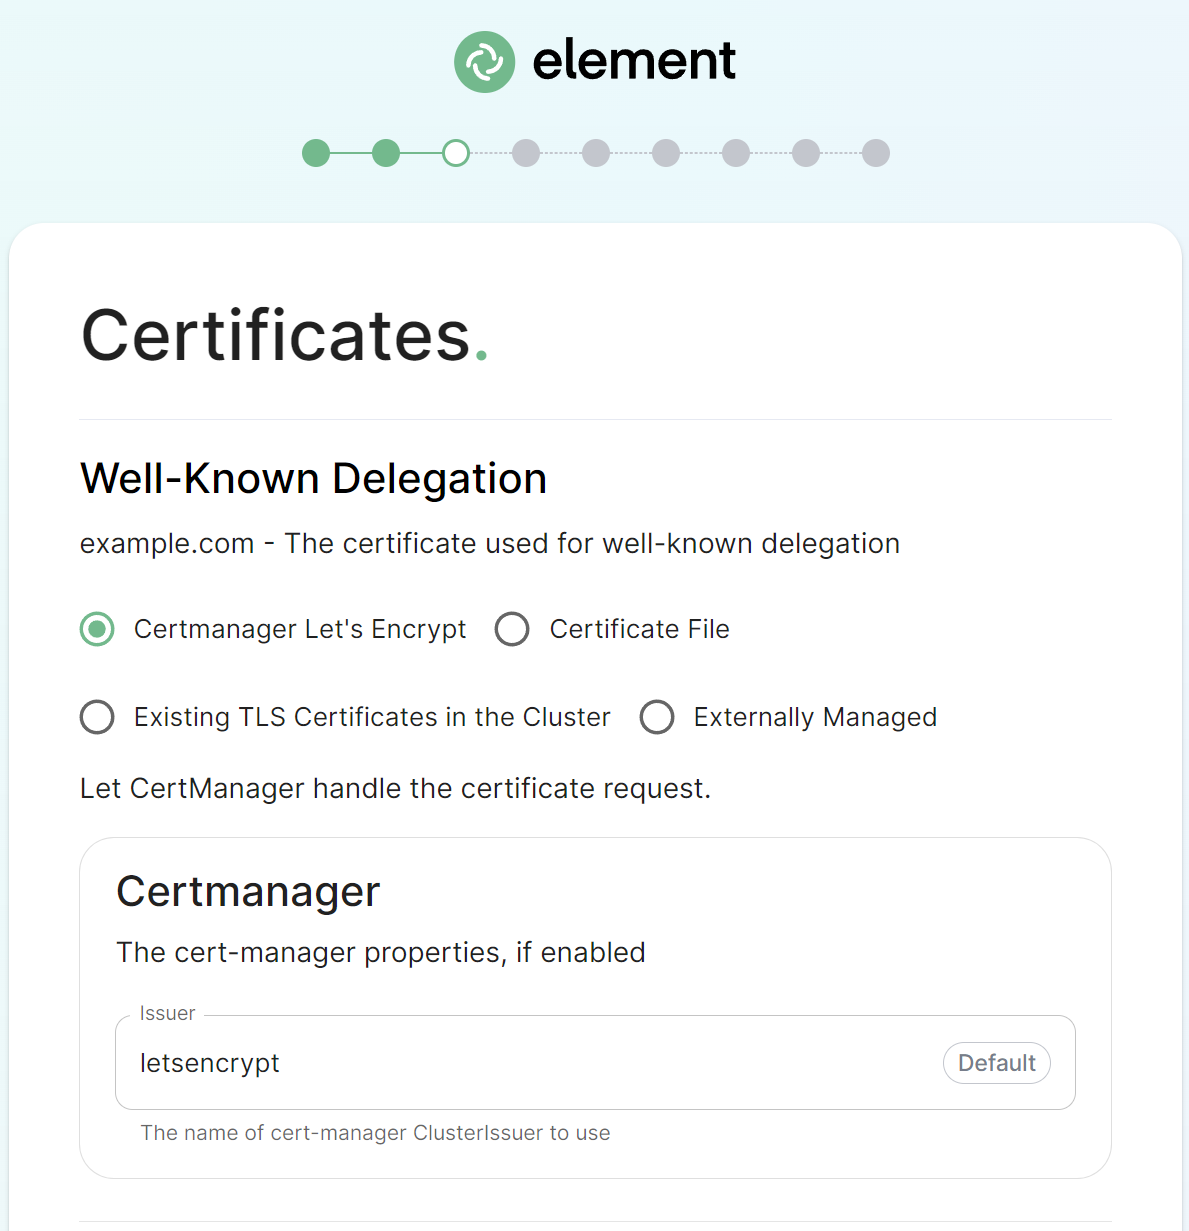
If you are already serving content on your base domain, please read the Well-Known Delegation notes specifically to understand how you should configure this components' certificates.
If you wish to use your own certificates they must be in PEM encoded format, for detailed guidance / details on each config option, check the Detailed Section Overview
Database Section.
The fourth section of the ESS installer GUI is the Database section, here you will provide the configuration of the PostgreSQL databse you will be using for Synapse.
If you're running in Standalone mode, and opted for the installer deployed postgres, you will not see this section.

Make sure you've read the Requirements and Recommendations page so your environment is ready for installation. Specifically for PostgreSQL, ensure you have followed the guidance specific to your deployment:
On this page you simply need to specify the database name, the database host name, the port to connect to, the SSL mode to use, and finally, the username and password to connect with. Once you have completed this section, simply click continue.
For Standalone Deployments, if your database is installed on the same server you are installing ESS to, esnure that the servers' public IP address is used. As the container is not sharing the host network namespace, entering 127.0.0.1 will resolve to the container itself and cause the installation failure.
For detailed guidance / details on each config option, check the Detailed Database Section Overview
Media Section.
The fifth section of the ESS installer GUI is the Media section, here you will configure where media will be saved as well as the maximum media upload size.
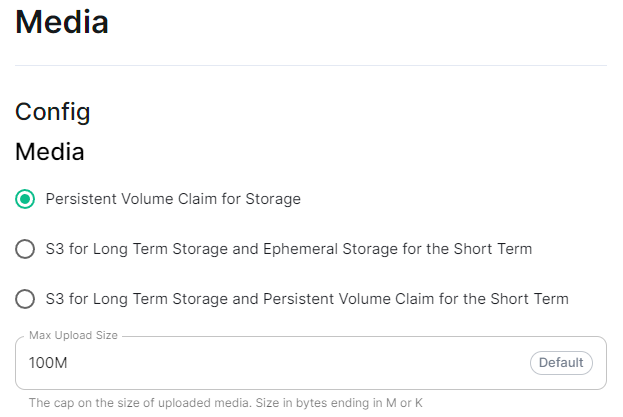
You can opt to use either a Persistent Volume Claim (default) or if you wish to use an S3 bucket. Selecting S3 will then require you to provide your S3 connection details and authentication credentials. You will also be able to adjust the maximum media upload size for your homeserver.
For detailed guidance / details on each config option, check the Detailed Media Section Overview
Cluster Section.
The sixth section of the ESS installer GUI is the Cluster section, here you will configure settings specific to the cluster in which Element Deployment will run on top of.
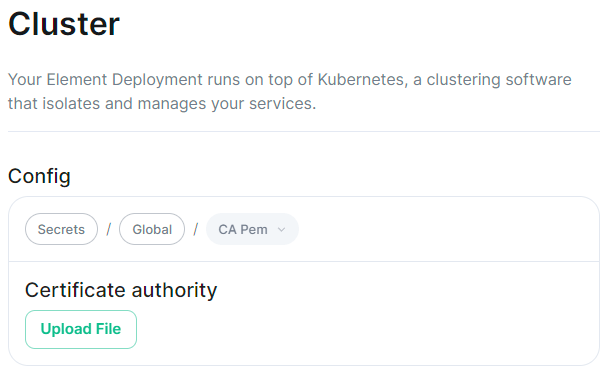
On standard setups, no options need configuring here so you can click continue.
For setups where on the certificates section, you uploaded certificates signed by you own private Certificate Authority, you will need to upload it's certificate in PEM encoded format. This should be a full chain certificate, like those upload in the Certificates section, including the Root Certificate Authority as well as any Intermediate Certificate Authorities.
If you are in an environment where you have self-signed certificates, you will want to disable TLS verification, by clicking Advanced and then scrolling down and unchecking Verify TLS. Please bear in mind that disabling TLS verification and using self-signed certificates is not recommended for production deployments.
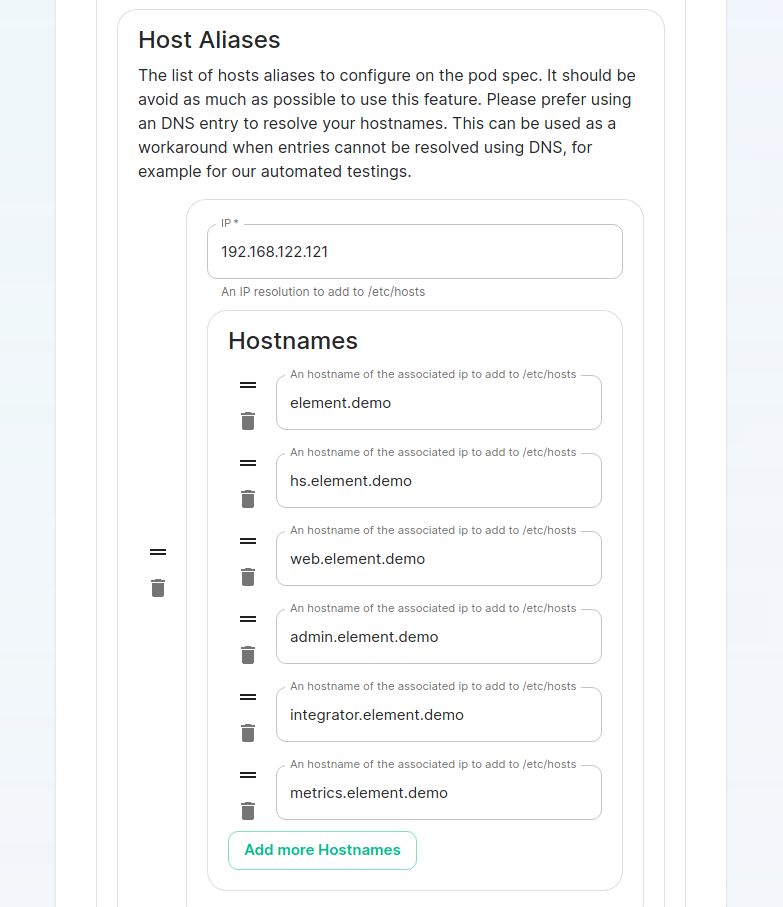
If your host names are not DNS resolvable, you need to use host aliases and this can be set up here. You will also click "Advanced" and scroll down to the "Host Aliases" section in "k8s". In here, you will click "Add Host Aliases" and then you will specify an IP and host names that resolve to that IP:
For detailed guidance / details on each config option, check the Detailed Cluster Section Overview
Kubernetes Deployment
If you are not using OpenShift, you will need to set Force UID GID and Set Sec Comp to Enable under the section Security Context so that it looks like:
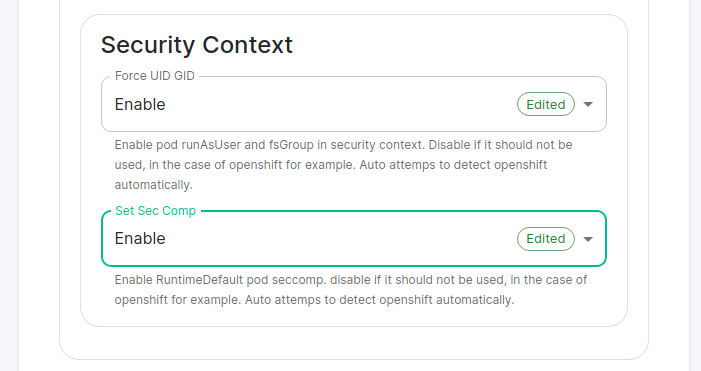
If you are using OpenShift, you should leave the values of Force UID GID and Set Sec Comp set to Auto.
Synapse Section.
The seventh section of the ESS installer GUI is the Synapse section, here you will configure settings specific to your homeserver.

While there are lots of options that can be configured in the section, it is generally recommended to complete the first-time setup before toggling on additional features i.e. Delegated Authentication, Data Retention etc.
Re-running the installer and configuring these individually after first-time setup is recommend to make troubleshooting easier should something in this section be mis-configured.
Generally speaking, for first-time setup the default options here can be left as-is, as they can be altered as needed post-deployment. Simply click continue to advance, however see below for details on some options you may wish to alter.
The first setting that you will come to is our built in performance profiles. Select the appropriate answers for Monthly Active Users and Federation Type to apply our best practices based on years of running Matrix homeservers.
Setting of Monthly Active Usersaka MAU and Federation Type within the Profile section does not directly set the maximum monthly active users or open/close Federation. These options will simply auto-configure the number of underlying pods deployed to handle the advised values.
You will be able to directly configure your desired maximum MAU and Federation in dedicated sections.
The next setting that you will see is whether you want to auto accept invites. The default of Manual will fit most use cases, but you are welcome to change this value.
The next setting is the maximum number of monthly active users (MAU) that you have purchased for your server. Your server will not allow you to go past this value. If you set this higher than your purchased MAU and you go over your purchased MAU, you will need to true up with Element to cover the cost of the unpaid users.
The next setting concerns registration. A server with open registration on the open internet can become a target, so we default to closed registration. You will notice that there is a setting called Custom and this requires explicit custom settings in the additional configuration section. Unless instructed by Element, you will not need the Custom option and should instead pick Closed or Open depending on your needs.
After this, you will see that the installer has generated a random admin password for you. You will want to use the eye icon to view the password and copy this down as you will use this with the user onprem-admin-donotdelete to log into the admin panel after installation.
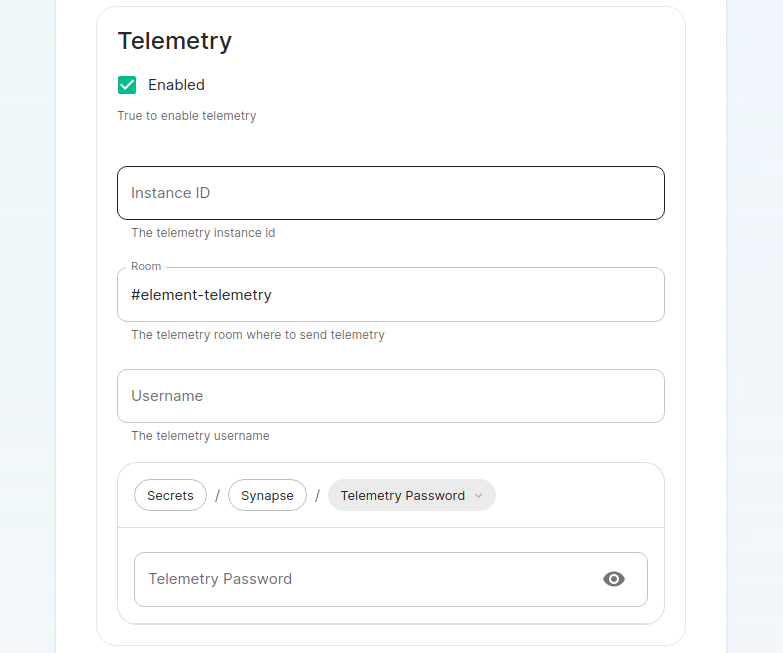
Continuing, we see telemetry. You should leave this enabled as you are required to report MAU to Element. In the event that you are installing into an enviroment without internet access, you may disable this so that it does not continue to try talking to Element. That said, you are still required to generate an MAU report at regular intervals and share that with Element.
For more information on the data that Element collects, please see: What Telemetry Data is Collected by Element?
As mentioned above, there are a lot of options that can be configured here, it is recommended to run through the detailed guidance / details on each config option available on the Detailed Synapse Section Overview
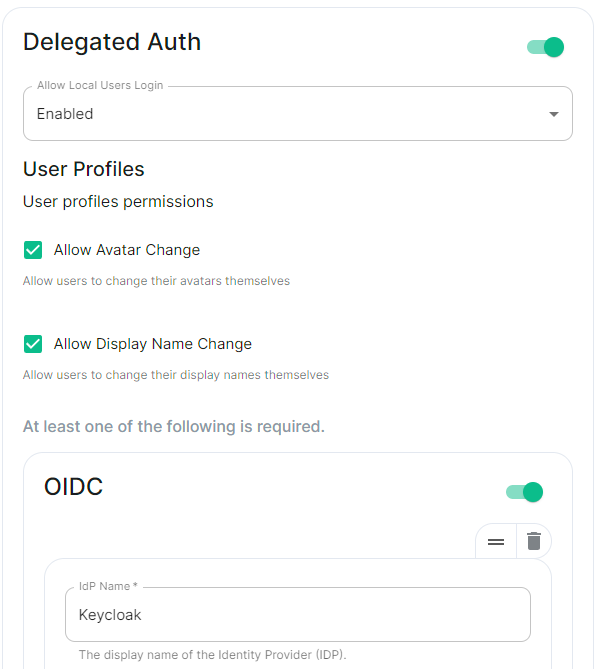
Delegated Auth.
A sub-section of the Synapse section is Delegated Authentication, which allows deferring to OIDC, SAML and LDAP Identity Providers for authentication.
It is not recommended to set this up on first-time install, however should you wish please refer to the dedicated Detailed Delegated Auth Section Overview page.
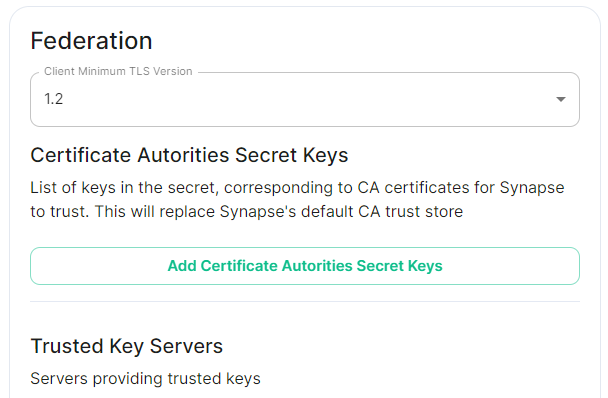
Federation.
A sub-section of the Synapse section is Federation, found under Advanced, which allows configuration of how your homeserver should federate with other homeservers.
It is not recommended to set this up on first-time install, however should you wish please refer to the dedicated Detailed Federation Section Overview page.
Element Web Section.
The eighth section of the ESS installer GUI is the Element Web section, here you can configure settings specific to the deployed Element Web client.
First almost all setups, nothing needs to be configured, simply click continue.
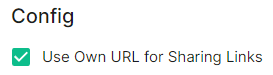
For airgapped environments you should click Advanced then enable Use Own URL for Sharing Links:
For detailed guidance / details on each config option, check the Detailed Section Overview
Homeserver Admin Section.
The ninth section of the ESS installer GUI is the Homeserver Admin section, here you can configure settings specific to the deployed Admin Console.
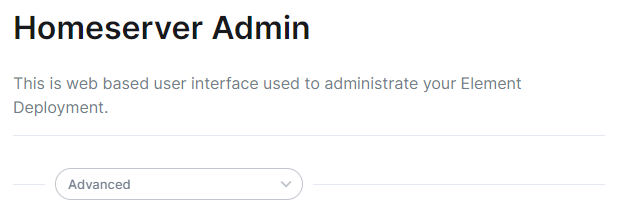
Unless advised by Element, you will not need to configure anything in this section, you will be able to access the homeserver admin via the admin domain specified in the Domains section, logging in with the built-in default Synapse Admin user onprem-admin-donotdelete whose password is defined in the Synapse section.
If you have enabled Delegated Authentication, the built-in Synapse Admin user onprem-admin-donotdelete will be unable to login unless Allow Local Users Login has been set to Enabled.
See the Delegated Authentication notes for how to promote a user from your Identity Provider to Synapse Admin
For detailed guidance / details on each config option, check the Detailed Section Overview
Integrator Section.
The final section of the ESS installer GUI when running for the first-time is the Integrator section, here you can configure settings specific to the integrator which is used to send messages to external services.
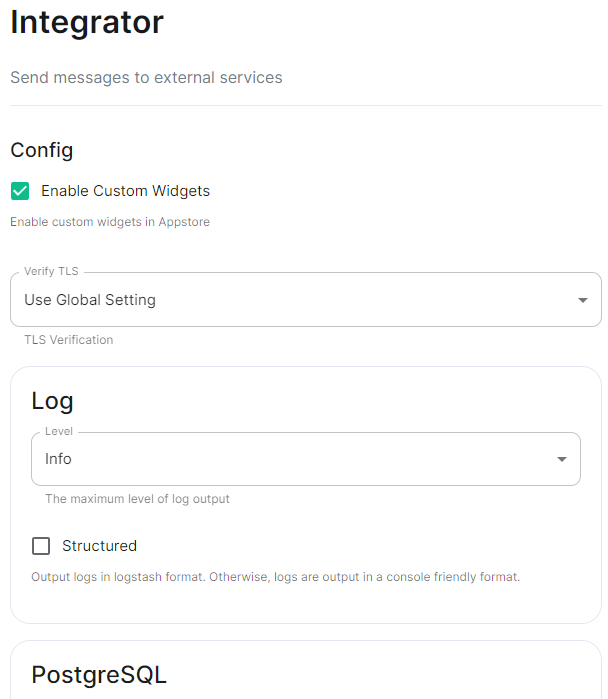
On first-time setup only PostgreSQL will need to be configured for Standalone Deployments where you are using an external PsotgreSQL or Kubernetes Deployments where an external PostgreSQL is required.
For Standalone Deployments where the installer is deploying PostgreSQL for you, you will not need to configure anything.
For detailed guidance / details on each config option, check the Detailed Section Overview
The Installation Screen
After all ten sections you will finally be ready to begin the installation, simply click Install to begin.
Depending on your OS setup, you may notice the installer hang, or directly ask for a password. Simply go back to the terminal where you are running the installer, you will see that you are being asked for the sudo password:
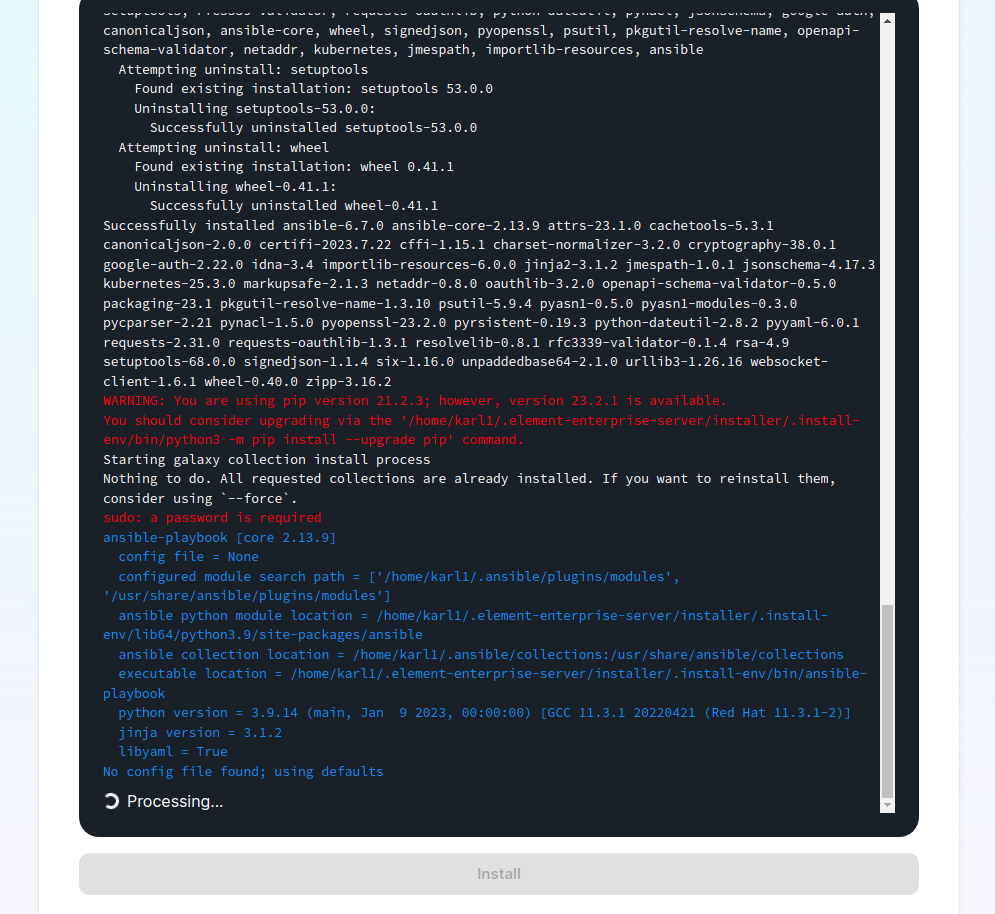
Provide your sudo password and the installation will continue. You will know the installer has finished when you see the Play Recap, as long as nothing failed the install was a success.
For Standalone Deployments, when running the installer for the first-time, you will be prompted to log out and back in again to allow Linux group membership changes to be refreshed. It is advised to simply cancel the running installer CTRL + C then reboot i.e. sudo reboot now. Then re-run the installer, return to the Installation Screen and click Install again. You will only have to perform this step once per server.
Verifying Your Installation
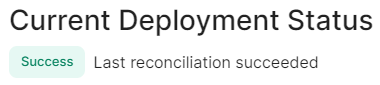
Once the installation has finished, it can take as much as 15 minutes on a first run for everything to be configured and set up. You can use:
watch kubectl get pods -n element-onprem
This will show the status of all pods, simply wait until all pods have come up and stablised showing as Ready. You can also keep track of the Current Deployment Status on the Installation Screen, once fully ready you should see:
End-User Documentation
After completing the installation you can share our User Guide PDF to help orient and onboard your users to Element! Or visit the Element Support book.
Reconfiguring an existing Installation
Notes
Upgrading an existing Installation
Notes
- Prior to download a new version of the installer, it is important to check all upgrade notes that may affect you (any since the version you are currently on). If you are upgrading from one version of the same LTS to another, check
- When you first run a new version of the installer, your config may be upgraded. Once this is complete, go through all sections within the installer, re-confirm all options (making sure to save any changes / click save on any pages that do not have it greyed out), enable Dry Run in Group Sync (if configured) then hit Deploy.
Where are the Installer Configuration Files
Everything that you have configured via the Element Server Suite installer is saved to configuration files placed in the .element-enterprise-server directory, found in the home directory of the user who ran the installer. In this directory, you will find a subdirectory called config that contains the actual configuration files - keep these backed up.
Running the Installer unattended
It is possible to run the installer without using the GUI provided that you have a valid set of configuration files in the .element-enterprise-server/config directory.
Using this method, you could use the GUI as a configuration editor and then take the resulting configuration and modify it as needed for further installations.
This method also makes it possible to set things up once and then run future updates without having to use the GUI.
See the Running the installer unattended section from the Automating ESS Deployment doc.