
Synapse Section
Synapse is the Matrix homeserver that powers ESS, in this section you will be customising settings relating to your homeserver, analogous with settings you'd set in the homeserver.yml if configuring Synapse manually.
All settings configured via the UI in this section will be saved to your deployment.yml, with the contents of secrets being saved to secrets.yml. You will find specific config examples under each respective section.
Config Example
-
deployment.ymlmetadata: annotations: ui.element.io/layer: | components: synapse: spec: components: synapse: -
secrets.ymlkind: Secret metadata: name: synapse namespace: element-onprem data:
By default, if you do not change any settings on this page, a number of defaults will be added to your deployment.yml (see example below).
Config Example
deployment.yml
metadata:
annotations:
ui.element.io/layer: |
components:
synapse:
config:
_value: defaulted
k8s:
haproxy:
_value: defaulted
redis:
_value: defaulted
synapse:
_value: defaulted
spec:
components:
synapse:
config:
maxMauUsers: 250
media:
volume:
size: 50Gi
urlPreview:
config:
acceptLanguage:
- en
k8s:
haproxy:
workloads:
resources:
limits:
memory: 200Mi
requests:
cpu: 100m
memory: 100Mi
redis:
workloads:
resources:
limits:
memory: 50Mi
requests:
cpu: 50m
memory: 50Mi
synapse:
workloads:
resources:
limits:
memory: 4Gi
requests:
cpu: 100m
memory: 100Mi
secrets.yml
apiVersion: v1
kind: Secret
metadata:
  name: synapse
  namespace: element-onprem
data:
adminPassword: exampleAdminPassword
macaroon: exampleMacaroon
registrationSharedSecret: exampleRegistrationSharedSecret
signingKey: >-
exampleBase64EncodedSigningKey
Profile
Need breakdown of exactly what profiles do
Monthly Active Users
Config Example
metadata:
  annotations:
    ui.element.io/profile: |
      components:
        synapse:
          _subvalues:
            mau: 500
            # mau: 2500
            # mau: 10000
what does this actually change in the installer?
Federation Type
Config Example
metadata:
  annotations:
    ui.element.io/profile: |
      components:
        synapse:
          _subvalues:
            fed: closed
            # fed: limited
            # fed: open
what does this actually change in the installer?
Config
Accept Invites

Config Example
spec:
  components:
    synapse:
      config:
        acceptInvites: manual
        # acceptInvites: auto
        # acceptInvites: auto_dm_only
This enables a Synapse module called Auto-Accept Invite which is used to automatically accept invites.
Manual retains the original behaviour, requiring users to accept invites to rooms, including Direct Messages.
Auto will automatically accept all invites to rooms, including Direct Messages.
Auto DM Only will only automatically accept invites to Direct Messages.
Max MAU Users

Config Example
spec:
  components:
    synapse:
      config:
        maxMauUsers: 250
Synapse can be configured to record the number of monthly active users (also referred to as MAU) on a given homeserver, MAU only tracks local users. This option sets the hard limit of monthly active users above which the server will start blocking users. See Monthly Active Users from the Synapse documentation, including max_mau_value and limit_usage_by_mau to learn more.
Registration

Config Example
spec:
  components:
    synapse:
      config:
        registration: open
        # registration: custom
        # registration: closed
Open enables registration for new users, users will be able create an account via Matrix clients that support it, i.e. Element Web. Specifically, setting this option is the equivalent to setting both enable_registration and enable_registration_without_verification to true.
Closed disables registration for new users, users will only be presented the option to login to the homeserver. You will need to either manually setup users via the Admin Console / Admin API or be using something like Delegated Authentication. link to delegated auth page
Custom, allows you to completely customise your configuration of Registration via the Additional Config section found under Advanced, you could then use it to enable verification by setting enable_registration_without_verification to false or other similar settings, i.e. registrations_require_3pid. linked to advanced config page
Open or Closed registration will not affect the creation of new Matrix Accounts via Delegated Authentication. New users via Delegated Authentication i.e. LDAP, SAML or OIDC, who have yet to login to the homeserver and technically do not yet have a created Matrix ID, will still have one created when they successfully authenticate regardless of if registration is Closed.
Admin Password
Config Example
-
deployment.ymlspec: components: synapse: config: adminPasswordSecretKey: adminPassword -
secrets.ymldata: adminPassword: ExampleAdminPasswordBase64EncodedString
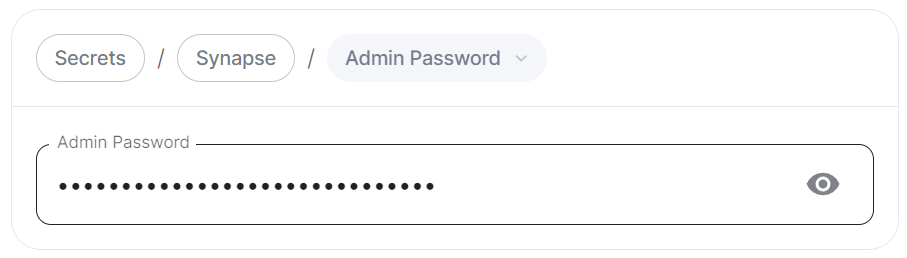
Password for the @onprem-admin-donotdelete user, a Synapse Admin user automatically created to allow you to use the Admin Console. You should use this account to promote Matrix accounts you setup to Synapse Admins. When using the Admin Console via the Installer (:8443), you should auto-login as this account, no password required.
If you are experiencing issues with accessing the Admin Console following a wipe and reinstall, ensure you do not have the previous install credentials cached. You can clear them via your browsers' settings, then refresh the page (you will be provided with a new link via the Installer CLI) to resolve.
Log
Unlike with most other sections, logging values set here are analogous to creating a <SERVERNAME>.log.config instead of the homeserver.yml. See the Logging Sample Config File for further reference.
Root Level

Config Example
spec:
  components:
    synapse:
      config:
        log:
          rootLevel: Info
          # rootLevel: Debug
          # rootLevel: Warning
          # rootLevel: Error
          # rootLevel: Critical
As defined under the Configuration file format section of the Python docs, the available options presented by the Installer are DEBUG, INFO, WARNING, ERROR and CRITICAL. These represent different severity levels for log messages and help control the verbosity of log output which help to filter messages based on their importance.
-
DEBUG: Detailed information, typically used for debugging purposes. Messages at this level provide the most fine-grained and detailed logging. -
INFO: General information about the program's operation. This level is used to confirm that things are working as expected. -
WARNING: Indicates a potential issue or something that might cause problems in the future. It doesn't necessarily mean an error has occurred, but it's a warning about a possible concern. -
ERROR: Indicates a more serious issue or error in the program. When an error occurs, it might impact the functionality of the application. -
CRITICAL: Indicates a very severe error that may lead to the program's termination. Critical messages suggest a problem that should be addressed immediately.
When troubleshooting, increasing the log level and redeploying can help narrow down where you're experiencing issues. By default, DEBUG is a good option to include everything allowing you to identify a problem.
It is not advised to leave your Logging Level at anything other than the default, as more verbose logging may expose information that should otherwise not be accessible. When sharing logs, remember to redact any sensitive information you do not wish to share.
Sentry DSN

Config Example
spec:
  components:
    synapse:
      config:
        log:
          sentryDsn: https://publickey:secretkey@sentry.io/projectid
Here you can specify a Sentry Data Source Name (DSN) to connect Synapse logging to a specific project within your Sentry account. A typical Sentry DSN looks like:
https://<public_key>:<secret_key>@sentry.io/<project_id>
Level Overrides
Config Example
spec:
  components:
    synapse:
      config:
        log:
          levelOverrides:
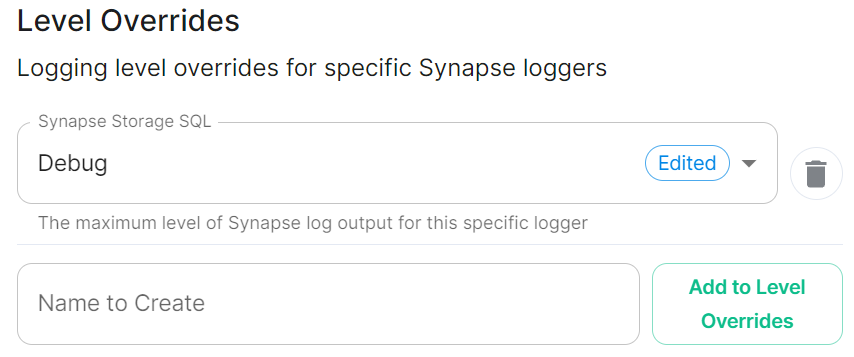
            synapse.storage.SQL: Info
            # synapse.storage.SQL: Debug
            # synapse.storage.SQL: Error
            # synapse.storage.SQL: Warning
            # synapse.storage.SQL: Critical
Need to understand how / where these are available i.e. synapse.storage.SQL
How does this work, should they be formatted like: synapse.storage.SQL: DEBUG maybe?
Security
Default Room Encryption
encryption_enabled_by_default_for_room_type
Config Example
spec:
  components:
    synapse:
      config:
        security:
          defaultRoomEncryption: auto_all
          # defaultRoomEncryption: auto_invite
          # defaultRoomEncryption: forced_all
          # defaultRoomEncryption: forced_invite
          # defaultRoomEncryption: not_set
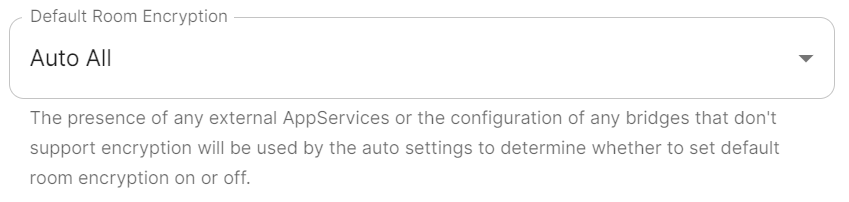
Controls whether locally-created rooms should be end-to-end encrypted by default.
This option will only affect rooms created after it is set and will not affect rooms created by other servers.
All / Invite
-
allwill apply to any locally-created room -
invitewill apply to any room created with theprivate_chatortrusted_private_chatroom creation presets.-
private_chatare rooms where an invitation is required to join. -
trusted_private_chatare rooms where an invitation is required to join and the invitee is assigned a power level of 100 upon joining.
-
Auto / Forced
what is difference between auto and forced
Not Set
This will specifically not define any requirement for end-to-end encryption by default. Leaving the default option
Password Policy
Config Example
spec:
  components:
    synapse:
      config:
        security:
          # Not present when disabled
          # passwordPolicy: # {} When enabled with default settings
          passwordPolicy: # Only configured like so when values changed from thier defaults
            minimumLength: 20 # Default: 15
            requireDigit: false # Default: true
            requireLowercase: false # Default: true
            requireSymbol: false # Default: true
            requireUppercase: false # Default: true
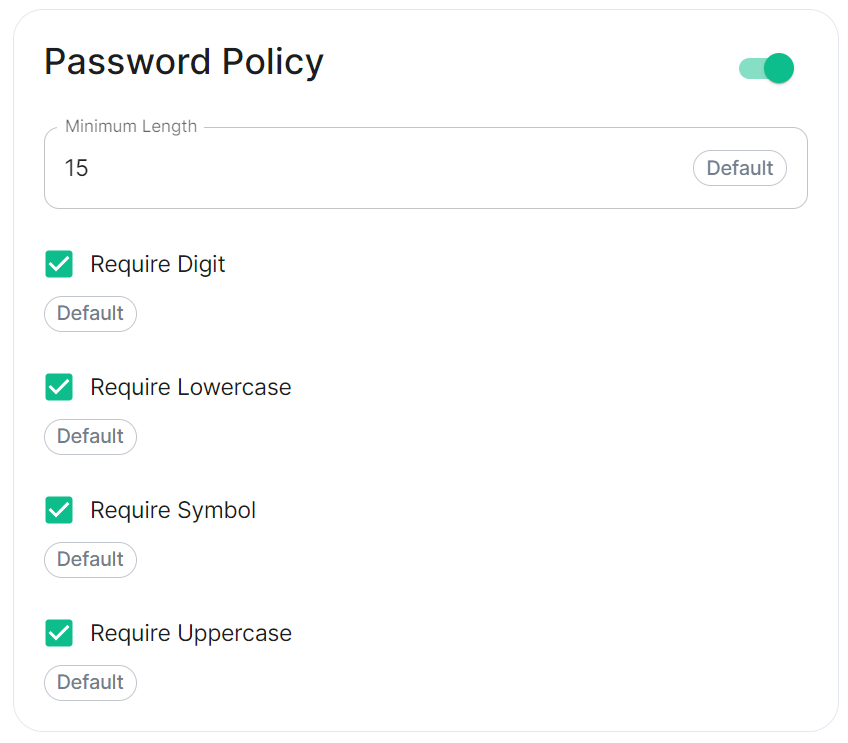
Turning on Password Policy will allow you to define and enforce a password policy for users' accounts on your homeserver.
You may notice that despite this not being enabled, users are required when registering to set secure passwords when doing do via the Element Web client. This is because the client itself enforces secure passwords, this setting is required should you wish to ensure all accounts have enforces password requirements, as other Matrix clients may not themselves enforce secure passwords.
Telemetry
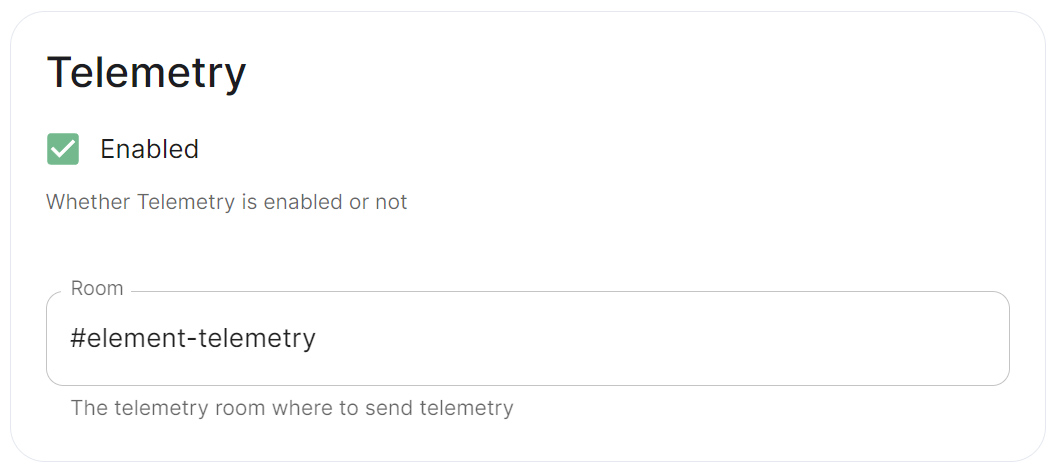
Config Example
spec:
  components:
    synapse:
      config:
        telemetry:
          enabled: true
          passwordSecretKey: telemetryPassword
          room: '#element-telemetry'
Element collects telemetry data to understand whether or not customers are in compliance with what they've purchased, so should be left enabled unless automatic sending of telemetry is not possible (i.e. Airgapped setups). By default, ESS servers connected to the internet will automatically send telemetry to Element. Please allow this to happen by making sure you have not blocked ems.element.io on port 443 from your homeserver.
What Telemetry Data is Collected by Element?
The following is a sample telemetry packet generated by Element On-Premise:
Config Example
{
    "_id" : ObjectId("6363bdd7d51c84d1f10a8126"),
    "onPremiseSubscription" : ObjectId("62f14dd303c67b542efddc4f"),
    "payload" : {
        "data" : {
            "activeUsers" : {
                "count" : 1,
                "identifiers" : {
                    "native" : [
                        "5d3510fc361b95a5d67a464a188dc3686f5eaf14f0e72733591ef6b8da478a18"
                    ]
                },
                "period" : {
                    "end" : 1667481013777,
                    "start" : 1666970260518
                }
            }
        },
        "generationTime" : 1667481013777,
        "hostname" : "element.demo",
        "instanceId" : "bd3bbf92-ac8c-472e-abb5-74b659a04eec",
        "type" : "synapse",
        "version" : 1
    },
    "request" : {
        "clientIp" : "71.70.145.71",
        "userAgent" : "Synapse/1.65.0"
    },
    "schemaVersion" : 1,
    "creationTimestamp" : ISODate("2022-11-03T13:10:47.476Z")
}
Submitting Telemetry Data to Element
If you are unable to allow Element's telemetry upload to take place, either because you are airgapped or need to block ems.element.io then you will need to manually submit telemetry data to Element.
In order to gather telemetry data, you will need to use the element-telemetry-export.py script, which comes with the installer.
To do this, run:
cd ~/.element-enterprise-server/installer/lib
/usr/bin/env python3 ./element-telemetry-export.py
You will be prompted for an access token:
Matrix user access token not specified in the "MATRIX_USER_ACCESS_TOKEN" environment variable. Please provide the access token and hit enter:
You will need to provide a valid access token for a user who has access to the telemetry room. This can be found by logging in to Element Web as this user, going to "All Settings", then clicking "Help & About" and finally expanding the section for "Access Token".
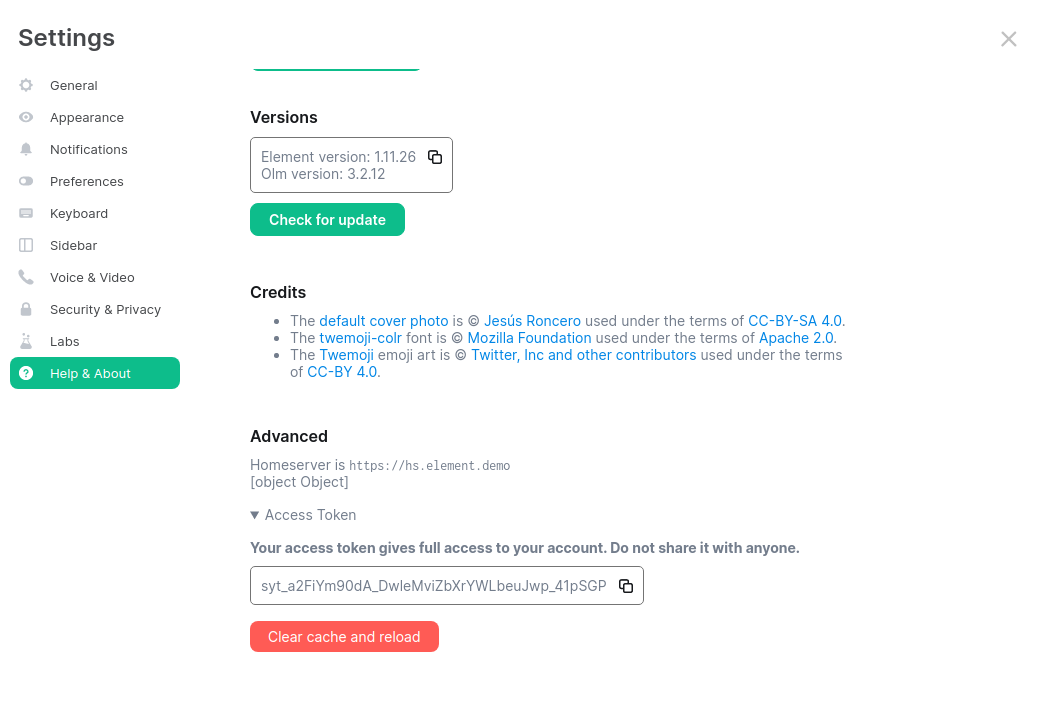
Provide the access token to the prompt and hit enter.
2023-04-18 15:36:41,580:INFO:Parsing configuration file (/home/karl1/.element-enterprise-server/config/telemetry-config.json)
2023-04-18 15:36:41,581:INFO:Performing Matrix sync with homeserver (https://hs.element.demo)
2023-04-18 15:36:41,643:INFO:Scanning page 1
2023-04-18 15:36:41,716:INFO:Scanning page 2
2023-04-18 15:36:41,782:INFO:Writing 19 telemetry events to ZIP file (/home/karl1/.element-enterprise-server/installer/lib/telemetry_2023-04-18.zip)
2023-04-18 15:36:41,783:INFO:Saving some internal state (for next time)
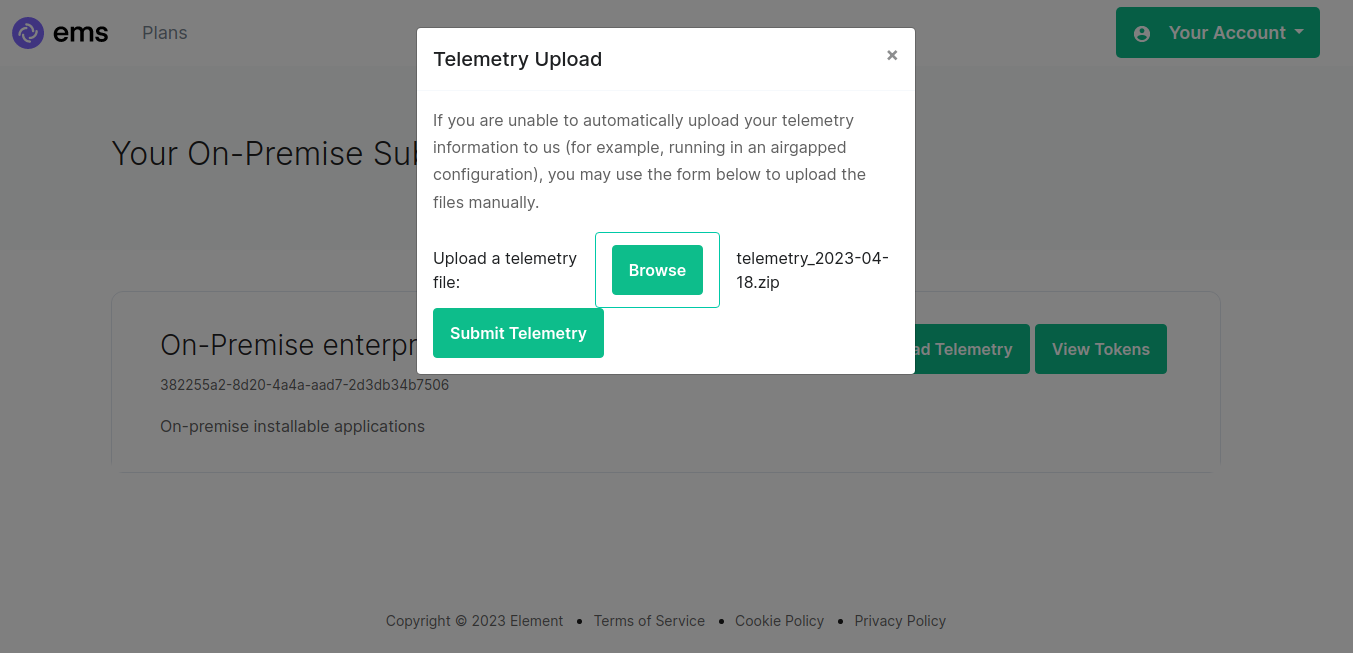
Once you have done this, you will have some messages that look similar to the above and you will have a new zip file in this directory with a date stamp in the format telemetry_YYYY-MM-DD.zip. In my case, I have telemetry_2023-04-18.zip.
If you are having SSL connectivity issues with the exporter, you may wish to either disable TLS verification or provide a CA certificate to the exporter with these optional command line parameters:
  --disable-tls-verification
                        Do not check SSL certificate validity when querying the Matrix server
  --ca-cert-path CA_CERT_PATH
                        Specify the path to the CA file (or a directory) to use when verifying Matrix server's
                        SSL certificate. Consult README.md for more details
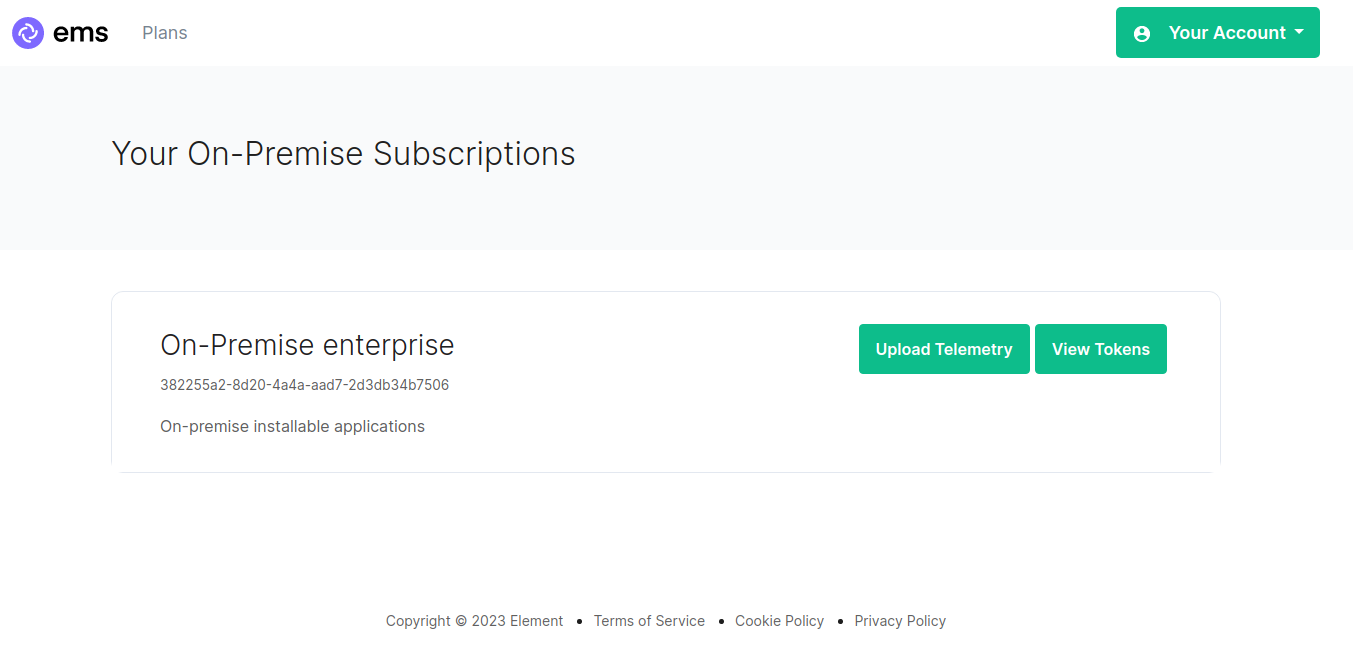
Then browse to https://ems.element.io/on-premise/subscriptions and click "Upload Telemetry" next to the subscription you are uploading the data for:
Click browse, find the telemetry file then click "Submit Telemetry":
Once successful, you will see this screen:
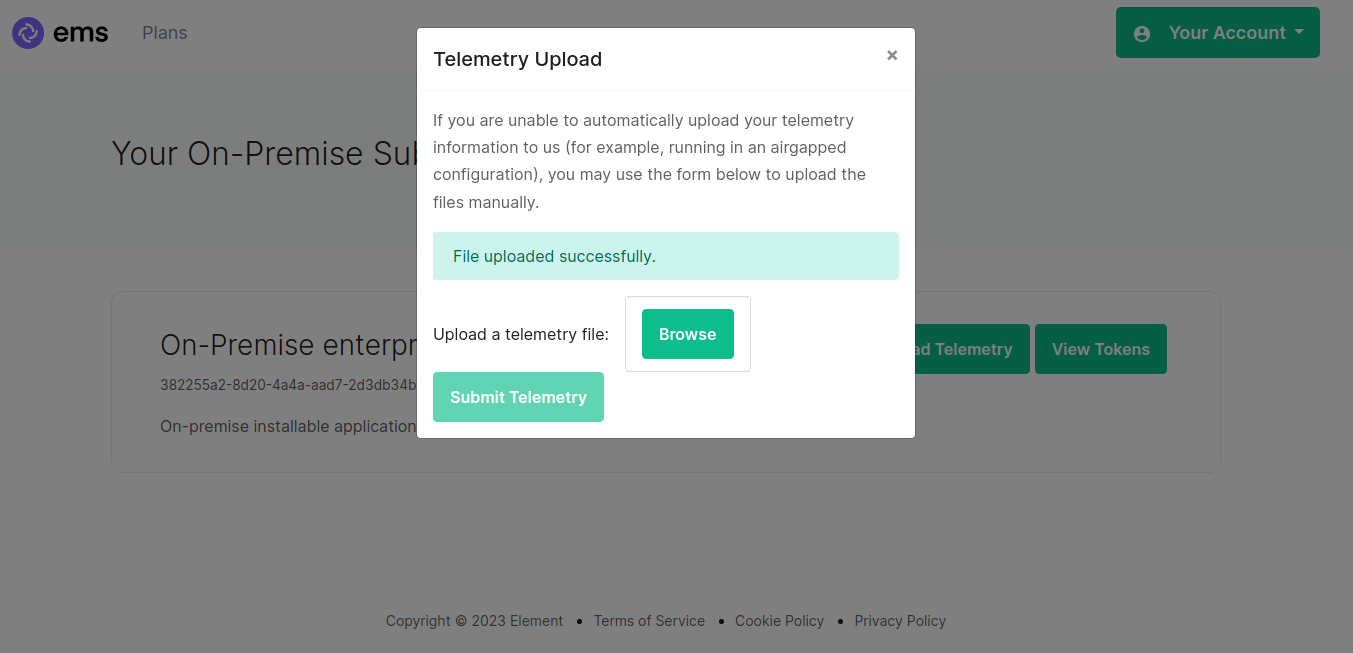
You can then close the upload window.
URL Preview

Config Example
spec:
  components:
    synapse:
      config:
        urlPreview: {} # {} When disabled, otherwise enabled with config as detailed in sections below.
URL previews involve fetching information from a URL (e.g., a website link) and displaying a preview of the content, such as a title, description, and an image. This feature can be useful for enhancing the user experience by providing more context about shared URLs in chat messages.
Enabling or disabling URL previews can impact the amount of information displayed in the chat interface, and it can also have privacy implications as fetching URL previews involves making requests to external servers to retrieve metadata.
Default Blacklist
When enabling URL Preview, a default blacklist using url_preview_ip_range_blacklist is configured for all private networks (see ranged below) to avoid leaking information by asking for preview of links pointing to private paths of the infrastructure. While this blacklist cannot be changed, you can whitelist specific ranges using IP Range Allowed.
Config Example
url_preview_ip_range_blacklist:
- '192.168.0.0/16'
- '100.64.0.0/10'
- '192.0.0.0/24'
- '169.254.0.0/16'
- '192.88.99.0/24'
- '198.18.0.0/15'
- '192.0.2.0/24'
- '198.51.100.0/24'
- '203.0.113.0/24'
- '224.0.0.0/4'
- '::1/128'
- 'fe80::/10'
- 'fc00::/7'
- '2001:db8::/32'
- 'ff00::/8'
- 'fec0::/10'
Config
Accept Language
Config Example
spec:
  components:
    synapse:
      config:
        urlPreview:
          config:
            acceptLanguage:
              - en
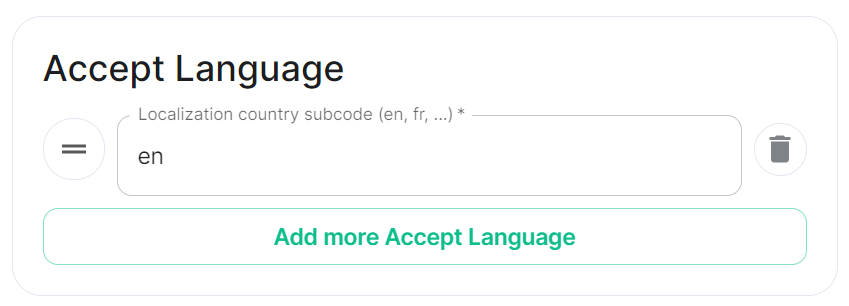
By setting this configuration option, you can control the language preference that Matrix Synapse communicates to external servers when fetching URL previews. This can be useful if you want to influence the language of the content retrieved for URL previews based on the preferred language of your users.
To do so, specify the Localisation country sub-code (e.g., en) that should be used as the Accept-Language header value that the server should send when fetching URL previews from external websites. The Accept-Language header is an HTTP header used by web browsers and other clients to indicate the preferred language(s) for the response.
Each value is a IETF language tag; a 2-3 letter identifier for a language, optionally followed by sub-tags separated by '-', specifying a country or region variant. Multiple values can be provided by clicking Add more Accept Language, and a weight can be added to each by using quality value syntax (;q=). '*' translates to any language.
IP Range Allowed
url_preview_ip_range_whitelist
Config Example
spec:
  components:
    synapse:
      config:
        urlPreview:
          config:
            ipRangeAllowed:
              - 10.0.0.0/24
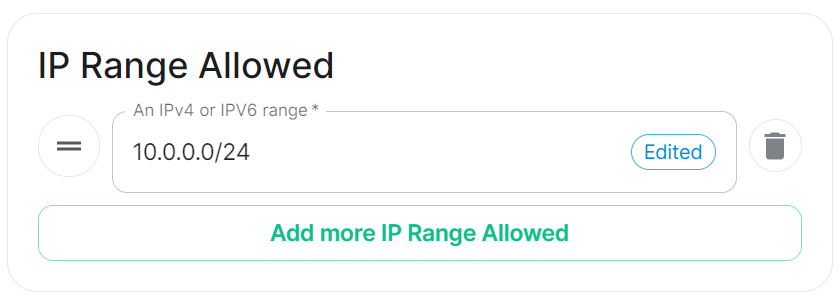
This option allows you to provide a list of IP address CIDR ranges that URL Preview is allowed to access even if they are specified in the Default Blacklist.
Synapse configuration options not available within the UI
We strongly advise against including any config not configurable via the UI as it will most likely interfere with settings automatically computed by the updater. Additional configuration options are not supported so we encourage you to first raise your requirements to Support where we can best advise on them.
An Additional Config section, which allows including config not currently configurable via the UI from the Configuration Manual, is available under the 'Advanced' section of this page.