
Synapse Section: Delegated Auth
A detailed look at Delegated Authentication options available and setup examples
LDAP on Windows AD
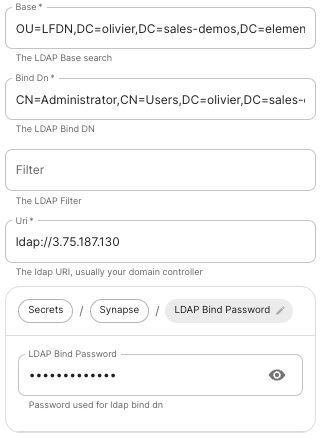 |
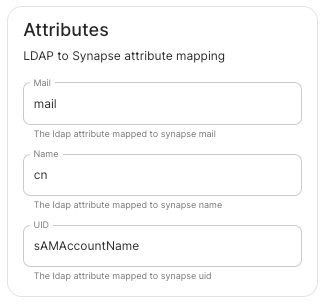 |
-
Base.
The distinguished name of the root level Org Unit in your LDAP directory.- The distinguished name can be displayed by selecting
View/Advanced Featuresin the Active Directory console and then, right-clicking on the object, selectingProperties/Attributes Editor.
- The distinguished name can be displayed by selecting
-
Bind DN.
The distinguished name of the LDAP account with read access. -
Filter.
A LDAP filter to filter out objects under the LDAP Base DN. -
URI.
The URI of your LDAP serverldap://dc.example.com.- This is often your Domain Controller, can also pass in
ldaps://for SSL connectivity. - The following are the typical ports for Windows AD LDAP servers:
-
ldap://ServerName:389 -
ldaps://ServerName:636
-
- This is often your Domain Controller, can also pass in
-
LDAP Bind Password.
The password of the AD account with read access. -
LDAP Attributes.
-
Mail.
mail -
Name.
cn -
UID.
sAMAccountName
-
Mail.
OpenID on Microsoft Azure
Before configuring within the installer, you have to configure Microsoft Azure Active Directory.
Set up Microsoft Azure Active Directory
- You need to create an
App registration. - You have to select
Redirect URI (optional)and set it to the following, wherematrixis the subdomain of Synapse andexample.comis your base domain as configured on the Domains section:https://matrix.example.com/_synapse/client/oidc/callback
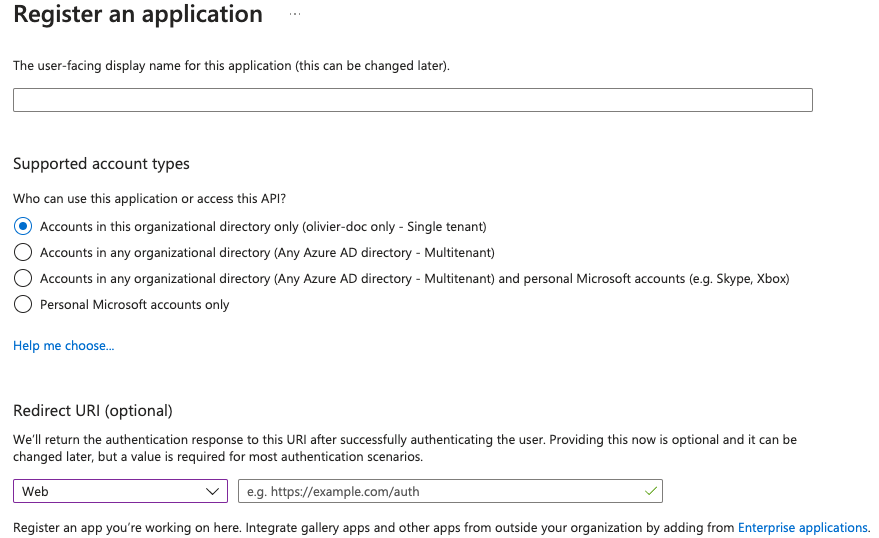
For the bridge to be able to operate correctly, navigate to API permissions, add Microsoft Graph APIs, choose Delegated Permissions and add:
-
openid -
profile -
email
Remember to grant the admin consent for those.
To setup the installer, you'll need:
- The
Application (client) ID - The
Directory (tenant) ID - A secret generated from
Certificates & Secretson the app.
Configure the installer
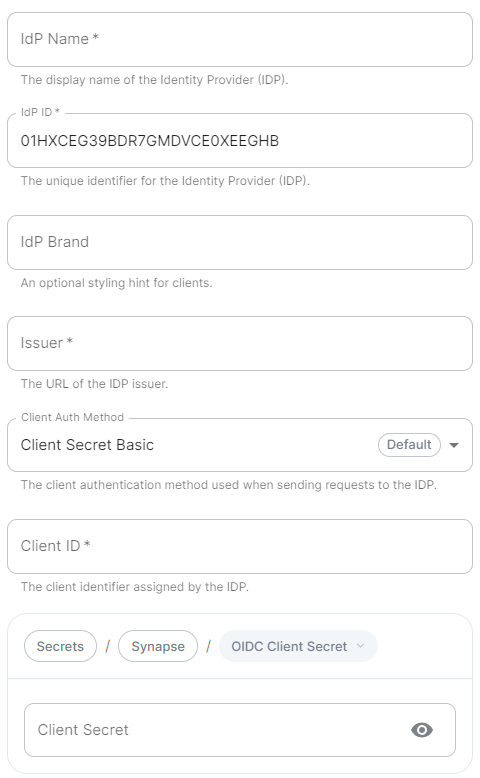 |
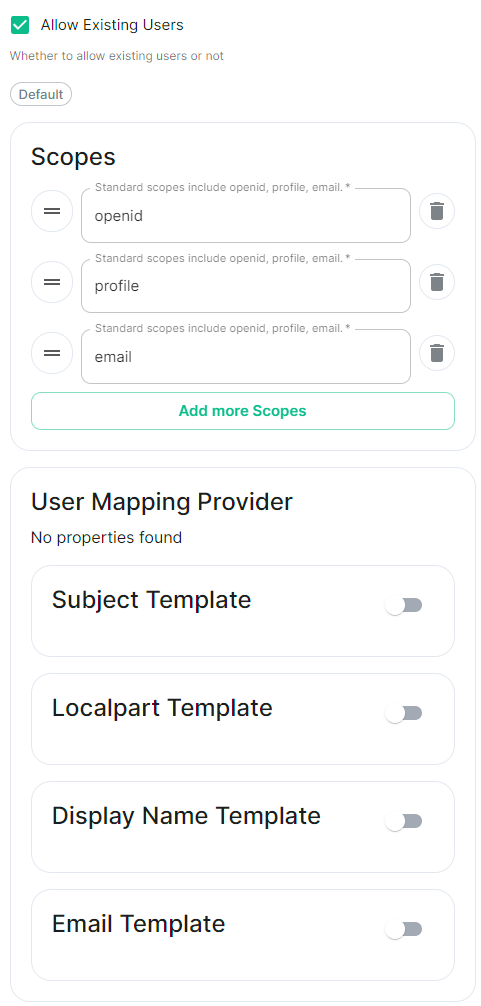 |
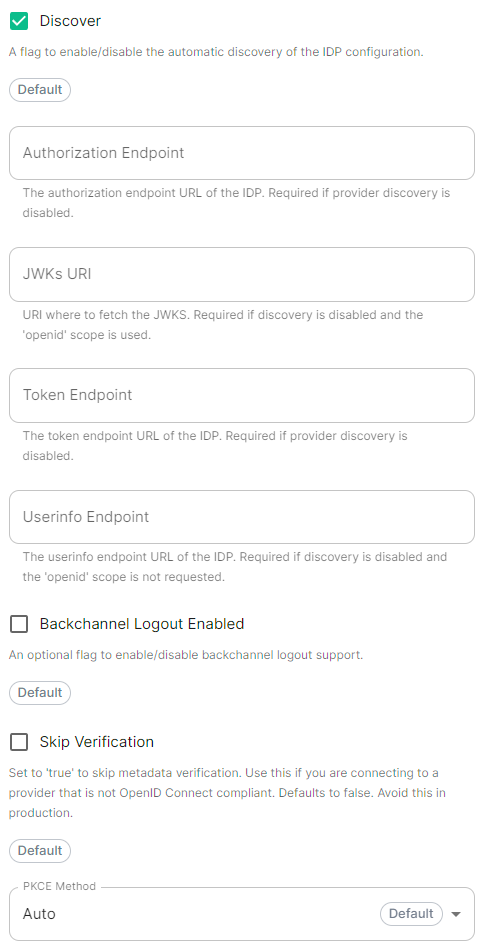 |
-
IdP Name.
A user-facing name for this identity provider, which is used to offer the user a choice of login mechanisms in the Element UI. -
IdP ID.
A string identifying your identity provider in your configuration, this will be auto-generated for you (but can be changed). -
IdP Brand.
An optional brand for this identity provider, allowing clients to style the login flow according to the identity provider in question. -
Issuer.
The OIDC issuer. Used to validate tokens and (if discovery is enabled) to discover the provider's endpoints. Usehttps://login.microsoftonline.com/DIRECTORY_TENNANT_ID/v2.0replacingDIRECTORY_TENNANT_ID. -
Client Auth Method.
Auth method to use when exchanging the token. Set it toClient Secret Postor any method supported by your IdP. -
Client ID.
Set this to yourApplication (client) ID. -
Client Secret.
Set this to the secret value defined under "Certificates and secrets". -
Scopes.
By defaultopenid,profileandemailare added, you shouldn't need to modify these. -
User Mapping Provider.
Configuration for how attributes returned from a OIDC provider are mapped onto a matrix user.-
Localpart Template.
Jinja2 template for the localpart of the MXID.
Set it to{{ user.preferred_username.split('@')[0] }}. -
Display Name Template.
Jinja2 template for the display name to set on first login.
If unset, no display name will be set. Set it to{{ user.name }}.
-
Localpart Template.
-
Discover.
Enable / Disable the use of the OIDC discovery mechanism to discover endpoints. -
Backchannel Logout Enabled.
Synapse supports receiving OpenID Connect Back-Channel Logout notifications. This lets the OpenID Connect Provider notify Synapse when a user logs out, so that Synapse can end that user session. This property has to bet set tohttps://matrix.example.com/_synapse/client/oidc/backchannel_logoutin your identity provider, wherematrixis the subdomain of Synapse andexample.comis your base domain as configured on the Domains section.
OpenID on Microsoft AD FS
Install Microsoft AD FS
Before starting the installation, make sure:
You can find a checklist here.
Steps to follow:
Install AD CS
You need to install the AD CS Server Role.
Obtain and Configure an SSL Certificate for AD FS
Before installing AD FS, you are required to generate a certificate for your federation service. The SSL certificate is used for securing communications between federation servers and clients.
Install AD FS
You need to install the AD FS Role Service.
Configure the federation service
AD FS is installed but not configured.
Configure the federation service on this server under Post-deployment configuration in the Server Manager.
Ensure Create the first federation server in a federation server farm and is selected
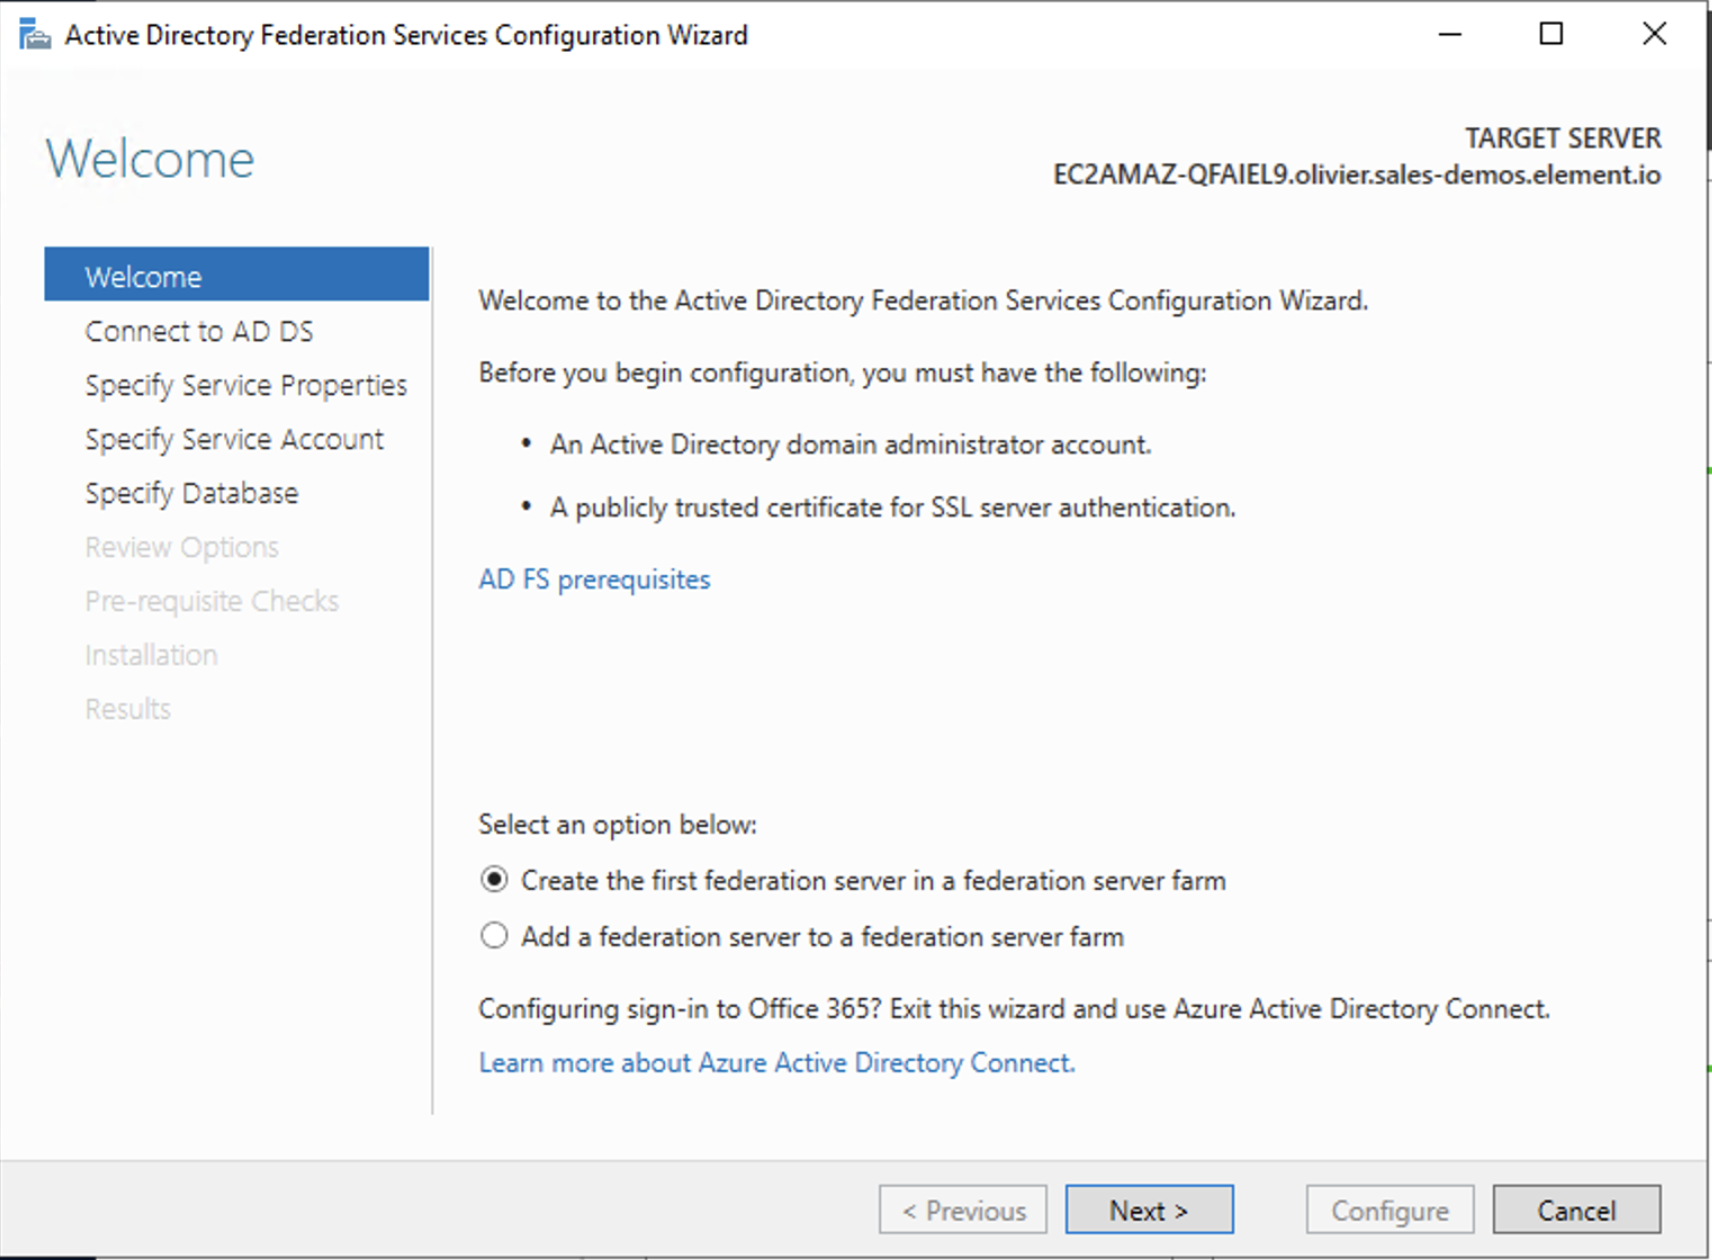
Next
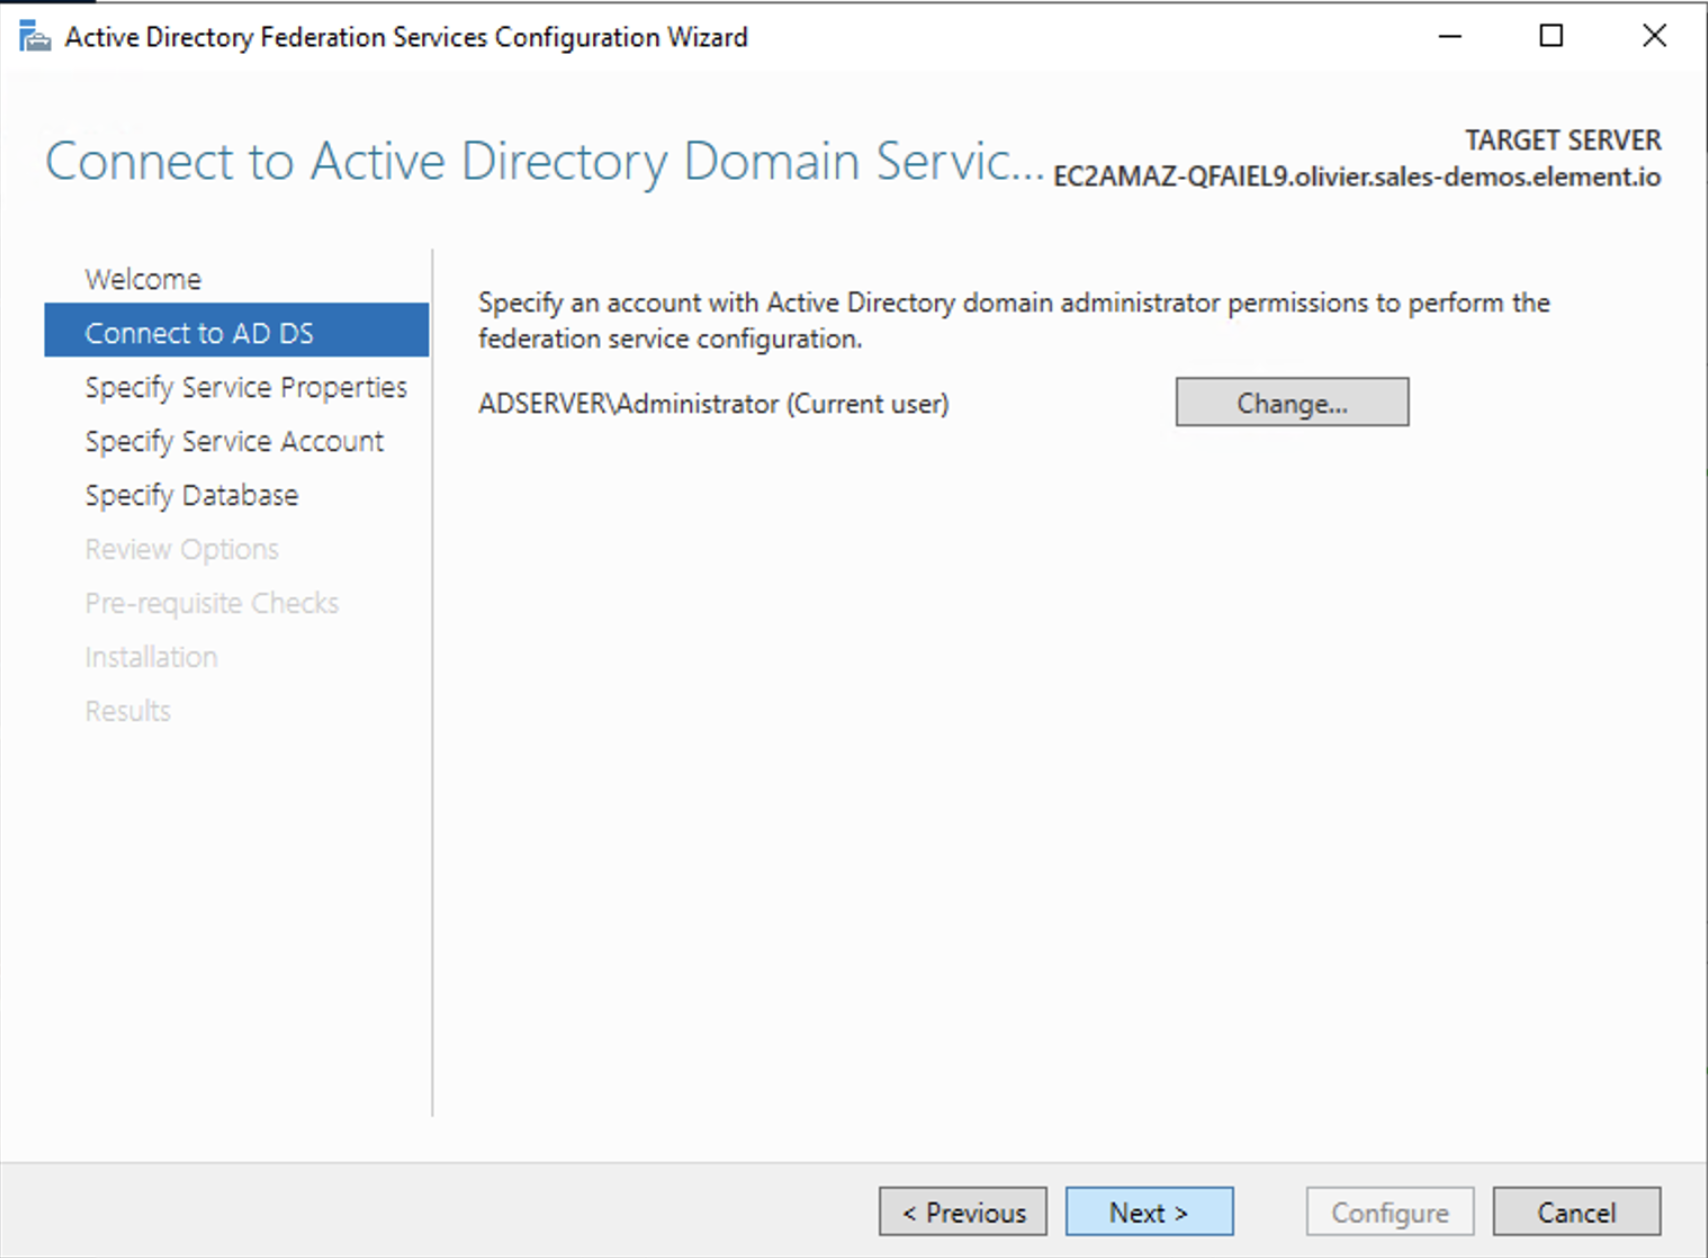
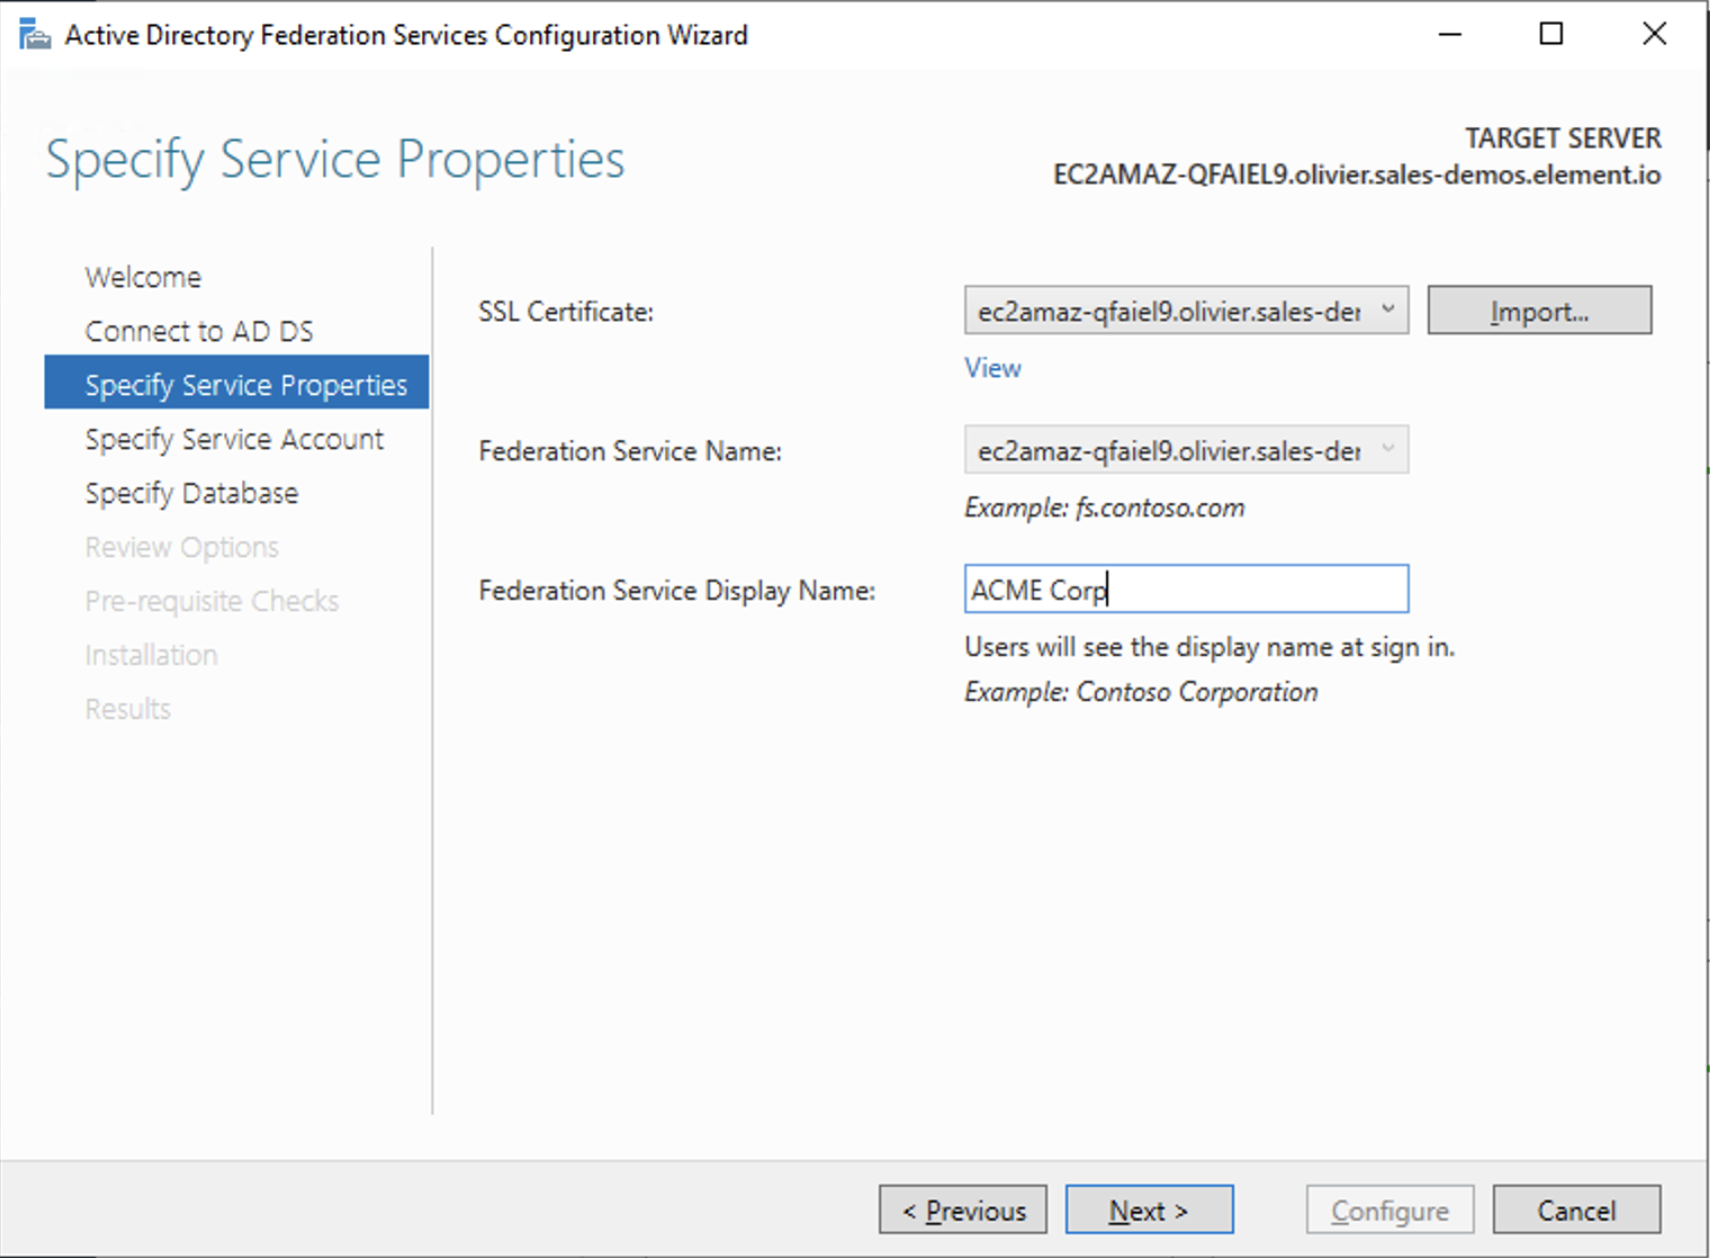
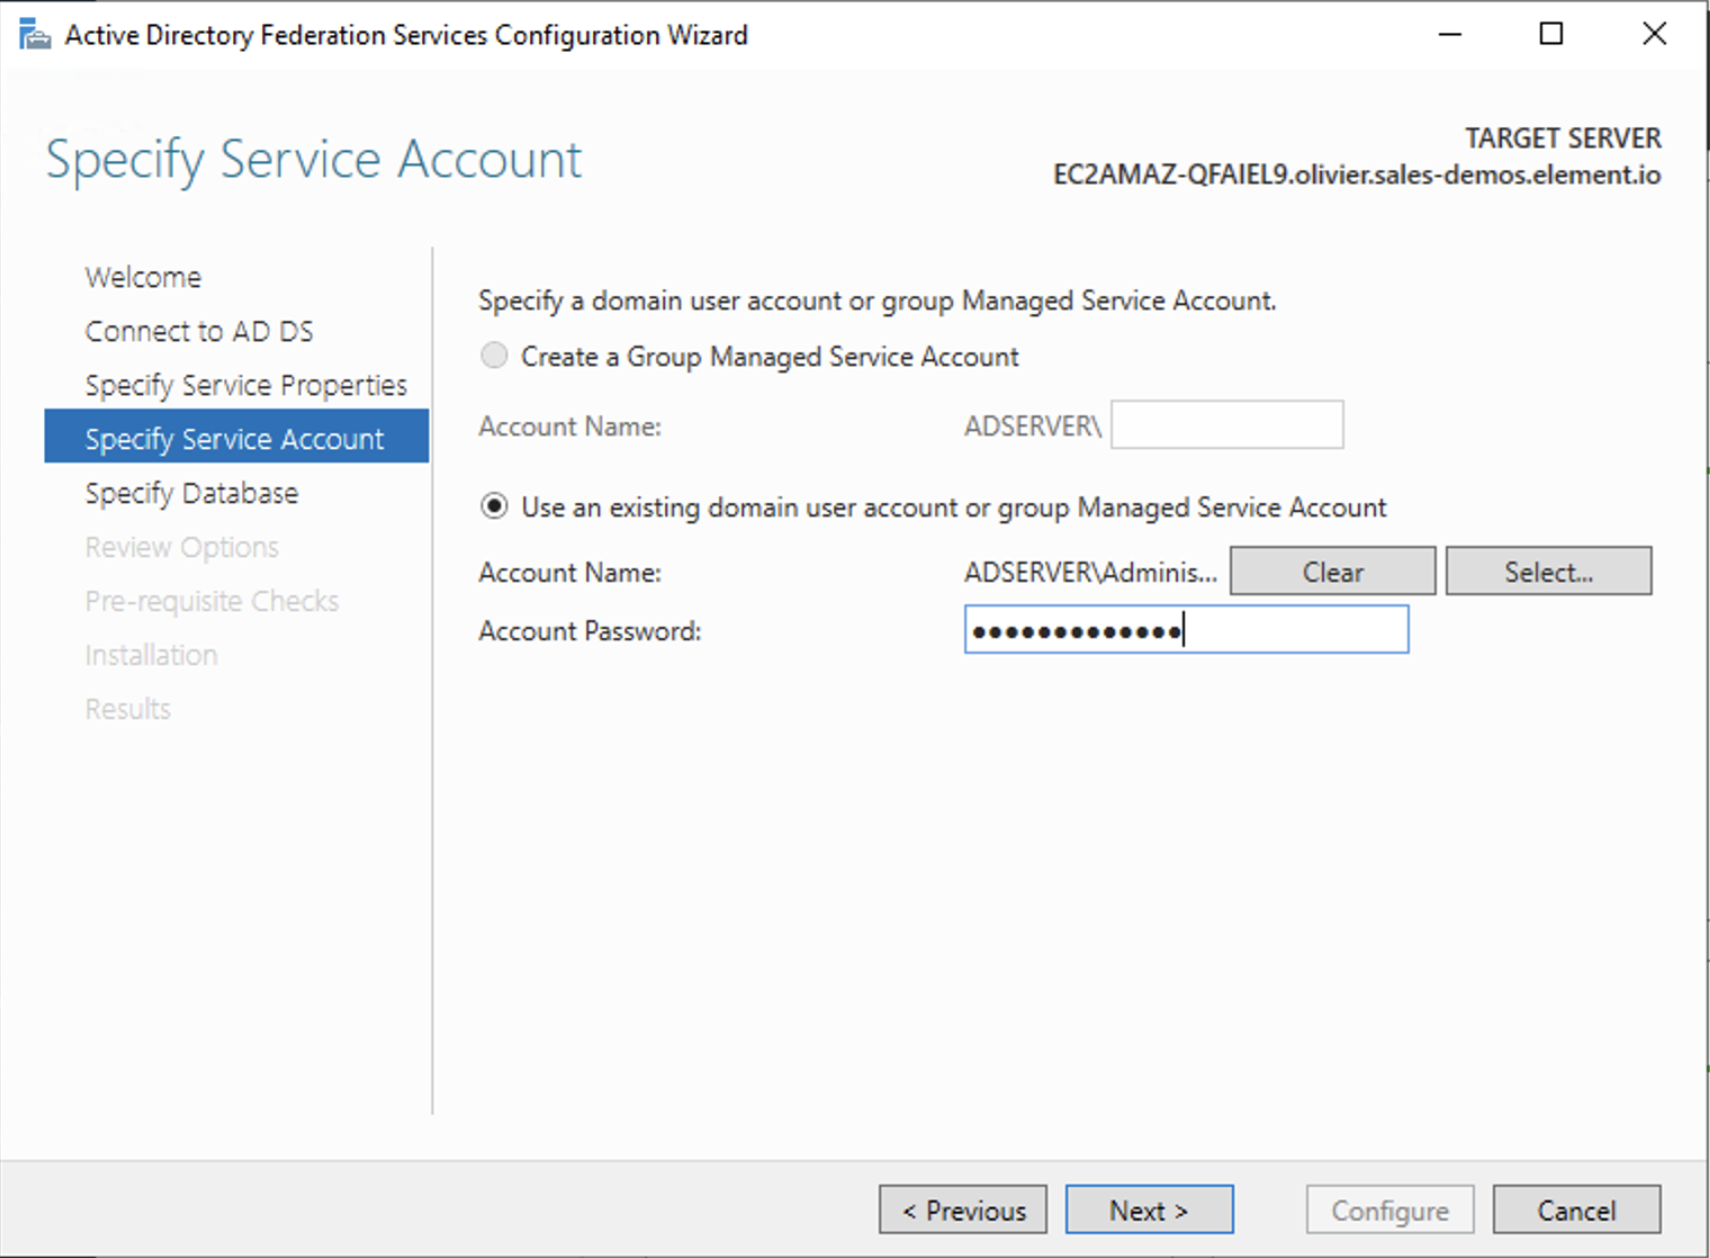
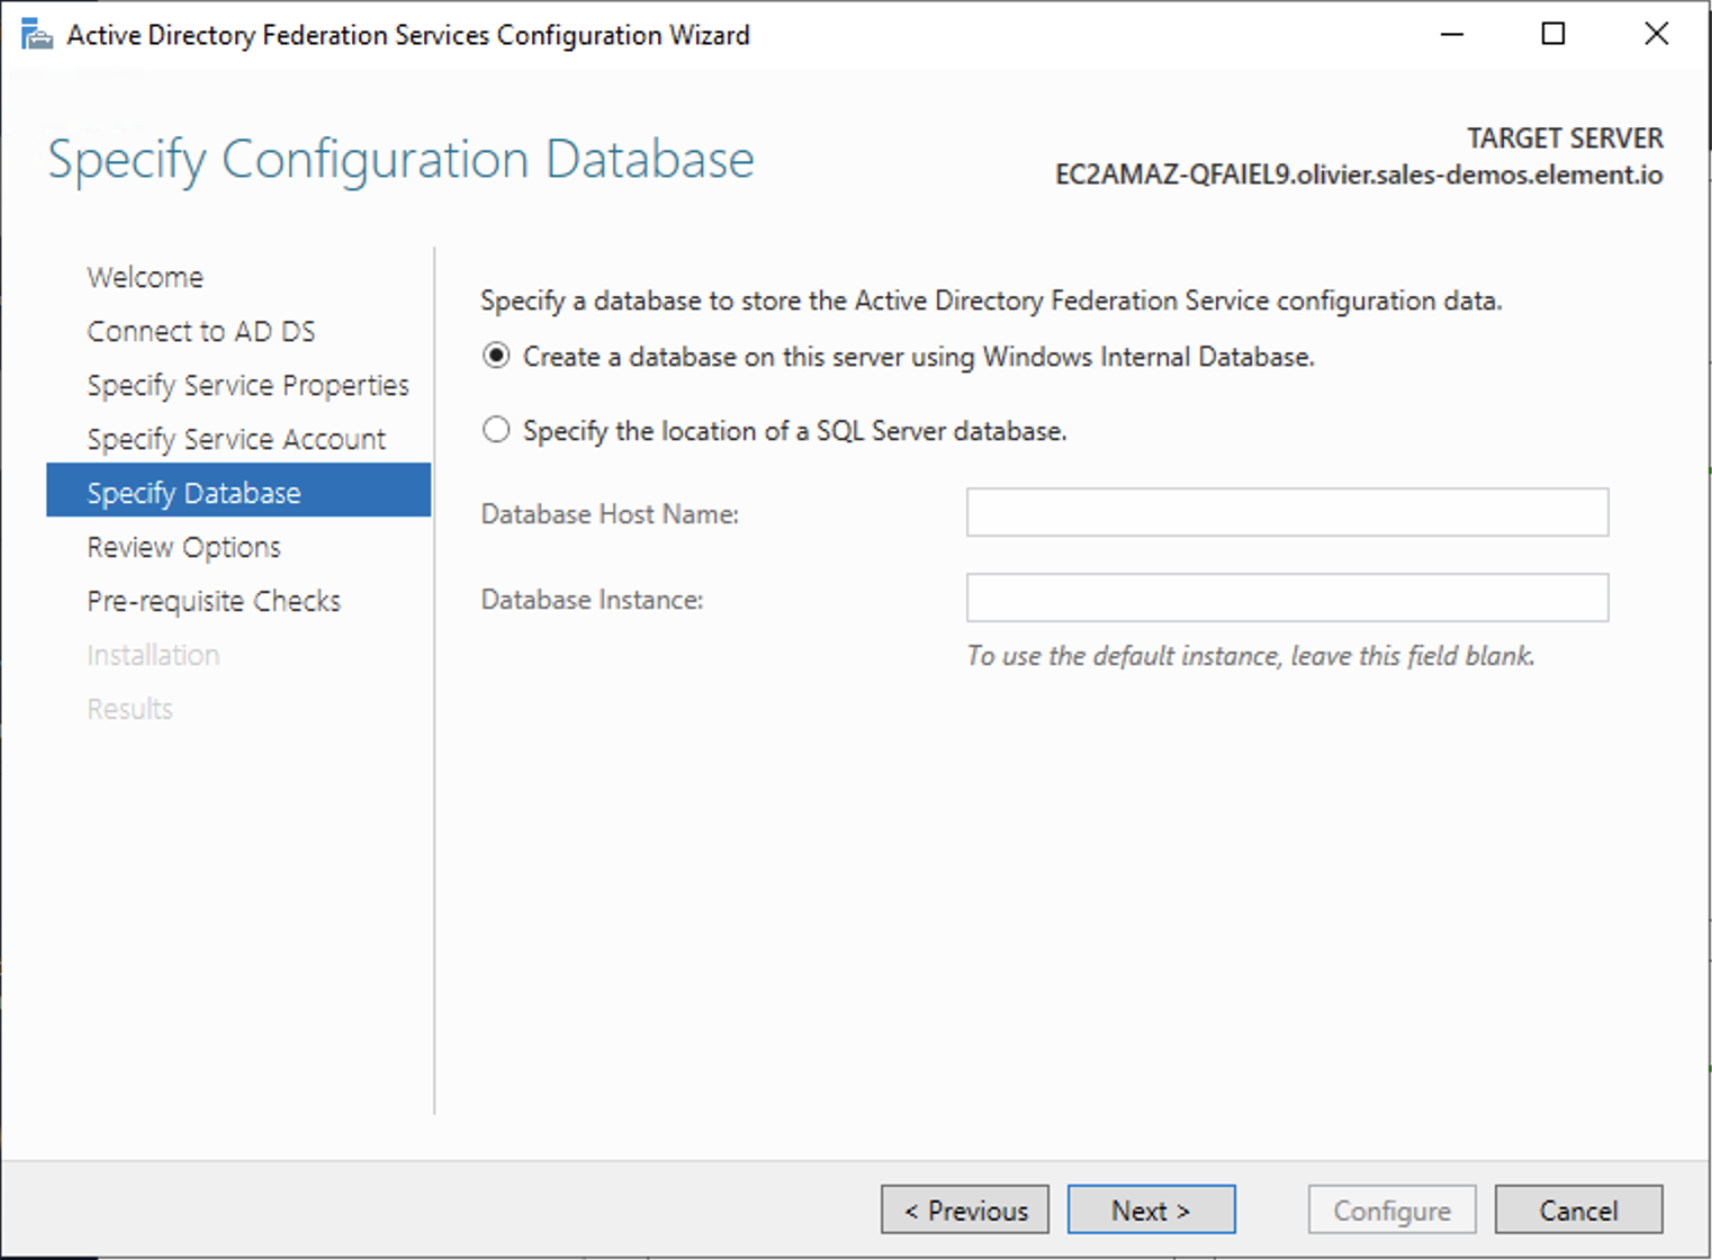
Configure
Restart the server
Add AD FS as an OpenID Connect identity provider
To enable sign-in for users with an AD FS account, create an Application Group in your AD FS.
To create an Application Group, follow theses steps:
Server Manager, select Tools, and then select AD FS Management
In AD FS Management, right-click on Application Groups and select Add Application Group
On the Application Group Wizard Welcome screen
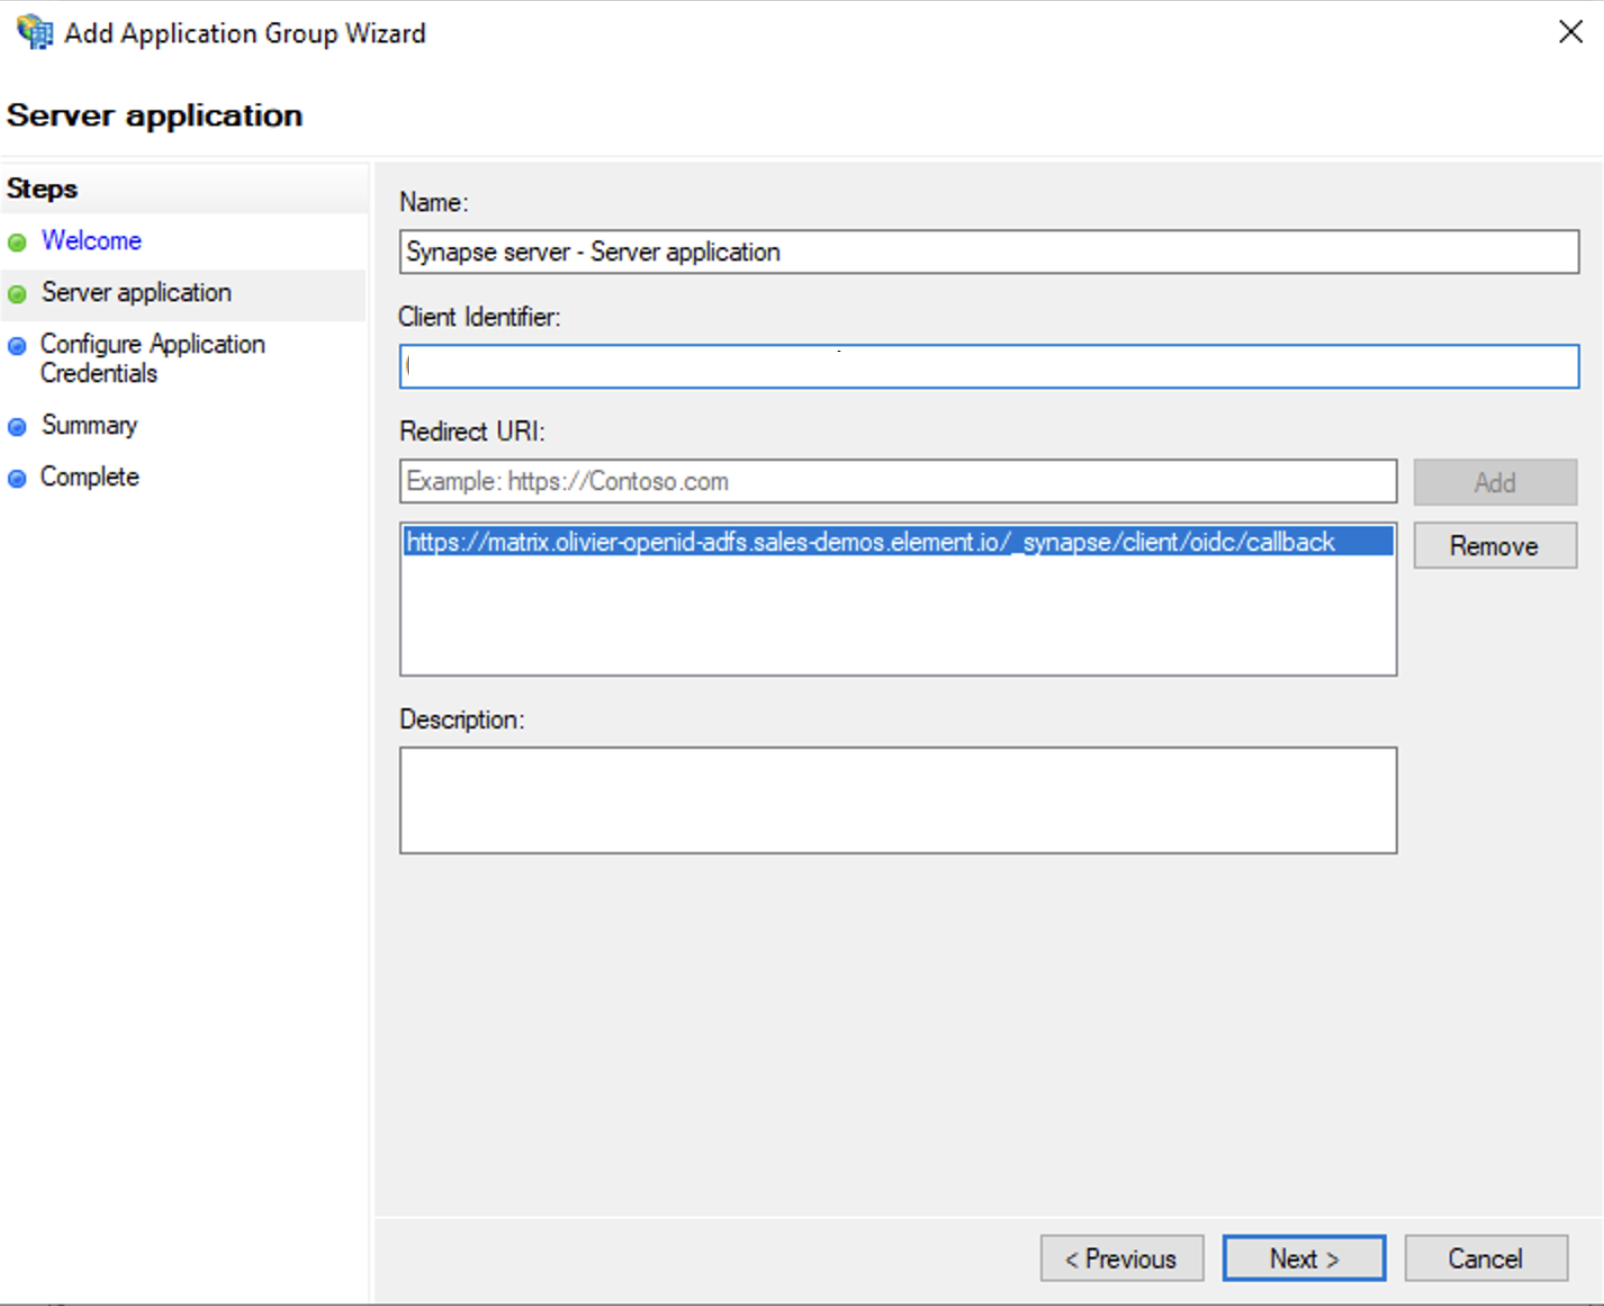
Standalone applications section, select Server application and click Next
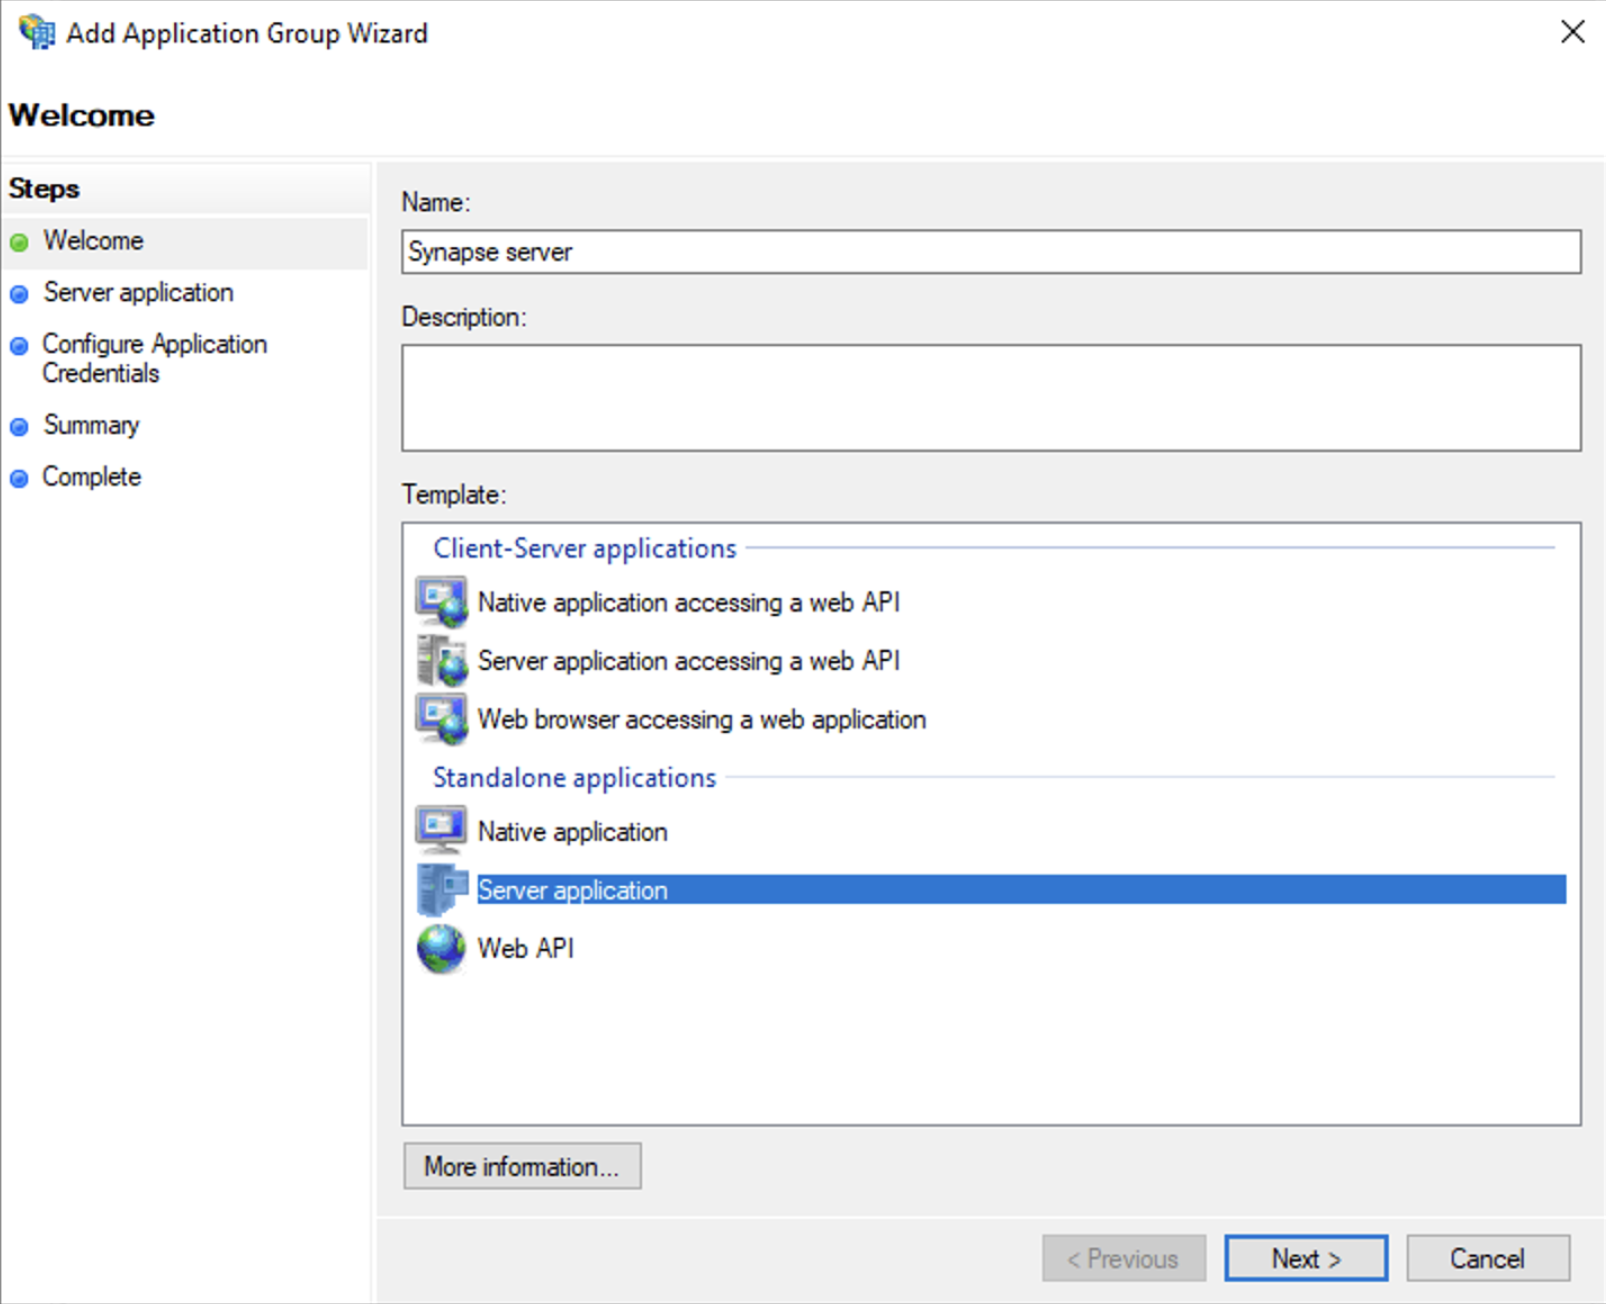
https://<matrix domain>/_synapse/client/oidc/callback in Redirect URI: field, click Add, save the Client Identifier somewhere, you will need it when setting up Element and click Next (e.g. https://matrix.domain.com/_synapse/client/oidc/callback)
Generate a shared secret checkbox and make a note of the generated Secret and press Next (Secret needs to be added in the Element Installer GUI in a later step)
Right click on the created Application Group and select `Properties``
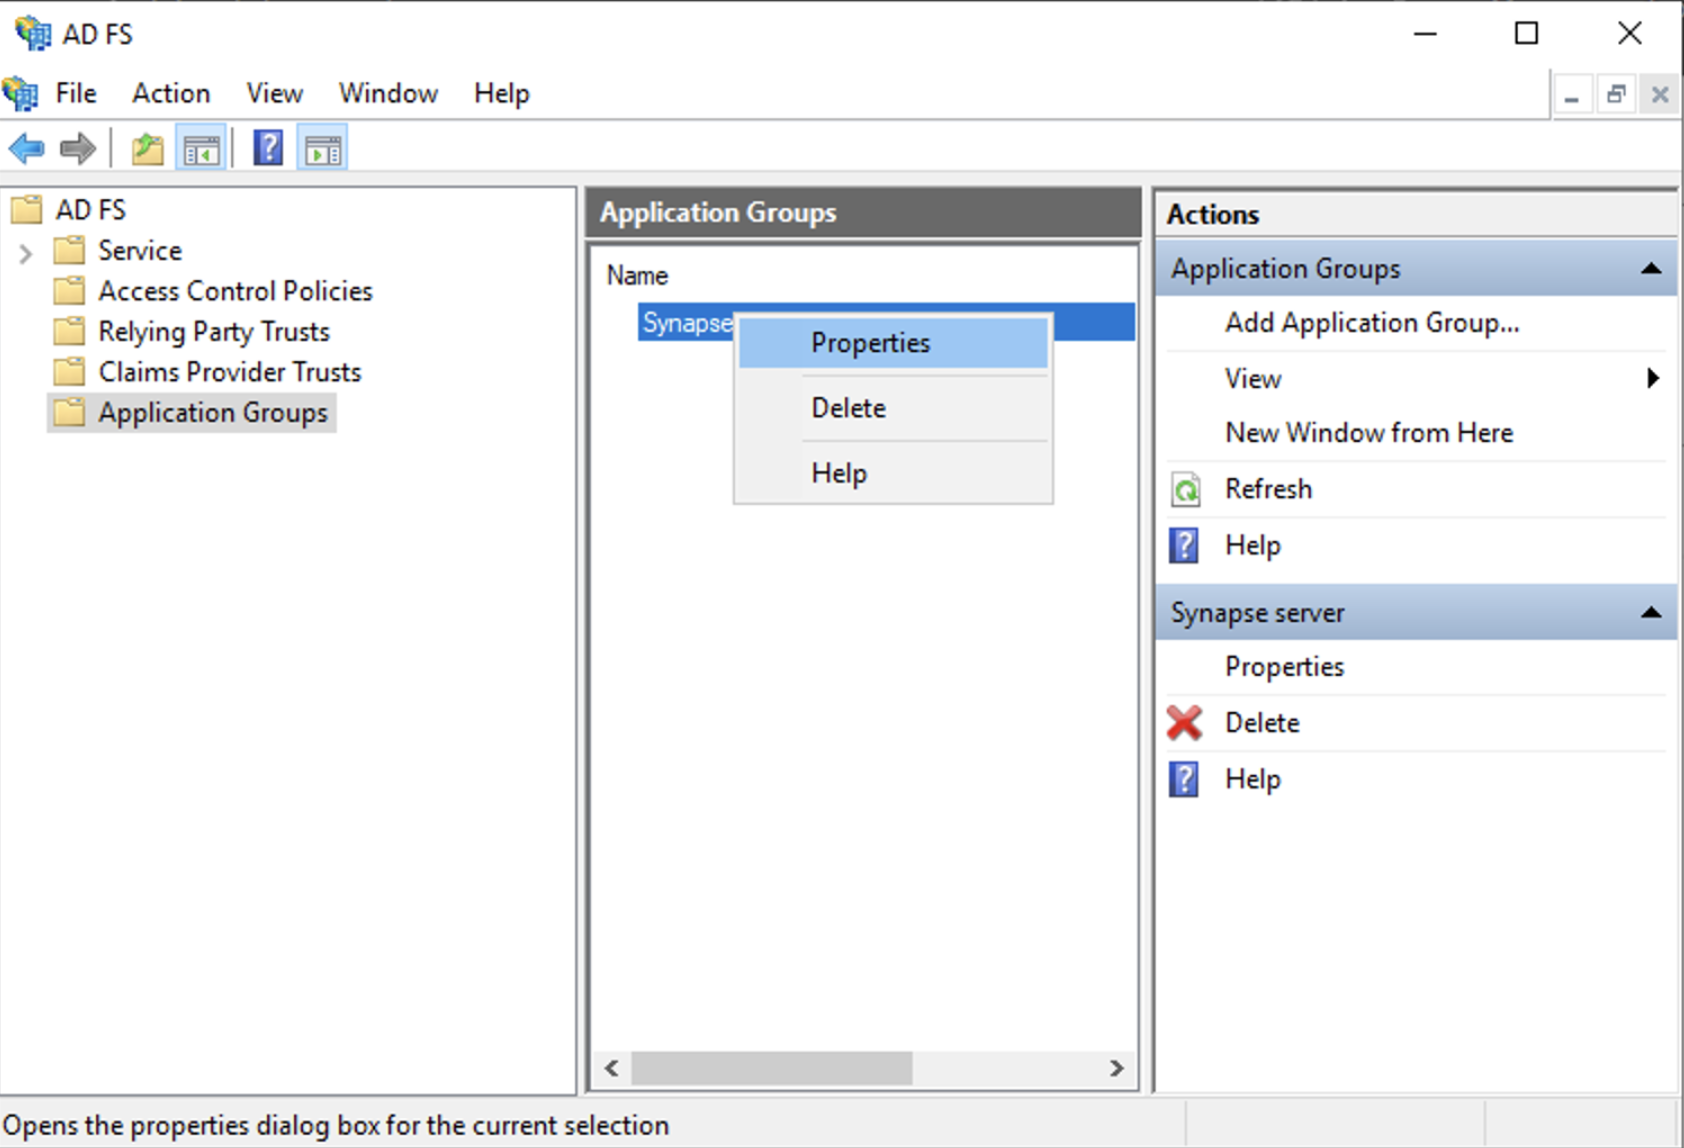
Add application... button.
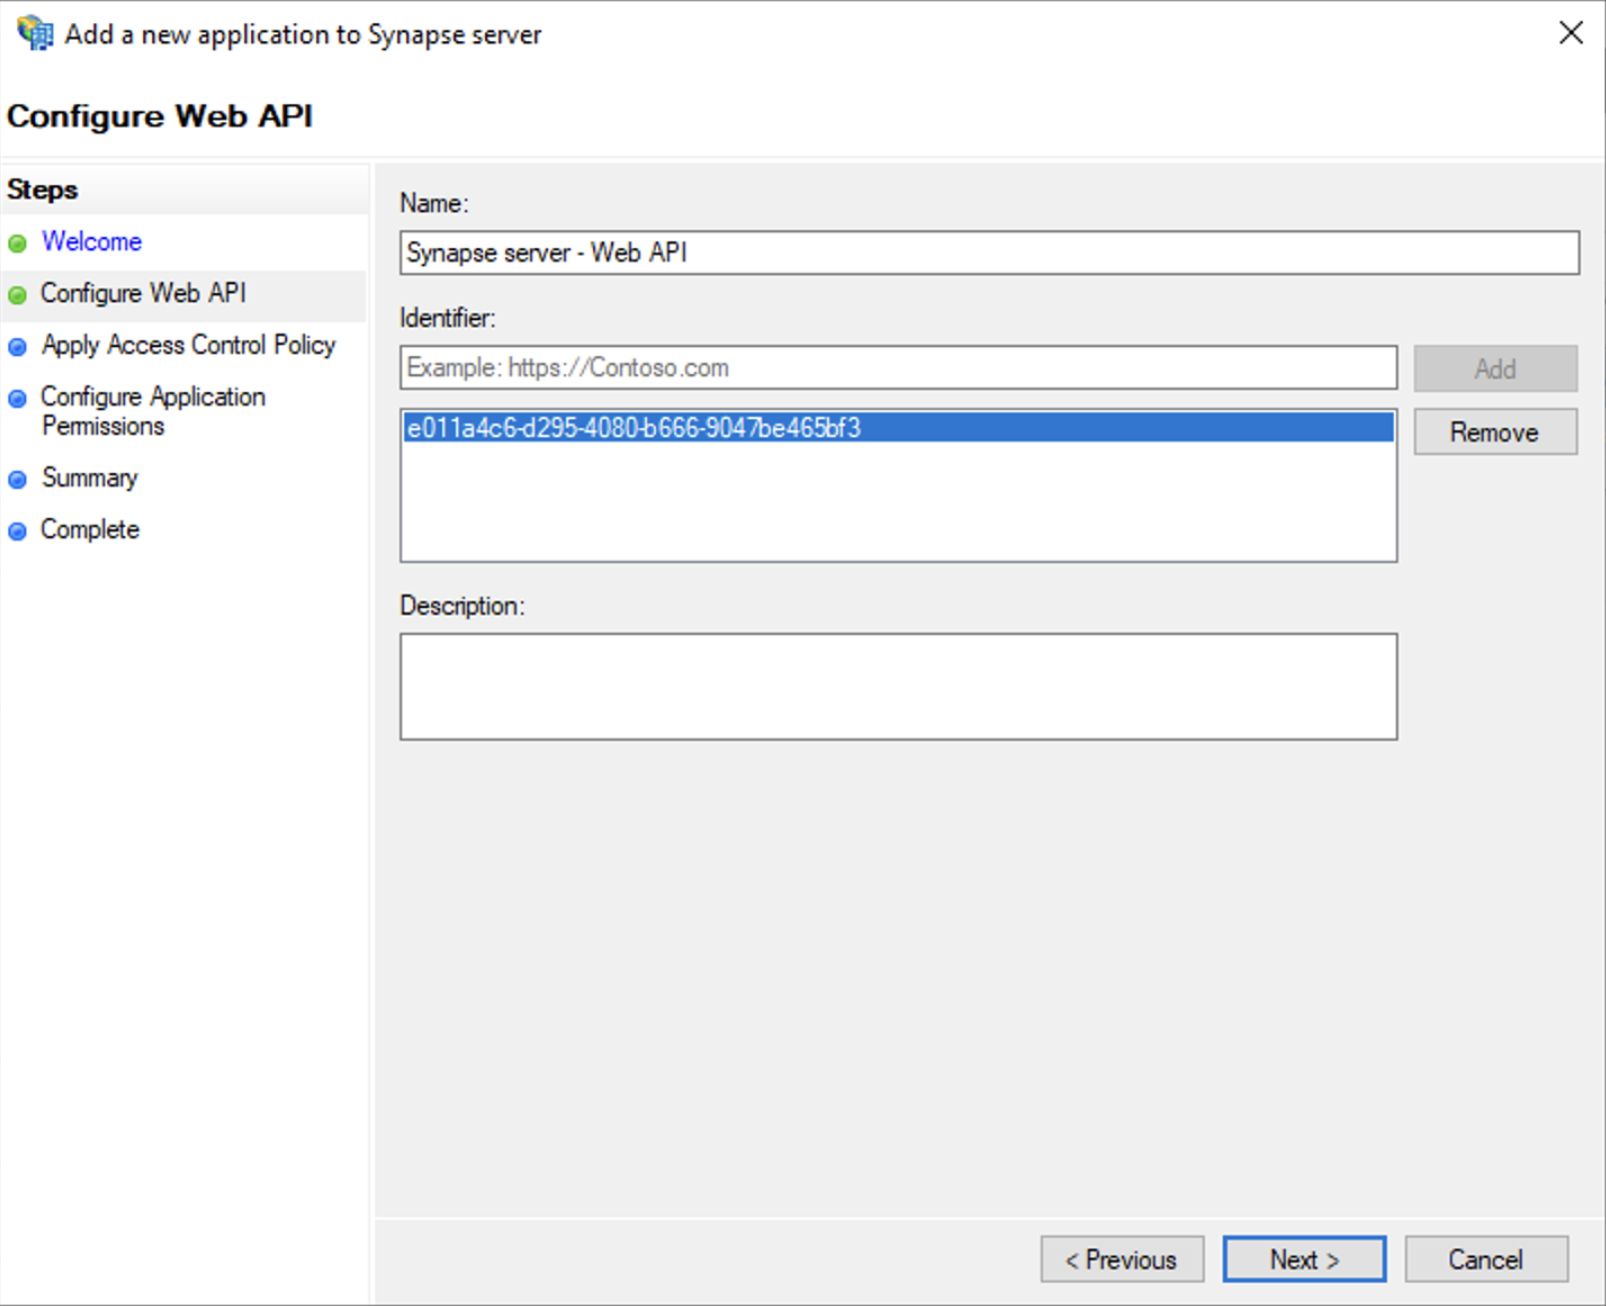
Select Web API
In the Identifier field, type in the client_id you saved before and click Next
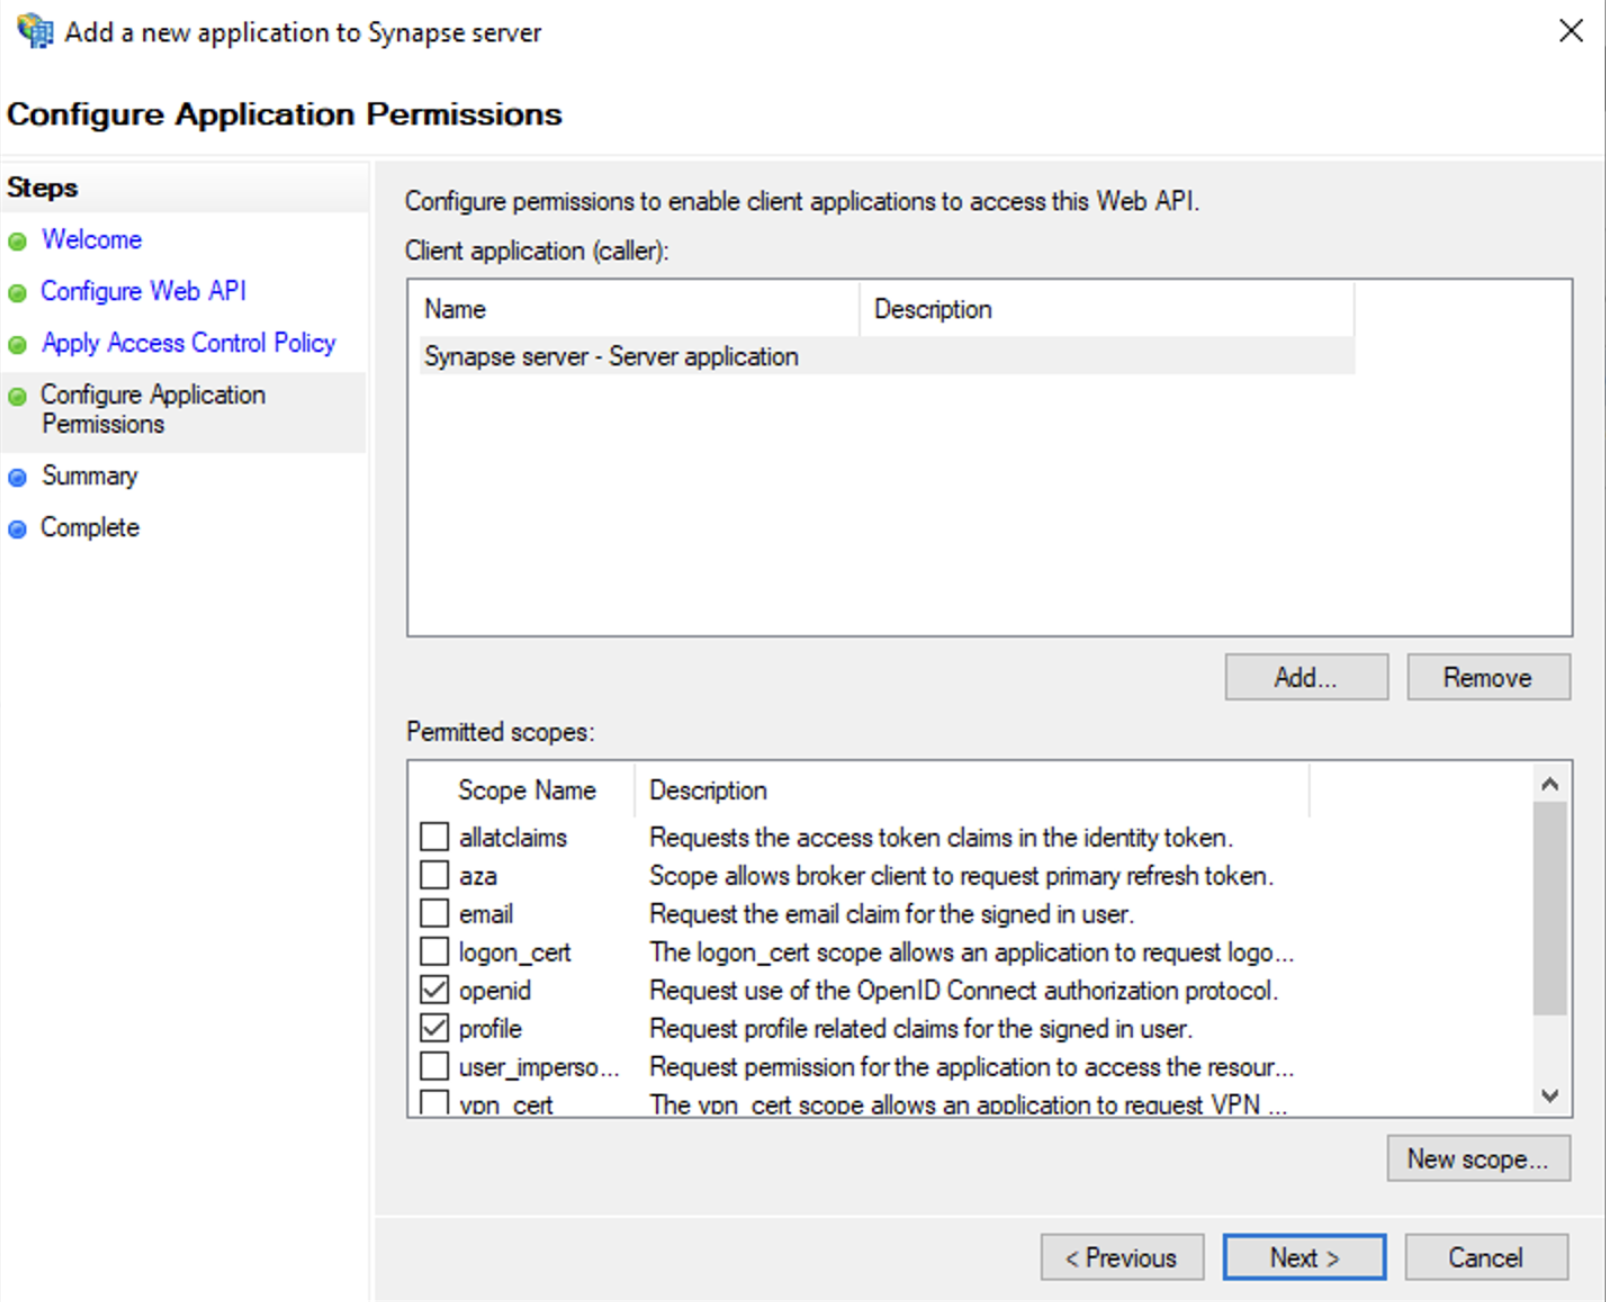
Permit everyone and click Next
Under Permitted scopes: select openid and profile and click Next
Summary page, click `Next``
Click Close and then OK
Export Domain Trusted Root Certificate
mmc.exe
Add the Certificates snap-in
Certificates, Computer account
Under Trusted Root Certification Authorities/Certificates, select your DC cert
Right click and select All Tasks/Export... and export as Base-64 encoded X 509 (.CER)
Copy file to local machine
Configure the installer
Add an OIDC provider in the 'Synapse' configuration after enabling Delegated Auth and set the following fields in the installer:
Allow Existing Users: if checked, it allows a user logging in via OIDC to match a pre-existing account instead of failing. This could be used if switching from password logins to OIDC.
Authorization Endpoint: the oauth2 authorization endpoint. Required if provider discovery is disabled.https://login.microsoftonline.com/<Directory (tenant) ID>/oauth2/v2.0/authorize
Backchannel Logout Enabled: Synapse supports receiving OpenID Connect Back-Channel Logout notifications. This lets the OpenID Connect Provider notify Synapse when a user logs out, so that Synapse can end that user session.
Client Auth Method: auth method to use when exchanging the token. Set it to Client Secret Basic or any method supported by your Idp
Client ID: the Client ID you saved before
Discover: enable/disable the use of the OIDC discovery mechanism to discover endpoints
Idp Brand: an optional brand for this identity provider, allowing clients to style the login flow according to the identity provider in question
Idp ID: a string identifying your identity provider in your configuration
Idp Name: A user-facing name for this identity provider, which is used to offer the user a choice of login mechanisms in the Element UI. In the screenshot bellow, Idp Name is set to Azure AD
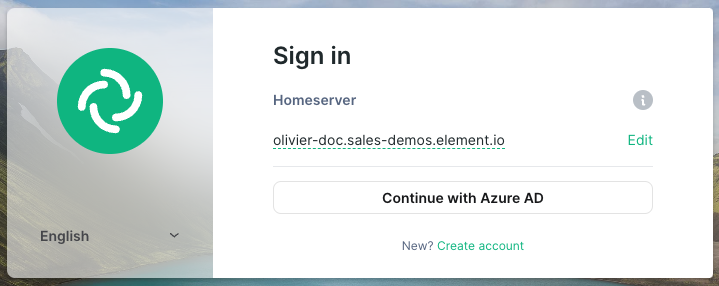
Issuer: the OIDC issuer. Used to validate tokens and (if discovery is enabled) to discover the provider's endpoints https://<your-adfs.domain.com>/adfs/
Token Endpoint: the oauth2 authorization endpoint. Required if provider discovery is disabled.
Client Secret: your client secret you saved before.
Scopes: add every scope on a different line
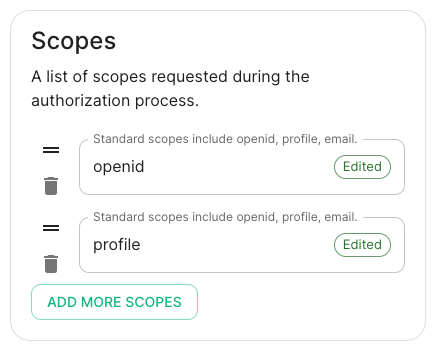
Localpart Template: Jinja2 template for the localpart of the MXID. Set it to {{ user.upn.split('@')[0] }} for AD FS
Other configurations are documented here.
SAML on Microsoft Azure
Before setting up the installer, you have to configure Microsoft Entra ID.
Set up Microsoft Entra ID
With an account with enough rights, go to : Enterprise Applications
- Click on
New Application - Click on
Create your own applicationon the top left corner - Choose a name for it, and select
Integrate any other application you don't find in the gallery - Click on "Create"
- Select
Set up single sign on - Select
SAML -
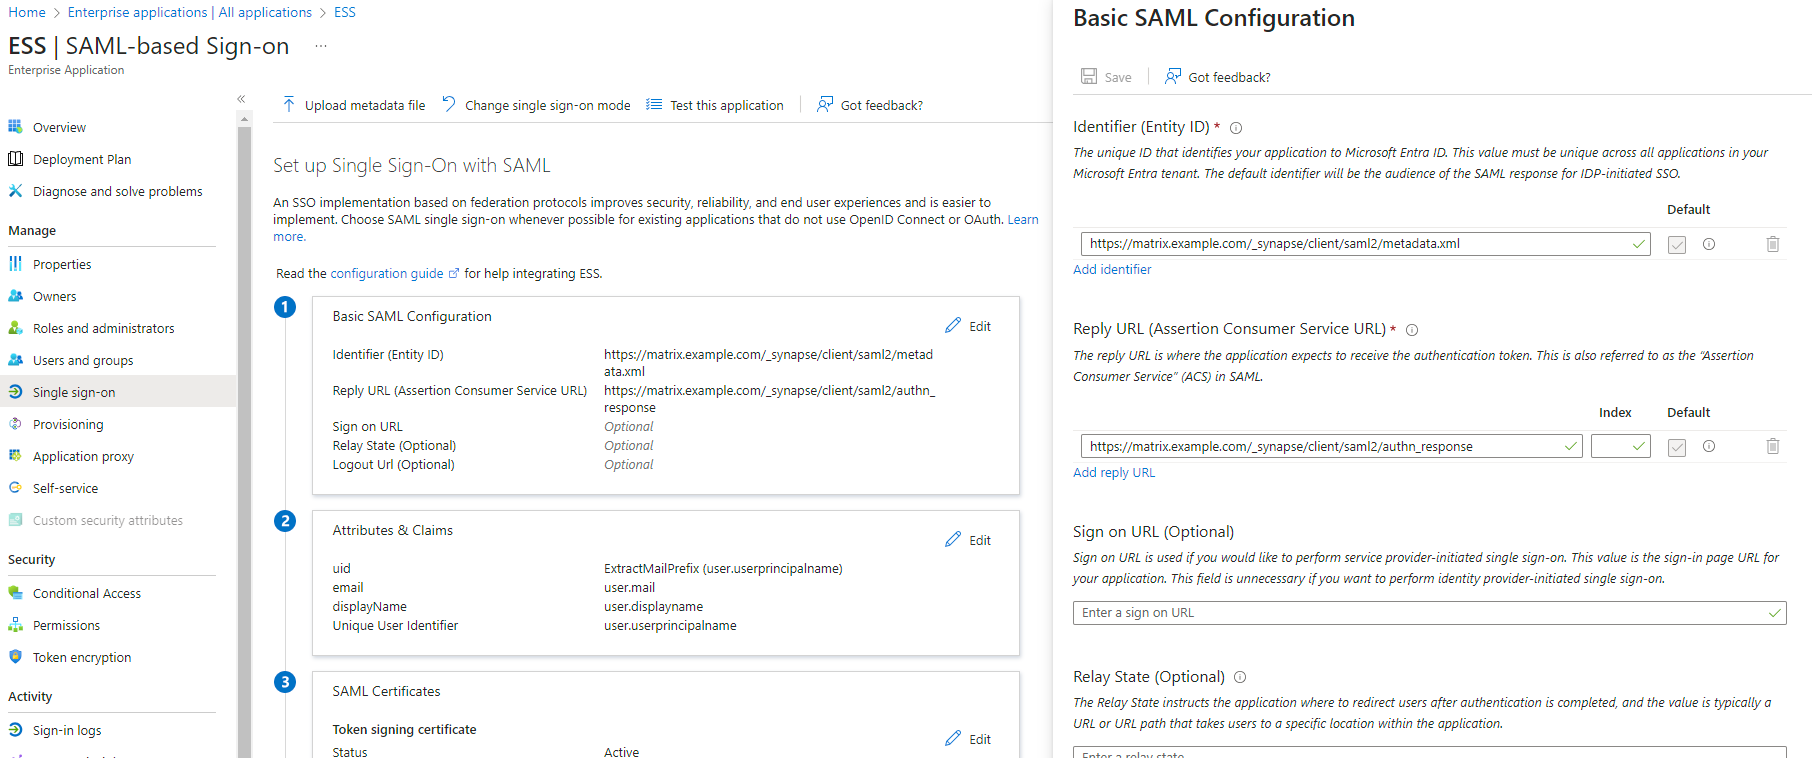
EditonBasic SAML Configuration - In
Identifier, add the following URL :https://synapse_fqdn/_synapse/client/saml2/metadata.xml - Remove the default URL
- In
Reply URL, add the following URL :https://synapse_fqdn/_synapse/client/saml2/authn_response - Click on
Save
- Make a note of the
App Federation Metadata UrlunderSAML Certificatesas this will be required in a later step. -
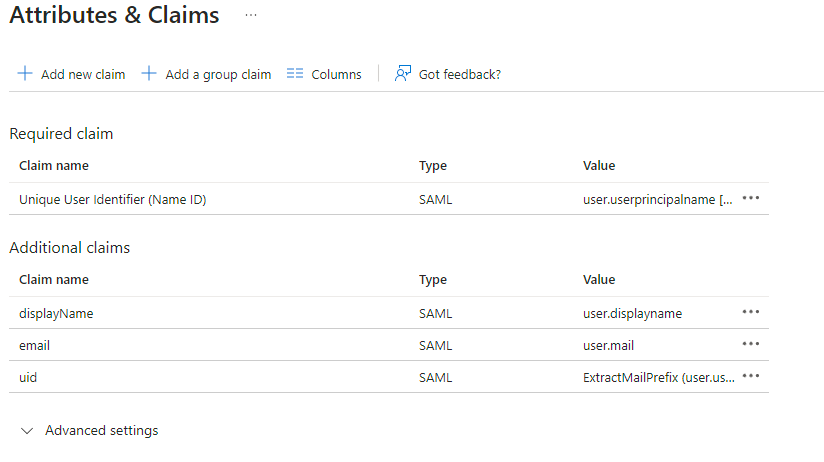
EditonAttributes & Claims - Remove all defaults for additional claims
- Click on
Add new claimto add the following (suggested) claims (the UID will be used as the MXID):- Name:
uid, Transformation :ExtractMailPrefix, Parameter 1 :user.userprincipalname - Name:
email, Source attribute :user.mail - Name:
displayName, Source attribute :user.displayname
- Name:
- Click on
Save
- In the application overview screen select
Users and Groupsand add groups and users which may have access to element
Configure the installer
Add a SAML provider in the 'Synapse' configuration after enabling Delegated Auth and set the following (suggested) fields in the installer:
-
Allow Unknown Attributes.
Checked -
Attribute Map.
SelectURN:Oasis:Names:TC:SAML:2.0:Attrname Format:Basicas theIdentifier -
Mapping.
Set the following mappings:- From:
Primary EmailTo:email - From:
First NameTo:firstname - From:
Last NameTo:lastname
- From:
-
Entity.
-
Description.
- Entity ID. (From Azure)
-
Name.
-
Description.
-
User Mapping Provider.
Set the following:-
MXID Mapping:Dotreplace -
MXID Source Attribute:uid
-
-
Metadata URL.
Add theApp Federation Metadata URLfrom Azure.