Migrating from Self-Hosted to ESS
Preparation
This section outlines what you should do ahead of the migration in order to ensure the migration goes as quickly as possible and without issues.
- At the latest 48 hours before your migration is scheduled, set the TTL on any DNS records that need to be updated to the lowest allowed value.
- Upgrade your Synapse to the same version as ESS is running (details on finding this below)
- This is not required, but if your Synapse version is not the same as the EMS version, your migration will take longer.
- Check the size of your database:
- PostgreSQL: Connect to your database and issue the command
\l+
- PostgreSQL: Connect to your database and issue the command
- Check the size of your media repository and report to your EMS contact.
- Synapse Media Store:
du -hs /path/to/synapse/media_store/ - Matrix Media Repo: https://github.com/turt2live/matrix-media-repo/blob/master/docs/admin.md#per-server-usage
- Synapse Media Store:
- If you are using SQLite instead of PostgreSQL, you should port your database to PostgreSQL by following this guide before dumping your database
Setup the new host
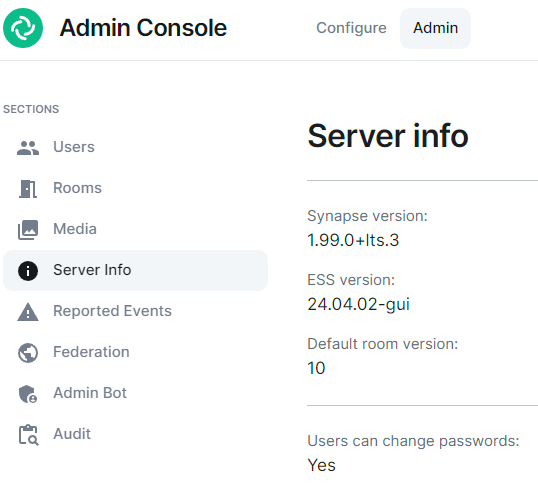
Follow the ESS docs for first-time installation, configuring to match your existing homeserver before proceeding with the below. Once installed, via the installer access the Admin tab and then Server Info to confirm the Synapse version deployed with the version of the installer you are using:
SSH to your matrix server
You might want to run everything in a tmux or a screen session to avoid disruption in case of a lost SSH connection.
Upgrade Synapse to the same version EES is running
Follow https://element-hq.github.io/synapse/latest/upgrade.html
Start Synapse, make sure it's happy Stop Synapse
Create a folder to store everything
mkdir -p /tmp/synapse_export
cd /tmp/synapse_export
The guide from here on assumes your current working directory is /tmp/synapse_export.
Set restrictive permissions on the folder
If you are working as root: (otherwise set restrictive permissions as needed):
chmod 000 /tmp/synapse_export
Copy Synapse config
Get the following files :
- Your Synapse configuration file (usually
homeserver.yaml) - Your message signing key.
- This is stored in a separate file. See the Synapse config file [
homeserver.yaml] for the path. The variable issigning_key_pathhttps://github.com/element-hq/synapse/blob/v1.32.2/docs/sample_config.yaml#L1526-L1528
- This is stored in a separate file. See the Synapse config file [
- grab
macaroon_secret_keyfromhomeserver.yamland place it in the "Secrets \ Synapse \ Macaroon"
Stop Synapse
Once Synapse is stopped, do not start it again after this
Doing so can cause issues with federation and inconsistent data for your users.
While you wait for the database to export or files to transfer, you should edit or create the well-known files and DNS records to point to your new EES host. This can take a while to update so should be done as soon as possible in order to ensure your server will function properly when the migration is complete.
Database export
PostgreSQL
Dump and Compress
pg_dump -Fc -O -h <dbhost> -U <dbusername> -d <dbname> -W -f synapse.dump
-
<dbhost>(ip or fqdn for your database server) -
<dbusername>(username for your synapse database) -
<dbname>(the name of the database for synapse)
Import DB
Enter a bash shell on the Synapse postgres container:
kubectl exec -it -n element-onprem synapse-postgres-0 --container postgres -- /bin/bash
Then on postgres container shell run:
psql -U synapse_user synapse
The following command will erase the existing Synapse Database without warning or confirmation. Please ensure that is is the correct database and there is no production data on it.
DO $$ DECLARE
r RECORD;
BEGIN
  FOR r IN (SELECT tablename FROM pg_tables WHERE schemaname = current_schema()) LOOP
    EXECUTE 'DROP TABLE ' || quote_ident(r.tablename) || ' CASCADE';
  END LOOP;
END $$;

DROP sequence cache_invalidation_stream_seq;
DROP sequence state_group_id_seq;
DROP sequence user_id_seq;
DROP sequence account_data_sequence;
DROP sequence application_services_txn_id_seq;
DROP sequence device_inbox_sequence;
DROP sequence event_auth_chain_id;
DROP sequence events_backfill_stream_seq;
DROP sequence events_stream_seq;
DROP sequence presence_stream_sequence;
DROP sequence receipts_sequence;
DROP sequence un_partial_stated_event_stream_sequence;
DROP sequence un_partial_stated_room_stream_sequence;
Use \q to quit, then back on the host run:
gzip -d synapse_export.sql.gz
sudo cp synapse_export.sql /data/postgres/synapse/
Finally on the pod:
cd /var/lib/postgresql/data
pg_restore <connection> --no-owner --role=<new role> -d <new db name> dump.sql