Using the Installer in an Air-Gapped Environment
Defining Air-Gapped Environments
An air-gapped environment is any environment in which the running hosts will not have access to the greater internet. This proposes a situation in which these hosts are unable to get access to various needed bits of software from Element and also are unable to share telemetry data back with Element.
For some of these environments, they can be connected to the internet from time to time and updated during those connection periods. In other environments, the hosts are never connected to the internet and everything must be moved over sneaker net.
This guide will cover running the microk8s installer when only sneaker net is available as that is the most restrictive of these environments.
Preparing the media to sneaker net into the air gapped environment
You will need our airgapped dependencies .tar.gz file which you can get from Element:
- element-enterprise-installer-airgapped-<version>
.-gui.tar.gz
Running the installer in the air gapped environment
Extract the airgapped dependencies to the airgappedaton the rootmachine ofyou theare installerinstalling folder.from. You obtain the following directories :
-
airgapped/pip -
airgapped/galaxy -
airgapped/snaps -
airgapped/containerd -
airgapped/images
Your airgapped machine will still require access to airgapped linux repositories depending on your OS.
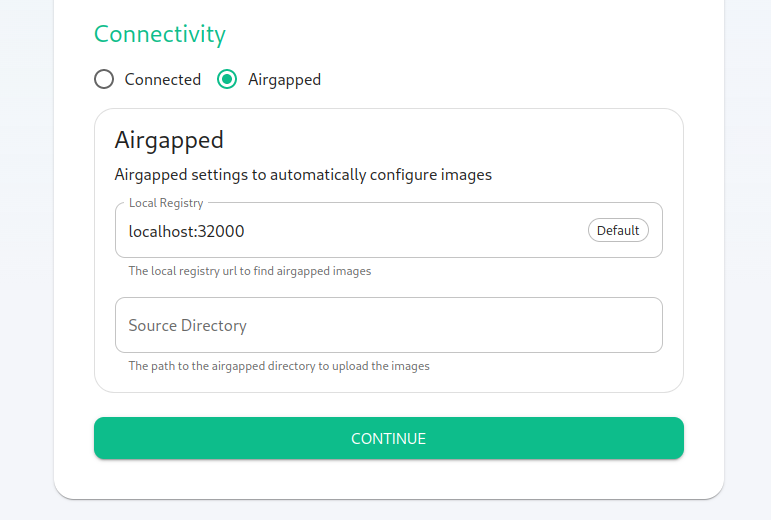
When using the followinginstaller, parametersselect in"Airgapped" youron parameters.ymlthe :first hosts screen.
- Local
local_registry:Registrylocalhost:32000should - be
images_dir:left<alone unless you have a separet custom registry that you would like to u se.For the Source directory, you need to specify the absolute path to the
airgapped/imagesdirectory>that
The
The installer will upload the images automatically to your local registry, and use these references to start the workloads.
When running the install script, add the parameter --airgapped so that it installs its pip and galaxy dependencies from the airgapped folder.
If you are using the kubernetes installer (instead of the single node installer), please note that once the image upload has been done, you will need to copy the airgapped/images/images_digests.yml file to the same path on the machine which will be used to render or deploy element services. Doing this, the new image digests will be used correctly in the kubernetes manifests used for deployment.

