Setting up GitLab, GitHub, JIRA and Webhooks Integrations With the Installer

In Element EnterpriseServer On-Premise,Suite, our GitLab, GitHub, and JIRA integrationsextensions are provided by the hookshot package. This documentation explains how to configure the installer to install hookshot and then how to interact with hookshot once installed.hookshot.

Configuring Hookshot with the Installer

    Copy sample file from config-sample/hookshot/hookshot.yml in

    From the installerInstaller's directoryIntegrations topage, click ~/.element-onpremise-config/hookshot"Install"

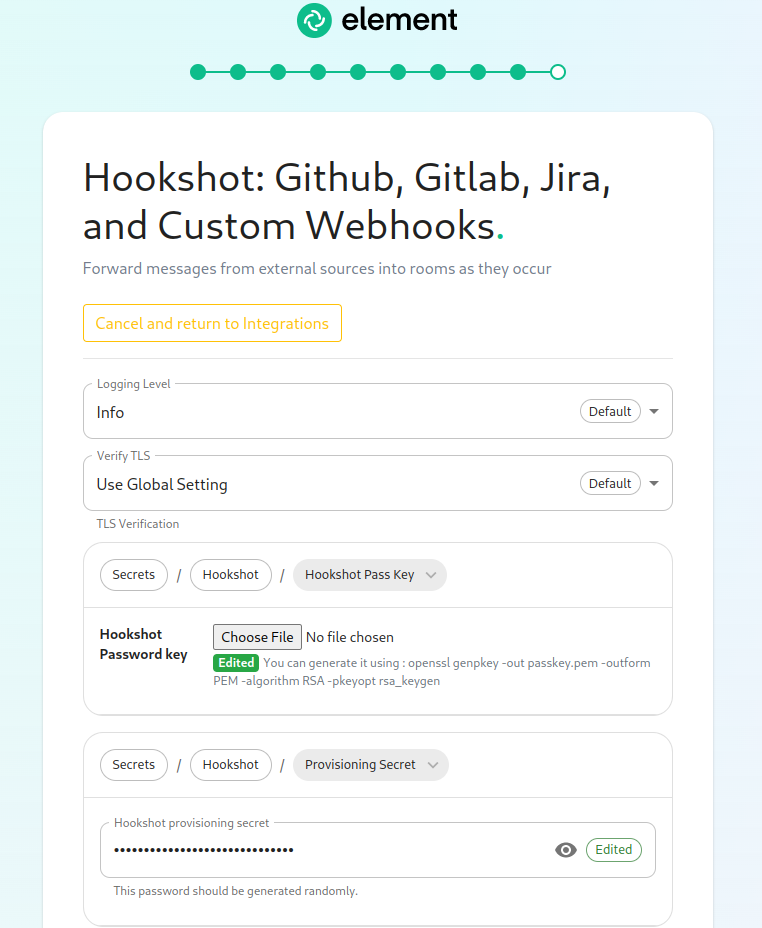
    under Edit"Hookshot: Github, Gitlab, Jira, and Custom Webhooks."

    hookshot1.png

    On the filefirst withscreen here, we can set the following values :

      logging_level : The logging level and hookshot_fqdn : The adress ofa hookshot webhookspecific fqdn.verify Ittls shouldsetting. matchMost something like hookshot.<fqdn.tld> passkey : The name of the local key file. Itusers can beleave generatedthese usingalone. openssl

      To -use opensslhookshot, genrsa -out key.pem 4096

      provisioning_secret : The provisioning secret used with integration managers. Necessary for integration with integrator. bot_display_name : The name of hookshot bot bot_avatar : An mxc:// uri to the hookshot bot avatar image. verify_tls : Optional. If doing a POC with self-signed certificates, set this to 0. Defaults to 1. disallowed_ip_ranges : Optional. A list of IP ranges to not allow connectivity to. For more information on this, please see: https://ems-docs.element.io/books/ems-knowledge-base/page/hookshot-fails-to-display-configuration-widget Restart the install script

      Enabling GitHub Integration

      On GitHub

        This bridge requires a GitHub App. Youyou will need to creategenerate one.a Onhookshot thepassword callbackkey, URL,when setcan be done by running the following onecommand :on a Linux command line:
        https://<hookshot_fqdn>/oauthgenrsa -out passkey.pem 4096
        
        and

        which enablewill generate output similar to this:

        RequestGenerating userRSA authorizationprivate key, 4096 bit long modulus (OAuth)2 duringprimes)
        installation..................++++
        
        ..............++++ One theis webhook URL, set the following one : https://<hookshot_fqdn>/65537 (don't0x010001) forget the

        Once endingthis /)

        has For the webhook secret,finished, you canwill generatehave one using pwgen 32 1 to generate one for example. Keep it somewhere safe, you'll need to to configure the bridge. Set the following permissions for the webhook :
          Repository
            Actions (read) Contents (read) Discussions (read & write) Issues (read & write) Metadata Projects (read & write) Pull requests (read & write) Organisation
              Team Discussions (read & write) Install the App

              On the installation

                Copy samplea file fromcalled config-sample/hookshot/github.ymlpasskey.pem in the installer directory to  ~/.element-onpremise-config/hookshot Edit the file with the following values :
                  github_auth_id : The AppID given in your github app page github_key_file : The key file received via the Generate a private key button under Private keys section of the github app page. github_webhook_secret : The webhook secret configured in the app. github_oauth_client_id : The OAuth ClientID of the github app page. github_oauth_client_secret : The OAuth Client Secret of the github app page. github_oauth_default_options A mapping to enable special oauth options. Restart the install script

                  In Element's room

                    Start a private conversation with the bot Type github login Follow the link to connect the bot to the configured app As an administrator of the room, invite the hookshot bot Promote the bot to a Moderator/Admin If you have setup Integrator, youthat can use the integration manager to addupload a bridge to github

                    Enabling GitLab integration

                    On GitLab

                      Add a webhook underas the group"Hookshot orPassword thekey". repository you are targeting On the webhook URL, set the following one : https://<hookshot_fqdn>/ For the webhook secret, you can generate one using pwgen 32 1 to generate one for example. Keep it somewhere safe, you'll need to to configure the bridge. You should add the events

                      If you wish to triggerchange on.the hookshot provisioning secret, you can, but you can also leave this alone as it is randomly generated by the installer.
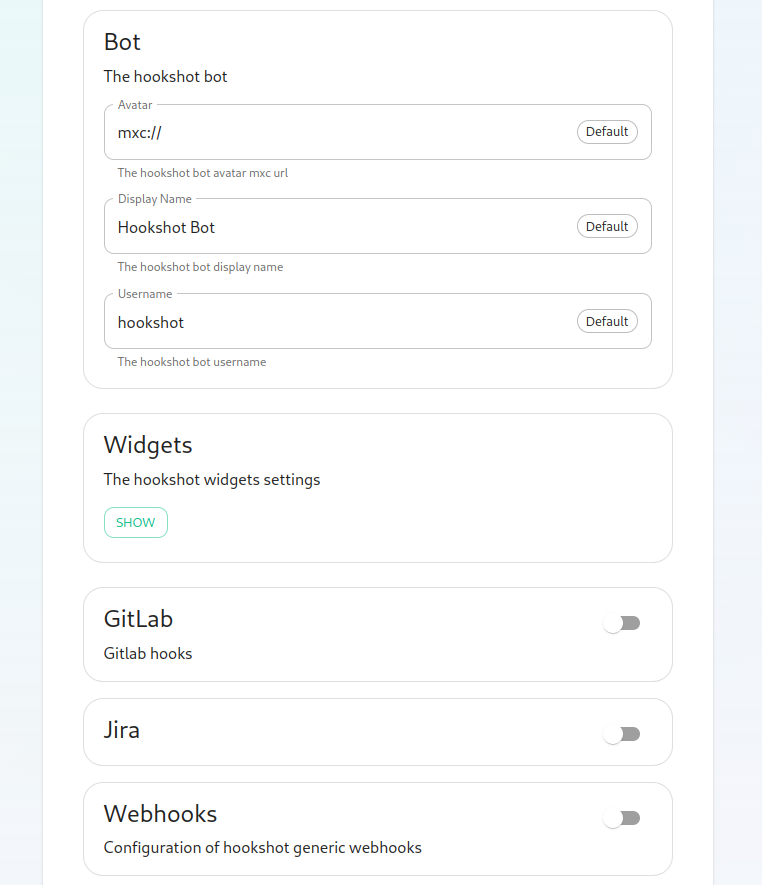
                      hookshot2.png

                      Next, we get to a set of settings that allow us to make changes to the Hookshot currentlybot's supports:appearance.

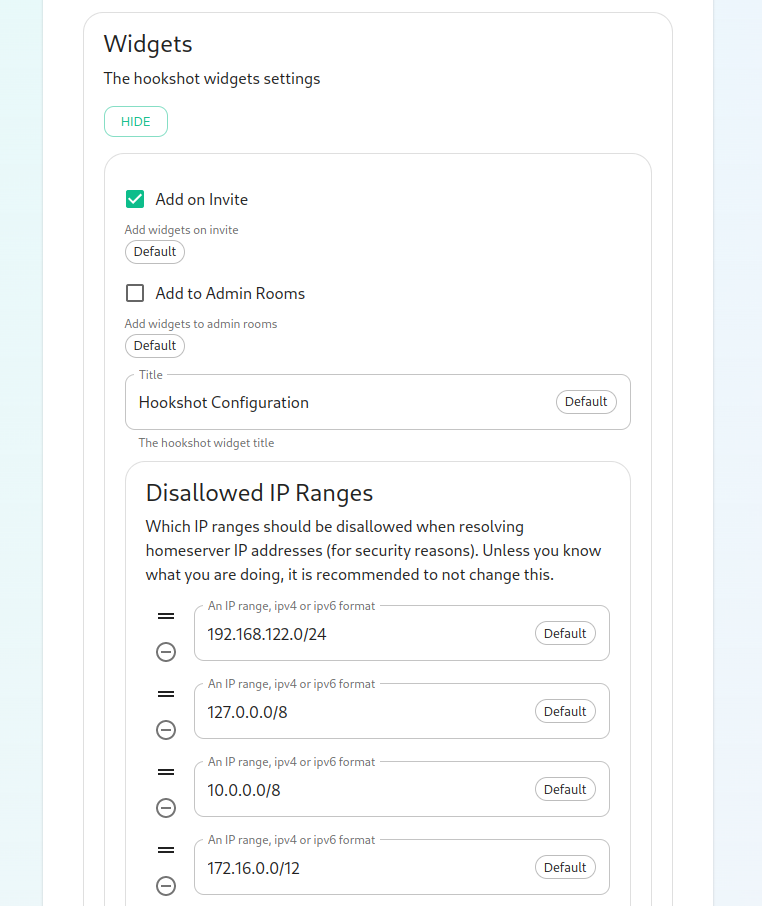
                        There

                        Pushis eventsalso Taga eventsbutton Issuesto eventsshow Mergewidget requestsettings, eventswhich Releasesbrings eventsup these options:

                        On

                        hookshot3.png

                        In this form, we have the installationability

                          to Copycontrol samplehow filewidgets fromare config-sample/hookshot/gitlab.ymlincorporated into rooms (the defaults are usually fine) and to set a list of Disallowed IP ranges wherein widgets will not load if the homeserver IP falls in the installerrange. directoryIf your homeservers IP falls in any of these ranges, you will want to remove ~/.element-onpremise-config/hookshotthat range Editso that the filewidgets withwill load!

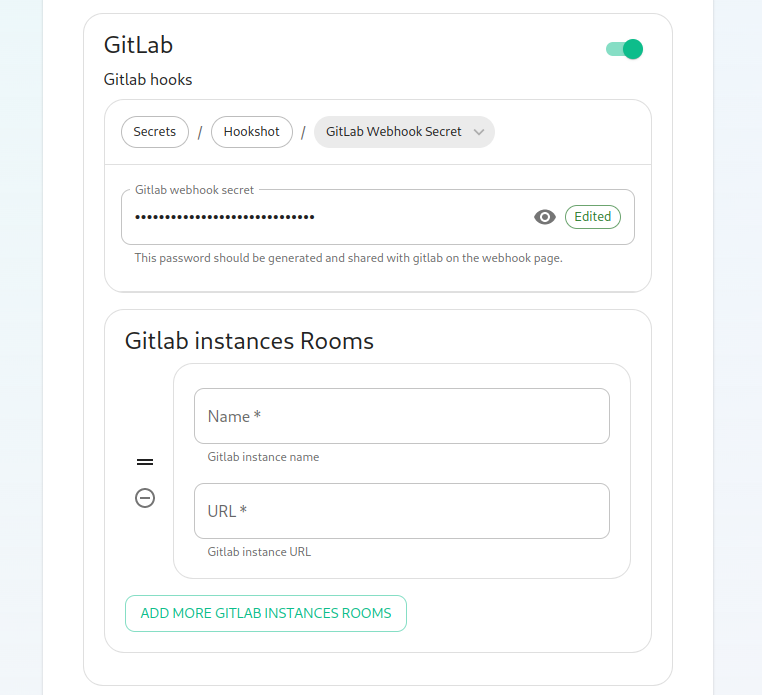
                          Next, we have the option to enable Gitlab, which shows us the following valuessettings:
                          :

                            hookshot-gitlab.png

                            gitlab_instances:

                            The Awebhook mappingsecret ofis randomly generated and does not need to be changed. You can also add Gitlab instances by specifying an instance name and pasting the GitLabURL.

                            servers

                            Next,

                              we git.example.org: Replace with name ofhave the GitLaboption serverto
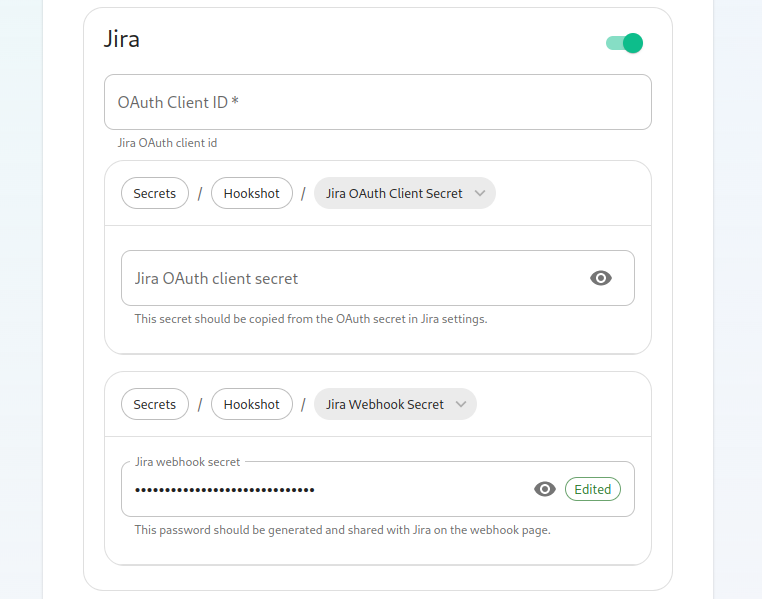
                                enable Jira, url:which Replaceshows with URL ofus the GitLabfollowing serversettings:

                                hookshot-jira.png

                                In

                                here, gitlab_webhook_secret:we Thecan secret configured inspecify the webhook.OAuth Client ID

                                In Element's room

                                  Start a private conversation withand the botOAuth Typeclient gitlab personaltoken instancename personaltokensecret to connect to GitLabJira. whereTo instancenameobtain isthis oneinformation, ofplease thefollow mappingsthese of the GitLab servers (git.example.org) and personaltoken, a token generated from the GitLab admin UI As an administrator of the room, invite the hookshot bot Run the command !hookshot gitlab project https://mydomain/my/project to bridge a project to the room Type !gl help to list supported commands

                                  Enabling JIRA integration

                                  On JIRA

                                    This should be done for all JIRA organisations you wish to bridge. The steps may differ for SaaS and on-prem, but you need to go to the webhooks configuration page under Settings > System > Webhooks. It should point to https://<hookshot_fqdn>/?secret=<jira_webhook_secret> For the webhook secret, you can generate one using pwgen 32 1 to generate one for example. Keep it somewhere safe, you'll need to to configure the bridge.

                                    Enable OAuth

                                    steps:

                                    The JIRA service currently only supports atlassian.com (JIRA SaaS) when handling user authentication. Support for on-prem deployments is hoping to land soon.

                                    • You'll first need to head to https://developer.atlassian.com/console/myapps/create-3lo-app/ to create a "OAuth 2.0 (3LO)" integration.
                                    • Once named and created, you will need to:
                                    • Enable the User REST, JIRA Platform REST and User Identity APIs under Permissions.
                                    • Use rotating tokens under Authorisation.
                                    • Set a callback url. This will be the public URL to hookshot with a path of /jira/oauth.
                                    • Copy the client ID and Secret from Settings

                                    On

                                    Once you've set these, you'll notice that a webhook secret has been randomly generated for you. You can leave this alone or edit it if you desire.

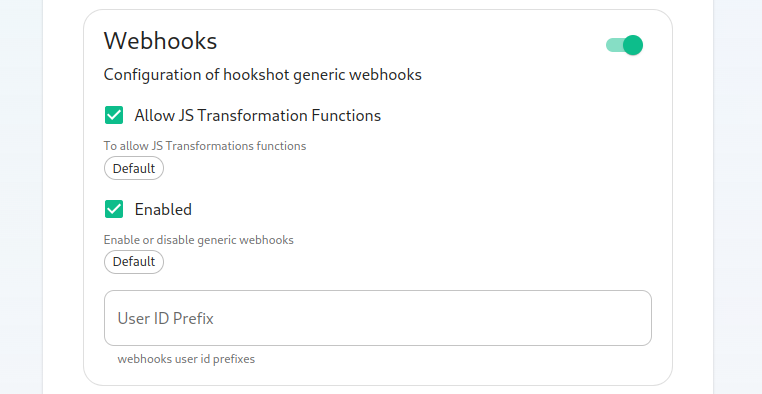
                                    Next, let's look at configuring Webhooks:
                                    hookshot-webhooks.png

                                    You can set whether or not webhooks are enabled and whether they allow JS Transformation functions. It is good to leave these enabled per the installationdefaults.

                                      You Copycan samplealso filespecify fromthe user id prefix for the creation of custom webhooks. If you set this to config-sample/hookshot/jira.ymlwebhook_ then each new webhook will appear in a room with a username starting with webhook_.

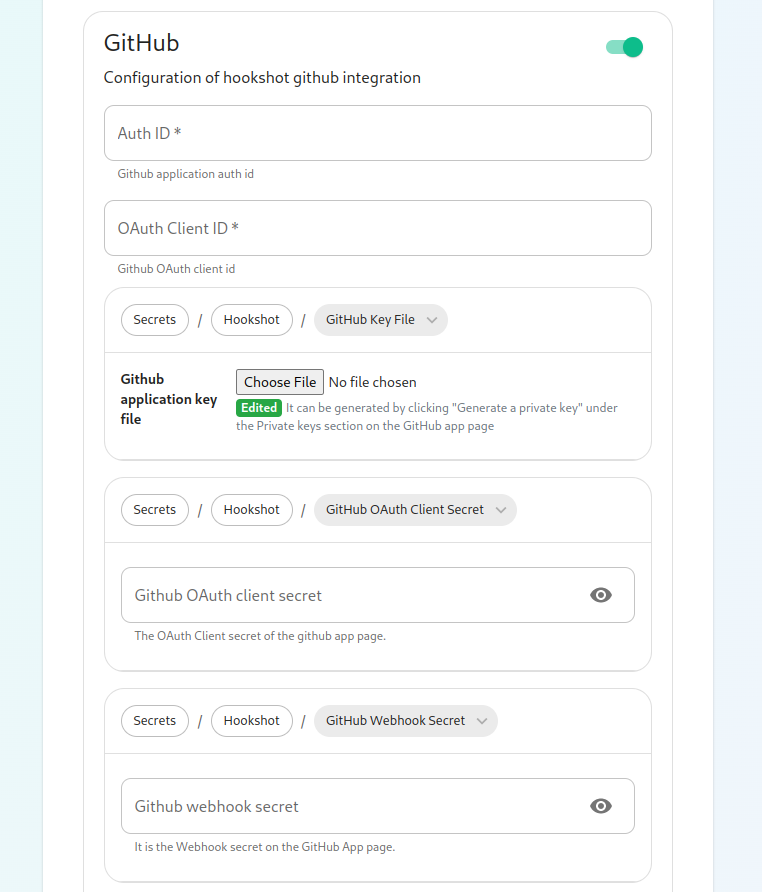
                                      Next, let's look at configuring Github:
                                      hookshot-github1.png

                                      This bridge requires a GitHub App. You will need to create one. Once you have created this, you'll be able to fill in the installerAuth directoryID and OAuth Client ID. You will also need to generate ~/.element-onpremise-config/hookshota

                                      "Github Editapplication key file" to upload this. Further, you will need to specify a "Github OAuth client secret" and a "Github webhook secret", both of which will appear on your newly created Github app page.

                                      hookshot-github2.png

                                      On this screen, we have the fileoption to change how we call the bot and other minor settings. We also have the ability to select which hooks we provide notifications for, what labels we wish to exclude, and then which hooks we will ignore completely.

                                      hookshot-github3.png

                                      Now we have the ability to add a list of labels that we want to match. This has the impact of the integration only notifying you of issues with a specifc set of labels.

                                      We then have the followingability valuesto :add

                                        a list jira_webhook_secret:of Thelabels webhookthat secretall configurednewly created jira_oauth_client_id:issues Ifthrough Oauththe bot should be labeled with.

                                        Then we have the ability to enable showing diffs in the room when a PR is enabled,created.
                                        it
                                        should

                                        hookshot-github4.png

                                        point

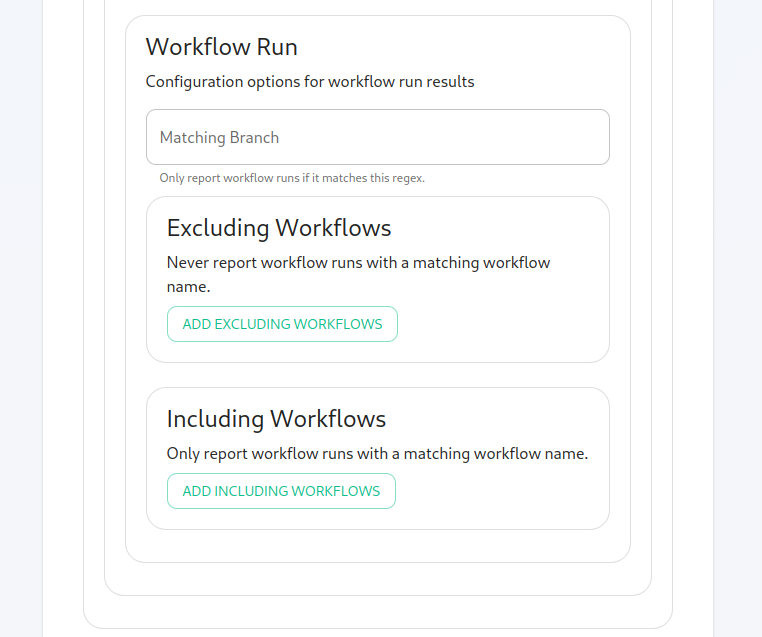
                                        Moving along, we can configure how workflow run results are configured in the bot, including matching specific workflows and including or excluding specific workflows.

                                        Finishing Configuration

                                        You furrther have the ability to click "Advanced" and set any kubernetes specific settings for how this pod is run. Once you have set everything up on this page, you can click "Continue" to go back to the ClientIDIntegrations page.

                                        When you have finished running the installer and the hookshot pod is up and running, there are some configurations to handle in Jira'sthe AppElement page.client Else,itself in the rooms that you canwish keepthe it empty.

                                        jira_oauth_client_secret: If Oauth is enabled, it should pointintegration to thebe Clientpresent. secret in Jira's App page. Else, you can keep it empty.

                                        In Element's room

                                          As an administratoradmin, ofyou thewill room,need to invite the hookshot bot

                                          Ifinto a room. The name can be found in the installer configuration under the username field in the "Bot" section.

                                          Once you have setupinvited Integrator,the bot into the room, you can use the integration"Add managerwidgets, bridges, & bots" functionality to add a bridge to JIRA. There is currently a limitation - it only works for public rooms.

                                          Enabling generic webhooks integration

                                          On the installation

                                          "Hookshot
                                            Configuration" Copy sample file from config-sample/hookshot/generic.yml in the installer directory to  ~/.element-onpremise-config/hookshot Edit the file with the following values :
                                              generic_enabled: true to enable it generic_allow_js_transformation_functions: true if you want to enable javascript transformations generic_user_id_prefix: Choose a prefix for the users generated by hookshot for webhooks you'll create

                                              In Element's room

                                                As an administrator of the room, invite the hookshot bot Type !hookshot webhook <name of the webhook> The bot will answer with a URL that you can set up as a webhook. Please ensure that the Content-Type is setwidget to the typeroom matchingand whatfinish the webhooksetup. sends If you have setup Integrator, you can use the integration manager to add a bridge to a new webhook