EMS Server With Custom Domain
For this guide, I will be using the domain element.io. I will set up EMS so that the Matrix usernames becomes @someone:element.io, and the Element client will be at https://chat.element.io/
From the guide at Get Your Own EMS Server, I will be replacing the EMS hostname ems-demo-staging.ems.host with element.ems.host
Prerequisites
- You own and control the domain you want to use
- If you do not have a website on the domain you want to use with your EMS server:
- You can create a CNAME DNS record for the domain. Some providers call this ALIAS or CNAME Flattening when used on the root of the domain (domain root =
yourdomain.com, notsomething.yourdomain.com)
- You can create a CNAME DNS record for the domain. Some providers call this ALIAS or CNAME Flattening when used on the root of the domain (domain root =
- If you have a website on the domain you want to use with your EMS server:
- Your website has HTTPS enabled using a valid certificate issued by a commonly recognized provider. For example, Comodo or LetsEncrypt.
- You can serve plain-text JSON files at these exact paths
-
https://yourdomain.com/.well-known/matrix/client -
https://yourdomain.com/.well-known/matrix/server - Note that these files do not and cannot have a file extension
-
- You can add the header
Access-Control-Allow-Origin: *to the client file on the web server
See also
Setup
Some providers for DNS and website hosting providers need special configuration. See Provider specific instructions at the bottom for known solutions.
-
Follow steps 1 - 10 from Get Your Own EMS Server
-
On step 10 from Get Your Own EMS Server, turn ON
Custom DNS

-
In the
Custom Homeserver domainfield, enterelement.io

-
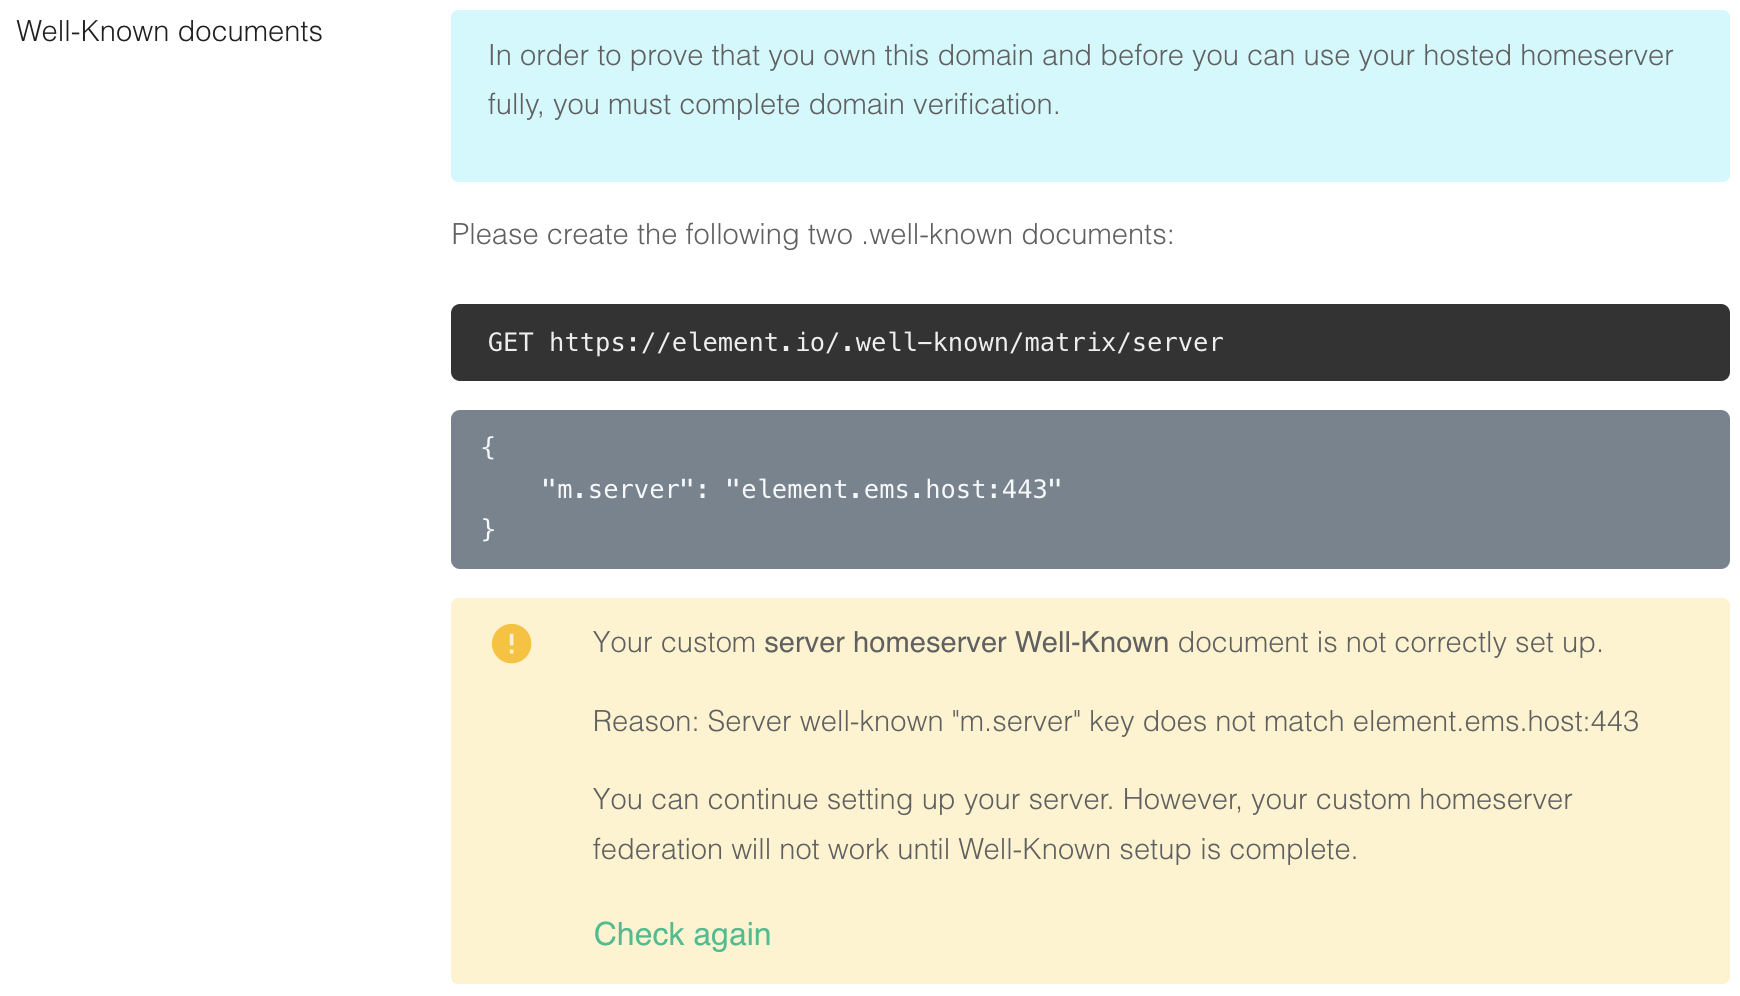
Create two files on your website according to the instructions given.
The path cannot be changed, but up to 30 redirects are supported.
While not required, you should add the headerContent-Type application/jsonto both files.-
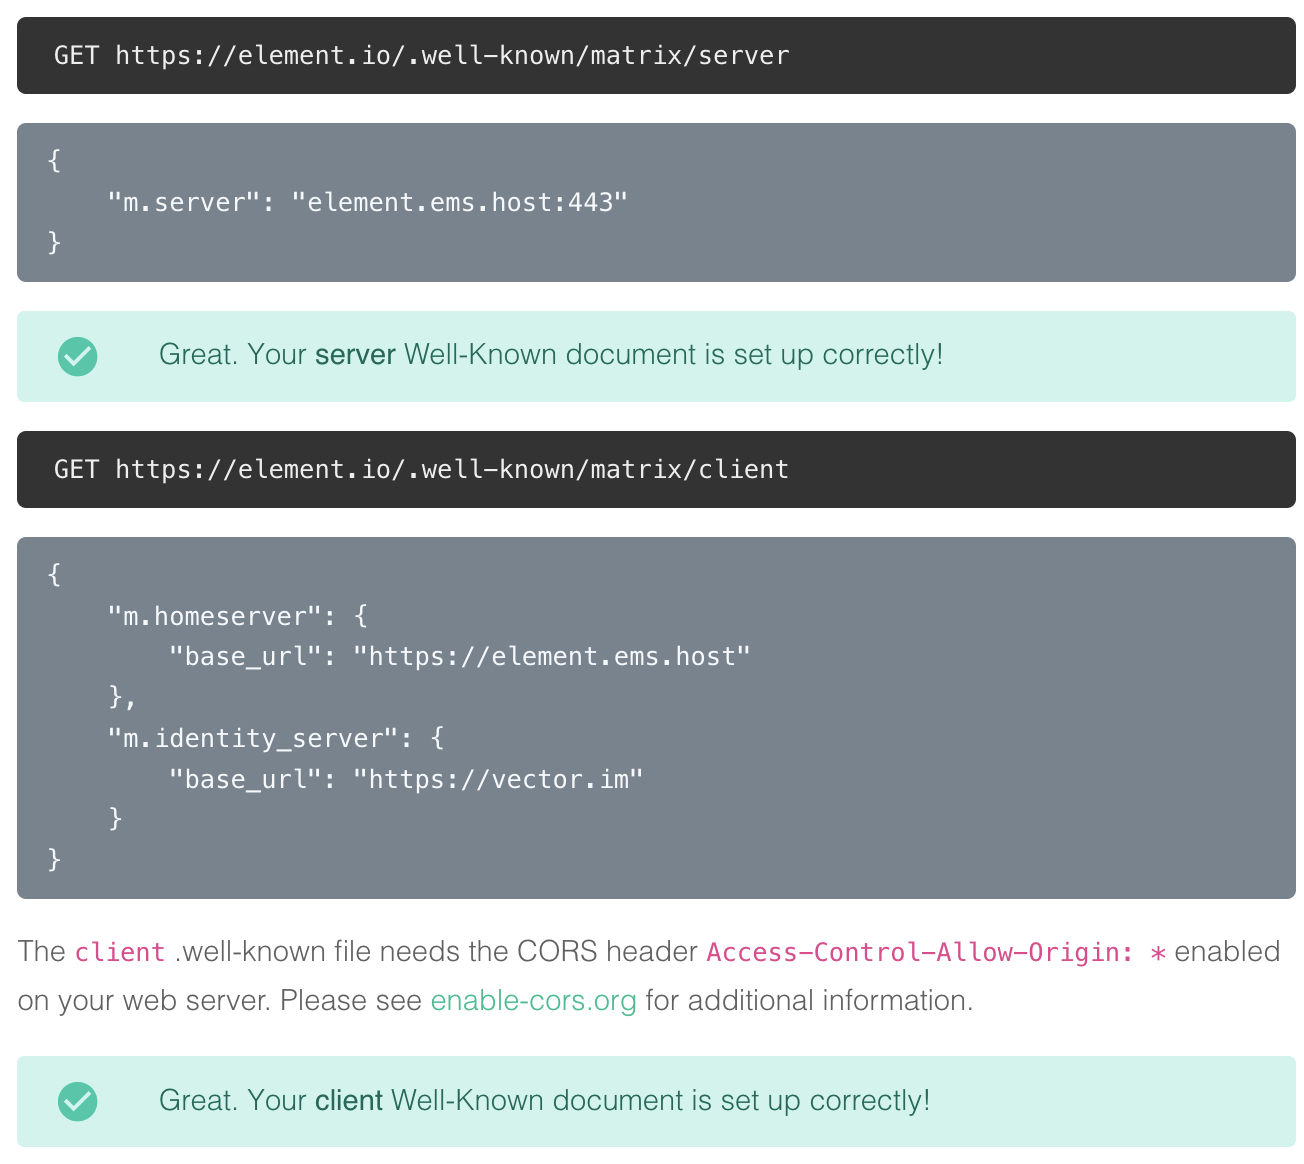
https://element.io/.well-known/matrix/server

{ "m.server": "element.ems.host:443" } -
https://element.io/.well-known/matrix/client
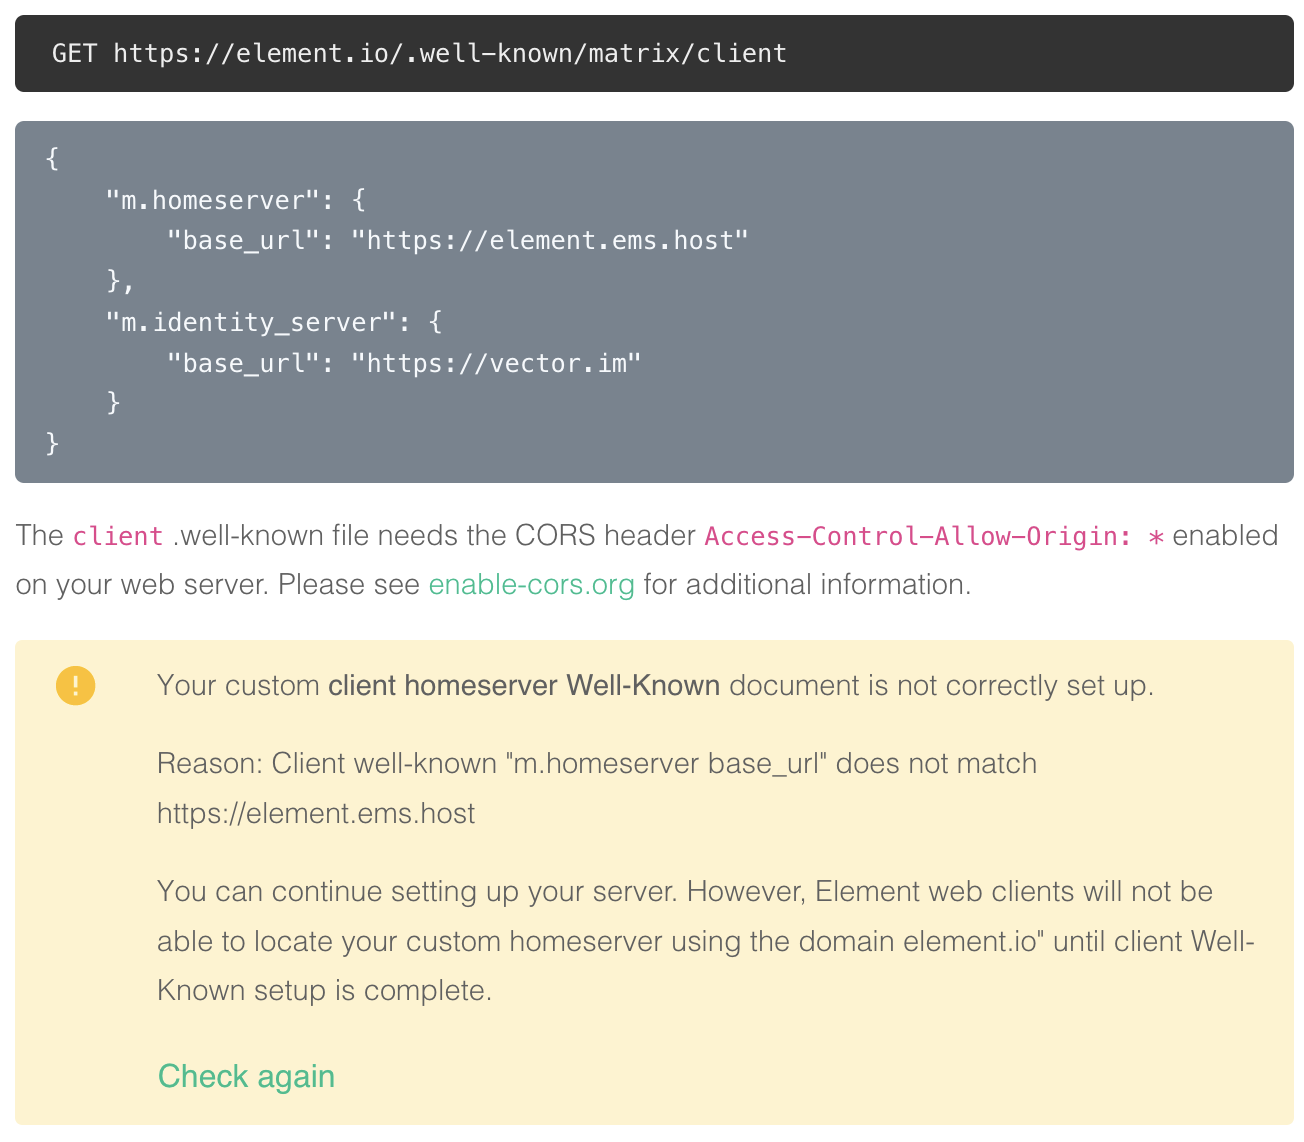
You need to enable the CORS headerAccess-Control-Allow-Origin: *on the web server for this file. See https://enable-cors.org/ for instructions on how to do this.{ "m.homeserver": { "base_url": "https://element.ems.host" }, "m.identity_server": { "base_url": "https://vector.im" } }
Optional Nginx-specific configuration
If your web server is running Nginx, you can set this in the Nginx config instead of creating actual files.
server { server_name element.io ... # Matrix well-known files location /.well-known/matrix/client { return 200 '{"m.homeserver": {"base_url": "https://element.ems.host"},"m.identity_server": {"base_url": "https://vector.im"}}'; add_header Content-Type application/json; add_header 'Access-Control-Allow-Origin' '*'; } location /.well-known/matrix/server { return 200 '{"m.server": "element.ems.host:443"}'; add_header Content-Type application/json; } } -
-
Click
Check againto verify that your.well-knownfiles are configured correctly
You can also verify your `.well-known` files from the command line
Note the lines
access-control-allow-origin: *andcontent-type: application/json-
On Mac or Linux, using the
terminal$ curl -i https://element.io/.well-known/matrix/client HTTP/2 200 date: Fri, 31 Jul 2020 09:11:21 GMT content-type: application/json content-length: 129 set-cookie: __cfduid=x...; expires=Sun, 30-Aug-20 09:11:21 GMT; path=/; domain=.element.io; HttpOnly; SameSite=Lax access-control-allow-origin: * cf-cache-status: DYNAMIC cf-request-id: 0... expect-ct: max-age=604800, report-uri="https://report-uri.cloudflare.com/cdn-cgi/beacon/expect-ct" server: cloudflare cf-ray: 5... { "m.homeserver": { "base_url": "https://element.ems.host" }, "m.identity_server": { "base_url": "https://vector.im" } } $ curl -i https://element.io/.well-known/matrix/server HTTP/2 200 date: Fri, 31 Jul 2020 09:11:25 GMT content-type: application/json content-length: 52 set-cookie: __cfduid=x...; expires=Sun, 30-Aug-20 09:11:25 GMT; path=/; domain=.element.io; HttpOnly; SameSite=Lax access-control-allow-origin: * cf-cache-status: DYNAMIC cf-request-id: 0... expect-ct: max-age=604800, report-uri="https://report-uri.cloudflare.com/cdn-cgi/beacon/expect-ct" server: cloudflare cf-ray: 5... { "m.server": "element.ems.host:443" } -
On Windows, using
PowerShellPS C:\Users\twilight> Invoke-WebRequest -Uri https://element.io/.well-known/matrix/client StatusCode : 200 StatusDescription : OK Content : { "m.homeserver": { "base_url": "https://element.ems.host" }, "m.identity_server": { "base_url": "https://vector.im" } } RawContent : HTTP/1.1 200 OK Connection: keep-alive Access-Control-Allow-Origin: * CF-Cache-Status: DYNAMIC cf-request-id: 0... Expect-CT: max-age=604800, report-uri="https://repor... Forms : {} Headers : {[Connection, keep-alive], [Access-Control-Allow-Origin, *], [CF-Cache-Status, DYNAMIC], [cf-request-id, 0...]...} Images : {} InputFields : {} Links : {} ParsedHtml : System.__ComObject RawContentLength : 129 PS C:\Users\twilight> Invoke-WebRequest -Uri https://element.io/.well-known/matrix/server StatusCode : 200 StatusDescription : OK Content : { "m.server": "element.ems.host:443" } RawContent : HTTP/1.1 200 OK Connection: keep-alive Access-Control-Allow-Origin: * CF-Cache-Status: DYNAMIC cf-request-id: 0... Expect-CT: max-age=604800, report-uri="https://repor... Forms : {} Headers : {[Connection, keep-alive], [Access-Control-Allow-Origin, *], [CF-Cache-Status, DYNAMIC], [cf-request-id, 0...]...} Images : {} InputFields : {} Links : {} ParsedHtml : System.__ComObject RawContentLength : 52
-
-
You can continue without the
.well-knownfiles in place, but your server will have limited functionality until this is fixed -
In the
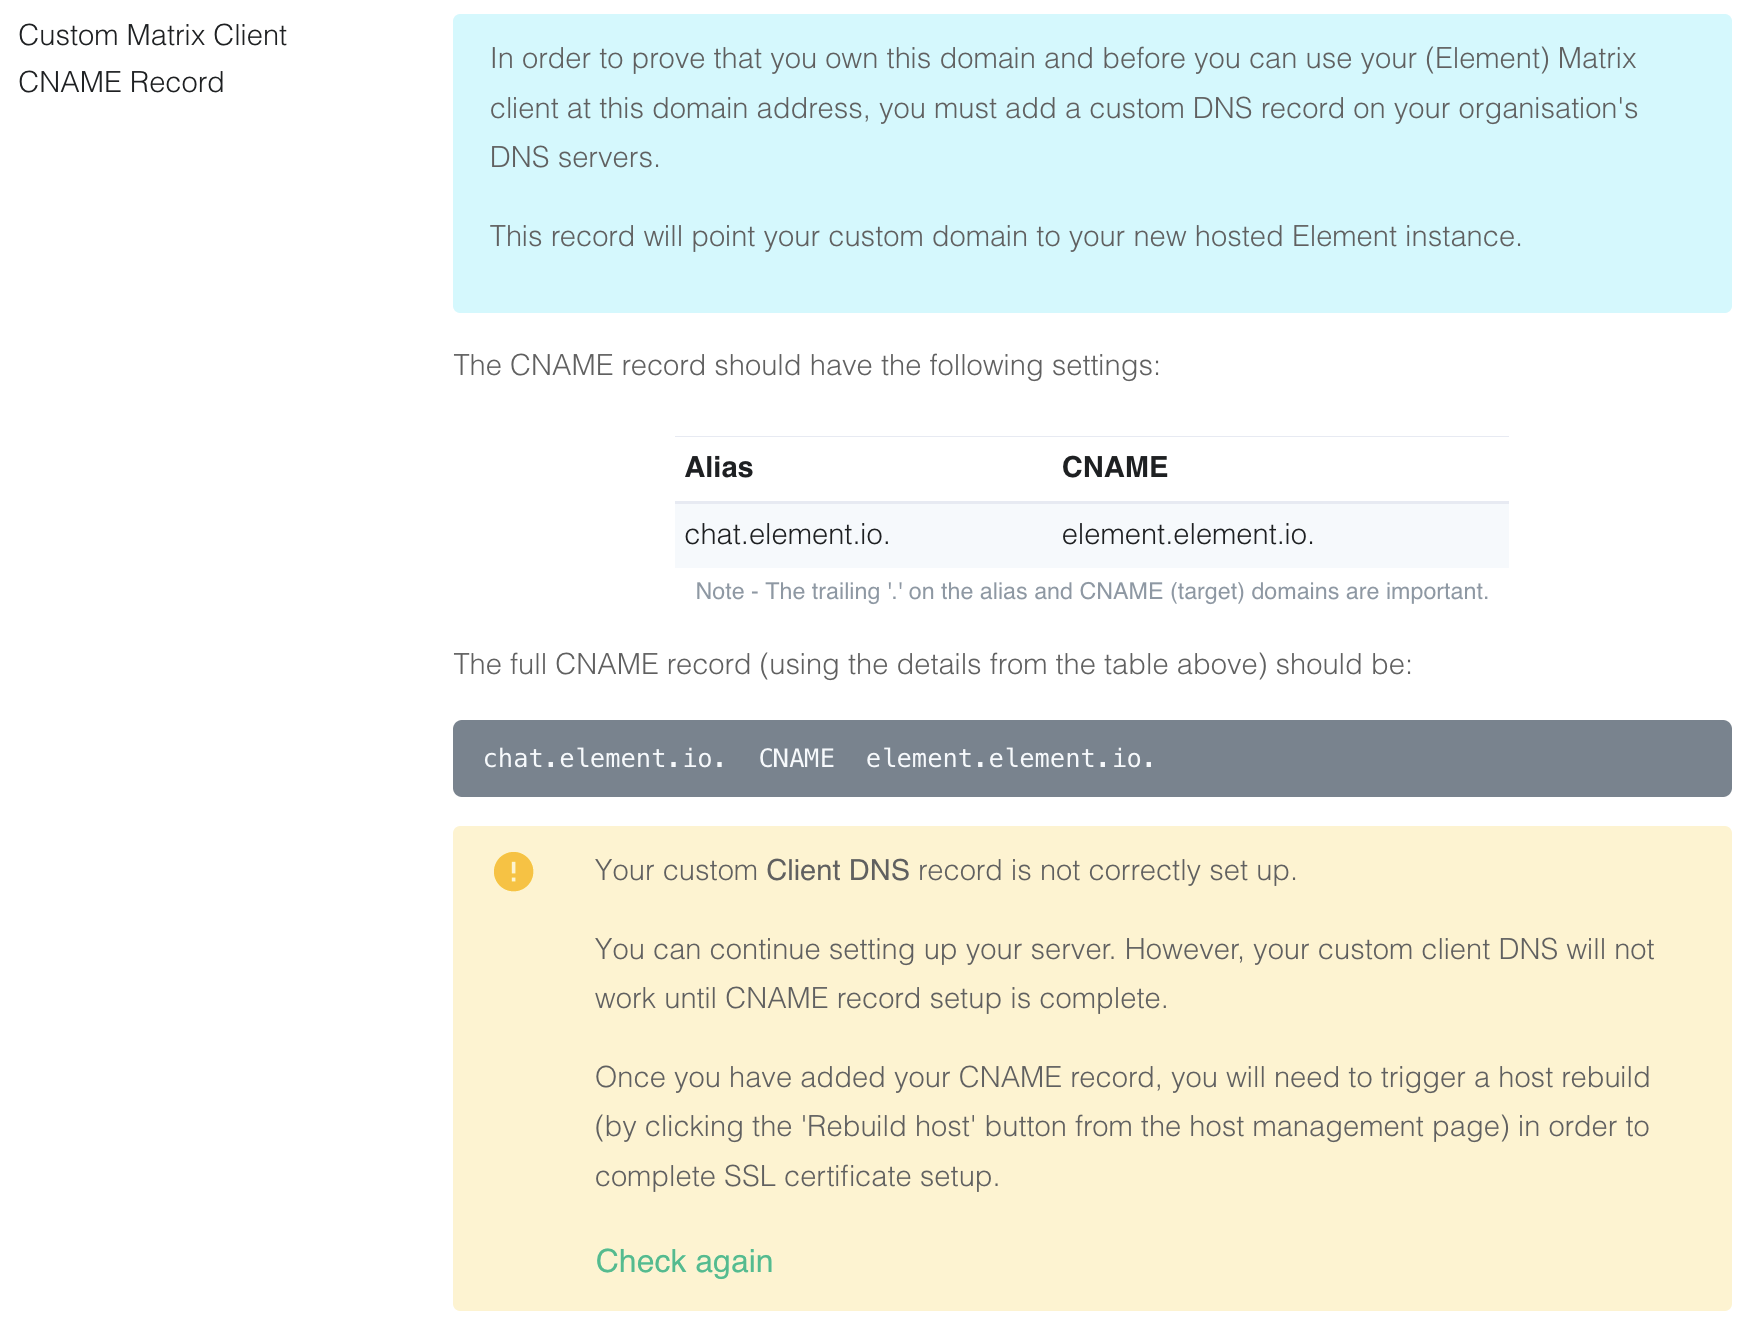
Custom Client domainfield, enterchat.element.io. This can be any domain, except the same asCustom Homeserver domain

-
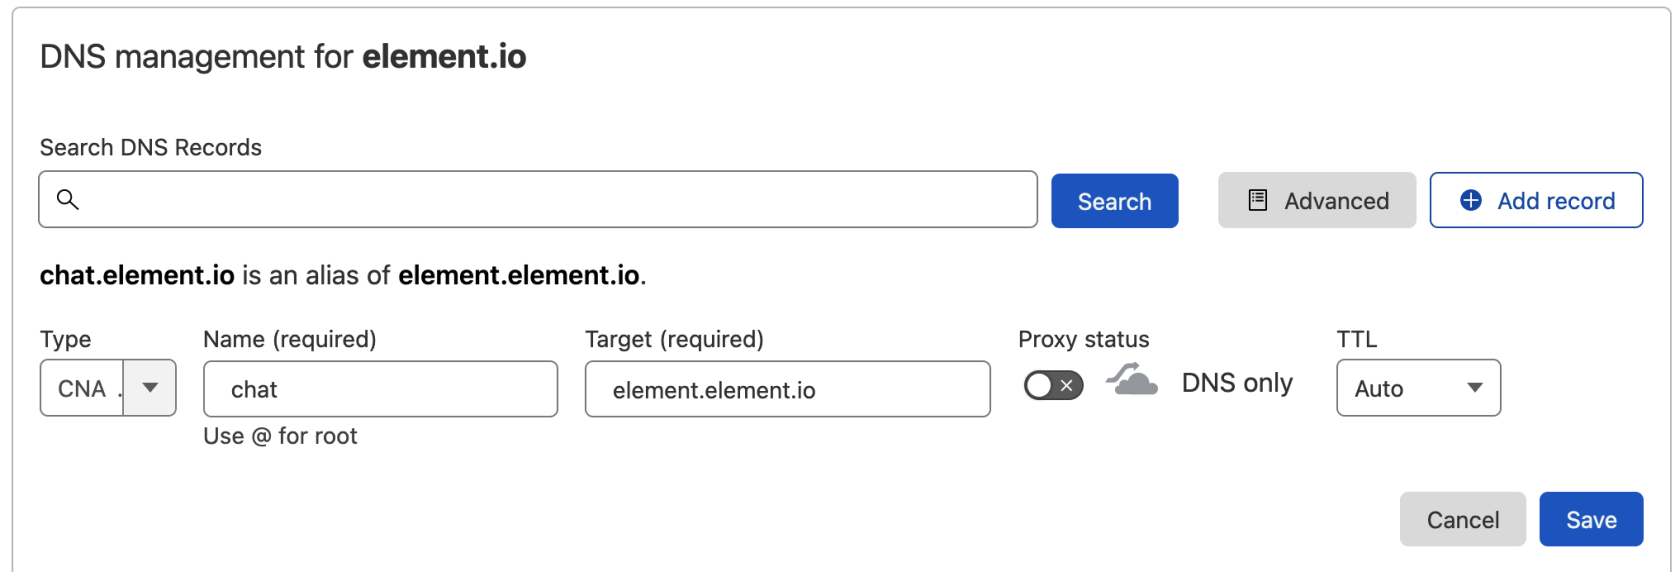
Create a CNAME DNS record with your DNS provider according to the instructions given
chat.element.io. CNAME element.element.io.
-
This shows how this is done with Cloudflare DNS. Depending on your DNS provider, this might be different. Consult the documentation for your provider. Note that Proxy must be turned off with Cloudflare.
-
Back on EMS, click
Check again. Note that sometimes it might take a while for your new DNS record to propagate. You can continue, but functionality will be limited. Check back with the Hosts tab on https://ems.element.io/user/hosting and clickRebuild Hostonce the DNS record is in place.

You can also verify the CNAME DNS record using the command line
-
On Mac or Linux, using the
terminal$ dig chat.element.io CNAME ; <<>> DiG 9.10.6 <<>> chat.element.io CNAME ;; global options: +cmd ;; Got answer: ;; ->>HEADER<<- opcode: QUERY, status: NOERROR, id: 57888 ;; flags: qr rd ra; QUERY: 1, ANSWER: 1, AUTHORITY: 0, ADDITIONAL: 1 ;; OPT PSEUDOSECTION: ; EDNS: version: 0, flags:; udp: 512 ;; QUESTION SECTION: ;chat.element.io. IN CNAME ;; ANSWER SECTION: chat.element.io. 299 IN CNAME element.element.io. ;; Query time: 32 msec ;; SERVER: 1.1.1.1#53(1.1.1.1) ;; WHEN: Fri Jul 31 10:21:56 BST 2020 ;; MSG SIZE rcvd: 91 -
On Windows, using
PowerShellPS C:\Users\twilight> Resolve-DnsName -Name chat.element.io -Type CNAME Name Type TTL Section NameHost ---- ---- --- ------- -------- chat.element.io CNAME 299 Answer element.element.io
-
-
Continue from step 11 on Get Your Own EMS Server


Provider-specific instructions
GitHub Pages
If you are hosting your website with GitHub Pages, add this to the Jekyll config file _config.yml
include:
  - .well-known