Client Look & Feel
This feature allows you to customize the home and welcome page on your EMS-provided Element Web client.
The guide below demonstrates how to use your EMS server to host the files.
You can also host the files on your web server. You need to enable the CORS header Access-Control-Allow-Origin: * on the web server for these files. See https://enable-cors.org/ for instructions on how to do this. Skip to Configure your EMS server.
Blog posts
See also our blog posts on the subject:
- Build your own custom branded chat platform at the touch of a button!
- A white label messaging app to create your own brand messenger
ServeCreate fileshome fromand yourlogin EMS servertemplate
-
Create the files you want to use.
-
Edit
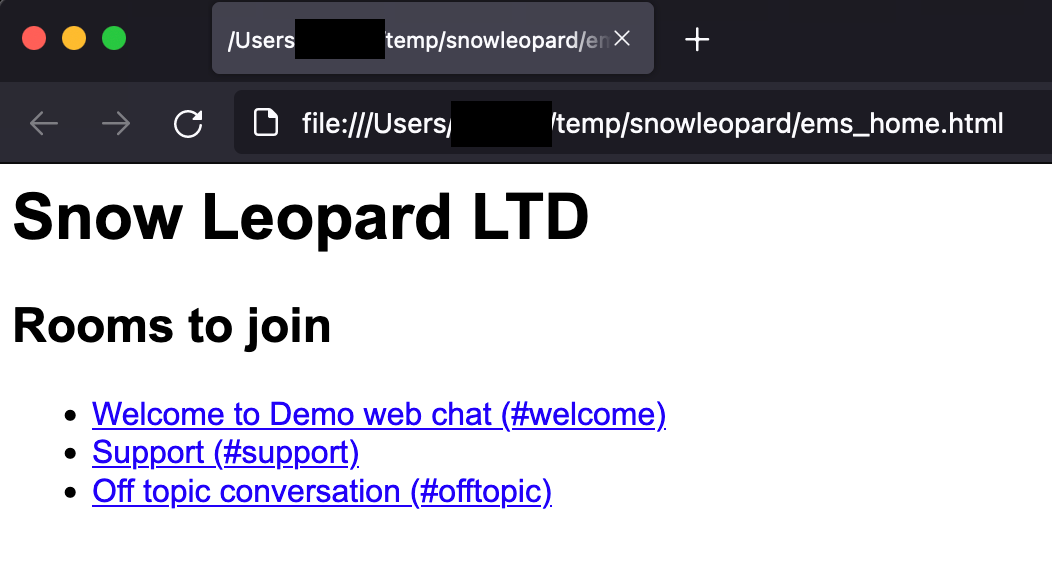
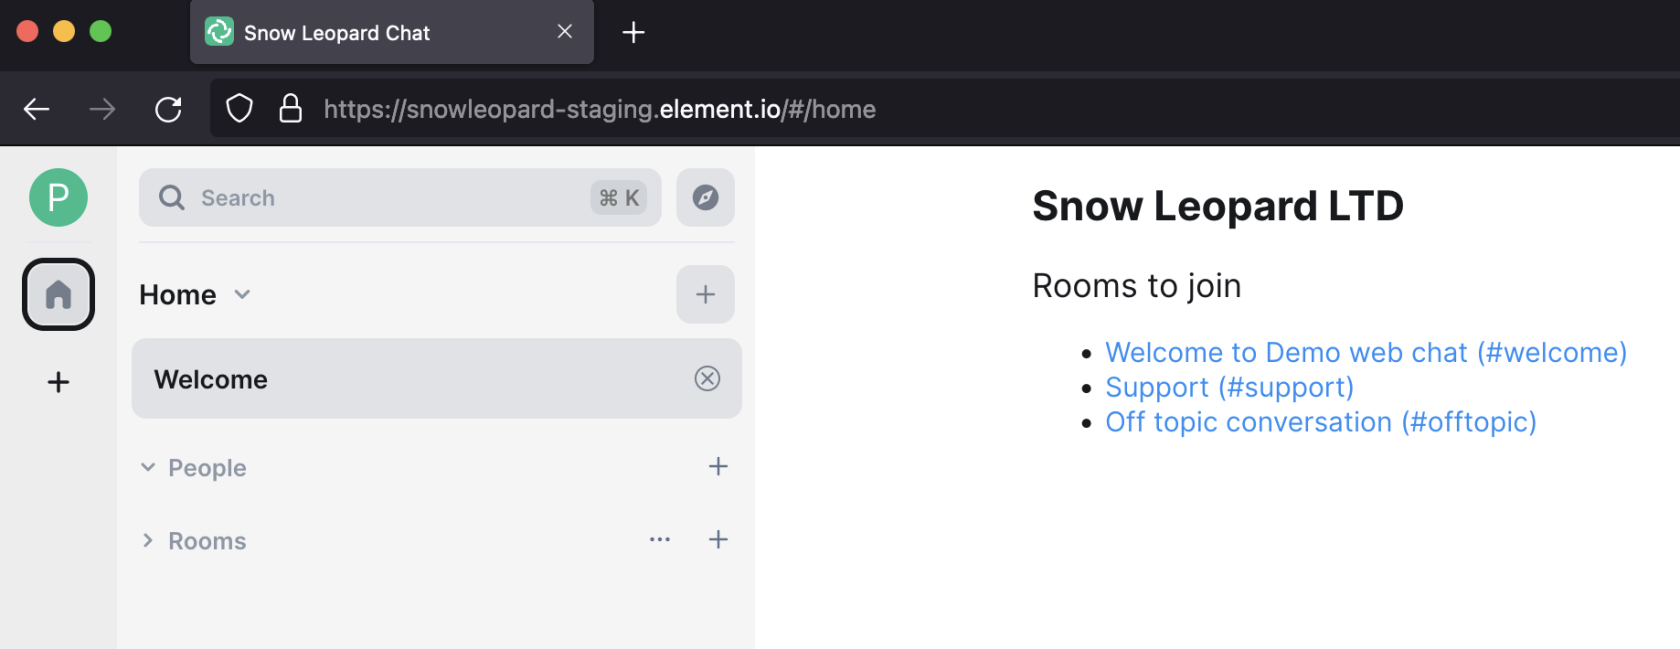
ems_home.html. This can be as simple as a couple of lines of HTML, for example:<h1>Snow Leopard LTD</h1> <h2>Rooms to join</h2> <ul> <li><a href='/#/room/#welcome:snowleopard-staging.ems.host'>Welcome to Demo web chat (#welcome)</a></li> <li><a href='/#/room/#support:snowleopard-staging.ems.host'>Support (#support)</a></li> <li><a href='/#/room/#offtopic:snowleopard-staging.ems.host'>Off topic conversation (#offtopic)</a></li> </ul>You can also add a more complex HTML and styling.
-
It looks like this in your web browser:

-
Edit
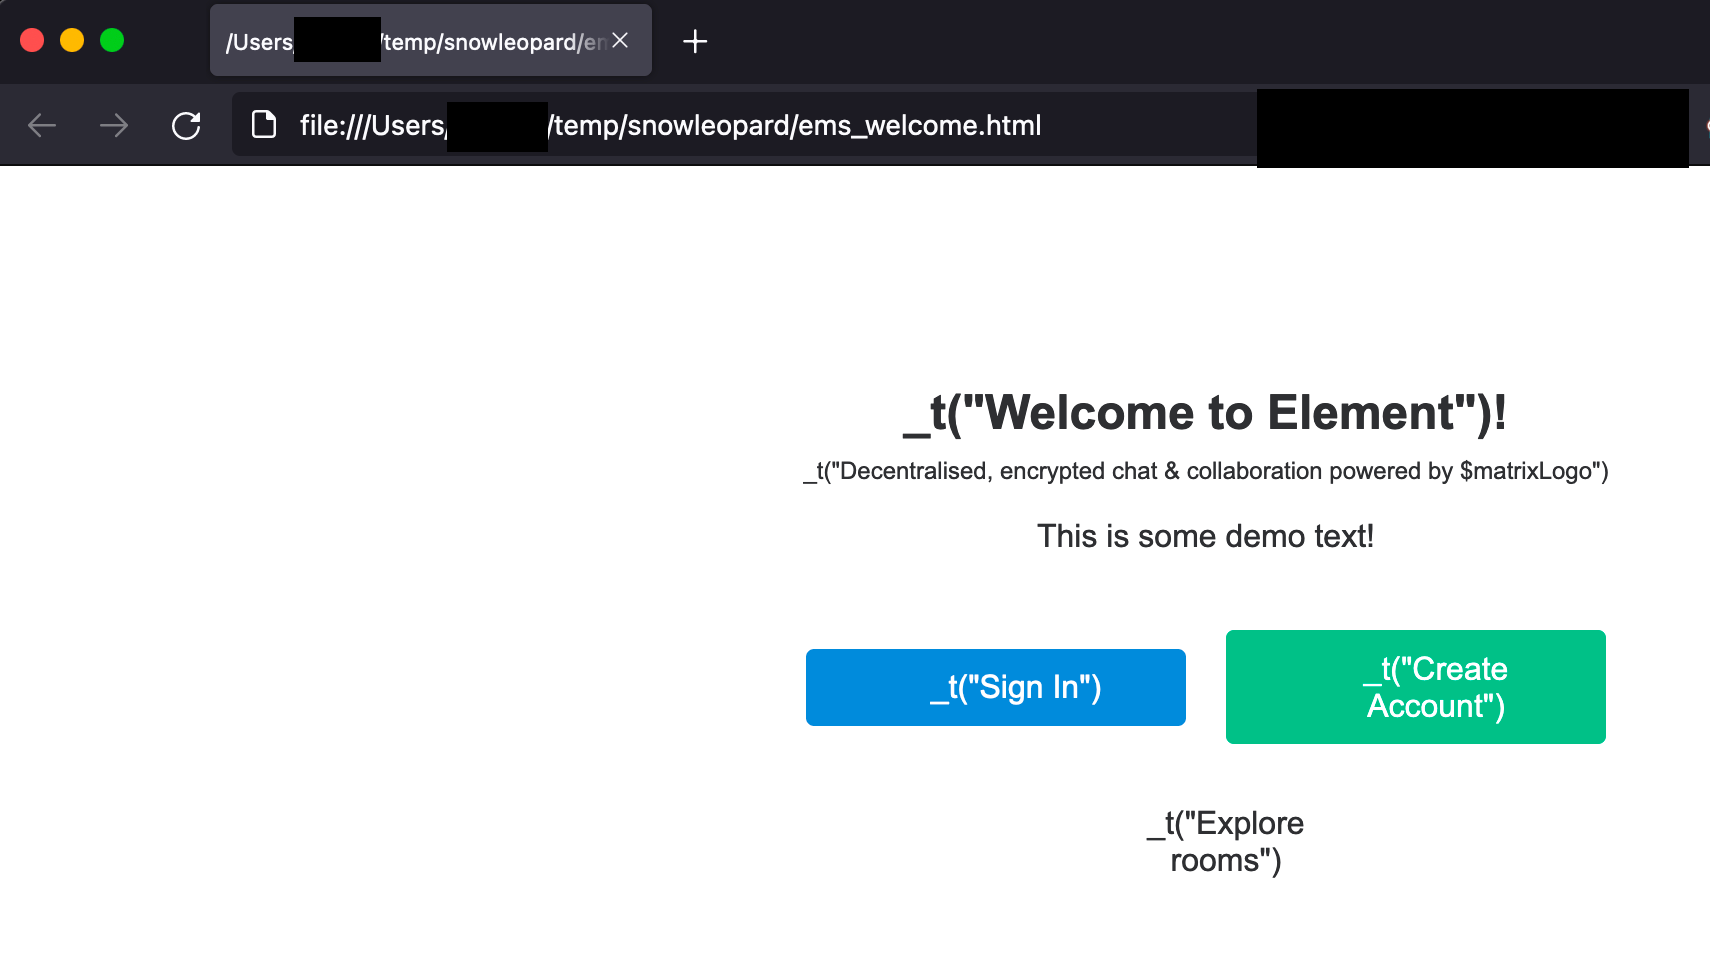
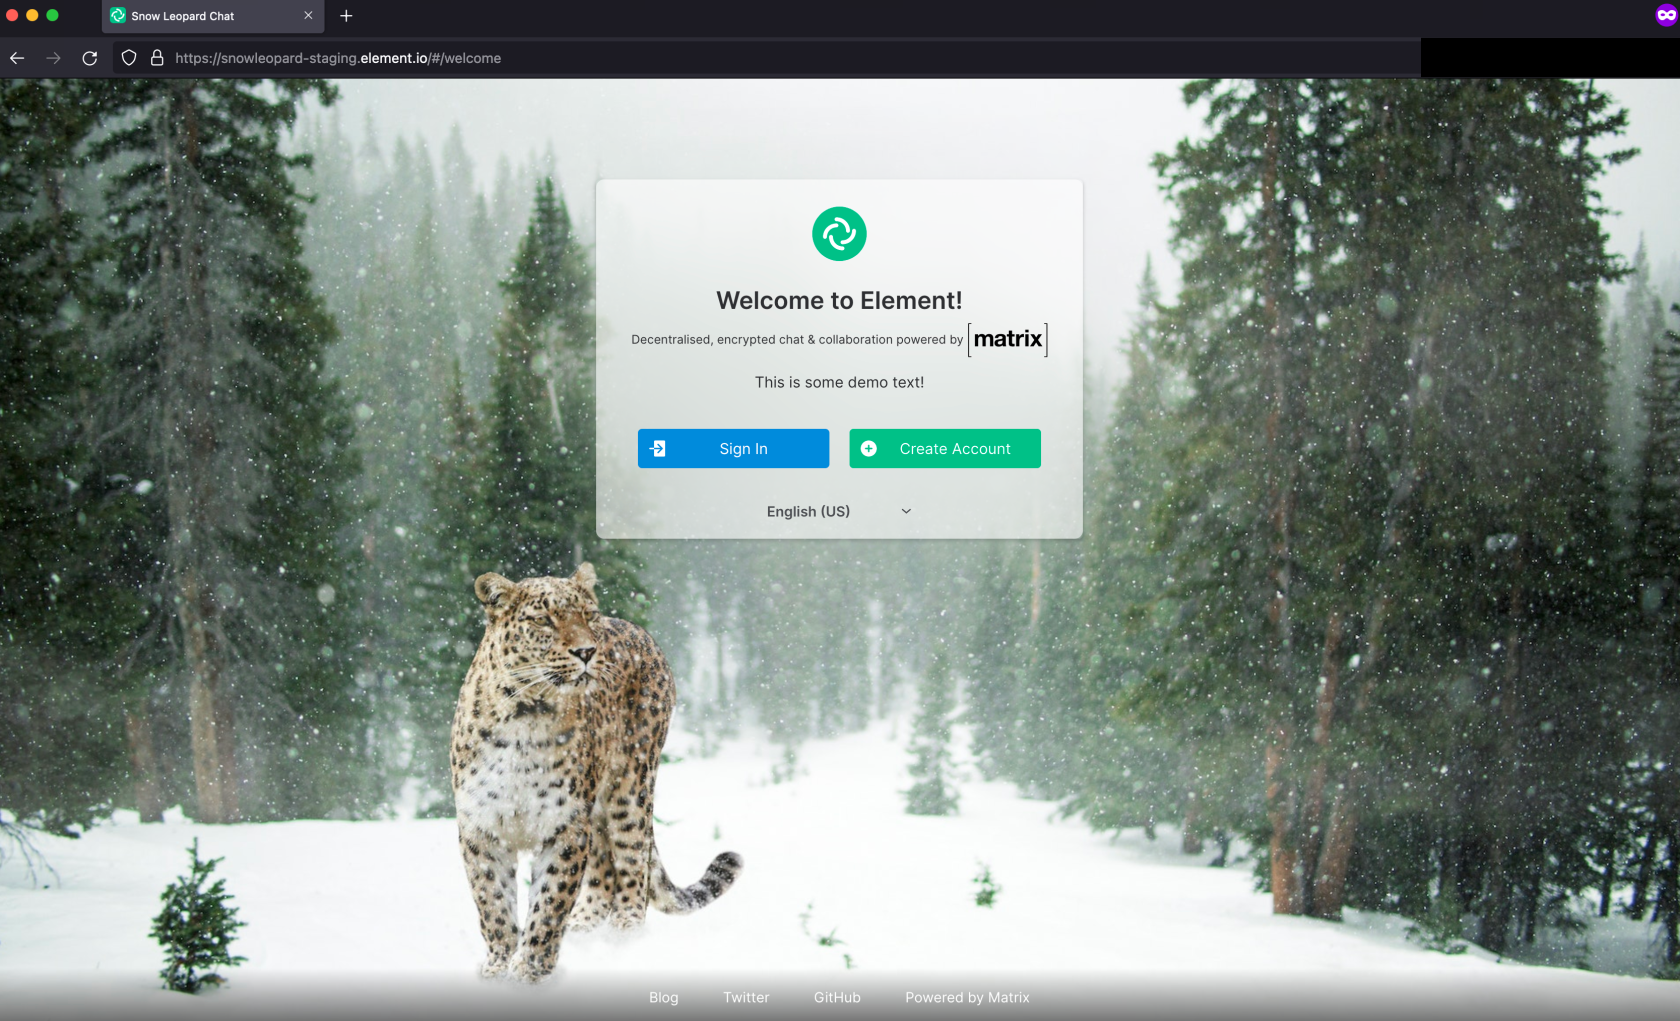
ems_welcome.html. This is a bit more complex, but it can be almost anything you want as long as it has links toLog in(/#/login) andCreate account(/#/register). The default design is based on this template. You can get creative with the CSS and the!importanttag.Click to see ems_welcome contents
The only change I made from the template is adding
<p>This is some demo text!</p>on line 177.<style type="text/css"> /* we deliberately inline style here to avoid flash-of-CSS problems, and to avoid * voodoo where we have to set display: none by default */ h1::after { content: "!"; } .mx_Parent { display: -webkit-box; display: -webkit-flex; display: -ms-flexbox; display: flex; -webkit-box-orient: vertical; -webkit-box-direction: normal; -webkit-flex-direction: column; -ms-flex-direction: column; flex-direction: column; -webkit-box-pack: center; -webkit-justify-content: center; -ms-flex-pack: center; justify-content: center; -webkit-box-align: center; -webkit-align-items: center; -ms-flex-align: center; align-items: center; text-align: center; padding: 25px 35px; color: #2e2f32; } .mx_Logo { height: 54px; margin-top: 2px; } .mx_ButtonGroup { margin-top: 10px; } .mx_ButtonRow { display: -webkit-box; display: -webkit-flex; display: -ms-flexbox; display: flex; -webkit-justify-content: space-around; -ms-flex-pack: distribute; -webkit-box-align: center; -webkit-align-items: center; -ms-flex-align: center; align-items: center; justify-content: space-between; box-sizing: border-box; margin: 12px 0 0; } .mx_ButtonRow > * { margin: 0 10px; } .mx_ButtonRow > *:first-child { margin-left: 0; } .mx_ButtonRow > *:last-child { margin-right: 0; } .mx_ButtonParent { display: -webkit-box; display: -webkit-flex; display: -ms-flexbox; display: flex; padding: 10px 20px; -webkit-box-orient: horizontal; -webkit-box-direction: normal; -webkit-flex-direction: row; -ms-flex-direction: row; flex-direction: row; -webkit-box-pack: center; -webkit-justify-content: center; -ms-flex-pack: center; justify-content: center; -webkit-box-align: center; -webkit-align-items: center; -ms-flex-align: center; align-items: center; border-radius: 4px; width: 150px; background-repeat: no-repeat; background-position: 10px center; text-decoration: none; color: #2e2f32 !important; } .mx_ButtonLabel { margin-left: 20px; } .mx_Header_title { font-size: 24px; font-weight: 600; margin: 20px 0 0; } .mx_Header_subtitle { font-size: 12px; font-weight: normal; margin: 8px 0 0; } .mx_ButtonSignIn { background-color: #368BD6; color: white !important; } .mx_ButtonCreateAccount { background-color: #0DBD8B; color: white !important; } .mx_SecondaryButton { background-color: #FFFFFF; color: #2E2F32; } .mx_Button_iconSignIn { background-image: url('welcome/images/icon-sign-in.svg'); } .mx_Button_iconCreateAccount { background-image: url('welcome/images/icon-create-account.svg'); } .mx_Button_iconHelp { background-image: url('welcome/images/icon-help.svg'); } .mx_Button_iconRoomDirectory { background-image: url('welcome/images/icon-room-directory.svg'); } /* .mx_WelcomePage_loggedIn is applied by EmbeddedPage from the Welcome component If it is set on the page, we should show the buttons. Otherwise, we have to assume we don't have an account and should hide them. No account == no guest account either. */ .mx_WelcomePage:not(.mx_WelcomePage_loggedIn) .mx_WelcomePage_guestFunctions { display: none; } .mx_ButtonRow.mx_WelcomePage_guestFunctions { margin-top: 20px; } .mx_ButtonRow.mx_WelcomePage_guestFunctions > div { margin: 0 auto; } @media only screen and (max-width: 480px) { .mx_ButtonRow { flex-direction: column; } .mx_ButtonRow > * { margin: 0 0 10px 0; } } </style> <div class="mx_Parent"> <a href="https://element.io" target="_blank" rel="noopener"> <img src="welcome/images/logo.svg" alt="" class="mx_Logo"/> </a> <h1 class="mx_Header_title">_t("Welcome to Element")</h1> <!-- XXX: Our translations system isn't smart enough to recognize variables in the HTML, so we manually do it --> <h4 class="mx_Header_subtitle">_t("Decentralised, encrypted chat & collaboration powered by $matrixLogo")</h4> <p>This is some demo text!</p> <div class="mx_ButtonGroup"> <div class="mx_ButtonRow"> <a href="#/login" class="mx_ButtonParent mx_ButtonSignIn mx_Button_iconSignIn"> <div class="mx_ButtonLabel">_t("Sign In")</div> </a> <a href="#/register" class="mx_ButtonParent mx_ButtonCreateAccount mx_Button_iconCreateAccount"> <div class="mx_ButtonLabel">_t("Create Account")</div> </a> </div> <!-- The comments below are meant to be used by Ansible as a quick way to strip out the marked content when desired. See https://github.com/vector-im/element-web/issues/8622. TODO: Strip out these comments and rely on the guest flag --> <!-- BEGIN Ansible: Remove these lines when guest access is disabled --> <div class="mx_ButtonRow mx_WelcomePage_guestFunctions"> <div> <a href="#/directory" class="mx_ButtonParent mx_SecondaryButton mx_Button_iconRoomDirectory"> <div class="mx_ButtonLabel">_t("Explore rooms")</div> </a> </div> </div> <!-- END Ansible: Remove these lines when guest access is disabled --> </div> </div> -
It looks like this in your web browser:

-
Serve the files
You can either serve the files on your own web server or upload them to your EMS Matrix server.
If you host the files on your web server, you need to enable the CORS header Access-Control-Allow-Origin: * on the web server for these files. See https://enable-cors.org/ for instructions on how to do this.
Serve files from your EMS Matrix server server
This is optional. See below for how to configure your EMS server.
Upload the files to an unencrypted room on your EMS server.

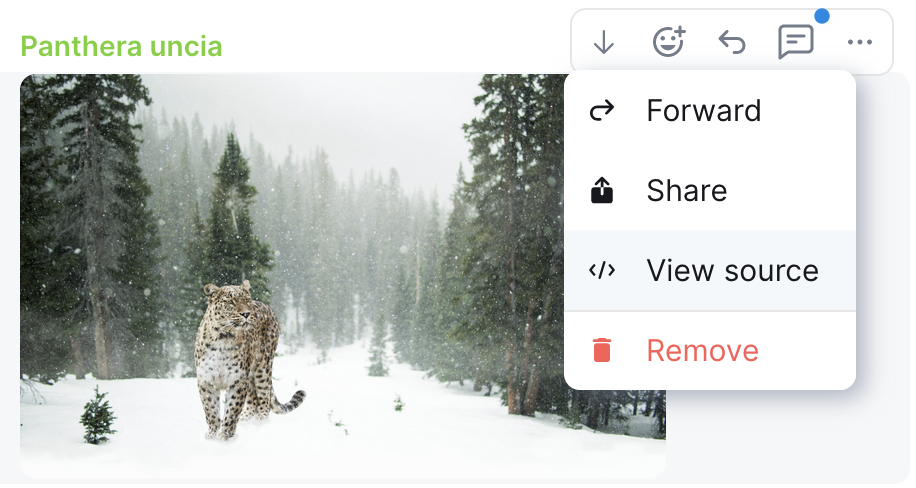
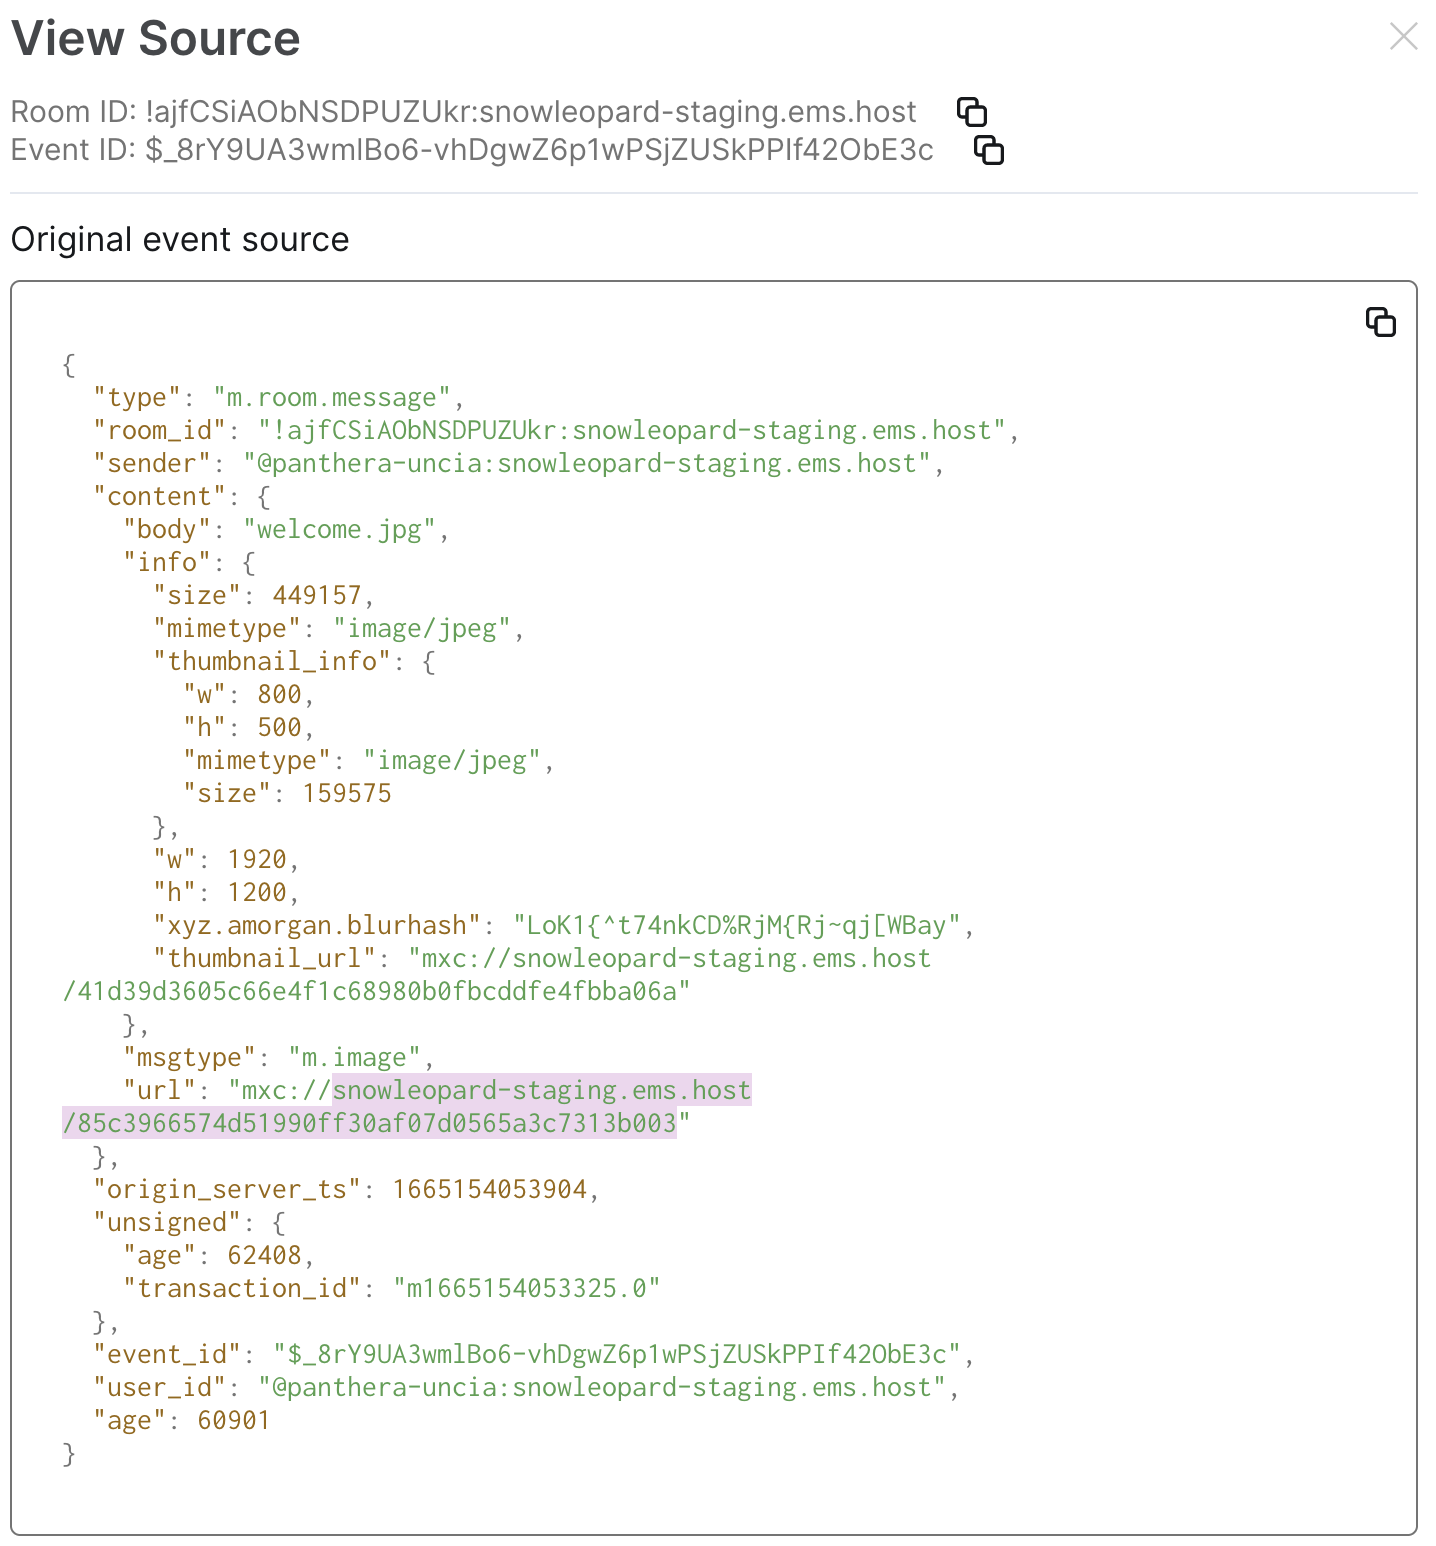
Get the ID for all four files. Click the Options button on the message containing the file, then View Source. Copy the url excluding mxc://. Make sure you do not use the thumbnail_url for images.
- The full URL for the files will be https://emsHostname.ems.host/_matrix/media/r0/download/url.
- You must use your
.ems.hostdomain, even if your EMS server uses a custom homeserver domain. - In my case, the URLs are
- Welcome page image: https://snowleopard-staging.ems.host/_matrix/media/r0/download/snowleopard-staging.ems.host/85c3966574d51990ff30af07d0565a3c7313b003
- Client logo: https://snowleopard-staging.ems.host/_matrix/media/r0/download/snowleopard-staging.ems.host/5a63e7917dc04255106e1c355190253b67bd46b3
- Welcome page content: https://snowleopard-staging.ems.host/_matrix/media/r0/download/snowleopard-staging.ems.host/a4ac2b5b99f90e437583f5eadab9f1ce23cc88f8
- Home page content: https://snowleopard-staging.ems.host/_matrix/media/r0/download/snowleopard-staging.ems.host/a757652a8d033542a87046feb1fde99e81fed461
Configure your EMS server
-
Add the URLs to the
Client look & feelsection in the EMS Control Panel. ClickSave.
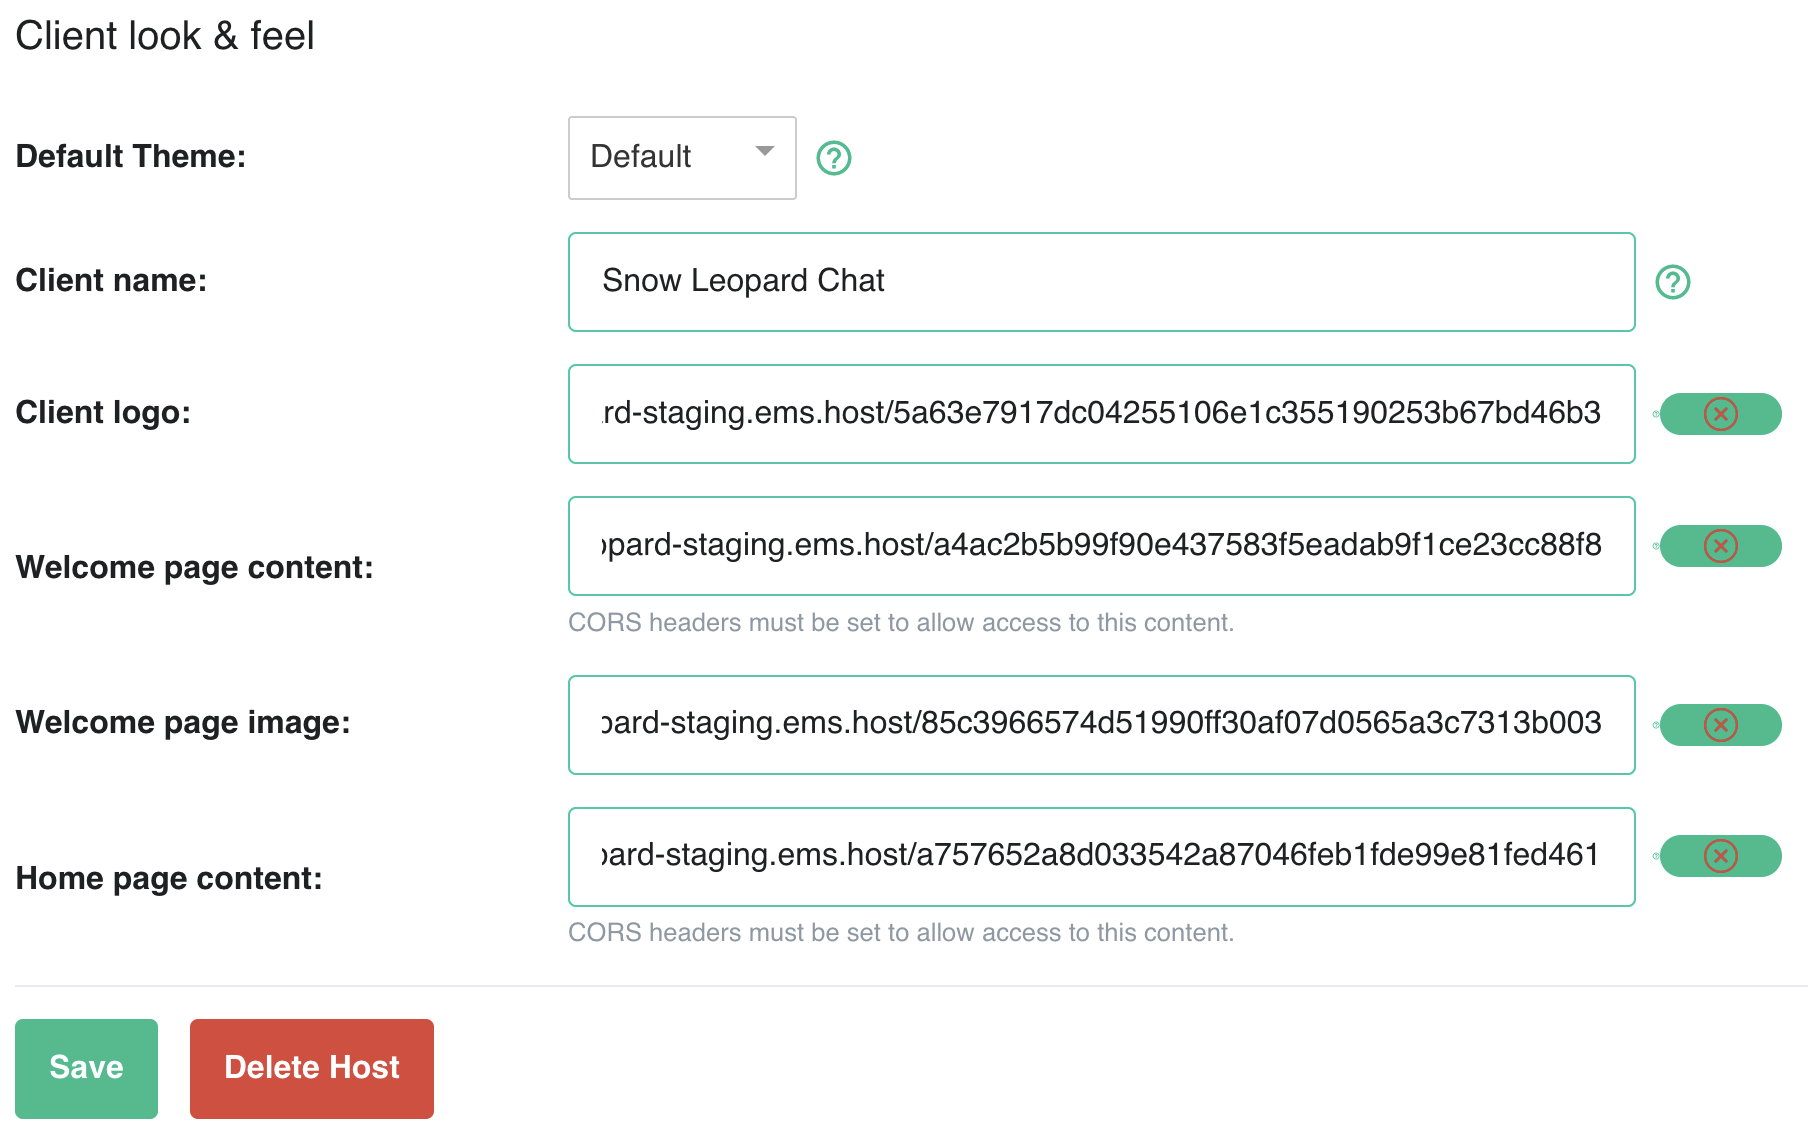
Unfortunately, we have a bug in the validator affecting files hosted on Matrix. Just ignore the error.- Note if you are hosting the files on your own web server, you only need to change your EMS server configuration or reprovision if the URLs have changed. Changes to the contents of existing files are applied
automatically.automatically
- Note if you are hosting the files on your own web server, you only need to change your EMS server configuration or reprovision if the URLs have changed. Changes to the contents of existing files are applied
-
Once your host finishes reprovisioning, check your Element Web to ensure the changes are applied correctly.
-
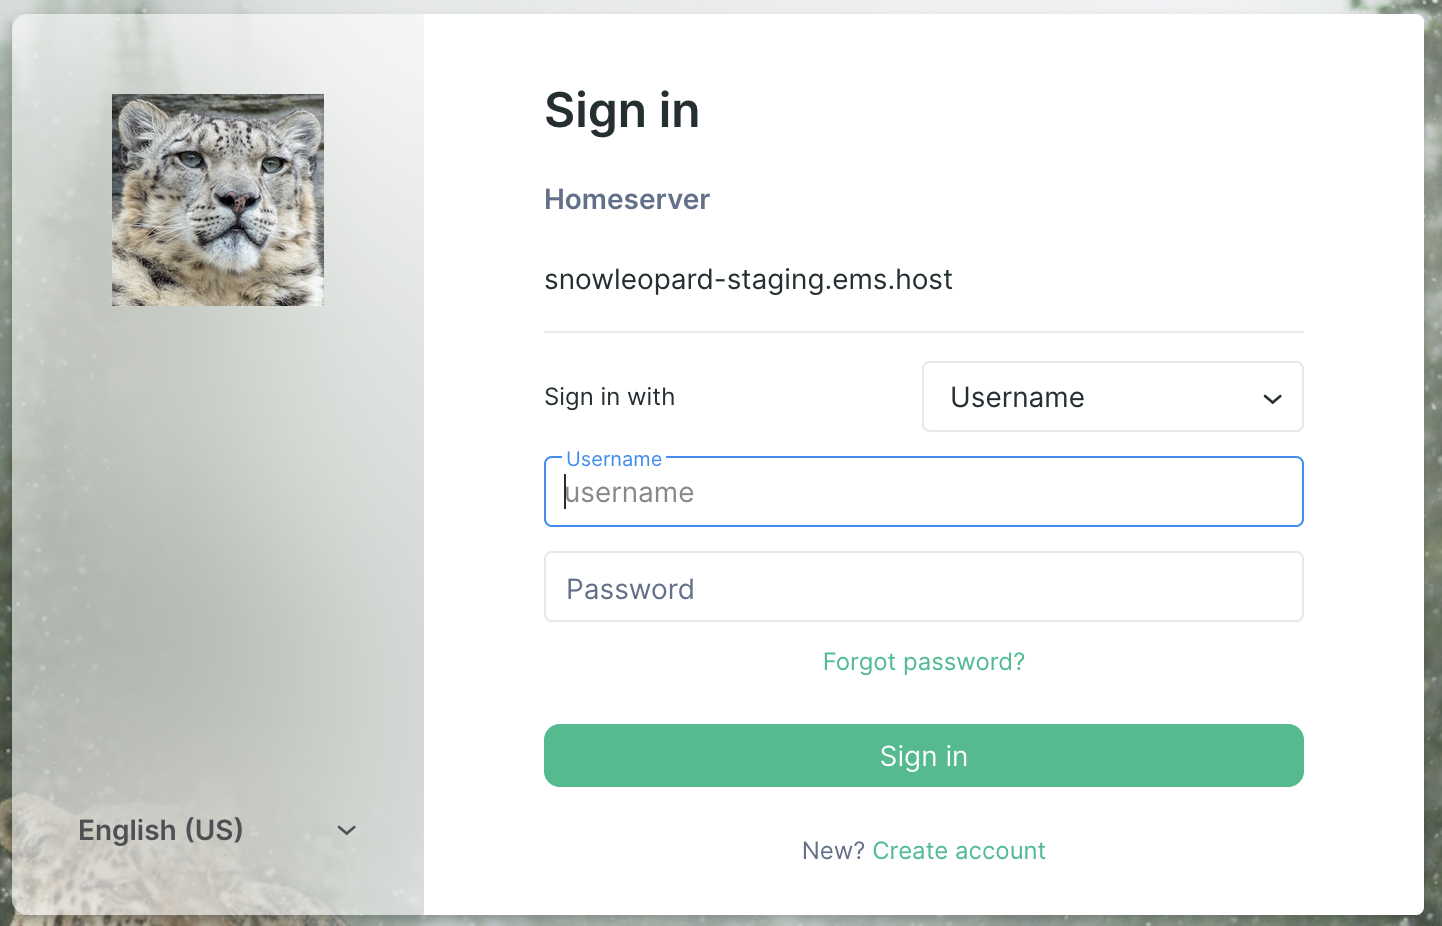
Welcome page image and Welcome page content
-
Client logo
-
Home page content
-

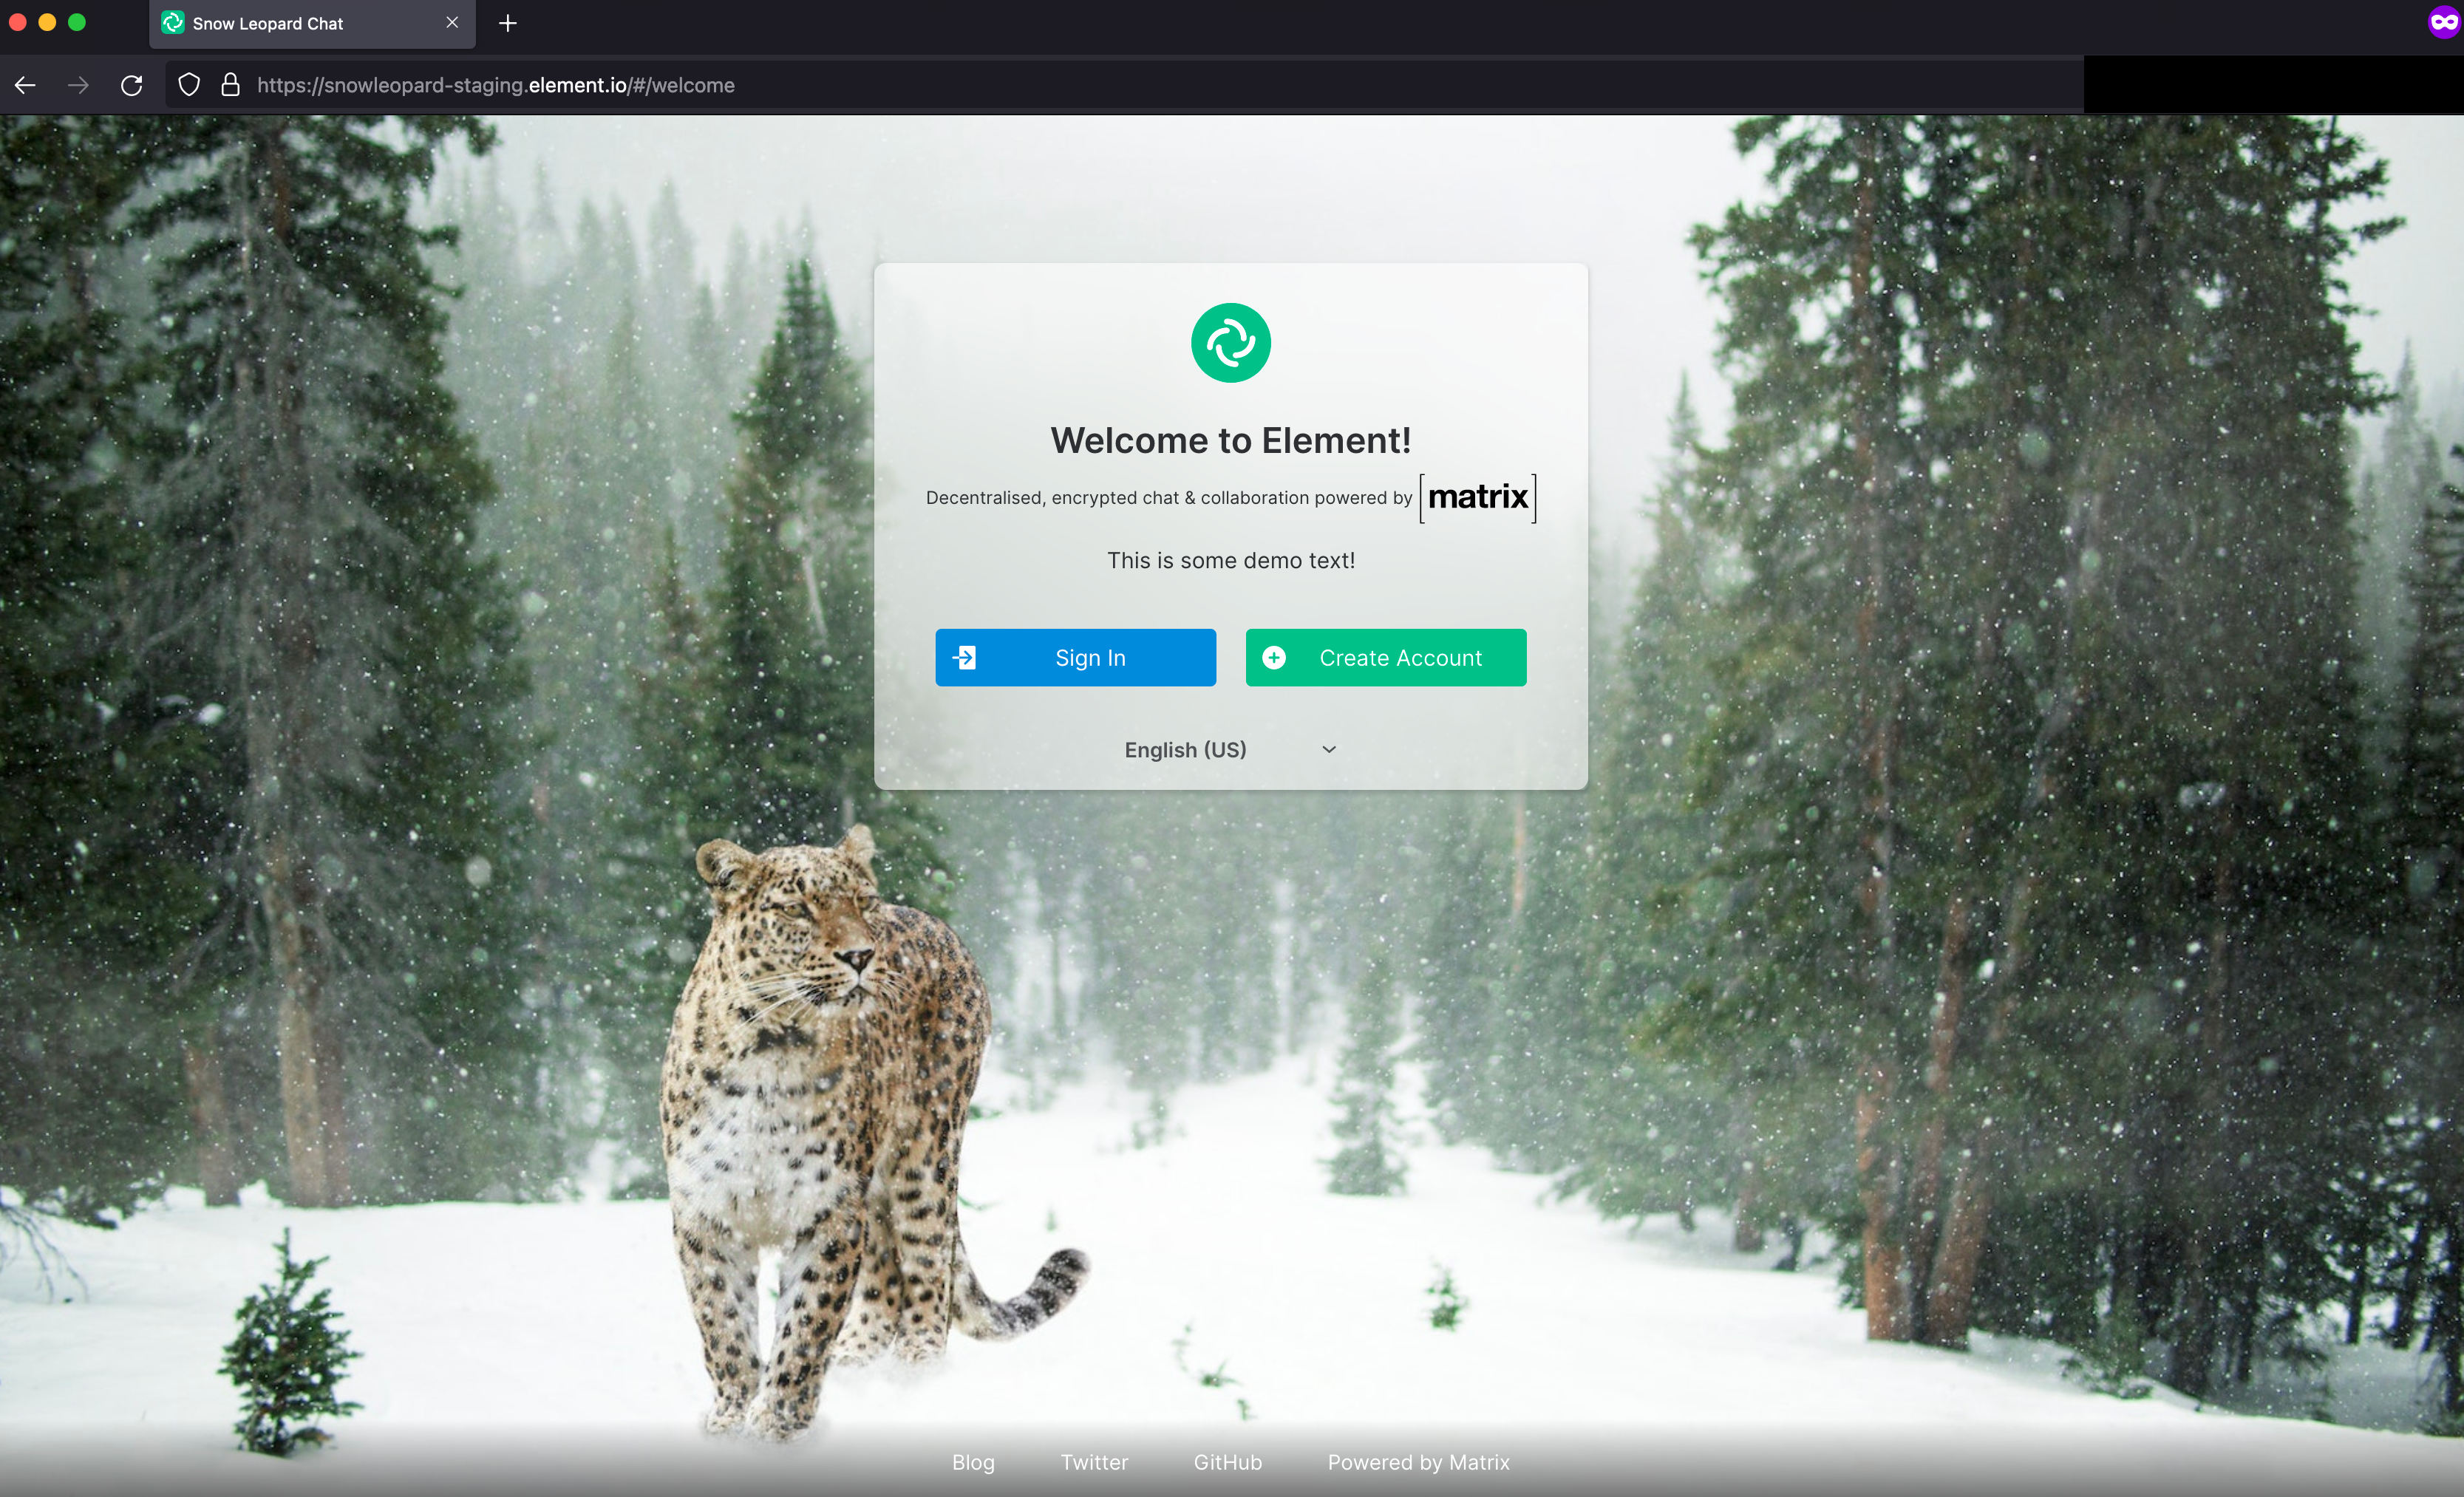


Image Credits
- Client logo image by Charles Miller used under the terms of Free to use License.
- Welcome page image by Pixabay used under the terms of Free to use (CC0) License.