Your access token grants full access to your Matrix account, threat it carefully like you would with a password
- Grab the room ID for the room you wish to add Hookshot to by clicking the `(i)` `Room Info` button, then Settings in the right column - Under Advanced, copy the Internal room ID [](https://ems-docs.element.io/uploads/images/gallery/2024-12/image-1733915724247.png) - Replace the leading `!` (exclamation mark) with `%21` (for example, `!QrmxBsBKPajykCohPz:localhost:8448` becomes `%21QrmxBsBKPajykCohPz:localhost:8448`) - Find the URL where your Matrix server is exposed. This may not be the same as the domain in your Matrix ID - Open a terminal on your computer. On Windows; PowerShell, on Mac; Terminal - Send the command below for your operating system. Replace `domain-where-your-matrix-server-is-exposed`, `room-id` and `access-toke` with the values from earlier. Note, if you are sending more than one message using your terminal, you need to change `1234` to another value each time. - Mac and Linux: ```bash curl --request PUT \ --url 'https://domain-where-your-matrix-server-is-exposed/_matrix/client/r0/rooms/room-id/send/m.room.message/1234' \ --header 'Authorization: Bearer access-token' \ --header 'content-type: application/json' \ --data '{ "msgtype":"m.text", "body":"!hookshot setup-widget" }' ``` For example: ```bash curl --request PUT \ --url 'https://localhost:8448/_matrix/client/r0/rooms/%21QrmxBsBKPajykCohPz:localhost:8448/send/m.room.message/1234' \ --header 'Authorization: Bearer syt_YWRtaW4_epoEMAUauwwFpsOGJxIg_471LjM' \ --header 'content-type: application/json' \ --data '{ "msgtype":"m.text", "body":"!hookshot setup-widget" }' ``` - Windows: ```powershell $url = "https://domain-where-your-matrix-server-is-exposed/_matrix/client/r0/rooms/room-id/send/m.room.message/1234" $headers = @{ "Authorization" = "Bearer access-token" "Content-Type" = "application/json" } $body = @{ msgtype = "m.text" body = "!hookshot setup-widget" } | ConvertTo-Json Invoke-RestMethod -Uri $url -Method Put -Headers $headers -Body $body ``` For example: ```powershell $url = "https://localhost:8448/_matrix/client/r0/rooms/%21QrmxBsBKPajykCohPz:localhost:8448/send/m.room.message/1234" $headers = @{ "Authorization" = "Bearer syt_YWRtaW4_epoEMAUauwwFpsOGJxIg_471LjM" "Content-Type" = "application/json" } $body = @{ msgtype = "m.text" body = "!hookshot setup-widget" } | ConvertTo-Json Invoke-RestMethod -Uri $url -Method Put -Headers $headers -Body $body ``` [](https://ems-docs.element.io/uploads/images/gallery/2024-12/image-1733916724815.png) [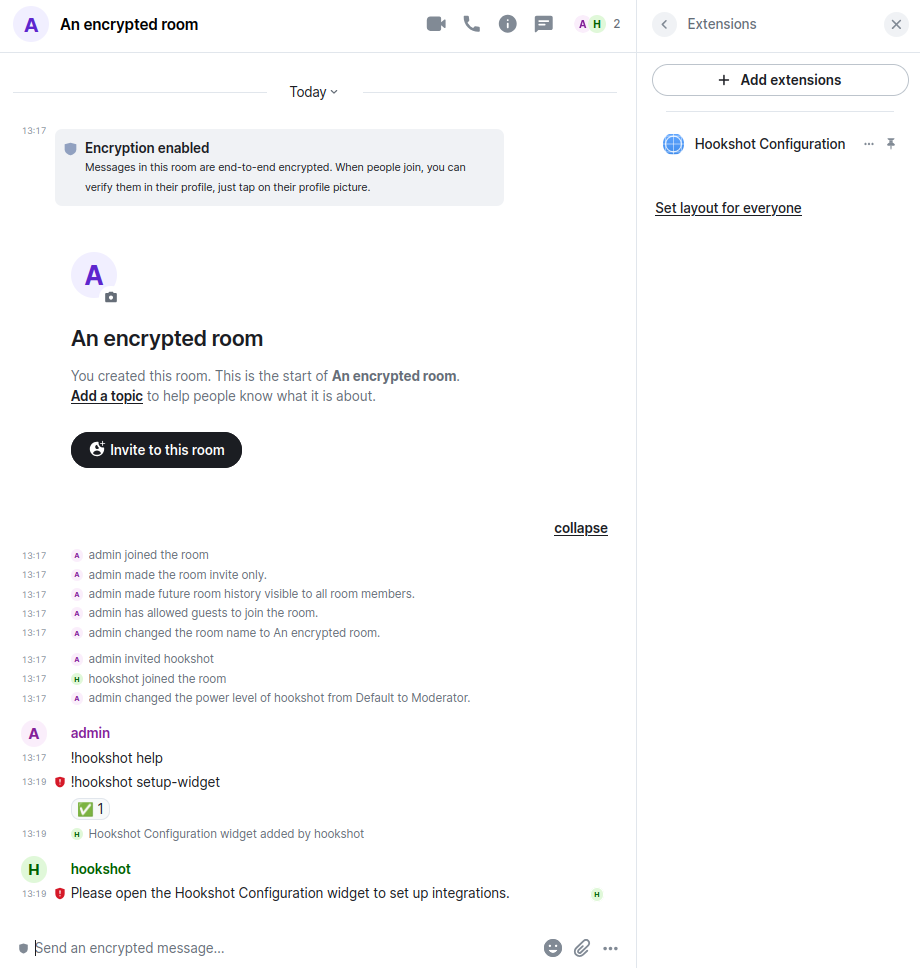](https://ems-docs.element.io/uploads/images/gallery/2024-12/image-1733923241297.png) My message was sent without encryption and Hookshot responded. You can now use Hookshot via the widget normally. Note that all messages sent by Hookshot remain unencrypted. Element warns you with the red shield on the messages. [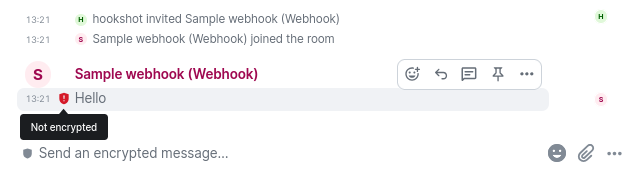](https://ems-docs.element.io/uploads/images/gallery/2024-12/image-1733923333978.png)