Element Support
Platform-agnostic (Cloud / On-Premise) documentation for Matrix, the Element clients etc. and troubleshooting / getting support.
- Understanding Your Element Accounts
- Frequently Asked Questions
- Getting Browser Network and Console Logs
- Submit Debug Logs
- Quick Start Guide
- Matrix Account Management
- Add Email to Your Account
- Creating a Matrix Account
- Securing a Matrix Account
- Change Account Password
- Changing a Matrix Account password
- Recovering a Matrix Account
- Deactivating a Matrix Account
- Reactivating a Matrix Account
- Cross Signing
- Check Status
- Export and Import E2E Room Keys
- Reset Cross Signing
- Set up Cross Signing
- Verify new Login
- Element Web/Desktop Client Settings
- Element Settings
- Accessing General Settings
- Appearance Settings
- Notification Settings
- Preference Settings
- Keyboard Settings
- Sidebar Settings
- Voice & Video Settings
- WIP Security & Privacy Settings
- Sessions
- Labs
- Help & About
- Matrix Rooms
- Understanding Matrix Rooms
- Getting Started: Creating a Room
- WIP Getting Started: Using a Room
- Managing a Room: Room Info
- Managing a Room: Room Settings
- Managing a Room: Advanced Room Management
- Exporting Messages
- Matrix Spaces
- Bridges
- Setting up Hookshot without E2EE support in encrypted rooms
- Using the Matrix IRC Bridge
- Using the Matrix IRC Bridge as an End User
- Using the Matrix XMPP Bridge as an End User
- Using the WhatsApp bridge
- Using the Telegram Bridge
- Element Android/iOS Client Settings
- Advanced Administration
Understanding Your Element Accounts
There are two different accounts you will have when signing up with Element. The first is your EMS Account, it is used to manage your subscriptions and configure them. Second is your Matrix account, this is the account you login to via any Matrix Client, such as the Element Web App or Element Mobile / Desktop Apps, and actively use to message other users.
EMS Account
When you sign up for a service with Element, you do so using your EMS Account. This account holds your personal details, company details (if applicable) and billing address / payment information.
Attached to this account are all your subscriptions, as well as the ability to manage those subscriptions' configuration, including creating additional subscriptions and cancelling existing ones.
You can access your account, and manage the above via the 'Admin Dashboard', you can find this by visiting Element.io selecting 'Sign In' then 'Admin Dashboard'. Alternatively you can access it directly from here EMS Control Panel.
All different subscriptions are managed through your EMS account, the admin dashboard will provide different management options depending on; if you host a homeserver with us; have an Element One account; or self-host using Element On-Premise.
You can find dedicated documentation depending on your subscription via EMS Cloud Documentation or Element On-Premise Documentation.
Deleting an EMS account
If you wish to delete your EMS account entirely, you can do so from your user account page in the [EMS Control Panel](https://ems.element.io/user/account) by clicking the "delete account" button and confirming. This will delete all hosts and subscriptions before removing your user account.Matrix Account
Your Matrix account is created on the homeserver of your choice, and you use it via a Matrix client to message others, make calls and join rooms etc. Following setup of a subscription, you will be provided your homeserver details, this maybe something you specified yourself or set depending on your subscription.
See our Matrix Account Management documentation for information covering creation and management of your Matrix account.
Cloud Hosted
If you have chosen for us to host your own dedicated homeserver in the cloud, you will need to create an account on the homeserver. Deployed alongside the homeserver is a dedicated Matrix web client accessible, by default, from the homeserver URL. When using this client, your homeserver URL will already be applied for you.
Alternatively you can use any other Matrix client of your choosing, simply make sure to correctly set your homeserver before registering for an account.
Self Hosted
If you are self-hosting your homeserver, you will need to create an account on the homeserver. As part of your configuration during the On-Premise setup process, you will have specified a sub-domain for your dedicated Matrix web client. You can access that URL to get started, when using this client, your homeserver URL will already be applied for you.
Alternatively you can use any other Matrix client of your choosing, simply make sure to correctly set your homeserver before registering for an account.
Deactivating your Matrix Account
If you'd like to deactivate your Matrix Account, check our Deactivating a Matrix Account page for guidance.
Element One
An Element One subscription is essentially a combination of both an EMS account and a Matrix account. While they are technically separate, your EMS account is used to authenticate accessing your Matrix account so you'll only have 1 login. It is however worth reading the above sections to understand the differences between them.
If you have signed up for an Element One account, you will have created your Matrix account, i.e. @example:one.ems.host, as part of the setup flow. A dedicated Matrix web client is accessible via Element One. When using this client, you'll be prompted for your EMS account login, which will seamlessly log you into your Matrix account.
Alternatively you can use any other Matrix client of your choosing, simply make sure to correctly set your homeserver to one.element.io and you'll be able to login using your EMS account.
Deleting an Element One account
You can manage or cancel your Element One subscription on by logging into the EMS Control Panel Element One page.
Frequently Asked Questions
Element General
Can spaces be deleted?
Spaces in Matrix are just rooms with some extra metadata. You can delete them the same way you delete rooms. If you are an EMS admin, see How do I delete a room or a space?
How do I enable guest users in a room?
Set the following settings:
- Security & Privacy -> Encryption -> Encrypted: Off 1
- Security & Privacy -> Access: Public
- Security & Privacy -> Access -> Show advanced -> Enable guest access: On
- Security & Privacy -> Who can read history: Anyone
Guest users only work if a native user on the default homeserver configured in your client is a member of the room. For example, to join a room on your EMS server as a guest using the client at https://app.element.io/, an account on the matrix.org homeserver must be a member of the room.
1 Guest users will technically work with encryption enabled, but guests will not be able to read any messages as they do not have the keys to decrypt them.
It's not recommended to add encryption to public rooms. Anyone can find and join public rooms, so anyone can read messages in them. You'll get none of the benefits of encryption, and you won't be able to turn it off later. Encrypting messages in a public room will make receiving and sending messages slower.
How do I get my access token?
The access token grants full access to your Matrix account. Do not share it with anyone.
- Open Element Settings
- Click
Help & About - At the bottom, under
Advanced, clickAccess Token - Copy your token
How do I link to my space outside of my Element Web?
Spaces are just rooms, so you can link to a space the same way you would a room—for example, https://matrix.to/#/#community:matrix.org.
My secret storage (key backup) secret key/passphrase has leaked, how do I reset and secure it again?
- Backup your message encryption keys, see Export and Import E2E Room Keys
- In Element Wed/Desktop settings, under
Security & Privacy->Secure backup, clickDelete Backuprepeatedly until all backup versions are deleted. - Click
ResetunderSecure Backup. - Click
ResetunderCross-signing. - Import the message encryption keys you backed up earlier. See Export and Import E2E Room Keys
What are the permissions required to start a video call?
In a room with more than two members, voice and video calls are done using the Jitsi integration. Users need "Modify widgets" permissions to add the Jitsi widget to the room and initiate a call.
Once the call is initiated, anyone in the room can join.
What does the different MAS access token prefixes mean?
mat_ are next gen auth access tokens, short lived; mar_ refresh tokens
mct_ are compatibility tokens, usually don't expire; mcr_ are compatibility refresh tokens (very rarely used)
syt_ are imported synapse compat access tokens; syr_ imported compat refresh tokens
What is the preferred resolution for room and space icons?
Room and space icons can be shown in a full-screen lightbox, so the resolution should be high. The homeserver will create a smaller thumbnail that is displayed when viewing rooms and spaces normally.
Matrix General
Can encrypted messages be recovered?
If you want to restore encrypted messages to your Matrix account, you need to have access to your encryption keys that were used to encrypt those messages.
If you have lost your encryption keys, you will not be able to decrypt these messages and they will remain encrypted.
However, if you have used multiple devices to access your Matrix account and have access to the encryption keys on one of those devices, you can try using that device to decrypt messages.
Can I sign in to multiple Matrix accounts in Element Desktop?
If you have multiple Matrix accounts - for example, an EMS account and a matrix.org account - you cannot log in to both simultaneously in the Element Desktop client today. However, you can launch multiple Element instances locally via its Profiles feature.
Do you have tips for migrating between Matrix accounts?
Currently Matrix doesn't support moving communication history over homeservers. The suggested manual method is to invite your new user (for example on an EMS cloud server) over to the same rooms as your old user and give your new user the relevant power levels, if possible.
Old messages in a room will be visible to the new user depending on the room history setting. If you have a room with history open to members, you will be able to simply scroll back to read history (assuming at least one homeserver in the room has the history available locally). Note that changing the room history visibility setting for a room doesn't affect old messages in the room. For rooms where history is limited for new users in the room from "join" or "invite", there is no way to retrieve that history using a user who was not present in that rooms.
Note for encrypted rooms, please ensure to export encryption keys from your old account and import them to the new account. This will allow you to decrypt encrypted room history for messages you have access to. You can do this from the "Security & Privacy" settings in Element.
It may also make sense to export important messages to file, in cases where you cannot get access to them from your new account, for example due to room message visibility settings. Element allows you to export chat history from a room from the room context menu.
How do I add a password if my account was created using SSO?
If your account was created using SSO, for example via GitLab or Apple, and your homeserver supports multiple authentication methods for an account (matrix.org does), follow these steps to add a password to your Matrix account. Note, you will need access to the third party SSO account you used to create the account.
- Add an email address to your account. See Add Email to Your Account.
- Open a new Matrix client, for example https://app.element.io in a private/incognito browser window, then reset the password for your account. See step 3 and onwards in this guide. Note signing out all other devices when prompted is optional for this guide to work.
- You can now sign in to your Matrix account using either your original SSO account, or the password you just created.
How do I manually tombstone a room?
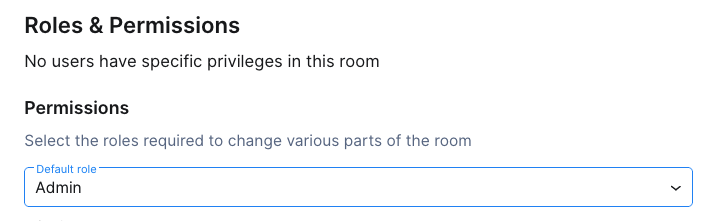
This can only be done by room admins (by default). This action cannot be undone.
- Set the Default role in the room to Admin

- Open Element Devtools by entering
/devtoolsin Element

- Click
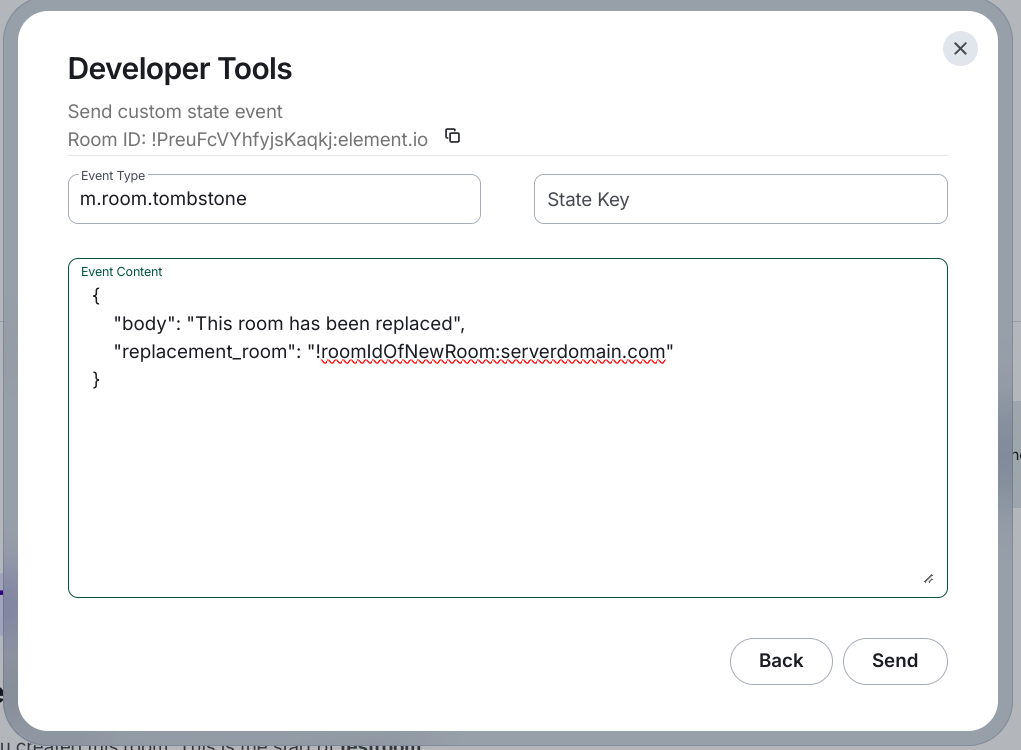
Explore room state - Click
Send custom state event- Event Type:
m.room.tombstone - State Key: leave empty
- Event Content:
{ "body": "This room has been replaced", "replacement_room": "!roomIdOfNewRoom:serverdomain.com" }- Click
Send

- Event Type:
- Optionally copy room settings and move aliases to the new room
- The room is now tombstoned


What characters can I use in my username/localpart?
Your Matrix username/localpart can only contain lower case letters, numbers, and the characters . _ = - /.
What is an Identity Server, and how does it work?
The best response to 'What is an Identity Server' is detailed in section 2. of the vector.im Identity Server privacy policy, available here: https://element.io/legal.
New Vector runs two identity servers, one at matrix.org and another at vector.im. These servers run in a closed federation - this means that if you add (or remove) your data from one, it is added to (or removed from) the other automatically, too.
The behavior and role of Identity Servers are changing. Historically, Identity Servers provided three sets of functionality:
- They let users publish their third-party identifiers (email/telephone number) to a directory to allow other Matrix users to discover them.
- Letting users send invites to a Matrix chat room to an email address instead of a Matrix ID.
- Letting homeservers send emails/SMS text messages to verify that they belong to a given Matrix user so that the user can log in to the homeserver using a third-party identifier instead of a Matrix ID.
Identity Servers continue to provide the functionality described in 1. However, the features described in 2. and 3. are now provided by the homeserver instead and will be deprecated and phased out of the Identity Server in the future.
For a period in 2019, while privacy functionality was being enhanced on vector.im and matrix.org, these Identity Servers were restricted to only provide services for users on New Vector homeservers. Once privacy improvements landed, this restriction was lifted.
Getting Browser Network and Console Logs
To troubleshoot some issues, logs from your browsers' Network and Console tabs will be requested, please see the steps below to pull those logs.
🔧 Accessing Developer Tools
- Press
F12orCtrl+Shift+I(Windows/Linux) - Or
Cmd+Option+I(Mac) - Alternatively: Right-click on the page > Inspect
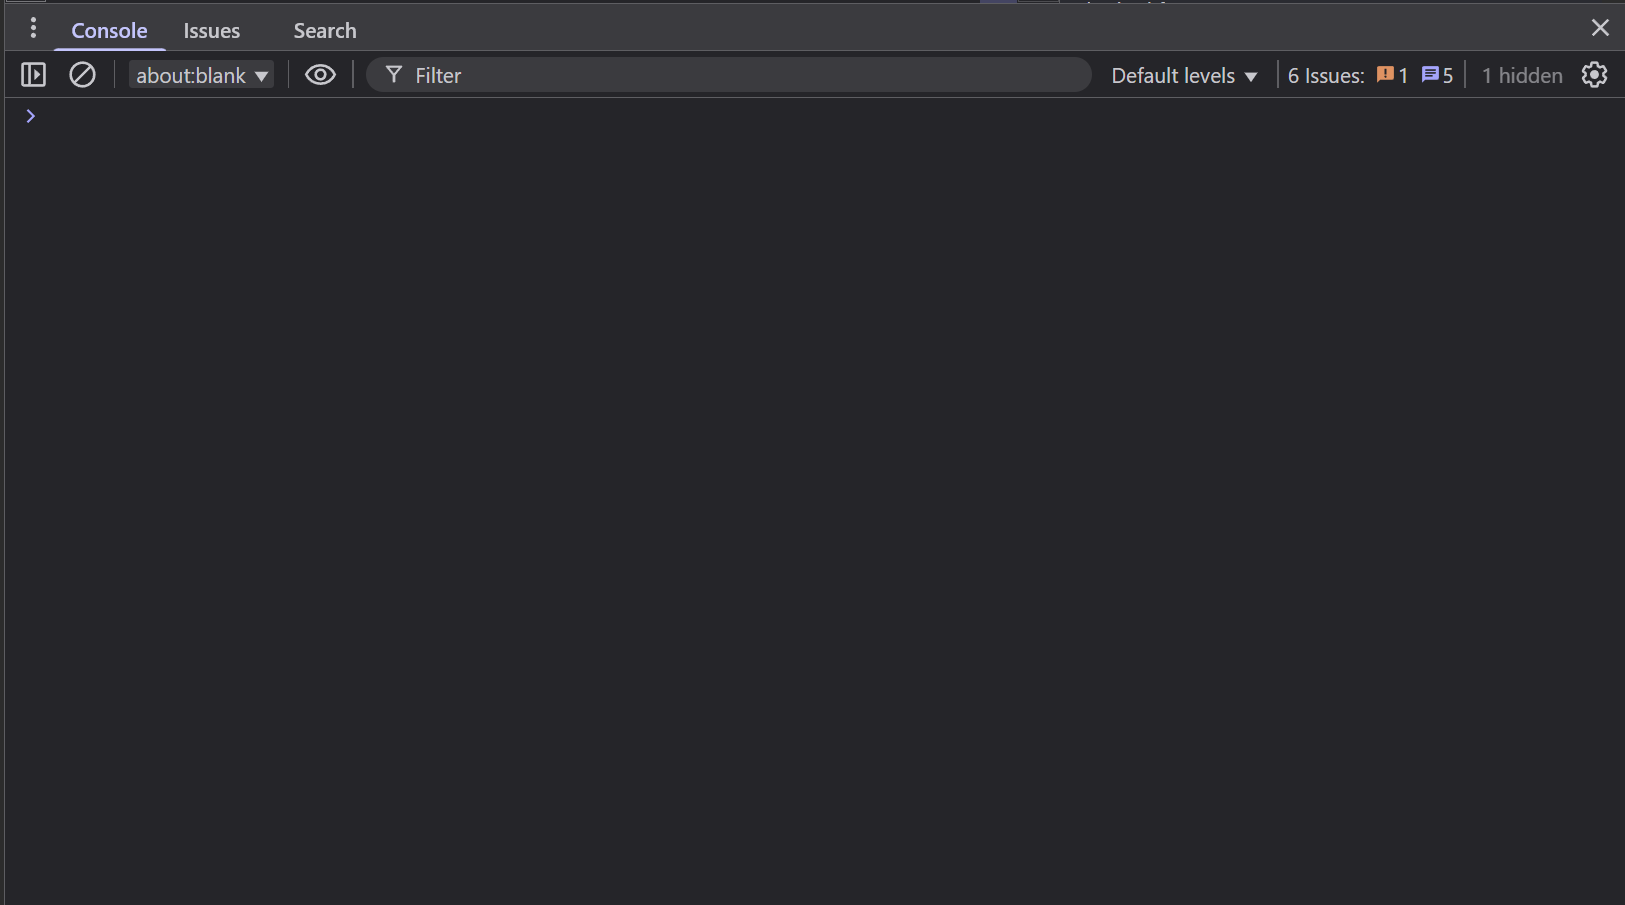
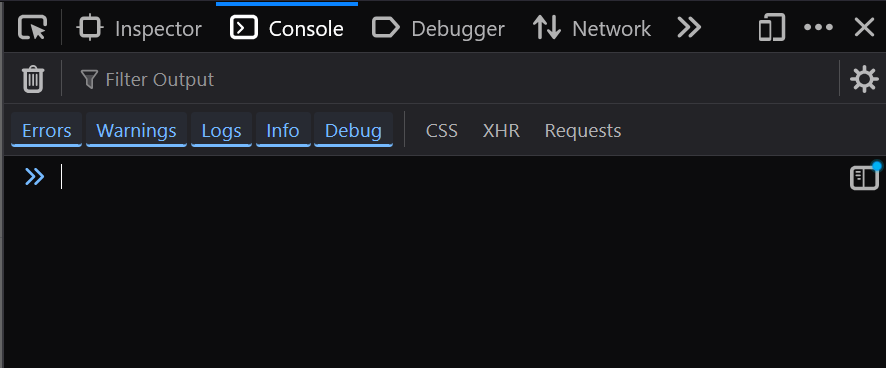
📜 The Console Tab
After opening Developer Tools, click the Console tab.
🌐 Accessing the Network Tab
After opening Developer Tools, click the Network tab.
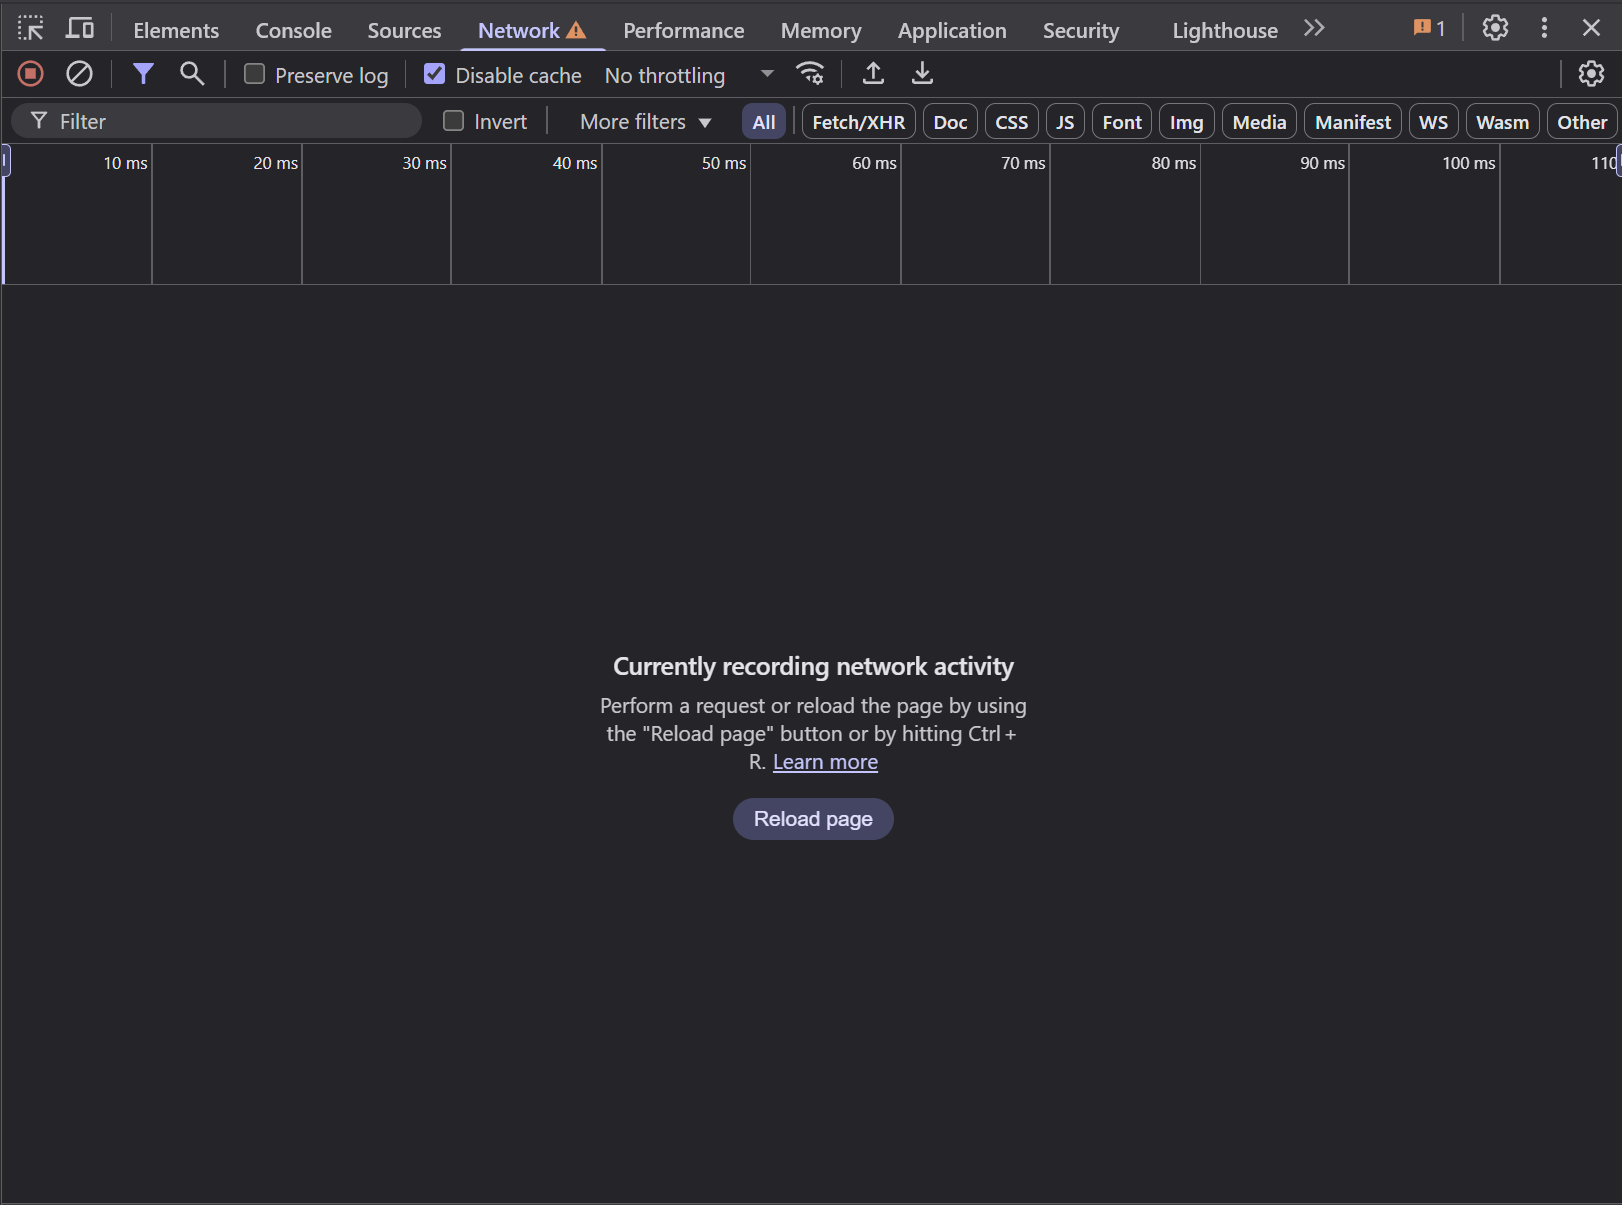
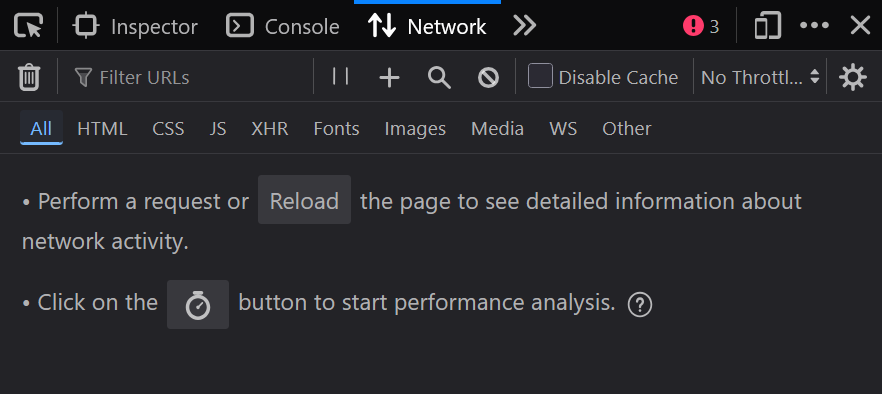
This shows all network requests (like XHR, Fetch, JS, CSS, etc.). Make sure to refresh the page if you opened the tab after the page loaded.
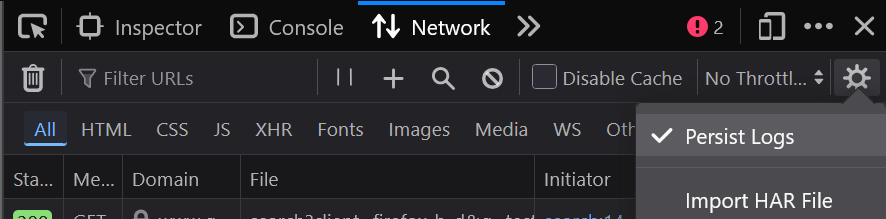
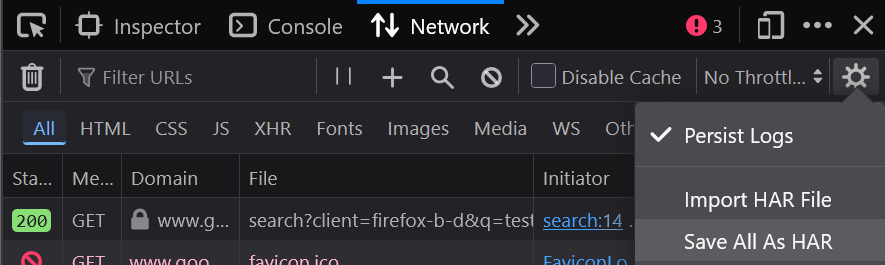
💾 Persisting Logs
By default, logs may clear on navigation or refresh.
To keep logs, on the Network tab look for the "Preserve log" checkbox or the "Persist Logs" dropdown option near the top.

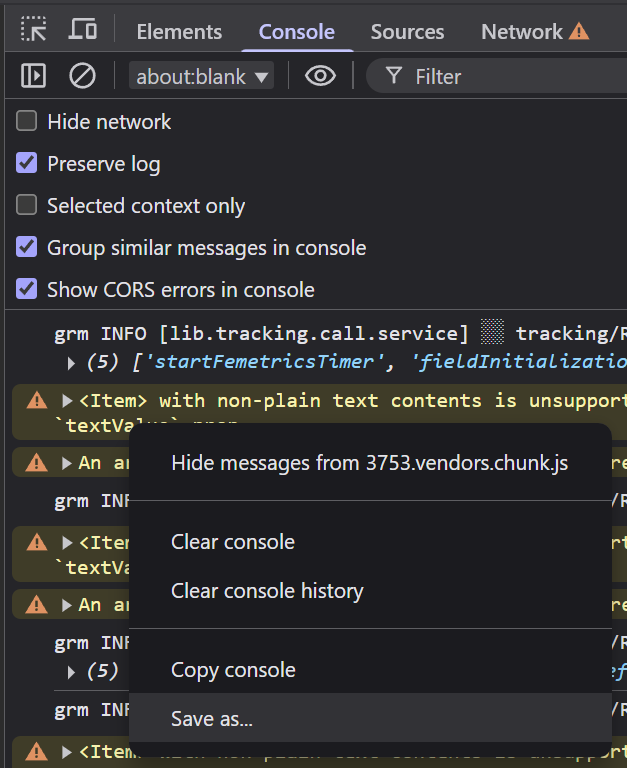
On the Console tab look for the "Preserve Log" checkbox or the "Persist Logs" within the Settings cog near the top.


Enable it to keep logs between page loads.
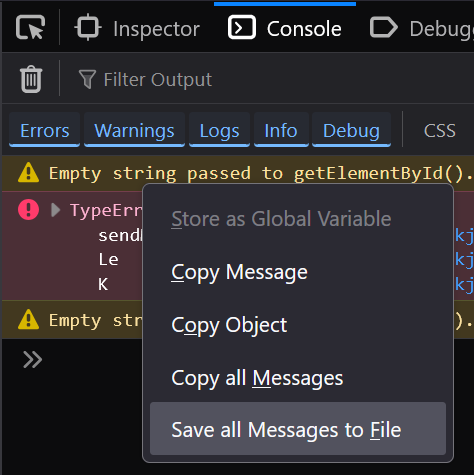
📥 Saving Console Output
- Right-click in the Console area.
- Choose "Save as..." or "Save all Messages to File" to download the console output.
📤 Exporting Network Traffic as HAR
- Go to the Network tab.
- Make sure "Preserve log" is enabled if you want to capture navigation.
- Reload the page or reproduce the issue.
- Click the download button ("Export HAR (sanitized)...") on the top bar.

Submit Debug Logs
-
Search for other issues of the same problem on
- Element Web and Desktop: https://github.com/element-hq/element-web/issues
- Element iOS: https://github.com/element-hq/element-ios/issues
- Element Android: https://github.com/element-hq/element-android/issues
-
If you cannot find any, create one by clicking
New issue, thenGet startedin theBug reportsection.


-
Go to the section for your device

Element Web and Desktop
-
Go to Element
All settings
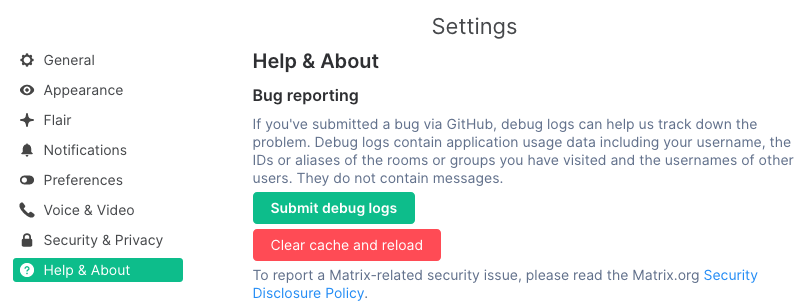
-
Under
Help & About, clickSubmit debug logs

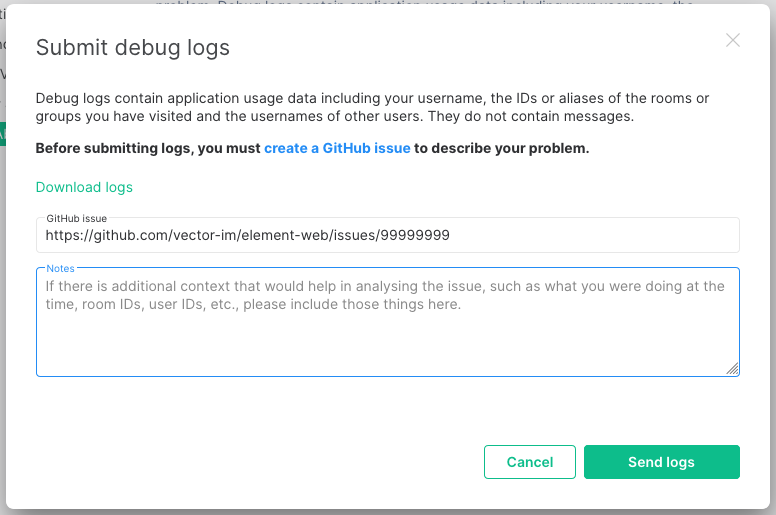
-
Enter a GitHub issue link and a description. Then click
Send logs

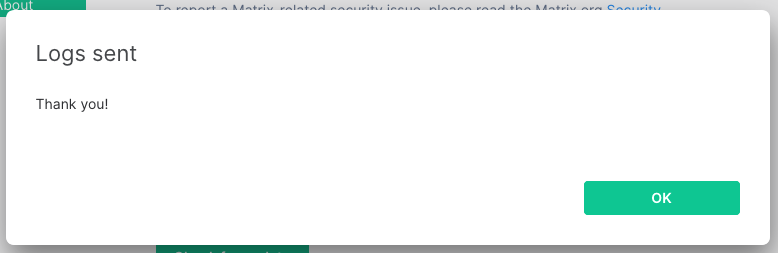
-
Click
OK


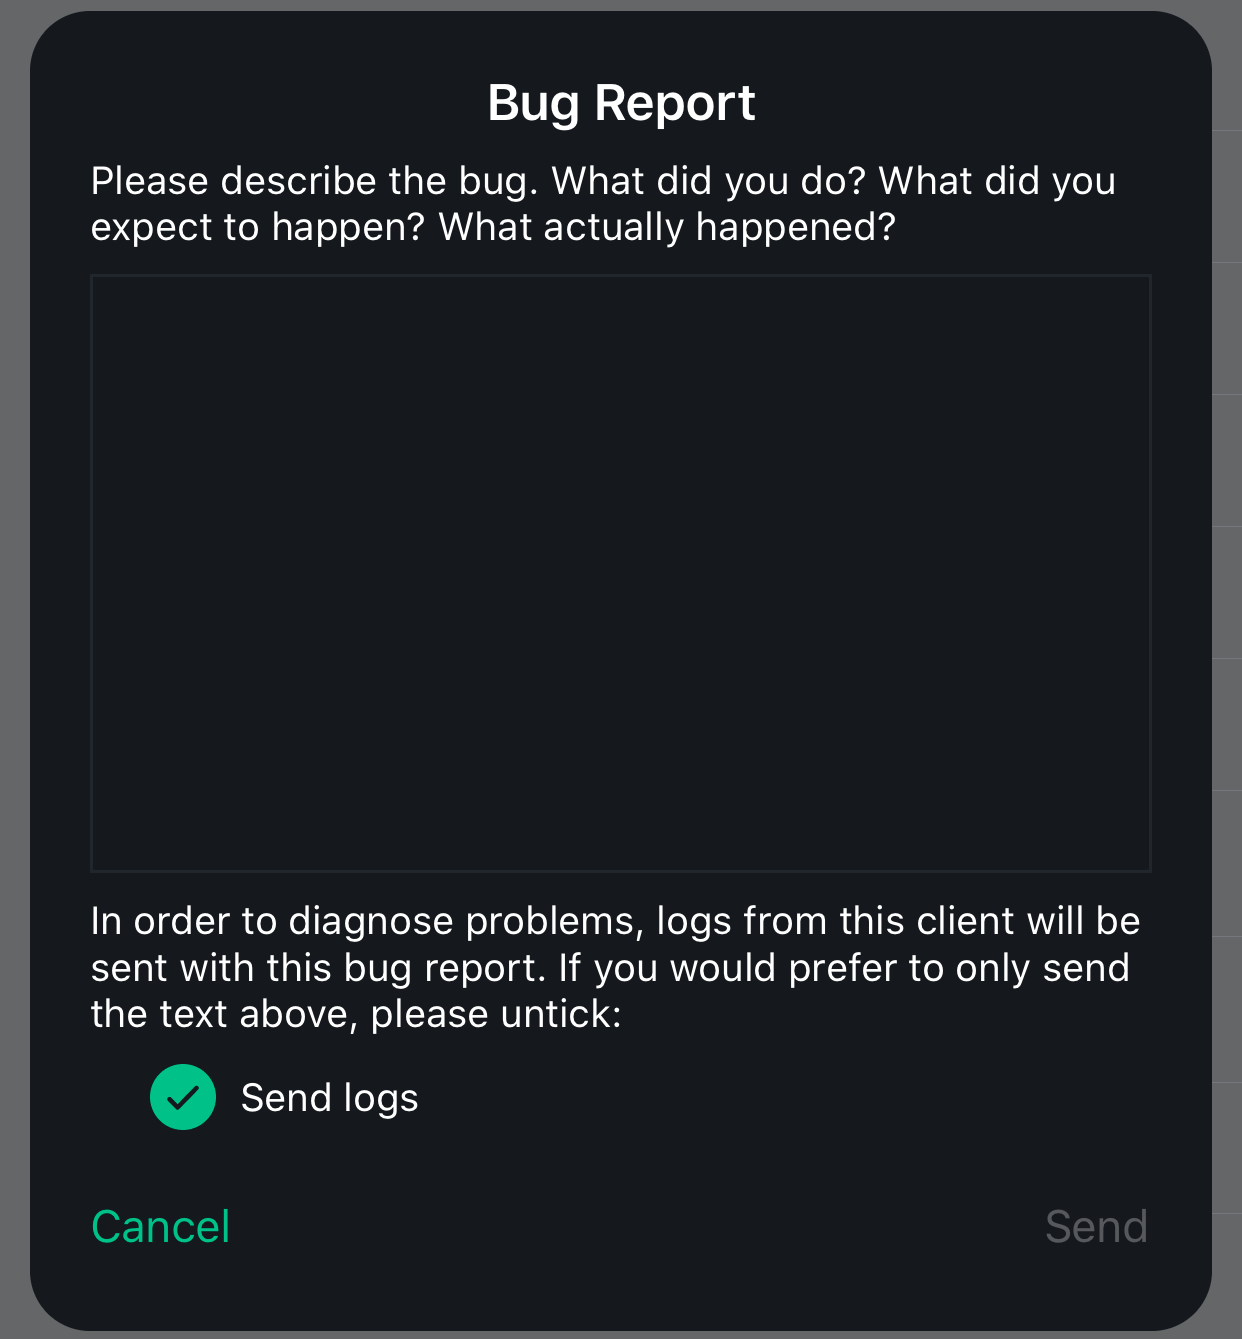
Element iOS
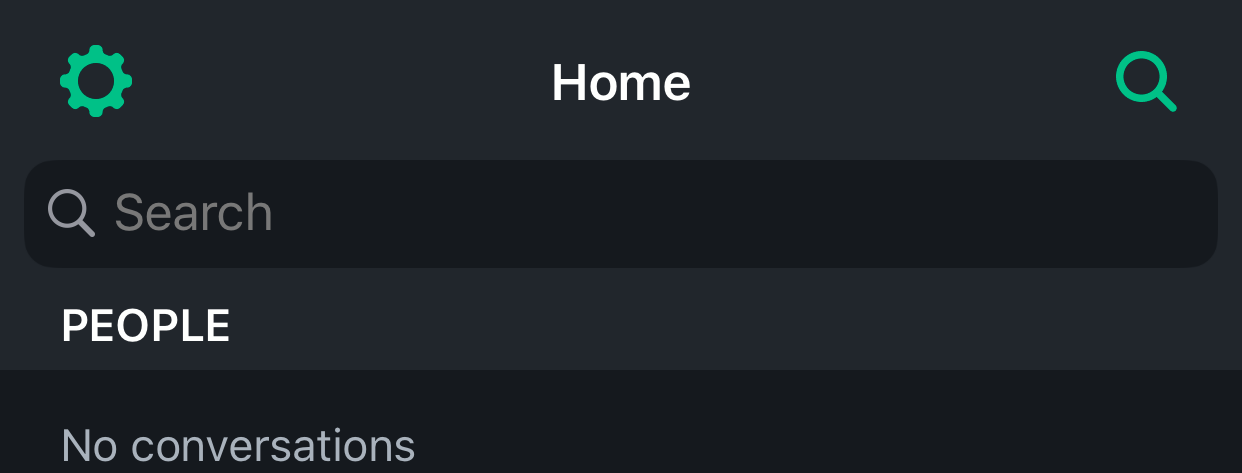
-
Tap the cog in the top left of Element

-
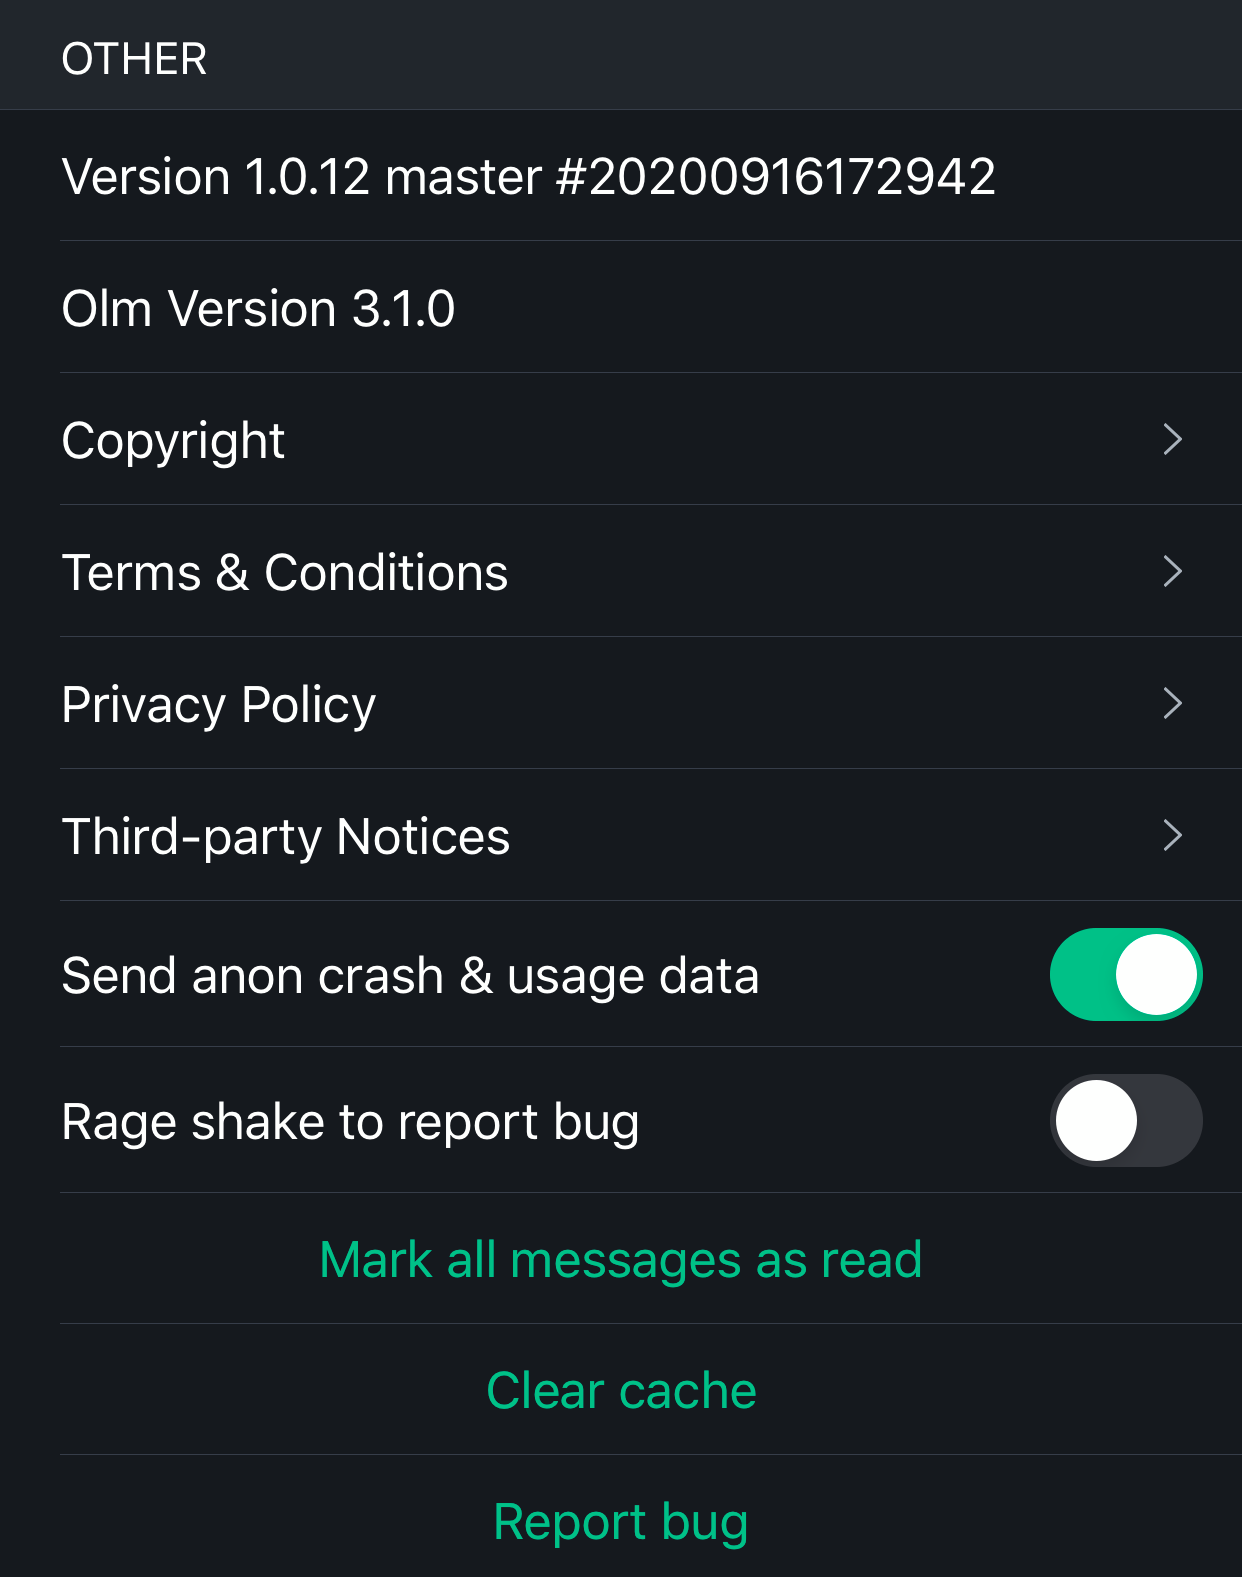
Scroll down to the
OTHERsection, then tapReport bug

-
Enter a GitHub issue link and a description, make sure
Send logsis checked, then clickSend

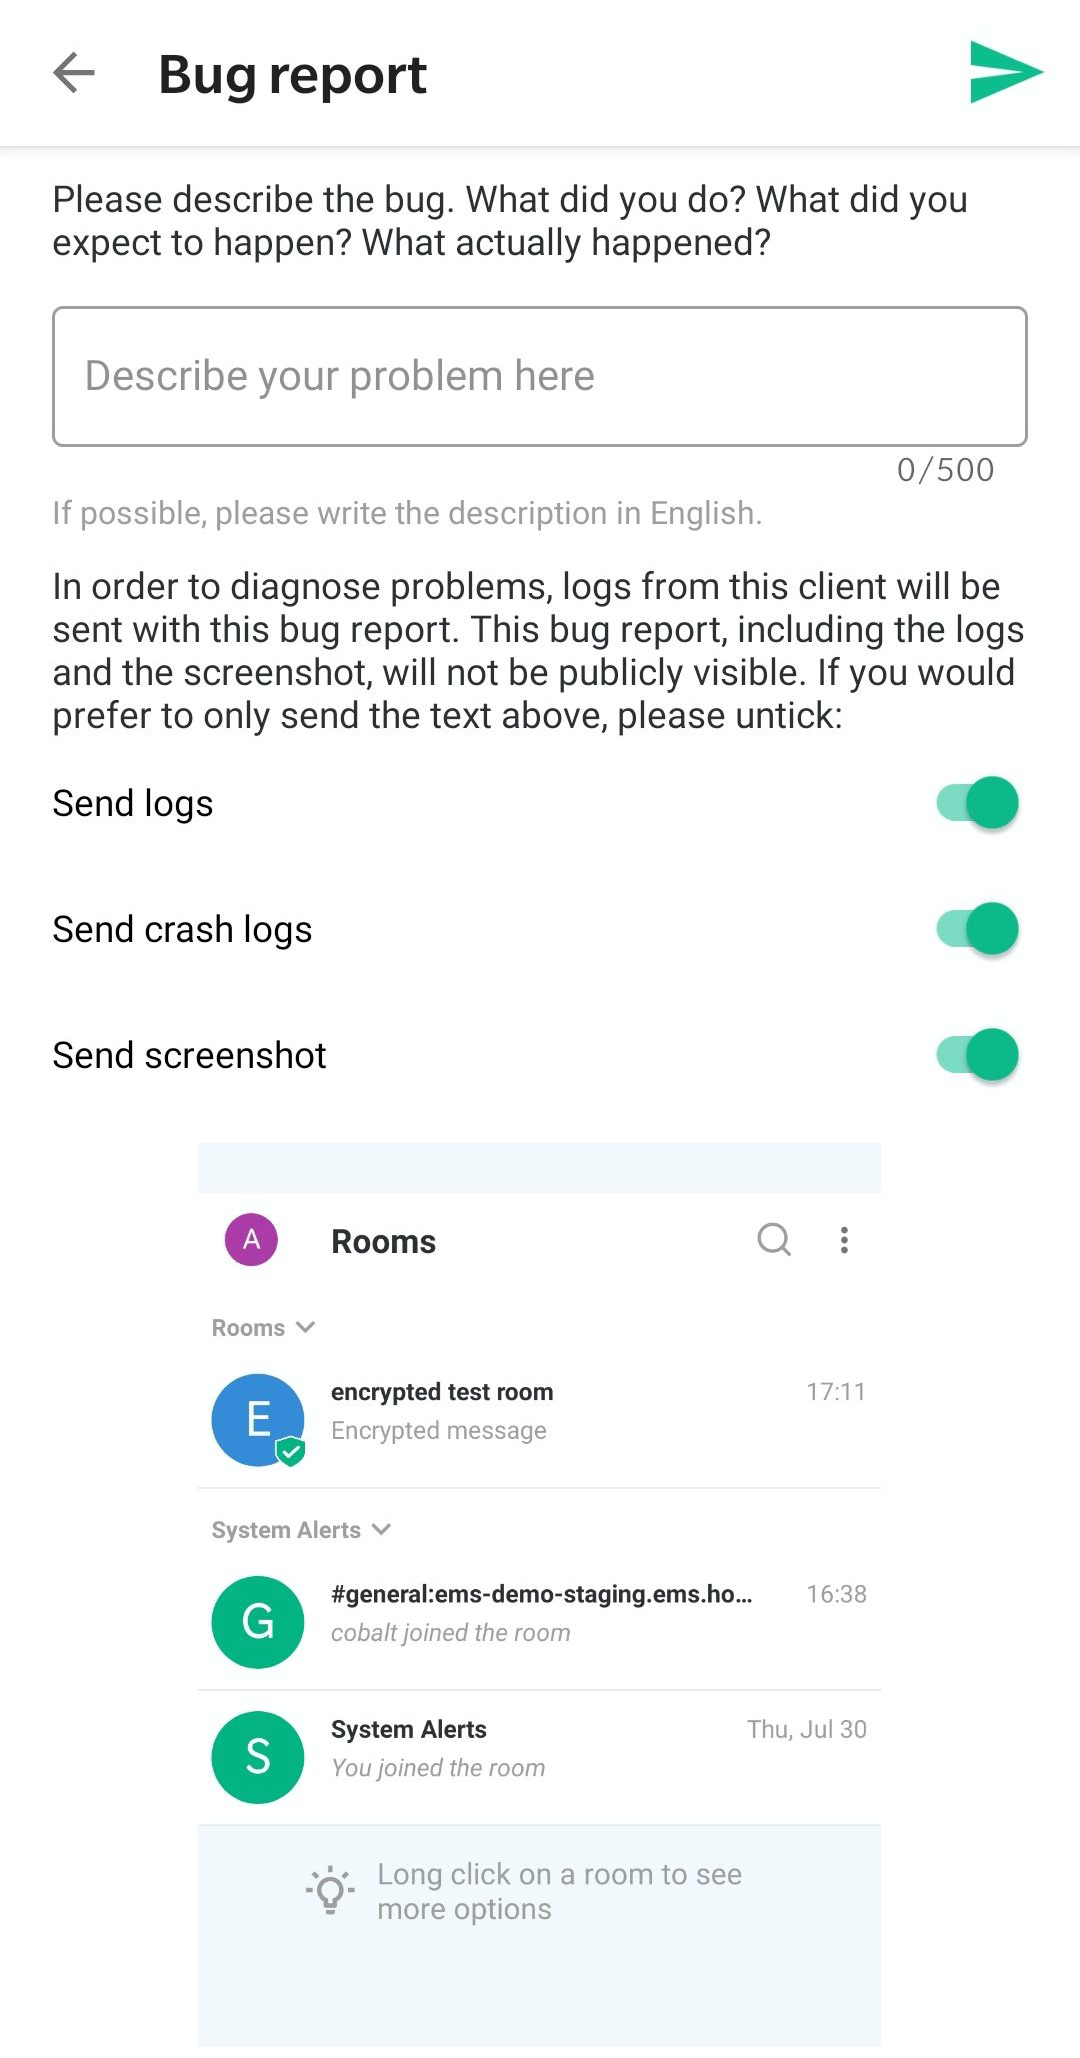
Element Android
-
Tap the three stacked dots in the top right

-
Tap
Report bug

-
Enter a GitHub issue link and a description, make sure
Send logs, andSend crash logsare checked, then tap the send arrow in the top right


Quick Start Guide
EMS Docs version of the Element Quick Start Guide - https://element.io/user-guide
Onboarding
If you are a new user click Create Account to register.
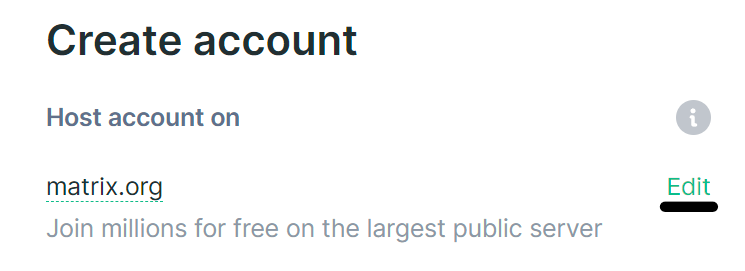
Select where to host your account by choosing a “homeserver”. You can use the custom server options to sign into other Matrix servers by specifying a homeserver URL. This allows you to use Element with an existing Matrix account on a different homeserver.
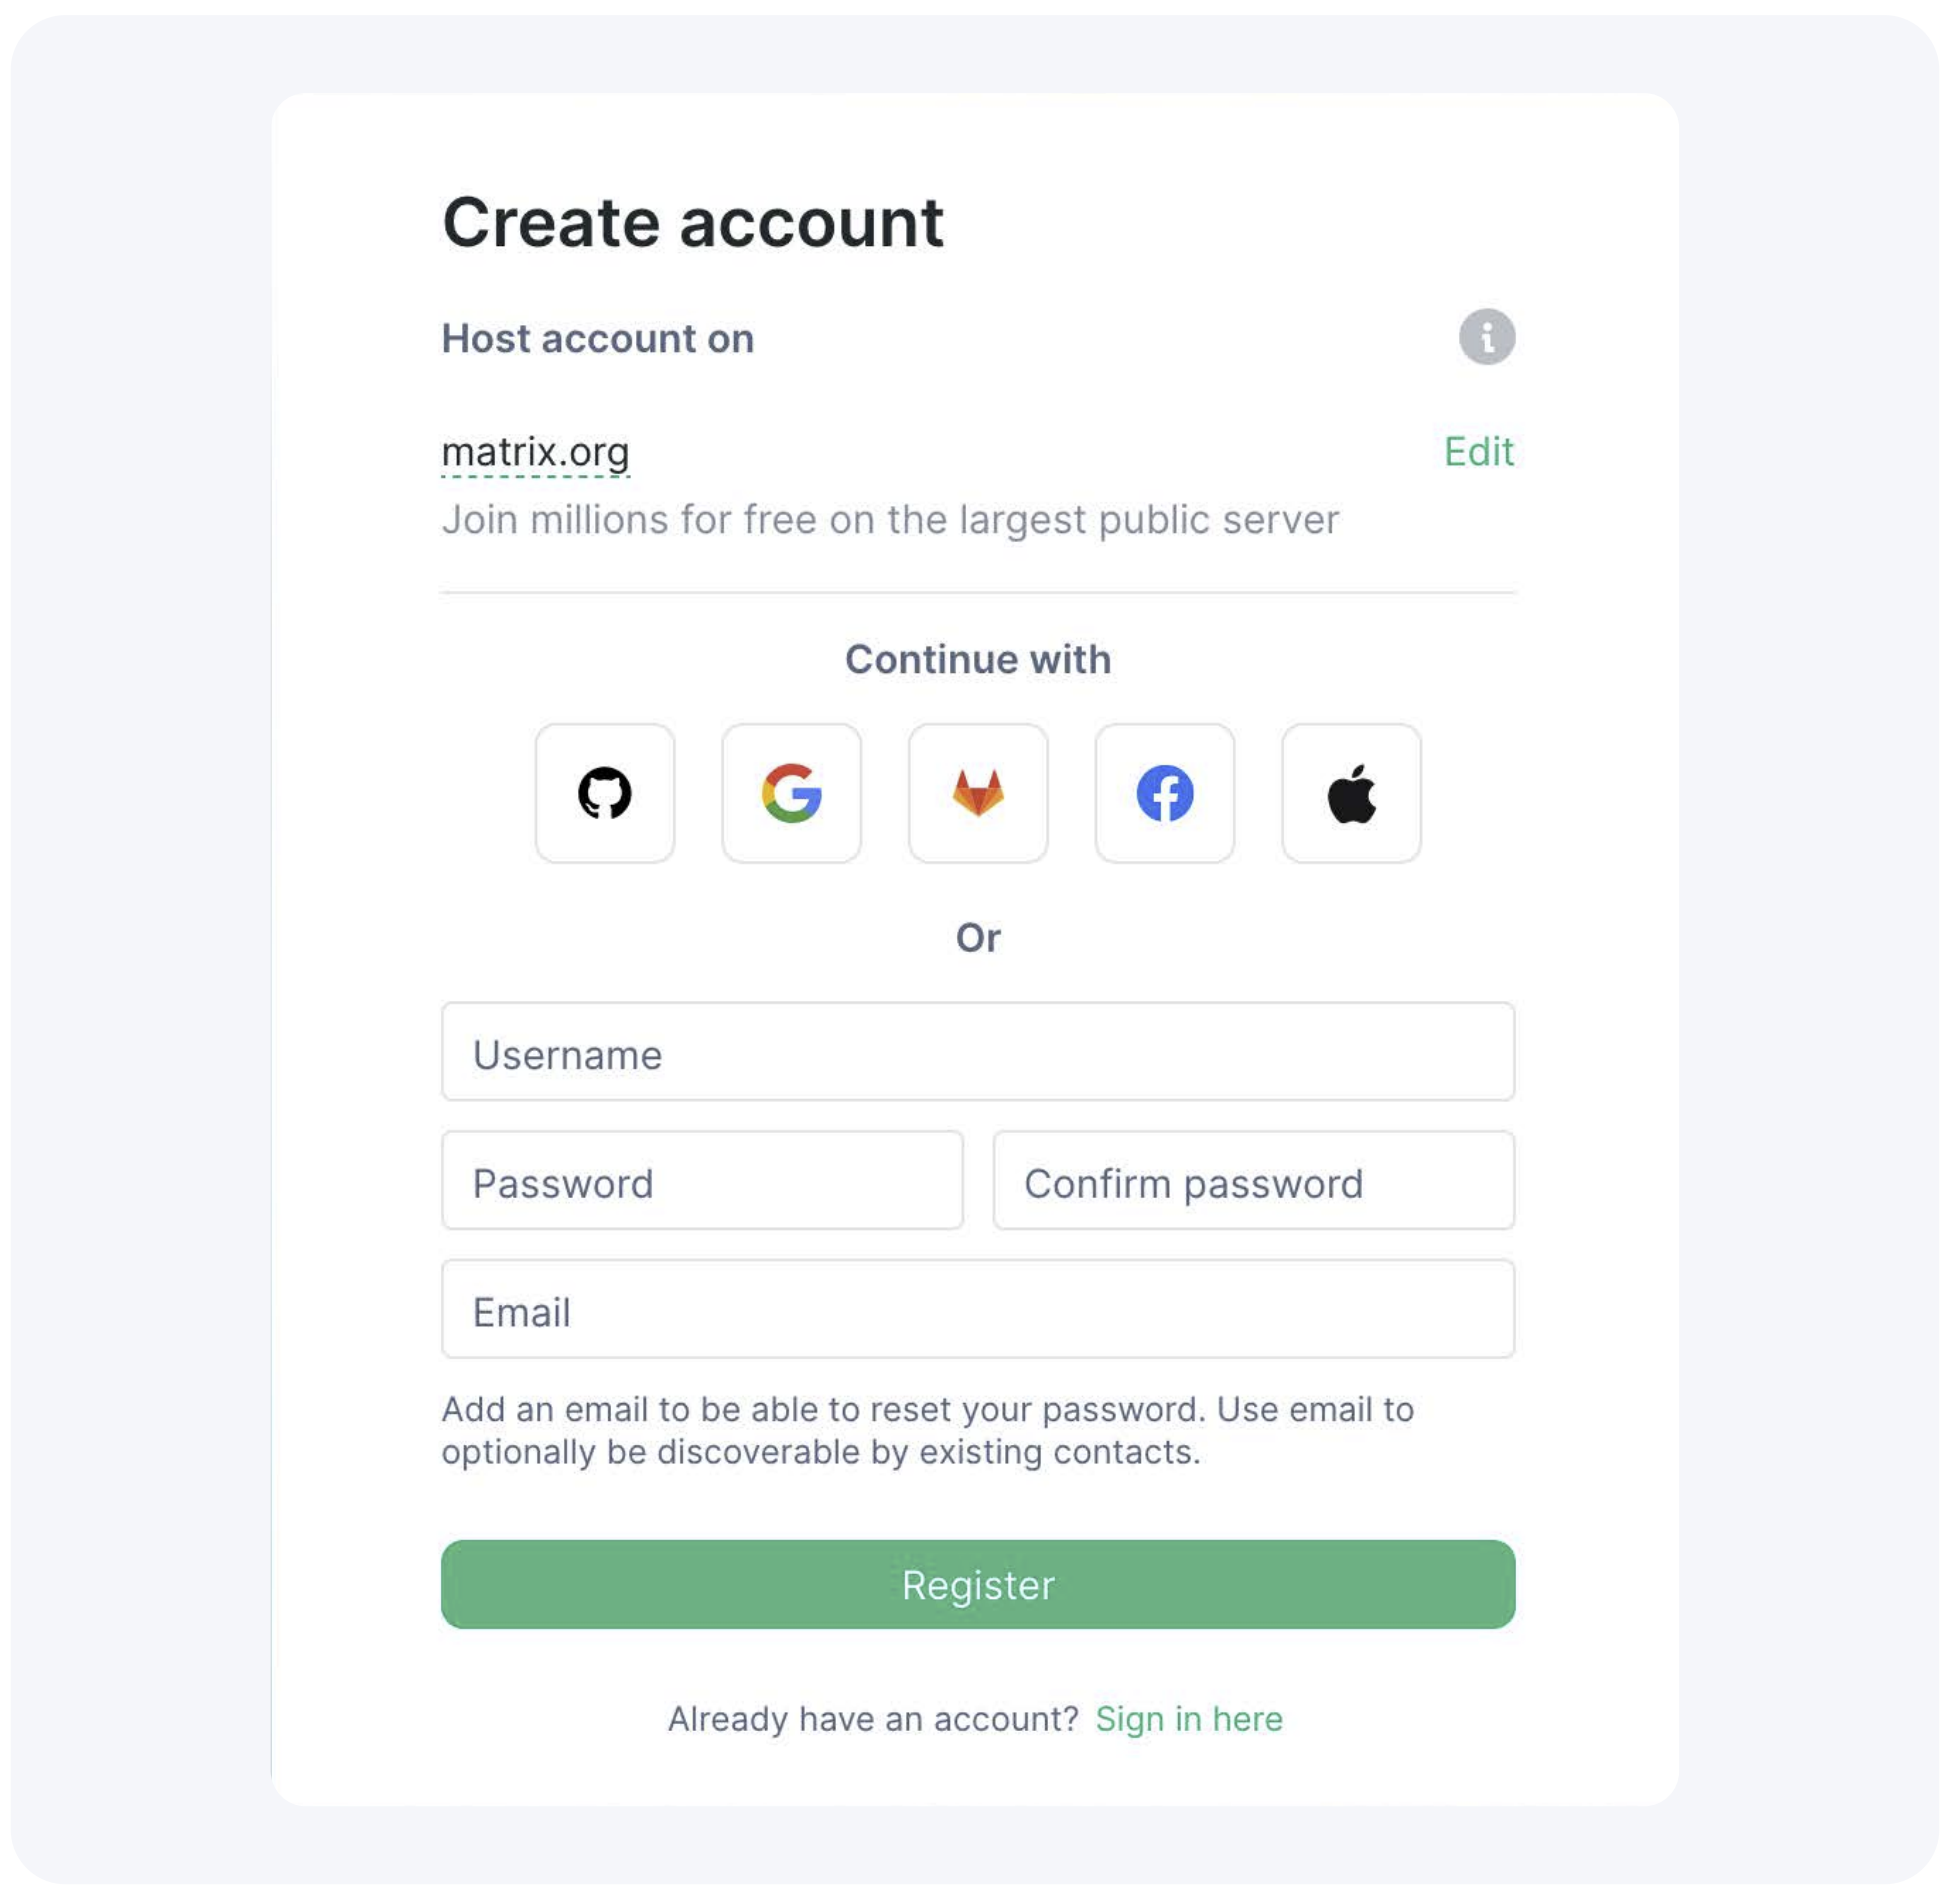
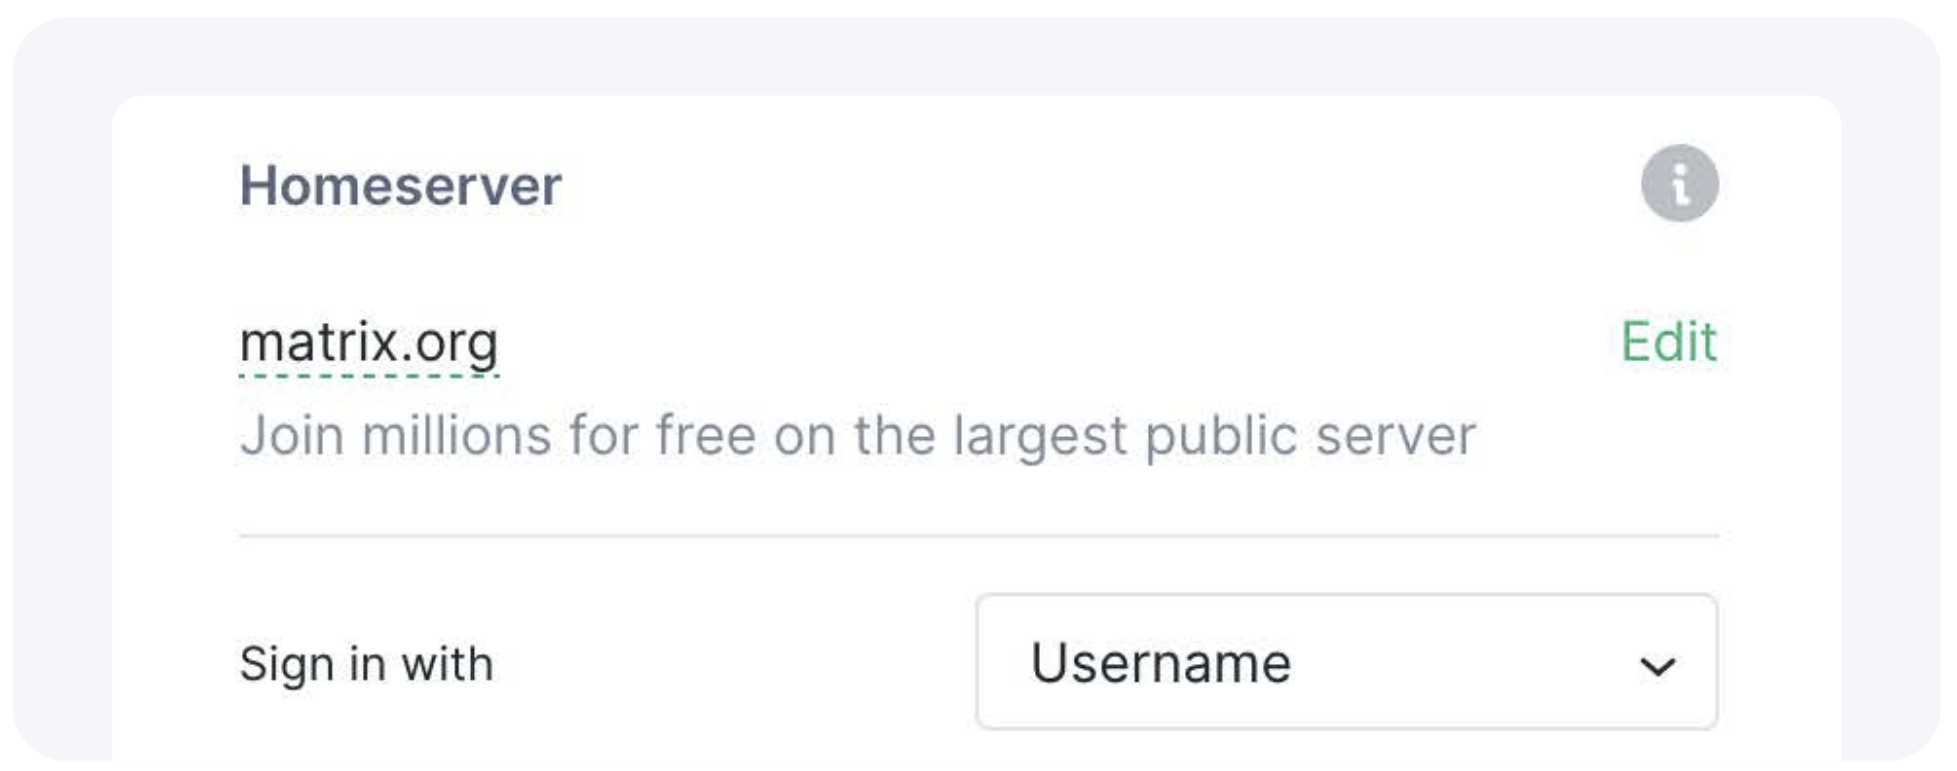
Click "Edit" to choose your preferred Matrix homeserver if you have one, or host your own.
To learn more about homeservers, please visit matrix.org.
From here, please enter a username, password and email address and click Register.
Alternatively you can register with your existing Github, Google, GitLab, Facebook or Apple account.
Once prompted, please read the Terms and Conditions and click accept.
An email will be sent to your inbox to verify your email address, please follow the steps in the email to complete your registration.
Now you can login
Enter your email or username and password then click sign in / log in. From here you will be taken to Home, where you can start exploring!
Secure backup
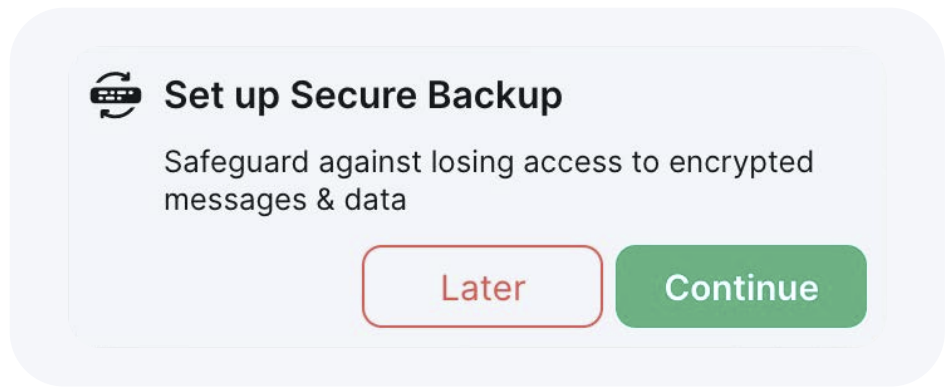
Secure backup is an important safeguarding step to take, to ensure you never lose access to your encrypted messages and data.
When setting up your account, a message will appear which prompts you to do so. If you missed the prompt you can set this up from within your security and privacy settings.
-
Click continue to start this process.

-
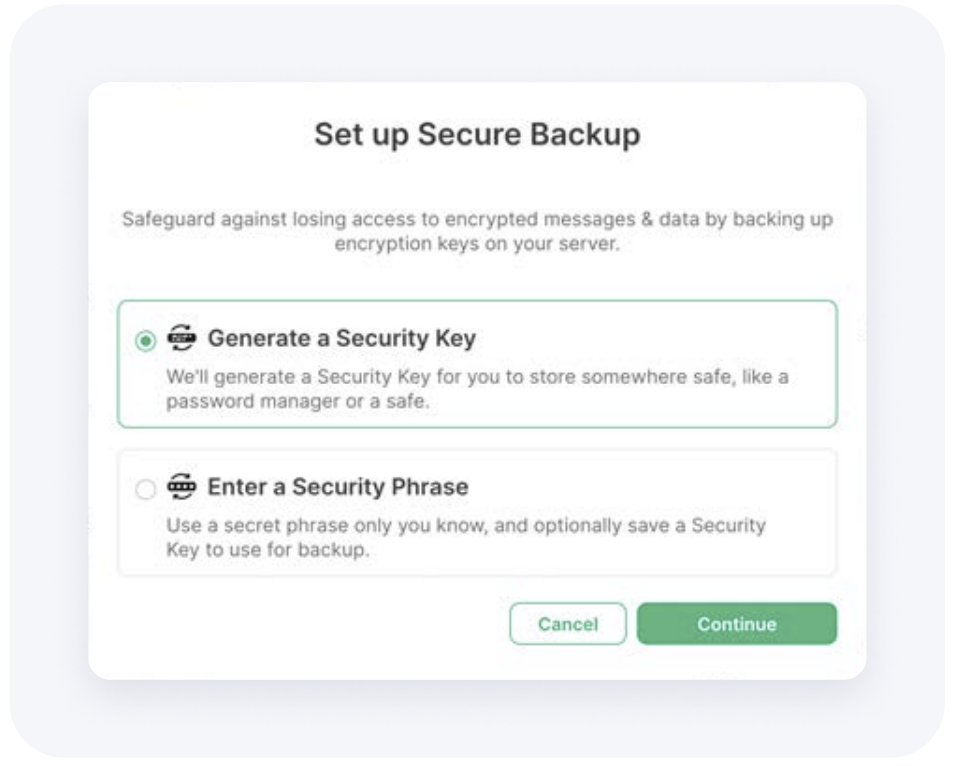
Choose a memorable security passphrase or security key (for file store). This will create an encrypted backup on your server that only you can decrypt.

The next time you login on a new device or session, simply enter the passphrase or key to verify your session and you’ll have access to all of your data.
Device Verification
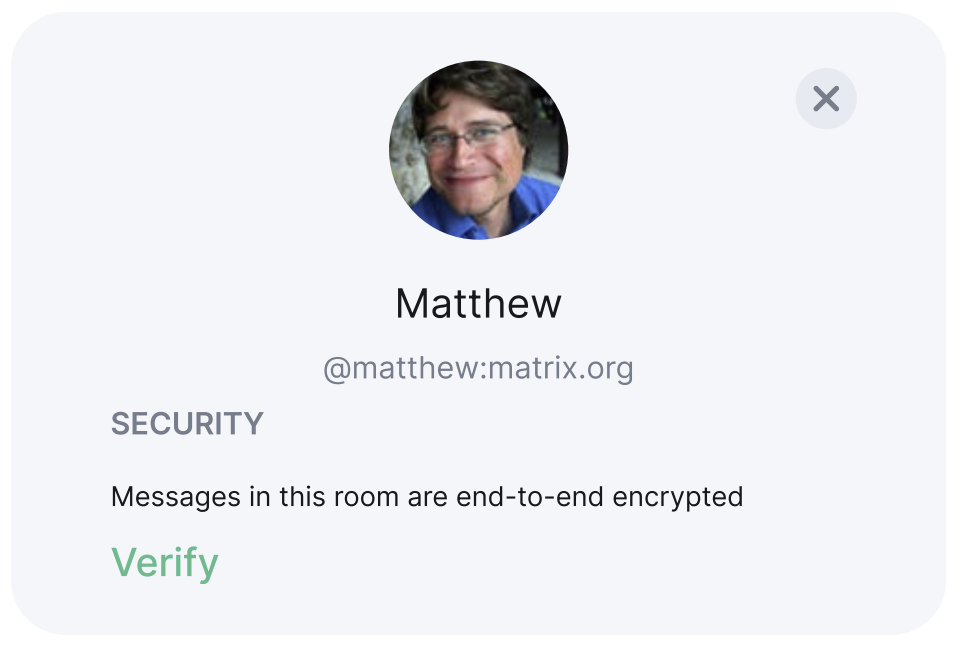
Device verification is optional and allows you to verify who you’re talking to.
-
Click the Avatar the person you would like to verify, in the room header or after clicking the information icon.

-
This will bring up their information and options, including one named "verify".

-
Once accepted, both you and the other user will have a set of emoji s appear on screen. We recommend comparing these in real life or over a video call to ensure you're verifying the right person. If these match, click accept and a green shield will display.


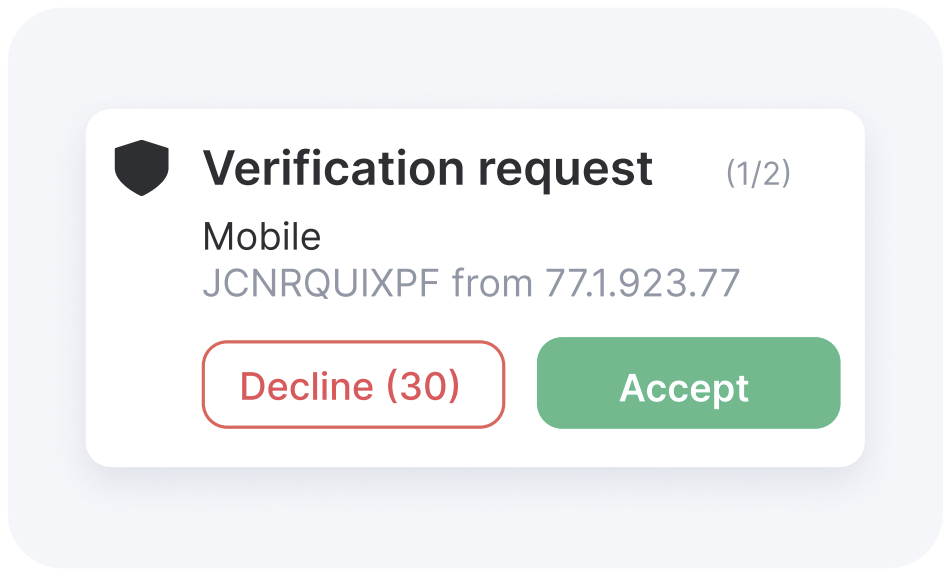
Verify an additional device
To add your additional device please log into the Element app. You will be asked to verify this login on your existing device. This is an important step as it’ll allow other people to see that the new login is really you.
-
Click Accept on your desktop app to start the verification process.

-
Next you will be asked to either scan a QR code with your mobile camera or compare unique emoji's.

-
A green shield will show once the process is complete.

-
To manage your verified device, go to Security & Privacy in your settings where you can see all devices, rename or sign out of them.


The Left Panel
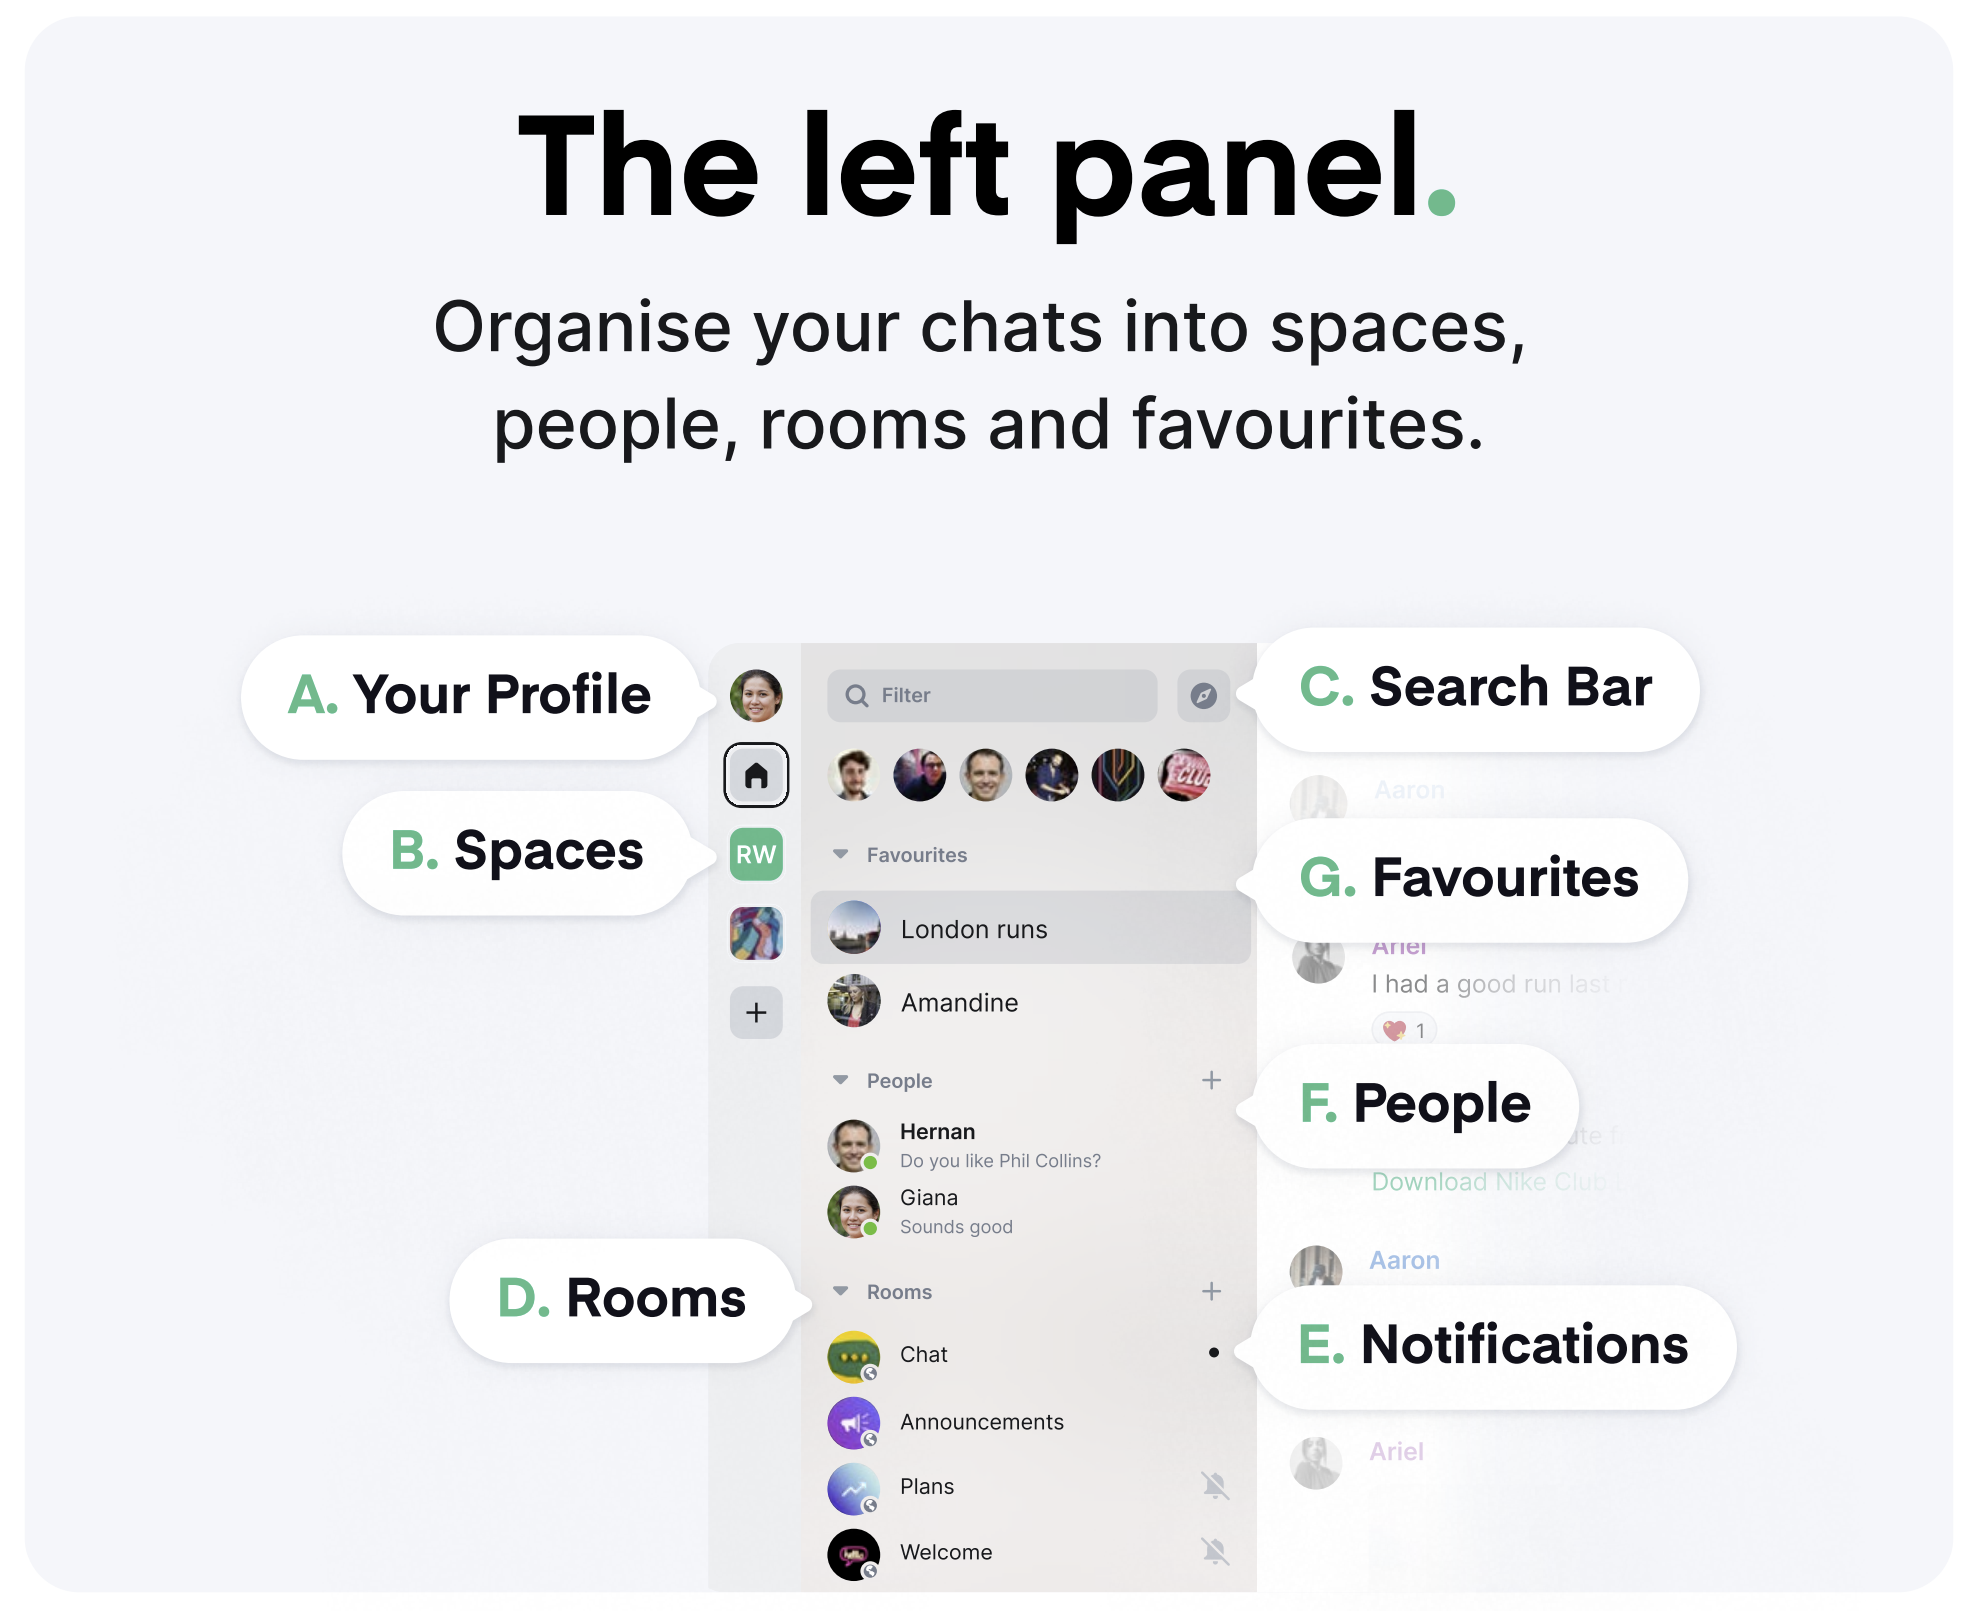
Organize your chats into spaces, people, rooms and favorites.
A. Your Profile
Update settings such as your display name, profile picture, language and password. Here is also where you manage notifications, security and privacy, and general settings about your account.
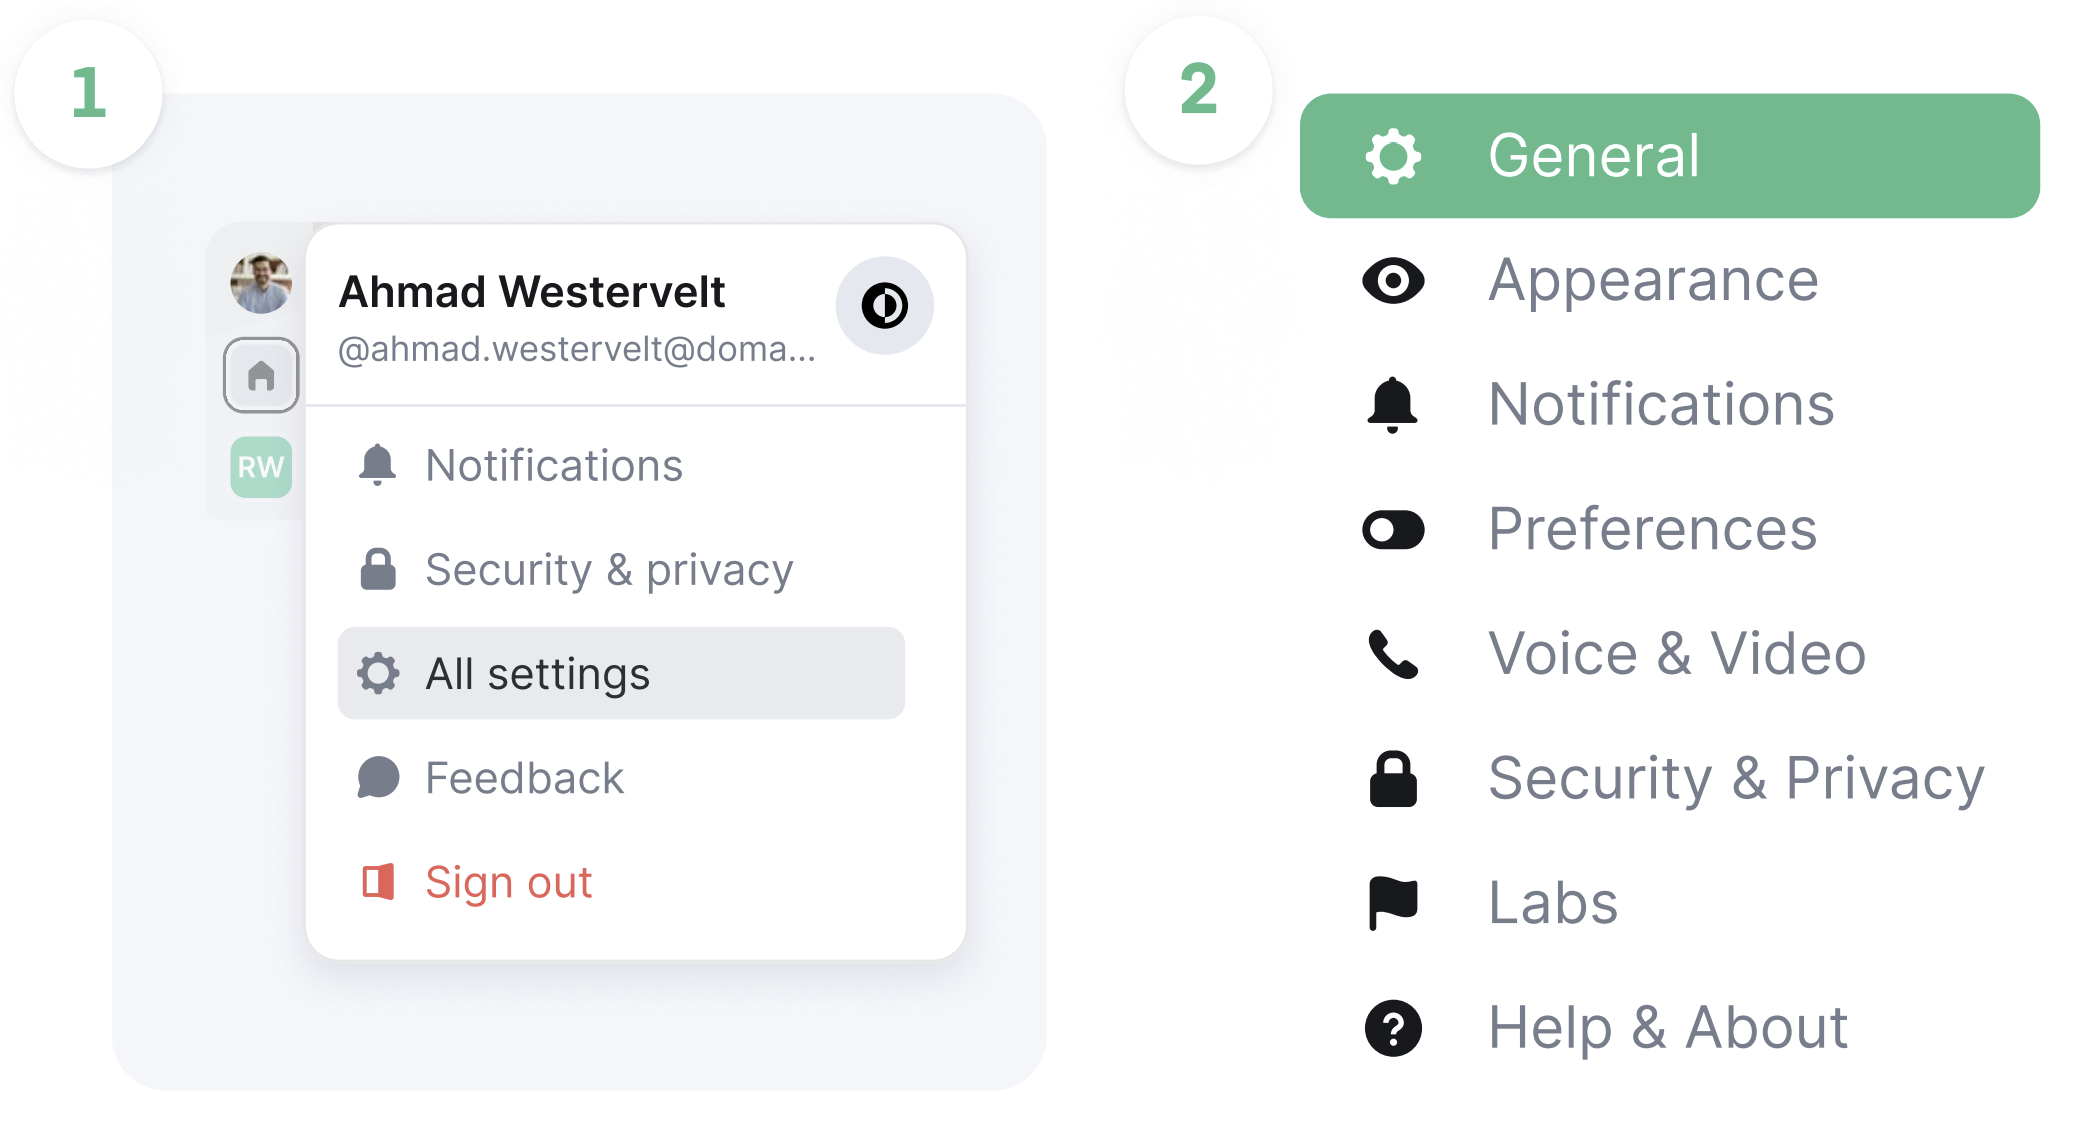
Access settings by clicking on your profile picture (Avatar) at the top left, from there select "All settings" and then "General".
Here you can update settings such as your display name, profile picture, language and password. You can also manage notifications, security and privacy, and general settings about your account.
Avatars are selected on the General tab. This is what will show as your display picture to other users. When you hover over the circle, the word upload will show. Click this and you will be taken to your system s files where you can select a file you want to upload.
Display Names are added or updated in the General tab, type your desired name into the box and click save.
Contact Details are added or removed on the General tab. Email addresses and phone numbers are optional, to reset your account or have forgotten your password.
Language preference can be selected using the drop down menu.
B. Spaces
Organize groups of people and rooms together by using Spaces. A selected space will only show the list of rooms and people that are part of it.
- On Web / Desktop, Set up a new space by clicking "+ Create a space"
- On iOS / Android, Tap the space icon and select "create"

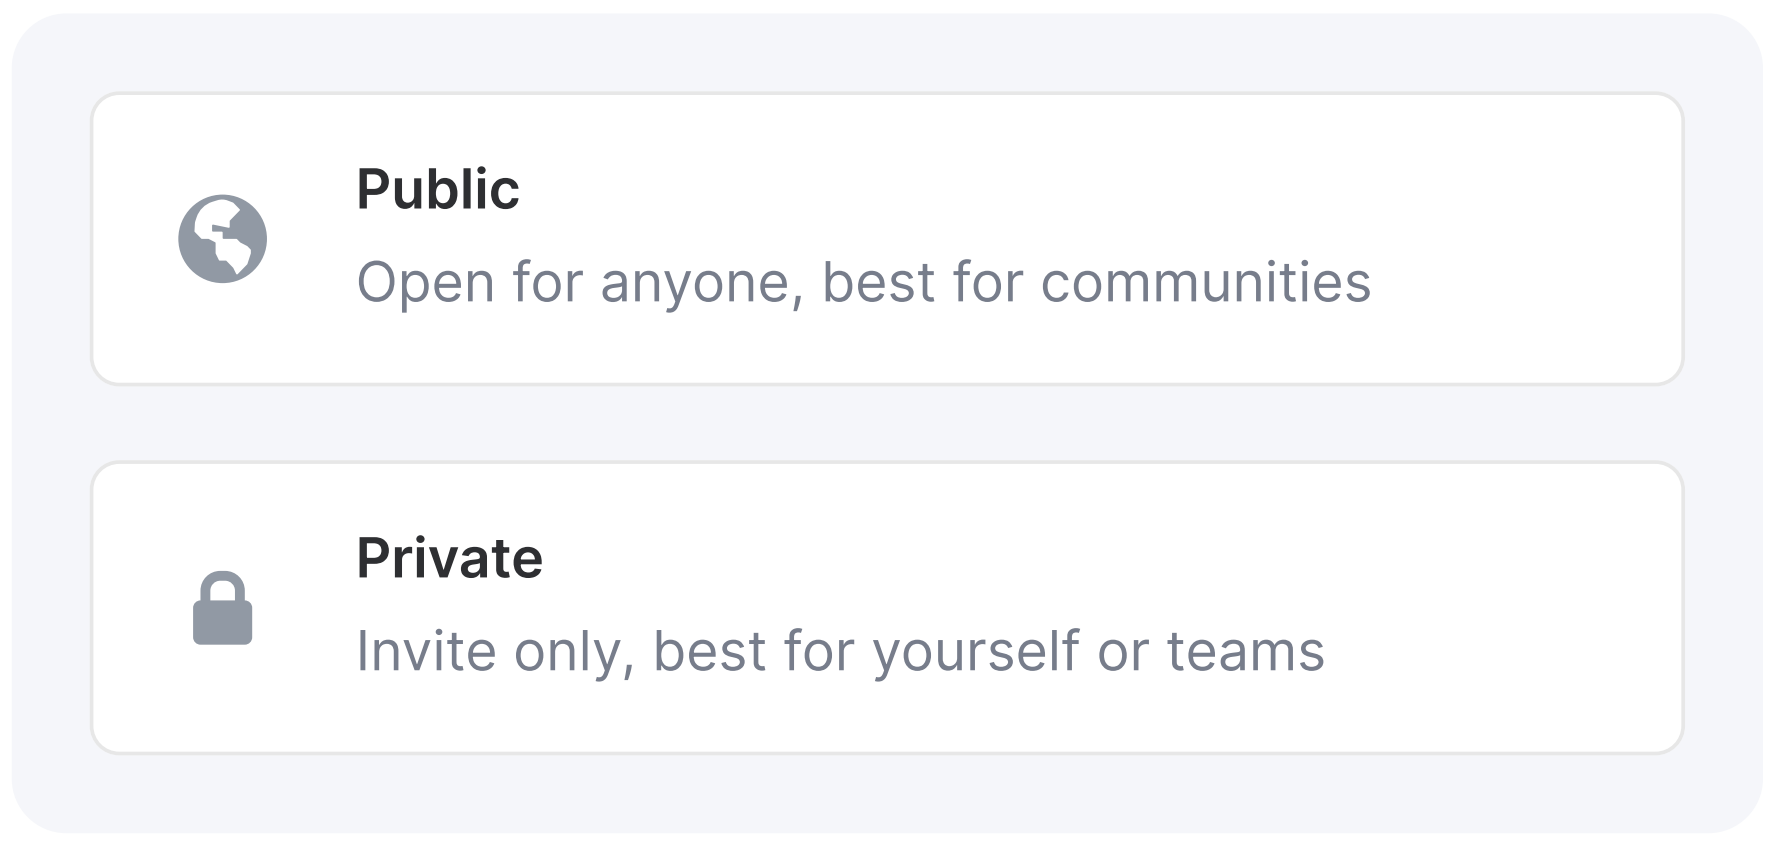
From here you can create either a public or private space. Once your space is created you can invite people to join it and create new or add already existing rooms. Cater the space to your specific wants and needs.
C. Search Bar
Find people and rooms who are already part of your lists.
D. Rooms
This is where group discussions take place. Naming conventions help conversations be focused on a specific topic, and aid discoverability.
When searching for a room, make sure to select the right server for it to be discoverable. You can only join a private room by receiving and accepting an invite.
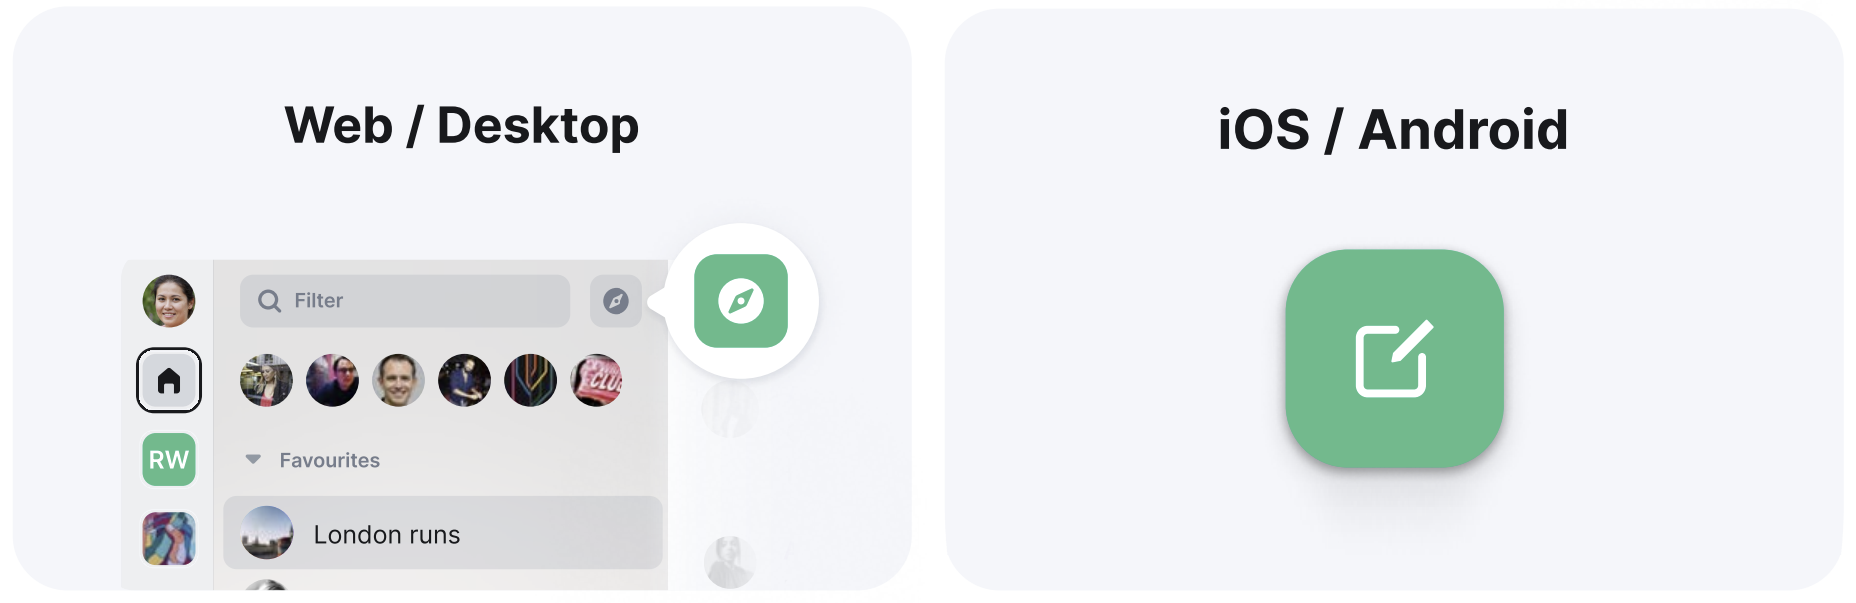
Find a public room
- On Web / Desktop, Find a room by using the "Compass" icon to explore already created public rooms and press "join".
- On iOS / Android, Tap the compose icon and select “Explore rooms”. Press "join" to participate.
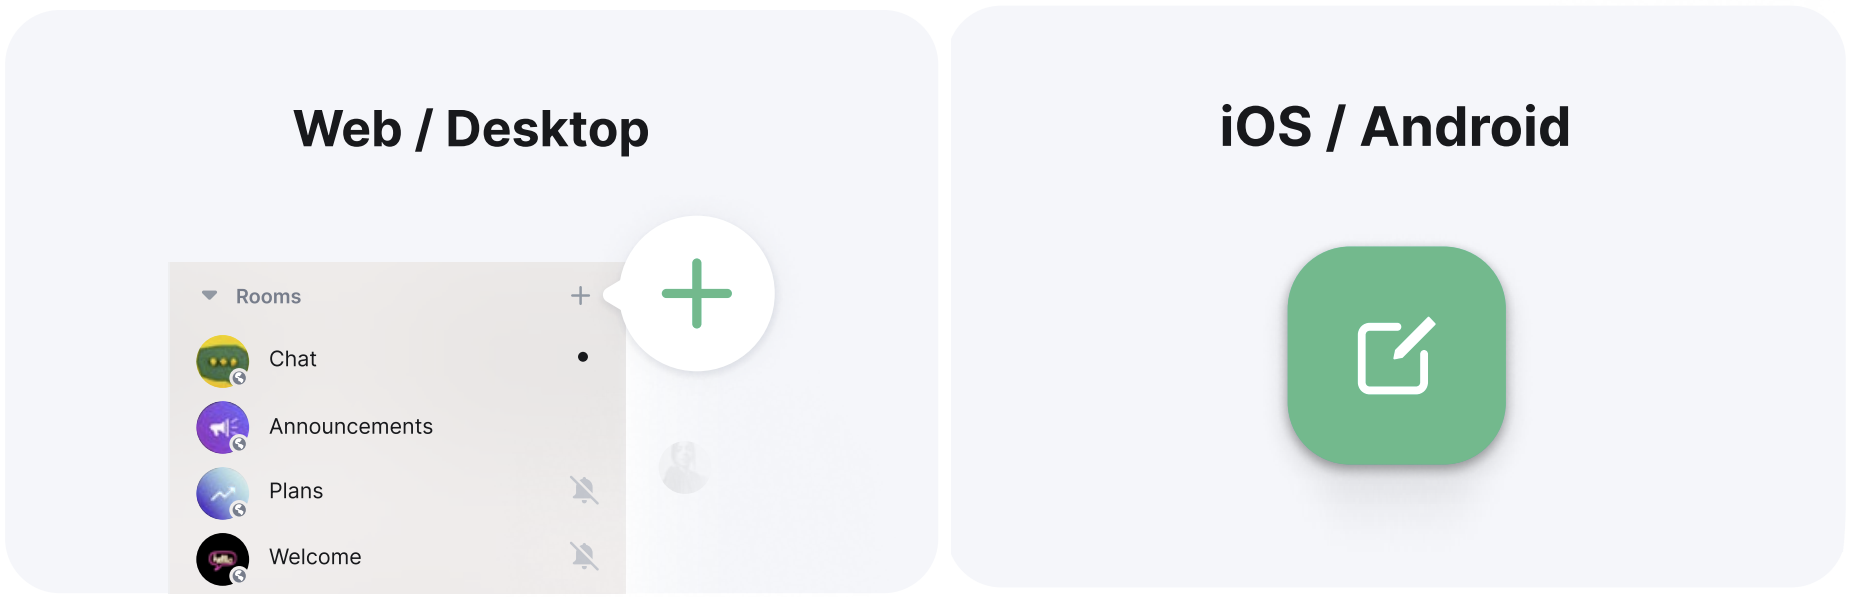
Create a room
- On Web / Desktop, Create a new room by clicking the "+" next to Rooms in the left panel.
- On iOS / Android, Tap the compose icon and select Add room.
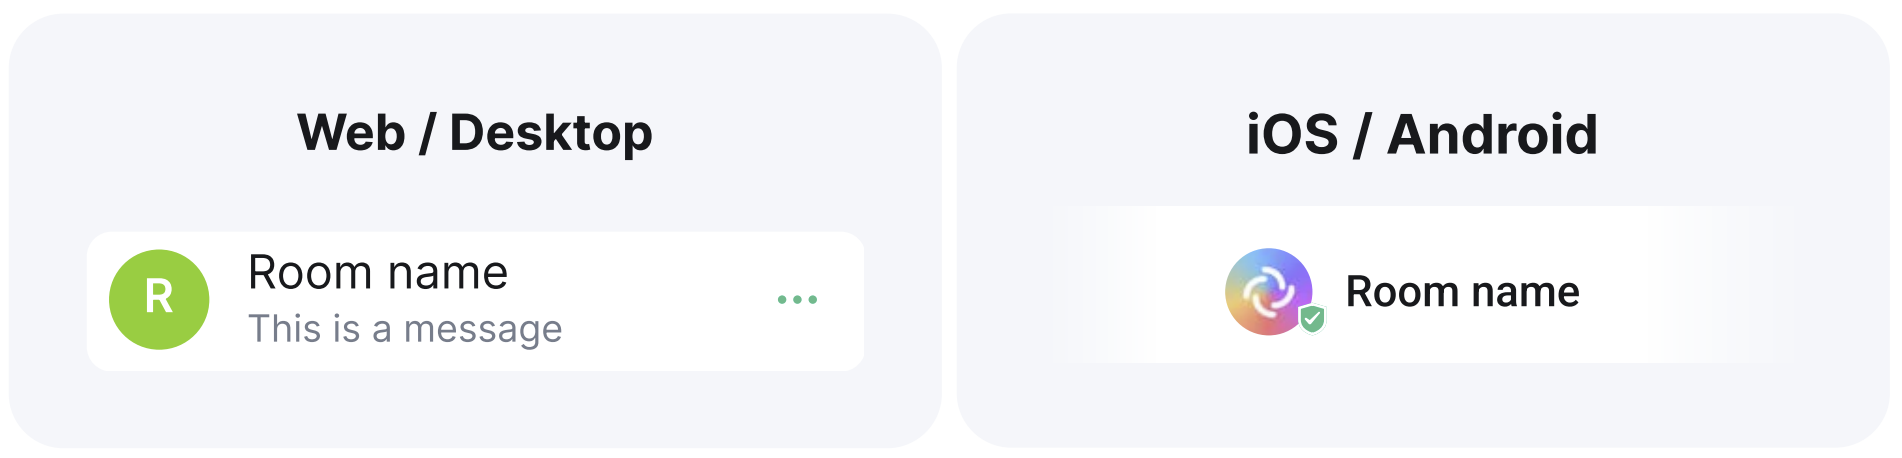
Leave a room
- On Web / Desktop, Leave a room by clicking the three dots and choose the "leave room" option.
- On iOS / Android, Leave a room by clicking the "room name" at the top of the room and choose the "leave room" option.
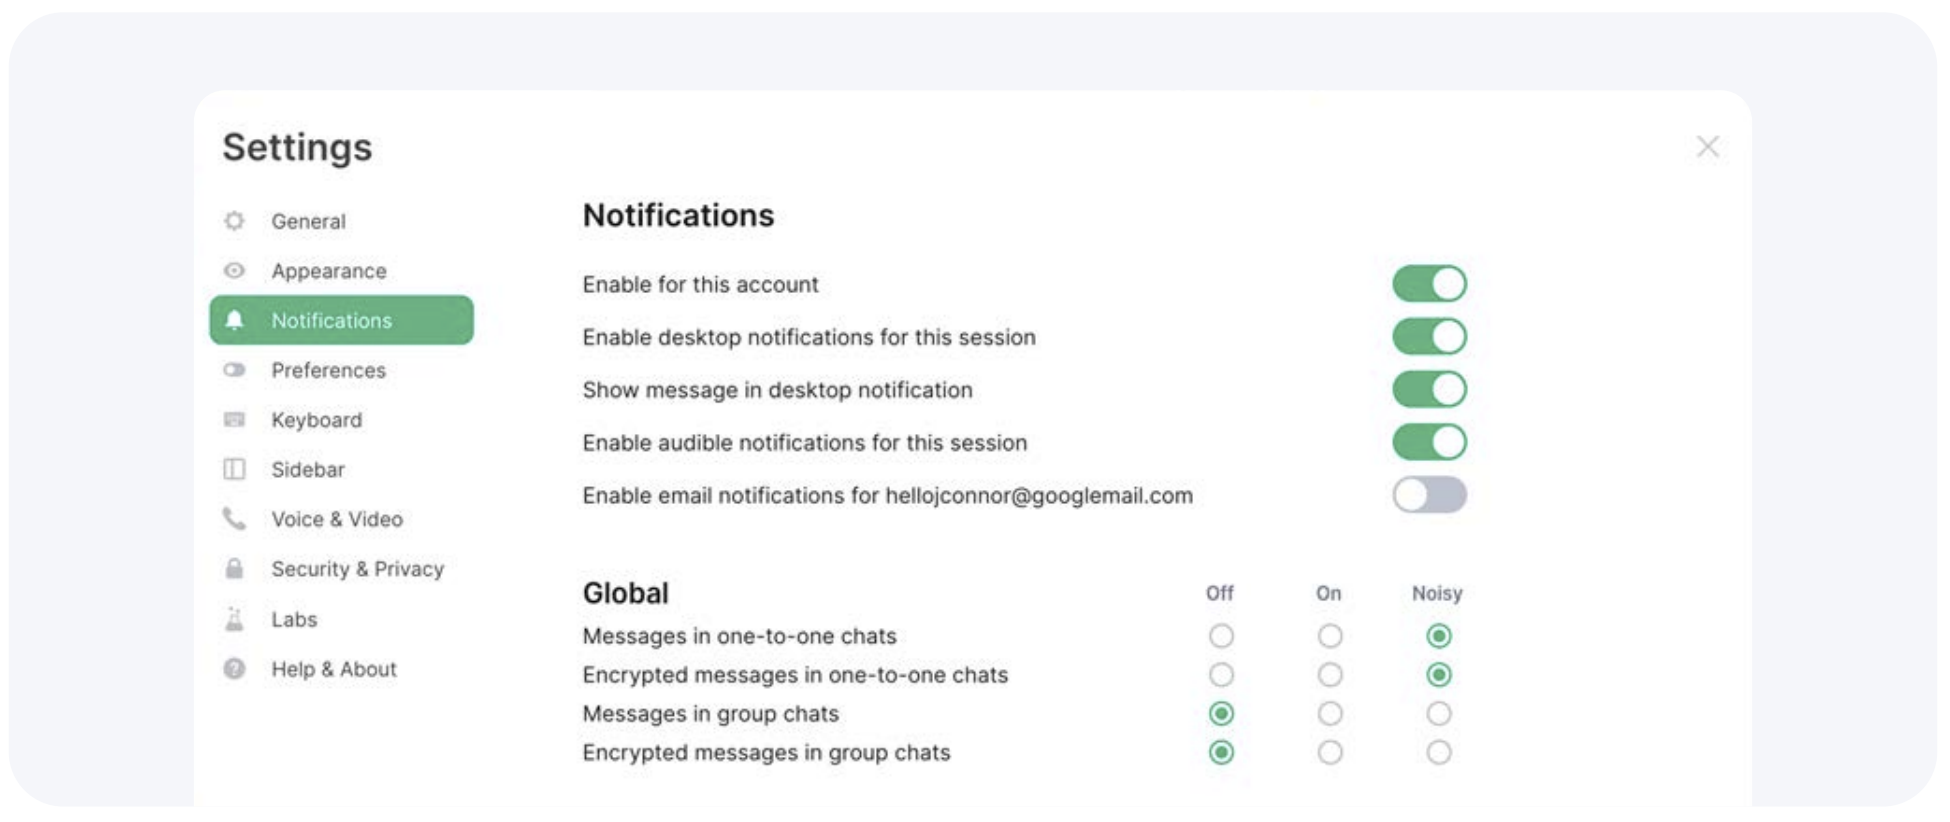
E. Notifications
To stay focused, you can set when you want to receive notifications.
Manage notifications per room and per person by clicking on the alarm icon next to it. Manage all notifications in your profile settings under "Notifications" to control where and when you will receive notifications.
The notifications will be set to a default e.g. Noisy for messages containing my username. Please alter these settings to your personal preference.
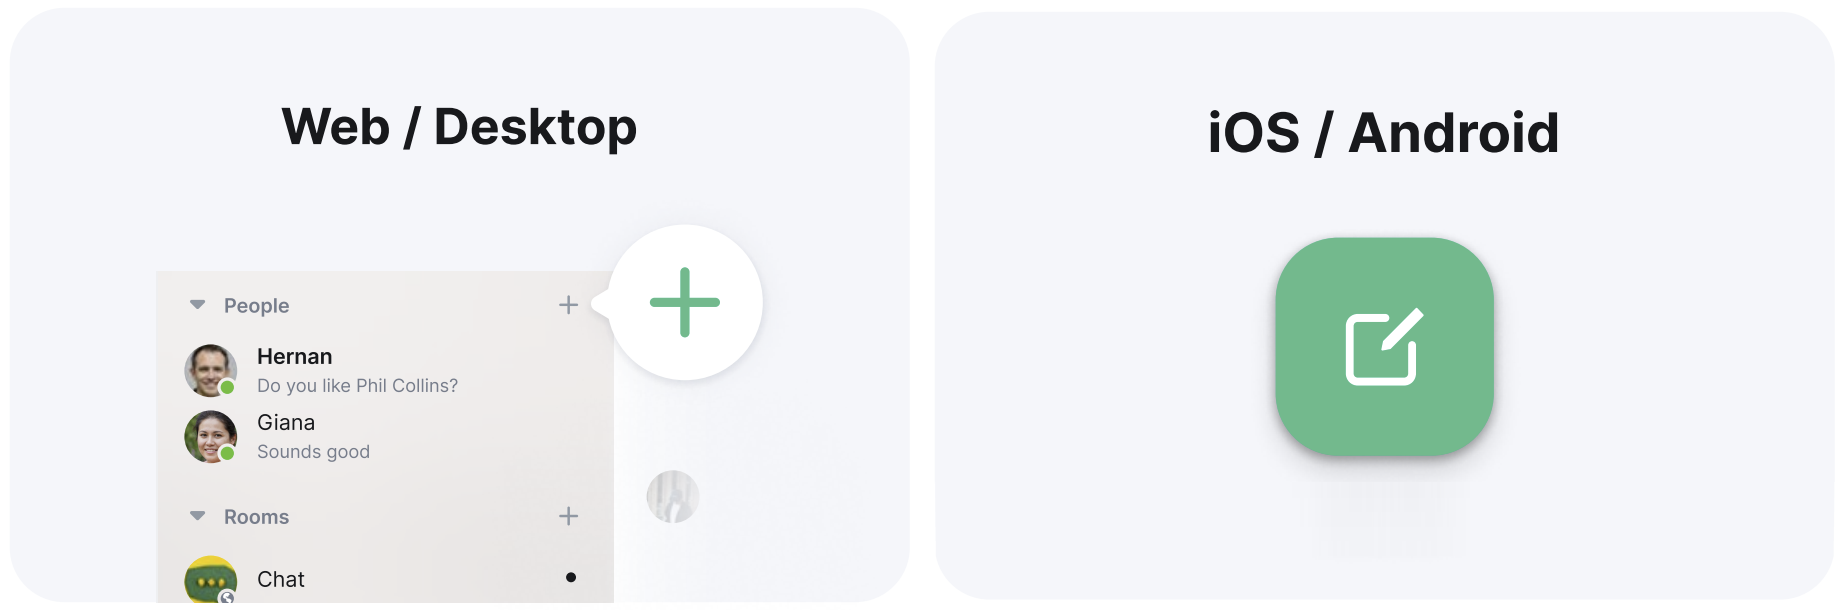
F. People
This is where one-to-one chats take place.
- On Web / Desktop, Start a new chat by using the + button next to "People" in the left panel and type in their username or Matrix ID.
- On iOS / Android, Tap the compose button and select “Start chat”.
G. Favorites
Easily pin favorite rooms and people for quick access to be displayed at the top of your list.
You can select "low priority" for the rooms and people you wish to push to the bottom of the lists using the “three dots” icon next to it.
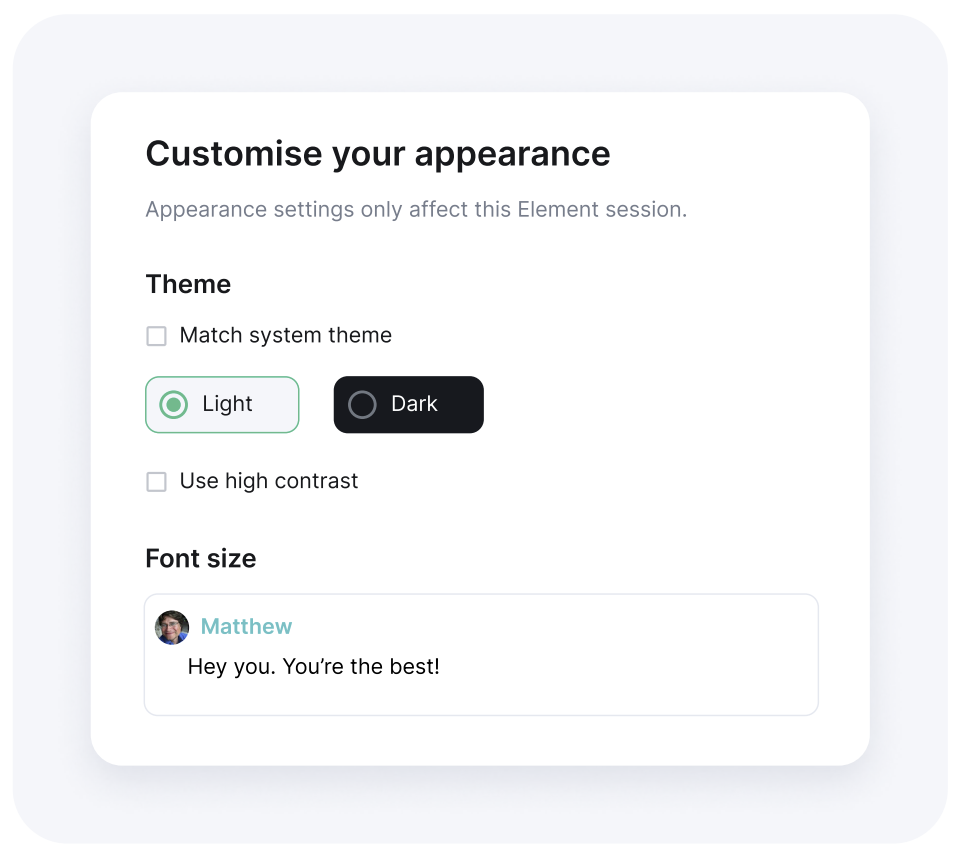
H. Appearance
Once you’re up and running, you can start to think about how you want everything to look.
In settings, click "Appearance" where you can amend the theme to light or dark, increase or decrease your font size or click on "Show advanced" for more.
The Middle Panel
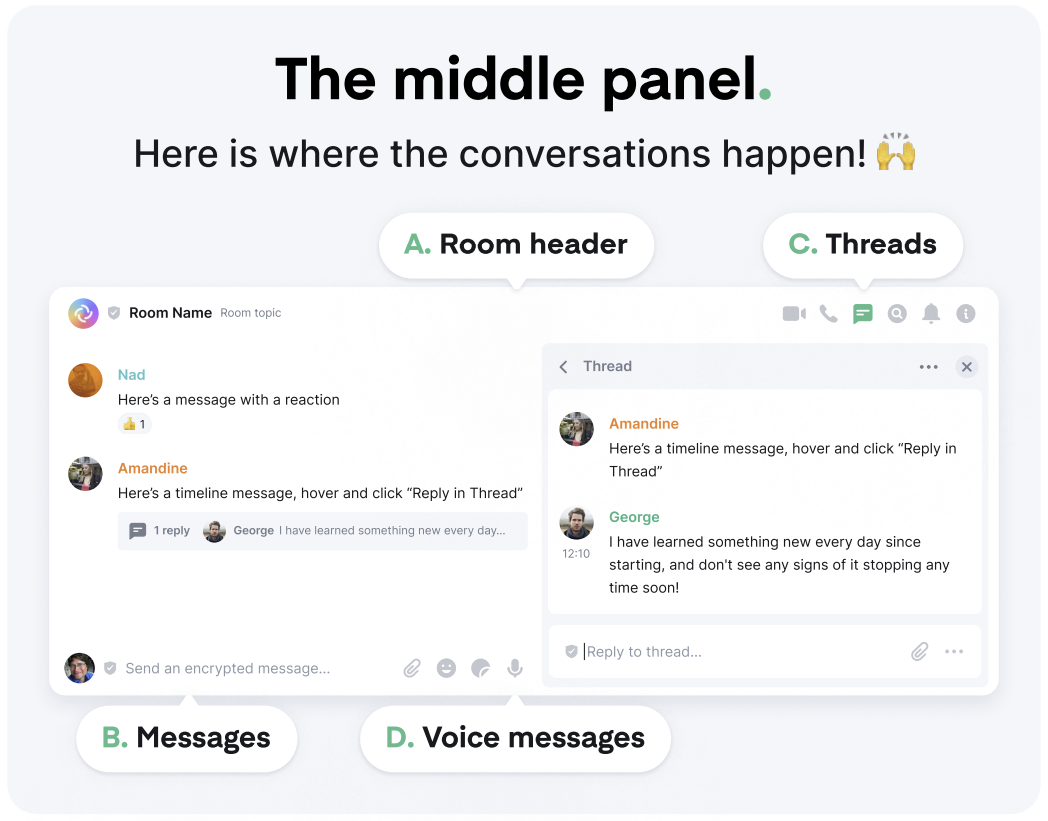
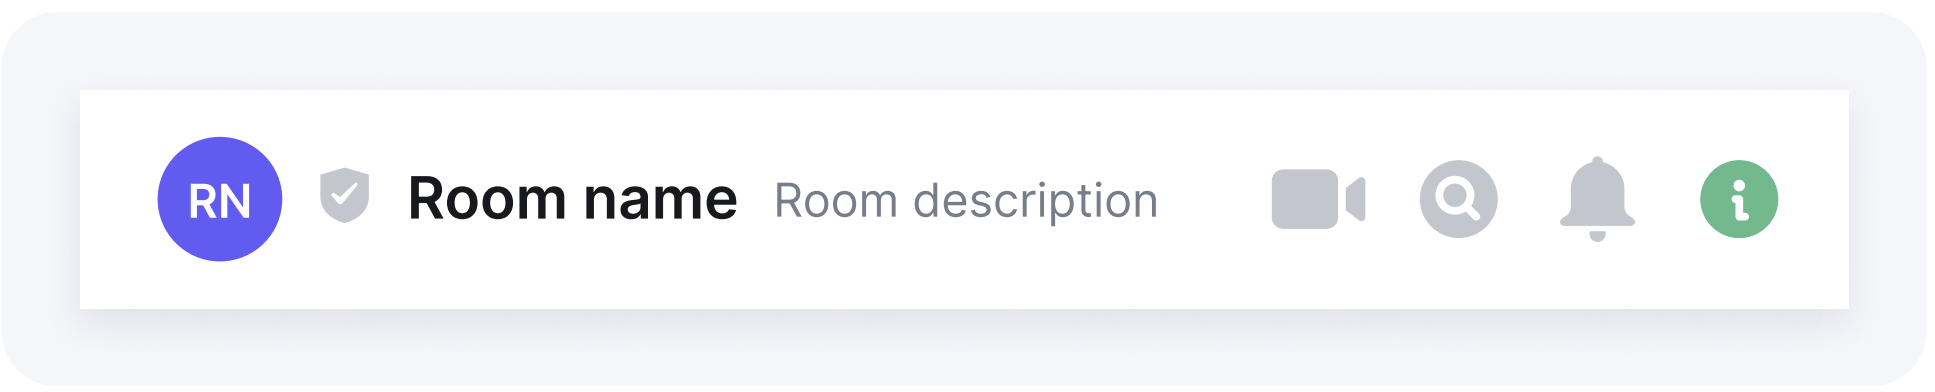
A. Room header
Shows you the room name and a quick summary of the topic. Settings and details of the room can be found and managed in the right hand panel (see separate section).
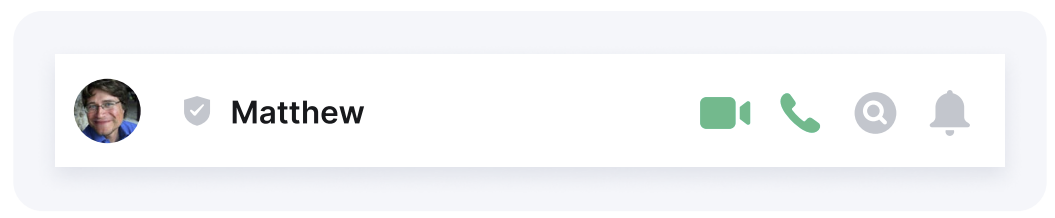
Start a video or audio call when you’re in a room or conversation by clicking on the icons in the "Room header".
B. Messages
Send a message by typing into the composer. Hit enter to send.
Notify someone in a room by writing their name or @ before their name.
Send a file either by drag and drop or click on the paperclip to browse your filesystem. You can also copy/paste into the composer.
React with emojis 😁 by hovering on a message and clicking the smiley face!
Reply to a message by hovering on a message and clicking the reply button.
Edit a message you’ve sent by hovering on the message and clicking the edit button (the room will be notified of edited messages).
Remove a message you’ve sent by hovering on it, clicking the 3 dots option button and choosing "remove" (the room will see a note that a message has been removed).
Format text by highlighting your message in the composer. You have options to bold, italics, strikethrough, code block and quote messages.
Forward a message by highlighting your message, clicking the options button and choosing "forward". You can then choose which room or conversation you want to forward it to.
Quote a message by hovering over your message and clicking the options button. You can then click "Quote" and type in your desired message.
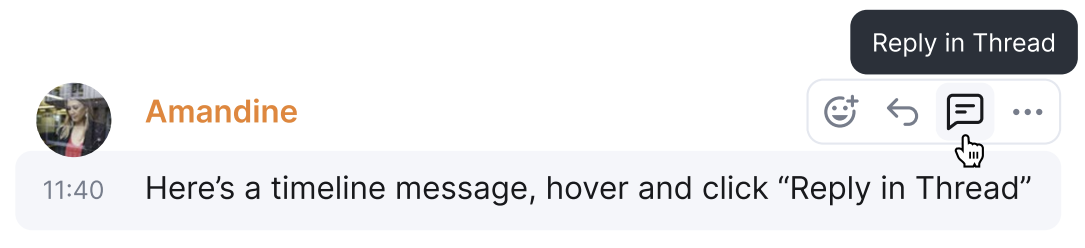
C. Threads
Threads move message replies out of your timeline to help declutter the main feed, keep topics together and “catch up” on conversation easier.
You can see Thread responses and respond/react to them.
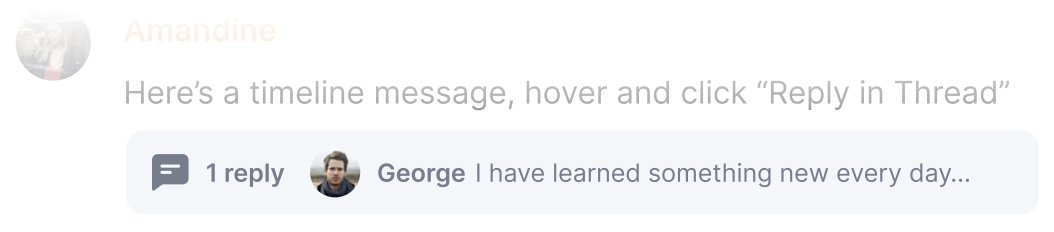
And see Threads in a room on the Thread panel.
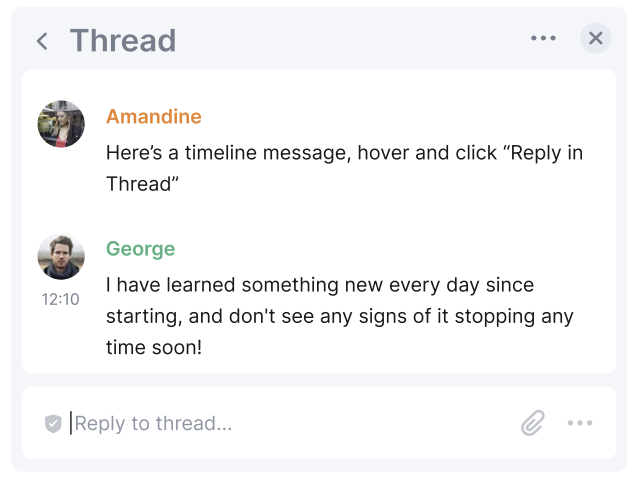
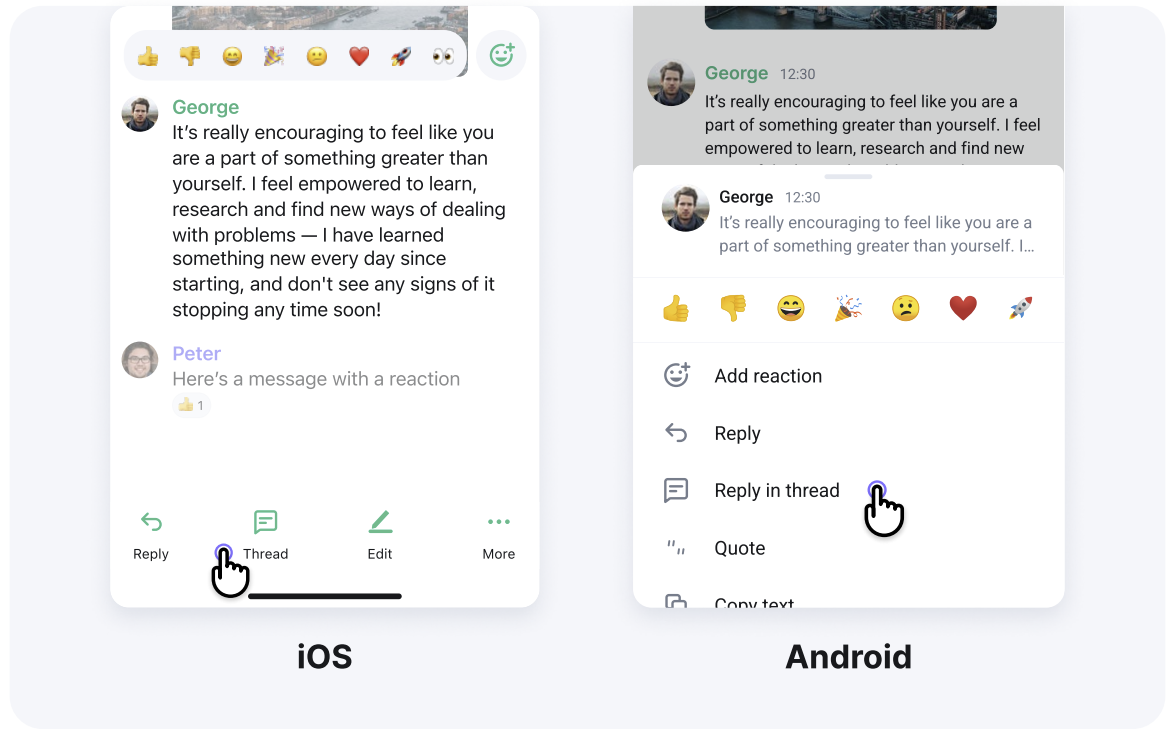
Tap on a message to bring up options then "Thread / Reply in thread"
D. Voice Messages
Send a voice message when you re in a room by clicking on the microphone in the "composer" bottom right hand corner.

The Right Panel
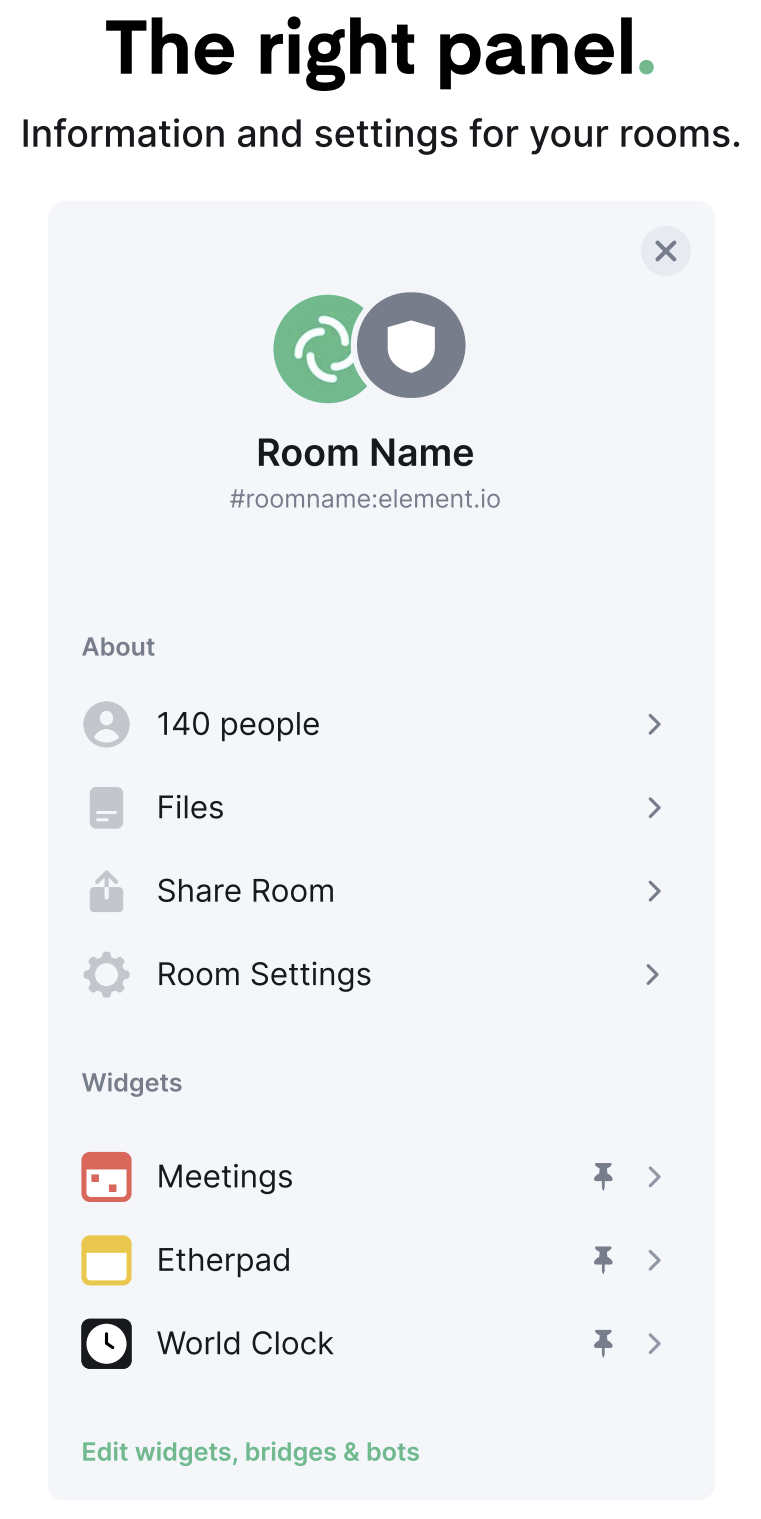
A. Room information
Click on the "information icon" or the room name on iOS and android in the room header to open the room information panel.
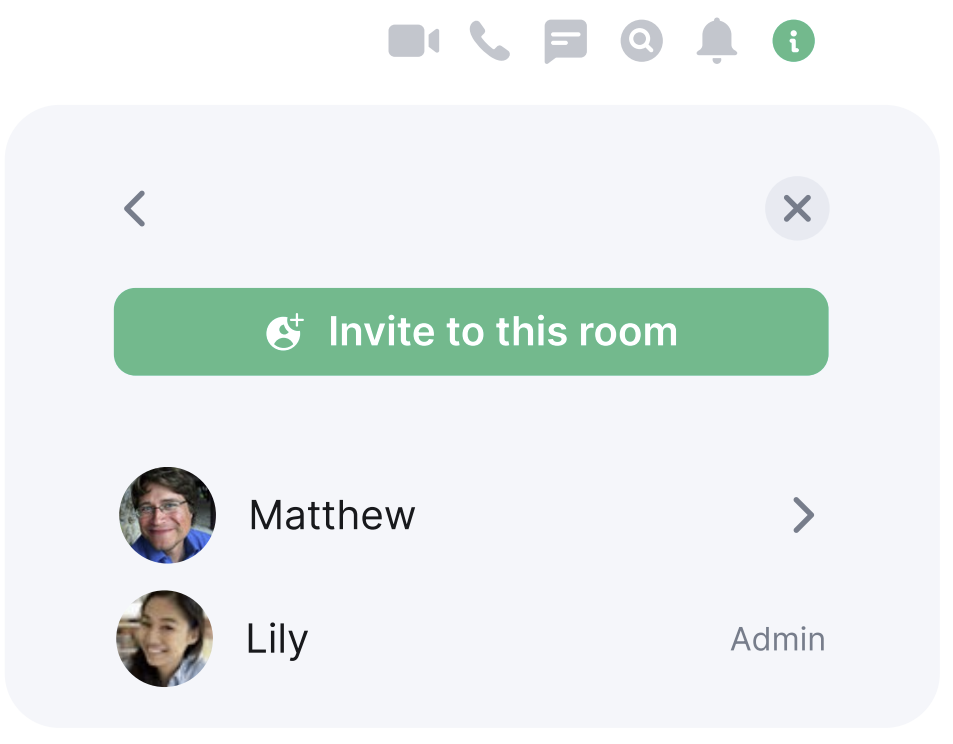
People lets you see who is already in the room, with the option to invite others to join.
Files gives you instant access to the shared files in the room.
Export chat lets you download the conversation in a room and export it to HTML, Plain Text and JSON formats.
Room settings gives you a series of advanced room setting options. Please note you can only amend these settings if you are an admin.
Click the room name and click "Settings" from the drop down menu.
Here you can manage a number of things, including room permissions and roles.
Additionally, security and privacy settings give you the freedom around encryption, room access and chat history.
Manage widgets, bridges and bots are optional advanced extras to improve room productivity.
B. Show notification messages
Displays room notifications to keep on top of important conversations.
C. Search conversations
Brings up the search functionality within the current (or other) rooms.
Frequently Asked Questions
Account management
How do I reset my password?
- Please note that we cannot reset passwords or reactivate matrix.org accounts. If you have an email address attached to your account, you can reset your password here.
Do I need an email address to register?
- Using an email address when creating a Matrix account is optional; it will make it easier for others to discover you and can help you to reset your password if needed.
It's ultimately up to the administrator of the server to decide whether or not you need to use an email address when creating a Matrix account.
For accounts on the matrix.org homeserver, supplying an email address during registration is optional, but matrix.org reserves the right to occasionally require it for abuse mitigation as referred to in the privacy policy.
What is the username used for?
- We will use your username to create an ID (Matrix ID) allowing to disambiguate you from others with the same display name. It will allow us to keep your email confidential. 🙂
Can I register with a phone number?
- Not anymore. Sorry!
Chat
How can I mention someone?
- Just type their name and they will be notified accordingly. You can autocomplete by pressing the tab button, you don’t need any prefix for the mention to work!
With what type of mentions will I get notified?
- By default you’ll be notified if your display name and your user name are mentioned. You can add other names, nicknames or keywords on which you want to be notified from your settings, in the Notifications section.
How do I send a file?
- Simple, just drag the file into Element and it will automatically upload. Alternatively you can click on the paperclip icon in the text input field and browse your filesystem.
Can I upload a file from a mobile device?
- Yes you can! On a mobile device simply press the arrow which is pointing upwards (on iOS) or the + symbol (on android) while in a chat and select your file.
How can I invite a contact to use Element?
- You can invite someone to a room by using the "Invite to this room" button in the right hand side "Room members list" using their Matrix ID (if they have one) or by email. Those without a Matrix ID will be able to preview the room if the room allows for that.
Is there a way to know if a message has been read?
- Yes! Element shows who has read a message by displaying their avatar to the right of the message. Hovering over these avatars (or clicking on them on mobile) will give you the user’s info and reading time.
How can I search for a file or message?
- To search a room from Desktop, click on the magnifying glass located near the top of the screen. You can then type in a keyword or filename that you are searching for with the ability to select whether you want to search within the specific chat room or across all conversations. For encrypted rooms, search only works on Desktop (not Element web and mobile) and you need to have "Message search" enabled in the Element Security & Privacy settings.
On Element iOS, tap the room name at the top, then "Search room."
On Element Android, tap the three dots in the top right corner, then "Search."
Settings
How do I change my account settings?
- Click on the drop down menu under your name in the top left corner of the web or desktop app and select. From here you can change all of your account and general Element preferences.
How do I change my notification settings?
-
Element allows you to customize your notifications at two levels: across the app and per room. You can configure how you will be notified for given events by default in the Notifications section of your Settings (accessible from the drop down menu under your name in the top left corner of the web/desktop app).
You can configure keywords, default notification settings for group, one-to-one chat rooms, invites and calls. The notifications can be:- Turned off: you won’t be notified when the selected event happens.
- Turned on: you will get a message popping up when the selected event happens, but no sound.
- “Noisy”: you will get a visual highlight (red badge and/or text highlight), a sound and/or vibration (depending on the device) when the selected event happens.
Then for finer tuning, you can easily configure per room notification setting from the context menu you get by clicking on the [...] icon that appears when hovering over the room name in the room list. This is very handy when you wish to temporarily mute a room, or make sure you’re not missing anything from a given discussion. You can select the following options:
- Mute: you won’t be notified, even if your name or a keyword is mentioned.
- Mentions only: you will only be notified for the items that are meant to be ‘noisy’, i.e. your name and keywords.
- All messages: you will get a (silent) notification for every message happening in the room; your ‘noisy’ events (e.g. your name being mentioned) will still be noisy (red badge and sound).
- All messages (noisy): every message will make a noise on top of the visual notification. Your noisy events will still be differentiated by a red badge.
How do I set up email notifications?
- You can set Element up to email you when you have missed some activity (new messages, new invites…). You can do this in the Notification section of your Settings and turn on the toggle labelled as ‘Enable email notifications’.
How can I change my display name?
- You can change your display name in General section of your Settings (accessible from the drop down menu under your name in the top left corner of the web/desktop app).
How do I reset my password?
- The Element team won't be able to reset passwords or reactivate matrix.org accounts.
If you have forgotten your password, please visit app.element.io and click on the link ‘Set a new password’. You will need to input the email address which is registered to your Element account and choose a new password. An email will then be sent to confirm your request to reset your password. Please follow the link in the email to complete the process and regain access to your account.
If you haven't set an email address for your Element account, please contact your homeserver administrator who may choose to reset your password for you.
Why would I need to associate an email address to my account?
- It's ultimately up to the administrator of the server to decide whether or not you need to use an email address when creating a Matrix account, and optionally restrict this to certain email addresses or domains.
If you can, we strongly recommend that you set an email address in order to be able to reclaim your account if you’ve lost your password. It is also useful for people to find you, and easier to remember than (yet another) ID. If you haven’t done so at registration, don’t worry; you can add as many email addresses as you like, at any point, in the General section of your Settings
If you have forgotten your password and did not register an email address with your account, your homeserver administrator may choose to reset the password for you. If not, we're sorry to say that there is no other way to access your account. 🙁
Rooms
How can I change the settings for a specific chat or room?
- You can change the settings for any one-to-one chat or group room by clicking on the cog icon next to the room name.
Can I restrict the access of a room to a given set of people?
- You can restrict the access of a room to people who have been invited by selecting the “Private (invite only)" option in the "Security & Privacy" settings of the room. People knowing the link of the room won’t be able to access it if an invite hasn’t been explicitly sent to their email address or ID.
By adding the room to a Space, you can also select "Space members" to only allow anyone that is a member of the Space to join.
Can I limit the access of a room to people knowing its existence?
- You can restrict the access of a room to people with whom you shared a link to the room by selecting the “anyone who knows the room link” option in the room settings. Selecting this option will not make the room publicly visible to the rest of the community.
Can I make a room publicly discoverable?
- You can get your room listed into your server’s directory by checking the button labeled "Publish this room to the public in example.com's room directory?". By checking this box, it will be discoverable to anyone searching for a room on the server. However, they will be able to join only if you haven’t restricted the access only to people with an invitation.
Will anyone be able to join my room if I list it in the directory?
- If your room is listed in the directory, people will know it exists but they will only be able to join it if you allowed the access to it to anyone knowing the link.
If I make the room accessible to anyone, will new joiners be able to read the history?
- It depends on how you configured the history visibility for the room. By default every member of the room can read its history. But you can decide that new joiners will only see the history they are part of, I.E. Members will only be able to see the history of the room since they were invited (or joined, both options are available).
However it is important to note that these settings are not retroactive and only apply from the time they are selected: if you have a discussion with the history being visible to every member since the start, then change it to discuss an important matter so that people only see the history from the time they joined, new members will have access to all the history before you changed the option.
Why would I want to make the history visible to anyone?
- Making the history visible to anyone means that people can see what is being said in a room before joining it. So typically, if you are browsing the room directory and see a room which might be interesting, you will have the opportunity to “peek” into it, having a view of what has been said without joining it. This gives users the opportunity to gauge a room before joining. It is a useful option for rooms publicly listed and hosting public discussions, or for people you share your room link with, so that they have an idea of what they’re going into before joining.
What is a room address?
- By default the room has an ugly identifier which is barely human readable. Setting an address for a room allows you to give it a simple reference, making it easier to share a link to it. The addresses are linked to the server you are registered on (e.g. Matrix.org if your ID is @username:matrix.org). A room can have different addresses on the same homeserver and addresses on different homeservers. They are just a user friendly entry point, but are required the moment you want to make the room accessible in other ways than by inviting users.
What is a favorite room?
- The favorite section allows you to pin and order important rooms which will be displayed at the top of your Element room list.
What is a low priority room?
- The low priority section allows you to declutter your room list by moving rooms you consider less important to the bottom.
What is the “historical” section?
- The “historical” section lists all the rooms you’ve left and allows you to access the history you have there. You won’t see the new activity in these rooms, only what happened before you left.
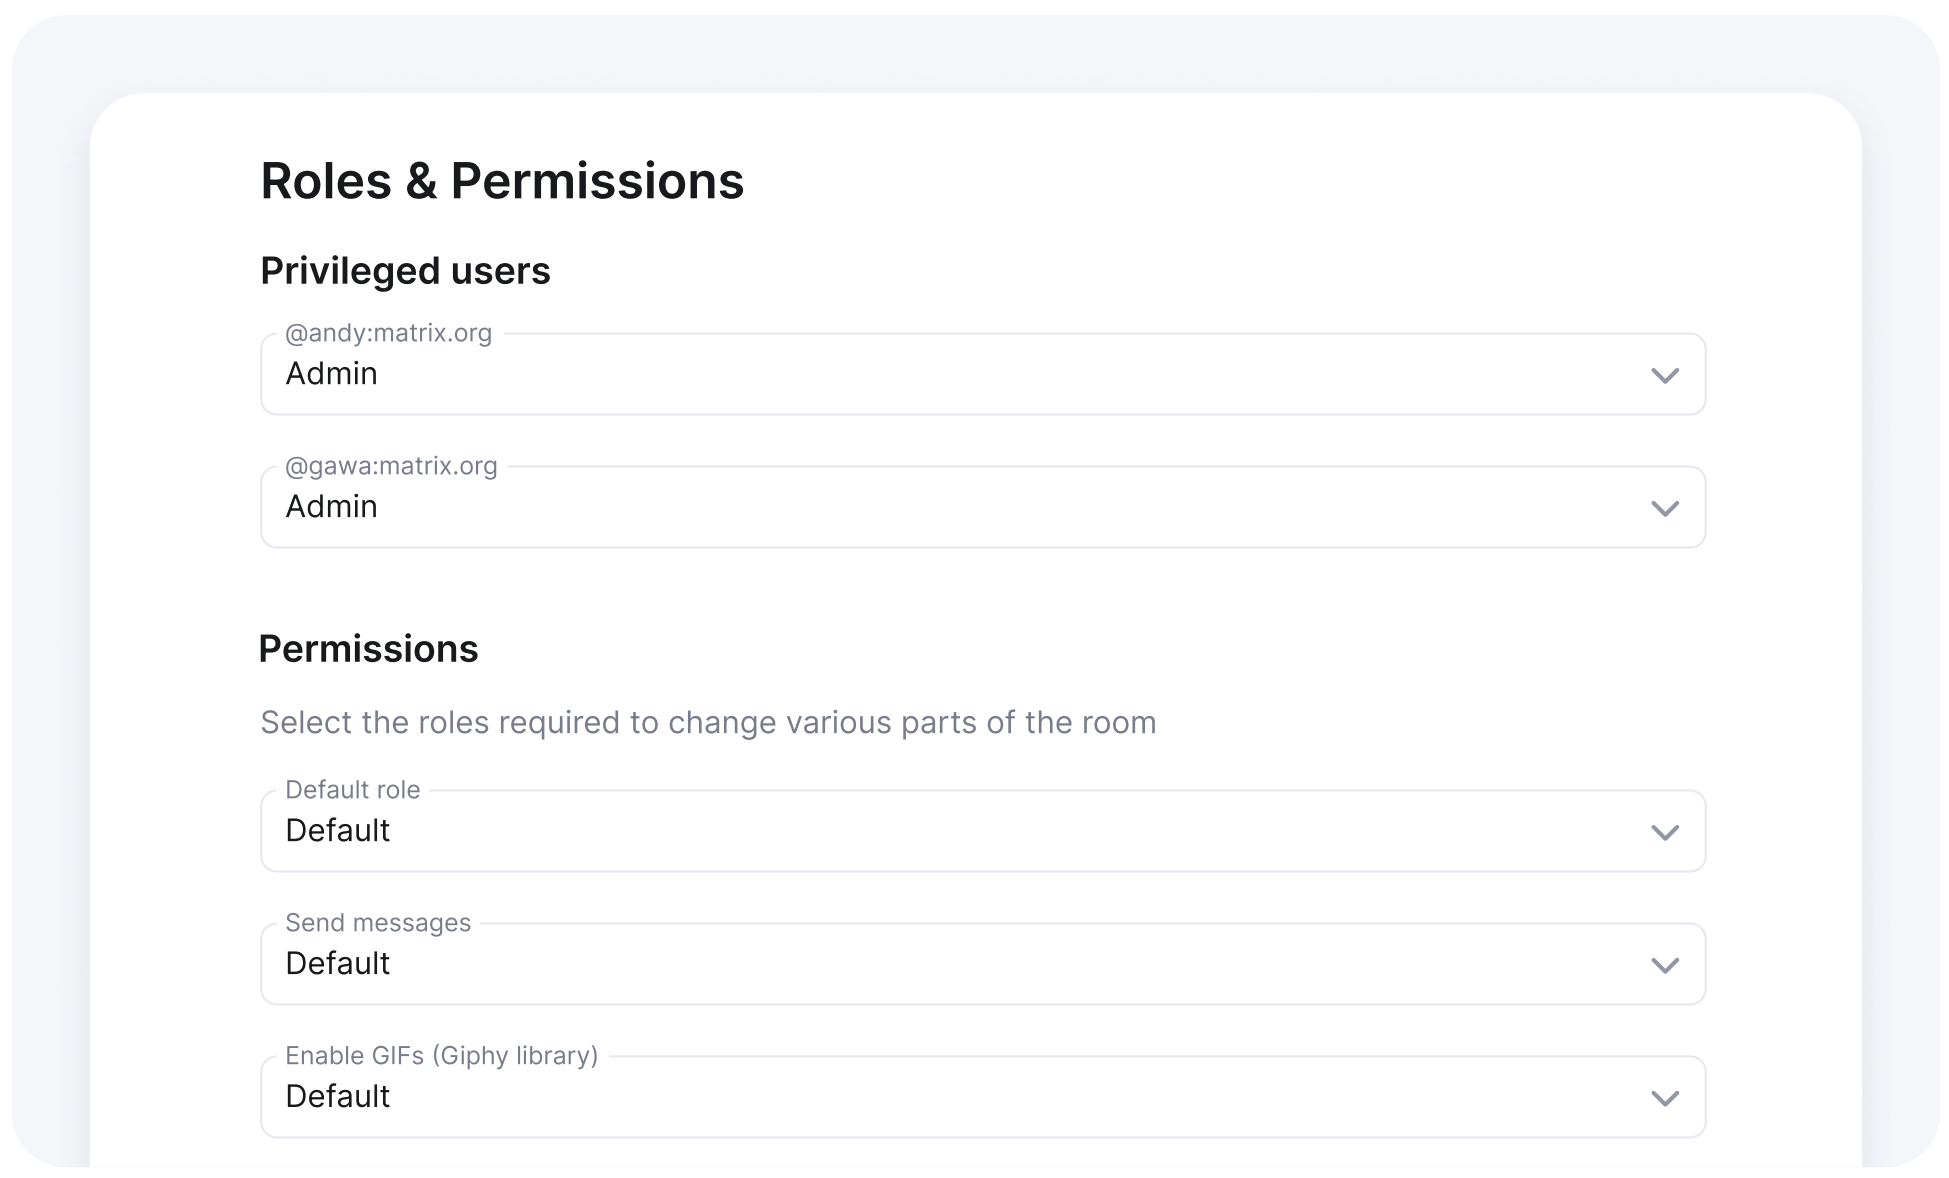
As a room admin, can I decide what members can do?
- In the roles and permissions section of the room’s settings, you’ll be able to configure the privilege levels required to perform various actions in the room, e.g. send a message, ban / kick members, redact messages, update the room’s settings, invite new members, etc..
Privacy, abuse and notices
Please note that Element is a client that allows you to access any homeserver in the Matrix network, just like a browser allows you to access any website you want. Each homeserver has different approaches to Abuse Management and Privacy, which are out of Element’s control.
How is my personal data being used?
- Here is Element’s privacy policy. If you have additional questions, contact our DPO.
How do I report on content in Element?
- Report inappropriate content on Element by hovering on the message and clicking the more options button (three dots) and "Report content".
How do I submit an abuse report?
- To report a general abuse issue, please contact abuse@element.io
- To report an abuse issue on the Matrix.org homeserver please contact abuse@element.io
- To report an issue outside of matrix.org homeserver, please contact the administrators of that homeserver.
How do I request a DMCA takedown?
- Please read our Copyright Policy for our approach to copyright. To send DMCA takedown notices, contact dmca@element.io
End-to-end encryption
What is encryption?
- Encryption means scrambling a message in such a way that only those knowing the secret key can unscramble it. We use encryption to keep your messages and files private.
What is end-to-end encryption?
- End-to-end encryption means your messages and files are encrypted before they leave your device, and stay encrypted until they reach the other participants' devices. End-to-end encrypted messages can only be read by the participants in the conversation.
Who can read my messages?
- Thanks to end-to-end encryption, your messages can only be read by the participants in the conversation and nobody else. This means your messages can't be read by anyone at Element, or by any other third party. It also means that if you lose your keys, you won't be able to read your messages.
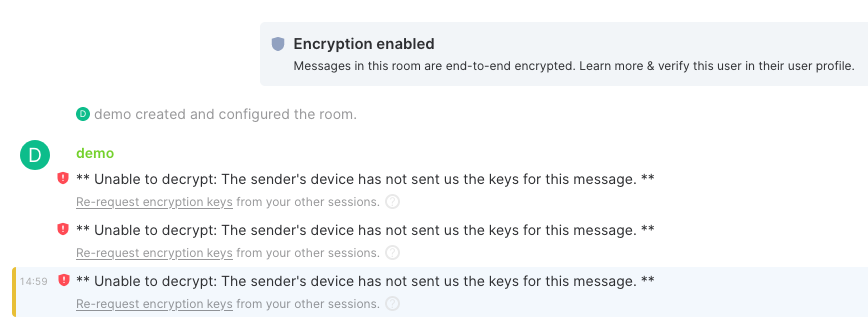
Why can't I read a message?
- If you can't read a message it's because your device doesn't have the right key. If your device doesn't have the right key, there are three ways you might be able to get hold of the key:
- Restore all of your keys from key backup
- Request the specific key from another device via key share
- Upload keys from a manual backup (advanced)
What is Key Backup?
- When key backup is enabled, your device will maintain a secure copy of its keys on your Matrix homeserver. To ensure those keys can only ever be accessed by you, they are encrypted on your device, with a key that you either store yourself, or secure with a passphrase and upload to your Matrix homeserver. It is important to understand that to protect your privacy your keys will never touch our systems unencrypted.
Is it safe to back up my encryption keys to your servers?
- Yes. Your keys are encrypted before they are uploaded to your Matrix homeserver, so we never see them unencrypted.
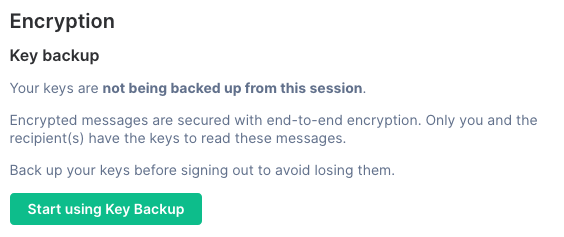
How do I set up key backup?
- Go to User Settings -> Security & Privacy and click Start using Key Backup.
How do I restore from key backup?
- Go to User Settings -> Security & Privacy and click Restore from Backup.
How do I request the key from another device via key share?
- When Element sees a message it can't decrypt, it automatically asks your other devices if they have a copy of the necessary key. Keys will be shared automatically with trusted devices - if the device with the key hasn't trusted the device requesting the key, the device with the key will pop up a prompt asking you to confirm the key share manually.
What is a 'device'?
- For historical reasons, when we say 'device' we don't mean your phone or your laptop - you actually create a new 'device' each time you log in on Matrix (and destroy it again when you log out).
What does it mean to verify or trust a device in Element?
- Element uses trust to represent an additional layer of security within the app, over and above username and password authentication.
If somebody is sending messages as Alice, we know that they have access to Alice's account - either they've logged in with Alice's username and password, or they're using a logged in session, perhaps on Alice's phone.
Usually, that somebody is going to be Alice. Unfortunately, in the real world, passwords can be guessed or sniffed and phones can be stolen. Element's trust mechanism is designed to mitigate this.
Element uses cross-signed device verification to help ensure the identity of conversation participants and their devices, with minimal effort.
In Element, you can see every device that has joined an encrypted conversation. If a new and unexpected device joins, you can use device verification to check that it's really Alice. And if you suspect that a trusted device has fallen into the wrong hands, you can revoke that trust and remove its access to the ongoing encrypted conversation.
Are all of my messages encrypted?
- No, messages are only encrypted in rooms with encryption enabled. You can enable encryption by going to Room Settings.
Can I search in encrypted rooms?
- Please note that search in encrypted rooms is only possible on Desktop if it's enabled in "Security & Privacy" settings on Element.
What does the red/green symbol mean at the top of the encrypted room?
- If an encrypted room has a green symbol next to the room name, it means your device trusts every other device in the room. This is the gold standard.
If instead there is a red symbol next to the room name, it means one or more devices are untrusted.
Verifying every device is, alas, still time-consuming — we’re working hard on a solution to this.
Reporting bugs and requesting features
How do I submit a bug report?
- From a mobile you can ‘rageshake’ (shake your phone when the app is open).
Alternatively for iOS: Go to ‘Settings’ (cog in the top left) and select ‘Report bug’ under the ‘Other’ section.
Or from Android: Go to ‘Settings’ (three dots in the top right) and select ‘Report bug.’
For desktop and web: Go to ‘Settings’ under your profile, click on ‘Feedback” and submit a report.
How do I request a new feature?
-
Please submit an Element feature report as an issue on GitHub:
- Element Web and Desktop:
- Element iOS:
-
Element Android: https://github.com/vector-im/element-android/issues
Before opening a new issue, please look for already open similar issues.
Threads Beta
Why does my homeserver need to support threads?
- In order to reliably update the list of threads in a room and their contents, your homeserver needs to support threads via MSC3440. If your home server runs Synapse, this is available in version 1.55 and above. You can ask your homeserver administrator to upgrade your server to ensure that threads are supported.
If your homeserver doesn't support threads, you will still be able to read and contribute to threads, but the feature might be unreliable - you might not see all threads in a room, and some messages might be missing, especially older messages. For that reason, we strongly recommend to upgrade your homeserver.
How does the room list unread badge work in regards to threads?
- The room list unread badge will behave exactly in the same way as it did before threads. The badge shows the number of messages between a user’s last read receipt and the last event in that room.
Sometimes, when reading a room, you might observe the room list unread badge decrease by a greater number than the visible messages shown in the room timeline. That ghost count is due to new messages tucked away in threads and hidden from the main timeline - the room list badge will not show them anymore, but an unread dot will still be shown in the thread list until you’ve opened the thread.
This limitation will be improved by future enhancements to homeservers which will help clients track thread read activity better.
If you have selected a different notification option like “Mentions & Keywords” or “None”, you should expect Element to honour this setting in the same way it did before the introduction of threads.
How can I avoid missing messages posted to threads?
- If at least one thread in the room has unread messages, you should see a notification dot on the thread icon in the room header. Clicking it will take you to the thread list which is sorted by the last reply to a thread. You’ll notice a dot on the right side of the thread tile indicating that a thread contains events you haven’t read yet.
Why does the thread list unread badge show only a dot, and not an unread count?
- This is not a supported feature for the beta release. For the moment, Element will always show a dot and not an unread count regardless of your room notification options.
Will the room list unread badge be incremented if someone sends a message in a thread I did not participate in?
- Yes, but we’re currently scoping out ways to have more granular settings for notifications in the context of threads.
Why does a thread show as unread even if I already read it on another device?
- Clients can not always sync the read state between themselves reliably for the beta release. It is possible that a thread you’ve already read on mobile will still have a notification dot on Element Web, or vice-versa.
Where are the read receipts in my threads?
- They are currently not supported for the beta release.
Are push/email notifications supported?
- Yes, following links from push or email notifications will show the event in the right context in Element.
Matrix Account Management
Unsure what an EMS account is, see the 'Understanding Your Element Accounts' page above.
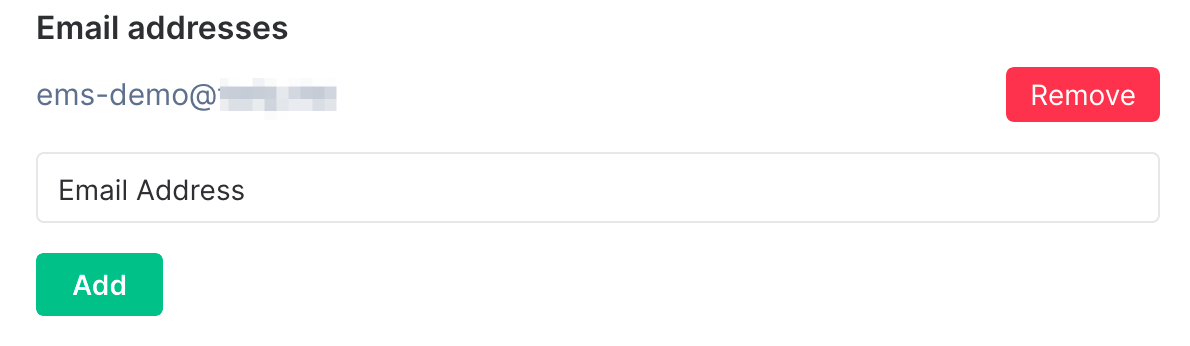
Add Email to Your Account
-
Go to Element
All settings
-
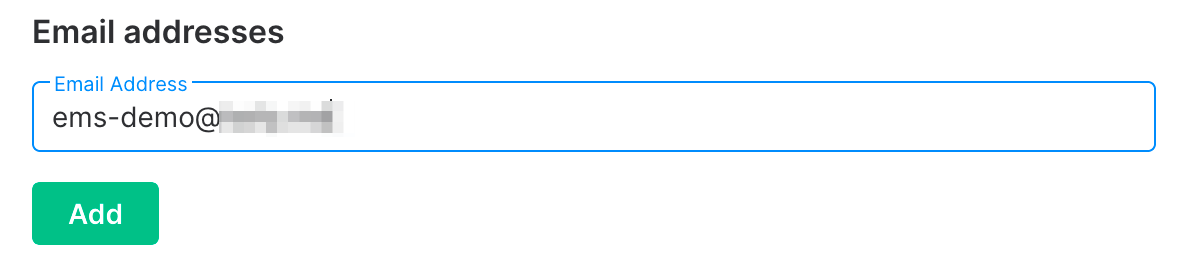
Enter your email address and click
Add

-
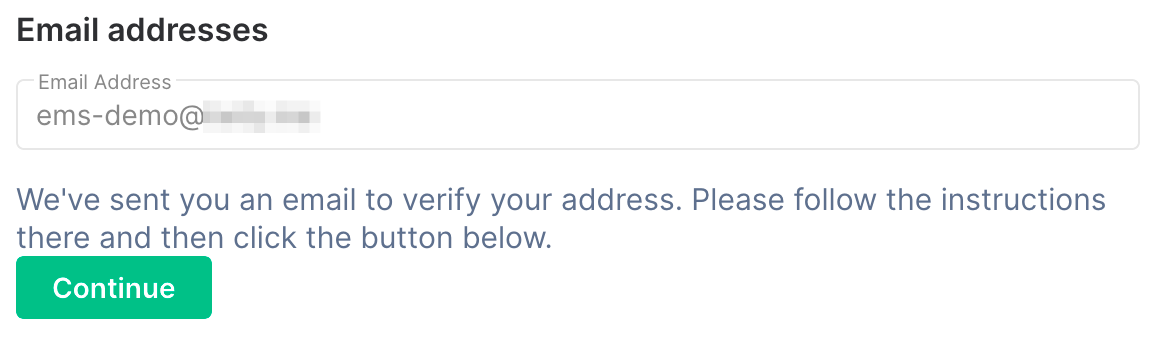
When you get this message, check your email

-
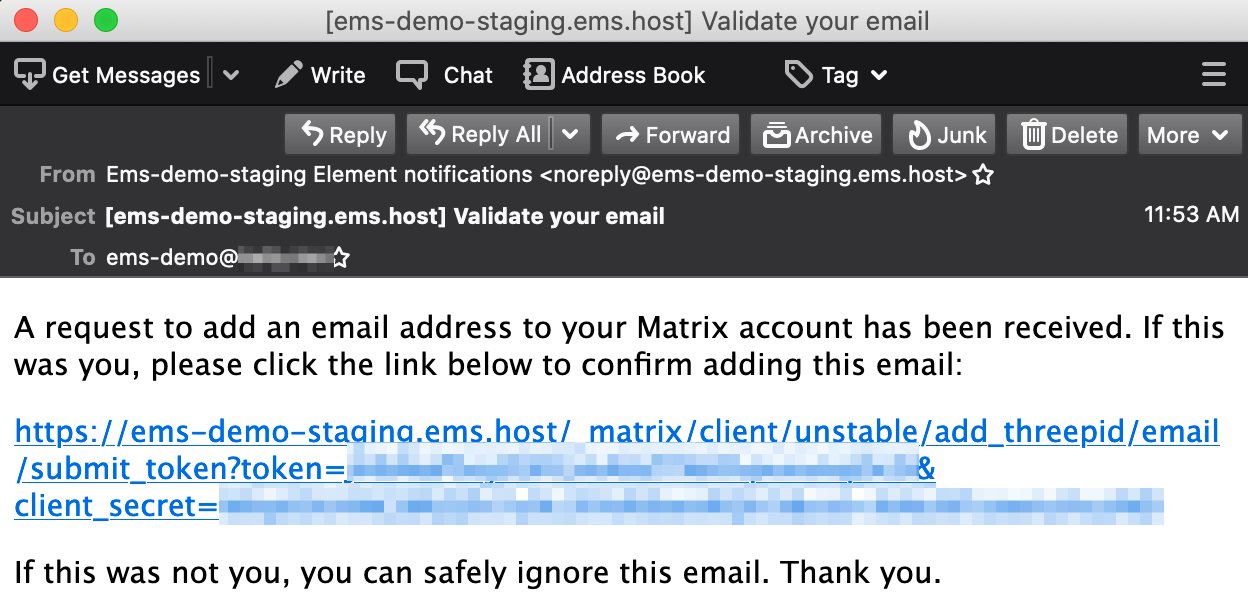
Click the link in the email. Make sure it opens in another tab/window, leaving your Element client where it is

-
When you get this message, you can close the verification tab/window and return to Element

-
Go back to Element and click
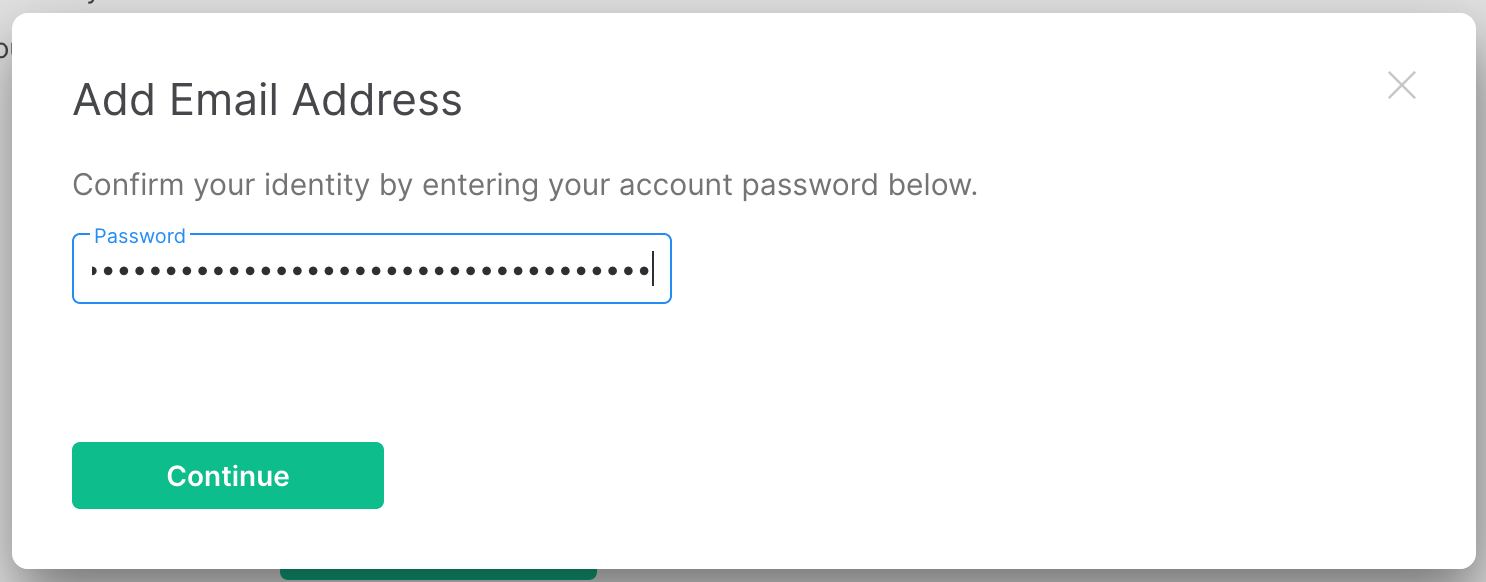
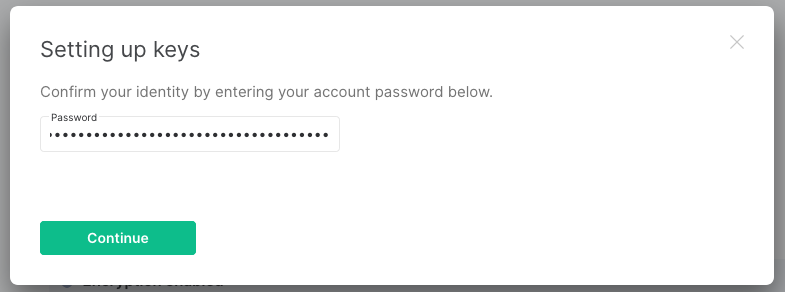
Continue -
Enter your account password or confirm using SSO, then click
Continue

-
If all worked correctly, your new email should now show up under the
Email addressessection in Element settings. If not, something went wrong and you need to try again


Creating a Matrix Account
Disclaimer: This guide refers to using the Element Matrix clients, Element Web or Element Desktop apps
Creating your Matrix Account
Depending on your homeserver, and it's configuration, the sign-up process may differ slightly, however the overall process should largely follow these steps.
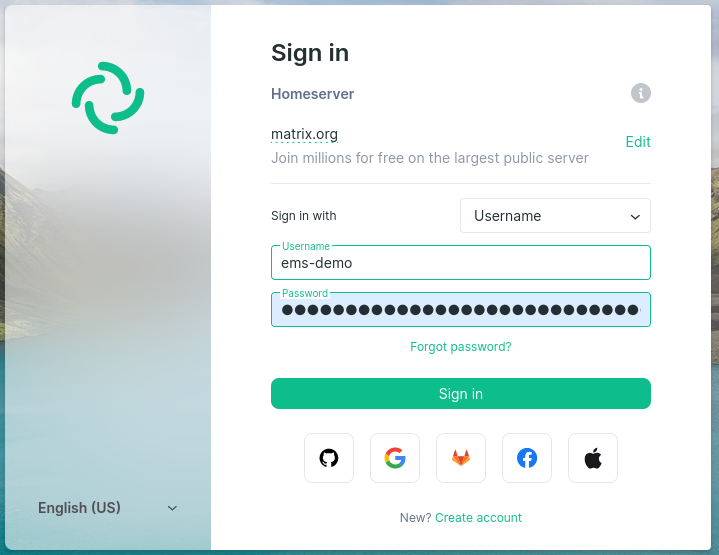
From your Matrix Client, click Create Account, then make sure to change the homeserver as needed. You can do this by clicking Edit next to the current homeserver name. Once a homeserver is selected, the client will then show you the available registration / authentication methods.
External Services
External service registration allows you to register for your account using a handful of different login providers, For example, matrix.org allows sign-up using a number of external services, including GitHub.
If you choose to register using an external service, you will not be able to use it with any other account, including if you deactivate the account it is associated with.
Username, Password and Email
For the initial stage of the registration flow, you will need to choose a username, otherwise known as your Matrix ID (MXID). Like email it follows a standardized format, @username:homeserver.com, for example a username of example-name on the matrix.org homeserver would be @example-name:matrix.org.
Choose carefully, it isn't possible to change your MXID, you will however have a display name, that is freely changeable.
You will also be able to provide an email, this is an optional field, if you add an email you will be able to reset your password. Additionally, adding an email allows you to opt-in to be discoverable by existing contacts.
Privacy Policy
Before your account can be created, you may need to review and accept any policies of the homeserver you wish to join. Do so by clicking the Privacy Policy link and reading through the document - if you accept the policy, confirm by clicking the checkbox and clicking Accept.
Creating a Matrix Account on your Homeserver
If you're an EMS customer, you can create your users via the Server Admin tab of the EMS Control Panel.
Alternatively you can make use of the Synapse Admin API to create a Matrix Account on a homeserver you hold an Admin account on. To do so, you will need to use Create or Modify Account from the User Admin API.
https://HOMESERVER_URL/_synapse/admin/v2/users/FULL_USERNAME
{
"password": "user_password",
"displayname": "User",
"threepids": [
{
"medium": "email",
"address": "<user_mail_1>"
},
{
"medium": "email",
"address": "<user_mail_2>"
}
],
"external_ids": [
{
"auth_provider": "<provider1>",
"external_id": "<user_id_provider_1>"
},
{
"auth_provider": "<provider2>",
"external_id": "<user_id_provider_2>"
}
],
"avatar_url": "<avatar_url>",
"admin": false,
"deactivated": false
}
Securing a Matrix Account
Disclaimer: This guide refers to using the Element Matrix clients, Element Web or Element Desktop apps
Once you have an account, it's important to understand the mechanisms it uses to keep your messages secure. Matrix uses encryption to protect your communication. The keys for this encryption should be kept secure, this is done using Secure Backup.
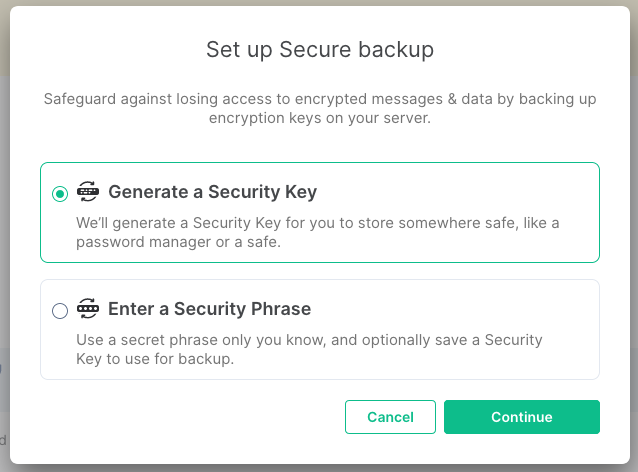
Secure Backup
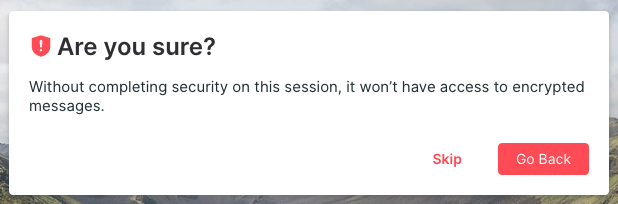
After sending your first encrypted message, you'll receive a prompt to Set up Secure Backup, to safeguard against losing access to encrypted messages & data. If you choose not to, any new sessions you start by logging into different clients, will not be able to see you messages.
If you do not receive a prompt, or chose to action later, you can initiate its setup by clicking on your avatar in the top left, then selecting Security & Privacy. Under the Encryption / Secure Backup section, select Set up.
Follow the prompt to set up your Secure Backup, you can opt to use a phrase or always use a Security Key. If you opt for a Security Phrase, you will be able to provide a phrase of your choosing which you will need to provide to any client when you login with your account. Alternatively, if you forget your phrase, or did not provide one - you will need to provide the generated key.
Verified Session
A verified session is a device (any client logged into your account) that has been verified as legitimate. On your accounts' first login, the session will be marked as verified, make sure to set up a Secure Backup, you will need it if you ever lose access to all verified sessions.
When you login to a new session, you will be presented with the option to either provide your Security Key / Phrase, or to request verification from another already verified session. Successfully completing either option will mark your new session as verified.
Forgotten or lost all recovery methods?
If you have forgotten or lost all methods of verifying your account, you will need to Reset you account. Doing so will result in losing access to all your encrypted messages, and mark all sessions as unverified (treating this new session like your first).
Add Email to your account
Adding an email to your account will allow you to be able to reset your password should you lose it. Simply follow these steps:
-
Go to Element
All settings -
Enter your email address and click
Add -
When you get this message, check your email
-
Click the link in the email. Make sure it opens in another tab/window, leaving your Element client where it is
-
When you get this message, you can close the verification tab/window and return to Element
-
Go back to Element and click
Continue -
Enter your account password or confirm using SSO, then click
Continue -
If all worked correctly, your new email should now show up under the
Email addressessection in Element settings. If not, something went wrong and you need to try again


Securing a Matrix Account on your Homeserver
If you're an EMS customer, you can create your users via the Server Admin tab of the EMS Control Panel.
Alternatively you can make use of the Synapse Admin API to create a Matrix Account on a homeserver you hold an Admin account on. To do so, you will need to use Create or Modify Account from the User Admin API.
https://HOMESERVER_URL/_synapse/admin/v2/users/FULL_USERNAME
{
"threepids": [
{
"medium": "email",
"address": "<user_mail_1>"
},
{
"medium": "email",
"address": "<user_mail_2>"
}
],
}
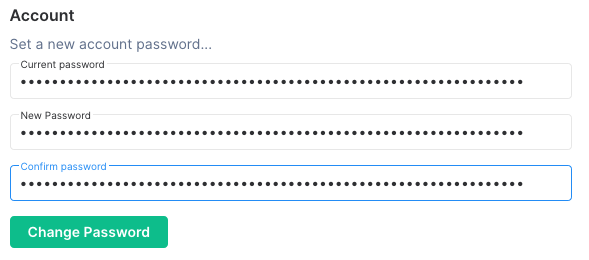
Change Account Password
Resetting the account password will log out all your sessions. Before doing this, make sure that
- all your sessions are connected to key backup,
- all sessions have backed up all their keys. See Check Cross Signing Status, and
- you have your correct key backup passphrase available.
If you know your current password
-
Go to Element
All settings
-
Enter your current password and your new password

-
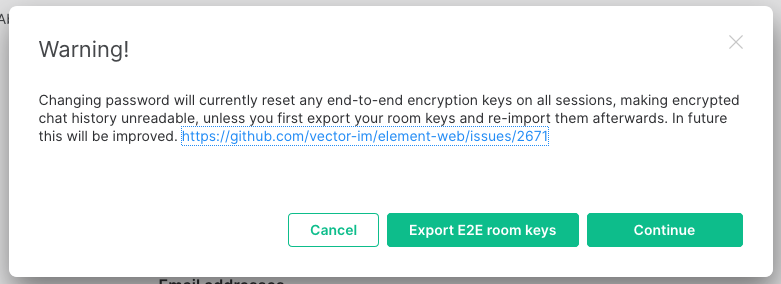
You might want to export your
E2E room keys. Just to be on the safe side in case something goes wrong. See also Export and Import E2E Room Keys -
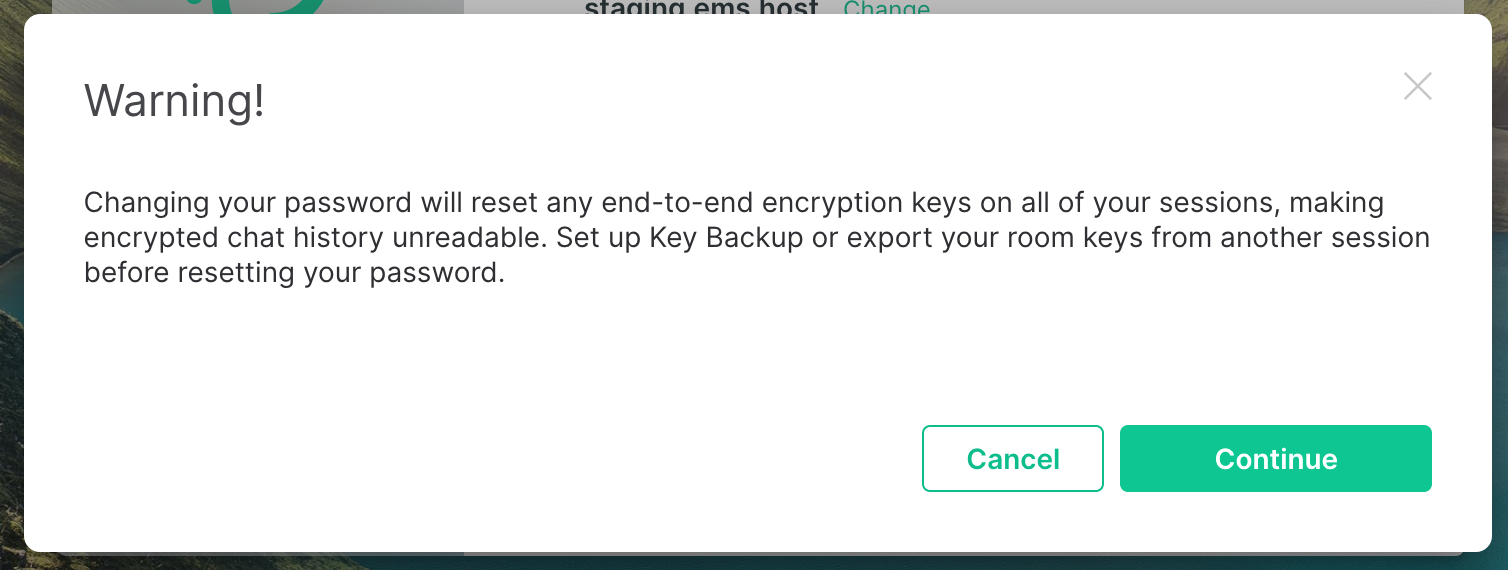
Click
Continue.
Note: This warning is outdated, see this issue

-
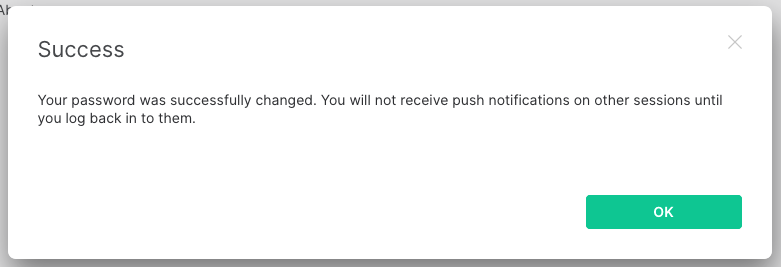
Click
OK

-
You now need to sign in again on all your other devices
If you do not know your current password
Note, this will only work if you have an email address attached to your Matrix account. If you do not have an email address attached, contact the administrators of your homeserver. (support@matrix.org does not reset passwords in any circumstance)
-
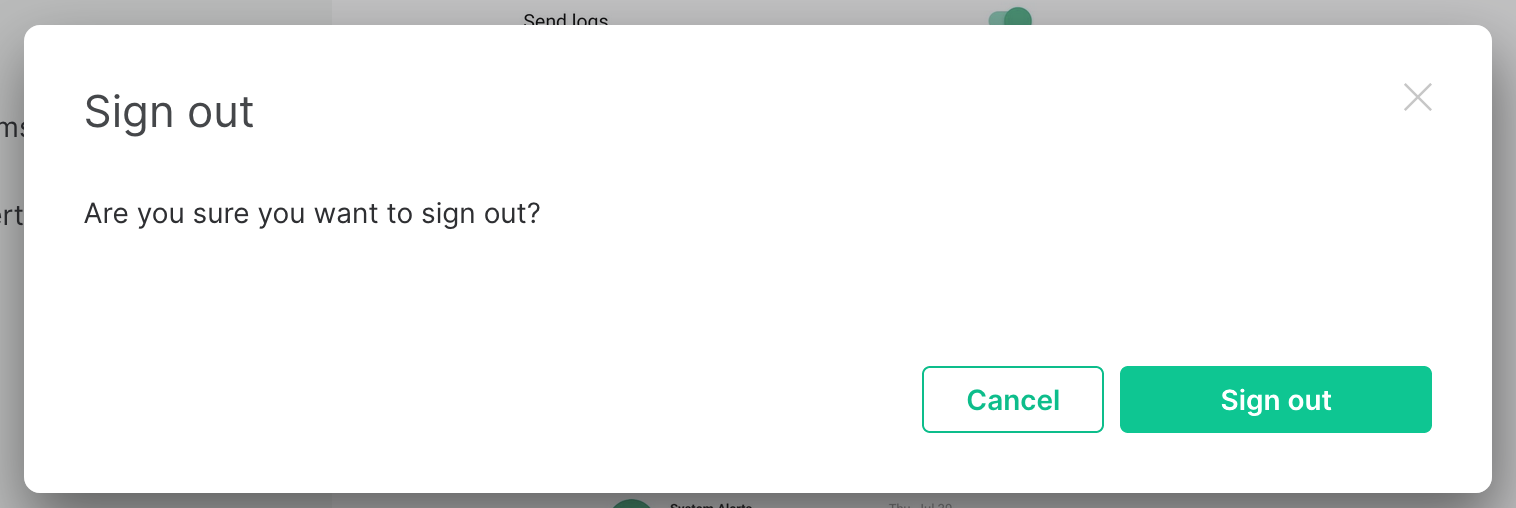
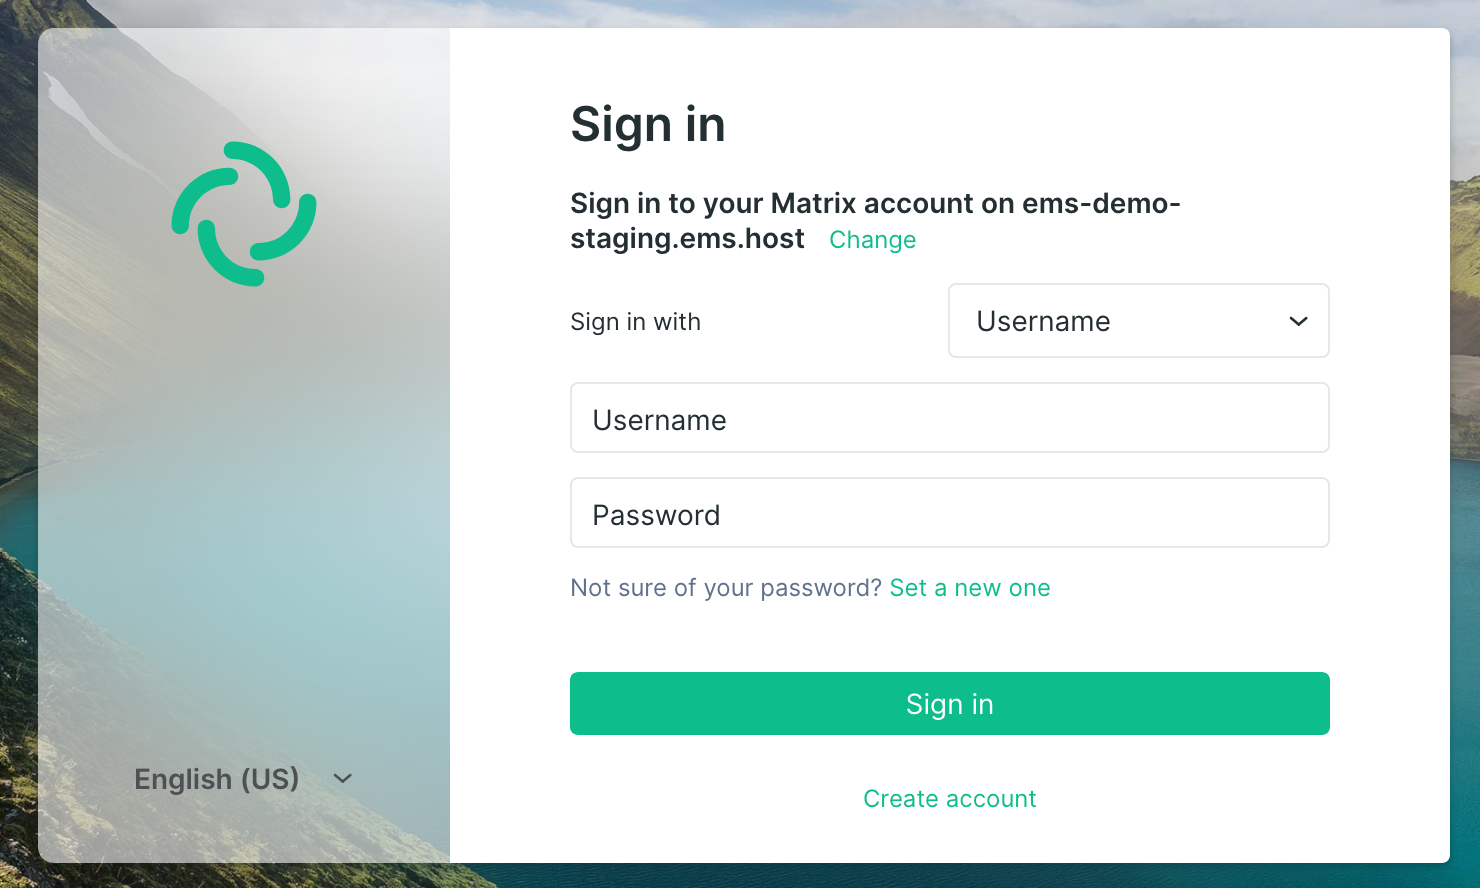
Sign out of Element

-
Click
Sign out

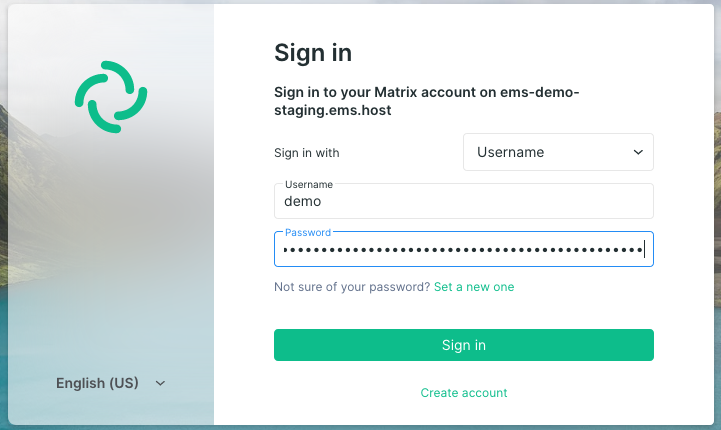
-
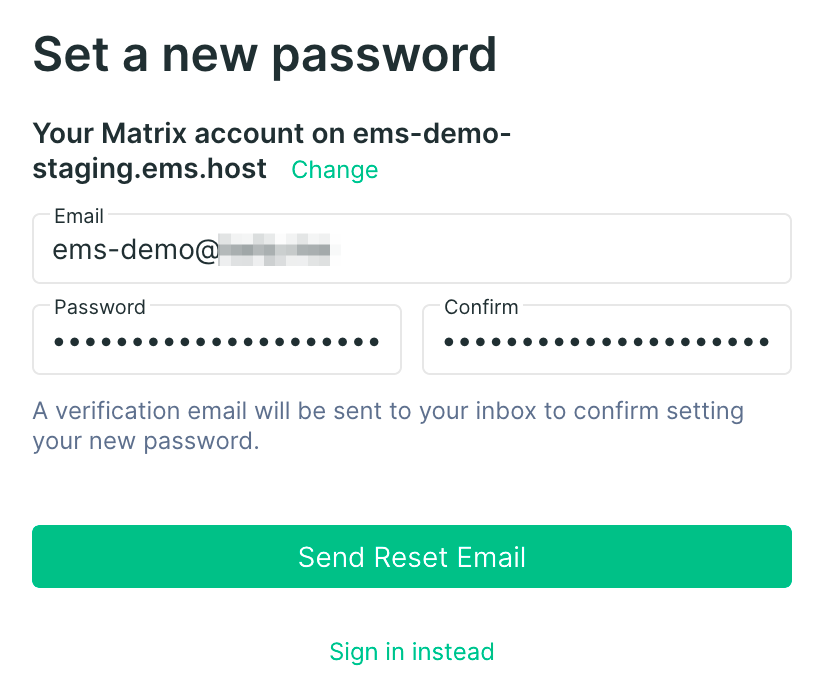
Click "Not sure of your password?
Set a new one"

-
Enter your email address, and a new password. Then click
Send Reset Email

-
Click
Continue.
Note: This warning is outdated, see this issue

-
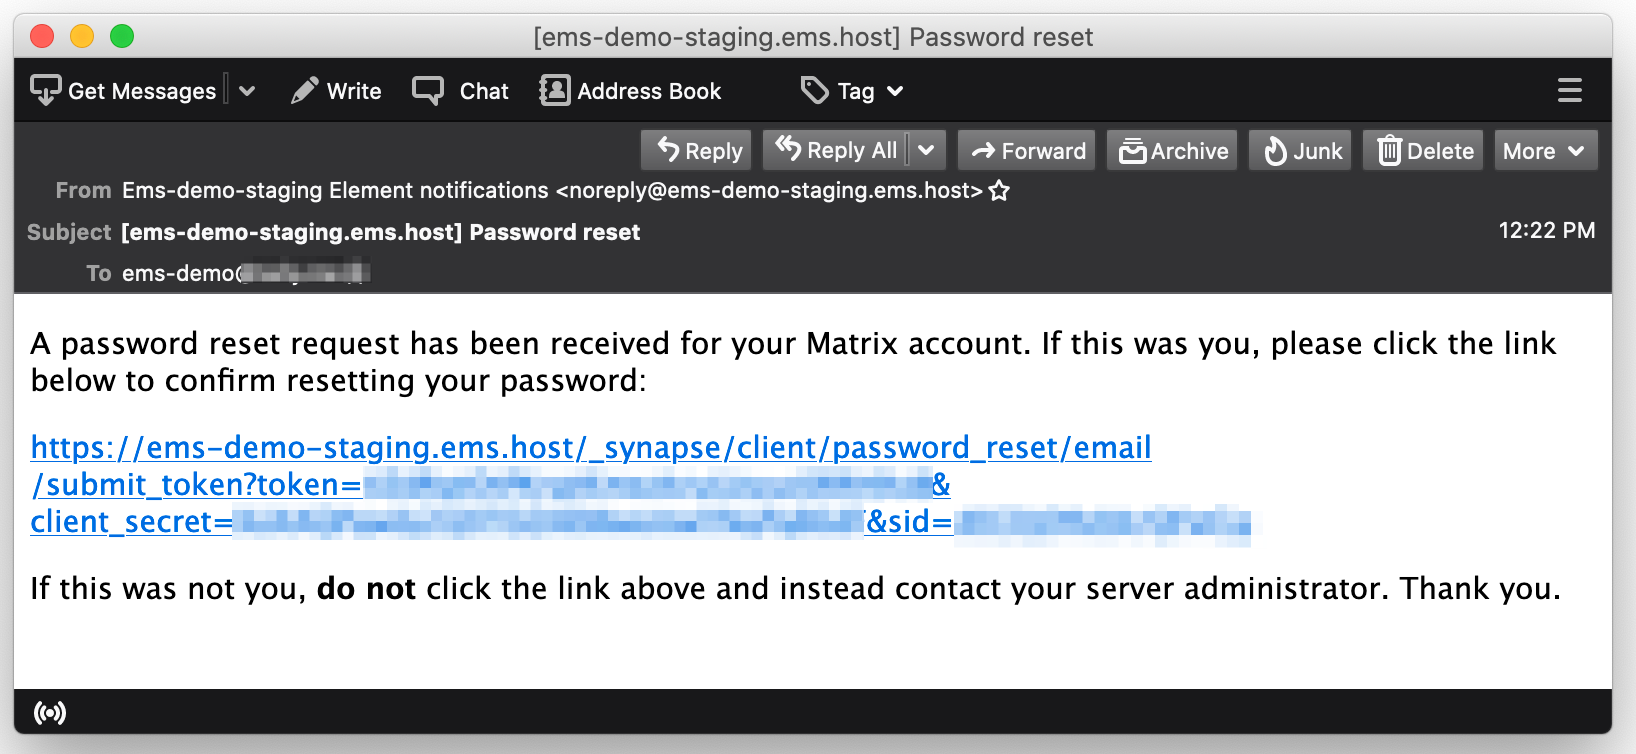
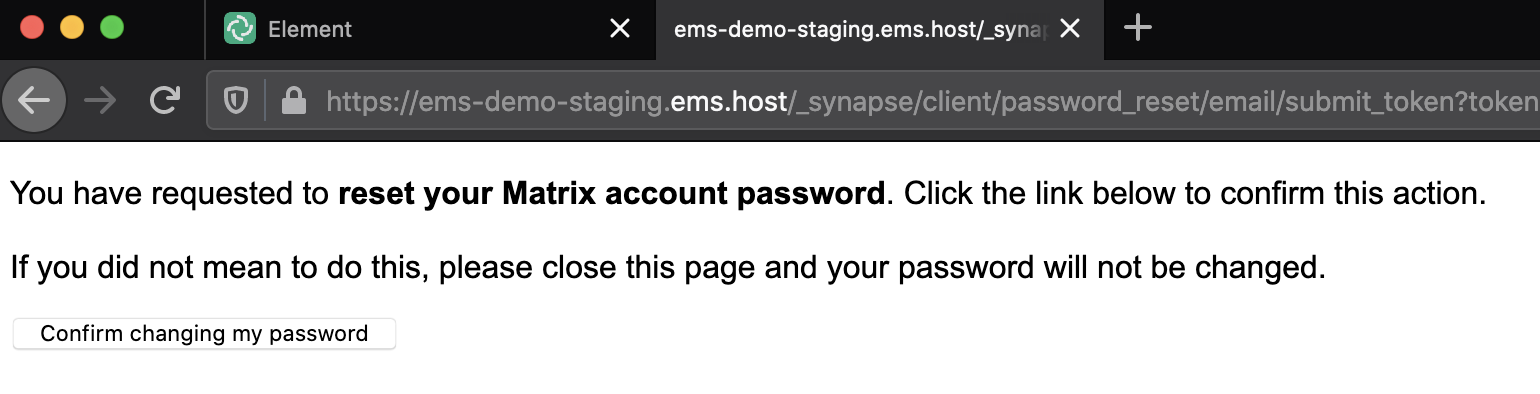
When you get this message, check your email

-
Click the link in the email. Make sure it opens in new browser tab, leaving your Element client open

-
Click
Confirm changing my password

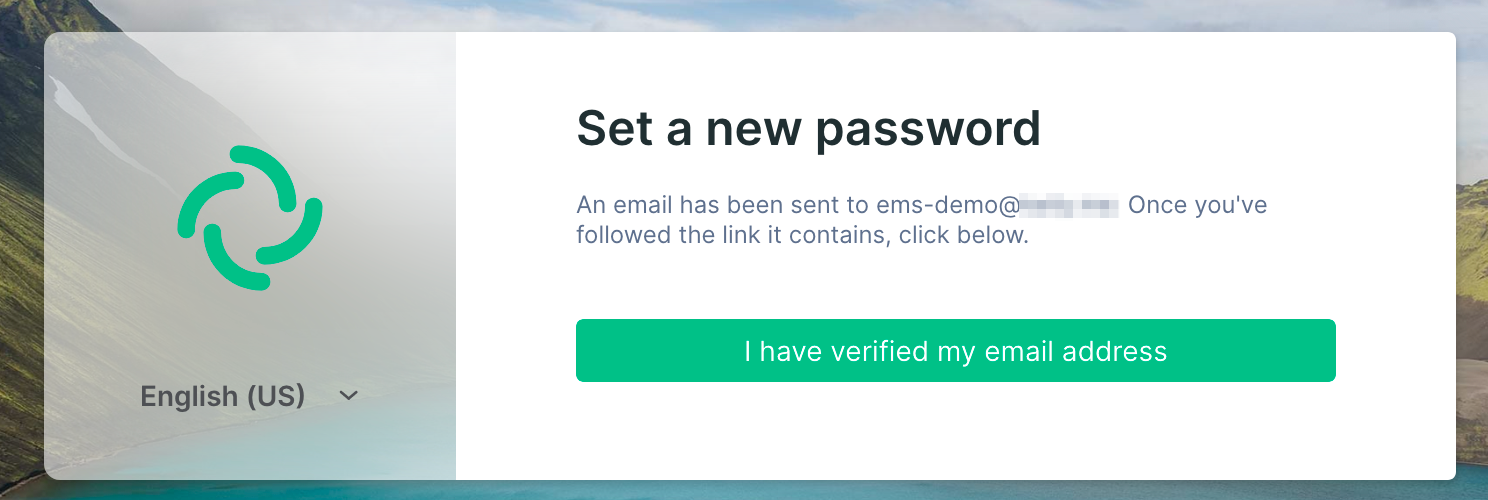
-
You can now close this tab and return to Element

-
Click
I have verified my email address -
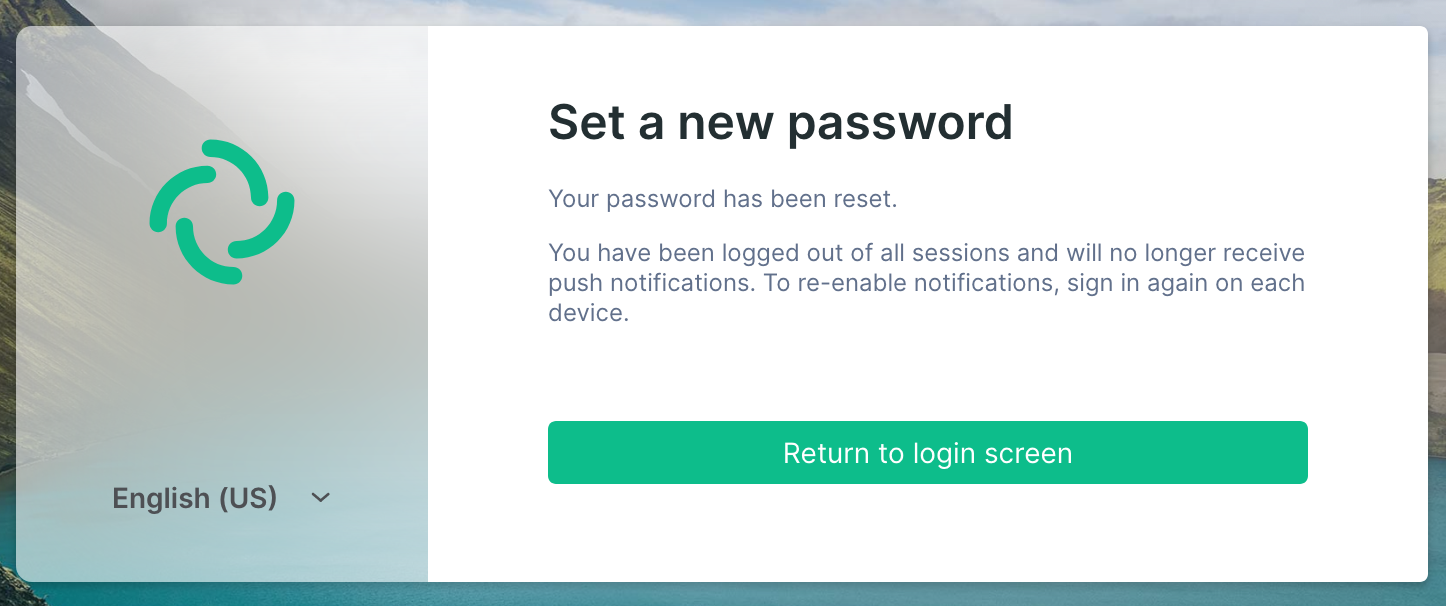
Click
Return to login screen -
Sign in like normal with your new password. Note that all your other sessions have been signed out and you need to sign in again.


Changing a Matrix Account password
Disclaimer: This guide refers to using the Element Matrix clients, Element Web or Element Desktop apps
Changing your Matrix Account password
If you don't know your password, you'll need to recover your account, see our Recovering a Matrix Account page for instructions.
-
Go to Element
All settings[

Changing a Matrix Account password on your Homeserver
If you're an EMS customer, you can create your users via the Server Admin tab of the EMS Control Panel.
Alternatively you can make use of the Synapse Admin API to change a Matrix Account password on a homeserver you hold an Admin account on. To do so, you will need to use Create or Modify Account from the User Admin API.
https://HOMESERVER_URL/_synapse/admin/v2/users/FULL_USERNAME
{
"password": "new_password"
}
Recovering a Matrix Account
Disclaimer: This guide refers to using the Element Matrix clients, Element Web or Element Desktop apps
Resetting the account password will log out all your sessions, before doing this, make sure that
- All your sessions are connected to Secure Backup
- All sessions have backed up all their keys (Check Cross Signing Status)
- You have your correct key backup passphrase available
Recovering your Matrix Account
This will only work if you have an email address attached to your Matrix account. If you do not have an email address attached, contact the administrators of your homeserver.
Reminder: support@matrix.org does not reset passwords under any circumstances
-
Sign out of Element
-
Click
Sign out -
Click "Not sure of your password?
Set a new one" -
Enter your email address, and a new password. Then click
Send Reset Email -
When you get this message, check your email
-
Click the link in the email. Make sure it opens in new browser tab, leaving your Element client open
-
Click
Confirm changing my password -
You can now close this tab and return to Element
-
Click
I have verified my email address -
Click
Return to login screen
-
Sign in like normal with your new password. Note that all your other sessions have been signed out and you need to sign in again.


Recovering a Matrix Account on your Homeserver
If you're an EMS customer, you can create your users via the Server Admin tab of the EMS Control Panel.
Alternatively you can make use of the Synapse Admin API to manage a Matrix Account on a homeserver you hold an Admin account on. To do so, you will need to use the User Admin API.
Deactivating a Matrix Account
Disclaimer: This guide refers to using the Element Matrix clients, Element Web or Element Desktop apps
Deactivating your Matrix Account
If you wish to deactivate your account, you can do so by following the below steps:
- Log in to your Matrix Client
- Click on your Avatar / Username in the top left corner
- Open
Settings - From the bottom of the
Generaltab, clickDeactivate - Check any additional options, if applicable, then enter your password or confirm via SSO to deactivate your account
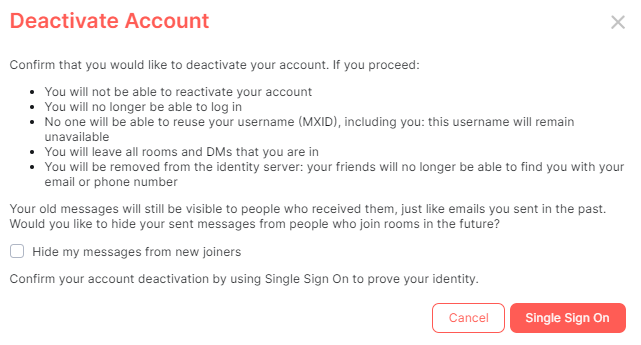
Please note once the account has been deactivated, it is impossible to reactivate it again or reuse the username. Your user is stored indefinitely to avoid account recycling, as such you may also wish to remove any Third-Party ID's from your account before deactivation, as this may cause issues if you ever attempt to create a new account.
Erasing your Matrix Account
You can also GDPR erase your account, this means messages sent by the user will still be visible by anyone that was in the room when these messages were sent, but hidden from users joining the room afterwards. You can do this by checking the Hide my messages from new joiners checkbox on the Deactivate Account confirmation prompt.
Deactivating a Matrix Account on your Homeserver
If you're an EMS customer, you can create your users via the Server Admin tab of the EMS Control Panel.
Alternatively you can make use of the Synapse Admin API to deactivate a Matrix Account on a homeserver you hold an Admin account on. To do so, you will need to use Deactivate Account from the User Admin API.
https://HOMESERVER_URL/_synapse/admin/v1/deactivate/FULL_USERNAME
{
"erase": true
}
Reactivating a Matrix Account
Disclaimer: This guide refers to using the Element Matrix clients, Element Web or Element Desktop apps
Reactivating your Matrix Account
Matrix.org
Once your account has been deactivated, it is impossible to reactivate it again or reuse the username. Your user is stored indefinitely to avoid account recycling. To protect the security and privacy of our users, we never reactivate, or release deleted usernames. Instead, we recommend creating a new account using a different Matrix ID.
Reactivating a Matrix Account on your Homeserver
If you're an EMS customer, see this FAQ entry.
Alternatively you can make use of the Synapse Admin API to reactivate a Matrix Account on a homeserver you hold an Admin account on. To do so, you will need to use Create or Modify Account from the User Admin API, passing "deactivated": false as well as providing a new password.
https://HOMESERVER_URL/_synapse/admin/v2/users/FULL_USERNAME
{
"password": "new_password"
"deactivated": false
}
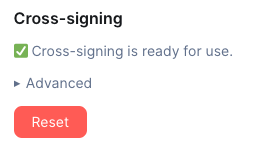
Cross Signing
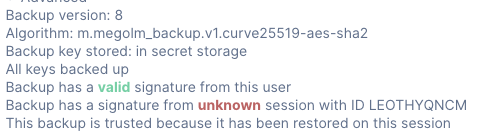
Check Status
-
Go to Element
Security & Privacysettings

-
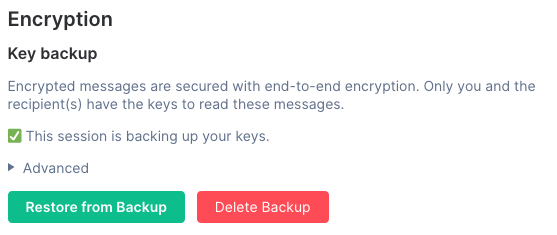
Expand the
Advancedsection

-
Look for
All keys backed up

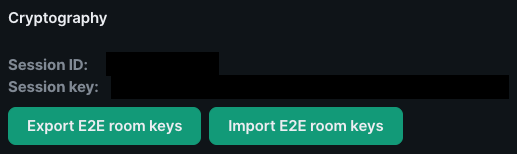
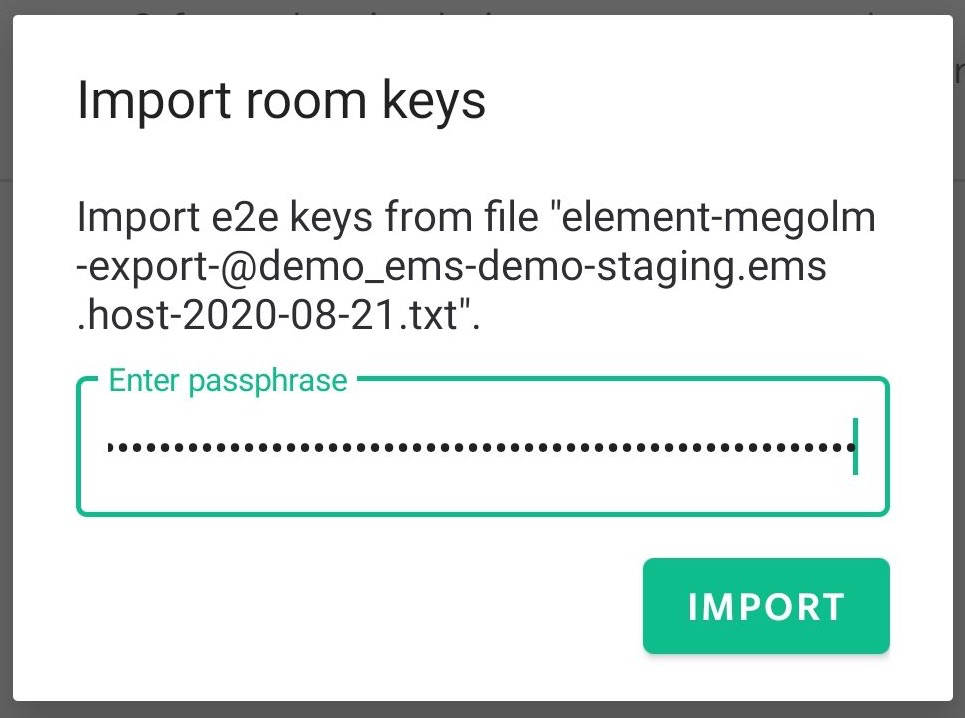
Export and Import E2E Room Keys
Element Web and Desktop
Export
-
Go to Element
Security & Privacysettings
-
Click
Export E2E room keys

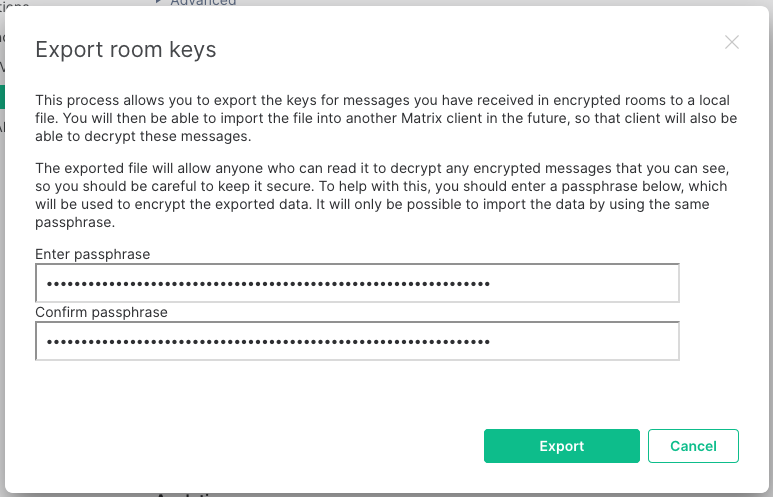
-
Enter a secure passphrase and click
Export

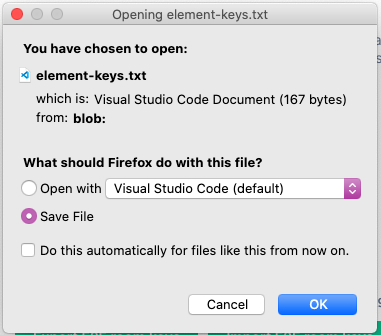
-
Choose to save the file

-
Select a directory on your computer

Import
-
Go to Element
Security & Privacysettings
-
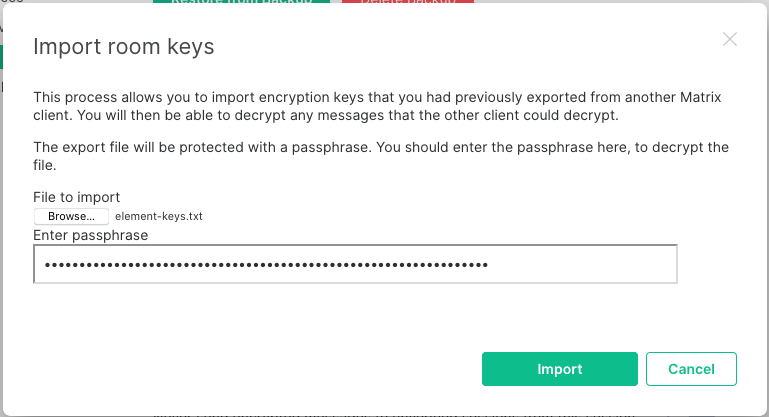
Click
Import E2E room keys
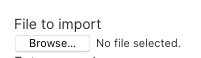
-
Click
Browse

-
Select your export

-
Enter your passphrase and click
Import


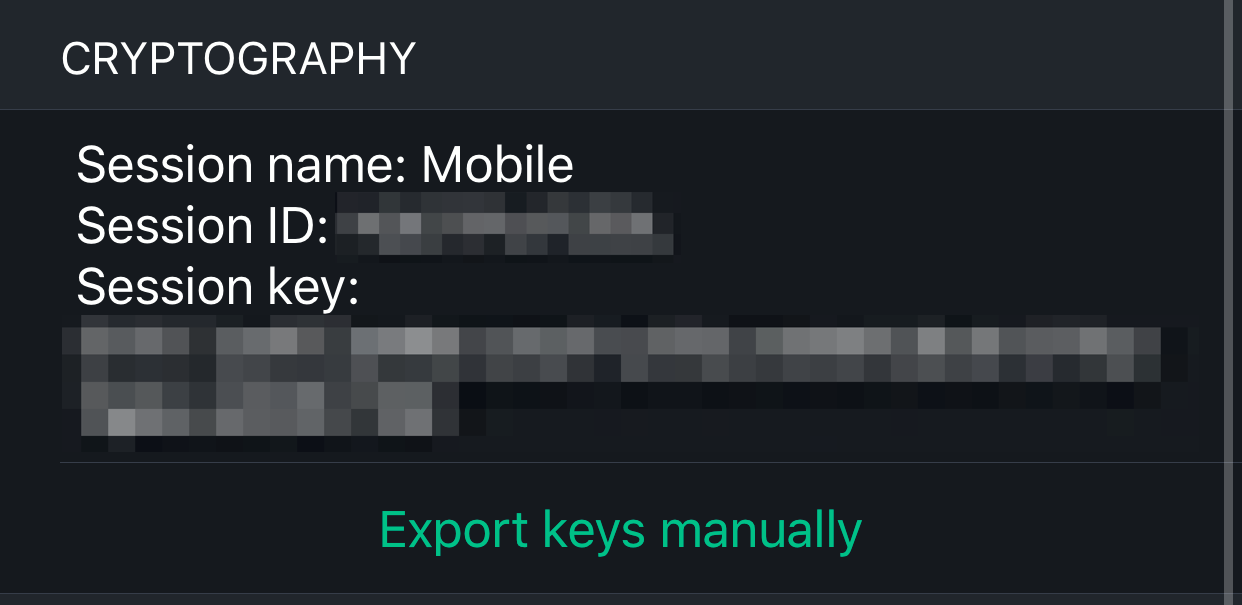
Element iOS
Export
-
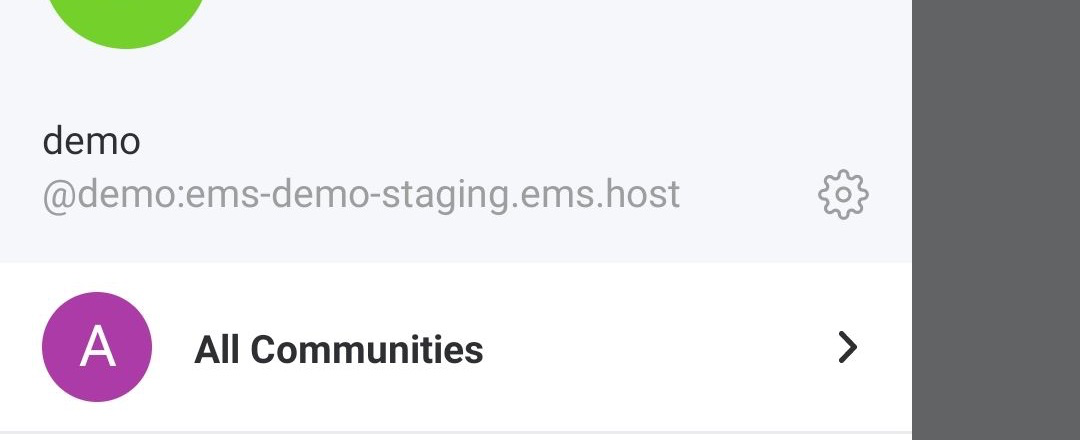
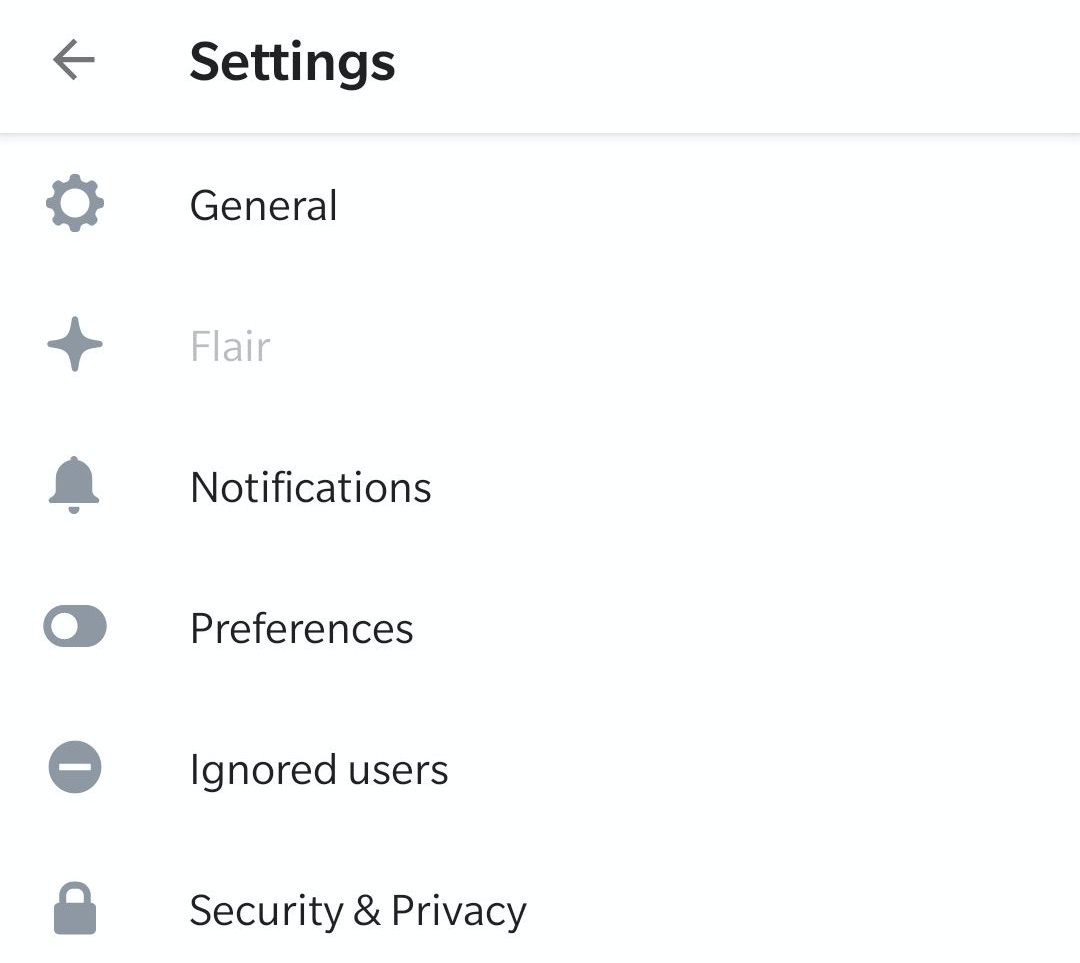
Tap the cog in the top left of Element
-
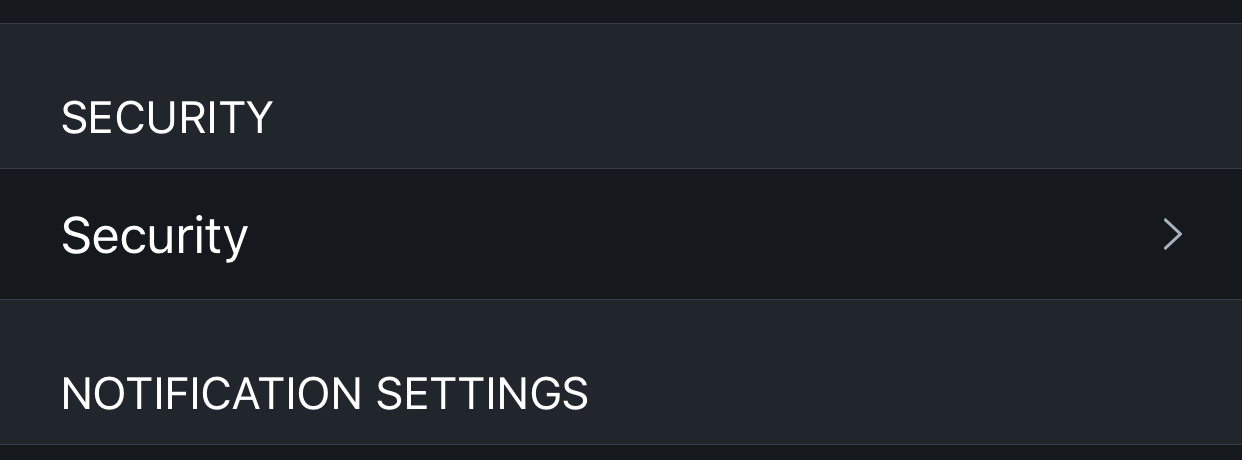
Tap
Security

-
Tap
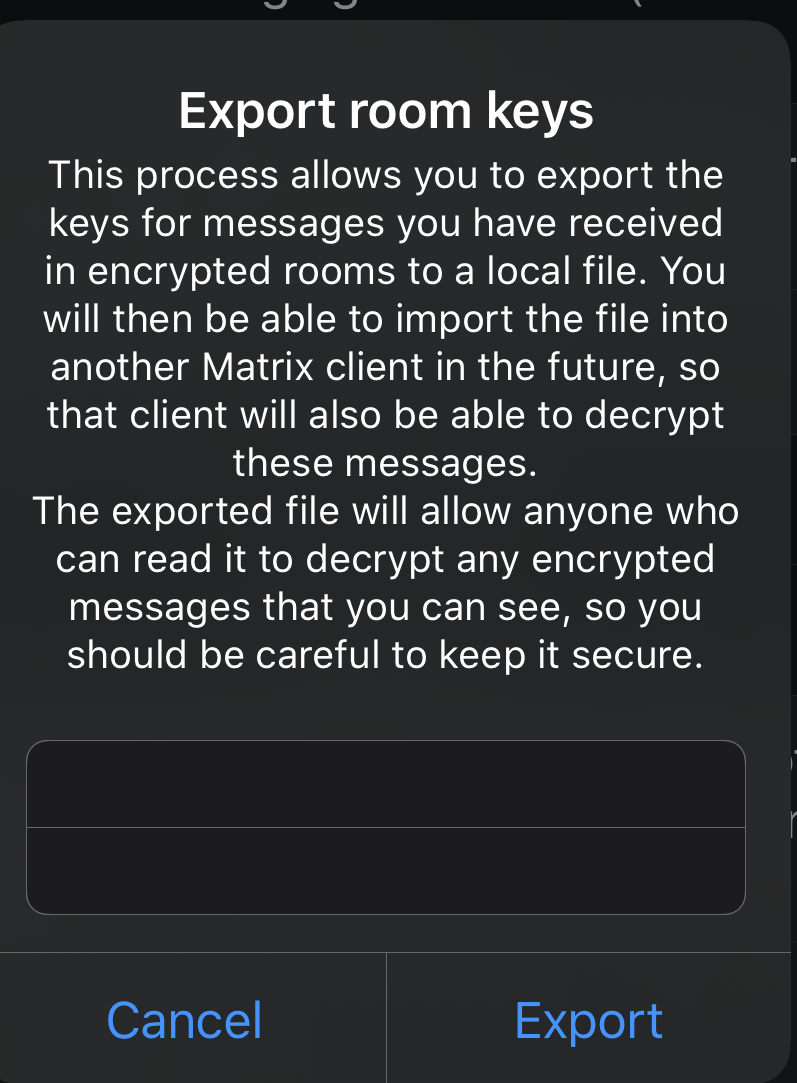
Export keys manually

-
Enter a secure passphrase and tap
Export

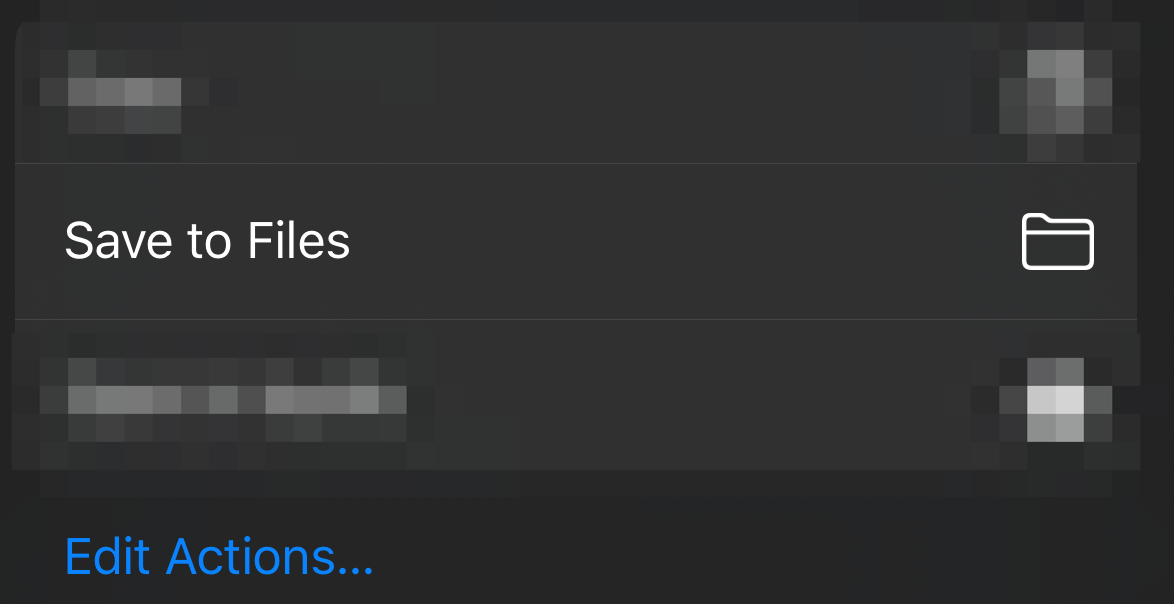
-
Choose
Save to Files

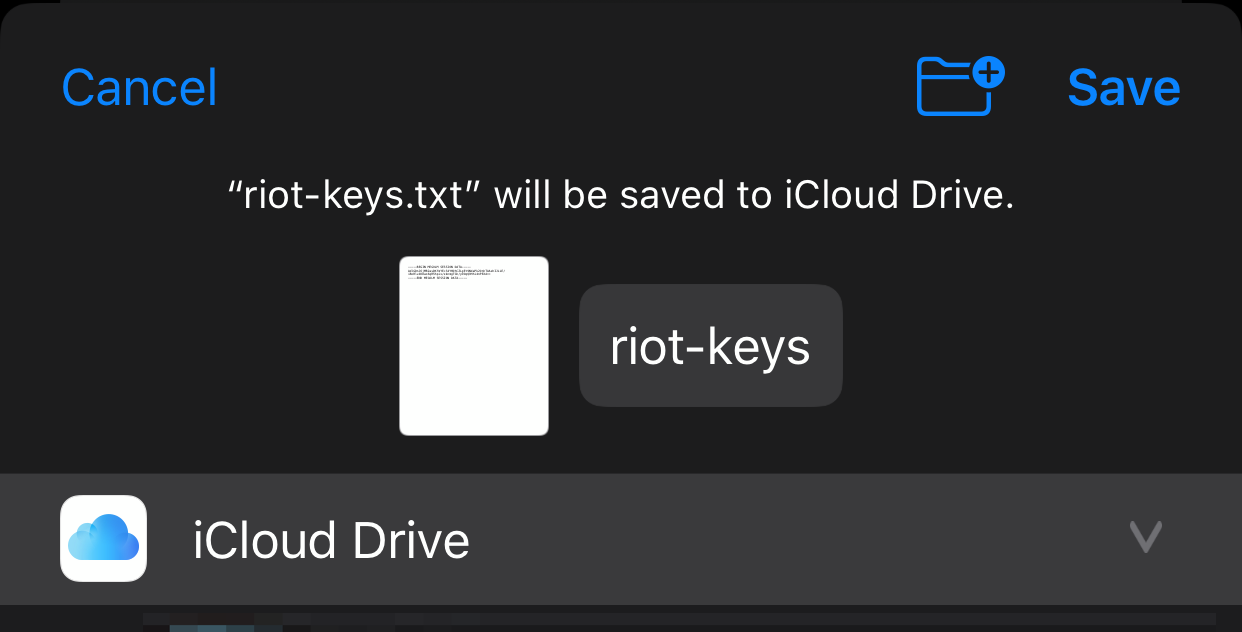
-
Choose a location then tap
Save

Import
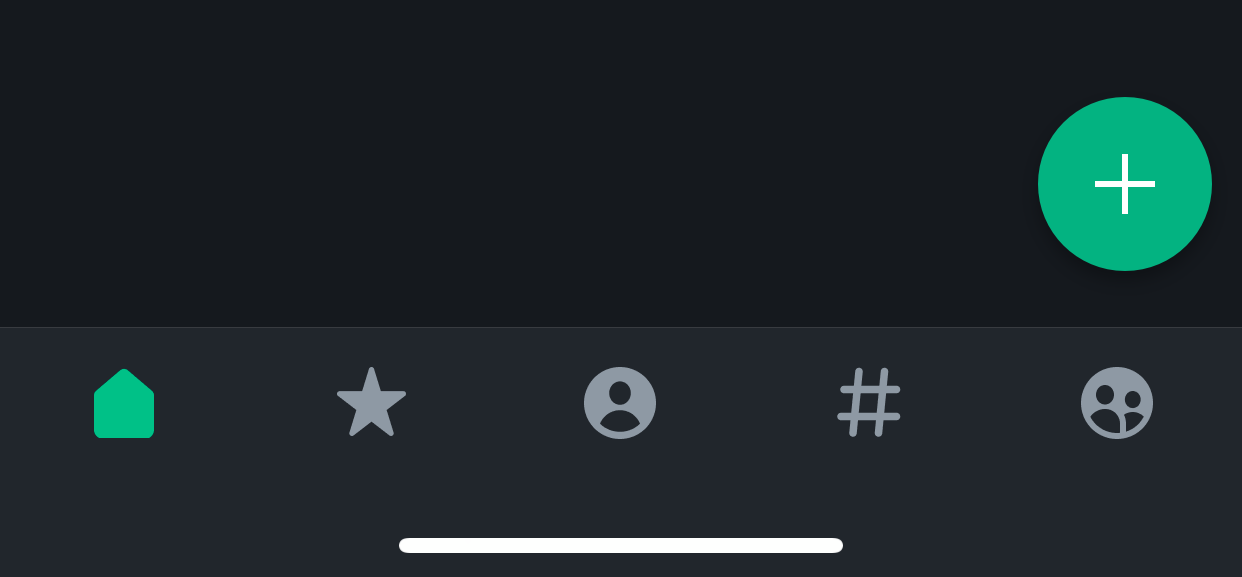
This is a temporary solution until this issue is resolved
-
Tap the

-
Tap
Create room

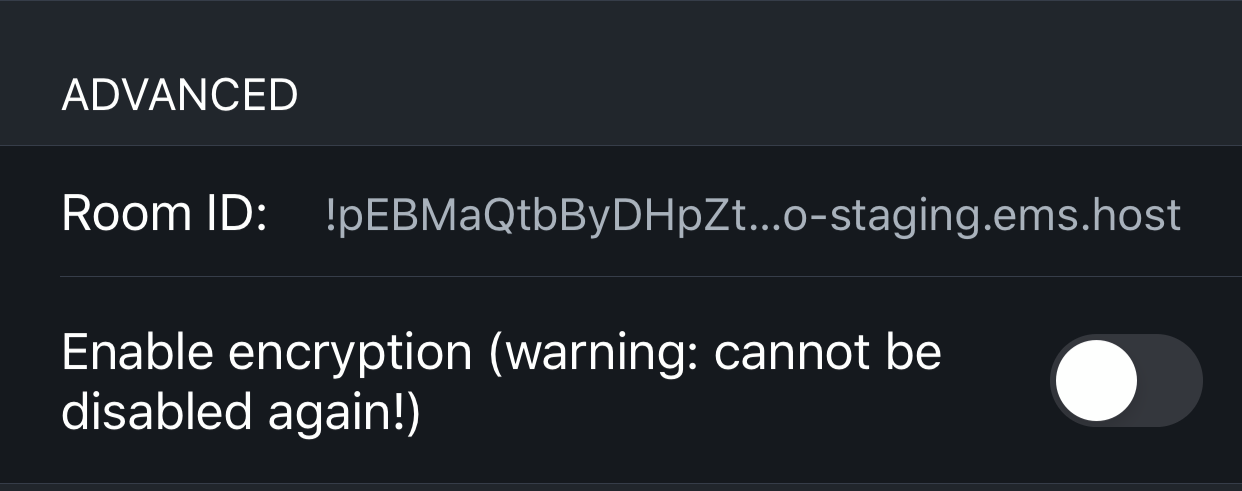
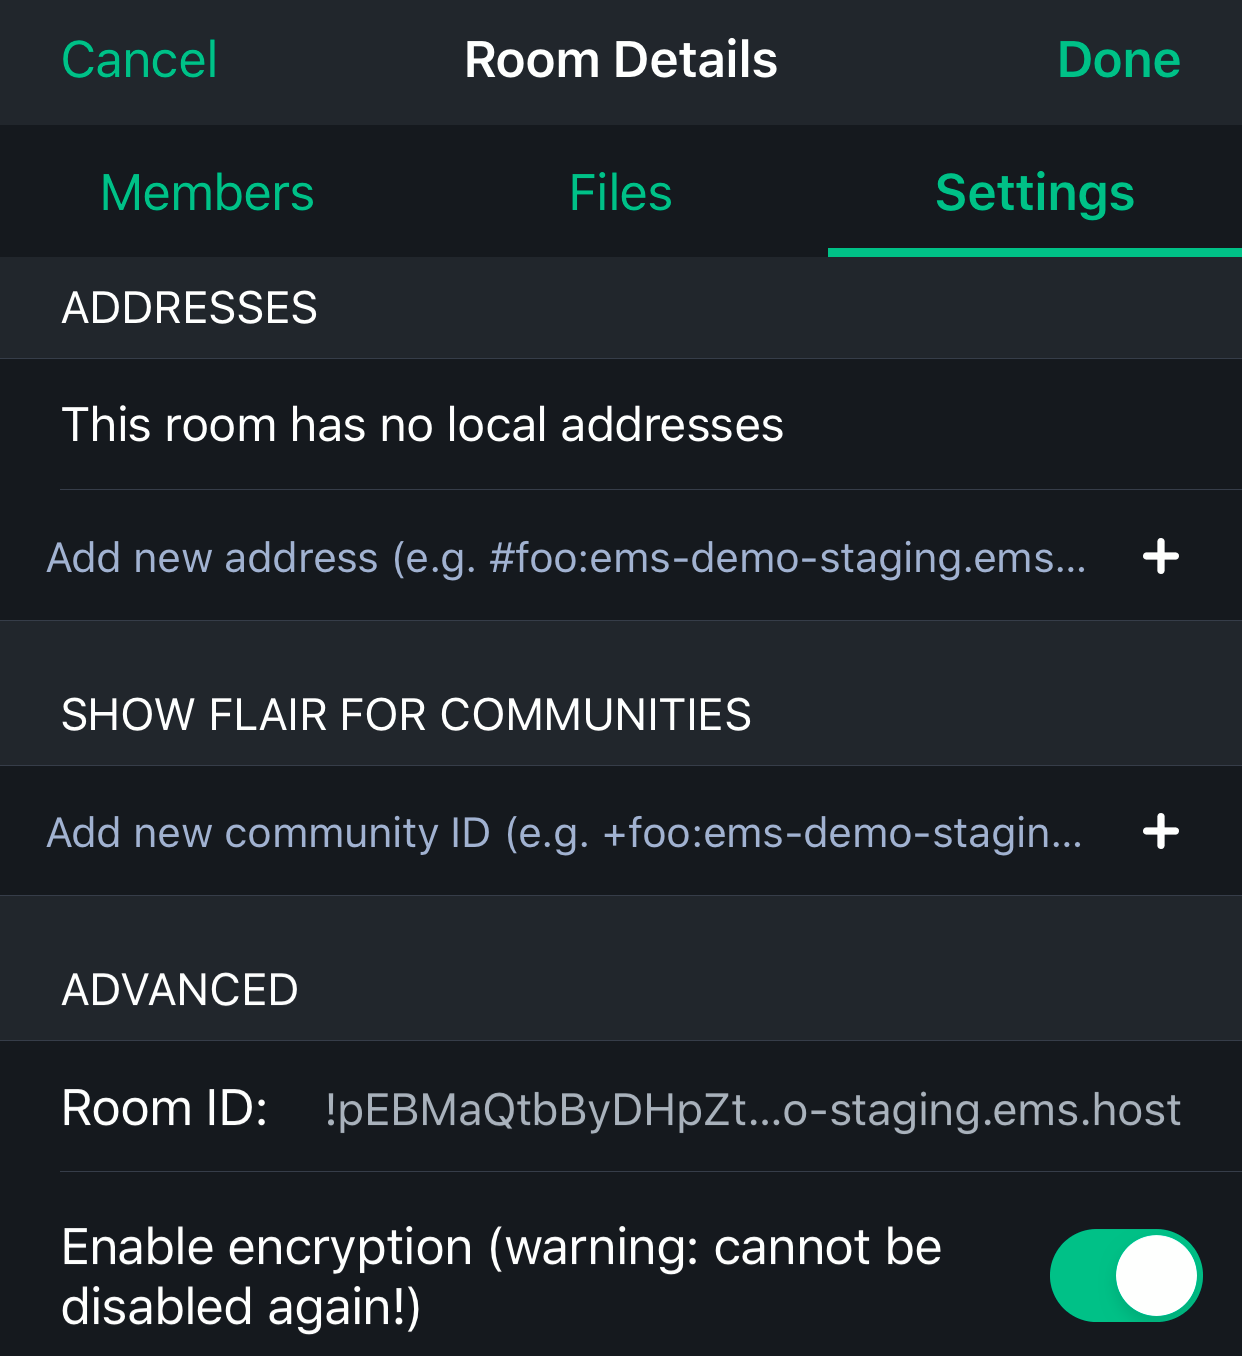
-
Tap the room name (Empty room) at the top

-
Tap the room name again

-
Under Advances, enable encryption

-
Tab
Donein the top right

-
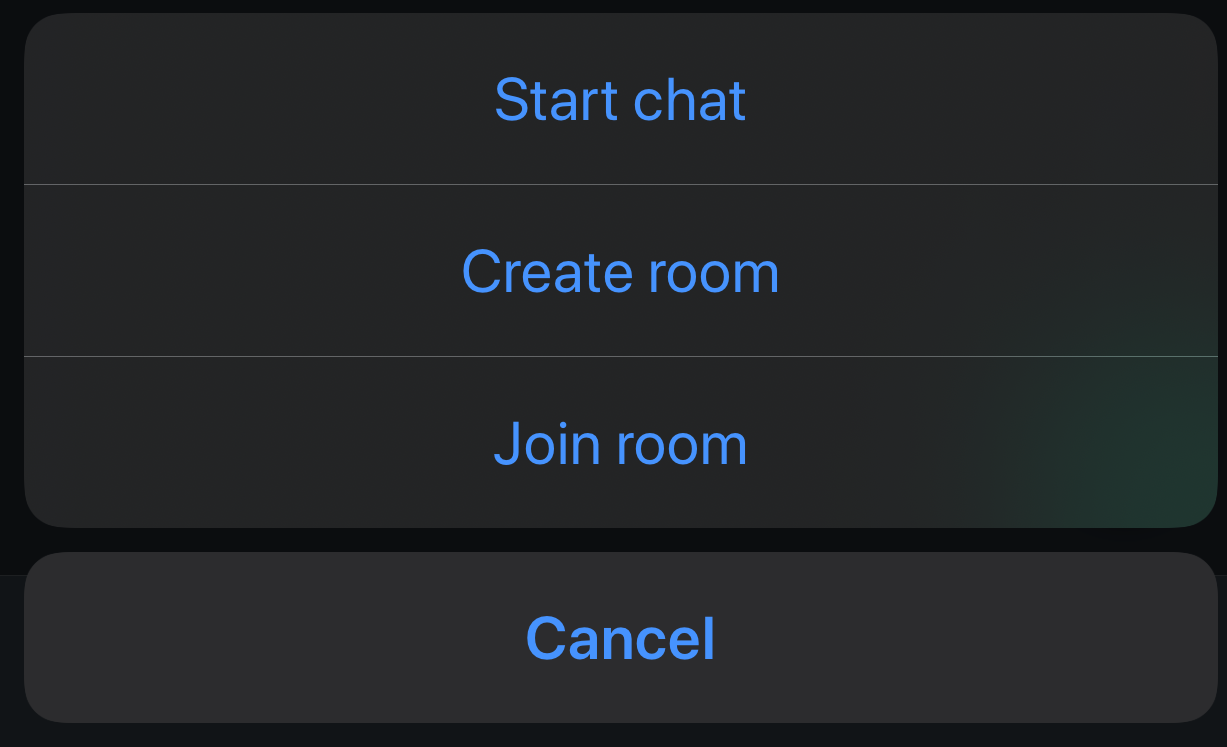
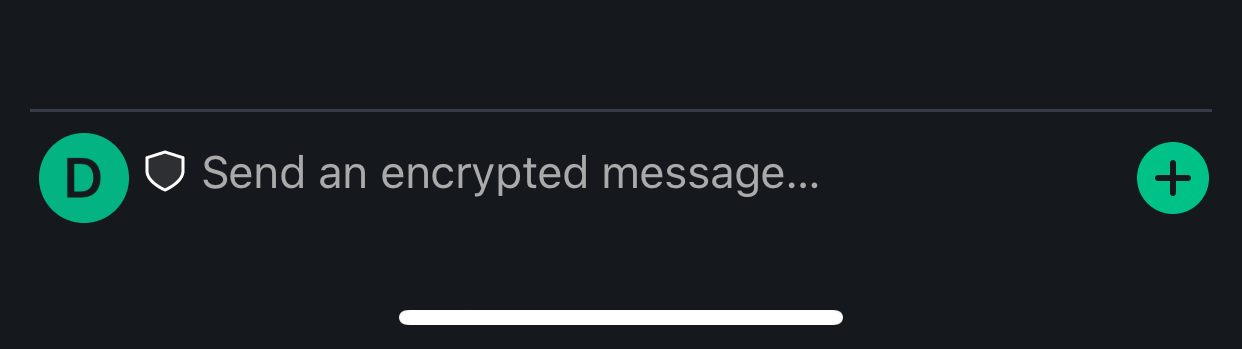
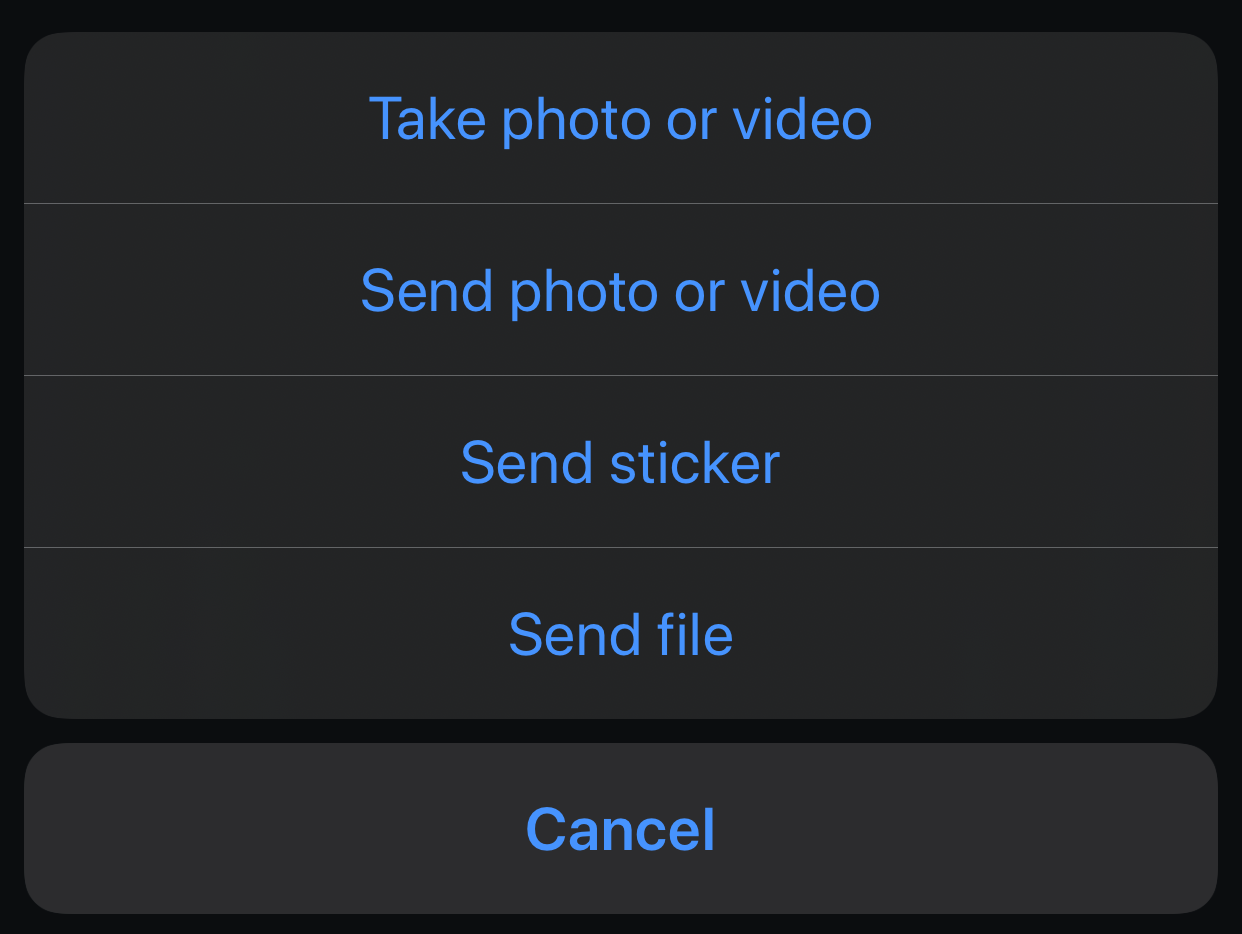
Tab the

-
Tap
Send file

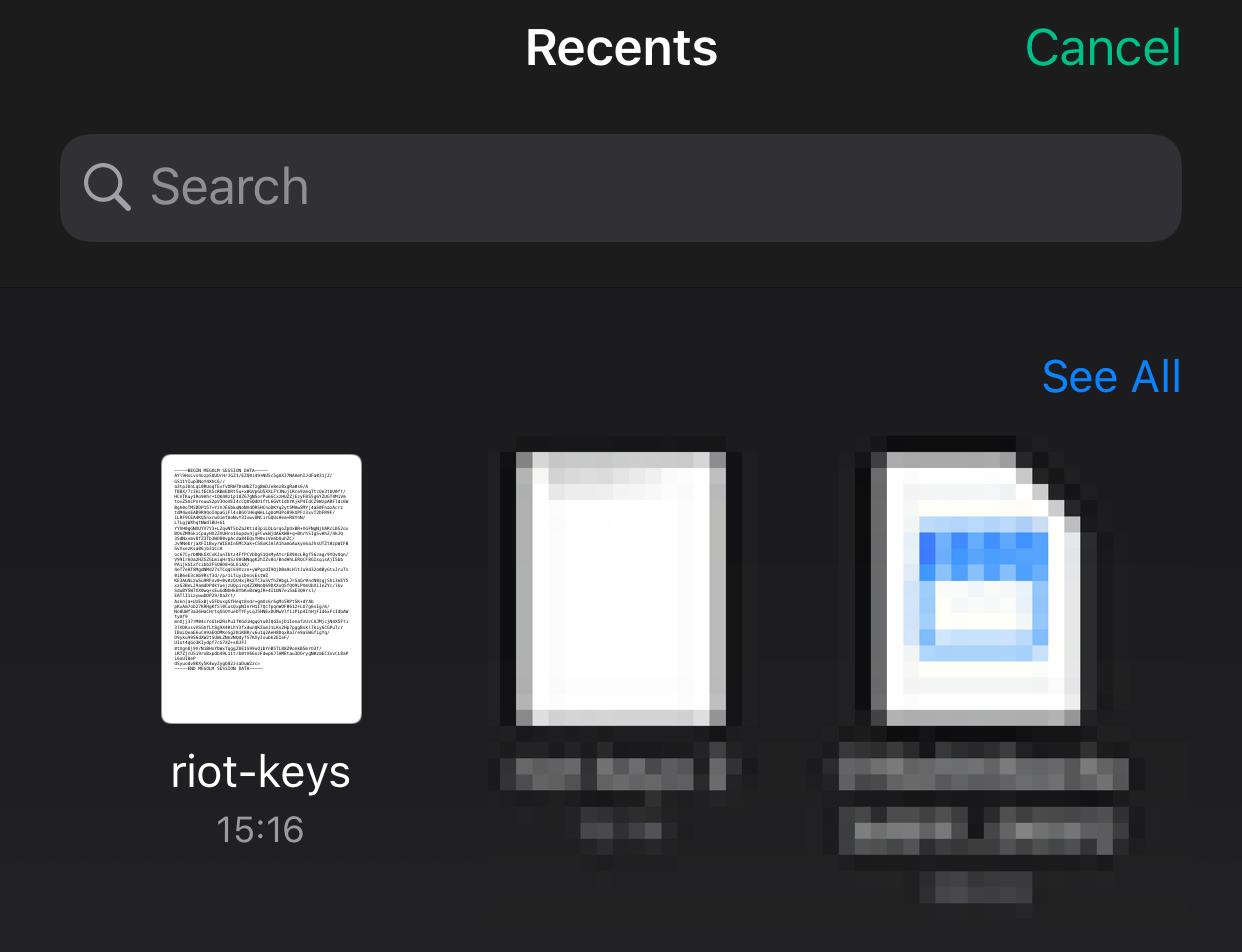
-
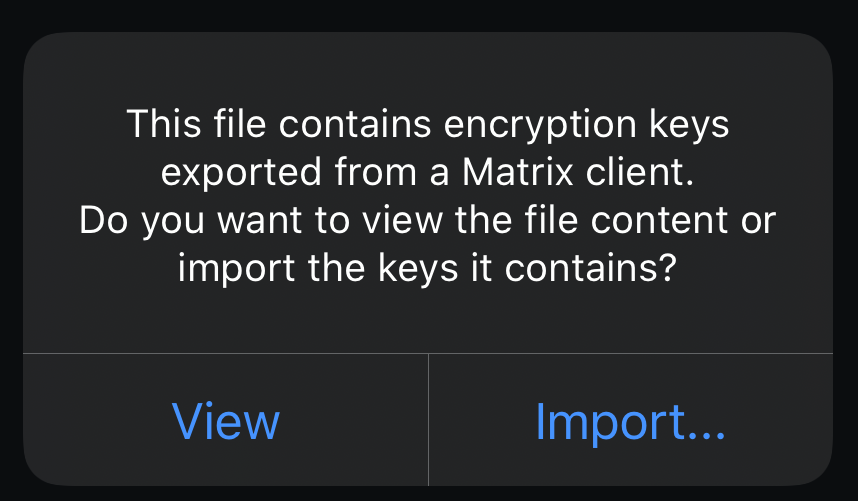
Browse to and select your export

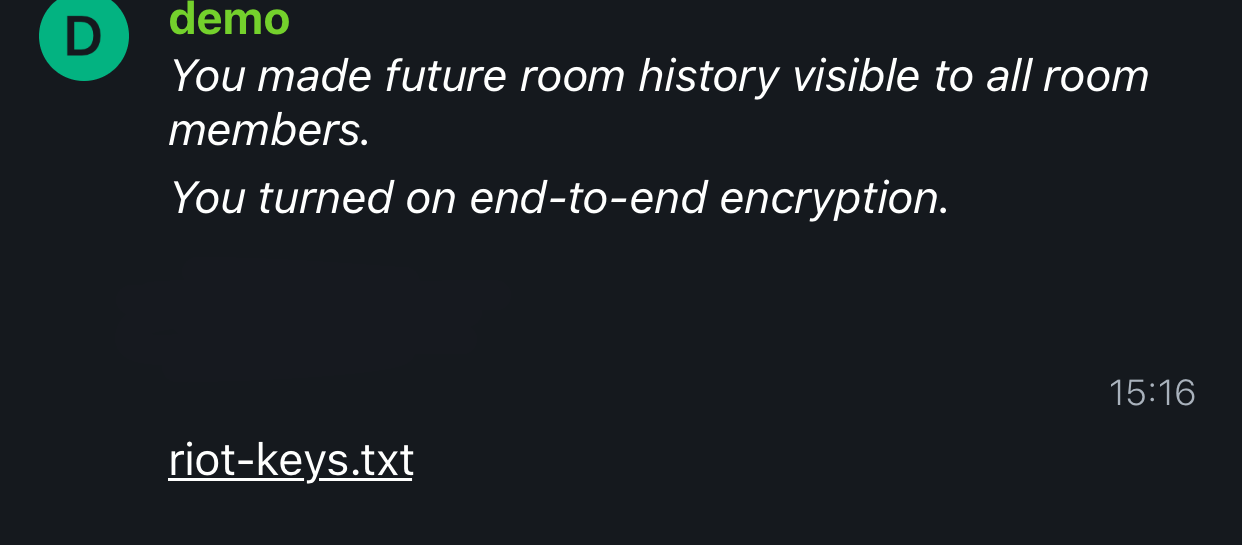
-
Tap the file you just sent

-
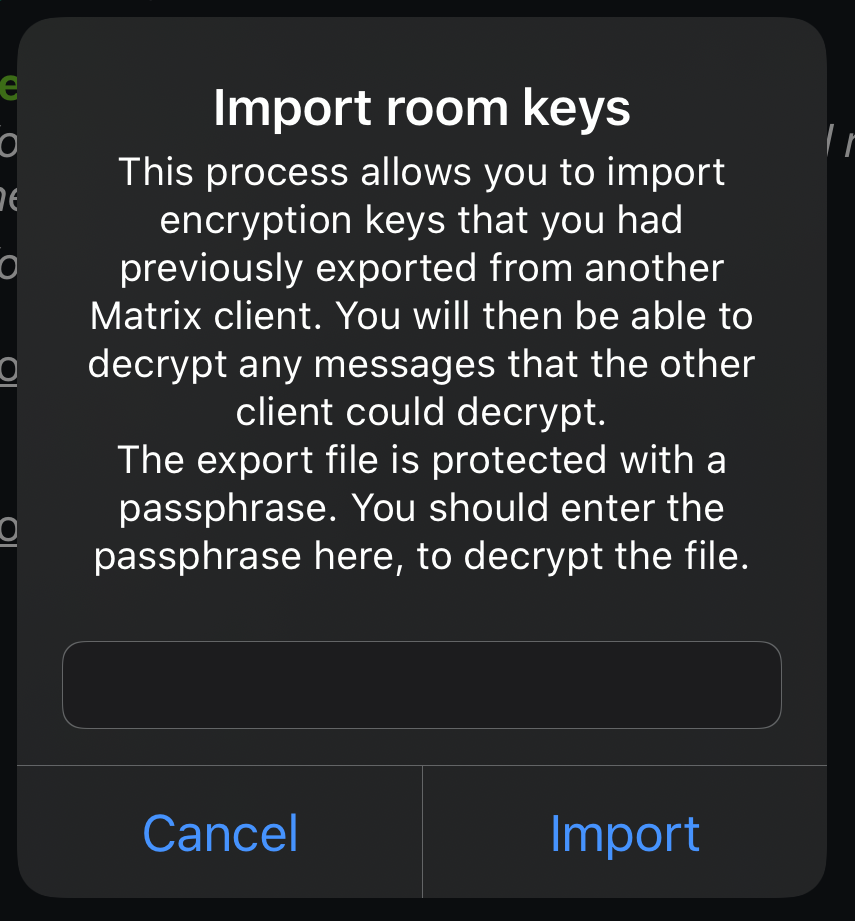
Tap
Import

-
Enter your passphrase and tap
Import


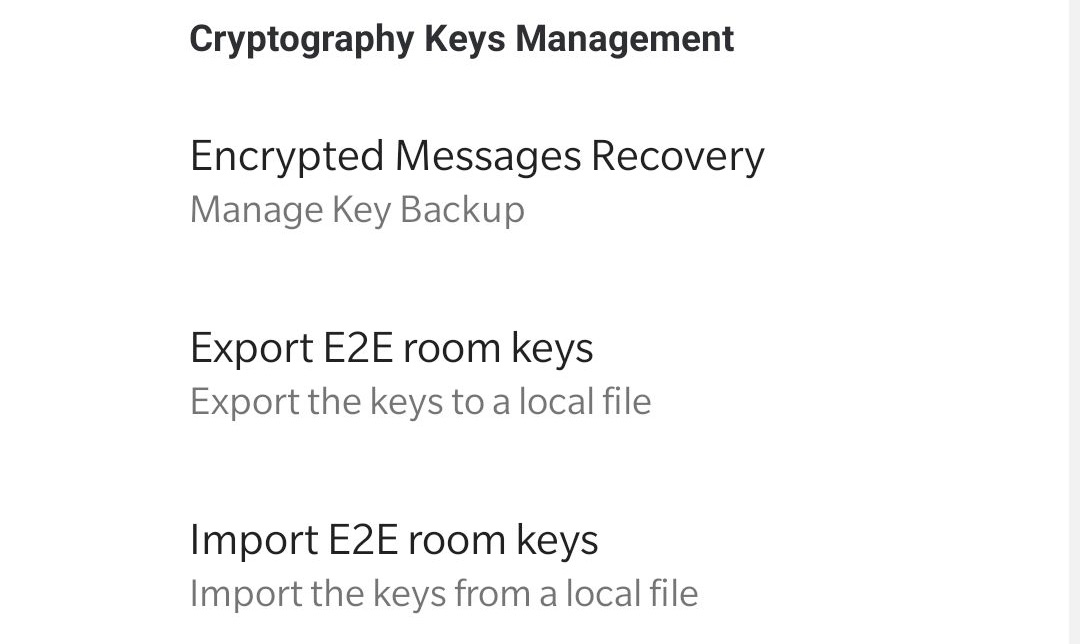
Element Android
Export
-
Tap your user picture in the top right
-
Tap the cog

-
Tap
Security & Privacy

-
Tap
Export E2E room keys

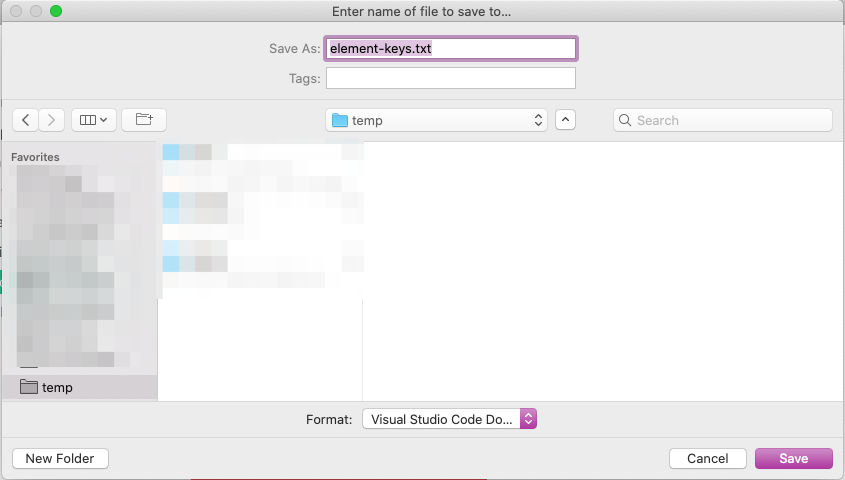
-
Select a location and a file name, then tap
SAVE

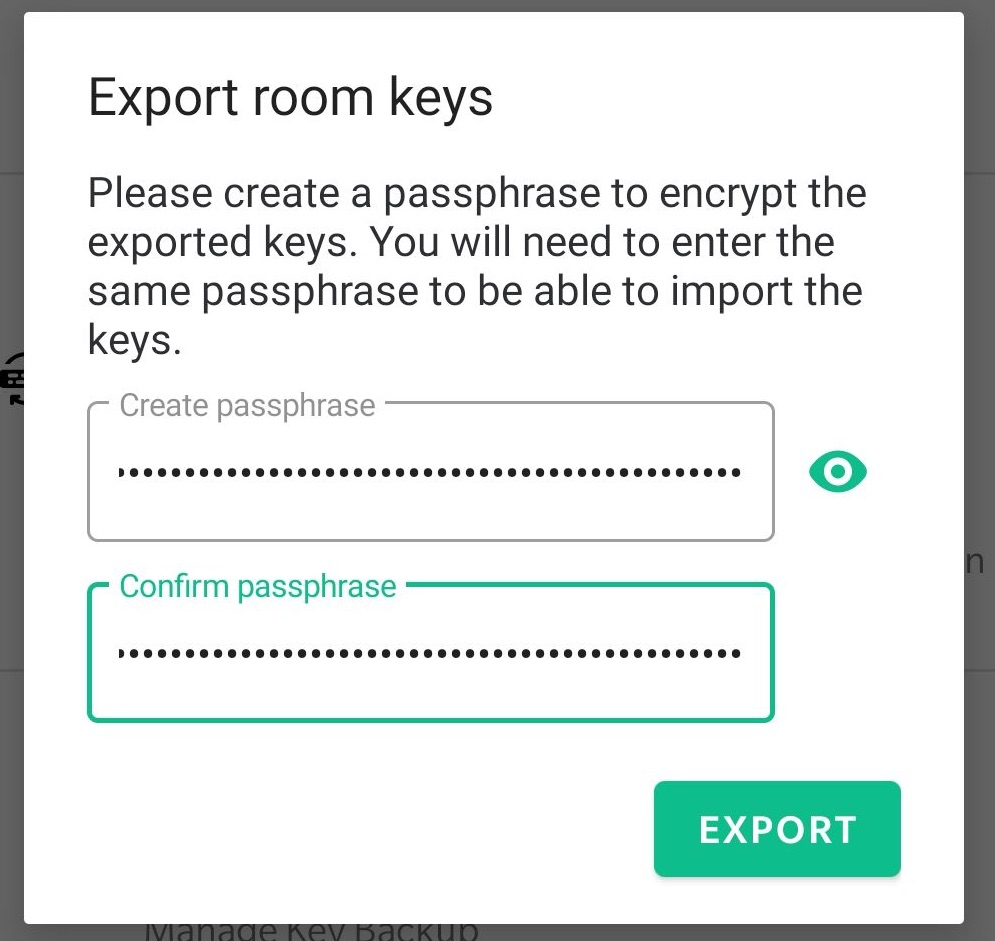
-
Enter a secure passphrase, then tap
EXPORT

Import
-
Tap your user picture in the top right
-
Tap the cog
-
Tap
Security & Privacy
-
Tap
Import E2E room keys
-
Browse to and select your export

-
Enter your passphrase and tap
IMPORT

Reset Cross Signing
Only do this if you have forgotten or lost your cross signing backup passphrase.
Please read through the entire document before starting to make sure you understand the consequences of doing this.
If you have an active session
-
You may wish to backup your keys before doing this just to be on the safe side if something goes wrong: See Export and Import E2E Room Keys
-
Click
Resetin theCross-signingsection

-
Click
Clear cross-signing keys -
Click
Generate a Security KeyorEnter a Security Phrase. ThenContinue

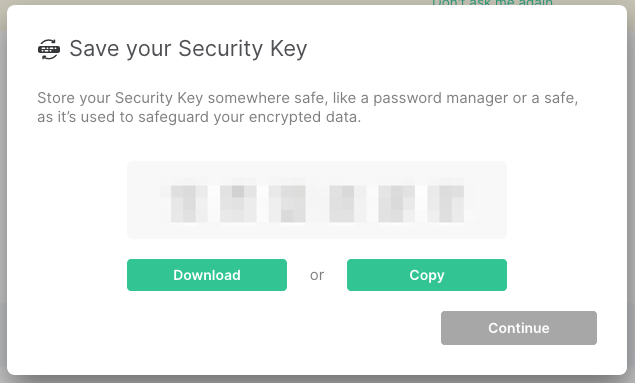
-
Take note of your key then click
Continue

-
Enter your account password and click
Continue

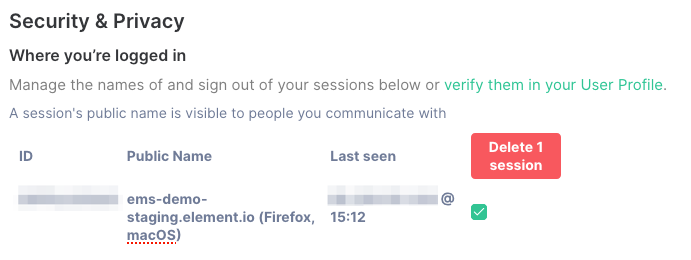
-
You can delete any untrusted sessions in Element
Security & Privacysettings. Select the sessions you want to remove and clickDelete 1 session

-
Optionally, Sign out old devices no longer needed
If you DO NOT have an active session
Doing this will destroy all your keys and you will NOT be able to access any historical encrypted messages.
-
Log in to Element

-
Click
Skip

-
Click
Skipagain

-
Do not connect to Key Backup or verify session when asked
-
Note that you will not be able to decrypt any previous messages after doing this

-
Follow the steps from If you have an active session
Sign out old devices
-
Go to Element
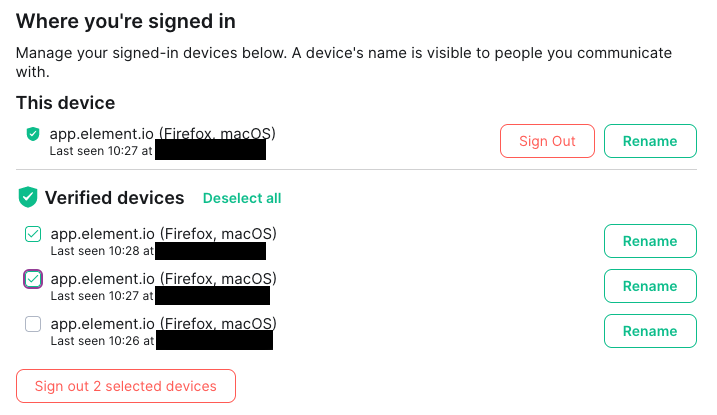
Security & Privacysettings -
Select the devices you wish to sign out

-
Click
Sign out n selected devices -
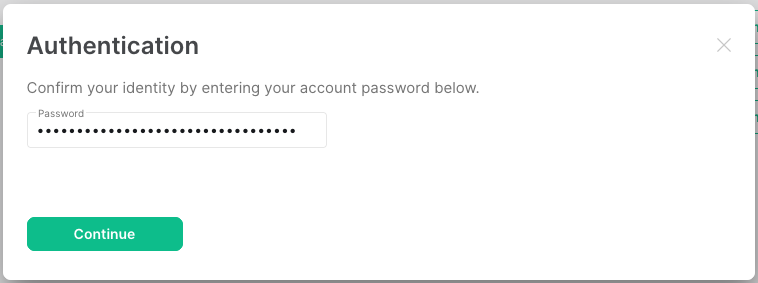
Authenticate with your Matrix account password or via SSO

Set up Cross Signing
On first login to a new account
-
Sign up or log in
-
Click
Generate a Security KeyorEnter a Security Phrase. Then clickContinue -
Take note of your key, then click
Continue
If you did not set it up on first login, or if you did not get asked
-
If you do not have key backup configured, you will be asked to set it up the first time you enter an encrypted room. Click
Start using Key Backup

-
Click
Generate a Security KeyorEnter a Security Phrase. ThenContinue -
Take note of your key, then click
Continue -
Enter your account password, then click
Continue
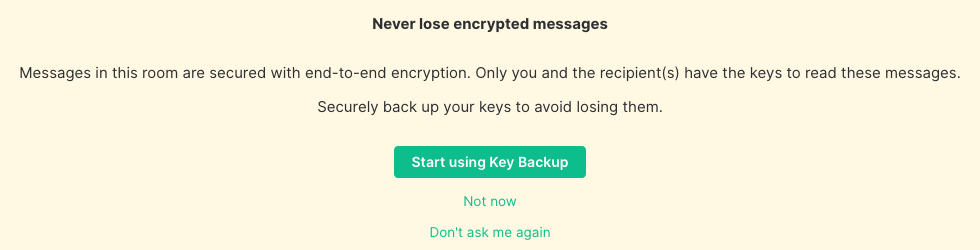
If you clicked Don't ask me again
-
Go to Element
Security & Privacysettings -
Click
Start using Key Backup

-
Click
Generate a Security KeyorEnter a Security Phrase. ThenContinue -
Take note of your key, then click
Continue -
Enter your account password, then click
Continue
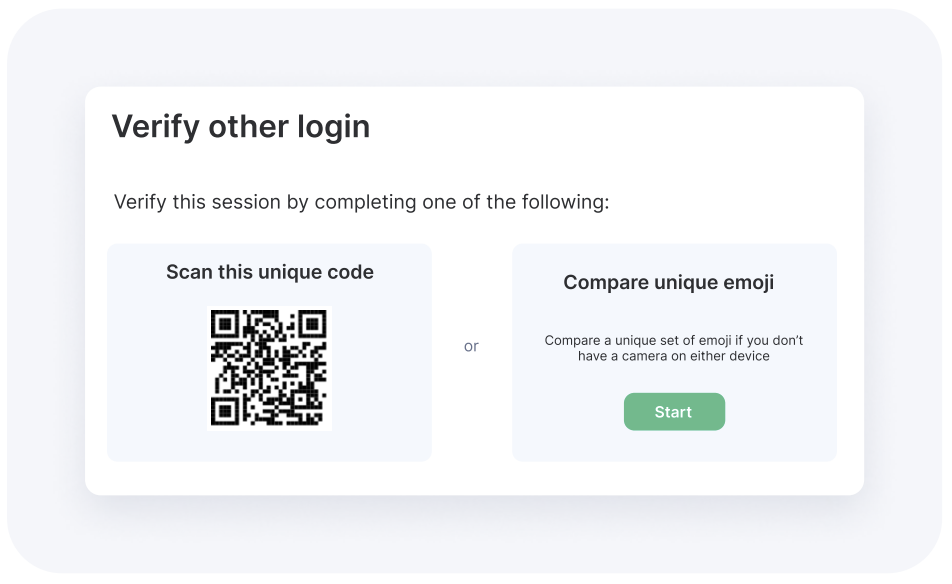
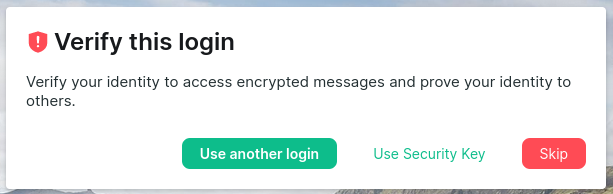
Verify new Login
When you log in to a new device/session, you must verify the login and connect it to cross signing and secret storage to access your backed up encryption keys for historical messages. This assumes you already have configured cross signing, see Set up Cross Signing.
-
Log in to Element with your username and password

-
Choose one of the methods below for cross signing
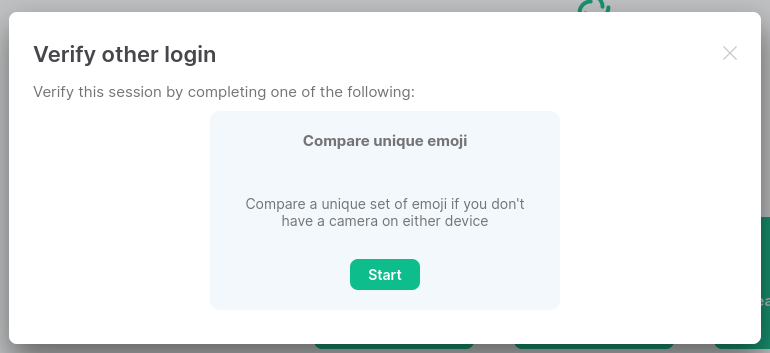
Compare emojis using another login
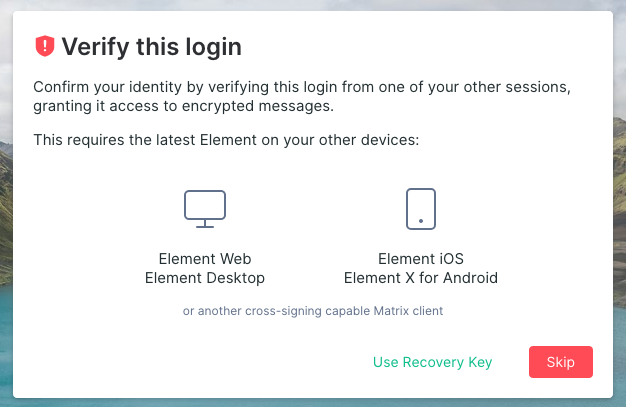
- Click
Use another login

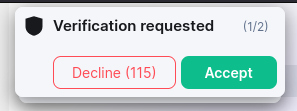
- On another device/session that is connected to cross signing, click
Accept

- Click
Start

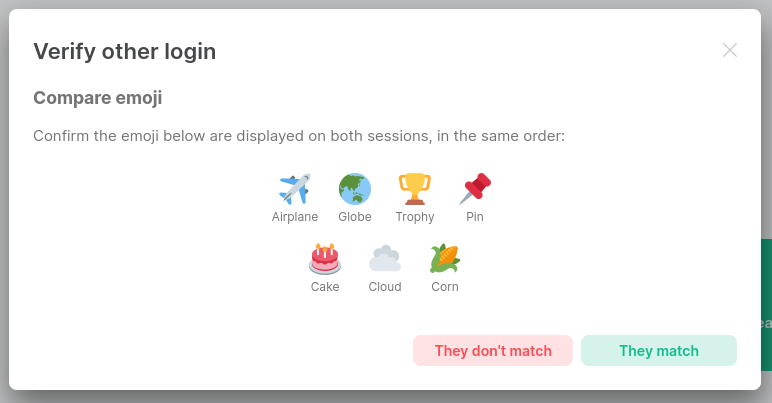
- Compare the emojis on your new and old sessions. They should be the same emojis and in the same order. Click
They matchon both sessions

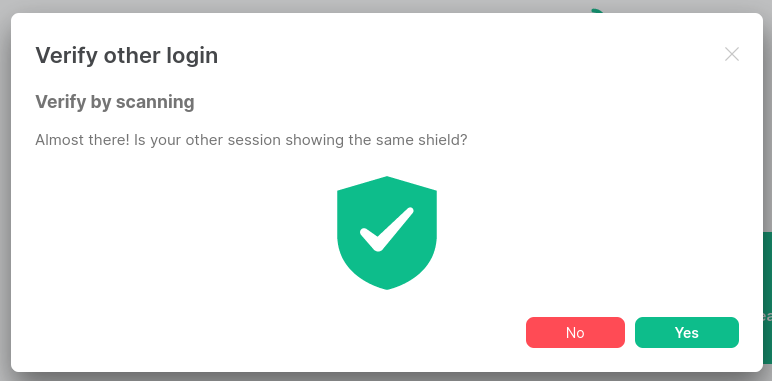
- If all was successful, you should get this green shield on both sessions. Click
Got it. Your new device/session is now verified and will download your backed up message encryption keys
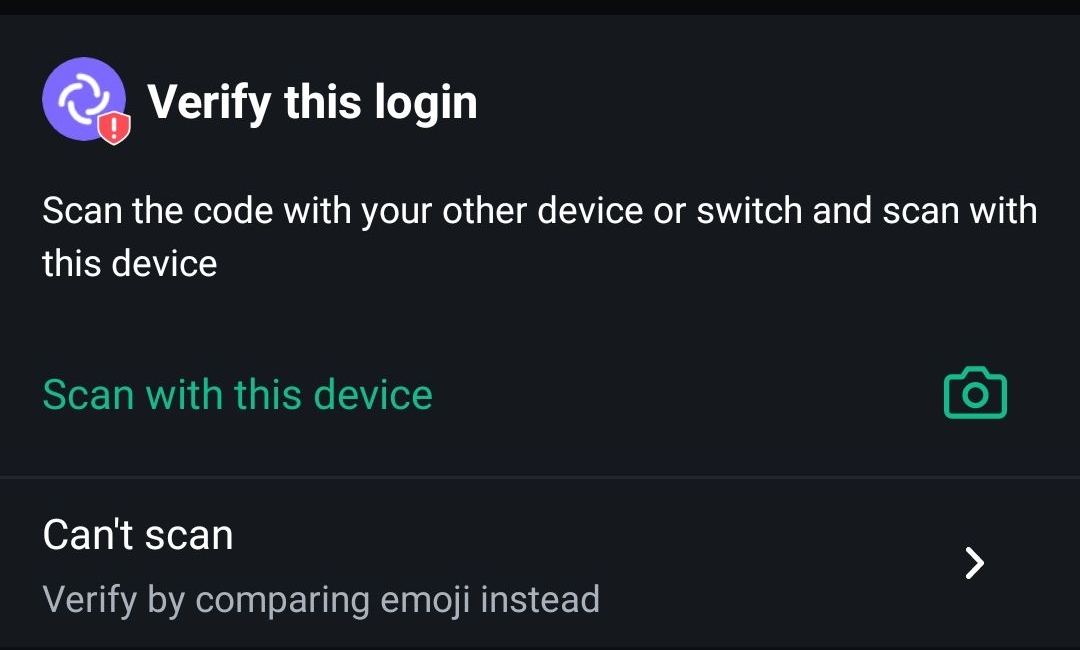
Scan QR code on another login
Login is here demonstrated on Element Android
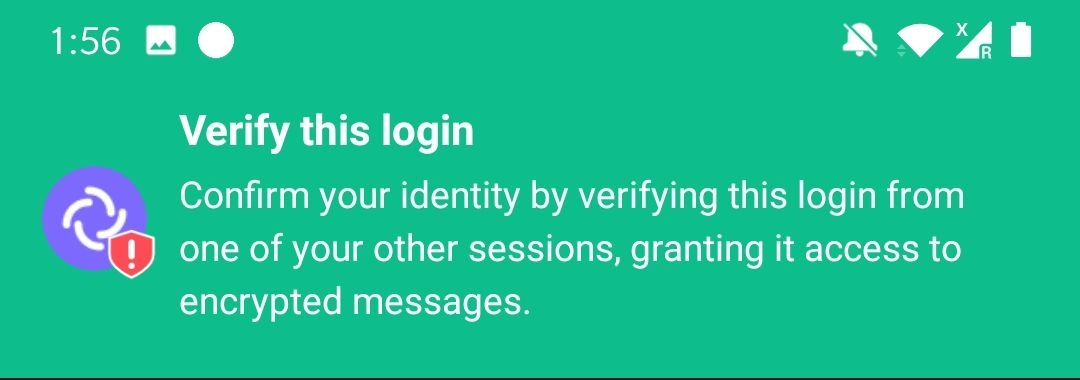
- On your phone, tap
Verify this login

- Your phone is now waiting for you to accept from another device
- On another device/session that is connected to cross signing, click
Accept - On your phone, tab
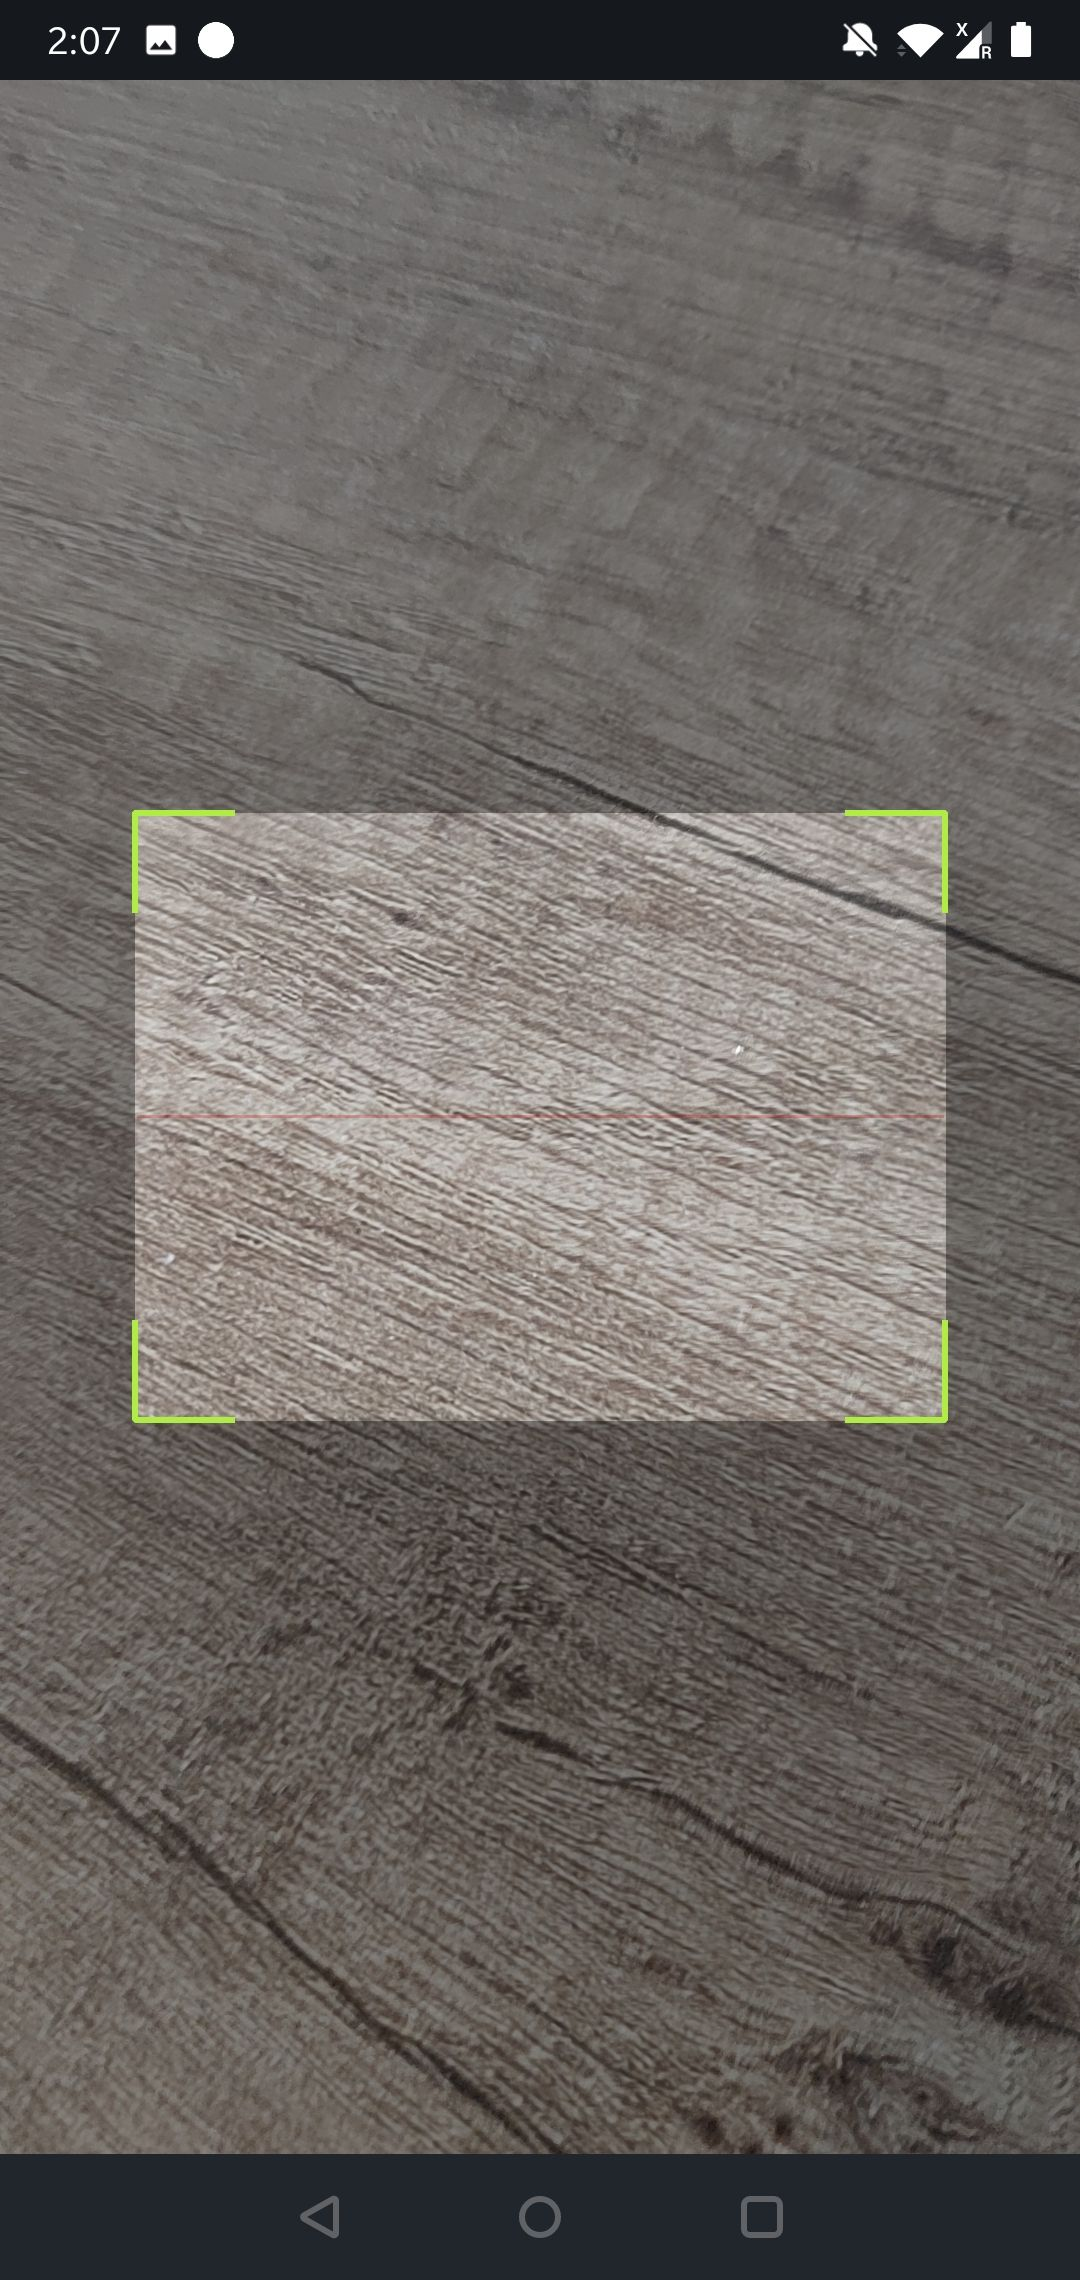
Scan with this device

- Using your phone, scan the QR code shown on your other session


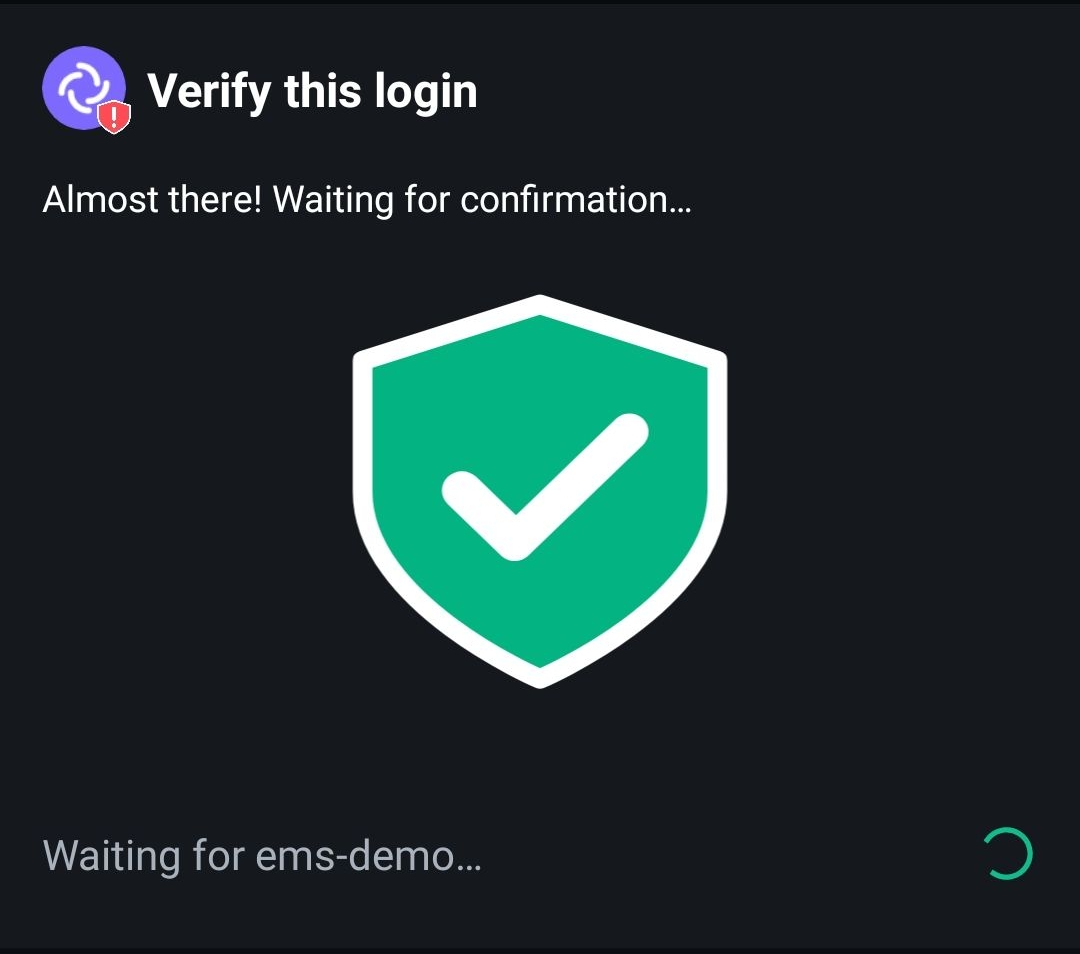
- Your phone waits for you to confirm green shield on your other session. Click
Yes


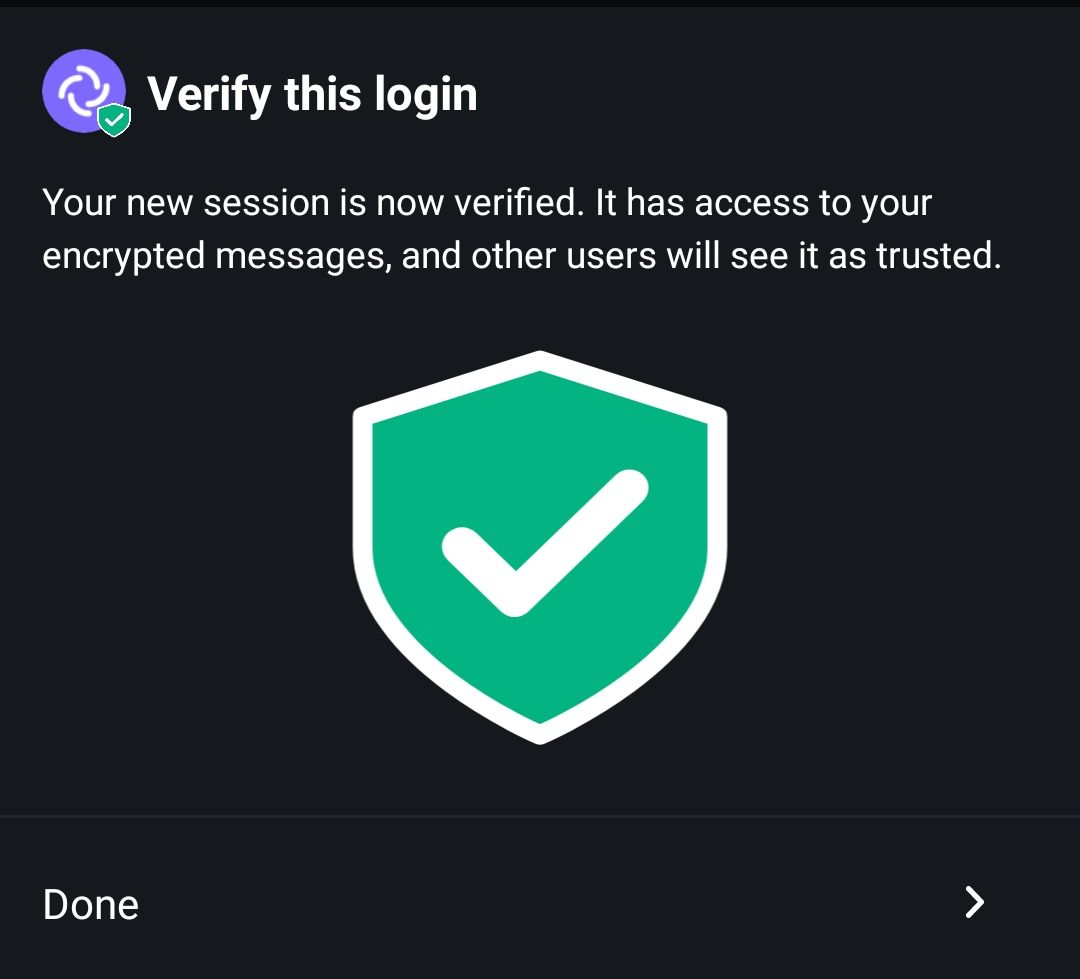
- Tap
Doneon your phone

- If all was successful, you should get this green shield on both sessions. Click
Got it. Your new device/session is now verified and will download your backed up message encryption keys


Using your Security Key
- Click
Use Security Key - Enter your Security key when prompted and click
Continue
- If all was successful, you should get this green shield on both sessions. Click
Got it. Your new device/session is now verified and will download your backed up message encryption keys
Element Web/Desktop Client Settings
Documentation covering the options available within the Element Web/Desktop Clients' Settings.
Element Settings
Notice: Please be advised this document is currently a work in progress, some information is currently missing and will be updated in due course.
Remember: Have you tried - https://element.io/help ?
Don't forget to download our User Guide
Relating to this page, Element Settings, you can specifically check for relevant information from the Account Management and Settings sections.
Accessing Settings
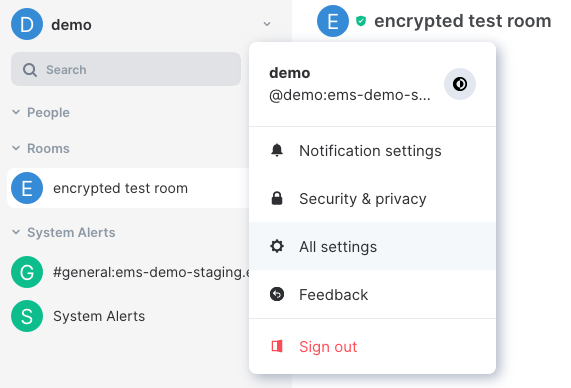
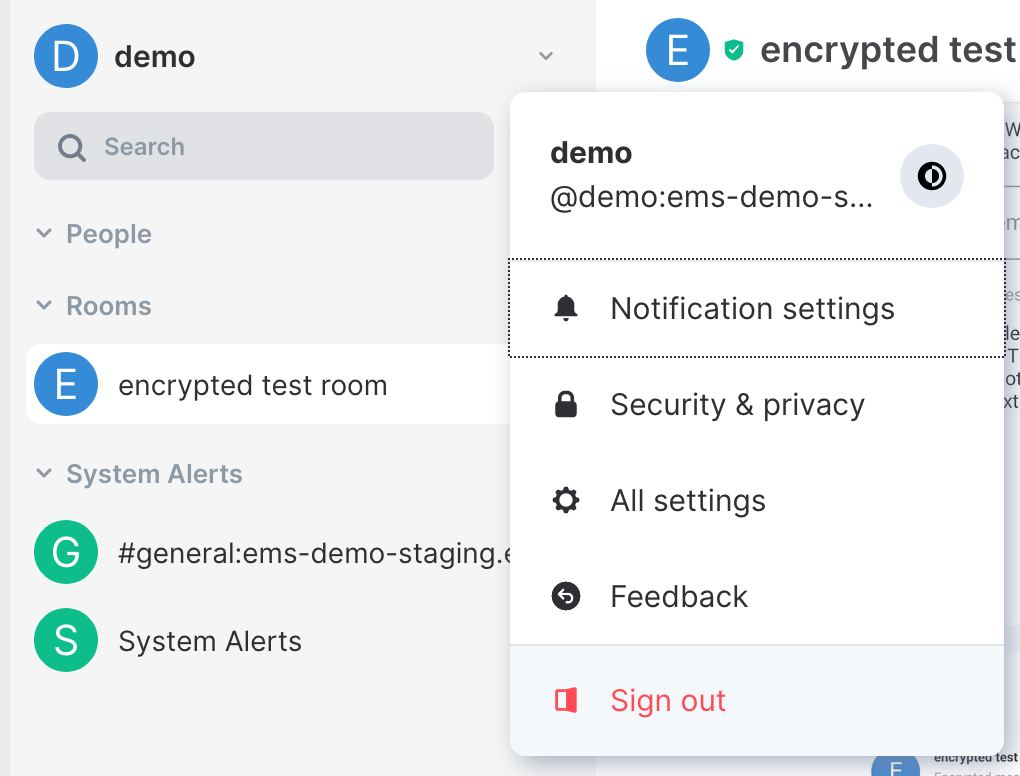
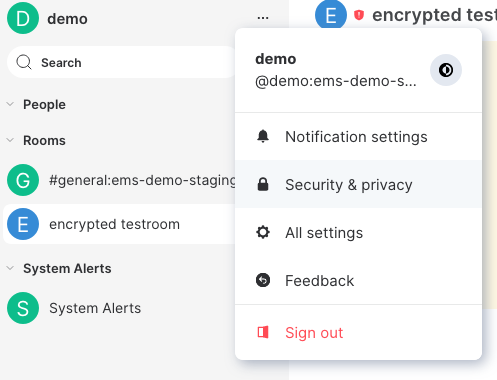
You can change your Matrix account settings by clicking your profile icon in the top left of the Element client. By defualt, this will be a coloured circle with the first letter of your Matrix ID. From the presented drop-down menu, you'll be able to jump into specfic settings straight away, or access 'All Settings'.
You can also use this menu to quickly return 'Home', provide 'Feedback' and this is where you can 'Sign Out' from your client.
Disclaimer: The below setting layout / order may change in subsequent client updates, however generally most settings will still perform the same function.
General
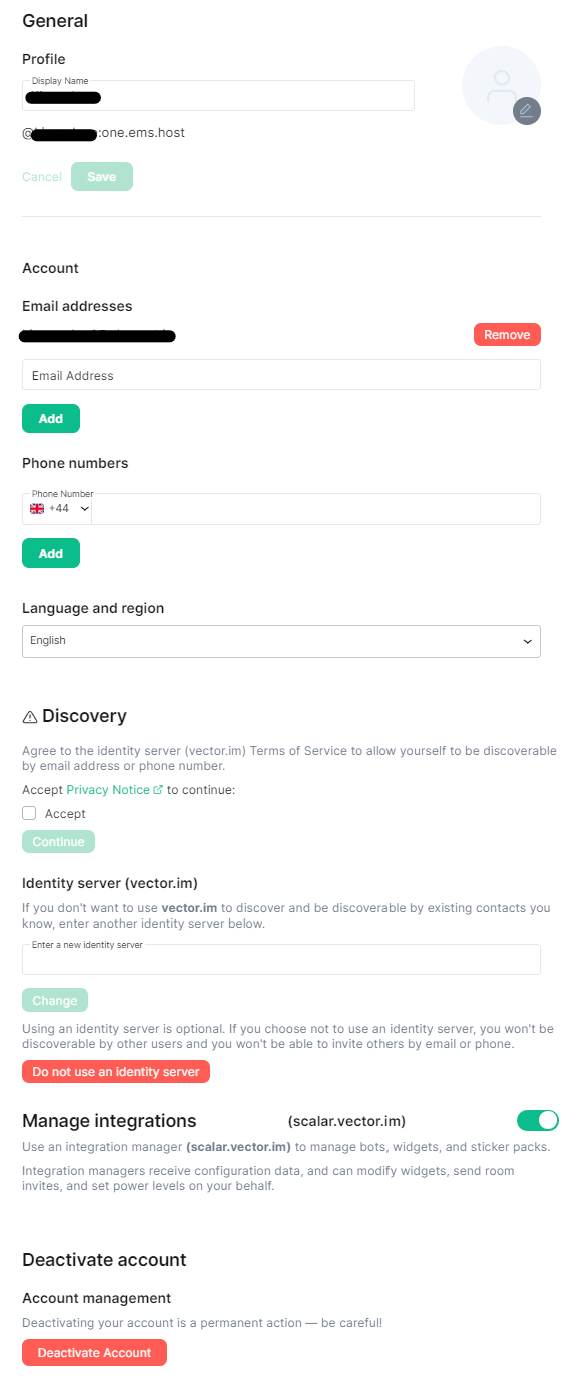
Profile
Allows you to change your 'Display Name', this is the name seen by others whilst messaging with them. Updating this will notify all rooms of the change of name. You are also able to upload / change your profile picture, you can do this by hoovering over the existing picture and clicking.
After making your changing, click 'Save' to set them. You Matrix ID in full is also displayed here for your reference.
Account
Allows you to add email addresses / phone numbers to your account, as well as change your 'Language and Region' setting. Adding of Third-Party IDs requires verifying your login by either supplying your account password, or using SSO (such as when using Element One).
Discovery
Allows you to agree to the identity server (vector.im) Terms of Service to allow yourself to be discoverable by email address or phone number, change your identity server. Using an identity server is optional. If you choose not to use an identity server, you won't be discoverable by other users and you won't be able to invite others by email or phone.
You can stop using an identity server by clicking 'Do not use an identity server'
Manage integrations
Allows you to turn on or off the use of an integration manager. You the toggle button to configure as desired.
Deactivate account
Allows you to deactivate your account - Warning! Deactivating your account is a permanent action.
Appearance

Appearance settings allows you to customise the look and feel of your client, all settings provide visual representation of the changes so you can confirm your preferred style. Options include Theme, Message Layout, Font Size and Image size in the timeline.
Notifications
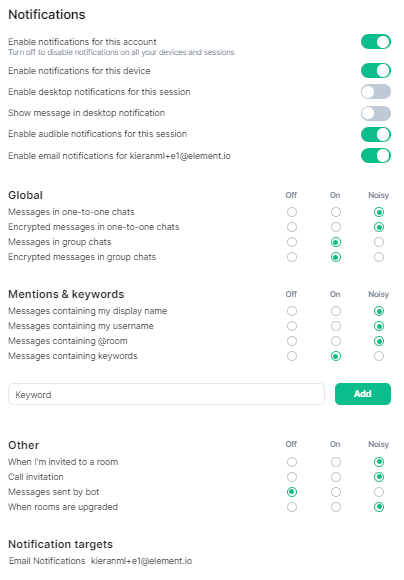
Notification settings allow you to customise default notification settings which are synced to your account, however you are also able to customise whether you recieve notifications for this specific device. Note: A device is per client, using both a web-based Matrix client and a Desktop client on the same physical device will still appear as two separate devices.
Desktop Notifications
To enable desktop notifications from your client, you can enable the toggle 'Enable desktop notifications for this session', you can also customise these notifications to also display the message that triggers the notification using the 'Show message in desktop notification' toggle. When using a web-based Element client, you will also need to accept permissions allowing the client to display notifications.
Notification types explained
Notification settings allow notifications to be set as either 'Off', 'On' or 'Noisy'.
- Off: You won’t be notified when the selected event happens.
- On: You will get a message popping up when the selected event happens, but no sound.
- Noisy: You will get a visual highlight (red badge and/or text highlight), a sound and/or vibration (depending on the device) when the selected event happens.
For finer tuning, you can easily configure per room notification setting from the context menu you get by clicking on the ... icon that appears when hovering over the room name in the room list. You can use this to temporarily mute a room, or make sure you’re not missing anything from a given discussion. You can select the following options:
- Mute: You won’t be notified, even if your name or a keyword is mentioned.
- Mentions only: You will only be notified for the items that are meant to be ‘noisy’, i.e. your name and keywords.
- All messages: You will get a (silent) notification for every message happening in the room; your ‘noisy’ events (e.g. your name being mentioned) will still be noisy (red badge and sound).
- All messages (Noisy): every message will make a noise on top of the visual notification. Your noisy events will still be differentiated by a red badge.
Keyword Notifications
From the notification settings you can also add additional keywords to listen for to trigger a notification. You can directly specify how a notification triggered from these keywords responds in the 'Mentions & keywords' section.
Preferences
Keyboard
Sidebar
Voice & Video
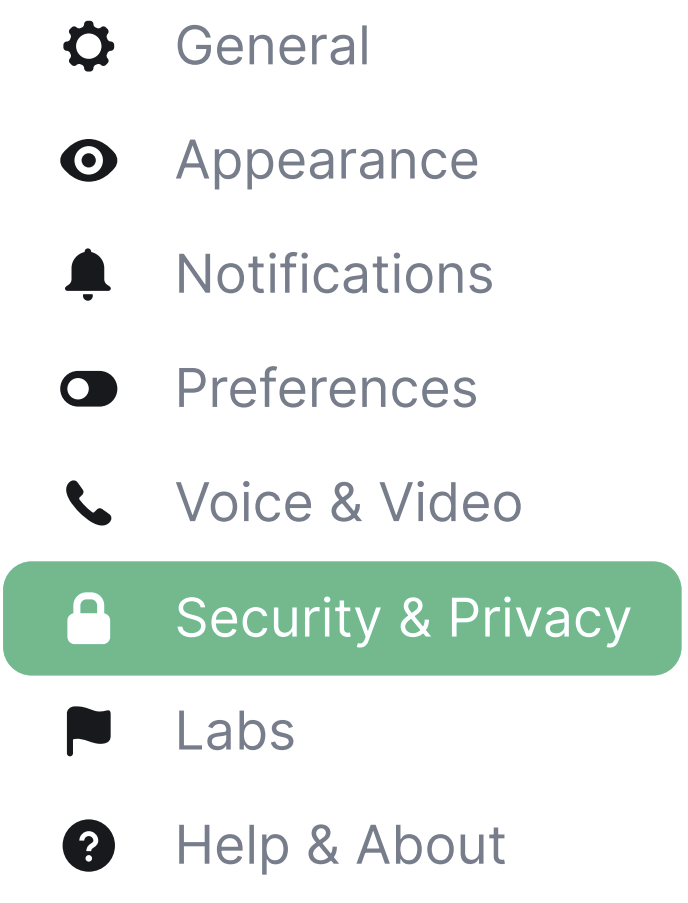
Security & Privacy
Labs
Help & About

From Help & About you can find important information related to the client itself, such as it's current version, your homeserver and identity server details as well as links to our FAQ, Legal documents and credits.
Your Access Token
Your access token gives full access to your account via the use of Matrix APIs, you can read more about them depending on your needs. If you are an Admin of a homeserver, and are using an account with Admin access, you can make use of the Synapse Admin API. For both admins and regular users, the Matrix APIs can be found from the latest Matrix Spec page - these include:
Bug Reporting
If you've experience a bug, the best place to report it is by submitting a bug report to the appropriate Github repository for your client, the Element account
Accessing General Settings
Disclaimer: This guide refers to using the Element Matrix clients, Element Web or Element Desktop apps
Accessing the Settings Page
You can change your Matrix account settings by clicking your profile icon in the top left of the Element client. By default, this will be a colored circle with the first letter of your Matrix ID. From the presented drop-down menu, you'll be able to jump into specific settings straight away, or access All Settings. Clicking All Settings will take you first to General settings.
You can also use this menu to quickly return Home, provide Feedback and this is where you can Sign Out from your client.
Disclaimer: The below setting layout / order may change in subsequent client updates, however generally most settings will still perform the same function.
General Settings
Profile
Allows you to change your Display Name, this is the name seen by others whilst messaging with them. Updating this will notify all rooms of the change of name. You are also able to upload / change your profile picture, you can do this by hoovering over the existing picture and clicking.
After making your changing, click 'Save' to set them. You Matrix ID in full is also displayed here for your reference.
Account
Allows you to add email addresses / phone numbers to your account, as well as change your Language and Region setting. Adding of Third-Party IDs requires verifying your login by either supplying your account password, or using SSO (such as when using Element One).
You'll want to add your email if you'd like to enable Email notifications, check out the Notification Settings documentation, or discovery via Identity Server - see the Discovery section below.
Discovery
Allows you to agree to the identity server (vector.im) Terms of Service to allow yourself to be discoverable by email address or phone number, change your identity server. Using an identity server is optional. If you choose not to use an identity server, you won't be discoverable by other users and you won't be able to invite others by email or phone.
You can stop using an identity server by clicking 'Do not use an identity server'
Manage integrations
Allows you to turn on or off the use of an integration manager. You the toggle button to configure as desired.
Deactivate account
Allows you to deactivate your account - Warning! Deactivating your account is a permanent action.
Appearance Settings
Disclaimer: This guide refers to using the Element Matrix clients, Element Web or Element Desktop apps
Accessing Appearance Settings
You can change your Matrix account settings by clicking your profile icon in the top left of the Element client. By default, this will be a colored circle with the first letter of your Matrix ID. From the presented drop-down menu, you'll be able to jump into specific settings straight away, or access All Settings. Clicking All Settings will take you first to General settings, click Appearance in the vertical navigation menu on the left to open Appearance settings.
Info: The below setting layout / order may change in subsequent client updates, however generally most settings will still perform the same function.
Appearance Settings
Appearance settings allows you to customize the look and feel of your client, all settings provide visual representation of the changes so you can confirm your preferred style. Options include Theme, Message Layout, Font Size and Image size in the timeline.
Notification Settings
Disclaimer: This guide refers to using the Element Matrix clients, Element Web or Element Desktop apps
Accessing Notification Settings
You can change your Matrix account settings by clicking your profile icon in the top left of the Element client. By default, this will be a colored circle with the first letter of your Matrix ID. From the presented drop-down menu, you'll be able to jump into specific settings straight away, or access All Settings. Clicking All Settings will take you first to General settings, click Notifications in the vertical navigation menu on the left to open Notifications settings.
Info: The below setting layout / order may change in subsequent client updates, however generally most settings will still perform the same function.
Notification Settings
Notification settings allow you to customize default notification settings which are synced to your account, however you are also able to customize whether you receive notifications for this specific device. Note: A device is per client, using both a web-based Matrix client and a Desktop client on the same physical device will still appear as two separate devices.
Desktop Notifications
To enable desktop notifications from your client, you can enable the toggle 'Enable desktop notifications for this session', you can also customize these notifications to also display the message that triggers the notification using the 'Show message in desktop notification' toggle. When using a web-based Element client, you will also need to accept permissions allowing the client to display notifications.
Notification types explained
Notification settings allow notifications to be set as either 'Off', 'On' or 'Noisy'.
- Off: You won’t be notified when the selected event happens.
- On: You will get a message popping up when the selected event happens, but no sound.
- Noisy: You will get a visual highlight (red badge and/or text highlight), a sound and/or vibration (depending on the device) when the selected event happens.
For finer tuning, you can easily configure per room notification setting from the context menu you get by clicking on the ... icon that appears when hovering over the room name in the room list. You can use this to temporarily mute a room, or make sure you’re not missing anything from a given discussion. You can select the following options:
- Mute: You won’t be notified, even if your name or a keyword is mentioned.
- Mentions only: You will only be notified for the items that are meant to be ‘noisy’, i.e. your name and keywords.
- All messages: You will get a (silent) notification for every message happening in the room; your ‘noisy’ events (e.g. your name being mentioned) will still be noisy (red badge and sound).
- All messages (Noisy): every message will make a noise on top of the visual notification. Your noisy events will still be differentiated by a red badge.
Keyword Notifications
From the notification settings you can also add additional keywords to listen for to trigger a notification. You can directly specify how a notification triggered from these keywords responds in the 'Mentions & keywords' section.
Preference Settings
Disclaimer: This guide refers to using the Element Matrix clients, Element Web or Element Desktop apps
Accessing Preference Settings
You can change your Matrix account settings by clicking your profile icon in the top left of the Element client. By default, this will be a colored circle with the first letter of your Matrix ID. From the presented drop-down menu, you'll be able to jump into specific settings straight away, or access All Settings. Clicking All Settings will take you first to General settings, click Preferences in the vertical navigation menu on the left to open Preference settings.
Info: The below setting layout / order may change in subsequent client updates, however generally most settings will still perform the same function.
Preference Settings
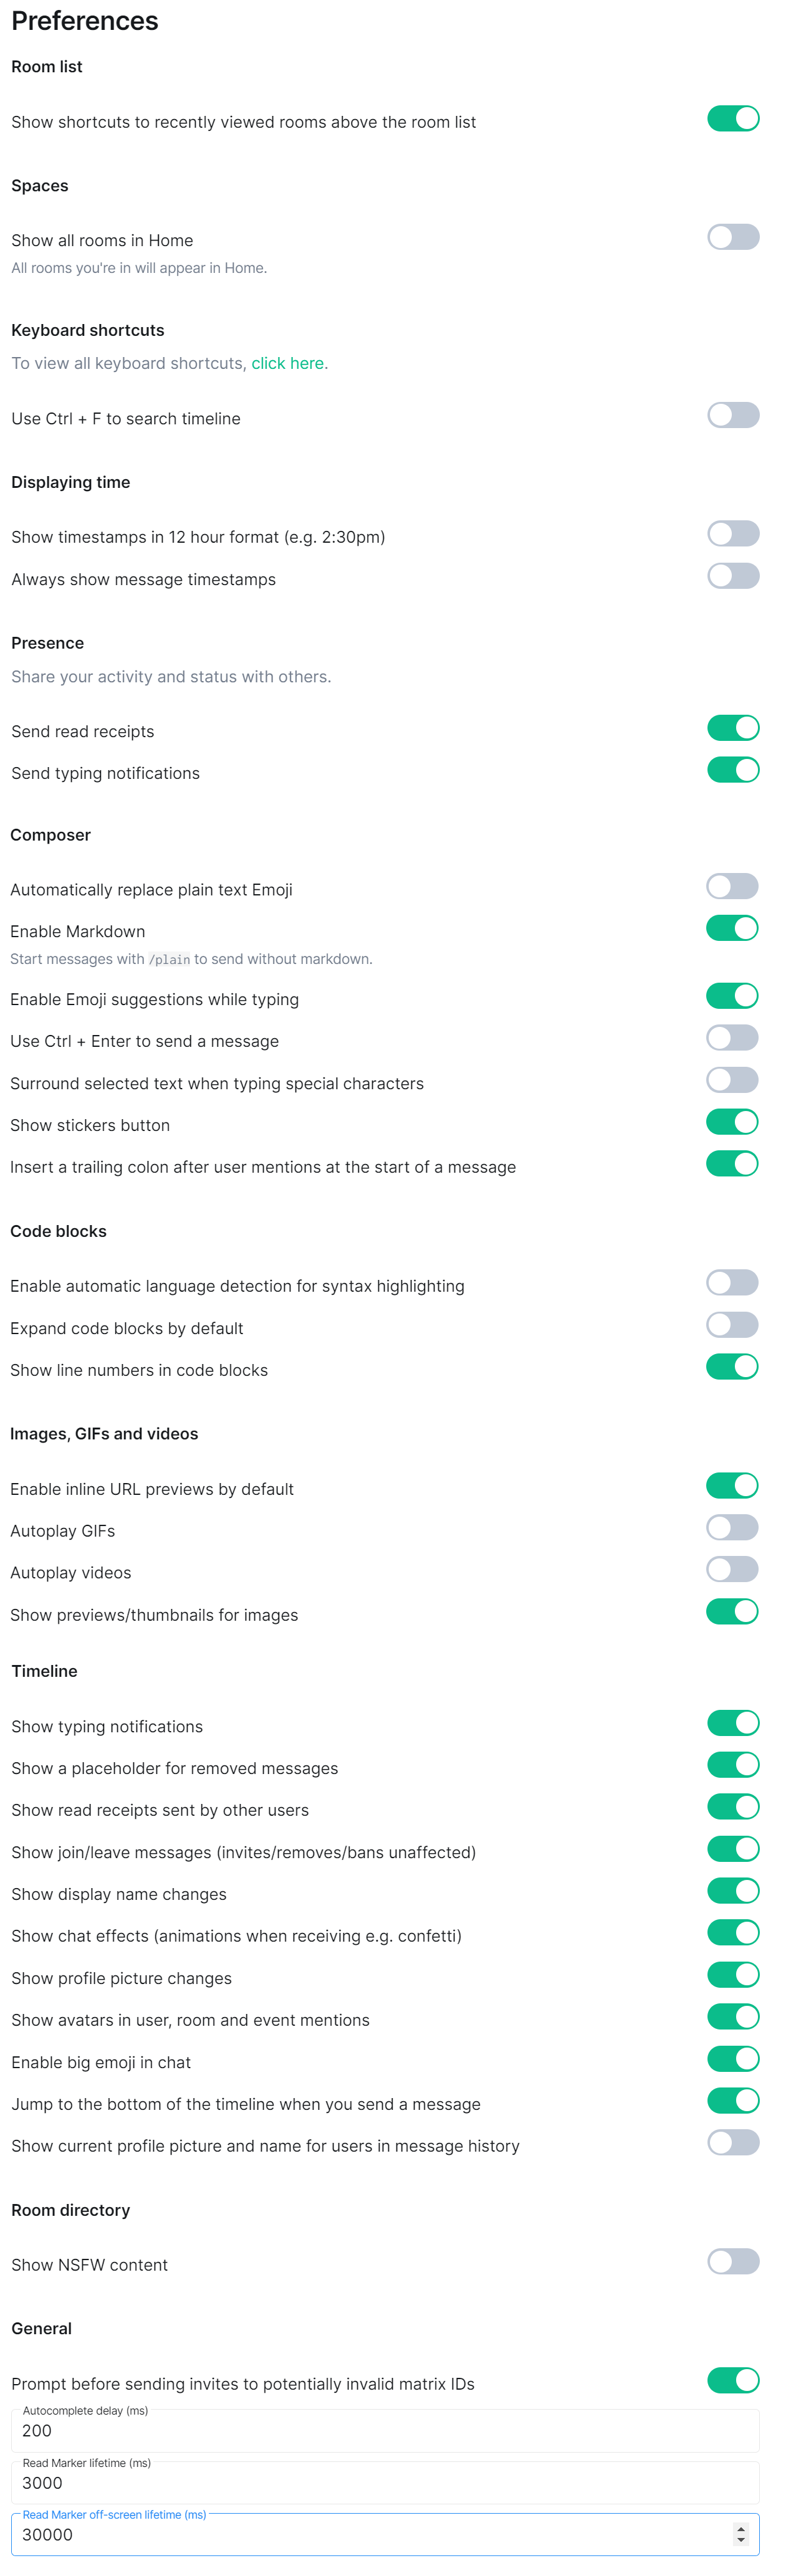
The Preferences view allows you to customize various aspects of the Element client organized by each area of the application. Each preference is explained next to the toggle to enable or disable the option.
Keyboard Settings
Disclaimer: This guide refers to using the Element Matrix clients, Element Web or Element Desktop apps
Accessing Keyboard Settings
You can change your Matrix account settings by clicking your profile icon in the top left of the Element client. By default, this will be a colored circle with the first letter of your Matrix ID. From the presented drop-down menu, you'll be able to jump into specific settings straight away, or access All Settings. Clicking All Settings will take you first to General settings, click Keyboard in the vertical navigation menu on the left to open Keyboard settings.
Info: The below setting layout / order may change in subsequent client updates, however generally most settings will still perform the same function.
Keyboard Settings
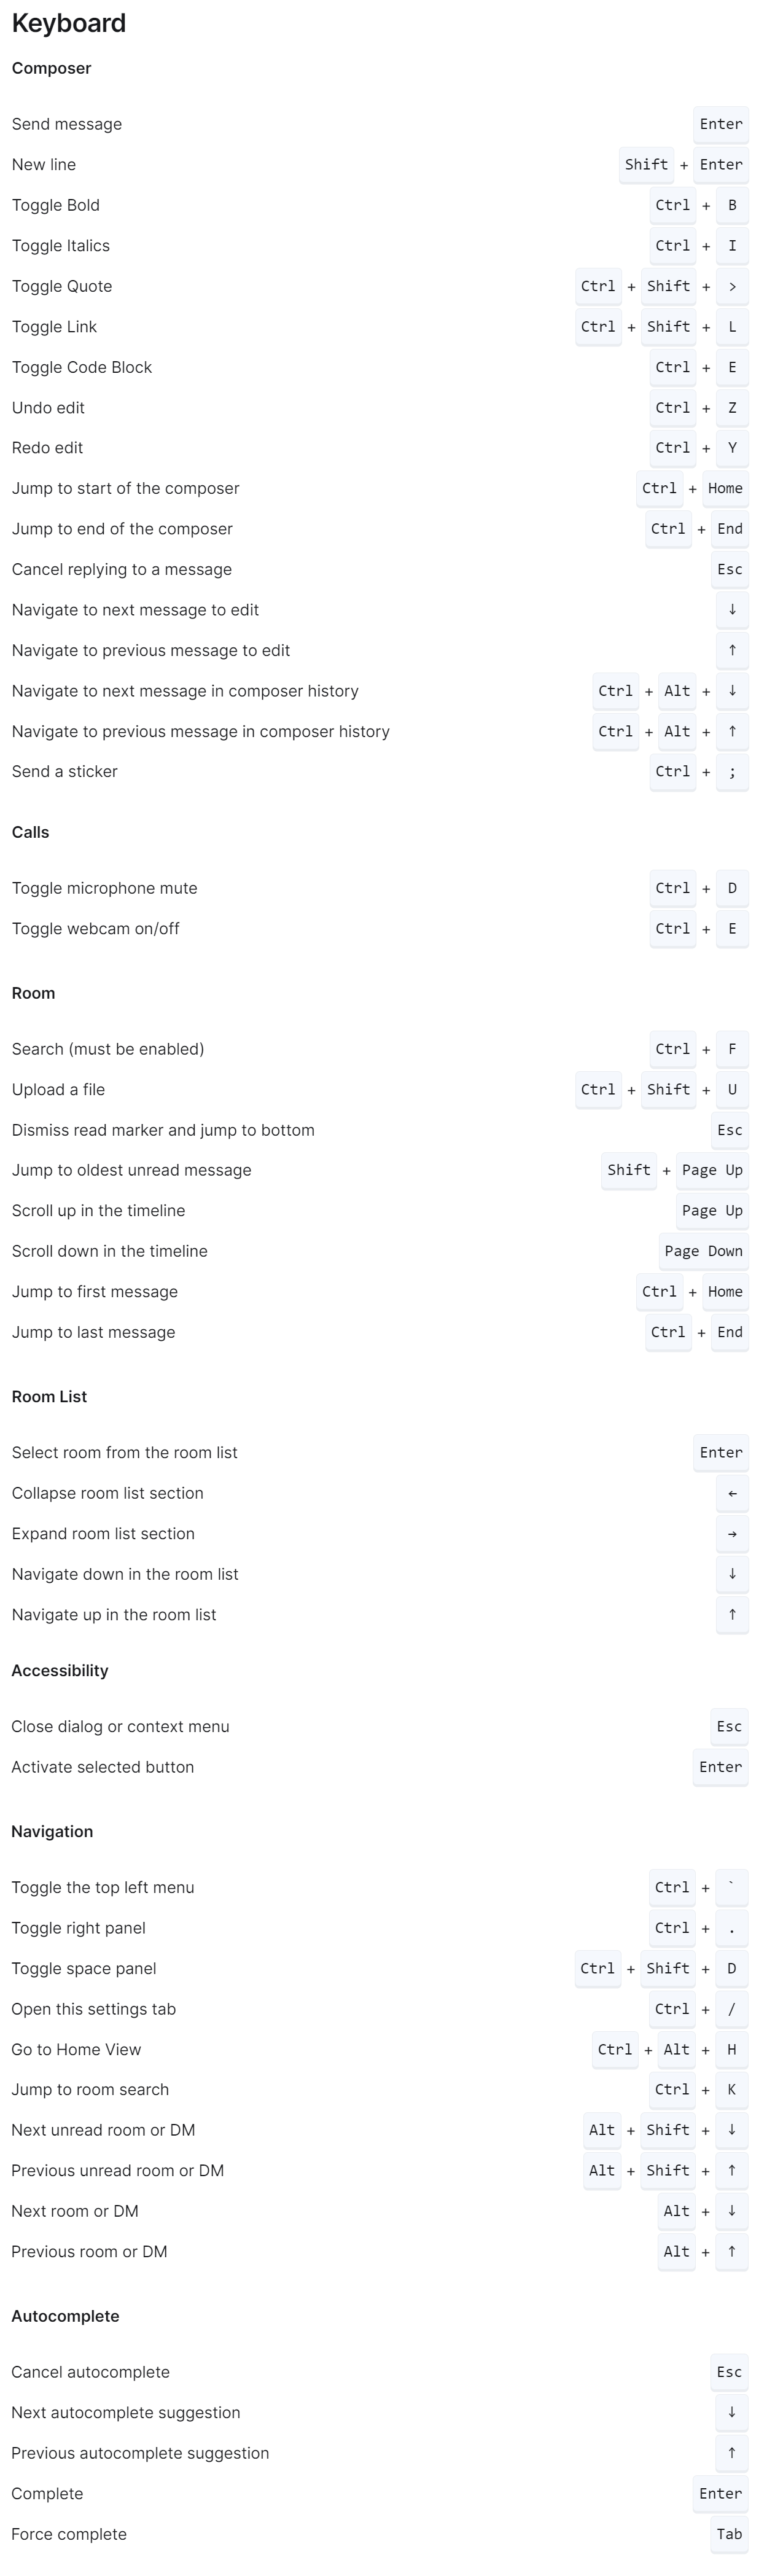
The Keyboard settings view allows you to view all Keyboard shortcuts you can use with the Element client organized by each area of the application.
Sidebar Settings
Disclaimer: This guide refers to using the Element Matrix clients, Element Web or Element Desktop apps
Accessing Sidebar Settings
You can change your Matrix account settings by clicking your profile icon in the top left of the Element client. By default, this will be a colored circle with the first letter of your Matrix ID. From the presented drop-down menu, you'll be able to jump into specific settings straight away, or access All Settings. Clicking All Settings will take you first to General settings, click Sidebar in the vertical navigation menu on the left to open Sidebar settings.
Info: The below setting layout / order may change in subsequent client updates, however generally most settings will still perform the same function.
Sidebar Settings
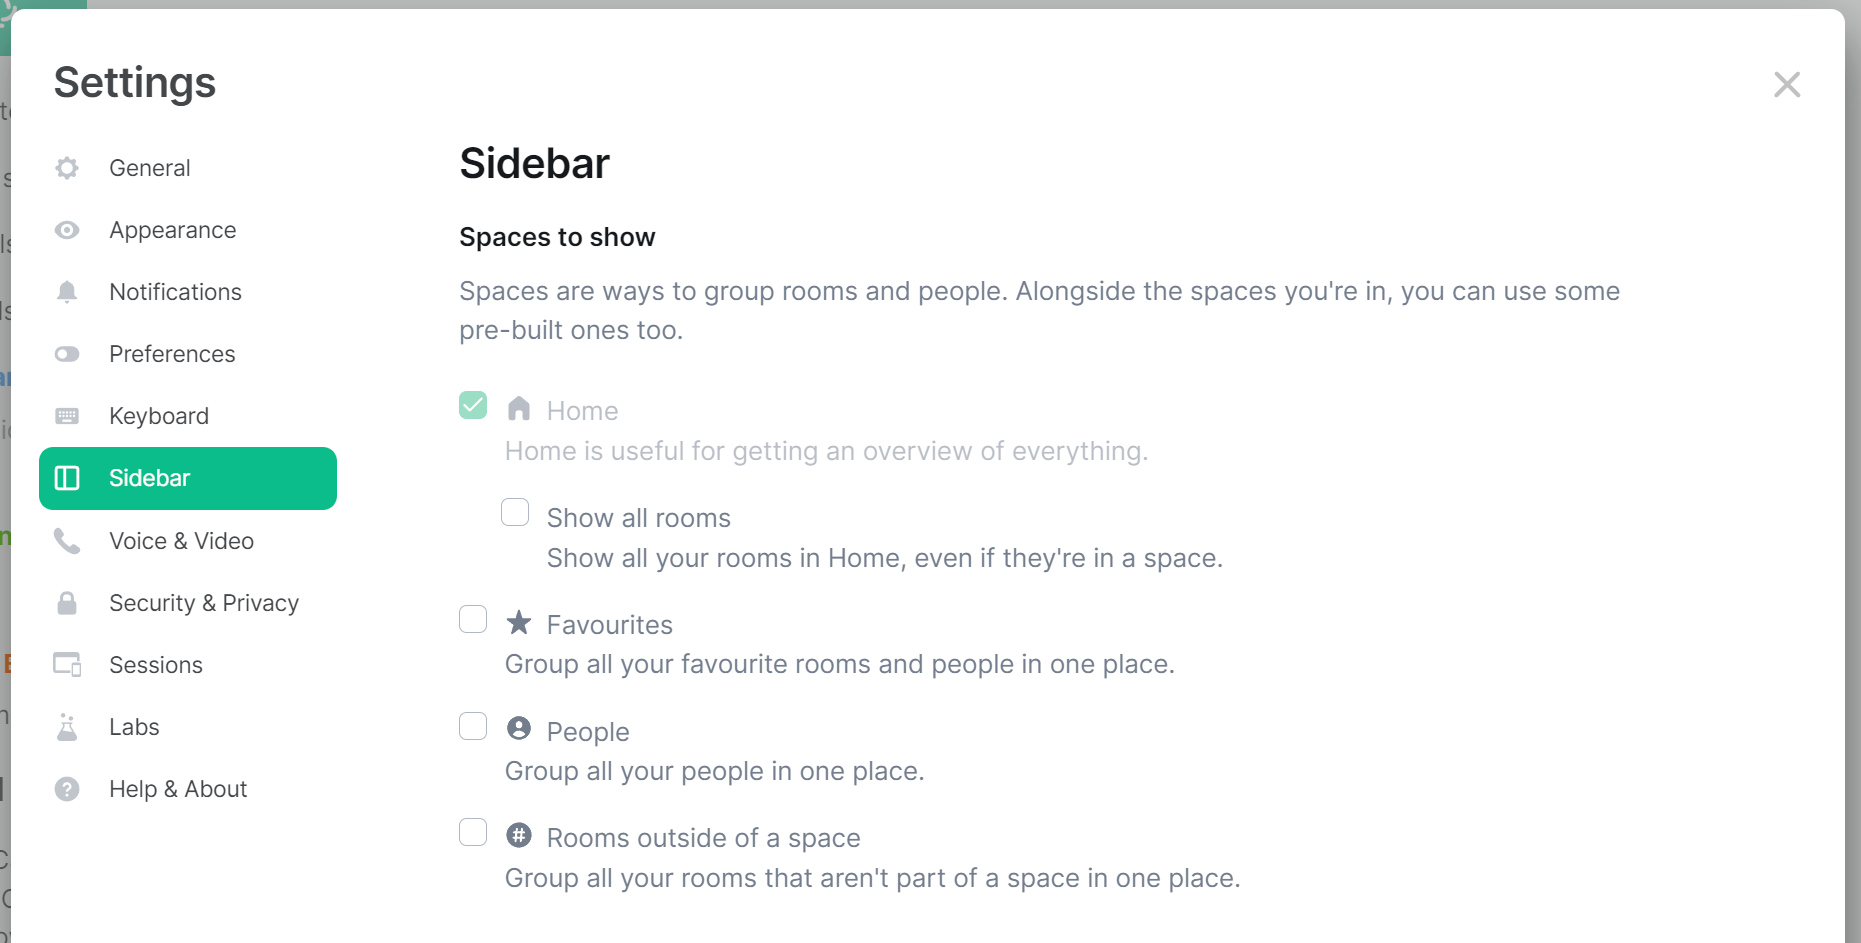
Home: Home is useful for getting an overview of everything.
- Show all rooms: Show all your rooms in Home, even if they're in a space.
Favorites: Group all your favorite rooms and people in one place.
People: Group all your people in one place.
Rooms outside of a space: Group all your rooms that aren't part of a space in one place.
See the below example of a sidebar with these options enabled:

Voice & Video Settings
Disclaimer: This guide refers to using the Element Matrix clients, Element Web or Element Desktop apps
Accessing Voice & Video Settings
You can change your Matrix account settings by clicking your profile icon in the top left of the Element client. By default, this will be a colored circle with the first letter of your Matrix ID. From the presented drop-down menu, you'll be able to jump into specific settings straight away, or access All Settings. Clicking All Settings will take you first to General settings, click Voice & Video in the vertical navigation menu on the left to open Voice & Video settings.
Info: The below setting layout / order may change in subsequent client updates, however generally most settings will still perform the same function.
Voice & Video Settings
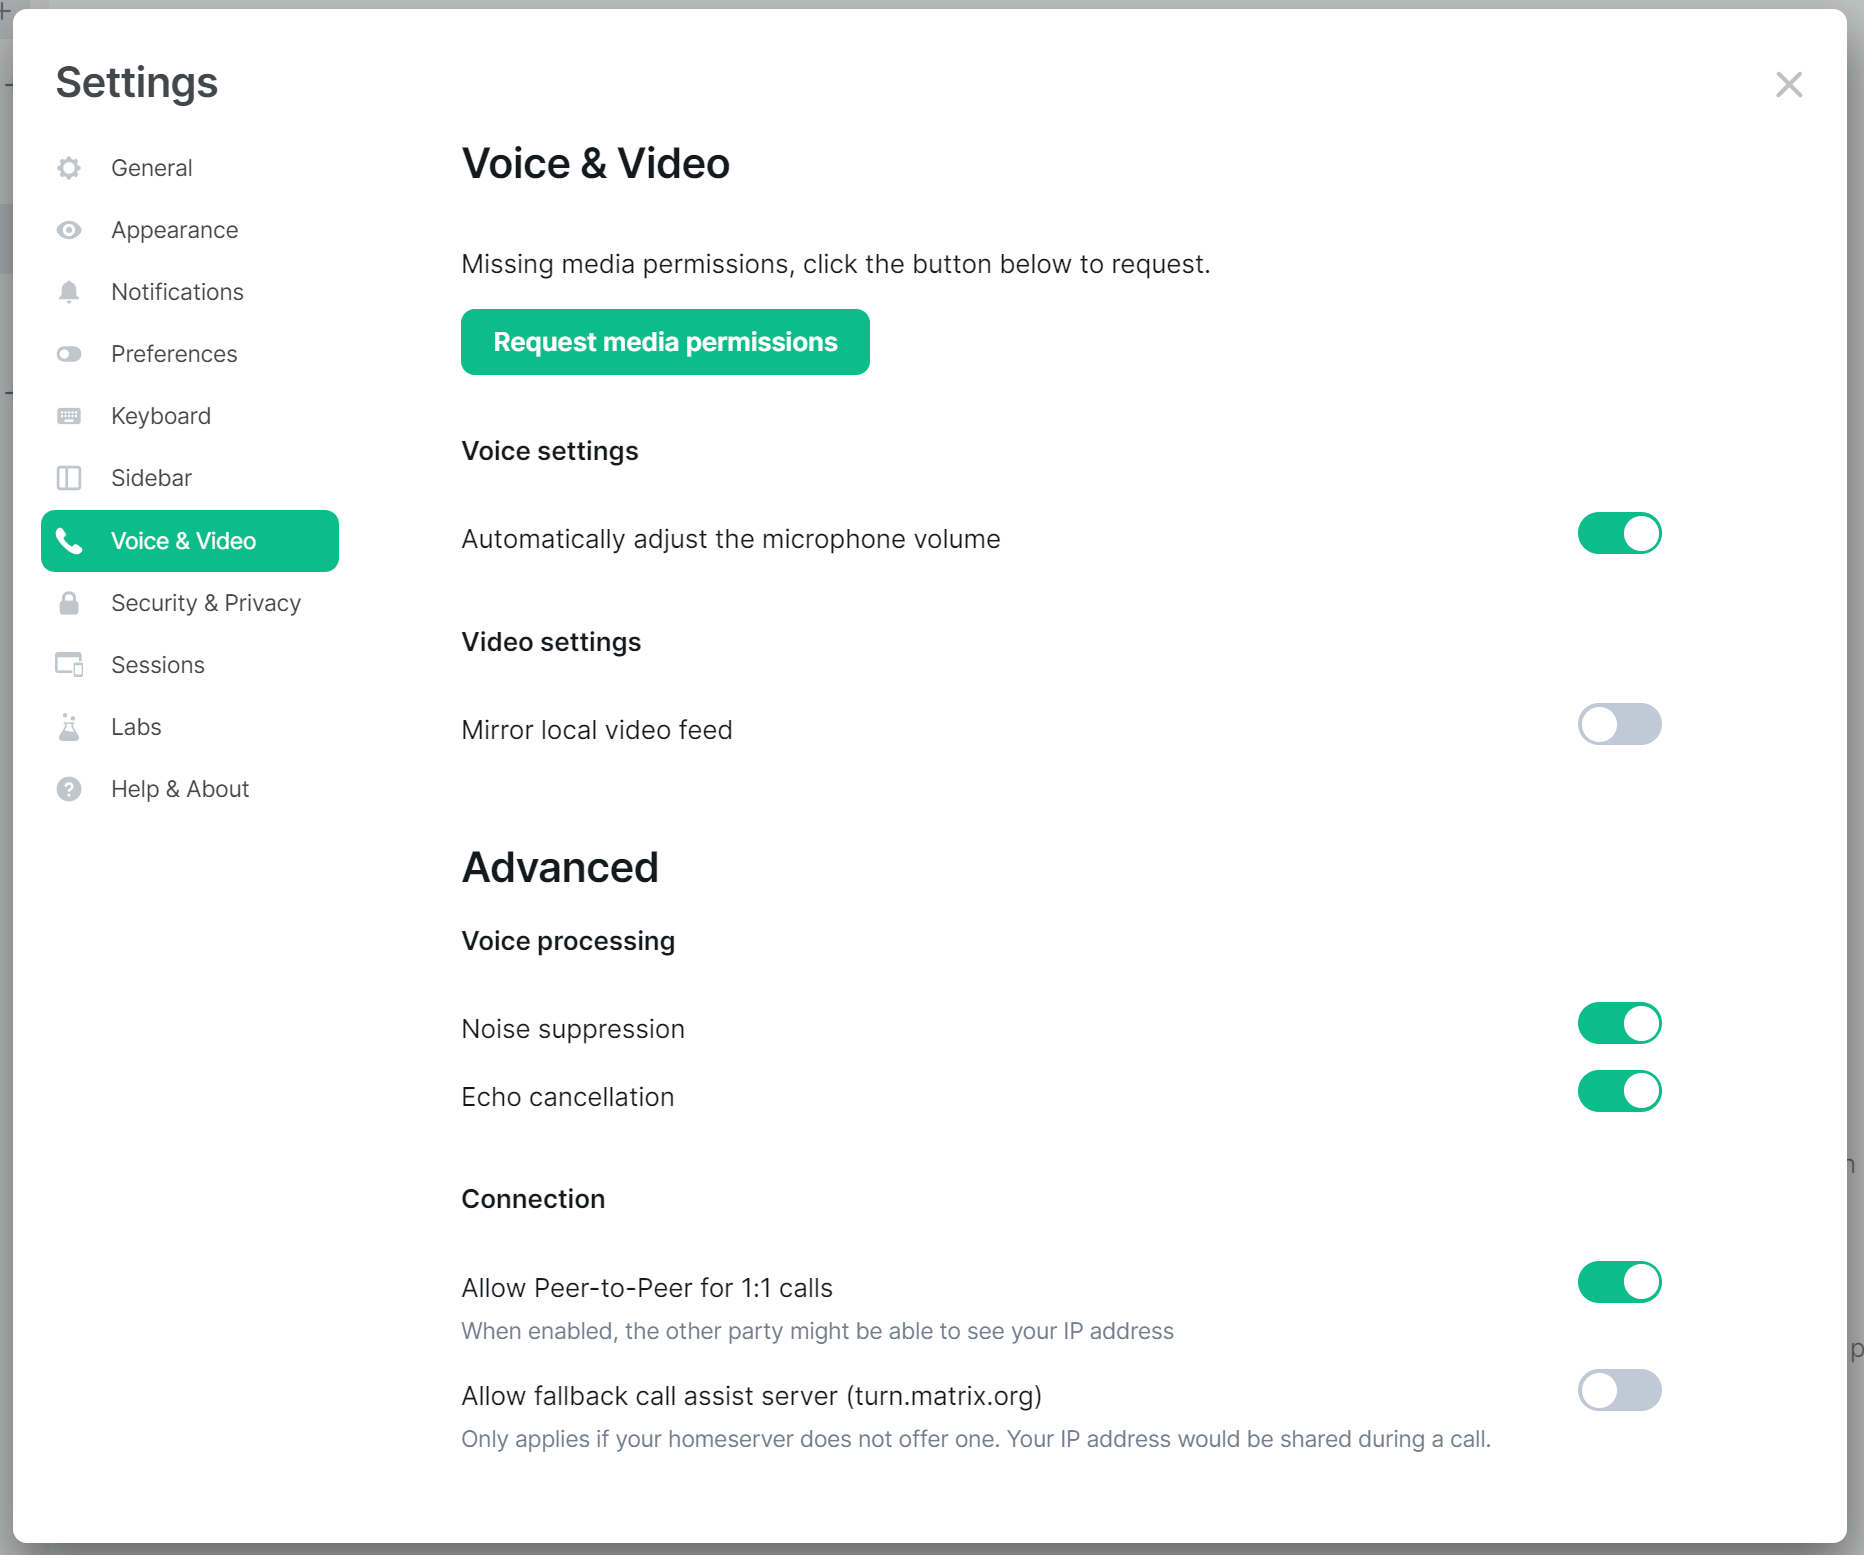
The Voice & Video settings section allows you to change your default audio and microphone devices, individual voice and video preferences as well as configure advanced options relating to Video Processing and your Connection.
To start, if you haven't yet made use of Voice & Video, you may see a Requests media permissions prompt, you will need to do this, then accept the prompt in your browser to allow the Element client to see, and use your Camera and Microphone.
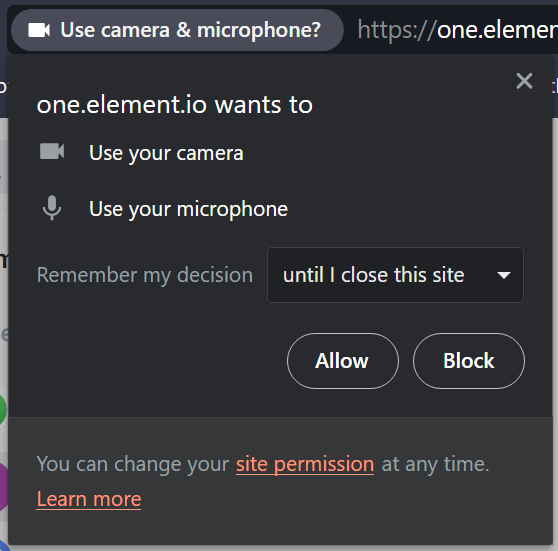
Once you have provided media permissions, you will be able to customize you default Audio and Microphone devices under Voice Settings, and the default Camera to use under Video settings.
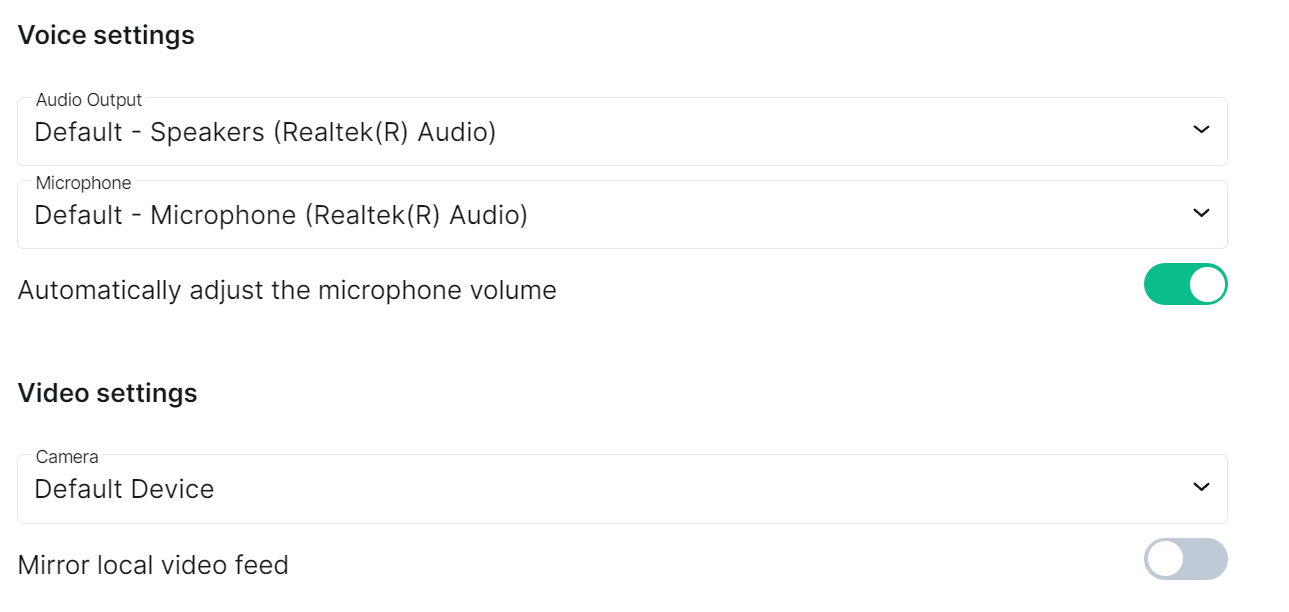
WIP Security & Privacy Settings
Disclaimer: This guide refers to using the Element Matrix clients, Element Web or Element Desktop apps
Accessing Security & Privacy Settings
You can change your Matrix account settings by clicking your profile icon in the top left of the Element client. By default, this will be a colored circle with the first letter of your Matrix ID. From the presented drop-down menu, you'll be able to jump into specific settings straight away, or access All Settings. Clicking All Settings will take you first to General settings, click Security & Privacy in the vertical navigation menu on the left to open Security & Privacy settings.
Info: The below setting layout / order may change in subsequent client updates, however generally most settings will still perform the same function.
Security & Privacy Settings
Sessions
Disclaimer: This guide refers to using the Element Matrix clients, Element Web or Element Desktop apps
Accessing Sessions
You can change your Matrix account settings by clicking your profile icon in the top left of the Element client. By default, this will be a colored circle with the first letter of your Matrix ID. From the presented drop-down menu, you'll be able to jump into specific settings straight away, or access All Settings. Clicking All Settings will take you first to General settings, click Sessions in the vertical navigation menu on the left to open Sessions settings.
Info: The below setting layout / order may change in subsequent client updates, however generally most settings will still perform the same function.
Sessions
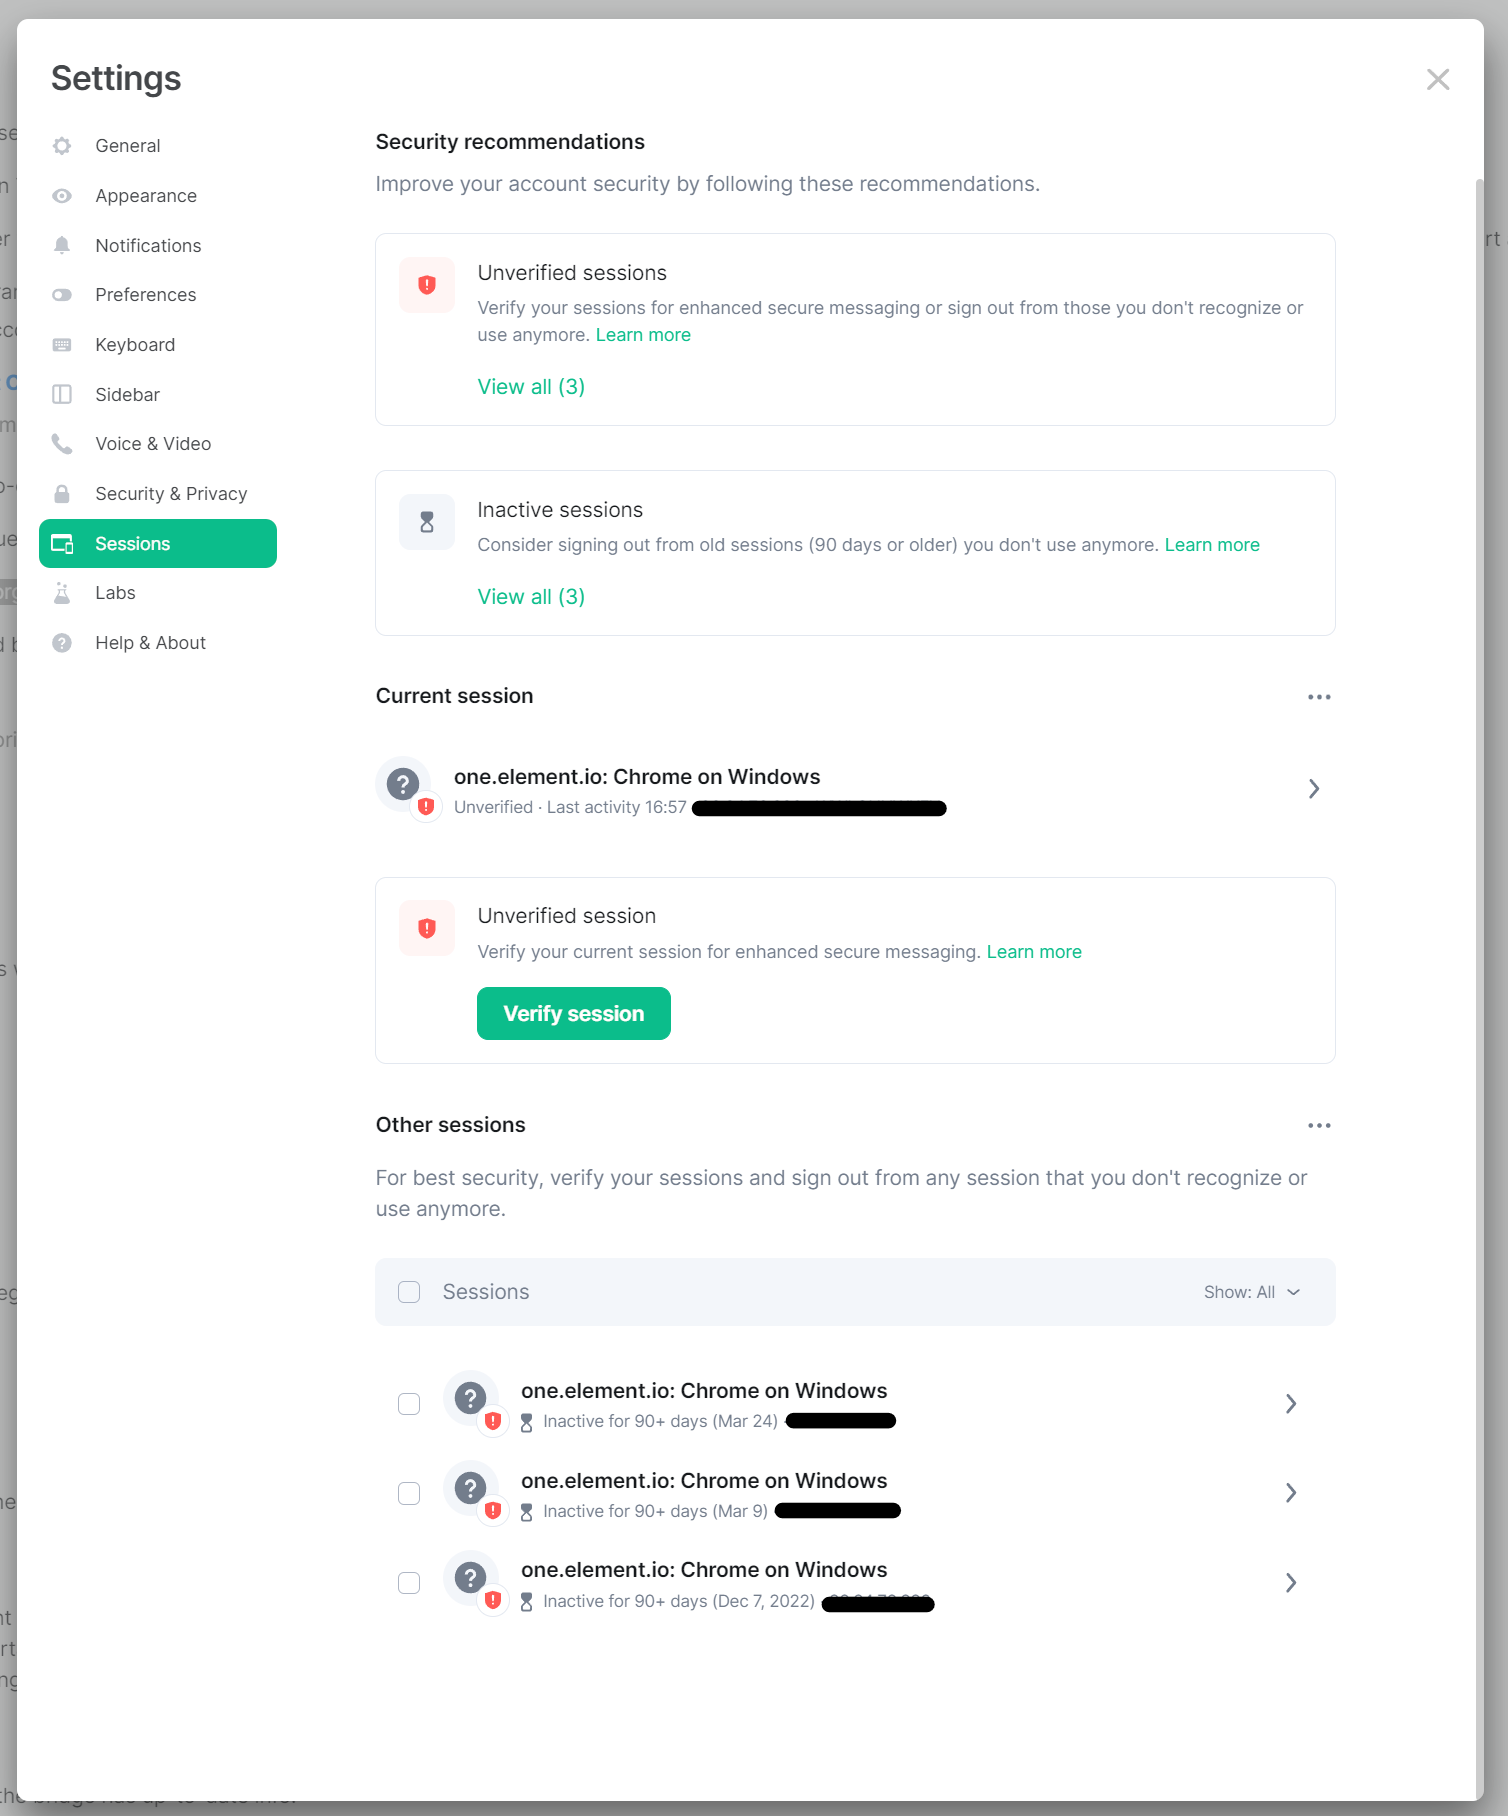
The Sessions section allows you to manage the existing logged in sessions you have open across various devices and whether they are verified.
Security Recommendations
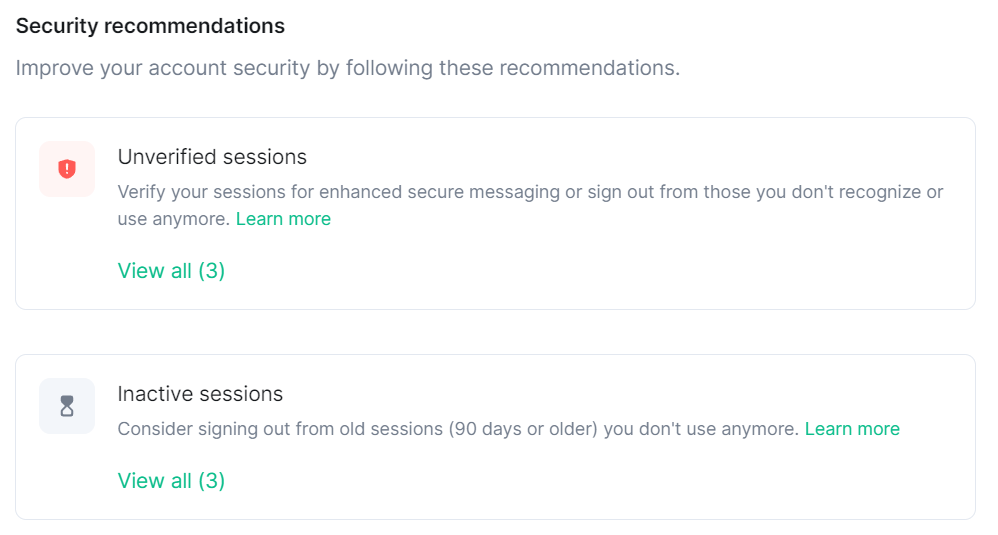
This first section will only appear if there are recommendations about your existing sessions to enhance the security of your account. In the example above, 3 unverified sessions exist, as well as 2 Inactive sessions (in this scenario, they are the same three sessions). Clicking on View All will filter the Other Sessions section on the recommendation clicked.
Current Session
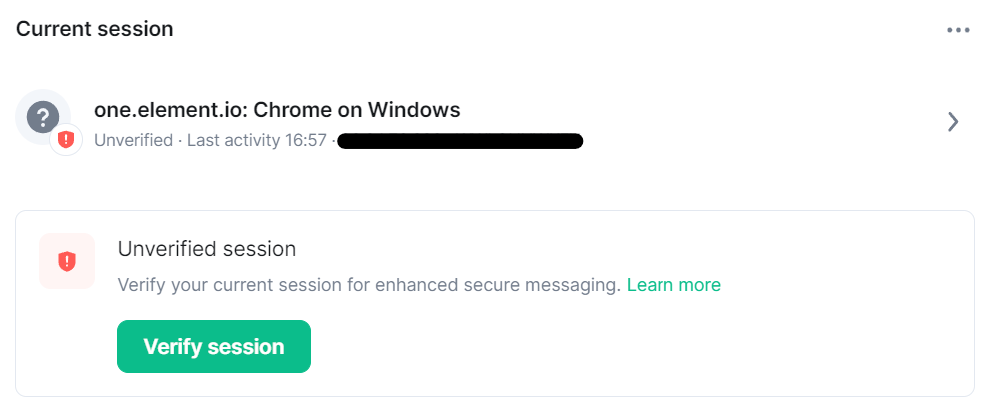
This section will show the details of your current session, i.e. the logged in session on the client you are using. Note, you can have multiple sessions on the same device, for instance, if you are logged in to both the Element Web client and the Desktop client. If the current session is unverified, you will be provided a prompt to begin verification of the session.
Clicking the 3-dot menu in the top right, will open a menu to sign out of the current session (or all sessions). Warning, this will sign you out and you will need to log back into your session on the client.
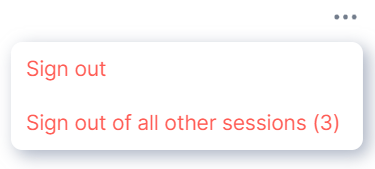
Clicking the right pointing arrow beneath the 3-dot menu, will expand to show more details about the session. Additional options include Signing out of this session, Rename-ing a session and toggling of Push notifications.
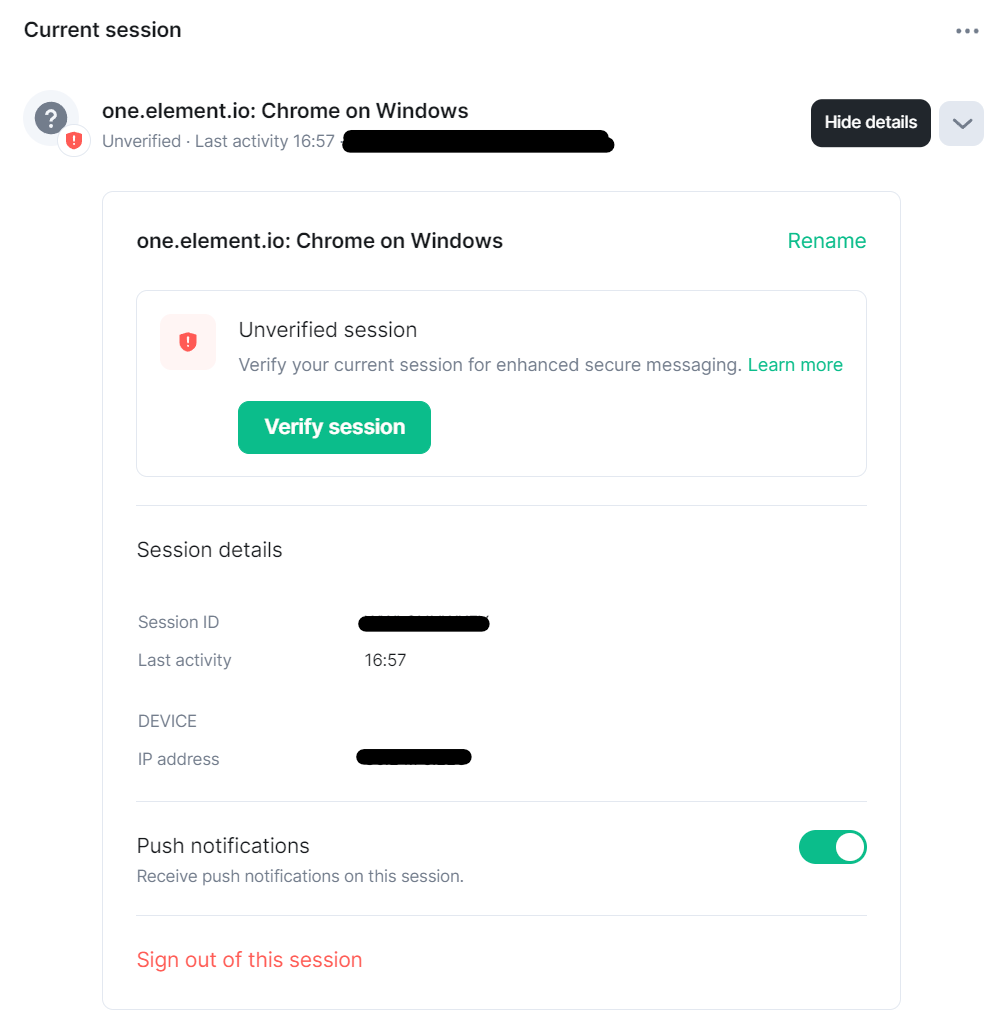
Other Sessions
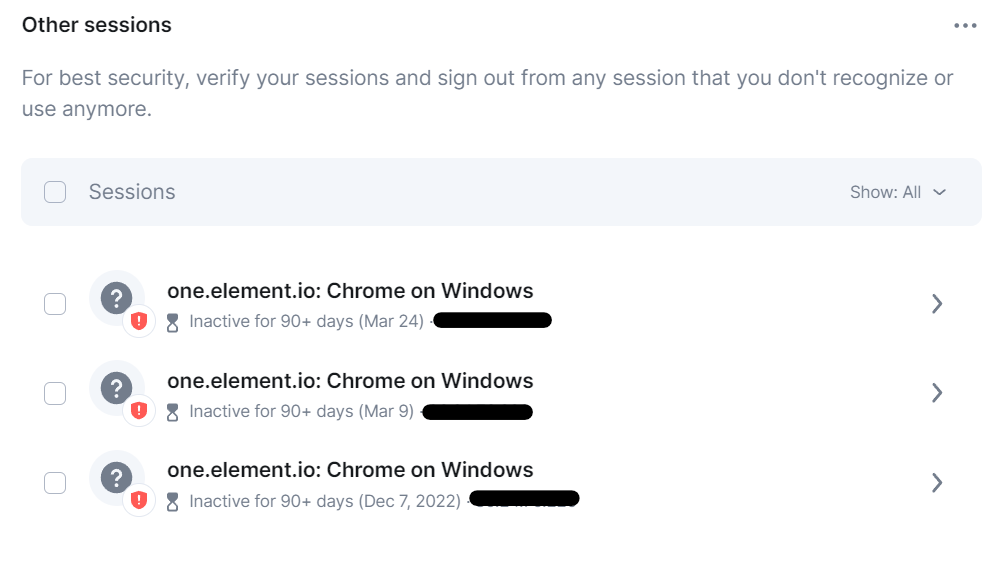
Much like the section above, this sections shows all other sessions you currently have. As above, the 3-dot menu will reveal the option to sign out of all of these other sessions. You could also individually tick various sessions and then click the then revealed Sign out button to customize which should be signed out.
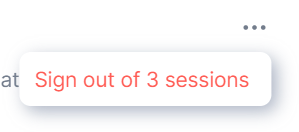

Along the grey bar, you can also filter the view of other sessions on various options:
- All
- Verified: Ready for secure messaging
- Unverified: Not ready for secure messaging
- Inactive: Inactive for 90 days or longer
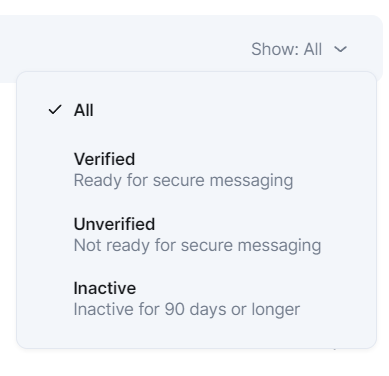
Clicking the right pointing arrow beneath the 3-dot menu, will expand to show more details about the session (see above). Additional options include Signing out of this session, Rename-ing a session and toggling of Push notifications.
Labs
Disclaimer: This guide refers to using the Element Matrix clients, Element Web or Element Desktop apps
Accessing Labs
You can change your Matrix account settings by clicking your profile icon in the top left of the Element client. By default, this will be a colored circle with the first letter of your Matrix ID. From the presented drop-down menu, you'll be able to jump into specific settings straight away, or access All Settings. Clicking All Settings will take you first to General settings, click Labs in the vertical navigation menu on the left to open the Labs page.
Info: The below setting layout / order may change in subsequent client updates, however generally most settings will still perform the same function.
Labs
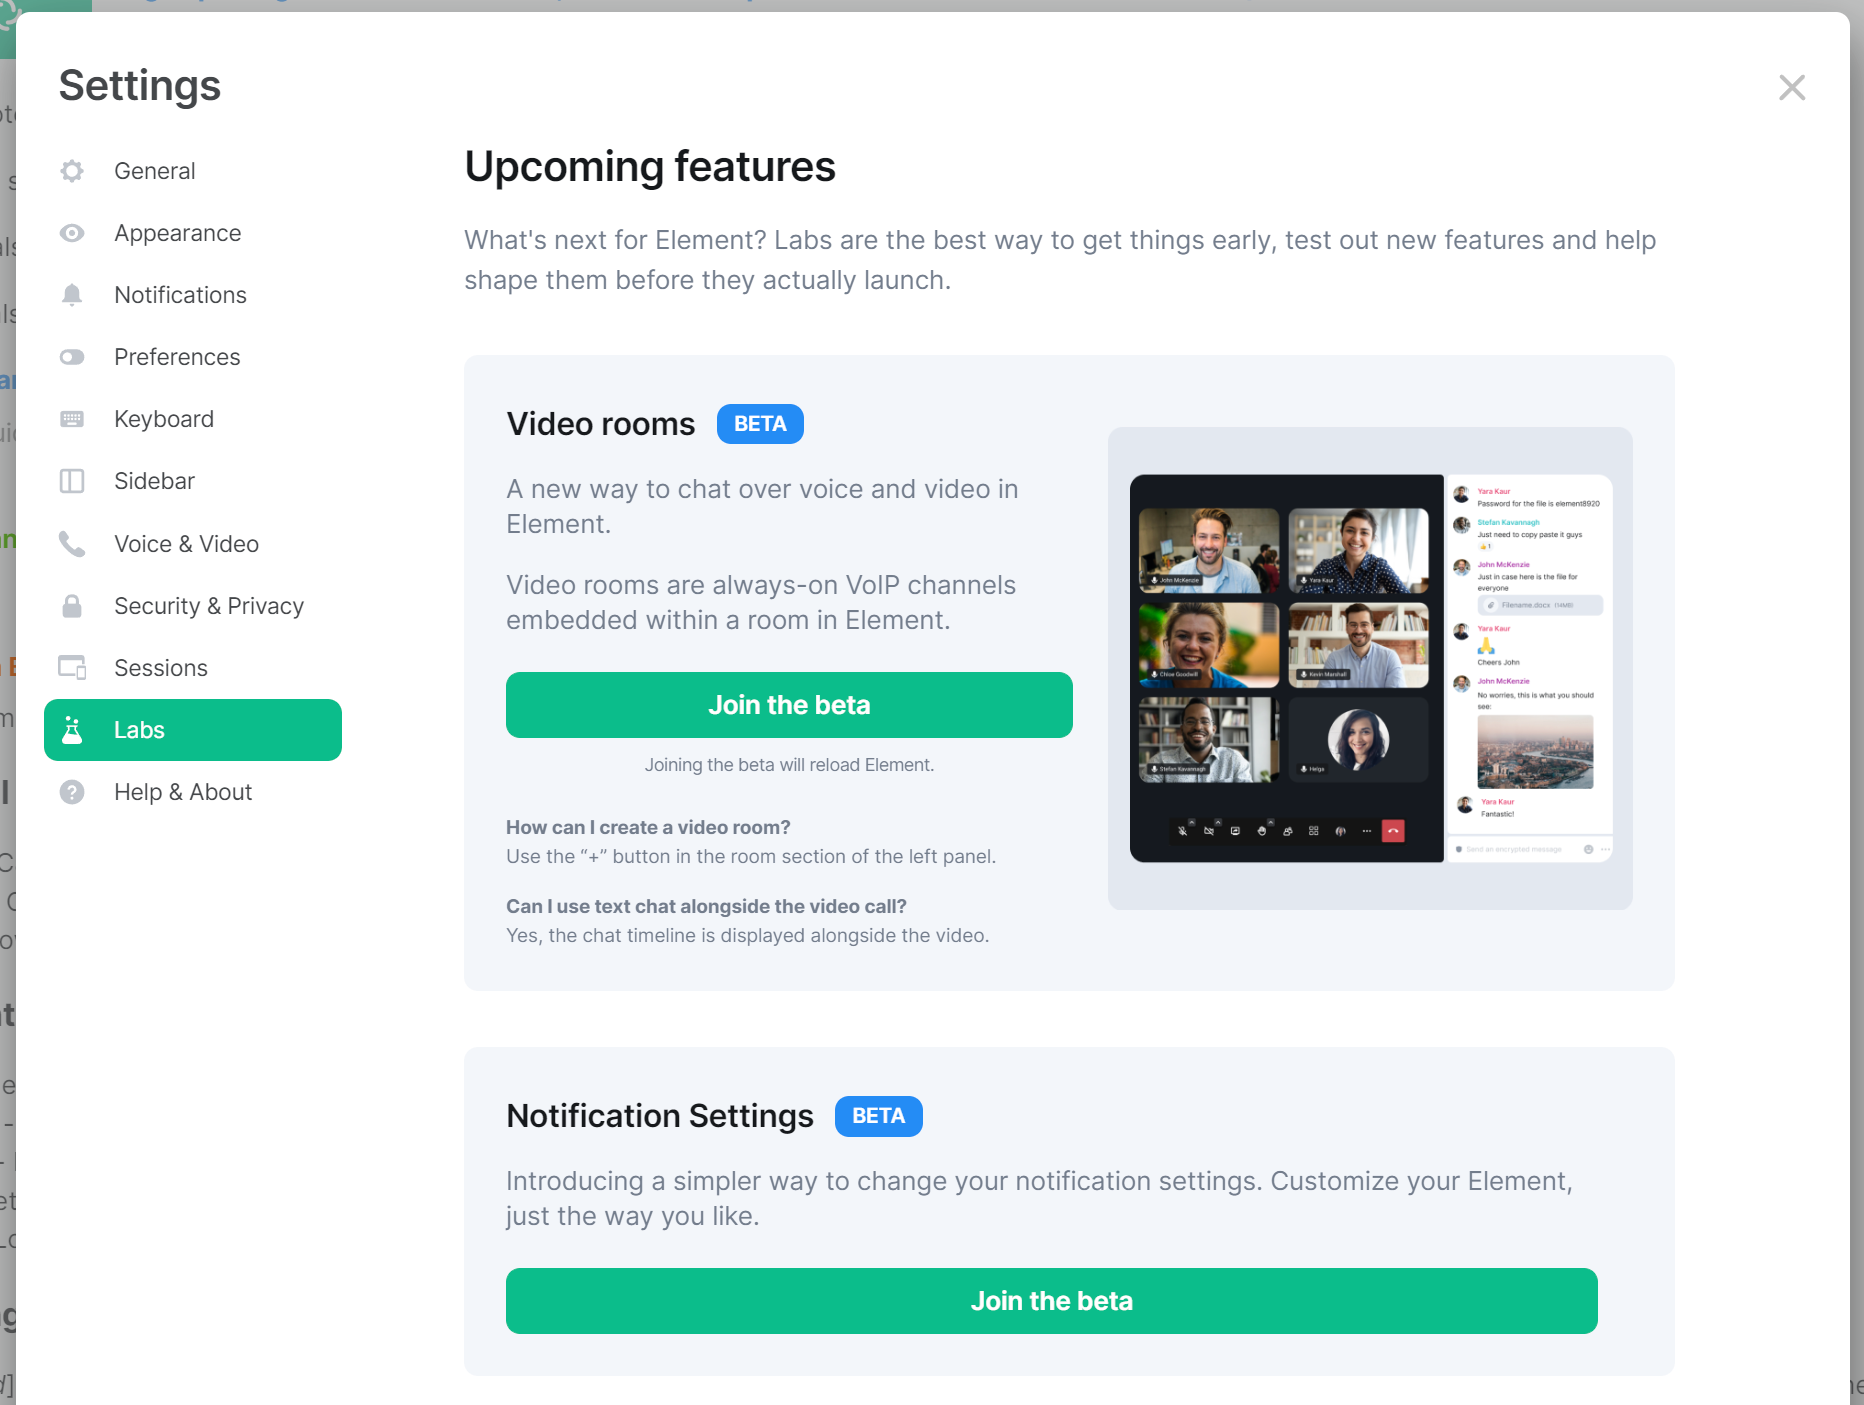
The Labs sections contains experimental options you can turn on to test out new / upcoming features. It is not recommended to enable Lab options unless you are happy to accept enabling of beta functionality.
Help & About
Disclaimer: This guide refers to using the Element Matrix clients, Element Web or Element Desktop apps
Accessing Help & About
You can change your Matrix account settings by clicking your profile icon in the top left of the Element client. By default, this will be a colored circle with the first letter of your Matrix ID. From the presented drop-down menu, you'll be able to jump into specific settings straight away, or access All Settings. Clicking All Settings will take you first to General settings, click Help & About in the vertical navigation menu on the left to open the Help & About page.
Info: The below setting layout / order may change in subsequent client updates, however generally most settings will still perform the same function.
Help & About
From Help & About you can find important information related to the client itself, such as it's current version, your homeserver and identity server details as well as links to our FAQ, Legal documents and credits.
Your Access Token
Your access token gives full access to your account via the use of Matrix APIs, you can read more about them depending on your needs. If you are an Admin of a homeserver, and are using an account with Admin access, you can make use of the Synapse Admin API. For both admins and regular users, the Matrix APIs can be found from the latest Matrix Spec page - these include:
Bug Reporting
If you've experience a bug, the best place to report it is by submitting a bug report to the appropriate Github repository for your client, the Element account.
Matrix Rooms
Documentation covering from basic usage and creation of rooms to room management.
Understanding Matrix Rooms
All communication via Matrix takes place within rooms. Rooms can be made available publicly or kept private, and they can configured to be encrypted depending on your requirements. From the Element Matrix clients, Element Web App or Element Mobile / Desktop Apps, rooms can be found under the Rooms section. However when speaking directly to one particular person, a Room is marked as a Direct Chat and can be found under the People section instead.
Rooms, if desired, can be prioritized as Low Priority or Favorite, moving them into dedicated sections named as such. Rooms can also be organized into any number of Spaces, allowing you to further manage the rooms you see. In addition, you can customize the notification settings for each room to alert for All messages, only Mentions & keywords or to Mute room.
What's Next?
Getting Started
To start learning the basics of creating and using rooms, check our 'Getting Started' series of docs on the subject, starting with Creating a Room.
Getting Started: Creating a Room
Disclaimer: This guide refers to using the Element Matrix clients, Element Web or Element Desktop apps
You can create a room by clicking the + button, located at the top alongside your current Space's name within the Left Panel - you will be presented with various options to create a room matching your requirements.
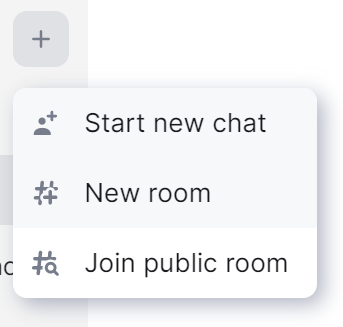
Starting a Direct Chat
After clicking Start new chat, you will be presented with the Direct Messages prompt, from here you can search for other people using their name, email address or username. You can select your desired contact(s) to directly invite them, or copy the provided invite link to send separately. You will see suggestions based on people you have most recently interacted with or search directly.
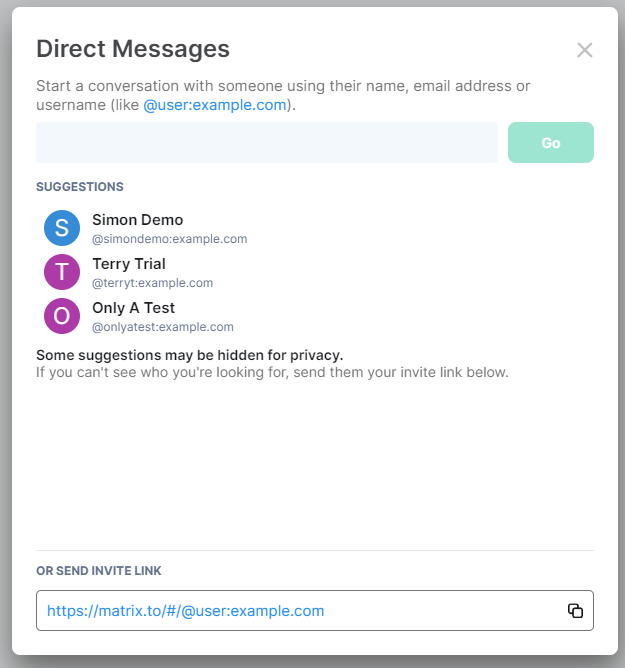
Searching for users: When searching for users, searching by name requires you to have interacted (been within a common room / space) with the user previously, otherwise you will need to specify their full Matrix ID, for example, @user:example.com.
After confirming the invitees for the chat, click Go. This will open a draft of the room in the Right Panel, you must then send your first message for the room to be created and the recipients to be invited.

Starting a New Room
After clicking New room, you will be presented with the Create a private room prompt, from here you can specify the room settings as desired.
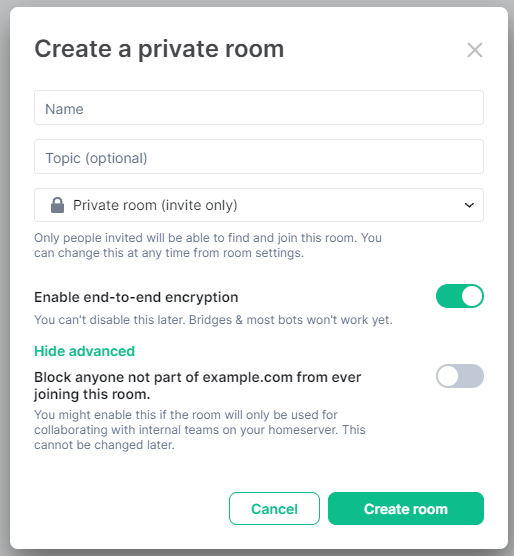
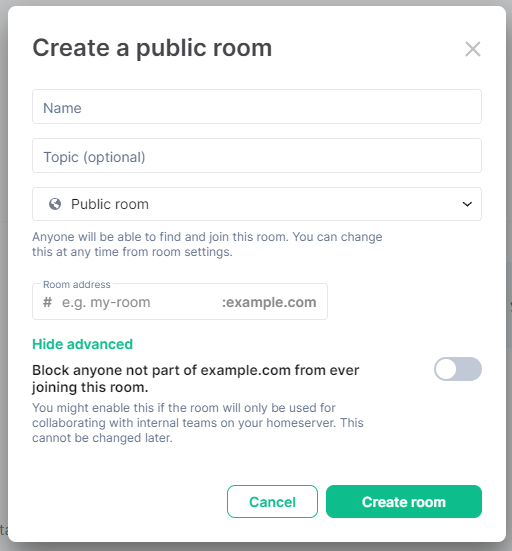
- Name: This is the name your room will appear as, if you are making a public room, make sure you choose a name that will be easily found when searching and is appropriate for the homeserver.
-
Topic: This works as a description for the room, it is presented at the top of a room

-
Room Type: Here you can customize whether the room should be publicly accessible, changing to public will change the available configuration options, per images above, and prevent enabling end-to-end encryption1.
- Private Rooms | Enable end-to-end encryption: Enabling this at any time prevents disabling it, ensure when creating the room you would like encryption. It is always possible to enable encryption after room creation via the room settings.
-
Public Rooms | Room Address: Much like your Matrix ID
@user:example.com, your room will also have an ID or address#room:example.comthat can be used to link to it from other chats, using#. It maybe beneficial to choose a simpler name here, allowing the room name to be more descriptive. Do note some characters are not allowed, such as spaces,#and%.
- Advanced - Block anyone not part of homeserver: Enabling this prevent users from other homeservers from joining the room.

1 Whilst you can enable encryption for a public room via the room settings after creation it's not recommended to add encryption to public rooms. Anyone can find and join public rooms, so anyone can read messages in them. You'll get none of the benefits of encryption, and you won't be able to turn it off later. Encrypting messages in a public room will make receiving and sending messages slower.
What's Next?
Using A Room
Now you've created a room, try the next in the Matrix Rooms: Getting Started series, Getting Started: Using a Room
Managing A Room
To learn more about managing a room, try our Matrix Rooms: Managing a Room series, starting with Managing a Room: Room Info.
WIP Getting Started: Using a Room
Disclaimer: This guide refers to using the Element Matrix clients, Element Web or Element Desktop apps
Joining a Room
- Searching for rooms
- Finding rooms using spaces
- Troubleshooting failed room invites
Configuring a Room
- Room settings (Priority / Notifications etc.)
Notifications
From this section, you can managed your personal notification settings. The options you choose
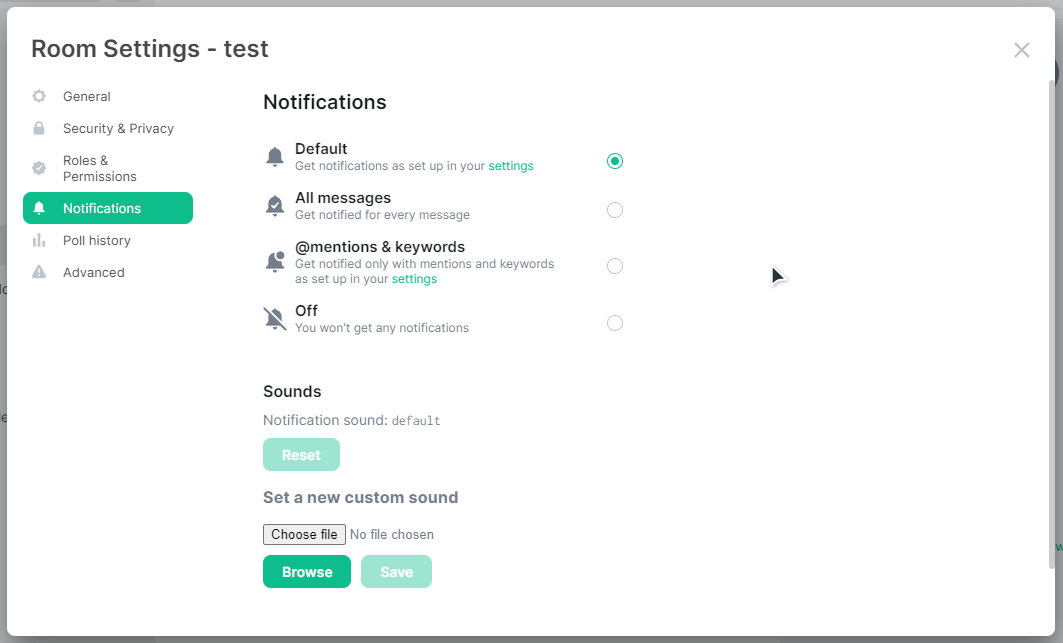
Leaving a Room
- Not known room - unable to leave room
What's Next?
Managing A Room
To learn more about managing a room, try our Matrix Rooms: Managing a Room series, starting with Managing a Room: Room Info.
Managing a Room: Room Info
Disclaimer: This guide refers to using the Element Matrix clients, Element Web or Element Desktop apps
To start managing a room, you can click the i icon in the top right of the room, this will open Room Info. From here there are a number of basic management options you can perform.
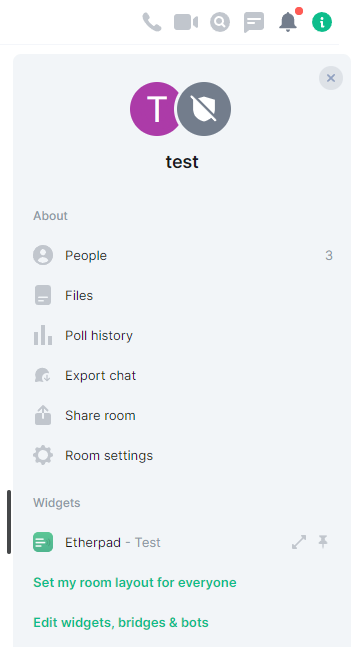
People
From this section, you can invite more people to the room and view the existing members.
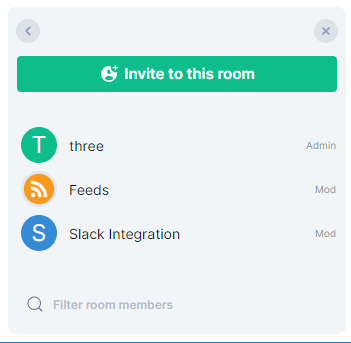
Clicking on any member, via this pane or from their username / profile picture from the room directly, will take you to management options specific to that user. You can adjust their power level, remove recent messages, mute them or Remove / Ban them from the room.
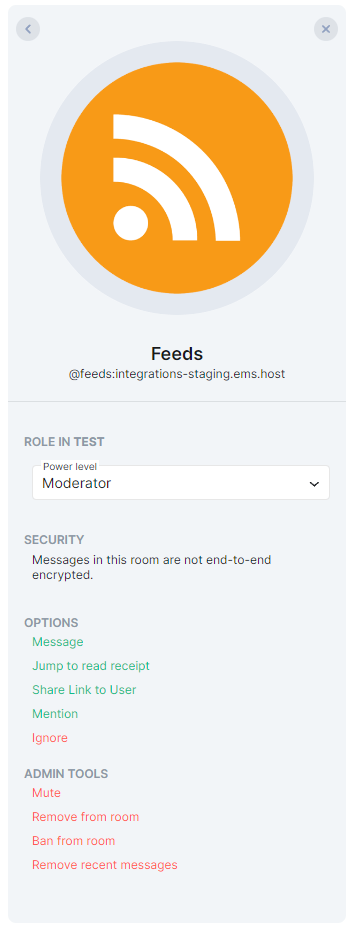
Files
From this section, you view in chronological order, media shared within the room. File entries include the name of the media and a preview if applicable, the media's size and the option to download it as well as information on who and when it was sent.
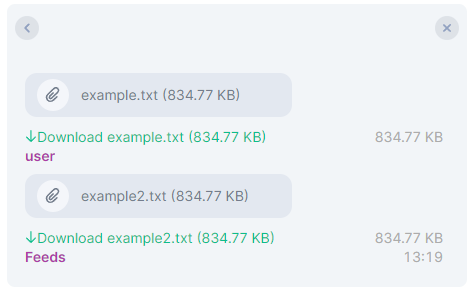
Poll History
From this section, you can review Active and Past polls, clicking on individual entries to drill down into the results as well as jump to them in the timeline.
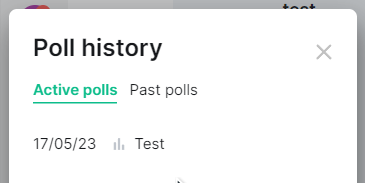
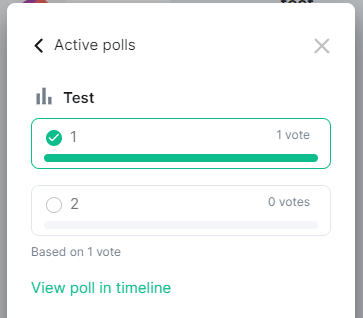
Export Chat
From this section, you can export your rooms message history (including attachments if needed) in HTML, Plain Text or JSON format.
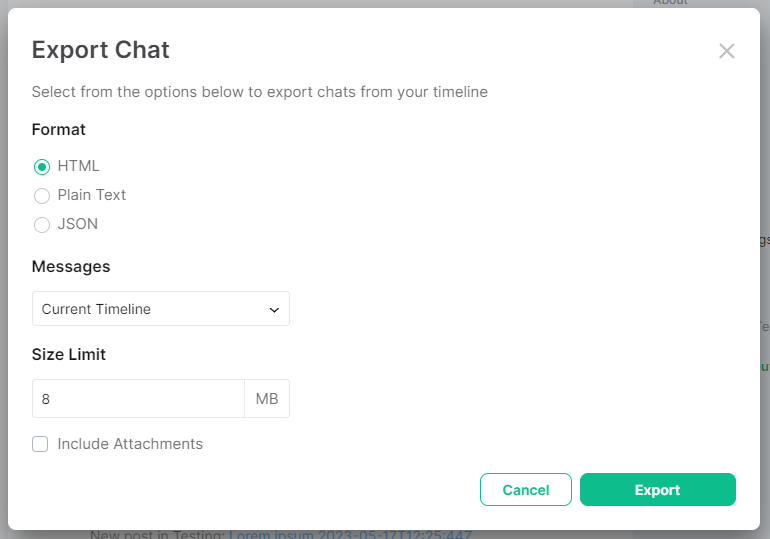
Share Room
From this section, you can generate a link or QR code image that can be shared beyond Matrix to allow others to join the room.
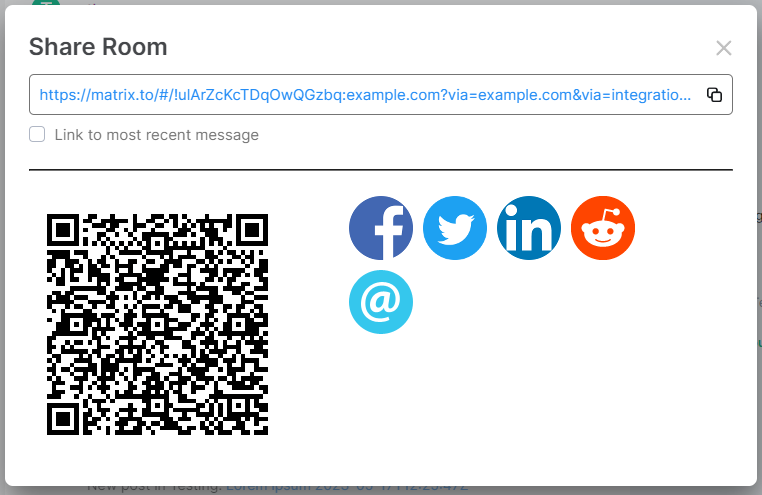
What's Next?
Room Settings
Now you've mastered this section, try the next in the Matrix Rooms: Managing a Room series, Room Settings, for details on available room settings.
Managing a Room: Room Settings
Disclaimer: This guide refers to using the Element Matrix clients, Element Web or Element Desktop apps
You can access Room Settings by either clicking Room settings from the Room info pane:

Or by hovering over the room name from the room list, clicking the 3-dot menu, then selecting Settings:
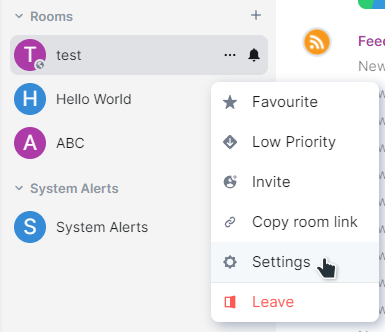
You will be presented with the Room Settings screen, and various navigation options, for details on each of these screens, see the below sections:
General
From this section, you can customize how your room looks and is accessed:
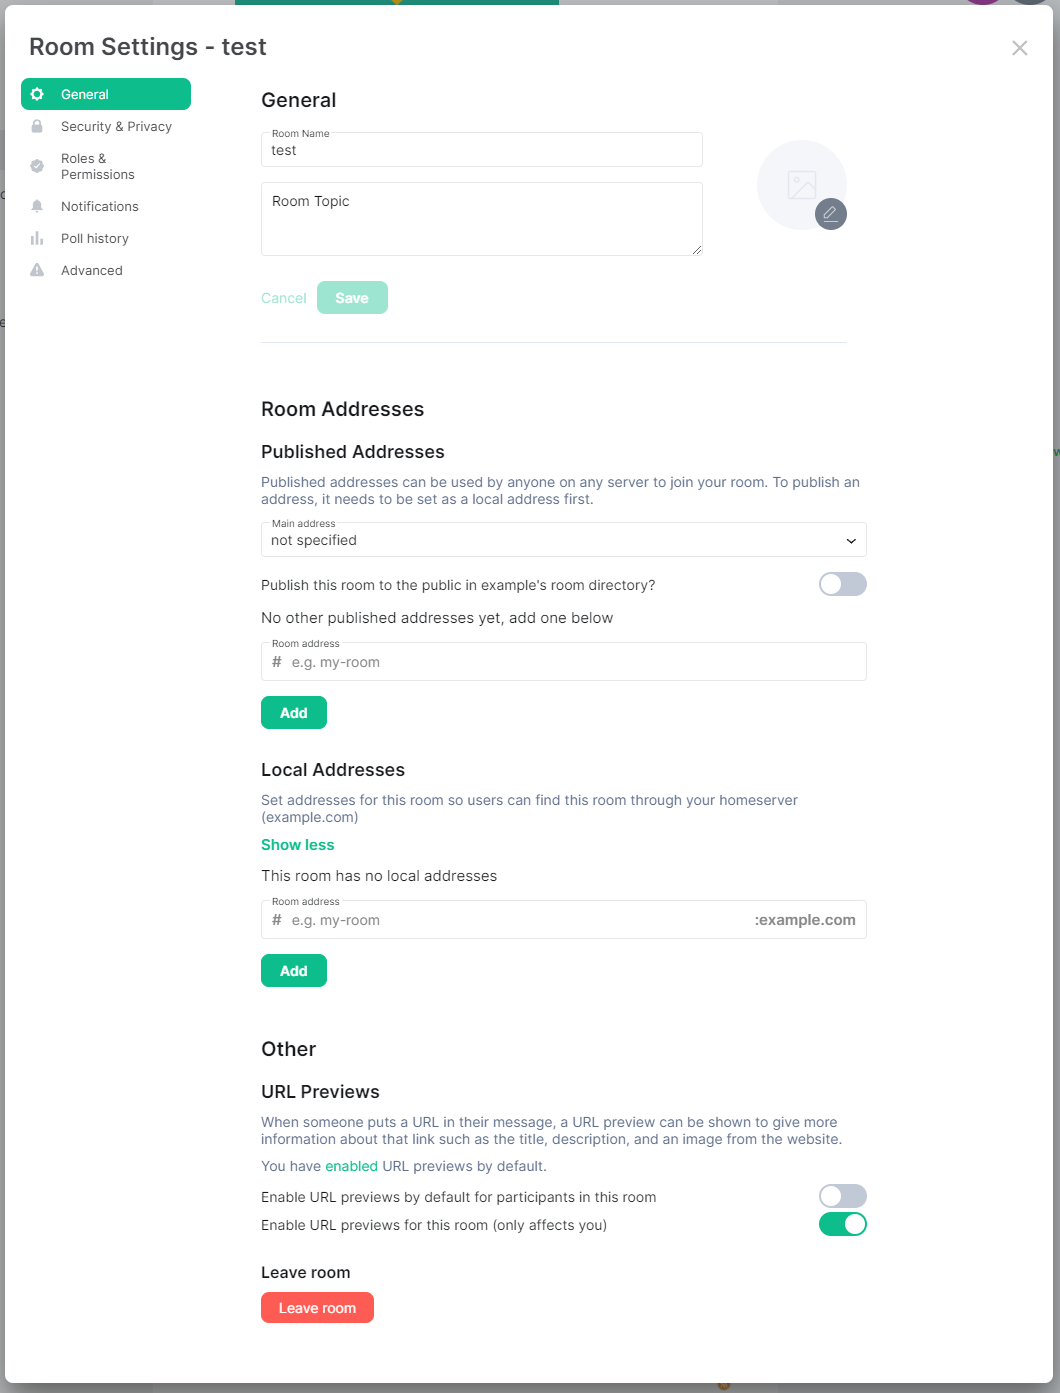
General
- Room Name - The name of your room as it appears within a users' room list.
- Room Topic - A description of the room, present along the top bar when viewing the room.
- Avatar - An icon for the room, change by clicking the
Pencilicon and uploading your desired image.
Check the FAQ Entry for details on What is the preferred resolution for room and space icons?
Room Addresses
Published Addresses
Published addresses can be used by anyone on any server to join your room. To publish an address, it needs to be set as a local address first.
- Main Address - from this dropdown you can select which local address you would like to be the main address to your room from external homeservers. Once a local address is first set, this will default to that address, however you can remove the main address by selecting
not specifiedfrom the dropdown. - Publish this room to the public in example's room directory - toggling this will allow your room to be discoverable by user's with access to the homeserver.
- Room Address - you can also publish other addresses in addition to the main address by adding other local addressed here and clicking
Add.
Local Addresses
Set addresses for this room so users can find this room through your homeserver.
- Room Address - Provide the address that users can use to access your room, creating your first Room Address will automatically set it as the
Main AddressunderPublished Addresses
Other
-
URL Previews - When someone puts a URL in their message, a URL preview can be shown to give more information about that link such as the title, description, and an image from the website. You can enable this for the room just for you, or as the default for participants in the room.
-
Leave room - Here you can opt to leave the room:
If you are the only person in a room, if you leave, no one will be able to join in the future, including you. If you are the sole user with Admin rights to a room and you intend to leave, you should increase the power level of an active member to allow for room management.
Security & Privacy
From this section, you can turn on Encryption if not already on, confirm who can join and the historical messages they can read.
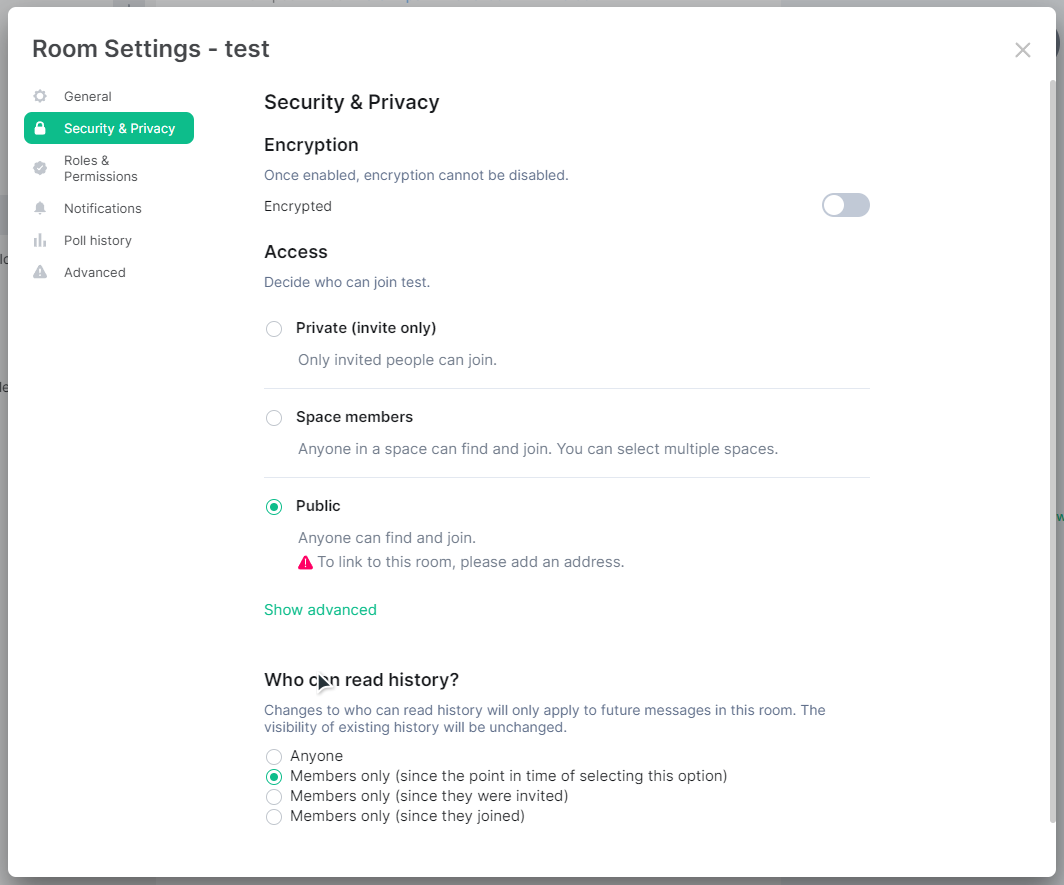
Access
-
Private (invite only) / Public - Select your desired access level, note to link to a public room, you will need to publish an address. You can do so from the
Generalsection.-
Space members - To use this option, ensure your room is in a space, then select and confirm all spaces that members of those spaces should be able to join.

-
-
Guest Access - Available only when
Public, by default, people with supported clients will be able to join the room without having a registered account. You can disable this behavior by clickingShow Advancedthen switching off via the toggle button.
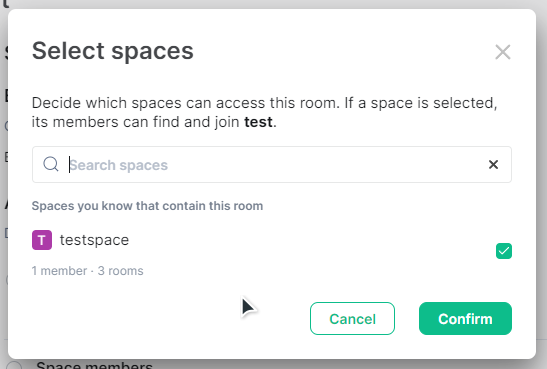
Who can read history?
Changes to who can read history will only apply to future messages in this room. The visibility of existing history will be unchanged.
From here the options are self-explanatory, simply change as desired to meet your requirements.
Roles & Permissions
From this section, you can manage who can access, who can manage and who can administer your room.
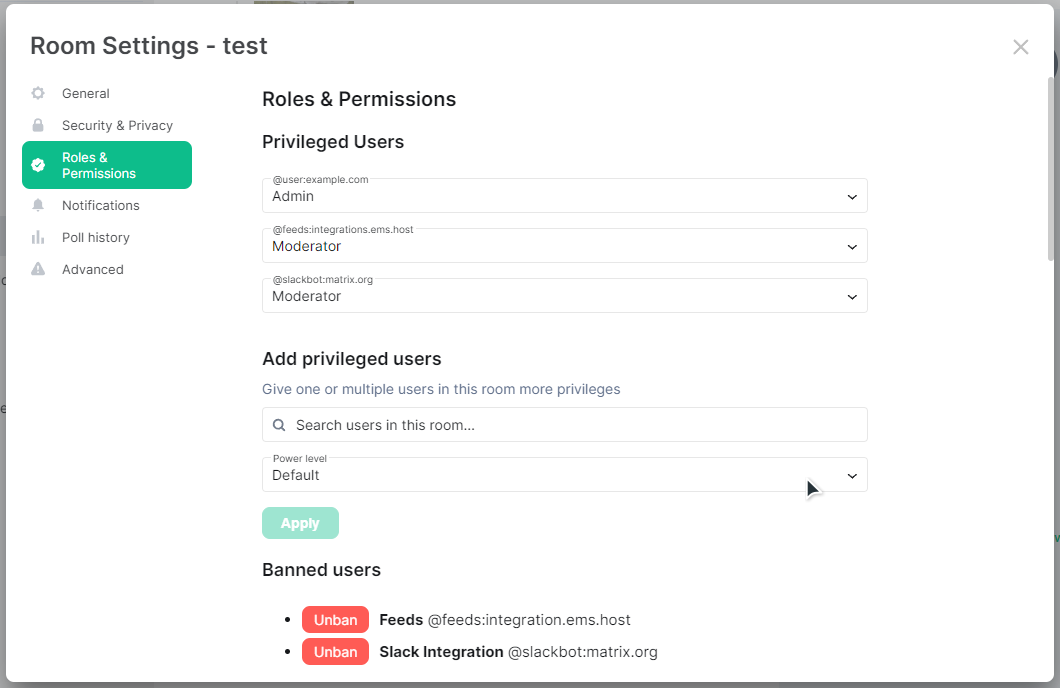
Management of a room is generally handled by it's admins and moderators, however under-the-hood, rooms make use of power levels. A users' power level is a number between 0 and 100 where the higher the number, the more access you have. The default power levels for the admin and moderator roles are 100 and 50 respectively, however you can specify any custom power level for specific actions.
Privileged Users
Setting a user from this list to Default will remove them as a Privileged User
If the only Admin for a room is demoted, you will not be able to manage the room, be careful when applying changes to permission levels
Here you can manage all Privileged users for the room, and the power level they have. You can select either Default, Moderator, Admin or Custom Level.
Add privileged users
From this section you can search existing members of the room and specify a desired power level to elevate them as a Privileged User.
Banned Users
A list of banned users, and the option to revoke the ban will be presented here if any bans have been made. You can identify who banned each specific user by hovering over the banned user.
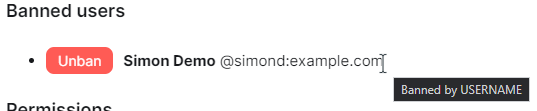
Permissions
From here you can see a list of all actions possible within a room, and control the required power level to perform those actions.
Actions and Default Power Levels
- Default role: Default (0)
- Send messages: Moderator (50)
- Invite users: Default (0)
- Change settings: Moderator (50)
- Remove users: Moderator (50)
- Ban users: Moderator (50)
- Remove messages sent by others: Moderator (50)
- Notify everyone: Moderator (50)
- Change room name: Moderator (50)
- Change permissions: Admin (100)
- Change history visibility: Admin (100)
- Change main address for the room: Moderator (50)
- Change room avatar: Moderator (50)
- Upgrade the room: Admin (100)
- Change server ACLs: Admin (100)
- Enable room encryption: Admin (100)
- Change topic: Moderator (50)
- Send m.room.pinned_events events: Moderator (50)
- Send reactions: Default (0)
- Remove messages sent by me: Default (0)
- Send org.matrix.msc3401.call events: Moderator (50)
- Send org.matrix.msc3401.call.member events: Moderator (50)
- Modify widgets: Moderator (50)
- Voice broadcasts: Moderator (50)
Notifications
This section configures your personal notification settings and isn't a management option applicable to all room users. To start learning the basics of creating and using rooms, check our 'Getting Started' series of docs on the subject, starting with Creating a Room and specifically Using a Room for notification configuration.
Poll History
This section is another way to access Poll History, you can also access simply via the Room Info pane. To learn more, check the Room Info doc from our 'Managing a Room' series.
Advanced
From this section, you can confirm the current room version as well as the Internal Room ID.
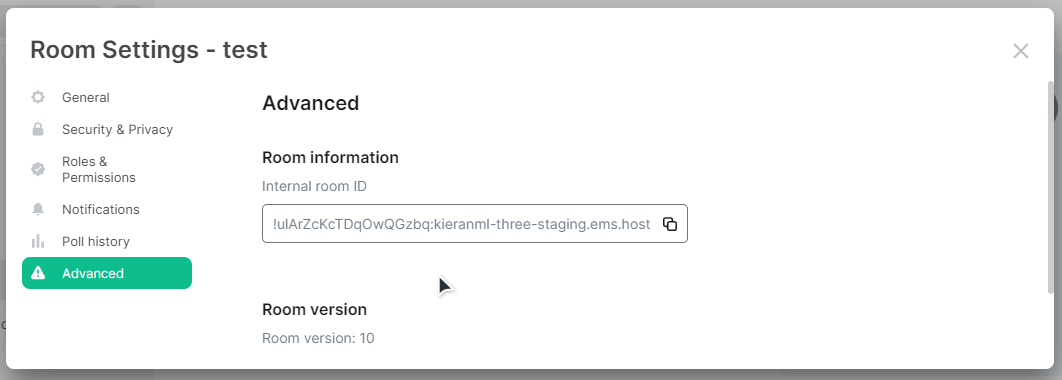
What's Next?
Advanced Room Management
Now you've mastered this section, try the next in the Matrix Rooms: Managing a Room series, Advanced Room Management, for details on available room settings.
Managing a Room: Advanced Room Management
Disclaimer: This guide refers to using the Element Matrix clients, Element Web or Element Desktop apps
Transferring Ownership of a Room
There are several scenarios where you might wish to transfer ownership of a room; perhaps you no longer wish to maintain the room yourself; have accidentally removed your, or possibly all privileged users' permissions from a room; or wish to take over an abandoned room.
How do I transfer ownership of a room? / How do I restore lost privileges to a room?
If you do not have permissions yourself, contact a current Admin for the room and get them to follow these steps to promote you.
Admins cannot remove admin permissions from other users, only themselves. Make sure any user prompted to Admin is correct before making changes.
- Open the room, click
i/Room Infofrom the top-right - Open
Room Settings, click toRoles & Permissions - Add a new privileged user, setting their power level to
Admin - Under privileged users, find your username, change your power level from
Adminto the desired level
How do I take over an abandoned room? / How do I restore lost privileges to a room without an Admin?
For the following you will need Admin access to the homeserver. If you do not manage the homeserver for your room, you will need to contact the support for that homeserver.
When a user is no longer active on your homeserver, or they have been deactivated, you may find some rooms where there are no remaining active Room Admins preventing administration of those rooms. This guide will make extensive use of the Admin API, see our Getting Started Using the Admin API guide for more information, and if required, will also use the Client-Server API, which has an equivalent Getting Started Using the Client-Server API guide.
If there is a non-deactivated but no longer active Room Admin user still present within the room, you can make use of the Admin API Make Room Admin API to grant the Admin role to another user:
POST https://HOMESERVER_URL/_synapse/admin/v1/rooms/ROOM_ID/make_room_admin
{
"user_id": "@user:example.com"
}
However that leaves a problem if there are no longer any admins still within the room. Fortunately, whether they are within the room or not, users retain their power levels unless they demote themselves prior to leaving.
So for rooms where you are unsure who holds Room Admin (I.E Power level 100), you can use the Admin API Room State API:
You can find the `ROOM_ID` from Room Settings Advanced
GET https://HOMESERVER_URL/_synapse/admin/v1/rooms/ROOM_ID/state
This will return a list of states, find the state where "type": "m.room.power_levels", from within that states' "content": { "users": {} } you will find a list of users followed by their power level, the Room Admins of the room will have a power level of 100.
If the listed Room Admins have been deactivated, you will first reactivate one of them. To reactivate a deactivated user, you can use an Admin Console if you have access to one to perform this operation for you, or you can use the Admin API Create Or Modify Account API:
`USER_ID` should look something like `@user:example.com`, otherwise known as the full Matrix ID
PUT https://HOMESERVER_URL/_synapse/admin/v2/users/USER_ID
{
"password": "NEW_PASSWORD",
"deactivated": false
}
At this point you should have an active account with Room Admin available that can be used to regain access to management of the room. If you've reactivated a deactivated user, you will have had to set a new password for the account, you could at this point login as the user using a Matrix client. You would then be able to rejoin any required rooms, promoting new users to the Admin role before deactivating the account.
Alternatively you can generate an access token for an account using the Admin API Login as a user API.
POST https://HOMESERVER_URL/_synapse/admin/v1/users/USER_ID/login
{}
{
"access_token": "<opaque_access_token_string>"
}
The users' access token can be used by the Client-Server API to perform actions, such as joining rooms and changing room permissions.
To join a room you will use the Client-Server API Join API
POST https://HOMESERVER_URL/_matrix/client/v3/join/ROOM_ID
{}
Finally, you can set the power levels for users within a room using the Client-Server API Events API:
PUT https://HOMESERVER_URL/_matrix/client/v3/rooms/ROOM_ID/state/m.room.power_levels
{
"users": {
"@user:example.com": 100
}
}
Important Notes
Any deactivated user that was reactivated via these steps should be deactivated once again following the process. You can do this a number of ways, see our Deactivating a Matrix Account documentation for further guidance.
The original Room Admin will still retain their admin power level, as Room Admins are not able to demote other admins, for deactivated user this isn't an issue however if the user is still active and you want to demote them you should repeat the final step. Using the Client-Server API Events API send that users' own username with the power level you want them to have.
Removing a Room
There is no way to unilaterally delete a room unless you own the homeserver is it on, however an invite-only room will no longer be able to be joined once all members of the room have left. As an admin it is possible to remove people from the room via the Room Info panel see the Managing a Room: Room Info page, once no other members remain, leaving the room will offer a final prompt to confirm the action.
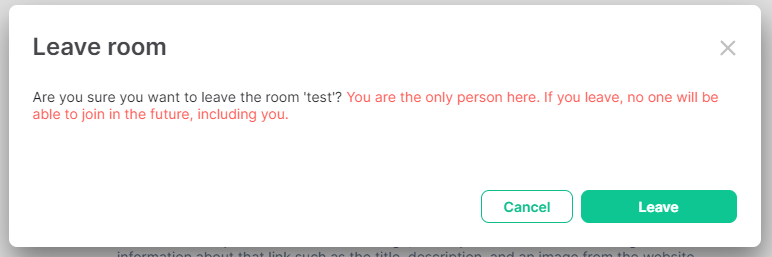
Tombstoning a Room
An alternative to everyone leaving a room, and a new one being created is to Tombstone it. This acts like closing a room and pointing it to a replacement. You can find the steps for this on our FAQ Page.
Deleting a Room
If you manage a homeserver you can delete a room from it, you can find the steps for doing this if you're an EMS customer on our FAQ Page. Rooms across multiple homeservers will only be deleted from your homeserver.
Exporting Messages
Note: If you are an EMS server admin and wish to export your entire EMS server, please see Migrate From EMS to Self-Hosted.
Using your Element client you can export your Room's message history in HTML, Plain Text or JSON format - including attachments.
-
Open the room you wish to export message history

-
Access 'Room Info' using the icon in the top right

-
Select 'Export Chat', then confirm your desired settings for export

-
Finally click 'Export' - once the export has completed you will be prompted to save an archive of the export.


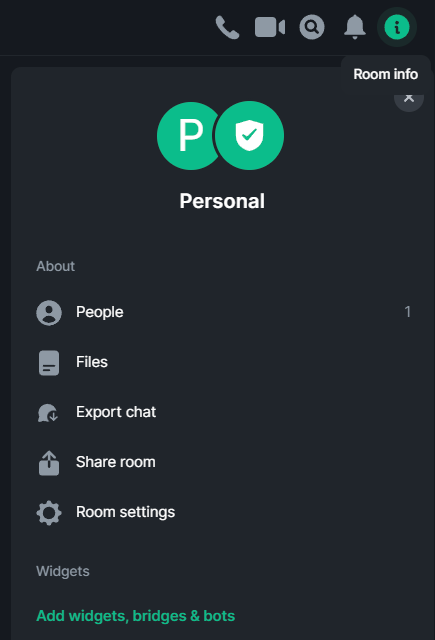
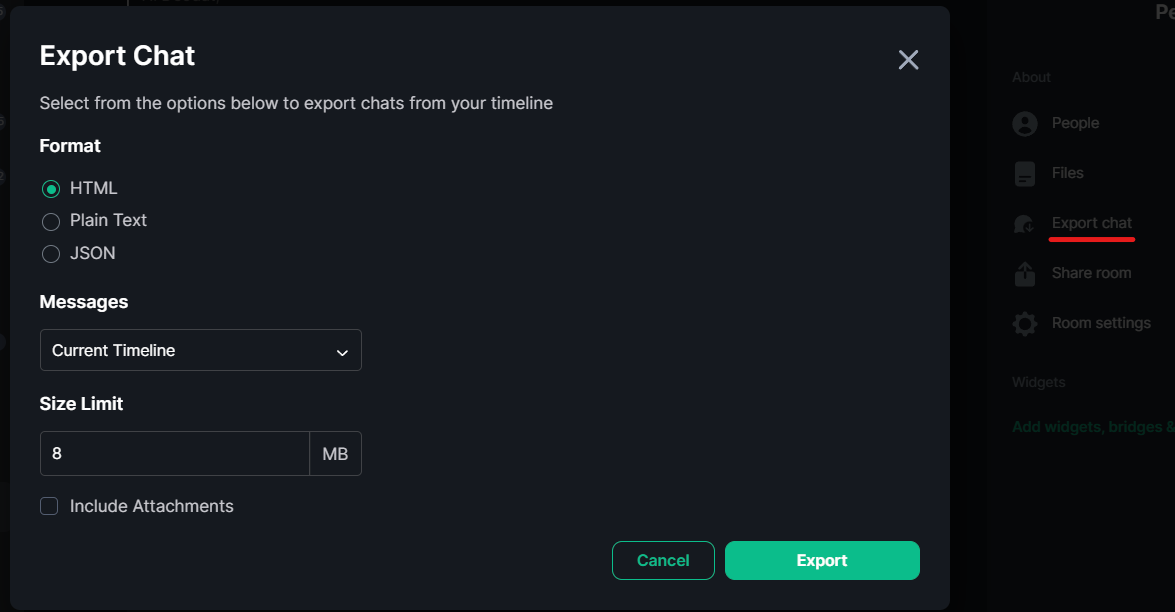
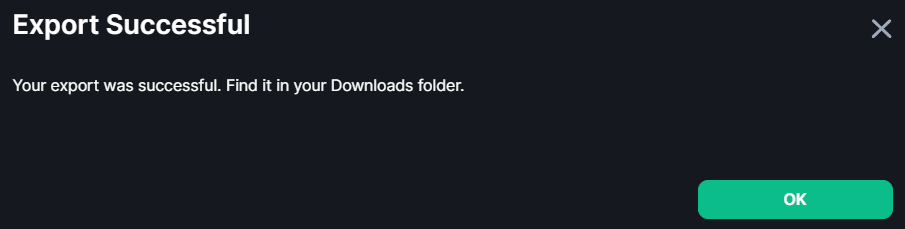
Matrix Spaces
Documentation covering from basic usage and creation of spaces to space management.
Understanding Matrix Spaces
Matrix Spaces are a way to group multiple rooms together. Rooms can be in multiple spaces at once, and spaces themselves can also be included within other spaces.
Much like rooms, Spaces can be made available publicly or kept private. From the Element Matrix clients, Element Web or Element Mobile / Desktop Apps, spaces can be found within the vertical navigation menu along the left. When viewing a space, all rooms and chats are filtered to show you only those within the selected space.
What's Next?
Getting Started
To start learning the basics of creating and using rooms, check our 'Getting Started' series of docs on the subject, starting with Creating a Space.
Getting Started: Creating a Space
Disclaimer: This guide refers to using the Element Matrix clients, Element Web or Element Desktop apps
You can create a space by clicking the + Create a space button, located at the bottom of the vertical navigation menu on the left when using the Element Web App.

Starting a New Space
After clicking Create a space, you will be presented with the Create a space prompt, from here you need to first choose whether the space should be Public or Private. You will then need to fill in the required details to create your space:
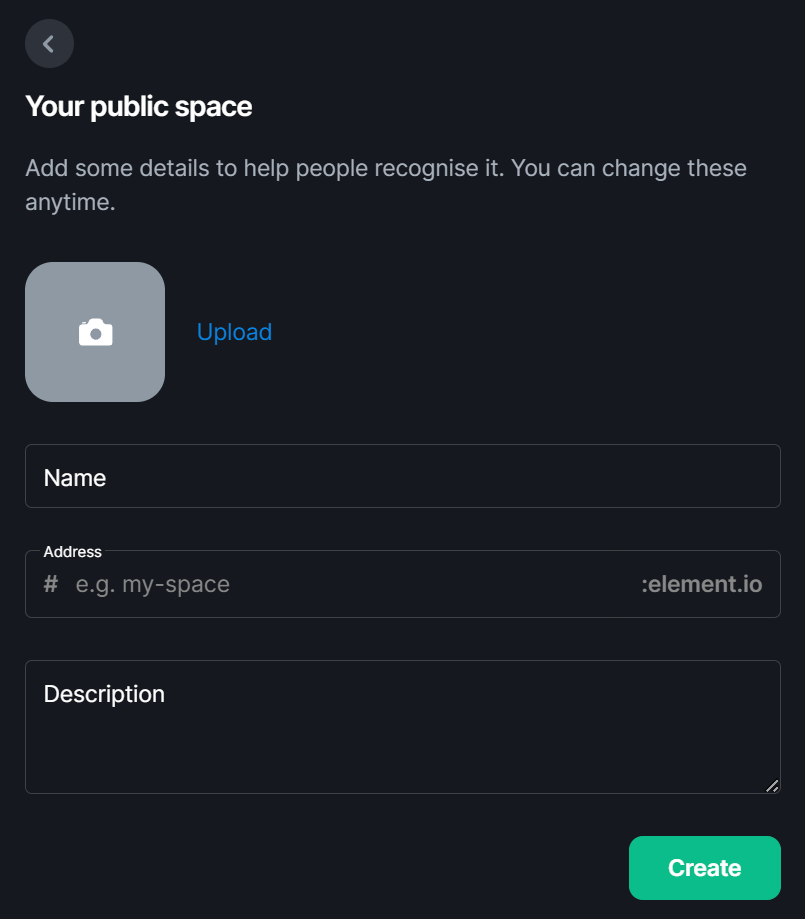
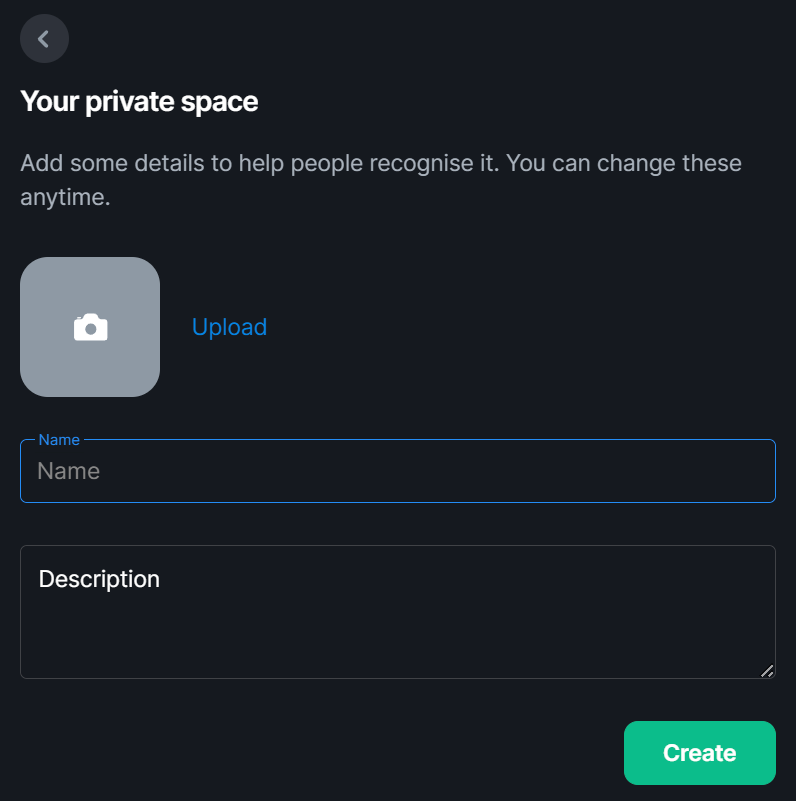
- Avatar: Here you can upload a picture for your space, this will be visible in the navigation menu and on the space overview.
- Name: This is the name your space will appear as, if you are making a public room, make sure you choose a name that will be easily found when searching and is appropriate for the homeserver.
-
Address: Available when creating a public space, this is the address for your space. User's will be able to link to it using this address when typing
# - Description: A description of the space and it's purpose will help inform others of why the space exists and help them decide whether it's a space they'd like to join.
Bridges
Documentation covering how to use the various Matrix / Element bridges
Setting up Hookshot without E2EE support in encrypted rooms
If your Hookshot instance does not have E2EE support enabled but you still want to add it to an encrypted room, you can do this with a couple of caveats:
- You cannot send commands to Hookshot in the room as Hookshot cannot read any messages in the room

- Any messages sent by Hookshot will be unencrypted
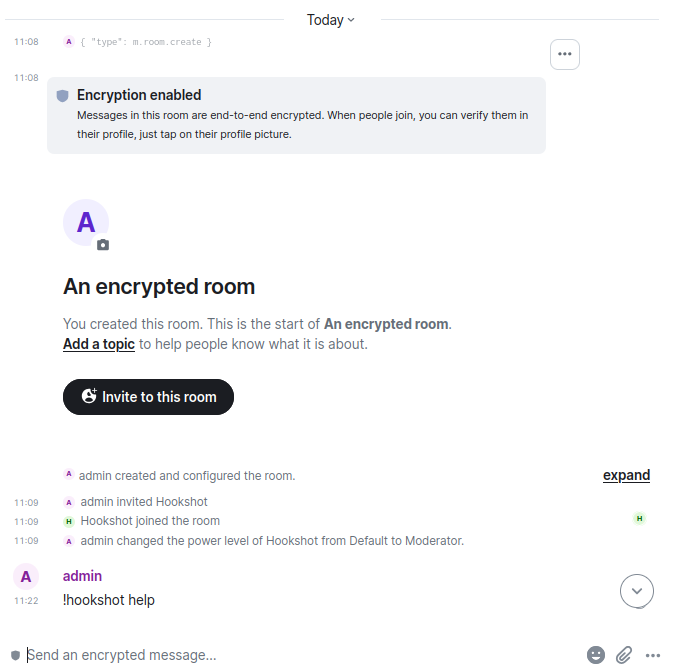
To set this up:
- Invite your Hookshot bot to the room, this works the same as with unencrypted rooms. The bot follows the same permissions in encrypted vs. unencrypted rooms and will join when invited.
- Promote the Hookshot bot to the required room permissions. By default, Moderator.
- If your Hookshot is configured to automatically add the widget on invite, no further configuration is required.
- If not, you need to manually send the
setup-widgetcommand unencrypted. By design, it is impossible to send an unencrypted message into an encrypted room using Element. So to do it:- Grab your account access token from Element settings -> Help & About -> Advanced -> Access Token

Your access token grants full access to your Matrix account, threat it carefully like you would with a password
- Grab the room ID for the room you wish to add Hookshot to by clicking the
(i)Room Infobutton, then Settings in the right column - Under Advanced, copy the Internal room ID

- Replace the leading
!(exclamation mark) with%21(for example,!QrmxBsBKPajykCohPz:localhost:8448becomes%21QrmxBsBKPajykCohPz:localhost:8448) - Find the URL where your Matrix server is exposed. This may not be the same as the domain in your Matrix ID
- Open a terminal on your computer. On Windows; PowerShell, on Mac; Terminal
- Send the command below for your operating system. Replace
domain-where-your-matrix-server-is-exposed,room-idandaccess-tokewith the values from earlier. Note, if you are sending more than one message using your terminal, you need to change1234to another value each time.- Mac and Linux:
For example:curl --request PUT \ --url 'https://domain-where-your-matrix-server-is-exposed/_matrix/client/r0/rooms/room-id/send/m.room.message/1234' \ --header 'Authorization: Bearer access-token' \ --header 'content-type: application/json' \ --data '{ "msgtype":"m.text", "body":"!hookshot setup-widget" }'curl --request PUT \ --url 'https://localhost:8448/_matrix/client/r0/rooms/%21QrmxBsBKPajykCohPz:localhost:8448/send/m.room.message/1234' \ --header 'Authorization: Bearer syt_YWRtaW4_epoEMAUauwwFpsOGJxIg_471LjM' \ --header 'content-type: application/json' \ --data '{ "msgtype":"m.text", "body":"!hookshot setup-widget" }' - Windows:
For example:$url = "https://domain-where-your-matrix-server-is-exposed/_matrix/client/r0/rooms/room-id/send/m.room.message/1234" $headers = @{ "Authorization" = "Bearer access-token" "Content-Type" = "application/json" } $body = @{ msgtype = "m.text" body = "!hookshot setup-widget" } | ConvertTo-Json Invoke-RestMethod -Uri $url -Method Put -Headers $headers -Body $body$url = "https://localhost:8448/_matrix/client/r0/rooms/%21QrmxBsBKPajykCohPz:localhost:8448/send/m.room.message/1234" $headers = @{ "Authorization" = "Bearer syt_YWRtaW4_epoEMAUauwwFpsOGJxIg_471LjM" "Content-Type" = "application/json" } $body = @{ msgtype = "m.text" body = "!hookshot setup-widget" } | ConvertTo-Json Invoke-RestMethod -Uri $url -Method Put -Headers $headers -Body $body
- Mac and Linux:
- Grab your account access token from Element settings -> Help & About -> Advanced -> Access Token
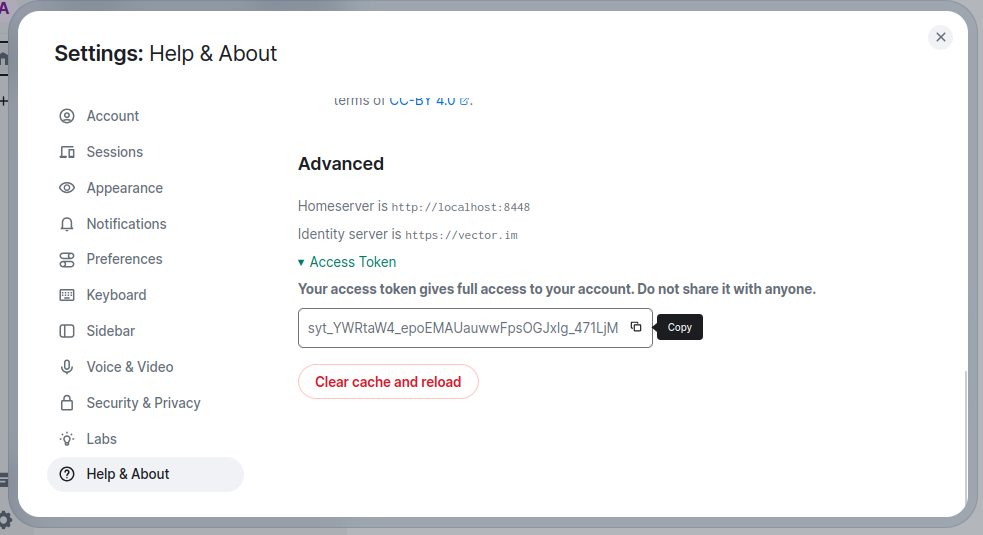
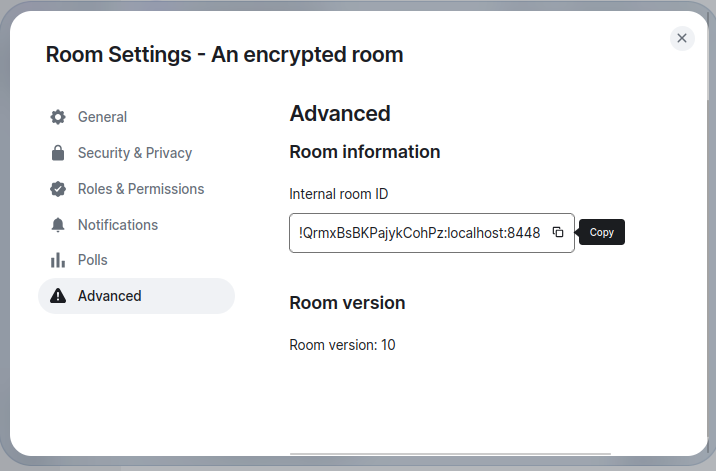

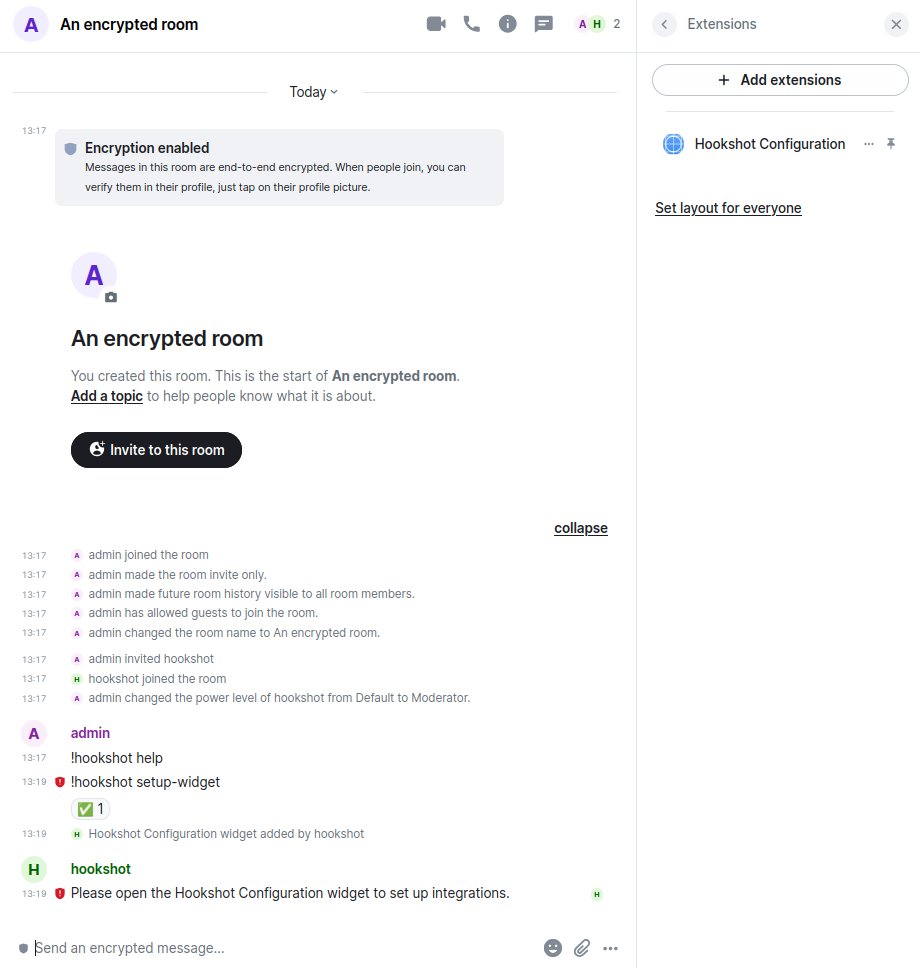
My message was sent without encryption and Hookshot responded. You can now use Hookshot via the widget normally.
Note that all messages sent by Hookshot remain unencrypted. Element warns you with the red shield on the messages.
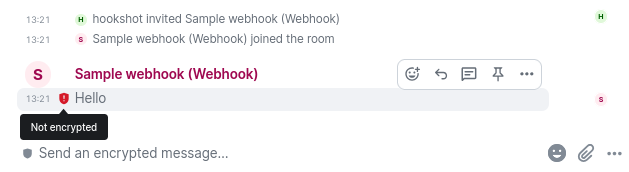
Using the Matrix IRC Bridge
The Matrix IRC Bridge is an IRC bridge for Matrix that will pass all IRC messages through to Matrix, and all Matrix messages through to IRC.
If you're an end user of the bridge, it's unlikely you will need to use the below commands, your IRC Channels may already be bridged to specific Matrix Rooms so you can simply join the Room from Matrix, or the Channel from IRC and communicate with Matrix/IRC users. Our End User focused documentation might be better suited to getting started with Matrix and IRC - Using the Matrix IRC Bridge as an End User
Please also refer to the Bridge Documentation for additional guidance.
The bridge is currently used on the matrix.org homeserver to bridge a number of popular IRC networks.
Getting Started with the Matrix IRC Bridge
In this guide we will be using the Matrix.org bridge to the Open and Free Technology Community (OFTC) IRC network. The key information to note is the Room alias format (#_oftc_#channame:matrix.org) and Appservice user (@oftc-irc:matrix.org). Though note this may differ from time of writing, check the link above to up-to-date details.
The Appservice user is the bot that interacts with the bridge, from a Direct Message with this user you will issue commands to connect to the desired channels and perform specific functions. First, invite the user to a DM:
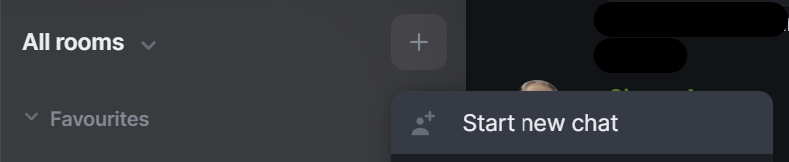
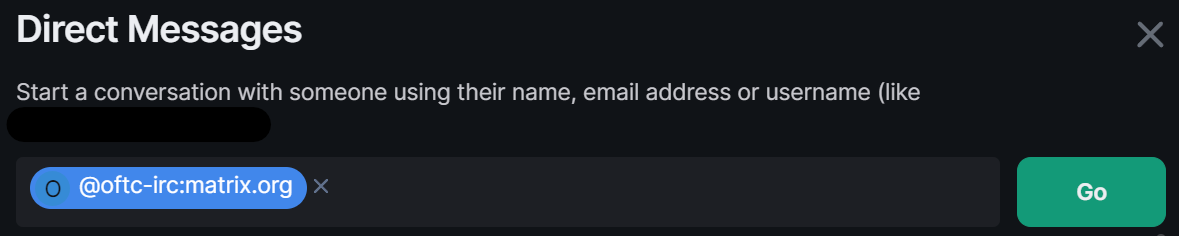
Using @oftc-irc:matrix.org we start a chat, your first message can be anything to create the room. The bot should join the room and then be responsive to commands.
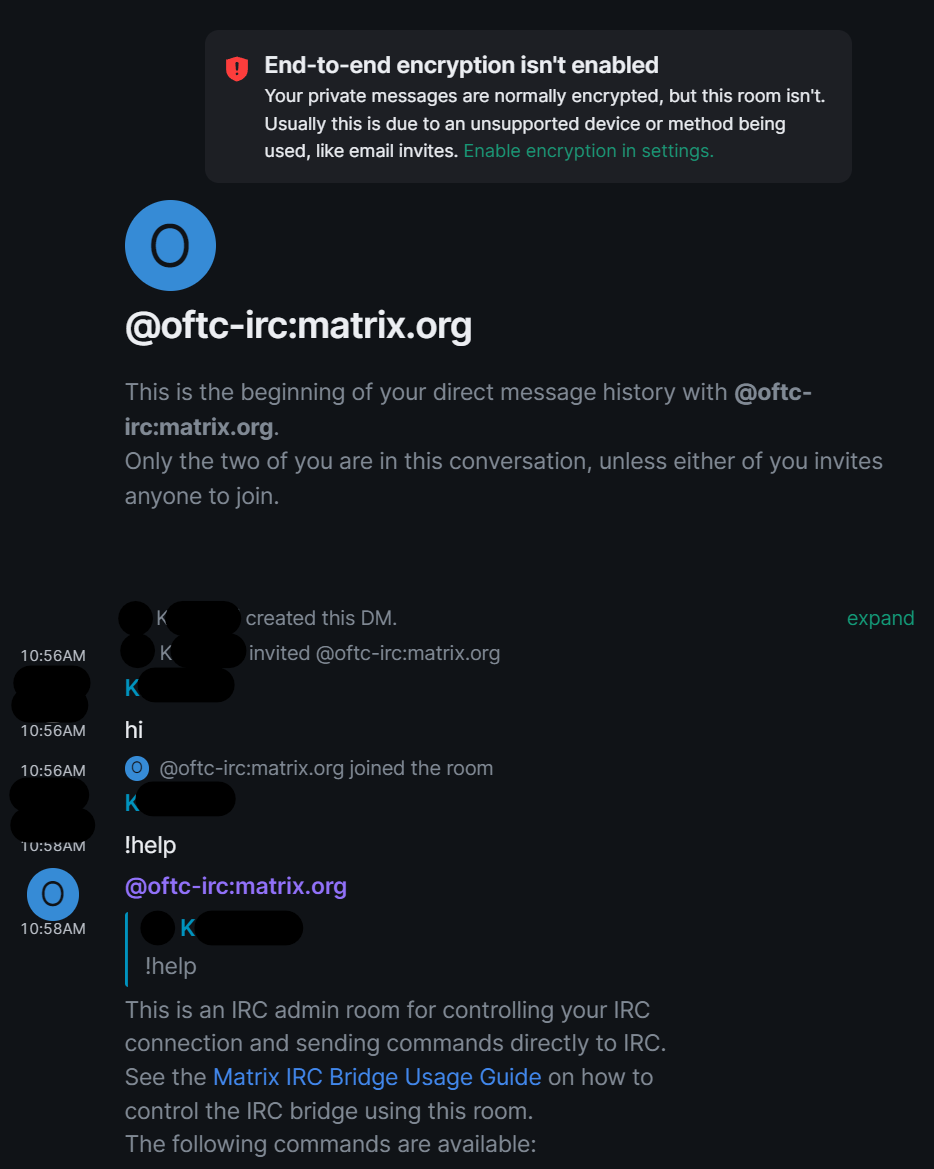
Matrix IRC Bridge Bot Command Overview
Commands to the bot are prefixed with !, to get started try !help, which should result in the bot listing out the available commands for use. You should see something like the below:
Actions
-
!cmd [irc.example.net] COMMAND [arg0 [arg1 [...]]]: Issue a raw IRC command. These will not produce a reply.(Note that the command must be all uppercase.) -
!feature feature-name [true/false/default]: Enable, disable or default a feature's status for your account.Will display the current feature status if true/false/default not given. -
!join [irc.example.net] #channel [key]: Join a channel (with optional channel key) -
!nick [irc.example.net] DesiredNick: Change your nick. If no arguments are supplied, your current nick is shown. -
!quit: Leave all bridged channels, on all networks, and remove your connections to all networks. -
!active: Mark yourself as active, which will exclude you from any idleness kicks.
Authentication
-
!storepass [irc.example.net] passw0rd: Store a NickServ OR SASL password (server password) -
!reconnect [irc.example.net]: Reconnect to an IRC network. -
!removepass [irc.example.net]: Remove a previously stored NickServ password -
!username [irc.example.net] username: Store a username to use for future connections.
Info
-
!bridgeversion: Return the version from matrix-appservice-irc bridge. -
!listrooms [irc.example.net]: List all of your joined channels, and the rooms they are bridged into. -
!whois [irc.example.net] NickName|@alice:matrix.org: Do a /whois lookup. If a Matrix User ID is supplied, return information about that user's IRC connection.
Management
These commands only work for bridge administrators.
-
!unlink !room:example.com irc.example.net #foobar: Unlink an IRC channel from a Matrix room. You need to be a moderator of the Matrix room or an administrator of this bridge. -
!plumb !room:example.com irc.network.net #channel: This command allows you to plumb a IRC channel into a room without using the HTTP provisioning API. This command does NOT validate that you have permission to do this on the IRC channel so please take care to ensure that the IRC channel is aware of your actions. You must invite the bridge bot into the Matrix room for this to work.
Using the Matrix IRC Bridge
Depending on your bridge setup you may have multiple IRC Networks accessible from your IRC Bridge bot, if so, you will need to specify the IRC Network after the each command. This guide is using @oftc-irc:matrix.org which is dedicated to the W3C IRC network so commands do not need to specify.
For any command given arguments wrapped in [] are optional, make sure to specify them if required for your usecase.
Joining a IRC Channel
The most basic usage of the bridge is to join IRC channels to talk with IRC users, you can do this with the !join command. Simply specify the channel you'd like the join:
-
!join [irc.example.net] #channel [key]
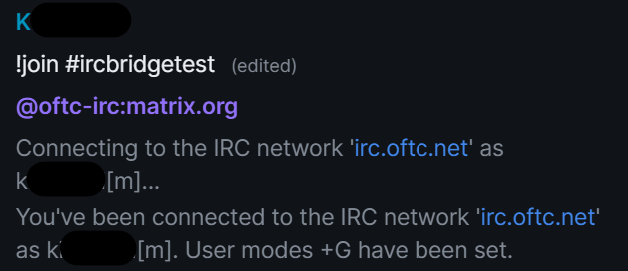
The first time you run such a command, the bot will connect to the IRC network, then inform you that you are connected. The nickname your user appears as in IRC is dependant on the bridge's configuration. Using the example above, you can see [m] has been appended to the users Matrix display name.
If the Channel you are joining hasn't yet been joined via the bot, it will create a Matrix room linking it with the IRC Channel. If the room already exists, the command will simply invite you to the already created room. Likewise, if the Channel doesn't yet exist on the IRC Network, it will be created and your user sent an invite.
You will then recieve an invite to a Matrix room, connected to that IRC Channel.
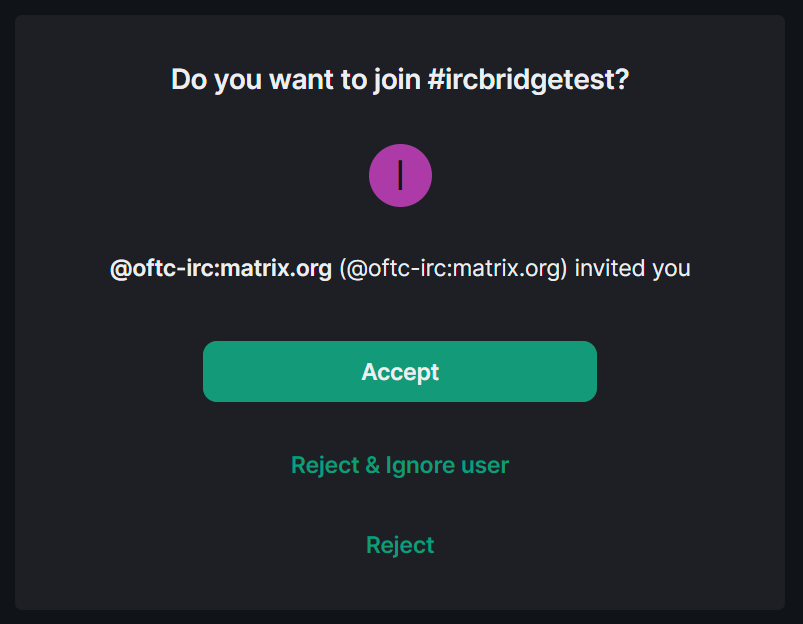
Once you've joined the room, you can then communicate with others within the channel.
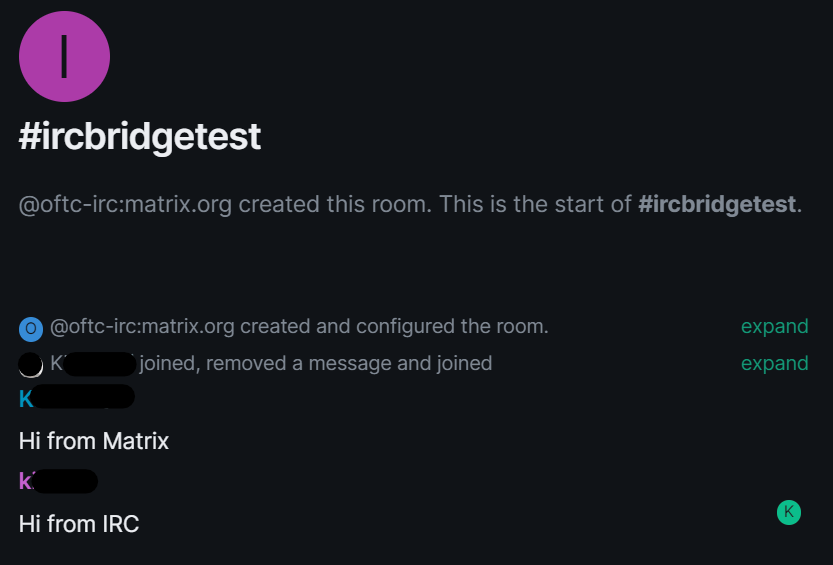
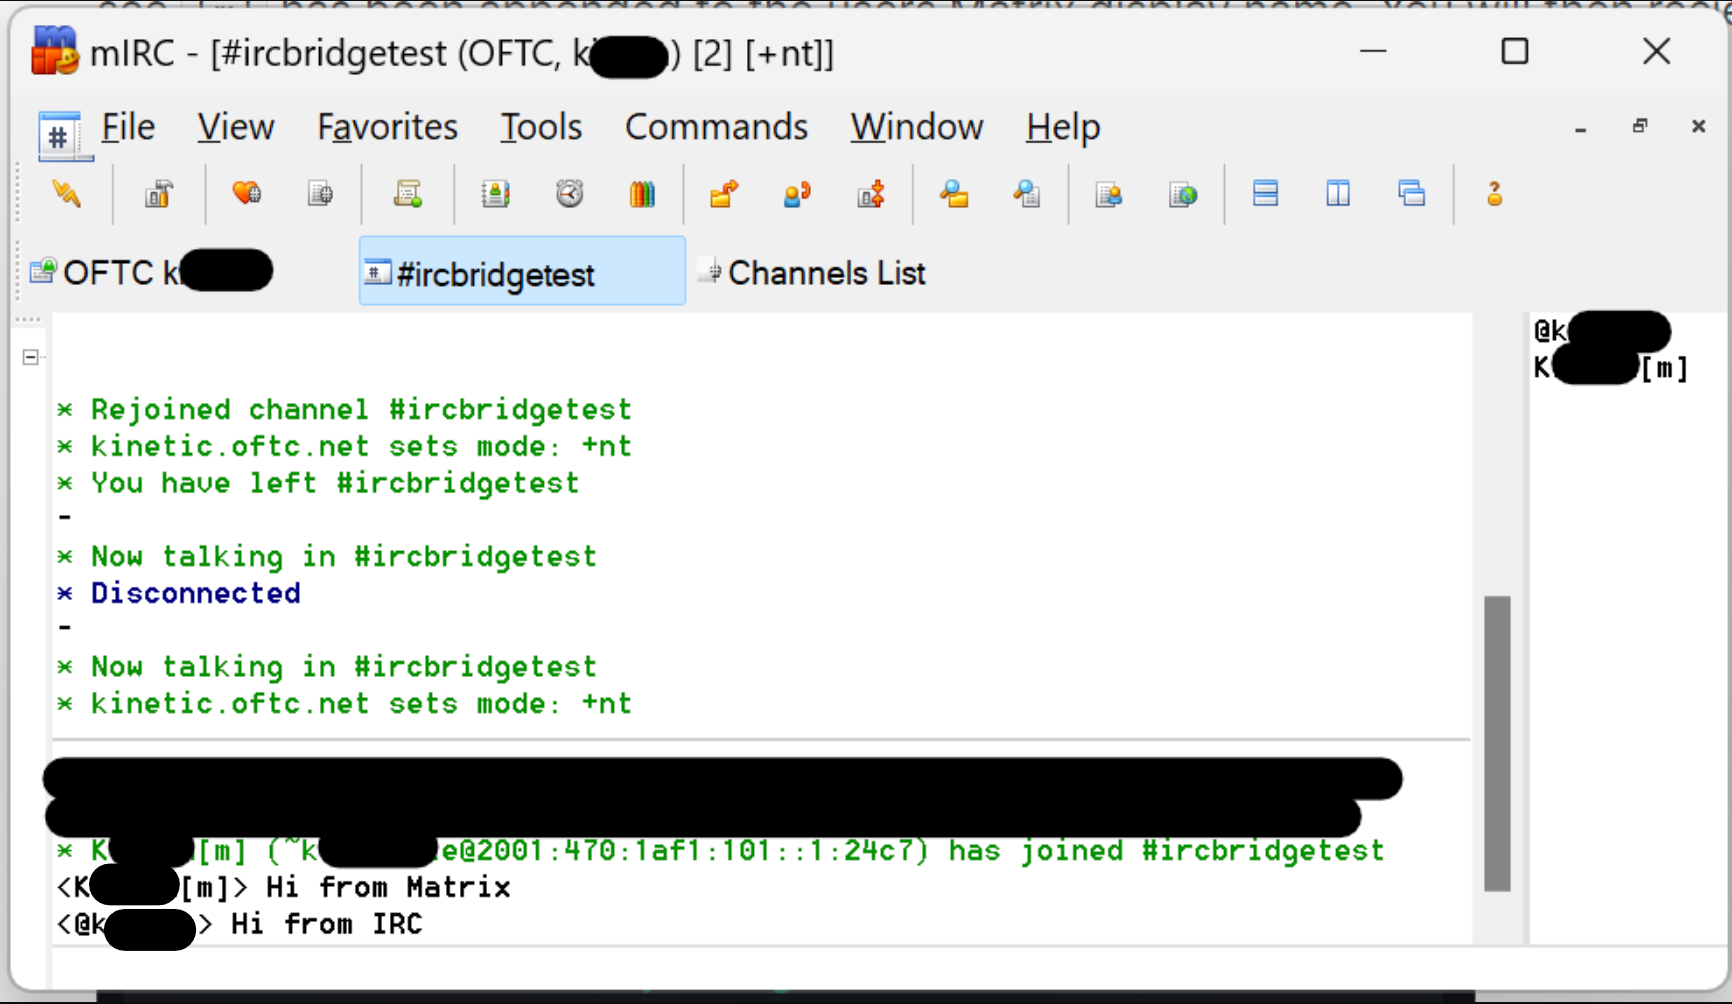
Listing joined IRC Channels
After joining a number of IRC Channels you may want to retrieve a list of all the Channels you are joined to, and the associated Matrix rooms. You can do this with the !listrooms command. The bot will respond including clickable links to jump straight to the Matrix room.
-
!listrooms [irc.example.net]
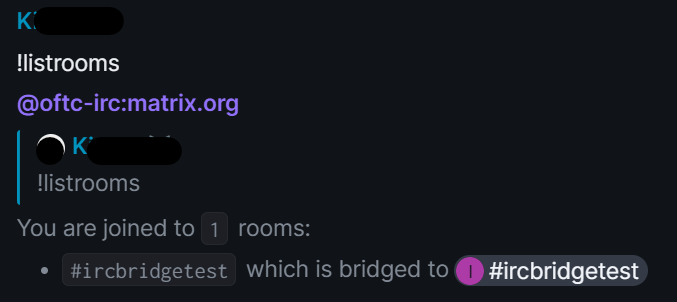
Staying active
You can use the !active command to mark yourself as active, which will exclude you from any idleness kicks.
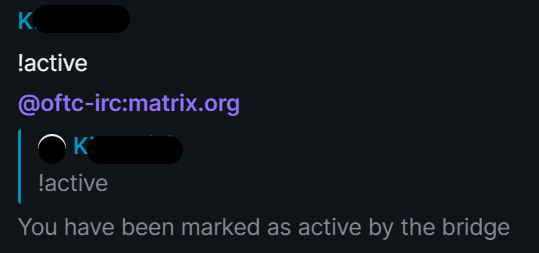
Changing your Nickname
To change the nickname presented to IRC users, simply use !nick. Provide your desired nickname and it will be updated on the IRC Network, you can also not provide any nickname for the bot to output your current nickname.
-
!nick [irc.example.net] DesiredNick
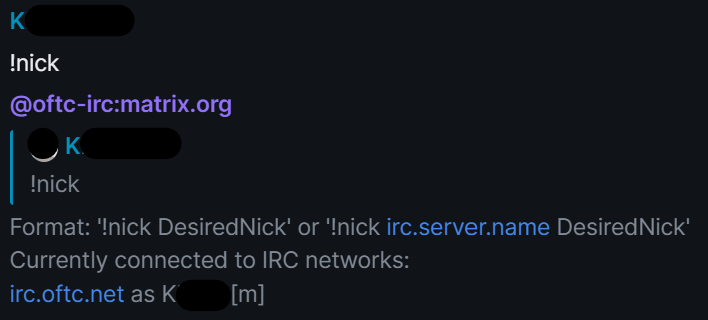
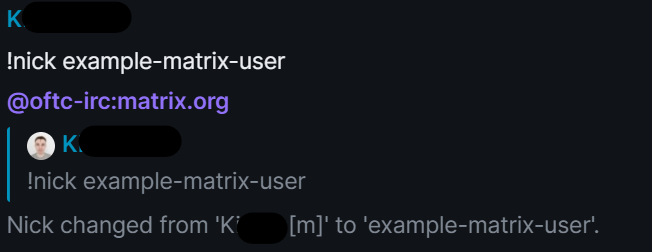

Finding out more information on IRC / Matrix users
You can use the !whois command, supplying either a Matrix ID to retrieve their IRC nickname, or a IRC nickname to information on what channels that user is in. The !whois command is also useful to test your connection to the IRC network, supply your own Matrix ID and if there's any issues with the connection the command will produce an error.
-
!whois [irc.example.net] NickName|@alice:matrix.org
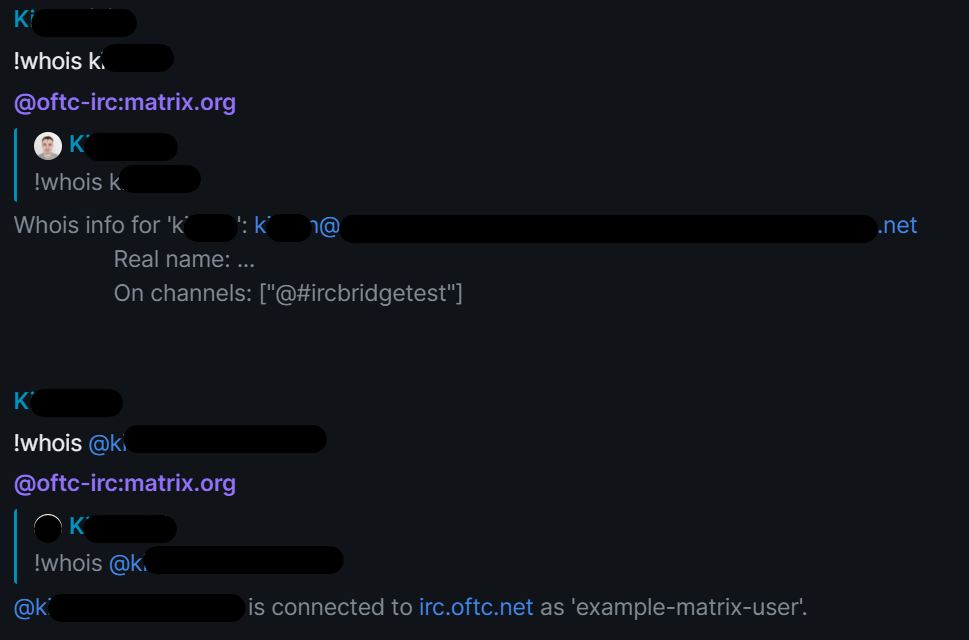
Direct Messaging between Matrix and IRC
You can start a DM with an IRC user by simply clicking there profile icon from an existing room linked to an IRC Channel. Then from their profile panel, click Message to start a chat. Enter a message to create the room (note they will not see this message), then wait for there user to join the room - once joined, you can send a message which will then be sent to the IRC user.
IRC users can also start DMs with Matrix users, they can do this by double clicking the Matrix users' name within the participants list of a channel, or if supported by your client, using the /query NICKNAME or /msg NICKNAME MESSAGE commands. Once a message is sent, the Matrix user will receive an invite from them to start chatting.
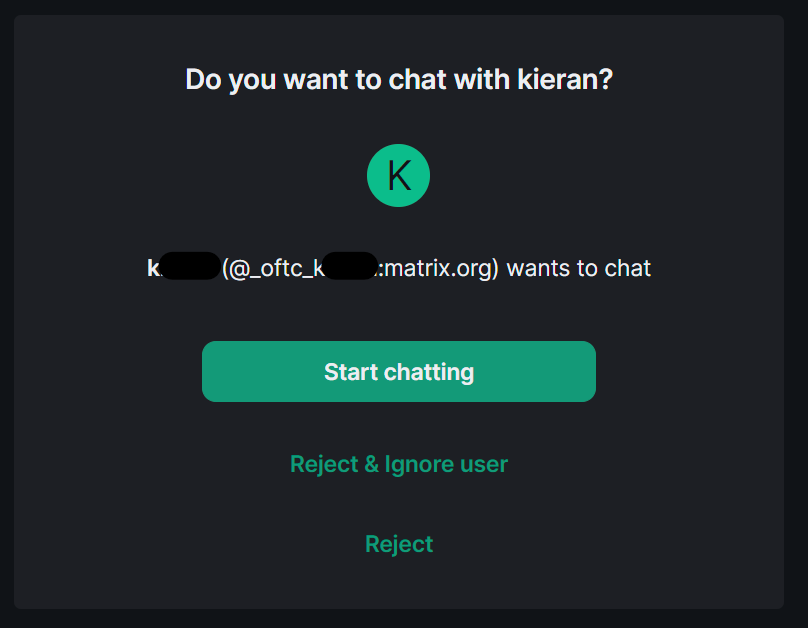
If you know the configuration of your bridge (or by checking existing IRC users), you can also manually start a DM with a user. Simply start a new chat using the username format the bridge uses. In the example above we can see that the format is @_oftc_NICKNAME:matrix.org. So we can initiate chats with any nickname by following that format.
Leaving an IRC Channel
Leaving a Channel is simply a case of leaving the Matrix room. Find the room in the Left Panel, hoover over its name, then click the 3-dot menu then Leave.
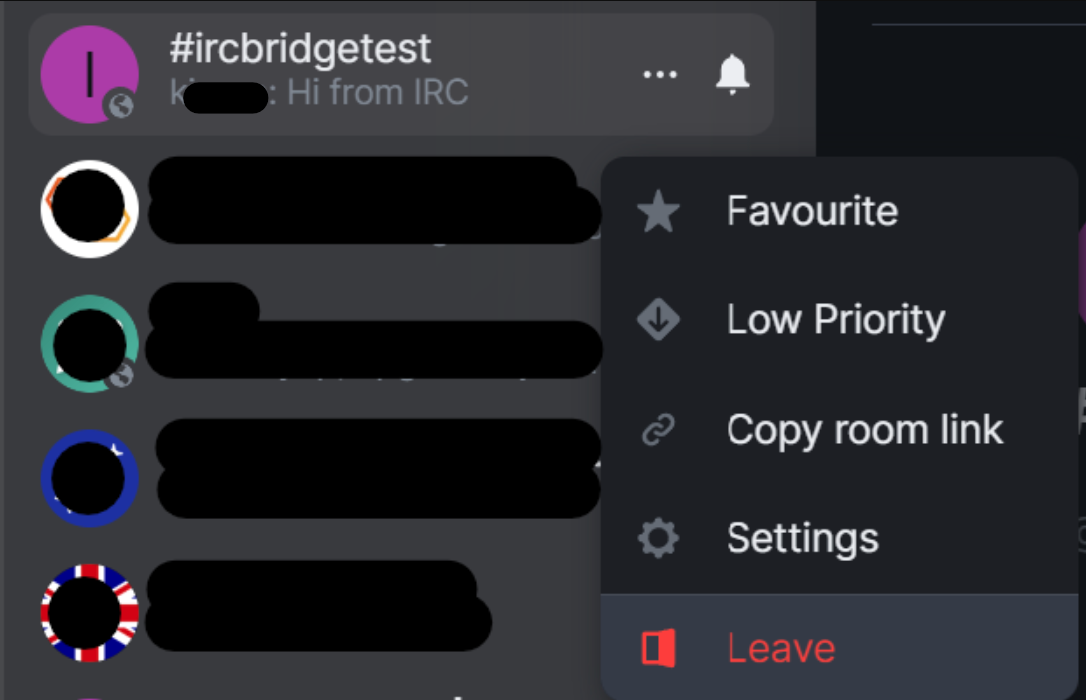
Leaving all IRC Channels
If you wish to disconnect from IRC and leave all Channels (/ Matrix linked rooms) you can simply issue the !quit command. Doing so will remove you from all the rooms, you can find them again at the bottom of the Left Panel under Historical.
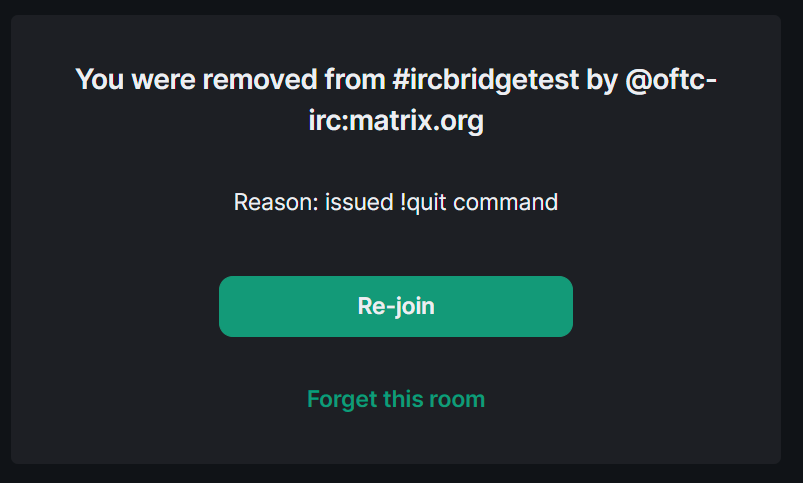
Advanced Bridge Usage
IRC Authentication
If you need to join the IRC Network using authentication credentials you will need to use the !storepass and possibly !username commands. With these you can set NickServ / SASL password and username respectively. Once completed, simply use !reconnect to rejoin the network with the provided credentials.
-
!storepass [irc.example.net] passw0rd -
!username [irc.example.net] username -
!reconnect [irc.example.net]
You can also remove your stored password using, you will then need to use !reconnect to rejoin without the credential:
-
!removepass [irc.example.net]
Troubleshooting bridge problems
If you are encountering issues with the bridge, first try using !reconnect, to see if disconnecting and reconnecting solves your issues. Otherwise !bridgeversion is a useful command to advise the version of the bridge. Supply this information, alongside any debug logs to the administrator of the bridge to help them troubleshoot your issue.
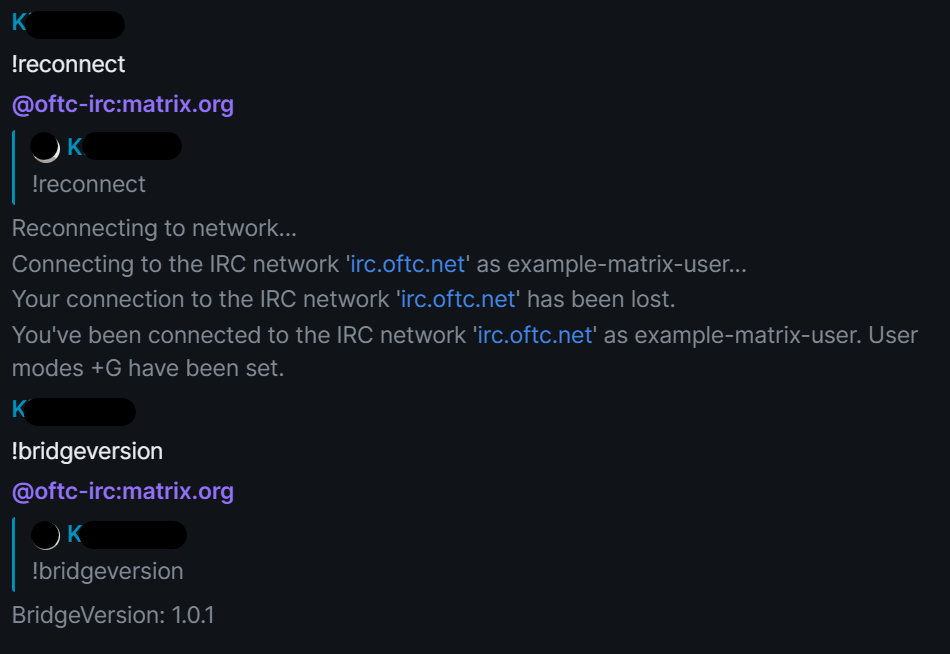
Sending raw IRC commands
It's possible to use the bot to issue raw IRC commands, to do so you'll need to use !cmd, followed by the commmand (in CAPS) and any additional arguments. Unless there is an error with the command, sending !cmd will not produce a reply.
-
!cmd [irc.example.net] COMMAND [arg0 [arg1 [...]]]
For example, if you wanted to send a private message without creating DM in Matrix, you could use the /PRIVMSG IRC command. To do so you'd send:
!cmd PRIVMSG USERNAME MESSAGE
The recipient will then receive the message, but a room in Matrix wont have been created.
Unlinking an IRC channel from a Matrix room
In order to unlink a channel you will need to use the !unlink command, followed by the matrix room ID, IRC network and channel name. To successfully perform this action you will need to be a moderator of the Matrix room or an administrator of the bridge.
-
!unlink !room:example.com irc.example.net #foobar
You can find the matrix room id by accessing the room's settings page, then within the Advanced section you will find the Internal Room ID.
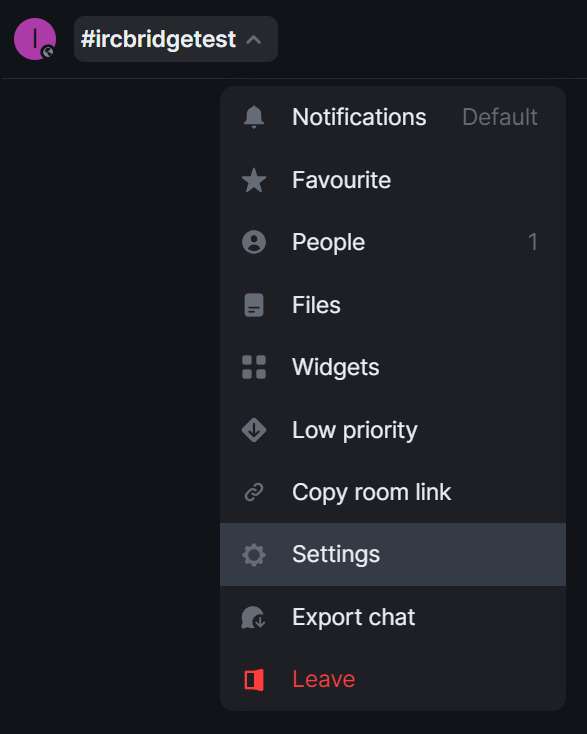
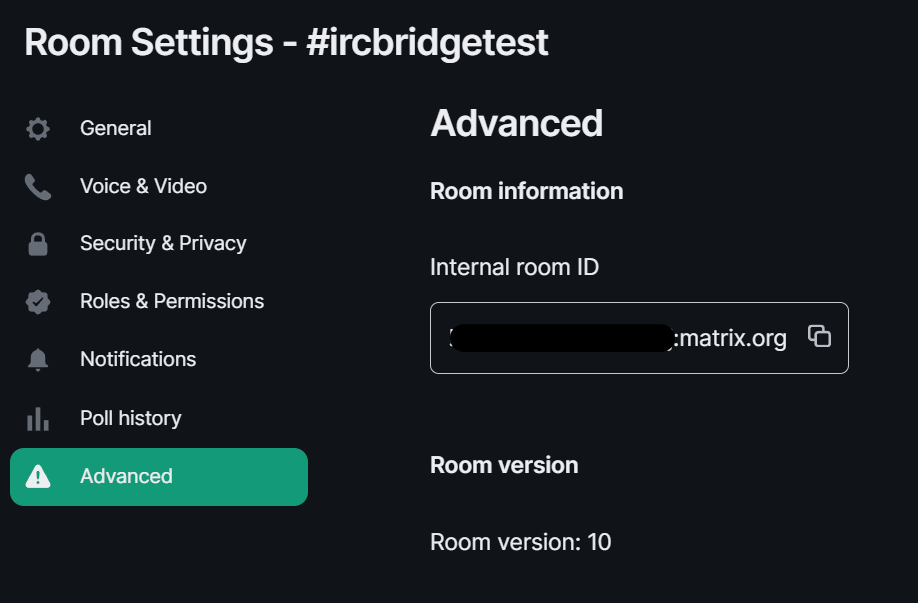
Using the Matrix IRC Bridge as an End User
If your homeserver has the Matrix IRC Bridge configured it will pass messages to and from IRC. Depending on your homeservers' IRC bridge configuration you will interact with IRC through various means; for instance your homeserver may have pre-configured Matrix Rooms bridged to IRC Channels; you may have the ability to join / create bridged rooms dynamically; or you may use private messaging to speak directly with a specific user in IRC.
Getting Started
Joining your first IRC Channel via a bridged Matrix Room
To start, the most basic usage of the IRC bridge would be to join an IRC Channel to communicate with both Matrix and IRC users together. Your homeserver administrators will have preconfigured bridging from specific IRC Channels to Matrix Rooms, they should be able to advise which rooms you should initially join, for instance, a #welcome Channel / Room.
When you join a bridged room and send a message for the first time, you'll be sent an invitation to a DM with your homeservers' IRC Bridge Bot. The Matrix User ID of the bridge bot is configurable by your homeservers administrator, but the DM room should be called IRC Bridge status prepended with the IRC Network name that the room was bridged to.
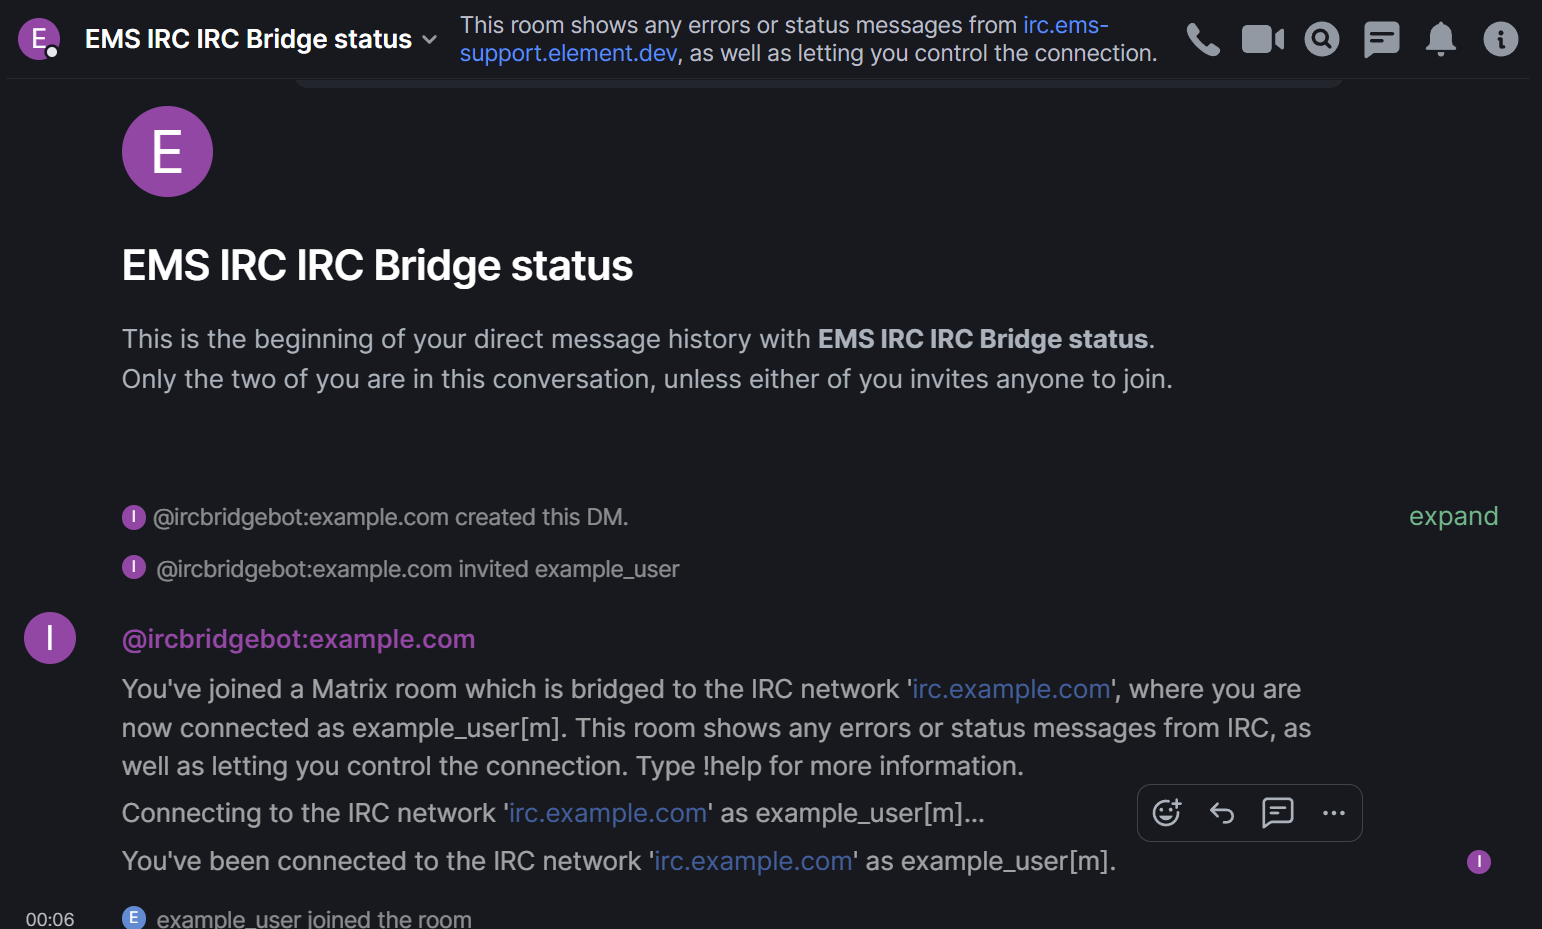
This room will allow you to keep check on your connection to the IRC network, the initial message from the bridge bot should confirm you connected successfully and the nick name in IRC you have connected as. This is customisable by your homeserver admin, in this guides' example environment, you can see Matrix users appear in IRC as their Display Name followed by [m].
Messaging in IRC Channels
Once you have joined a bridged Matrix Room you're already able to communicate with any IRC users connected to the IRC Channel bridged with the room. You can send messages, emoji 👋, even upload attachments or send voice messages. So what does an IRC user see?
While Matrix messages can be formatted in a number of ways, supporting Markdown and HTML, IRC messaging is mostly simple text. You'll find sending simple text messages and emoji works best whereas Markdown and HTML, whilst it will be sent, may not be correctly rendered in an IRC client.
When sending attachments, voice messages, and multi-line messages (if restricted by your homeserver) IRC users will instead see a message that you uploaded a file, a voice message or a truncated version of your multi-lined messages each with a link to download / listen / view.
From the below examples, of the Element Matrix and mIRC IRC clients respectively, you can see differences in how messages are rendered, that reactions are not supported in IRC etc.
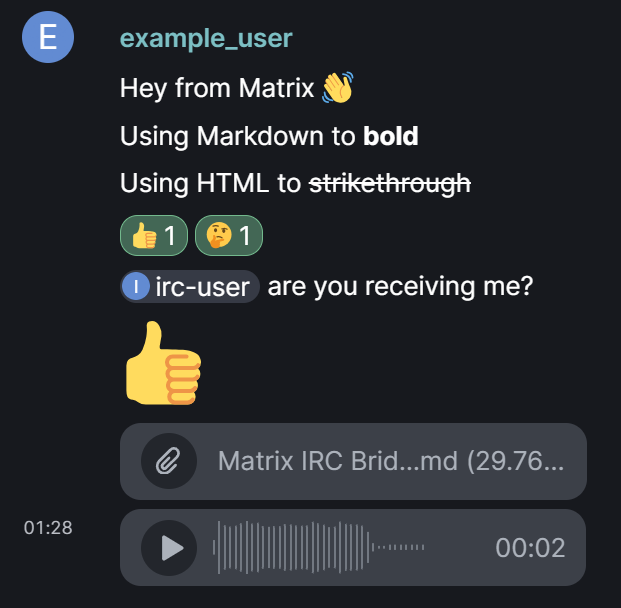
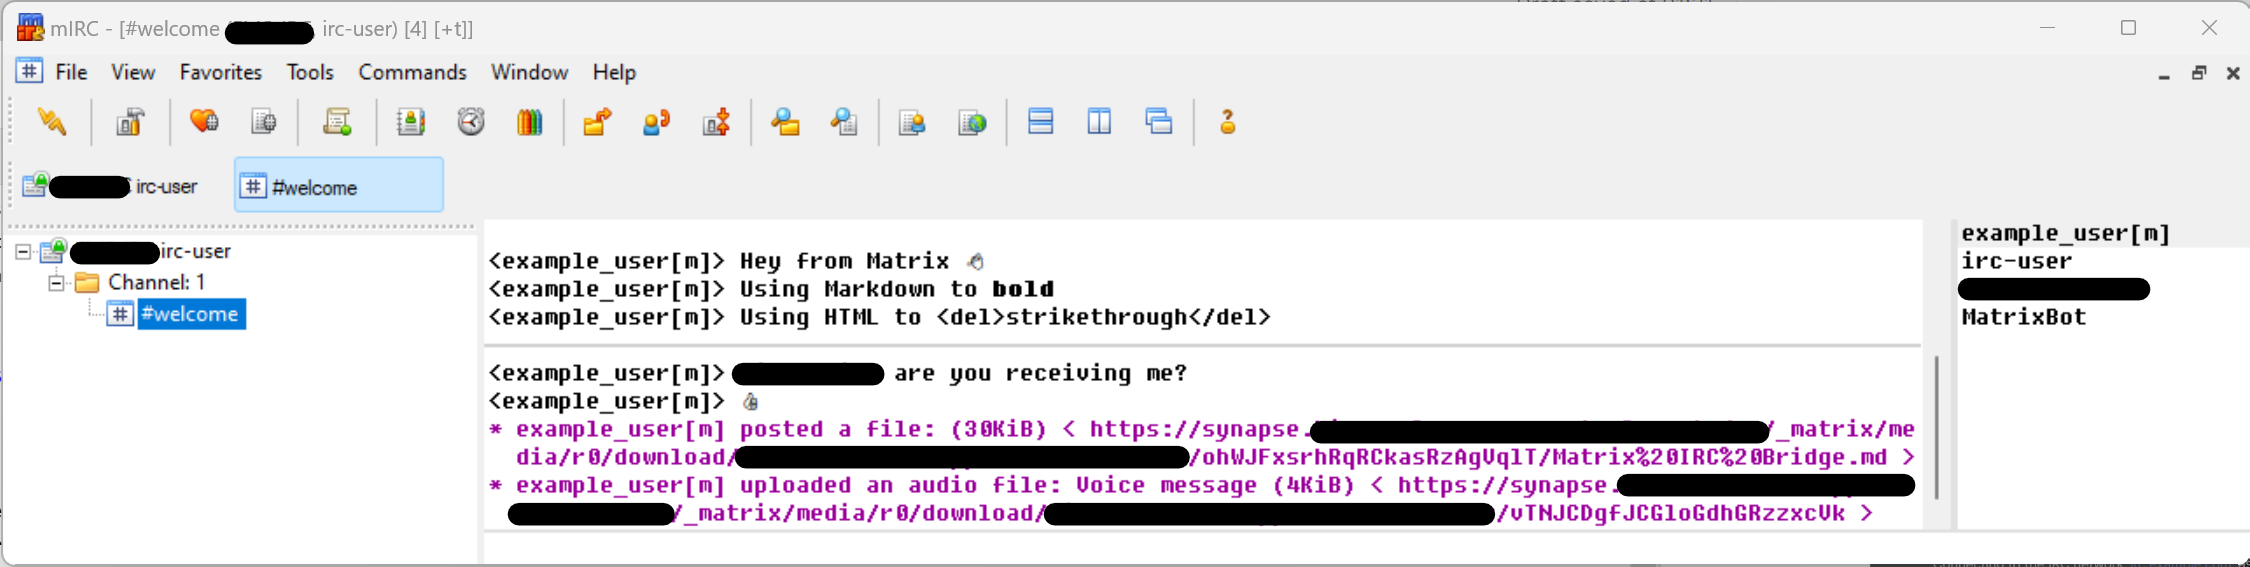
Private Messaging IRC Users
So long as private messaging is enabled by your administrator you can do so just like with any other Matrix user. IRC users appear in Matrix as Matrix users, you can view the list of people in a room by clicking the i icon in the top-right of the client, then selecting People. Here you can see all users within the room, including those users created to represent IRC users. The format for their Matrix User IDs is configured by your homeserver administrator, but is usually prefixed with irc_ followed by their IRC nick name.
Just like with any other Matrix user; you can click on a person from this pane; click on their profile picture next to any message they've sent within the room; or simply search for them to initiate the DM. Compose your initial message and send to start a Direct Message with the IRC user. IRC user can likewise start a private message with you, using your IRC nickname - if they do, you will be invited to a DM just like any other Direct Message.
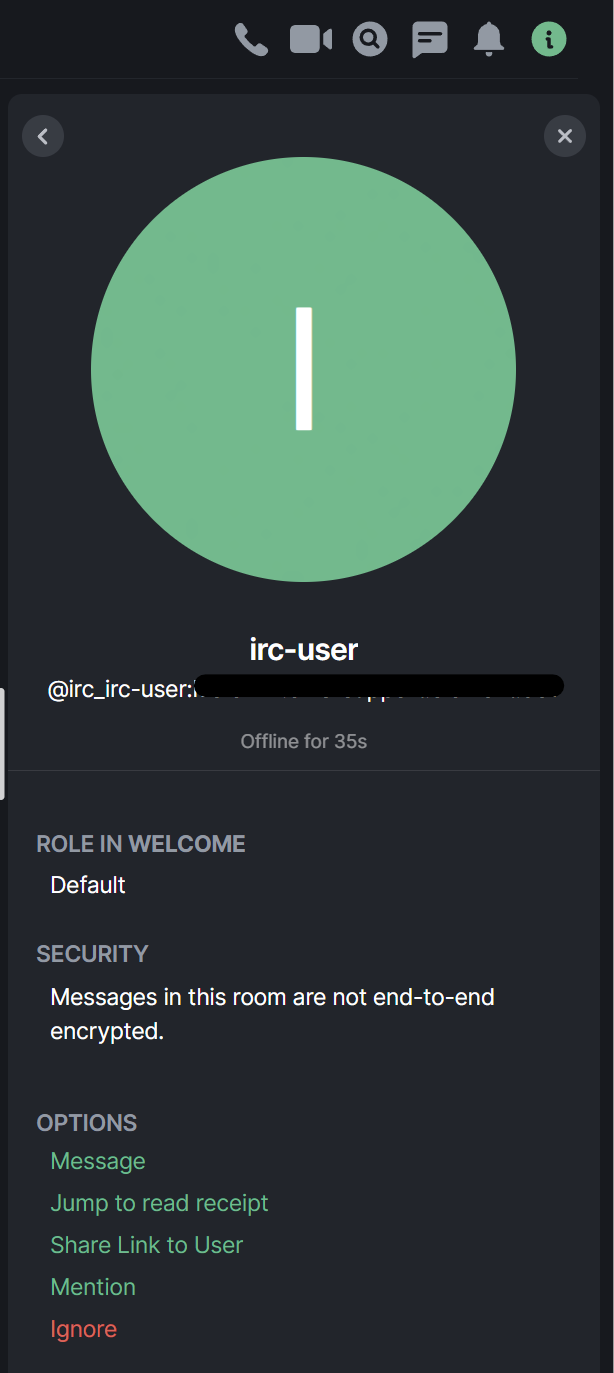
Going Further
Changing your IRC Nickname
If permitted, you may wish to change the nick name used when you connect to the IRC Network. You can do this by speaking with the bridge bot within the IRC Bridge status room you were invited too. Don't worry if you left the room, simply invite the bridge bot into a new DM and it'll work just the same.
You can do this by sending !nick to the bot, you'll notice the bot will respond advising on how to format the command to change your nick name and supply the nick name your are currently using on each connect IRC Network.
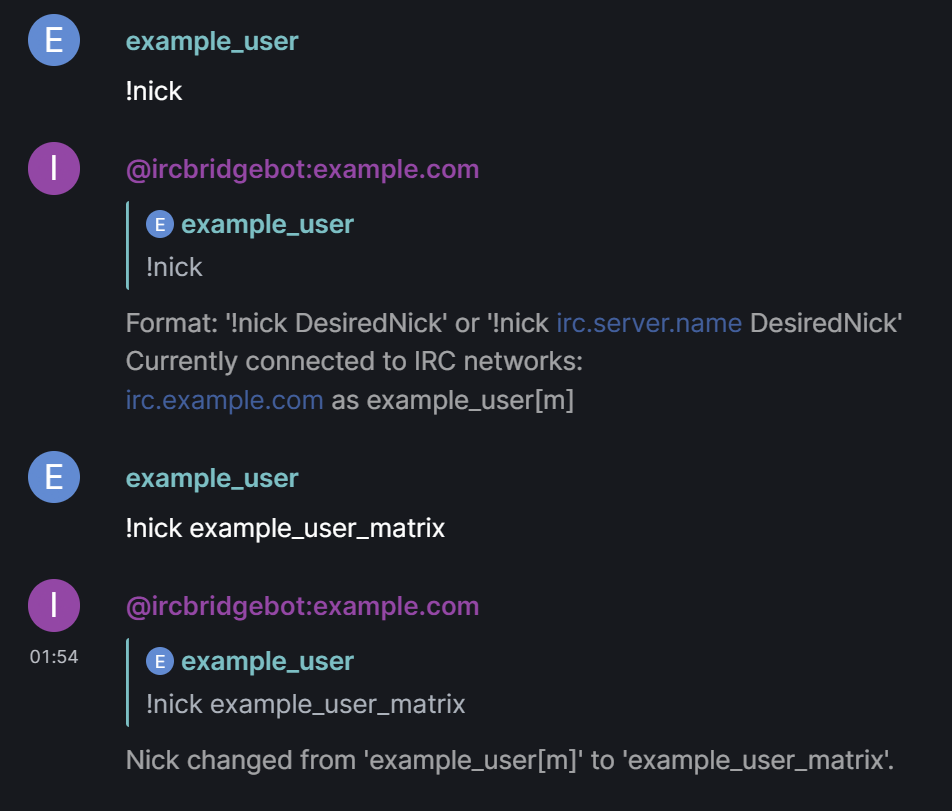
Joining an as-yet unbridged IRC Channel
If permitted, you may want to join a conversation within an IRC Channel, not yet bridged to any specific Matrix room. Just like with changing your nick name, you can do this by speaking with the bridge bot within the IRC Bridge status room you were invited too.
Send the !join [irc.example.net] #channel [key] command, making sure to specify the IRC Network if there are multiple, then the IRC Channel name. Make sure to include the key if needed. A complete command to join the #locked IRC Channel requiring a key of password would look like, !join irc.example.com #locked password.
Assuming you have permission to use the !join command, and that the channel specified is not excluded, you will recieve an invite to the newly created room for the specified IRC Channel.
Using the bridge bot
To delve deeper into using the bridge bot and it's commands, or for a more in-depth doc on the IRC Bridge, you can check out Using the Matrix IRC Bridge.
Using the Matrix XMPP Bridge as an End User
If your homeserver has the Matrix XMPP Bridge configured it will pass messages to and from XMPP. You will interact with XMPP by; joining Matrix Rooms specifically bridged to existing XMPP rooms; speaking with XMPP users who have joined public Matrix rooms; or you may use private messaging to speak directly with a specific user in XMPP.
Getting Started
Messaging in public Matrix Rooms
To start, the most basic usage of the XMPP bridge would be to join a Public Matrix room that XMPP users also join to communicate. You or your homeserver administrators will have created a Public room, which XMPP users can search for using a configured endpoint, by default matrix instead of conference.
That's it, by messaging in this room, anyone who is joined from XMPP will be able to see and respond to your messages. As far as how you appear in XMPP, you'll be displayed in room member lists using your Matrix display name, with a full username formatted based on how your homeserver administrators configured. Usually in a format like DISPLAYNAME_HOMESERVER@EXTERNALCOMPONENT.XMPPSERVER, so an example user would look like:
alice_example.com@matrix.xmpp.example.com
In Matrix, XMPP users will appear with Matrix User IDs, following a format like @PREFIX_USERNAME=40XMPPSERVER:HOMESERVER, so an example user would look like:
@xmpp_alice=40xmpp.example.com:example.com
However it's unlikely you will ever need to directly type these, you can use your native clients' functions to interact with users, just like any other Matrix user in Element, or XMPP user in your XMPP client.
Messaging in an XMPP room via a bridged Matrix Room
The alternative to speaking with XMPP users in a public Matrix room they join, is to join an existing XMPP room. To do this all you need to know is the XMPP rooms name and how your homeservers have configured the room name format in Matrix. By default, XMPP rooms in Matrix are translated following a format like #PREFIX_XMPPROOMNAME_CONFERENCE.XMPPSERVER:HOMESERVER, so an example room alias would look like:
#_xmpp_exampleroom_conference.xmpp.example.com:example.com
So you can either enter this in the room search prompt, or simply send /join #_xmpp_exampleroom_conference.xmpp.example.com:example.com in any room (nothing is sent to the room you send this to), for the Element Client to automatically join you to the room.
Once joined, exactly as with public Matrix rooms, you can communicate with anyone else in the room just as you normally would in Matrix.
Private Messaging XMPP Users
XMPP users appear in Matrix as Matrix users, you can view the list of people in a room by clicking the i icon in the top-right of the client, then selecting People. Here you can see all users within the room, including those users created to represent XMPP users. The format for their Matrix User IDs is configured by your homeserver administrator, see above for defaults.
Just like with any other Matrix user; you can click on a person from this pane; click on their profile picture next to any message they've sent within the room; or simply search for them to initiate the DM. Compose your initial message and send to start a Direct Message with the XMPP user. A XMPP user can likewise start a private message with you, using your XMPP username - if they do, you will be invited to a DM just like any other Direct Message.
Using the WhatsApp bridge
Overview
This guide describes how to bridge your Element and WhatsApp accounts. This allows you to chat with WhatsApp contacts and groups natively within Element.
Before you can carry out the steps in this guide, ensure you have the following:
- WhatsApp - You will need a phone with WhatsApp installed and a registered account.
- Element - You will need a Matrix account to log into Element, and a WhatsApp bridge set up on your Matrix homeserver.
Note: When setting up the Whatsapp bridge you will need to scan a QR code generated in Element from your phone. To make this process as easy as possible, we recommend using Element Web for the initial setup, once set up you can then login to any platform with your Element account and use the bridge which you have set up. However, it is possible with two mobile phones if you can quickly take a photo of the QR code with one phone and then scan it with the original phone.
Setting up
Sign into Element Web using your Element username and password.
(If asked to verify your login, see docs on verifying a new login.
Once signed in, start a new direct message with the WhatsApp bridge bot. (It will not work if you create a room with the bridge bot, it needs to be a direct message)
The username of the bot will be @whatsappbot:your.server (for example @whatsappbot:matrix.org)
Ensure that your.server is the homeserver where the bridge is hosted. This may be different to the homeserver hosting your own account.
Click on the suggested WhatsApp bridge bot, and click Go to start the direct message.

You will be taken into a new room with the WhatsApp bridge bot. The bot automatically joins the room.
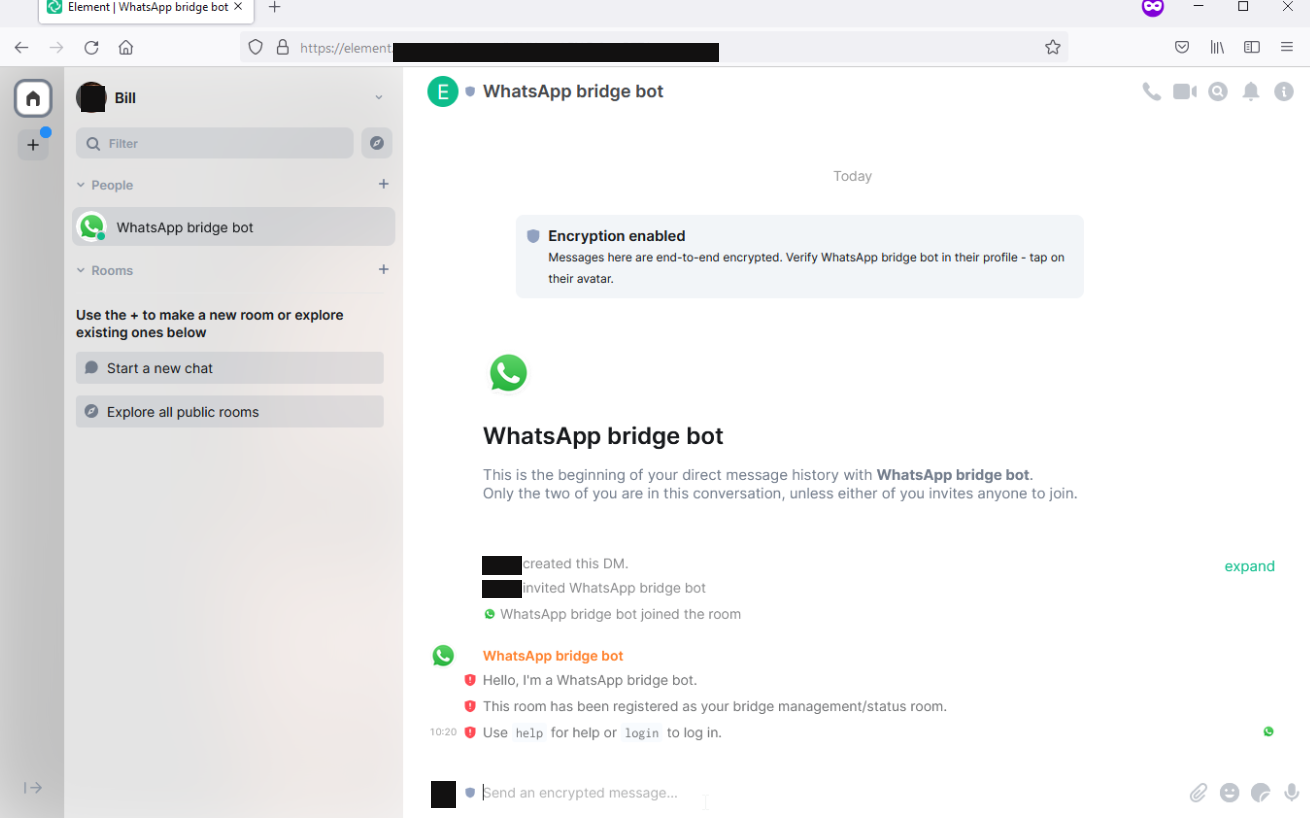
Remaining in the room, send the login command by sending login into the room.
Tip: You can also send the command **help** to get a list of all available commands.
The bot will generate a QR code to scan from WhatsApp on your phone.
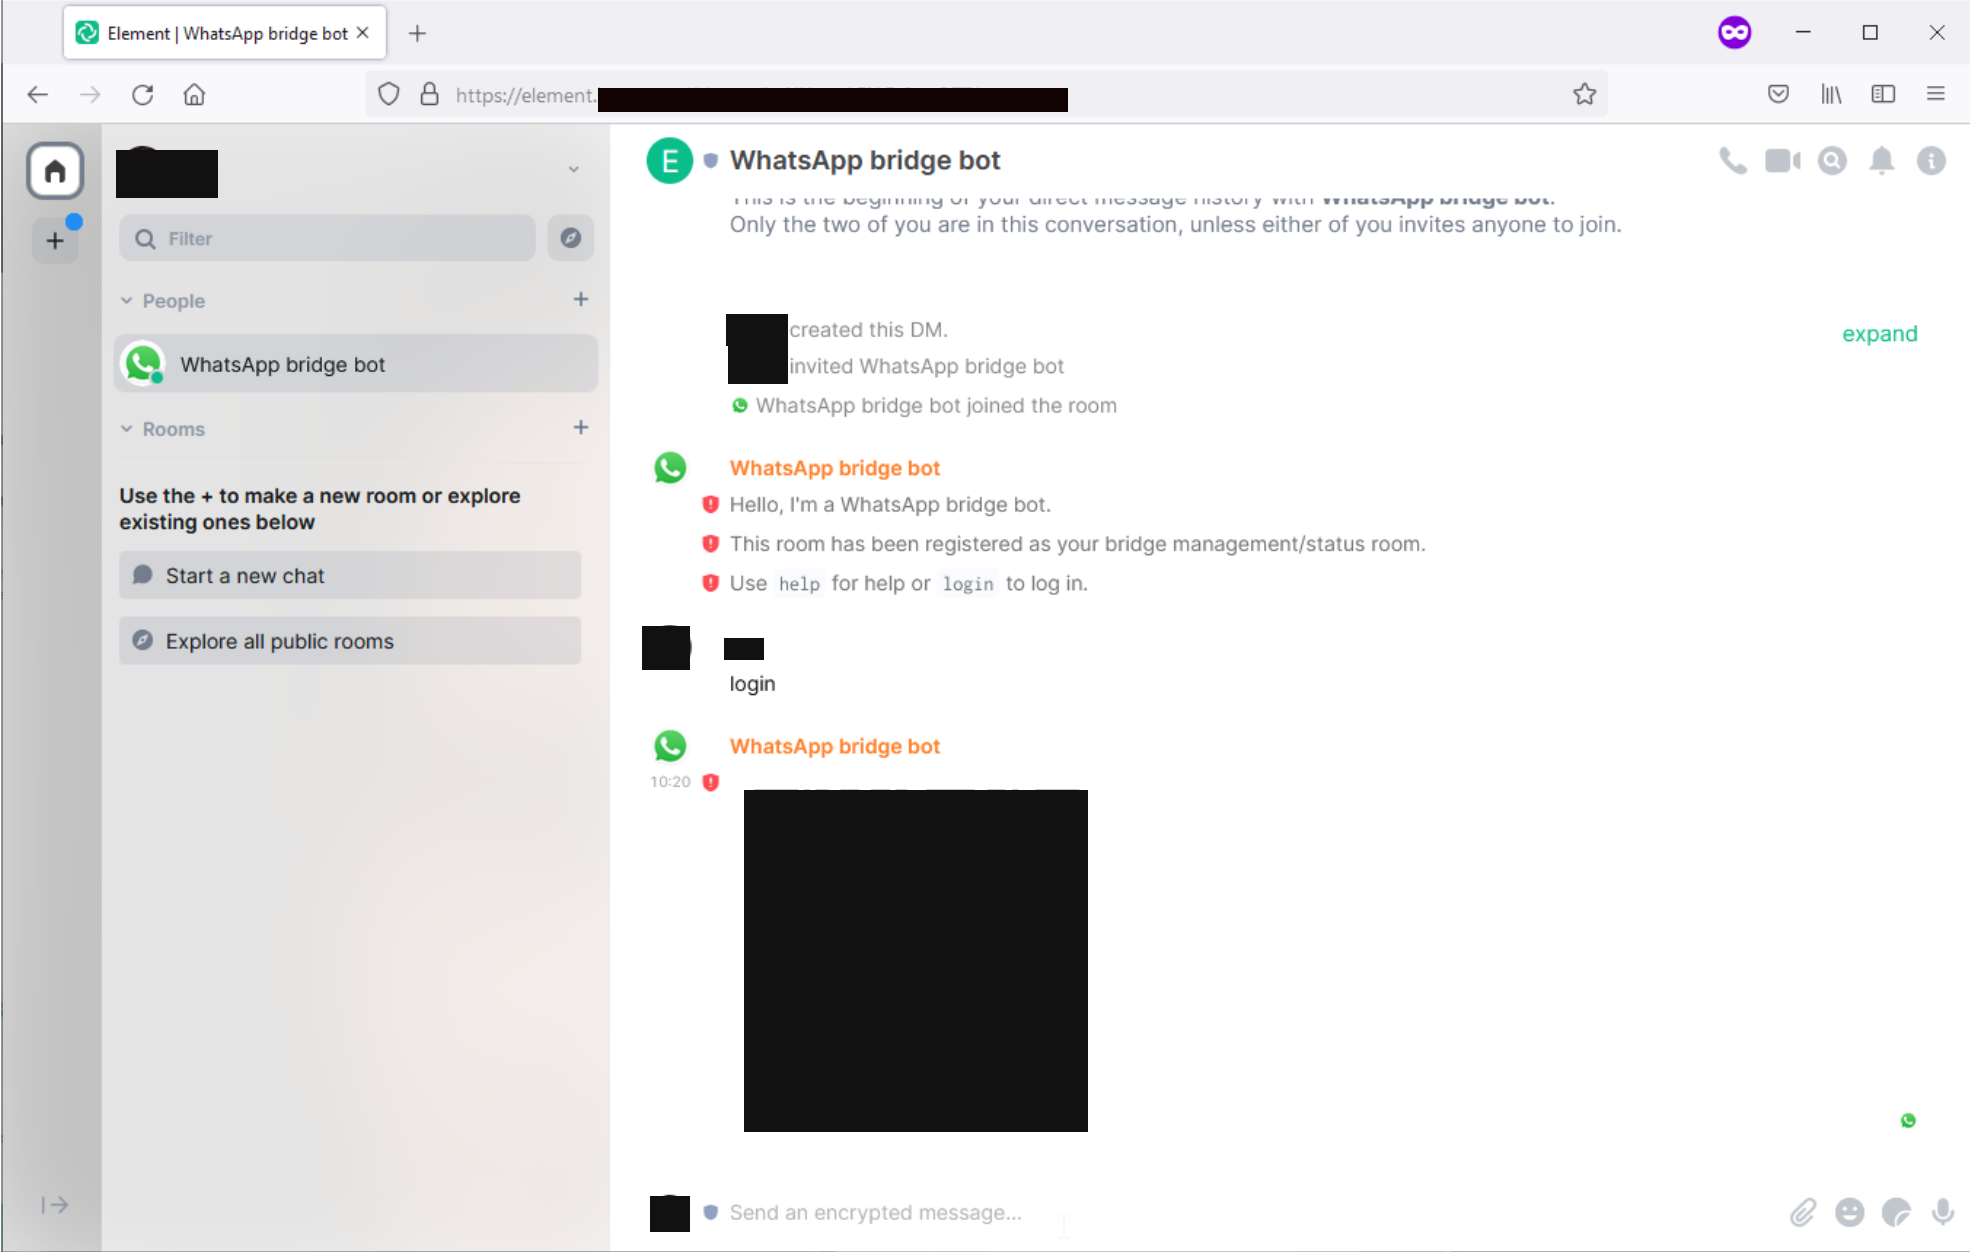
Leaving Element open, open WhatsApp on your phone for the next step
In WhatsApp, tap the three dots (⋮) in the top right corner of the app.
From the drop-down menu tap Linked devices.
Tap LINK A DEVICE.

Tap OK to begin scanning the QR code.
Scan the QR code generated by the WhatsApp bot in Element.
The WhatsApp bridge now shows as a linked device in DEVICE STATUS.
If this doesn't work the first time, it is likely that the QR code has expired, you will need to repeat the steps again and scan the QR code before it expires.
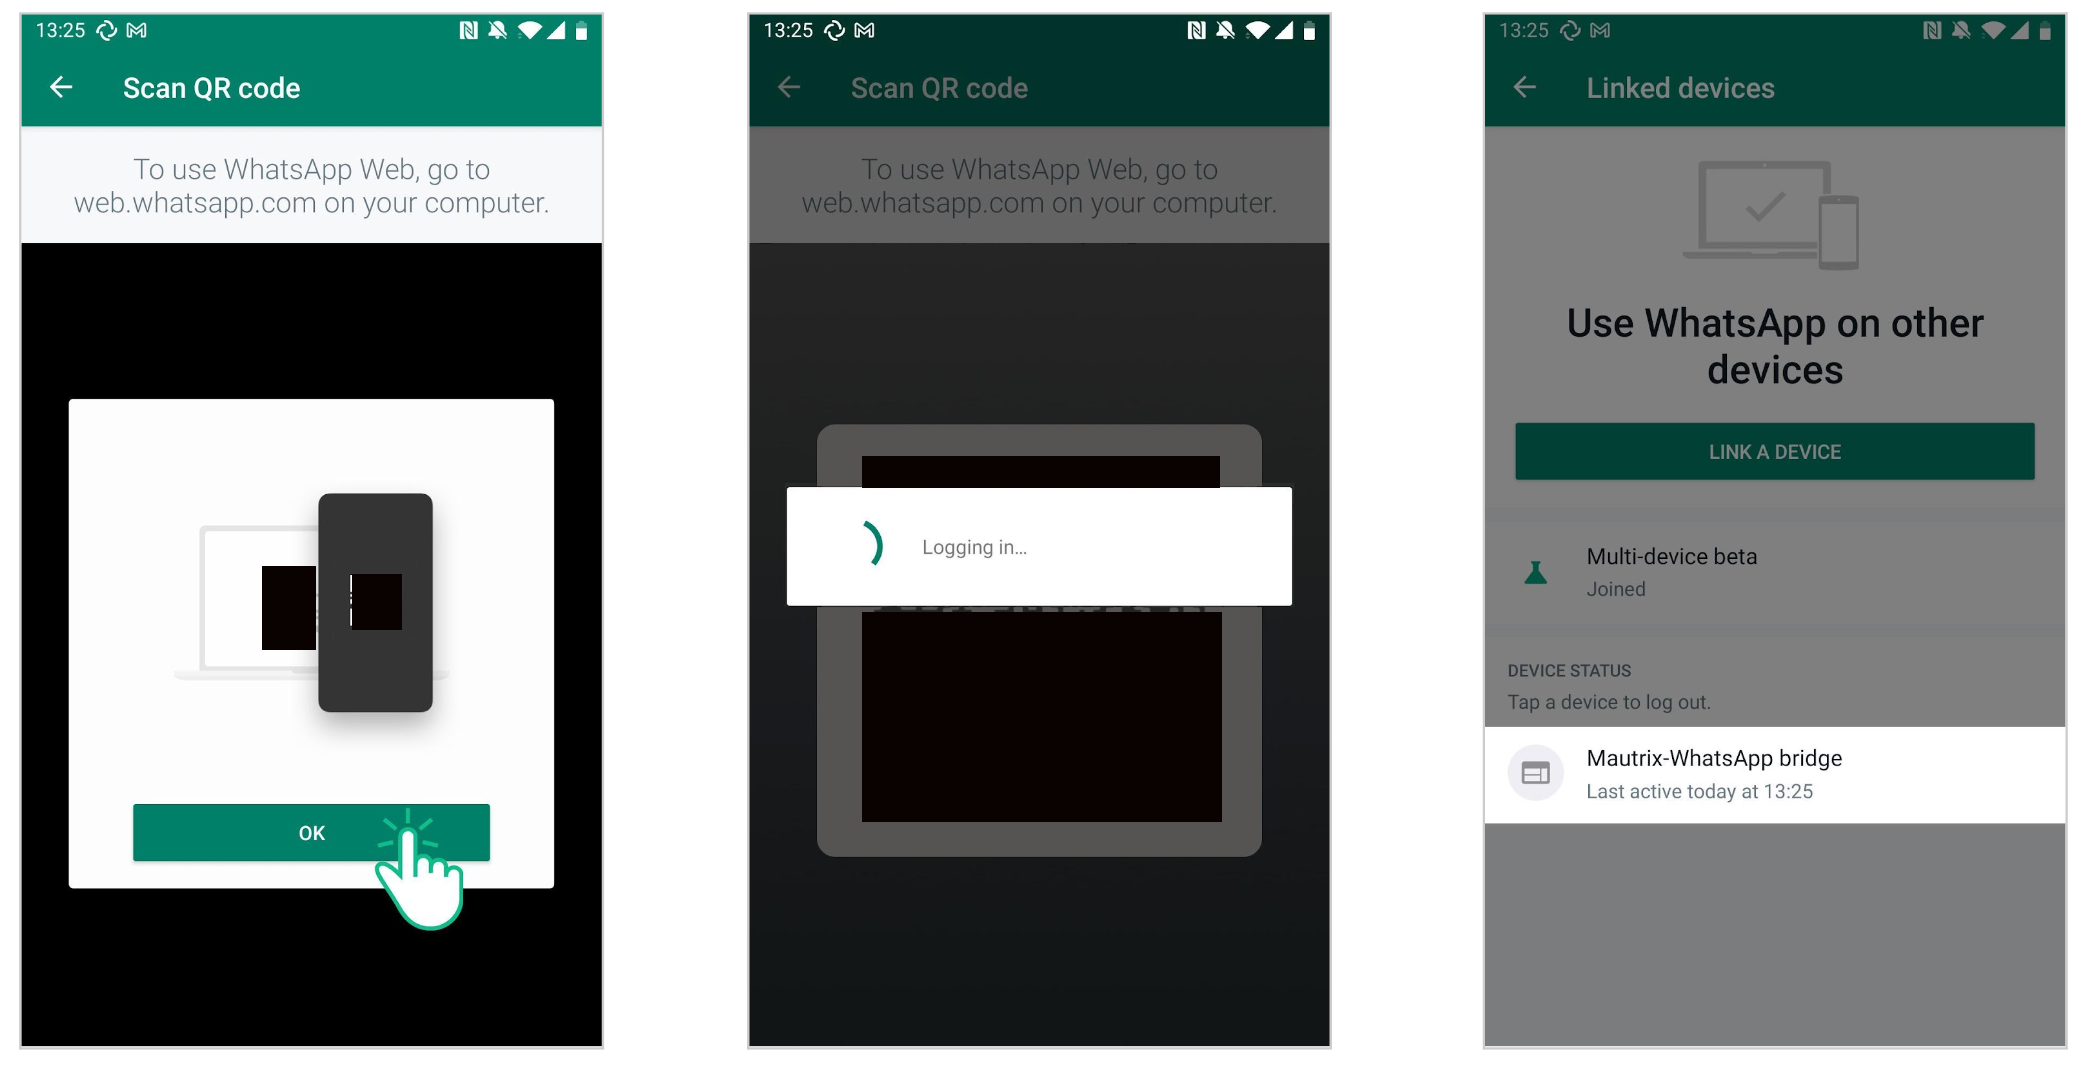
Back in Element, the bridge bot will confirm that you have logged in to WhatsApp.
The bridge then creates rooms to allow you to chat with WhatsApp contacts and groups. By default the bridge automatically creates rooms for people or groups you have interacted with in the last week. Others are created as new messages arrive. See below for how to use bridged rooms.
Note: WhatsApp requires your phone to connect to your WhatsApp account every 14 days to keep the bridge active, otherwise you will need to QR code scan again. So ensure you open the WhatsApp app every 14 days to ensure you are not disconnected.
Using direct messages
The bridge will automatically invite you to new rooms for your recent contacts.
You will be able to see in the upper left-hand corner that WhatsApp contacts automatically have (WA) added to their display name.
To start, click on a room invite and join the room.You will be taken into the new room for your WhatsApp contact.
You can now begin chatting with your WhatsApp contact in the same way as any other Element user.
(Note that the bridge does not support voice or video calling.)
Starting new chats (or resuming older ones that were not automatically set up) can be done with the pm command, followed by the number for the other person in international format. For example to invite whatsapp number +4412345678 you would send the command pm +4412345678 into the WhatsApp bridge bot room.
Tip: Using the list contacts command retrieves your existing WhatsApp contacts, including their numbers. You can then click on the contact and click message to start chatting.
Once the pm command is sent the bridge will invite you to a new room for the WhatsApp chat.
Using rooms
You will automatically be invited to some rooms for WhatsApp group chats that have been automatically created by the bridge. If this has not happened you can manually open an existing group chat.
To open an existing WhatsApp group in Element, you can use the list groups command (send the message list groups into the WhatsApp bridge bot room) to get a list of all WhatsApp groups. All groups will be shown in a list together with their group IDs.
Use the open command, followed by the ID of the group. For example you can see the Office part group chat has the room ID 441234567891-9876543219, so you would send the command open 441234567891-9876543219.
The bridge will then create a room for the group and invite you.
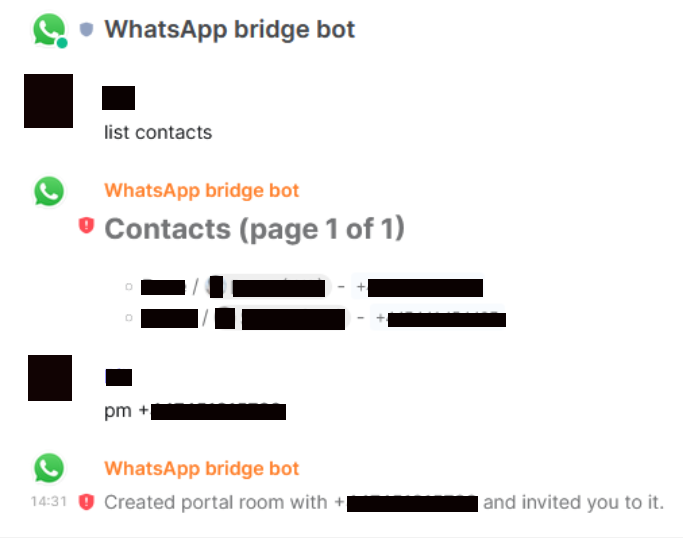
Disconnecting from WhatsApp
To disconnect WhatsApp from Element enter the logout command, by sending logout into the WhatsApp brtidge bot room. This will remove the linked device from WhatsApp.
As a further option, the connection to WhatsApp can be forcibly disconnected by using the delete-session command. This removes the connection at the Element side but does not perform a graceful logout from WhatsApp.
Once logged out, the delete-all-portals command can be used to clean up rooms previously created by the bridge.
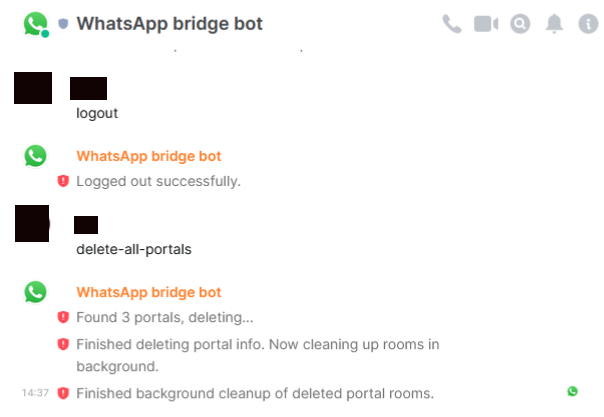
Using the Telegram Bridge
Overview
This guide describes how to bridge your Element and Telegram accounts. This allows you to chat with Telegram contacts and groups natively within Element.
Before you can carry out the steps in this guide, ensure you have the following:
- Telegram - You will need a phone with the Telegram app installed and a registered account.
- Element - You will need a Matrix account to log into Element, and a Telegram bridge set up on your Matrix homeserver.
Setting up
Sign into Element Web using your Element username and password.
(If asked to verify your login, see docs on verifying login.)
Once signed in, start a new direct message with the Telegram bridge bot. (It will not work if you create a room with the bridge bot, it needs to be a direct message)
The username of the bot will be @telegram:your.server (for example @telegram:matrix.org)
Ensure that your.server is the homeserver where the bridge is hosted. This may be different to the homeserver hosting your own account.
Click on the suggested Telegram bridge bot, and click Go to start the direct message.
You will be taken into a new room with the Telegram bridge bot. The bot automatically joins the room.
Remaining in the room, send the login command by sending login into the room.
Tip: You can also send the command **help** to get a list of all available commands.
Then enter the number of the Telegram account you are wanting to connect to in international format e.g +4412345678.
Your Telegram account will then receive a 4 digit login code, enter this code into the Element room to connect.
Note: If you get this wrong the first time, you will need to use the "cancel" command and start again from "login".
Your Telegram account should now be linked to your Element account and the bot should confirm this in your room.
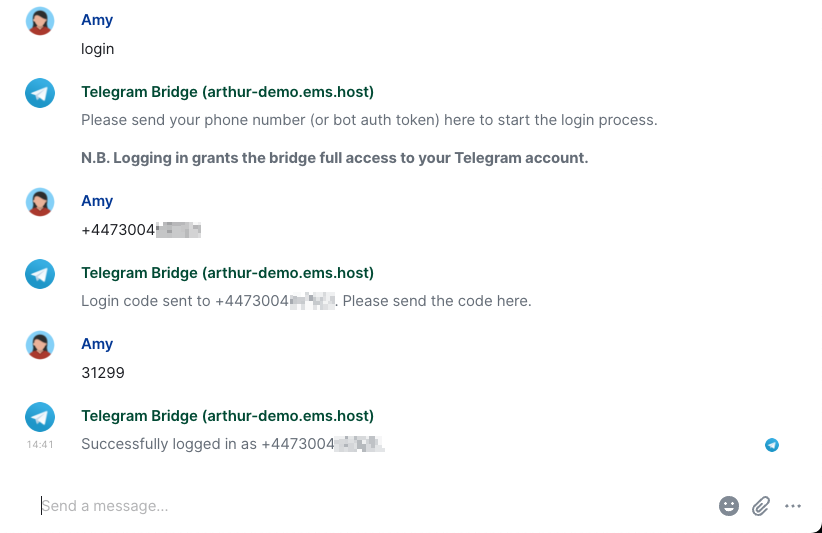
Using direct messages
The bridge will automatically invite you to new rooms for your recent contacts.
To start, click on a room invite and join the room. You will be taken into the new room for your Telegram contact.
You can now begin chatting with your Telegram contacts in the same way as any other Element user.
Note: The bridge does not support voice or video calling.
To start a chat with a new contact, first ensure you have added the contact in your Telegram contacts. If you send your first message from Telegram you will then get a new invite in Element to join the room.
Or it can be done with the pm command, followed by the number for the other person in international format. For example to invite Telegram contact number +4412345678 you would send the command pm +4412345678 into the Telegram bridge bot room.
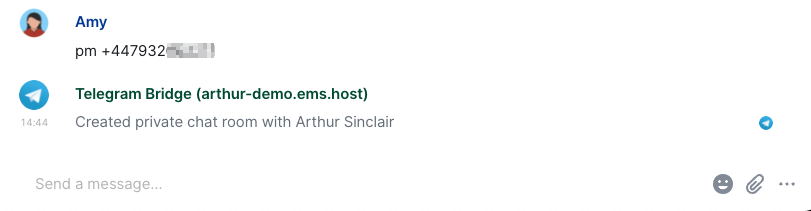
Using rooms
You will automatically be invited to some rooms for Telegram group chats that have been automatically created by the bridge. If this has not happened you can manually open an existing group chat.
Element Android/iOS Client Settings
Documentation covering the options available within the Element Android/iOS Clients' Settings.
Understanding Push Notifications
To best understand how push notifications are setup in Matrix, a good place to start is with the diagram below from the Push Gateway API.
+--------------------+ +-------------------+
Matrix HTTP | | | |
Notification Protocol | App Developer | | Device Vendor |
| | | |
+-------------------+ | +----------------+ | | +---------------+ |
| | | | | | | | | |
| Matrix homeserver +-----> Push Gateway +------> Push Provider | |
| | | | | | | | | |
+-^-----------------+ | +----------------+ | | +----+----------+ |
| | | | | |
Matrix | | | | | |
Client/Server API + | | | | |
| | +--------------------+ +-------------------+
| +--+-+ |
| | <-------------------------------------------+
+---+ |
| | Provider Push Protocol
+----+
Mobile Device or Client
The process starts when a user installs a Matrix client, for example on an iOS device or Android device, and signs in. The client is configured with the push gateway location (URL) and also acquires a push key to identify itself from its push provider, Apple Push Notification (APN) service or Firebase Cloud Messaging (FCM). The client then registers a pusher on the users' homeserver providing the URL, push key etc.
On the Matrix Homeserver (for instance, Synapse), a pusher is registered for a user. The pusher information details1:
-
app_display_name: A string that will allow the user to identify what application owns this pusher. -
app_id: This is a reverse-DNS style identifier for the application. Max length, 64 chars. -
url: The URL to use to send notifications to the push gateway. -
device_display_name: A string that will allow the user to identify what device owns this pusher. -
pushkey: This is a unique identifier for this pusher. (Acquired from APN / FCM)
1 See pushers/set and pushers for more information
When a notification is received the homeserver sends this information to the registered Push Gateway, i.e. Sygnal from the users' pushers. The push gateway is where you configure your App Types - APNS GCM. The push gateway, Sygnal in this instance, recieves the request and forwards it to the required notification service (APN or FCM) using the pushkey. If successful, the push gateway confirms the success to the homeserver.
You can find a good overview of the entire process on Sygnal's Notes for Application Developers.
What information the payload holds regarding the specific device?
Per the above payload example, a pusher contains a display name for the App (client), that app's reverse-DNS style identifier, a device name and finally the push key. The pushkey is the unique identifier of the pusher.
See an example of a set pusher from the Client-Server APIs Push Notifications section:
{
"pushers": [
{
"app_display_name": "Appy McAppface",
"app_id": "face.mcapp.appy.prod",
"data": {
"url": "https://example.com/_matrix/push/v1/notify"
},
"device_display_name": "Alice's Phone",
"kind": "http",
"lang": "en-US",
"profile_tag": "xyz",
"pushkey": "Xp/MzCt8/9DcSNE9cuiaoT5Ac55job3TdLSSmtmYl4A="
}
]
}
How does e.g Apple APNS know that my device is suppose to get the push notice?
When the application on a user's device registers for push notifications, it acquires a pushkey from the push provider. So for iOS, the client will acquire this key from APN and use it when registering the pusher with synapse.
Does the payload hold any information about my device? E.g. IMEI etc?
Per the sample payload provided above, only a device_display_name and pushkey are included, as such it does not contain a devices' IMEI etc.
Using 'Unified Push' and 'ntfy' for Push Notifications
What is Unified Push?
UnifiedPush is a set of specifications and tools that lets the user choose how push notifications* are delivered. All in a free and open source way.
Unified Push website
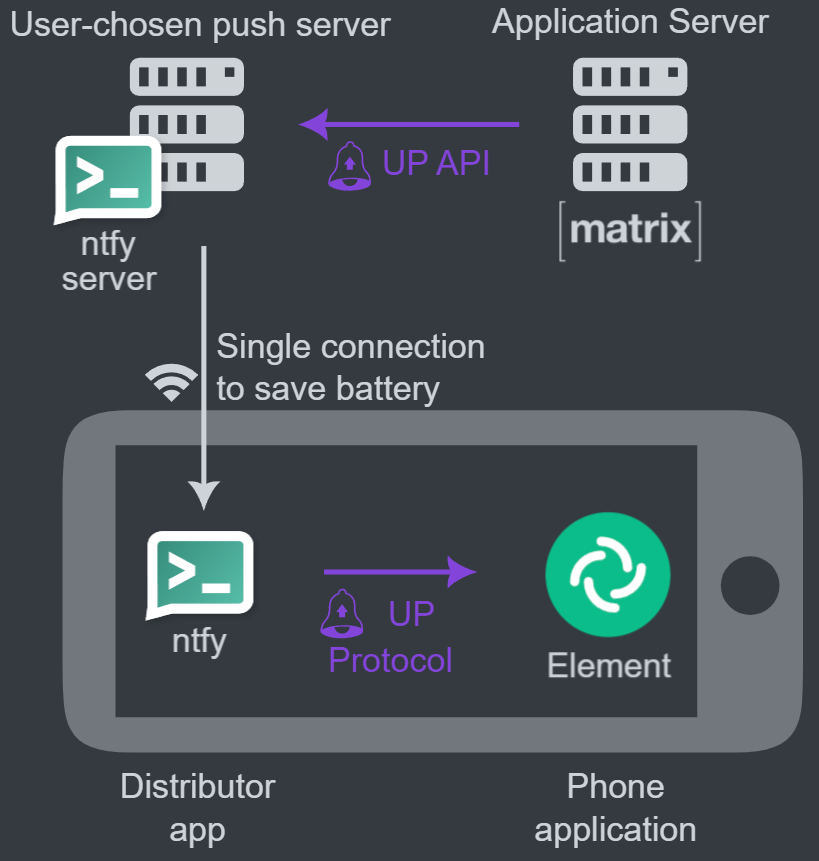
The Unified Push website features multiple diagrams detailing the overall process worth viewing - for this setup, per the static version above, we will be utilising the Unified Push specification to have notifications recieved on a Matrix homeserver, sent to a Unified Push compatible push gateway (ntfy) which are relayed to a Unified Push Distributor application (ntfy) installed on a users' device. This distributor application recieves and relays these notifications to applications installed on your device.
What is ntfy?
ntfy (pronounce: notify) is a simple HTTP-based pub-sub notification service. It allows you to send notifications to your phone or desktop via scripts from any computer, entirely without signup, cost or setup. It's also open source if you want to run your own.
ntfy website
ntfy comes in two forms, the server and the application. The ntfy server is your push gateway, recieving notifications from your homeserver bound for client devices, it communicates with the ntfy application. The ntfy application is your distributor application, this application is used to subscribe to topics of interest, and specifically for this use-case, subscribing to Unified Push notifications to relay to the Element Android application.
Overview of the process / setup
You will need to setup an ntfy server, with a specified domain name and associated certificates, which can access and is accessible by, your Matrix homeserver and end-users' mobile devices. You should also ensure your Certificate Authority (CA) certificate is added to this servers' trust store.
Each end-user will need the ntfy distributor application installed on their devices alongside the Element Android application. This application will require the ntfy server address to be changed from the default to your ntfy servers' domain name. Each device should also ensure they too have the required Certicate Authority (CA) certificate added to the device's trust store.
Once these essentials are in-place, a user need only open the Element Android application and login to their homeserver. On first login, the application will see the installed ntfy application, and prompt the user for which notification service they wish to use. Once ntfy is selected, a topic is subscribed to within the ntfy application and the push gateway (the ntfy server) is registered as a 'pusher' for the logged in user on the home server.
Getting Started
Setting up the ntfy server
The ntfy docs are the best place to start as they are updated with each new release. For the ntfy server, the Self-Hosting Installation section will cover everything you need to get the server binaries installed on your system. Then the subsequent Configuration section will cover fine-tuning your desired configuration, i.e. Disabling the built-in web application, which isn't used for this use case.
Pre-Installation
The server will need access to the ntfy, for internet connect devices you can directly follow the step in Installation below. For Airgapped systems, please source the required binaries linked to from the Linux Binaries section of the Installation section. Ensure the binary is made available to the airgapped server.
Configure your DNS appropriately such as that a sub-domain is setup for the server, i.e. ntfy.example.com and is accessible from your homeserver and end-user devices. If required, set the correct DNS settings on the ntfy server, you can verify DNS is resolving correctly by testing your newly setup ntfy domain, i.e. ping ntfy.example.com.
Generate the required certificates for the sub-domain from your Certificate Authority (CA) and ensure the .key & .crt is made available to the server (if not using a proxy).
The Certificate Authority (CA) certificate should also be made available to the server and installed to it's trust store. The process for this is dependant on your system, for Ubuntu, the Ubuntu Server Docs - Installing a root CA certificate in the trust store are a good choice.
Ensure the domain certificate / key files are located in a suitable location accessible by the user running the ntfy binary, and note their location to be added to the ntfy configuration file later, i.e. /home/example/ntfy/ntfy.example.com.key & /home/example/ntfy/ntfy.example.com.crt.
Ensure the ntfy server firewall allows port 80 and 443, the process for this is dependant on your system & firewall, for Ubuntu using the built-in firewall, the Ubuntu Server Docs - Security - Firewall cover the required steps.
❗As above, following the official ntfy documentation is best here, as it is updated with each new release. This guide will focus on steps taken outside the basic install step. For configuration, please check the config sample is up-to-date and adapt as required for your specific environment / setup.
Installation
There are two main choices for installation for Linux systems, manual installation of the Linux binaries or installation via a package / repository - follow the appropriate steps for your system.
Server Configuration
Once installed you can configure the server by config file, command line or using environment variables. For this guide we will make use of the config file, typically located /etc/ntfy/server.yml.
The official documentation covers all configuration options, including if the server is behind a proxy, setting up access control etc. A basic configuration utilising HTTPS and Certificates on the server, is included below. (This example also disables the web client setup by default)
Note: for access control, please follow the Unified Push guidance on ensuring Synapse has anonymous write access to the topic used for push messages. See the Unified Push Example under the Access Control section and the linked Access Control Example from the Unified Push website.
base-url: "http://ntfy.example.com"
listen-http: ":80"
listen-https: ":443"
key-file: "/home/example/ntfy/ntfy.example.com.key"
cert-file: "/home/example/ntfy/ntfy.example.com.crt"
cache-file: "/var/cache/ntfy/cache.db"
attachment-cache-dir: "/var/cache/ntfy/attachments"
web-root: disable
Modify the config as required, correcting the base-url, key-file / cert-file locations and cache-file / attachment-cache-dir if desired.
Before running the server, please ensure the /var/cache/ntfy directory (or wherever you have specified as the cache-file location exists), if not simply sudo mkdir /var/cache/ntfywill prevent any errors on first-run.
A full list of Config Options is available, once configured as desired, run the server so it is ready to recieve notifications from your homeserver.
Verification
These tests can be performed to ensure the server is correctly setup and accessible from all devices involved:
Tests run from the ntfy server
First perform a basic connection test to the ntfy domain name, i.e. ping https://ntfy.example.com, this will confirm DNS resolves correctly on the ntfy server itself. Then do the same but to your homeserver, i.e. ping https://synapse.example.com, as well as a test mobile device connected to the same Wi-Fi network as your end-users, i.e. ping 10.0.0.76 (The IP address of the mobile device).
Next to confirm the server is correctly hosting a push gateway that your homeserver can make use of, confirm https://ntfy.example.com/_matrix/push/v1/notify outputs {"unifiedpush":{"gateway":"matrix"}}.
Using the above URL, you can also verify that the ntfy server trusts the ntfy.example.com certificate and so the Certificate Authority is trusted.
To locally test the ntfy server can recieve messages, follow the steps from the Sending messages section of the ntfy documentation. The ntfy logs should confirm the message has been recieved, but you could also, if not disabled, use the web app provided by the server.
Tests run from the homeserver
First perform a basic connection test to the ntfy domain name, i.e. ping https://ntfy.example.com, this will confirm DNS resolves correctly to the ntfy server.
Next to confirm the homeserver is able to access the push gateway by confirming https://ntfy.example.com/_matrix/push/v1/notify outputs {"unifiedpush":{"gateway":"matrix"}}. You should also confirm that the ntfy.example.com certificate is trusted, adding it's Certificate Authority (CA) certificate to the servers' trust store. For On-Premise setups, please refer to the On-Premise Documentaion for guidance on certification setup.
You could also test the ntfy server can recieve messages, by following the steps from the Sending messages section of the ntfy documentation. The ntfy logs should confirm the message has been recieved, but you could also, if not disabled, access the web app provided by the server.
Tests run from a test mobile device
First perform a basic connection test to the ntfy domain name, for a mobile device it's easiest to visit https://ntfy.example.com/_matrix/push/v1/notify from your web browser, this will confirm DNS resolves correctly to the ntfy server and the push gateway is available too.
Setting up a mobile device
First ensure the Certificate Authority (CA) certificate that signed the ntfy server domain certificate is added to the devices trust store. You can do this on Android by following these steps:
- Open your phone's Settings app, search 'CA Certificate'
- Tap 'CA certificate' to be taken to the 'Install a certificate' screen, then tap 'CA certificate'
- Tap 'Install anyway' and enter your device PIN / Password
- Locate where you saved the certificate and tap the file, i.e.
ca.pem
For the end-user mobile device they will need both the Element Android application, and the ntfy distributor application.
Once both are installed, open the ntfy application, click the 3-dot menu from the top right, and press 'Settings'. Under the 'General' section, find 'Defualt server' and press to modify. Replace with your ntfy server domain name, i.e. https://ntfy.example.com. You may also notice a warning prompt banner across the top of the main application screen, follow it's steps to ensure the application is being optimised for battery as this may prevent a reliable notification experience.
Open the Element application and complete the sign-in flow, once logged in, you will be presented with a prompt 'Choose how to receive notifications', then select 'ntfy'.
Verification
These tests can be performed to ensure the mobile device is correctly setup and recieves notifications correctly:
First open the ntfy application and subscribe to a test topic by clicking the '+' icon at the bottom right, then entering an example topic name, i.e. test.
Follow the steps from the Sending messages section of the ntfy documentation sending a message to the test topic (or whichever topic name you specified above). The phone should recieve a notification that the topic has recieved the message. This will confirm the ntfy applications connection to the ntfy server and its ability to successfully recieve messages.
Next confirm the presence of an entry within your 'Subscribed Topics' of the ntfy application generated by the Element application. It will have a topic name starting ntfy.example.com/up, and below will confirm it was added by the im.vector.app / im.vector.app.debug and the protocol, Unified Push.
Ensure on the mobile device, the Element application is not in the foreground. From another device, use a Matrix client to send a message to the account logged into the mobile device. The phone should recieve a notification that they have recieved the message. This will confirm successful registration of the ntfy server as the push gateway for the logged in user.
Result
You should now have setup the Unified Push infrastructure so you can recieve push notifications from the Element application via your own self-hosted servers.
Advanced Administration
Documentation covering more advanced topics relating to the administration of your homeserver.
Getting Started Using the Admin API
The Synapse Admin API allows administration of your homeserver, such as managing users, rooms and media. In order to make use of the API you will need to have an admin user account present on the homeserver you wish to manage.
Promoting a Matrix Account to Admin
If you're an EMS customer, you can create / manage your users via the Server Admin tab of the EMS Control Panel.
If you're an ESS customer, you can create / manage your users via your admin dashboard, or via the Admin tab available when running the installer.
Promote the user you will be using to Admin by clicking on the desired user, and checking the Admin checkbox and confirming.
Getting your access_token
In order to use the Synapse Admin API you will need to authenticate your calls to the API using an access_token from an Admin user account. You can find your access_token from the Help & About section of your settings. Check out the Help & About page from the Element Web/Desktop Client Settings chapter for more guidance.
Making an Admin API request
Using your preferred method, you will need to authenticate each request to an Admin API endpoint by providing the token as either a query parameter or a request header. To add it as a request header in cURL, you can use the following, replacing syt_AjfVef2_L33JNpafeif_0feKJfeaf0CQpoZk with your own access_token:
curl --header "Authorization: Bearer syt_AjfVef2_L33JNpafeif_0feKJfeaf0CQpoZk" -X GET http://127.0.0.1:8008/_synapse/admin/v2/users/@foo:bar.com
Here is the equivalent action using Python and the requests library:
import requests
headers = {
'Authorization': 'Bearer syt_AjfVef2_L33JNpafeif_0feKJfeaf0CQpoZk',
}
response = requests.get('http://127.0.0.1:8008/_synapse/admin/v2/users/@foo:bar.com', headers=headers)
Further details on the using the API are out-of-scope for this documentation, please consult the Synapse Admin API documentation. You will find multiple sections covering its use, such as Rooms, Users and Media.
Getting Started Using the Client-Server API
The Client-Server API allows a user to perform any action they could via a Matrix client programatically. In order to make use of the API you will need to retrieve an access token for your account.
Getting your access_token
In order to use the Client-Server API you will need to authenticate your calls to the API using an access_token from your user account. You can find your access_token from the Help & About section of your settings. Check out the Help & About page from the Element Web/Desktop Client Settings chapter for more guidance.
Making a Client-Server API request
Using your preferred method, you will need to authenticate each request to a Client-Server API endpoint by providing the token as either a query parameter or a request header. To add it as a request header in cURL, you can use the following, replacing syt_AjfVef2_L33JNpafeif_0feKJfeaf0CQpoZk with your own access_token:
curl --header "Authorization: Bearer syt_AjfVef2_L33JNpafeif_0feKJfeaf0CQpoZk" -X GET https://HOMESERVER_URL/_matrix/client/v0/profile/@user:example.com
Here is the equivalent action using Python and the requests library:
import requests
headers = {
'Authorization': 'Bearer syt_AjfVef2_L33JNpafeif_0feKJfeaf0CQpoZk',
}
response = requests.get('https://HOMESERVER_URL/_matrix/client/v0/profile/@user:example.com', headers=headers)
Further details on the using the API are out-of-scope for this documentation, please consult the Client-Server API documentation.
Using Python with the Admin + Client-Server APIs
You can use Python to make consume and utilise APIs, including those available with Matrix - such as the Synapse Admin API, and the Matrix Client-Server API. See the below docs to learn more about them before progressing with this guide.
The key requirement before progressing is getting the Matrix Accounts' access_token, if your using the Synapse Admin API, you must use a Matrix Account which is a Synapse Admin.
Using python
You will need Python setup on your system to make use of the script. The best way to use Python is to keep individual projects / scripts in separate virtual environments (venv). The documentation on this can be found here, for example on Windows you'd use:
python -m venv .\myPythonProject\
.\myPythonProject\Scripts\Activate.ps1
The script uses the requests library in order to make the API requests, to install in in you venv, after activating run:
python -m pip install requests
You will then be able to run scripts you create by using:
python .\myPythonProject\scriptName.py
Writing a python script
At it's most basic, you will need to setup the below template within your script:
import requests
homeseverURL = 'example.com'
accountToken = 'accountTokenStringExample'
requestHeaders = {
'Authorization': 'Bearer ' + accountToken
}
requestData = {
'key': 'value'
}
getResponse = requests.post('API Endpoint URL', headers=requestHeaders).json()
postResponse = requests.post('API Endpoint URL', headers=requestHeaders, data=requestData).json()
The below examples are for reference only, when running any scripts with any access to your homeserver you should verify and understand the script yourself, the below may end up out-dated so please use the various linked documentation before running. We do not provide any support for the following scripts.
Example #1: Join Users to Rooms
Let's say you wanted to join a list of users to a list of rooms, you would adapt this template to something like the below to make use of the Edit Room Membership API:
import requests
# Homeserver
homeserverURL = 'synapse.example.com'
# Credentials
accountToken = 'accountTokenStringExample'
# Rooms to Auto-Join
roomAliasList = ['#room1:example.com', '#room2:example.com']
# Users to Auto-Join
userList = ['@user1:example.com', '@user2:example.com']
# API Auth Header
requestHeaders = {
'Authorization': 'Bearer ' + accountToken,
}
# Loop through all rooms
for roomAlias in roomAliasList:
# Construct API Endpoint URL
editRoomMembershipURL = 'https://' + homeserverURL + '/_synapse/admin/v1/join/' + roomAlias
# Loop through all users
for user in userList:
# Construct POST contents
editRoomMembershipData = {
"user_id": user
}
# Send Request
response = requests.post(editRoomMembershipURL, headers=requestHeaders, data=editRoomMembershipData).json()
Example #2: Delete Older Media
If you are looking to remove all media older than a specific Unix Timestamp, you could adjust the template above to make use of Delete local media by date or size.
import requests
# Homeserver
homeserverURL = 'synapse.example.com'
# Credentials
accountToken = 'accountTokenStringExample'
# API Auth Header
requestHeaders = {
'Authorization': 'Bearer ' + accountToken,
}
# Construct API Endpoint URL
unixTimestamp : str = '1672531200000'
deleteMediaURL = 'https://' + homeserverURL + '/_synapse/admin/v1/media/delete?before_ts=' + unixTimestamp
# Send Request
response = requests.post(deleteMediaURL, headers=requestHeaders).json()
Example #3: Remove specific external_ids
If you are looking to remove specific External IDs from user accounts, you can use the below. Simply replace the url, adminToken and authProvider variables at the top of the script with the desired values. This script makes use of List Accounts to get all users, Query User Account to get each users' external_ids and finally Create or Modify Account to remove that specific external_id.
import requests
import json
url = 'synapse.example.com' # Replace with Synapse FQDN
adminToken = 'exampleToken' # Replace with Admin Token
authProvider = 'exampleAuth'# Replace with Auth Provider to Delete
headers = {
'Authorization': 'Bearer ' + adminToken,
}
userAccountURL = 'https://' + url + '/_synapse/admin/v2/users'
# GET ALL USER ACCOUNTS
def get_all_users():
all_users = []
list_account_from = 0
users = requests.get(userAccountURL + '?limit=5', headers=headers).json()
all_users.extend(users['users'])
while 'next_token' in users.keys():
list_account_from = int(users['next_token'])
users = requests.get(userAccountURL + '?from=' + str(list_account_from), headers=headers).json()
all_users.extend(users['users'])
return all_users
# DELETE EXTERNAL ID WITH SPECIFIED AUTH PROVIDER
def delete_matching_external_id(auth_provider, user_accounts):
for user in user_accounts:
user_details = requests.get(userAccountURL + '/' + user['name'], headers=headers).json()
if 'external_ids' in user_details.keys():
body = {
'external_ids': []
}
for external_id in user_details['external_ids']:
if external_id['auth_provider'] != auth_provider:
body['external_ids'].append(external_id)
body_json = json.dumps(body)
result = requests.put(userAccountURL + '/' + user['name'], headers=headers, data=body_json).json()
delete_matching_external_id(authProvider, get_all_users())