Matrix Rooms
Documentation covering from basic usage and creation of rooms to room management.
- Understanding Matrix Rooms
- Getting Started: Creating a Room
- WIP Getting Started: Using a Room
- Managing a Room: Room Info
- Managing a Room: Room Settings
- Managing a Room: Advanced Room Management
- Exporting Messages
Understanding Matrix Rooms
All communication via Matrix takes place within rooms. Rooms can be made available publicly or kept private, and they can configured to be encrypted depending on your requirements. From the Element Matrix clients, Element Web App or Element Mobile / Desktop Apps, rooms can be found under the Rooms section. However when speaking directly to one particular person, a Room is marked as a Direct Chat and can be found under the People section instead.
Rooms, if desired, can be prioritized as Low Priority or Favorite, moving them into dedicated sections named as such. Rooms can also be organized into any number of Spaces, allowing you to further manage the rooms you see. In addition, you can customize the notification settings for each room to alert for All messages, only Mentions & keywords or to Mute room.
What's Next?
Getting Started
To start learning the basics of creating and using rooms, check our 'Getting Started' series of docs on the subject, starting with Creating a Room.
Getting Started: Creating a Room
Disclaimer: This guide refers to using the Element Matrix clients, Element Web or Element Desktop apps
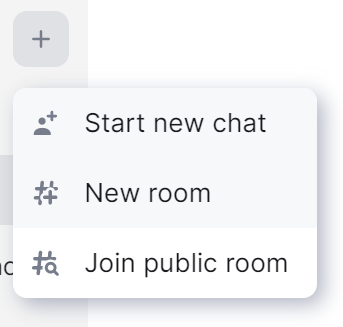
You can create a room by clicking the + button, located at the top alongside your current Space's name within the Left Panel - you will be presented with various options to create a room matching your requirements.
Starting a Direct Chat
After clicking Start new chat, you will be presented with the Direct Messages prompt, from here you can search for other people using their name, email address or username. You can select your desired contact(s) to directly invite them, or copy the provided invite link to send separately. You will see suggestions based on people you have most recently interacted with or search directly.
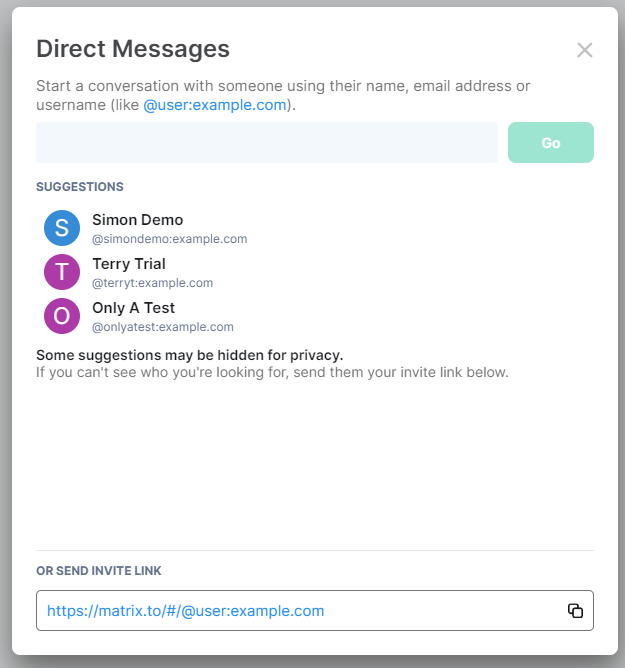
Searching for users: When searching for users, searching by name requires you to have interacted (been within a common room / space) with the user previously, otherwise you will need to specify their full Matrix ID, for example, @user:example.com.
After confirming the invitees for the chat, click Go. This will open a draft of the room in the Right Panel, you must then send your first message for the room to be created and the recipients to be invited.

Starting a New Room
After clicking New room, you will be presented with the Create a private room prompt, from here you can specify the room settings as desired.
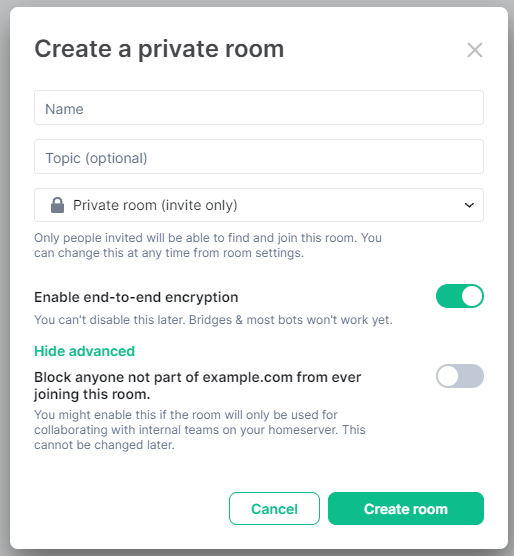
- Name: This is the name your room will appear as, if you are making a public room, make sure you choose a name that will be easily found when searching and is appropriate for the homeserver.
-
Topic: This works as a description for the room, it is presented at the top of a room

-
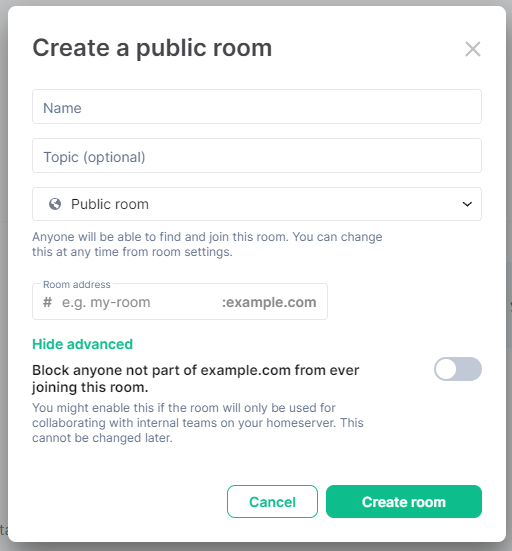
Room Type: Here you can customize whether the room should be publicly accessible, changing to public will change the available configuration options, per images above, and prevent enabling end-to-end encryption1.
- Private Rooms | Enable end-to-end encryption: Enabling this at any time prevents disabling it, ensure when creating the room you would like encryption. It is always possible to enable encryption after room creation via the room settings.
-
Public Rooms | Room Address: Much like your Matrix ID
@user:example.com, your room will also have an ID or address#room:example.comthat can be used to link to it from other chats, using#. It maybe beneficial to choose a simpler name here, allowing the room name to be more descriptive. Do note some characters are not allowed, such as spaces,#and%.
- Advanced - Block anyone not part of homeserver: Enabling this prevent users from other homeservers from joining the room.

1 Whilst you can enable encryption for a public room via the room settings after creation it's not recommended to add encryption to public rooms. Anyone can find and join public rooms, so anyone can read messages in them. You'll get none of the benefits of encryption, and you won't be able to turn it off later. Encrypting messages in a public room will make receiving and sending messages slower.
What's Next?
Using A Room
Now you've created a room, try the next in the Matrix Rooms: Getting Started series, Getting Started: Using a Room
Managing A Room
To learn more about managing a room, try our Matrix Rooms: Managing a Room series, starting with Managing a Room: Room Info.
WIP Getting Started: Using a Room
Disclaimer: This guide refers to using the Element Matrix clients, Element Web or Element Desktop apps
Joining a Room
- Searching for rooms
- Finding rooms using spaces
- Troubleshooting failed room invites
Configuring a Room
- Room settings (Priority / Notifications etc.)
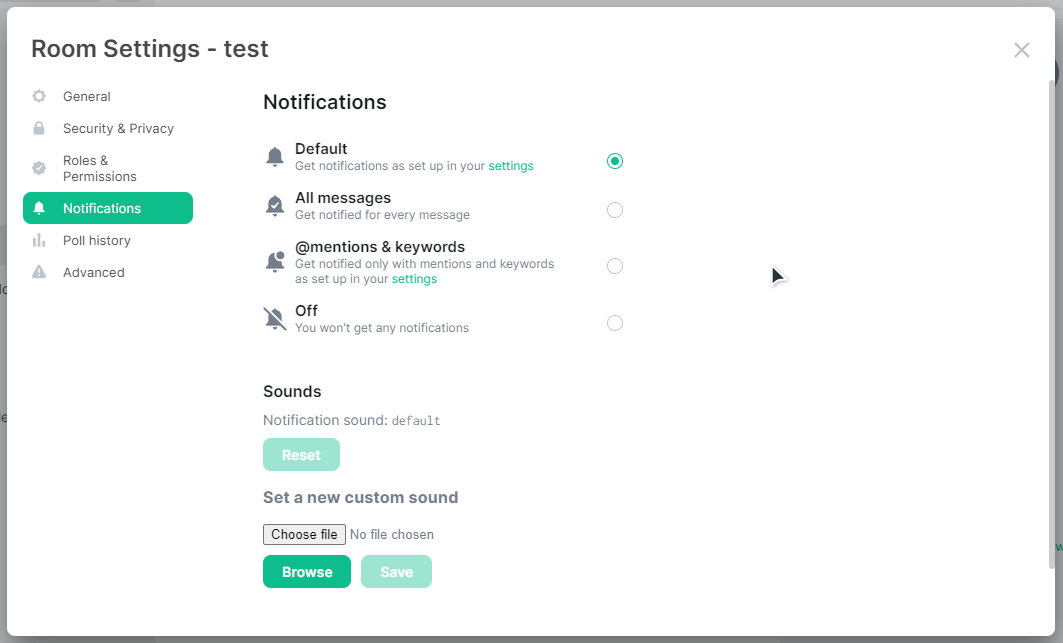
Notifications
From this section, you can managed your personal notification settings. The options you choose
Leaving a Room
- Not known room - unable to leave room
What's Next?
Managing A Room
To learn more about managing a room, try our Matrix Rooms: Managing a Room series, starting with Managing a Room: Room Info.
Managing a Room: Room Info
Disclaimer: This guide refers to using the Element Matrix clients, Element Web or Element Desktop apps
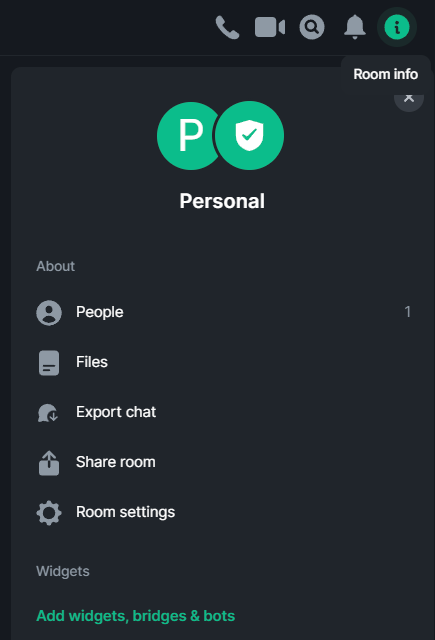
To start managing a room, you can click the i icon in the top right of the room, this will open Room Info. From here there are a number of basic management options you can perform.
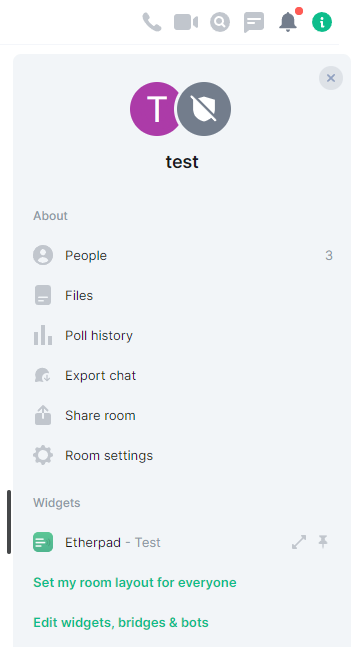
People
From this section, you can invite more people to the room and view the existing members.
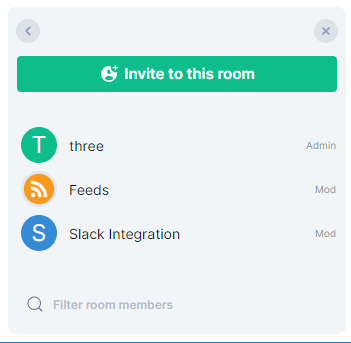
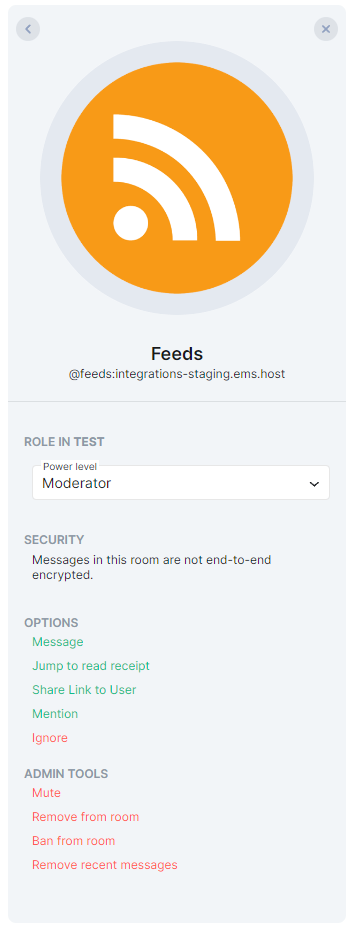
Clicking on any member, via this pane or from their username / profile picture from the room directly, will take you to management options specific to that user. You can adjust their power level, remove recent messages, mute them or Remove / Ban them from the room.
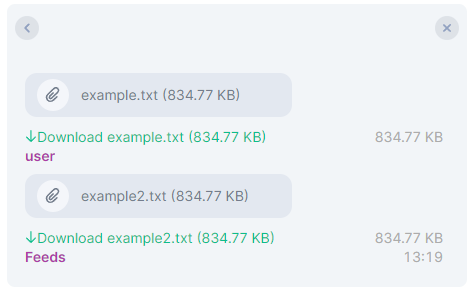
Files
From this section, you view in chronological order, media shared within the room. File entries include the name of the media and a preview if applicable, the media's size and the option to download it as well as information on who and when it was sent.
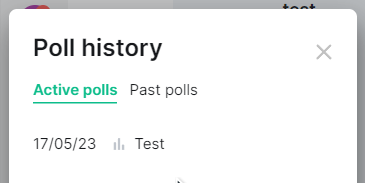
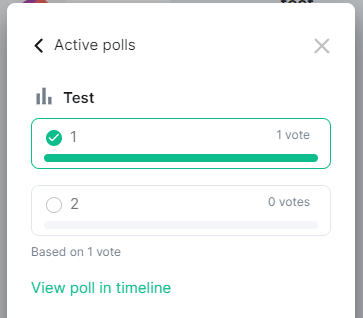
Poll History
From this section, you can review Active and Past polls, clicking on individual entries to drill down into the results as well as jump to them in the timeline.
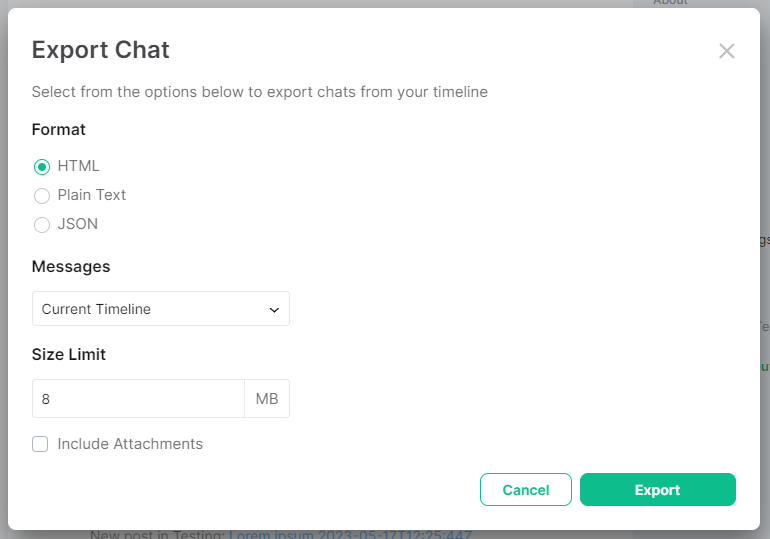
Export Chat
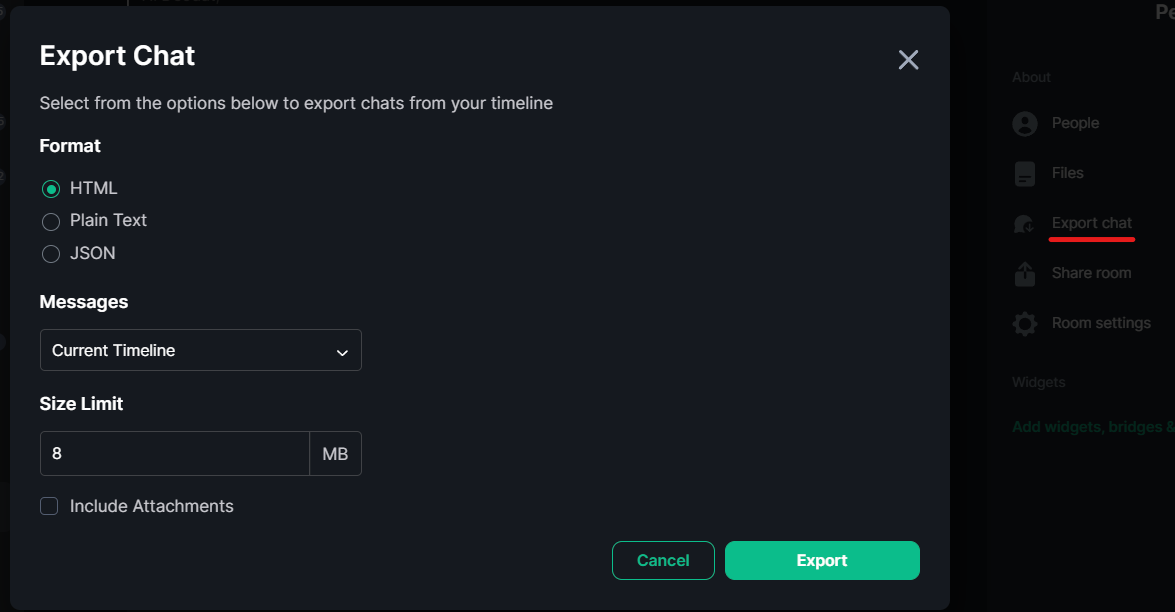
From this section, you can export your rooms message history (including attachments if needed) in HTML, Plain Text or JSON format.
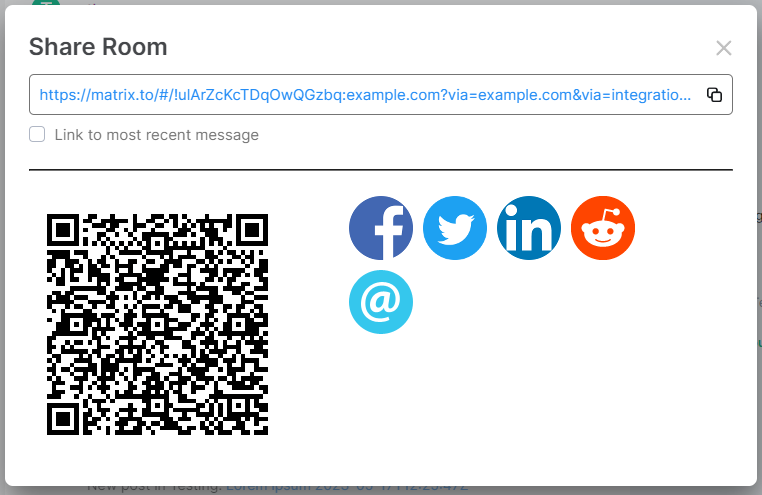
Share Room
From this section, you can generate a link or QR code image that can be shared beyond Matrix to allow others to join the room.
What's Next?
Room Settings
Now you've mastered this section, try the next in the Matrix Rooms: Managing a Room series, Room Settings, for details on available room settings.
Managing a Room: Room Settings
Disclaimer: This guide refers to using the Element Matrix clients, Element Web or Element Desktop apps
You can access Room Settings by either clicking Room settings from the Room info pane:

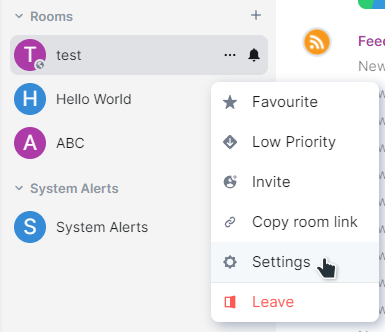
Or by hovering over the room name from the room list, clicking the 3-dot menu, then selecting Settings:
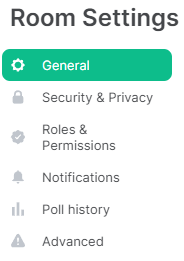
You will be presented with the Room Settings screen, and various navigation options, for details on each of these screens, see the below sections:
General
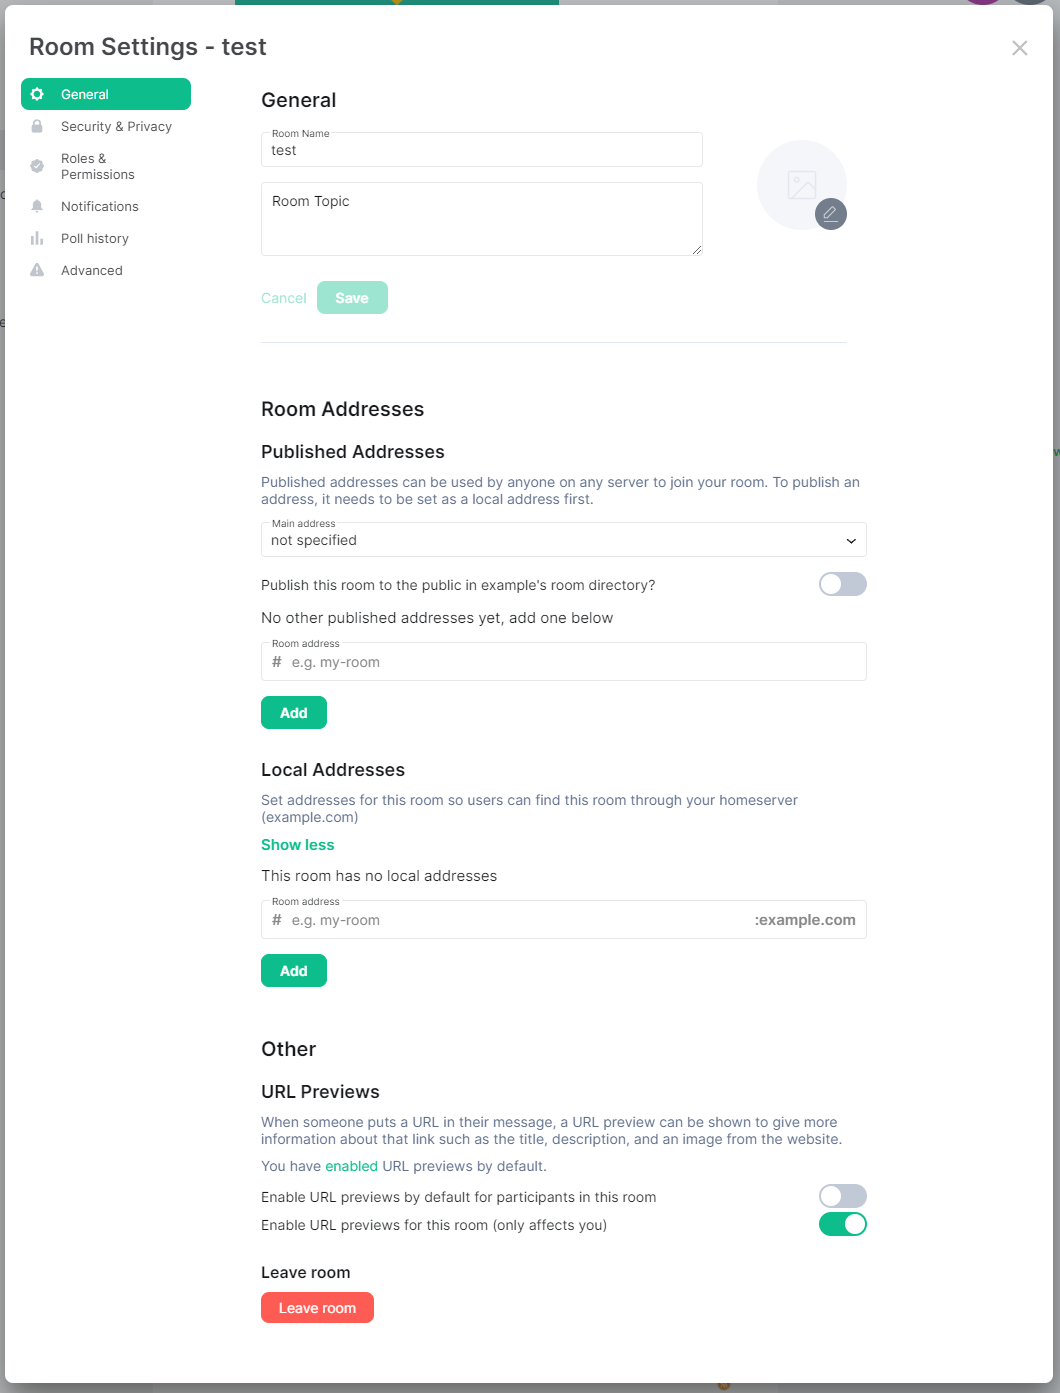
From this section, you can customize how your room looks and is accessed:
General
- Room Name - The name of your room as it appears within a users' room list.
- Room Topic - A description of the room, present along the top bar when viewing the room.
- Avatar - An icon for the room, change by clicking the
Pencilicon and uploading your desired image.
Check the FAQ Entry for details on What is the preferred resolution for room and space icons?
Room Addresses
Published Addresses
Published addresses can be used by anyone on any server to join your room. To publish an address, it needs to be set as a local address first.
- Main Address - from this dropdown you can select which local address you would like to be the main address to your room from external homeservers. Once a local address is first set, this will default to that address, however you can remove the main address by selecting
not specifiedfrom the dropdown. - Publish this room to the public in example's room directory - toggling this will allow your room to be discoverable by user's with access to the homeserver.
- Room Address - you can also publish other addresses in addition to the main address by adding other local addressed here and clicking
Add.
Local Addresses
Set addresses for this room so users can find this room through your homeserver.
- Room Address - Provide the address that users can use to access your room, creating your first Room Address will automatically set it as the
Main AddressunderPublished Addresses
Other
-
URL Previews - When someone puts a URL in their message, a URL preview can be shown to give more information about that link such as the title, description, and an image from the website. You can enable this for the room just for you, or as the default for participants in the room.
-
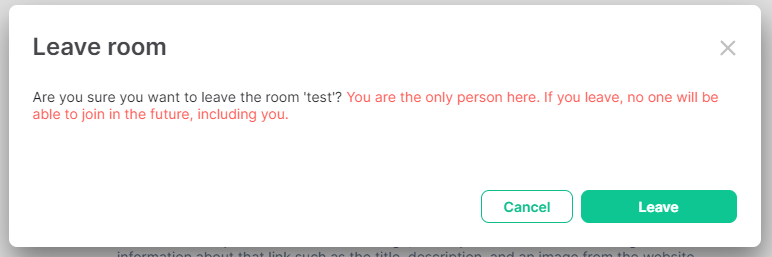
Leave room - Here you can opt to leave the room:
If you are the only person in a room, if you leave, no one will be able to join in the future, including you. If you are the sole user with Admin rights to a room and you intend to leave, you should increase the power level of an active member to allow for room management.
Security & Privacy
From this section, you can turn on Encryption if not already on, confirm who can join and the historical messages they can read.
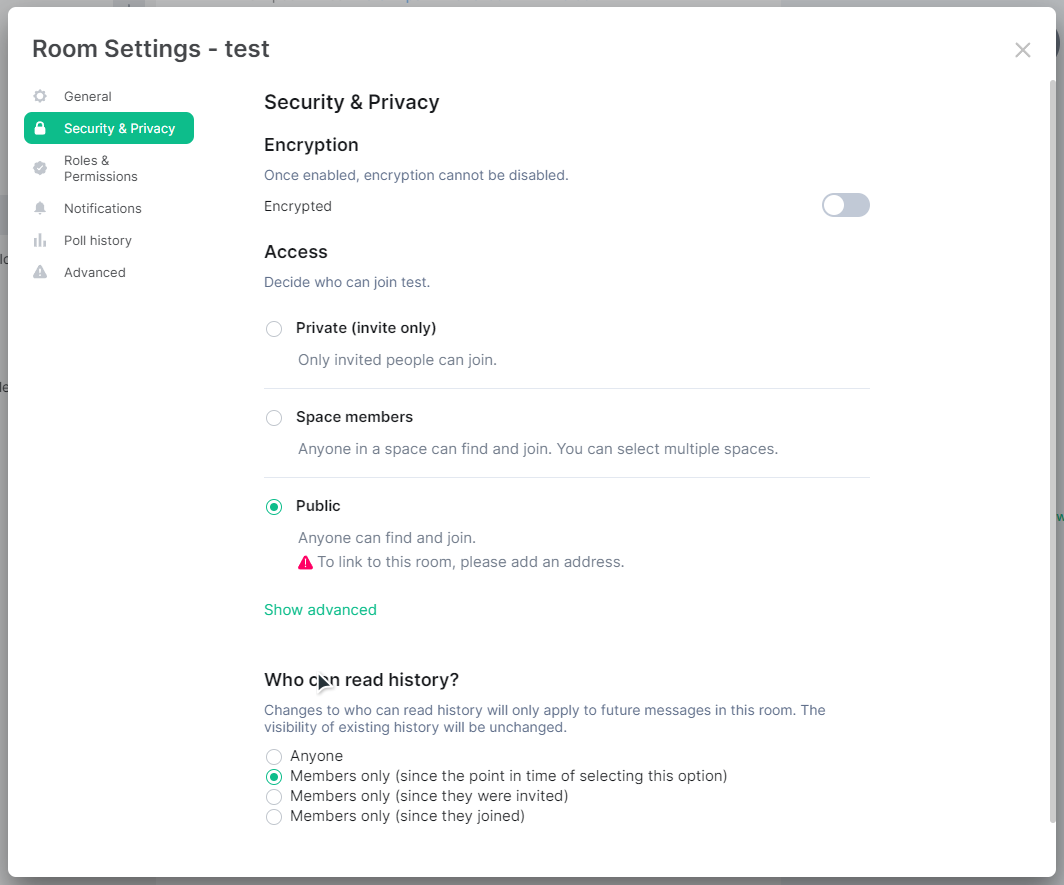
Access
-
Private (invite only) / Public - Select your desired access level, note to link to a public room, you will need to publish an address. You can do so from the
Generalsection.-
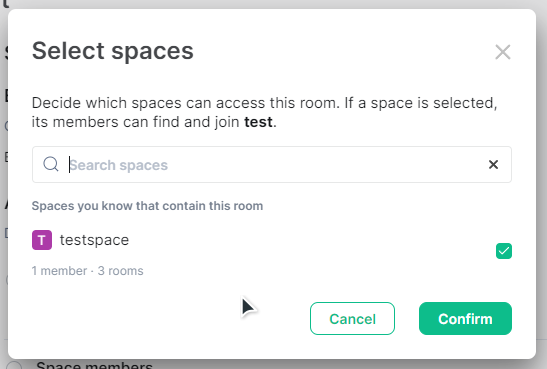
Space members - To use this option, ensure your room is in a space, then select and confirm all spaces that members of those spaces should be able to join.

-
-
Guest Access - Available only when
Public, by default, people with supported clients will be able to join the room without having a registered account. You can disable this behavior by clickingShow Advancedthen switching off via the toggle button.
Who can read history?
Changes to who can read history will only apply to future messages in this room. The visibility of existing history will be unchanged.
From here the options are self-explanatory, simply change as desired to meet your requirements.
Roles & Permissions
From this section, you can manage who can access, who can manage and who can administer your room.
Management of a room is generally handled by it's admins and moderators, however under-the-hood, rooms make use of power levels. A users' power level is a number between 0 and 100 where the higher the number, the more access you have. The default power levels for the admin and moderator roles are 100 and 50 respectively, however you can specify any custom power level for specific actions.
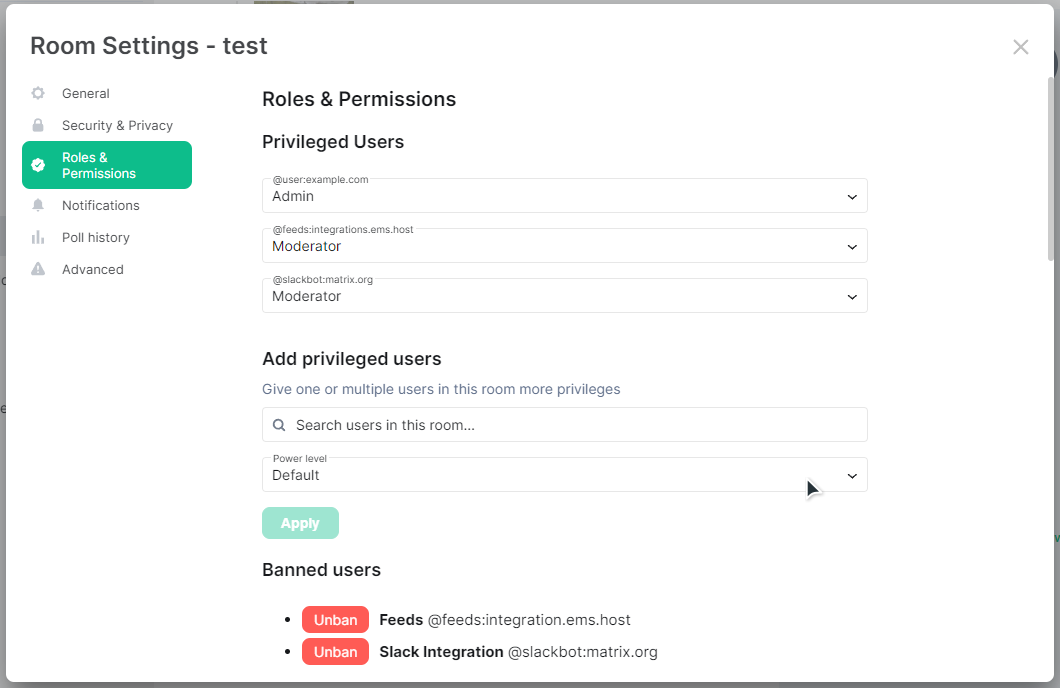
Privileged Users
Setting a user from this list to Default will remove them as a Privileged User
If the only Admin for a room is demoted, you will not be able to manage the room, be careful when applying changes to permission levels
Here you can manage all Privileged users for the room, and the power level they have. You can select either Default, Moderator, Admin or Custom Level.
Add privileged users
From this section you can search existing members of the room and specify a desired power level to elevate them as a Privileged User.
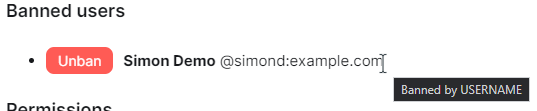
Banned Users
A list of banned users, and the option to revoke the ban will be presented here if any bans have been made. You can identify who banned each specific user by hovering over the banned user.
Permissions
From here you can see a list of all actions possible within a room, and control the required power level to perform those actions.
Actions and Default Power Levels
- Default role: Default (0)
- Send messages: Moderator (50)
- Invite users: Default (0)
- Change settings: Moderator (50)
- Remove users: Moderator (50)
- Ban users: Moderator (50)
- Remove messages sent by others: Moderator (50)
- Notify everyone: Moderator (50)
- Change room name: Moderator (50)
- Change permissions: Admin (100)
- Change history visibility: Admin (100)
- Change main address for the room: Moderator (50)
- Change room avatar: Moderator (50)
- Upgrade the room: Admin (100)
- Change server ACLs: Admin (100)
- Enable room encryption: Admin (100)
- Change topic: Moderator (50)
- Send m.room.pinned_events events: Moderator (50)
- Send reactions: Default (0)
- Remove messages sent by me: Default (0)
- Send org.matrix.msc3401.call events: Moderator (50)
- Send org.matrix.msc3401.call.member events: Moderator (50)
- Modify widgets: Moderator (50)
- Voice broadcasts: Moderator (50)
Notifications
This section configures your personal notification settings and isn't a management option applicable to all room users. To start learning the basics of creating and using rooms, check our 'Getting Started' series of docs on the subject, starting with Creating a Room and specifically Using a Room for notification configuration.
Poll History
This section is another way to access Poll History, you can also access simply via the Room Info pane. To learn more, check the Room Info doc from our 'Managing a Room' series.
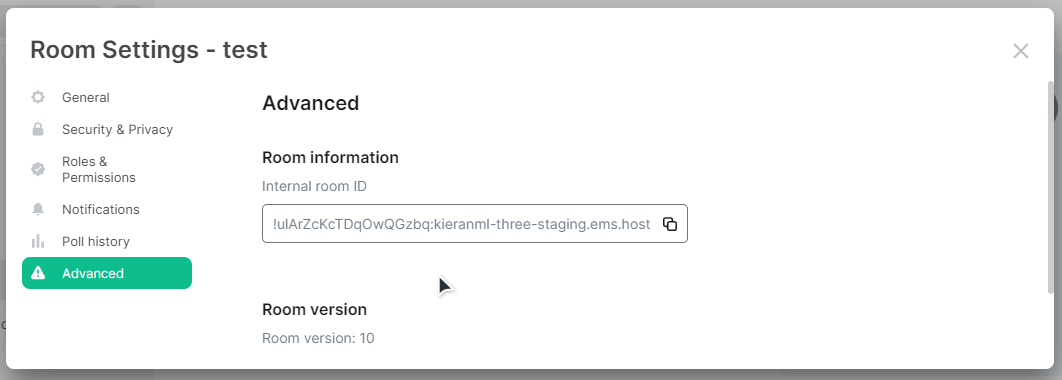
Advanced
From this section, you can confirm the current room version as well as the Internal Room ID.
What's Next?
Advanced Room Management
Now you've mastered this section, try the next in the Matrix Rooms: Managing a Room series, Advanced Room Management, for details on available room settings.
Managing a Room: Advanced Room Management
Disclaimer: This guide refers to using the Element Matrix clients, Element Web or Element Desktop apps
Transferring Ownership of a Room
There are several scenarios where you might wish to transfer ownership of a room; perhaps you no longer wish to maintain the room yourself; have accidentally removed your, or possibly all privileged users' permissions from a room; or wish to take over an abandoned room.
How do I transfer ownership of a room? / How do I restore lost privileges to a room?
If you do not have permissions yourself, contact a current Admin for the room and get them to follow these steps to promote you.
Admins cannot remove admin permissions from other users, only themselves. Make sure any user prompted to Admin is correct before making changes.
- Open the room, click
i/Room Infofrom the top-right - Open
Room Settings, click toRoles & Permissions - Add a new privileged user, setting their power level to
Admin - Under privileged users, find your username, change your power level from
Adminto the desired level
How do I take over an abandoned room? / How do I restore lost privileges to a room without an Admin?
For the following you will need Admin access to the homeserver. If you do not manage the homeserver for your room, you will need to contact the support for that homeserver.
When a user is no longer active on your homeserver, or they have been deactivated, you may find some rooms where there are no remaining active Room Admins preventing administration of those rooms. This guide will make extensive use of the Admin API, see our Getting Started Using the Admin API guide for more information, and if required, will also use the Client-Server API, which has an equivalent Getting Started Using the Client-Server API guide.
If there is a non-deactivated but no longer active Room Admin user still present within the room, you can make use of the Admin API Make Room Admin API to grant the Admin role to another user:
POST https://HOMESERVER_URL/_synapse/admin/v1/rooms/ROOM_ID/make_room_admin
{
    "user_id": "@user:example.com"
}
However that leaves a problem if there are no longer any admins still within the room. Fortunately, whether they are within the room or not, users retain their power levels unless they demote themselves prior to leaving.
So for rooms where you are unsure who holds Room Admin (I.E Power level 100), you can use the Admin API Room State API:
You can find the `ROOM_ID` from Room Settings Advanced
GET https://HOMESERVER_URL/_synapse/admin/v1/rooms/ROOM_ID/state
This will return a list of states, find the state where "type": "m.room.power_levels", from within that states' "content": { "users": {} } you will find a list of users followed by their power level, the Room Admins of the room will have a power level of 100.
If the listed Room Admins have been deactivated, you will first reactivate one of them. To reactivate a deactivated user, you can use an Admin Console if you have access to one to perform this operation for you, or you can use the Admin API Create Or Modify Account API:
`USER_ID` should look something like `@user:example.com`, otherwise known as the full Matrix ID
PUT https://HOMESERVER_URL/_synapse/admin/v2/users/USER_ID

{
    "password": "NEW_PASSWORD",
    "deactivated": false
}
At this point you should have an active account with Room Admin available that can be used to regain access to management of the room. If you've reactivated a deactivated user, you will have had to set a new password for the account, you could at this point login as the user using a Matrix client. You would then be able to rejoin any required rooms, promoting new users to the Admin role before deactivating the account.
Alternatively you can generate an access token for an account using the Admin API Login as a user API.
POST https://HOMESERVER_URL/_synapse/admin/v1/users/USER_ID/login
{}
{
    "access_token": "<opaque_access_token_string>"
}
The users' access token can be used by the Client-Server API to perform actions, such as joining rooms and changing room permissions.
To join a room you will use the Client-Server API Join API
POST https://HOMESERVER_URL/_matrix/client/v3/join/ROOM_ID
{}
Finally, you can set the power levels for users within a room using the Client-Server API Events API:
PUT https://HOMESERVER_URL/_matrix/client/v3/rooms/ROOM_ID/state/m.room.power_levels
{
    "users": {
        "@user:example.com": 100
    }
}
Important Notes
Any deactivated user that was reactivated via these steps should be deactivated once again following the process. You can do this a number of ways, see our Deactivating a Matrix Account documentation for further guidance.
The original Room Admin will still retain their admin power level, as Room Admins are not able to demote other admins, for deactivated user this isn't an issue however if the user is still active and you want to demote them you should repeat the final step. Using the Client-Server API Events API send that users' own username with the power level you want them to have.
Removing a Room
There is no way to unilaterally delete a room unless you own the homeserver is it on, however an invite-only room will no longer be able to be joined once all members of the room have left. As an admin it is possible to remove people from the room via the Room Info panel see the Managing a Room: Room Info page, once no other members remain, leaving the room will offer a final prompt to confirm the action.
Tombstoning a Room
An alternative to everyone leaving a room, and a new one being created is to Tombstone it. This acts like closing a room and pointing it to a replacement. You can find the steps for this on our FAQ Page.
Deleting a Room
If you manage a homeserver you can delete a room from it, you can find the steps for doing this if you're an EMS customer on our FAQ Page. Rooms across multiple homeservers will only be deleted from your homeserver.
Exporting Messages
Note: If you are an EMS server admin and wish to export your entire EMS server, please see Migrate From EMS to Self-Hosted.
Using your Element client you can export your Room's message history in HTML, Plain Text or JSON format - including attachments.
-
Open the room you wish to export message history

-
Access 'Room Info' using the icon in the top right

-
Select 'Export Chat', then confirm your desired settings for export

-
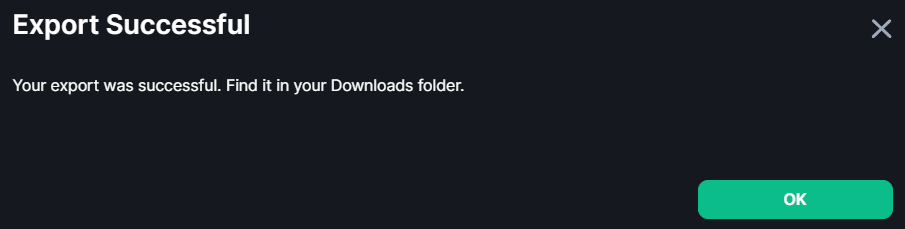
Finally click 'Export' - once the export has completed you will be prompted to save an archive of the export.