Element Web/Desktop Client Settings
Documentation covering the options available within the Element Web/Desktop Clients' Settings.
- Element Settings
- Accessing General Settings
- Appearance Settings
- Notification Settings
- Preference Settings
- Keyboard Settings
- Sidebar Settings
- Voice & Video Settings
- WIP Security & Privacy Settings
- Sessions
- Labs
- Help & About
Element Settings
Notice: Please be advised this document is currently a work in progress, some information is currently missing and will be updated in due course.
Remember: Have you tried - https://element.io/help ?
Don't forget to download our User Guide
Relating to this page, Element Settings, you can specifically check for relevant information from the Account Management and Settings sections.
Accessing Settings
You can change your Matrix account settings by clicking your profile icon in the top left of the Element client. By defualt, this will be a coloured circle with the first letter of your Matrix ID. From the presented drop-down menu, you'll be able to jump into specfic settings straight away, or access 'All Settings'.
You can also use this menu to quickly return 'Home', provide 'Feedback' and this is where you can 'Sign Out' from your client.
Disclaimer: The below setting layout / order may change in subsequent client updates, however generally most settings will still perform the same function.
General
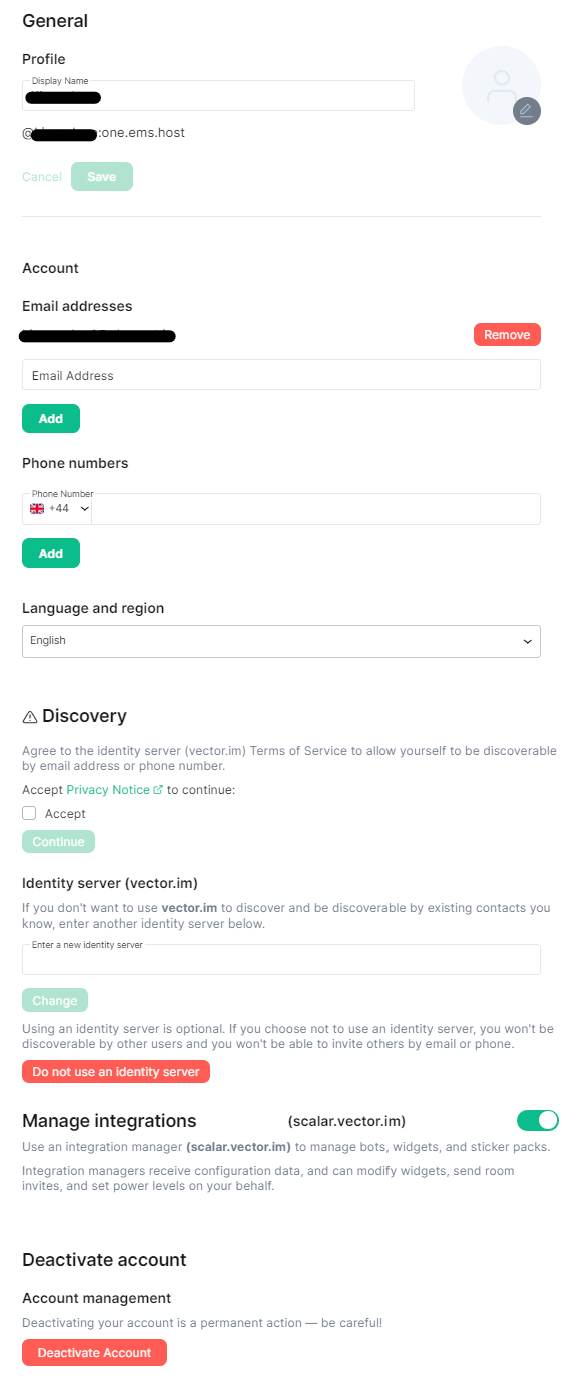
Profile
Allows you to change your 'Display Name', this is the name seen by others whilst messaging with them. Updating this will notify all rooms of the change of name. You are also able to upload / change your profile picture, you can do this by hoovering over the existing picture and clicking.
After making your changing, click 'Save' to set them. You Matrix ID in full is also displayed here for your reference.
Account
Allows you to add email addresses / phone numbers to your account, as well as change your 'Language and Region' setting. Adding of Third-Party IDs requires verifying your login by either supplying your account password, or using SSO (such as when using Element One).
Discovery
Allows you to agree to the identity server (vector.im) Terms of Service to allow yourself to be discoverable by email address or phone number, change your identity server. Using an identity server is optional. If you choose not to use an identity server, you won't be discoverable by other users and you won't be able to invite others by email or phone.
You can stop using an identity server by clicking 'Do not use an identity server'
Manage integrations
Allows you to turn on or off the use of an integration manager. You the toggle button to configure as desired.
Deactivate account
Allows you to deactivate your account - Warning! Deactivating your account is a permanent action.
Appearance

Appearance settings allows you to customise the look and feel of your client, all settings provide visual representation of the changes so you can confirm your preferred style. Options include Theme, Message Layout, Font Size and Image size in the timeline.
Notifications
Notification settings allow you to customise default notification settings which are synced to your account, however you are also able to customise whether you recieve notifications for this specific device. Note: A device is per client, using both a web-based Matrix client and a Desktop client on the same physical device will still appear as two separate devices.
Desktop Notifications
To enable desktop notifications from your client, you can enable the toggle 'Enable desktop notifications for this session', you can also customise these notifications to also display the message that triggers the notification using the 'Show message in desktop notification' toggle. When using a web-based Element client, you will also need to accept permissions allowing the client to display notifications.
Notification types explained
Notification settings allow notifications to be set as either 'Off', 'On' or 'Noisy'.
- Off: You won’t be notified when the selected event happens.
- On: You will get a message popping up when the selected event happens, but no sound.
- Noisy: You will get a visual highlight (red badge and/or text highlight), a sound and/or vibration (depending on the device) when the selected event happens.
For finer tuning, you can easily configure per room notification setting from the context menu you get by clicking on the ... icon that appears when hovering over the room name in the room list. You can use this to temporarily mute a room, or make sure you’re not missing anything from a given discussion. You can select the following options:
- Mute: You won’t be notified, even if your name or a keyword is mentioned.
- Mentions only: You will only be notified for the items that are meant to be ‘noisy’, i.e. your name and keywords.
- All messages: You will get a (silent) notification for every message happening in the room; your ‘noisy’ events (e.g. your name being mentioned) will still be noisy (red badge and sound).
- All messages (Noisy): every message will make a noise on top of the visual notification. Your noisy events will still be differentiated by a red badge.
Keyword Notifications
From the notification settings you can also add additional keywords to listen for to trigger a notification. You can directly specify how a notification triggered from these keywords responds in the 'Mentions & keywords' section.
Preferences
Keyboard
Sidebar
Voice & Video
Security & Privacy
Labs
Help & About

From Help & About you can find important information related to the client itself, such as it's current version, your homeserver and identity server details as well as links to our FAQ, Legal documents and credits.
Your Access Token
Your access token gives full access to your account via the use of Matrix APIs, you can read more about them depending on your needs. If you are an Admin of a homeserver, and are using an account with Admin access, you can make use of the Synapse Admin API. For both admins and regular users, the Matrix APIs can be found from the latest Matrix Spec page - these include:
Bug Reporting
If you've experience a bug, the best place to report it is by submitting a bug report to the appropriate Github repository for your client, the Element account
Accessing General Settings
Disclaimer: This guide refers to using the Element Matrix clients, Element Web or Element Desktop apps
Accessing the Settings Page
You can change your Matrix account settings by clicking your profile icon in the top left of the Element client. By default, this will be a colored circle with the first letter of your Matrix ID. From the presented drop-down menu, you'll be able to jump into specific settings straight away, or access All Settings. Clicking All Settings will take you first to General settings.
You can also use this menu to quickly return Home, provide Feedback and this is where you can Sign Out from your client.
Disclaimer: The below setting layout / order may change in subsequent client updates, however generally most settings will still perform the same function.
General Settings
Profile
Allows you to change your Display Name, this is the name seen by others whilst messaging with them. Updating this will notify all rooms of the change of name. You are also able to upload / change your profile picture, you can do this by hoovering over the existing picture and clicking.
After making your changing, click 'Save' to set them. You Matrix ID in full is also displayed here for your reference.
Account
Allows you to add email addresses / phone numbers to your account, as well as change your Language and Region setting. Adding of Third-Party IDs requires verifying your login by either supplying your account password, or using SSO (such as when using Element One).
You'll want to add your email if you'd like to enable Email notifications, check out the Notification Settings documentation, or discovery via Identity Server - see the Discovery section below.
Discovery
Allows you to agree to the identity server (vector.im) Terms of Service to allow yourself to be discoverable by email address or phone number, change your identity server. Using an identity server is optional. If you choose not to use an identity server, you won't be discoverable by other users and you won't be able to invite others by email or phone.
You can stop using an identity server by clicking 'Do not use an identity server'
Manage integrations
Allows you to turn on or off the use of an integration manager. You the toggle button to configure as desired.
Deactivate account
Allows you to deactivate your account - Warning! Deactivating your account is a permanent action.
Appearance Settings
Disclaimer: This guide refers to using the Element Matrix clients, Element Web or Element Desktop apps
Accessing Appearance Settings
You can change your Matrix account settings by clicking your profile icon in the top left of the Element client. By default, this will be a colored circle with the first letter of your Matrix ID. From the presented drop-down menu, you'll be able to jump into specific settings straight away, or access All Settings. Clicking All Settings will take you first to General settings, click Appearance in the vertical navigation menu on the left to open Appearance settings.
Info: The below setting layout / order may change in subsequent client updates, however generally most settings will still perform the same function.
Appearance Settings
Appearance settings allows you to customize the look and feel of your client, all settings provide visual representation of the changes so you can confirm your preferred style. Options include Theme, Message Layout, Font Size and Image size in the timeline.
Notification Settings
Disclaimer: This guide refers to using the Element Matrix clients, Element Web or Element Desktop apps
Accessing Notification Settings
You can change your Matrix account settings by clicking your profile icon in the top left of the Element client. By default, this will be a colored circle with the first letter of your Matrix ID. From the presented drop-down menu, you'll be able to jump into specific settings straight away, or access All Settings. Clicking All Settings will take you first to General settings, click Notifications in the vertical navigation menu on the left to open Notifications settings.
Info: The below setting layout / order may change in subsequent client updates, however generally most settings will still perform the same function.
Notification Settings
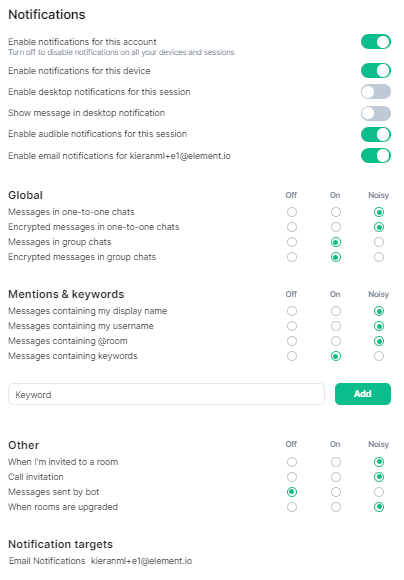
Notification settings allow you to customize default notification settings which are synced to your account, however you are also able to customize whether you receive notifications for this specific device. Note: A device is per client, using both a web-based Matrix client and a Desktop client on the same physical device will still appear as two separate devices.
Desktop Notifications
To enable desktop notifications from your client, you can enable the toggle 'Enable desktop notifications for this session', you can also customize these notifications to also display the message that triggers the notification using the 'Show message in desktop notification' toggle. When using a web-based Element client, you will also need to accept permissions allowing the client to display notifications.
Notification types explained
Notification settings allow notifications to be set as either 'Off', 'On' or 'Noisy'.
- Off: You won’t be notified when the selected event happens.
- On: You will get a message popping up when the selected event happens, but no sound.
- Noisy: You will get a visual highlight (red badge and/or text highlight), a sound and/or vibration (depending on the device) when the selected event happens.
For finer tuning, you can easily configure per room notification setting from the context menu you get by clicking on the ... icon that appears when hovering over the room name in the room list. You can use this to temporarily mute a room, or make sure you’re not missing anything from a given discussion. You can select the following options:
- Mute: You won’t be notified, even if your name or a keyword is mentioned.
- Mentions only: You will only be notified for the items that are meant to be ‘noisy’, i.e. your name and keywords.
- All messages: You will get a (silent) notification for every message happening in the room; your ‘noisy’ events (e.g. your name being mentioned) will still be noisy (red badge and sound).
- All messages (Noisy): every message will make a noise on top of the visual notification. Your noisy events will still be differentiated by a red badge.
Keyword Notifications
From the notification settings you can also add additional keywords to listen for to trigger a notification. You can directly specify how a notification triggered from these keywords responds in the 'Mentions & keywords' section.
Preference Settings
Disclaimer: This guide refers to using the Element Matrix clients, Element Web or Element Desktop apps
Accessing Preference Settings
You can change your Matrix account settings by clicking your profile icon in the top left of the Element client. By default, this will be a colored circle with the first letter of your Matrix ID. From the presented drop-down menu, you'll be able to jump into specific settings straight away, or access All Settings. Clicking All Settings will take you first to General settings, click Preferences in the vertical navigation menu on the left to open Preference settings.
Info: The below setting layout / order may change in subsequent client updates, however generally most settings will still perform the same function.
Preference Settings
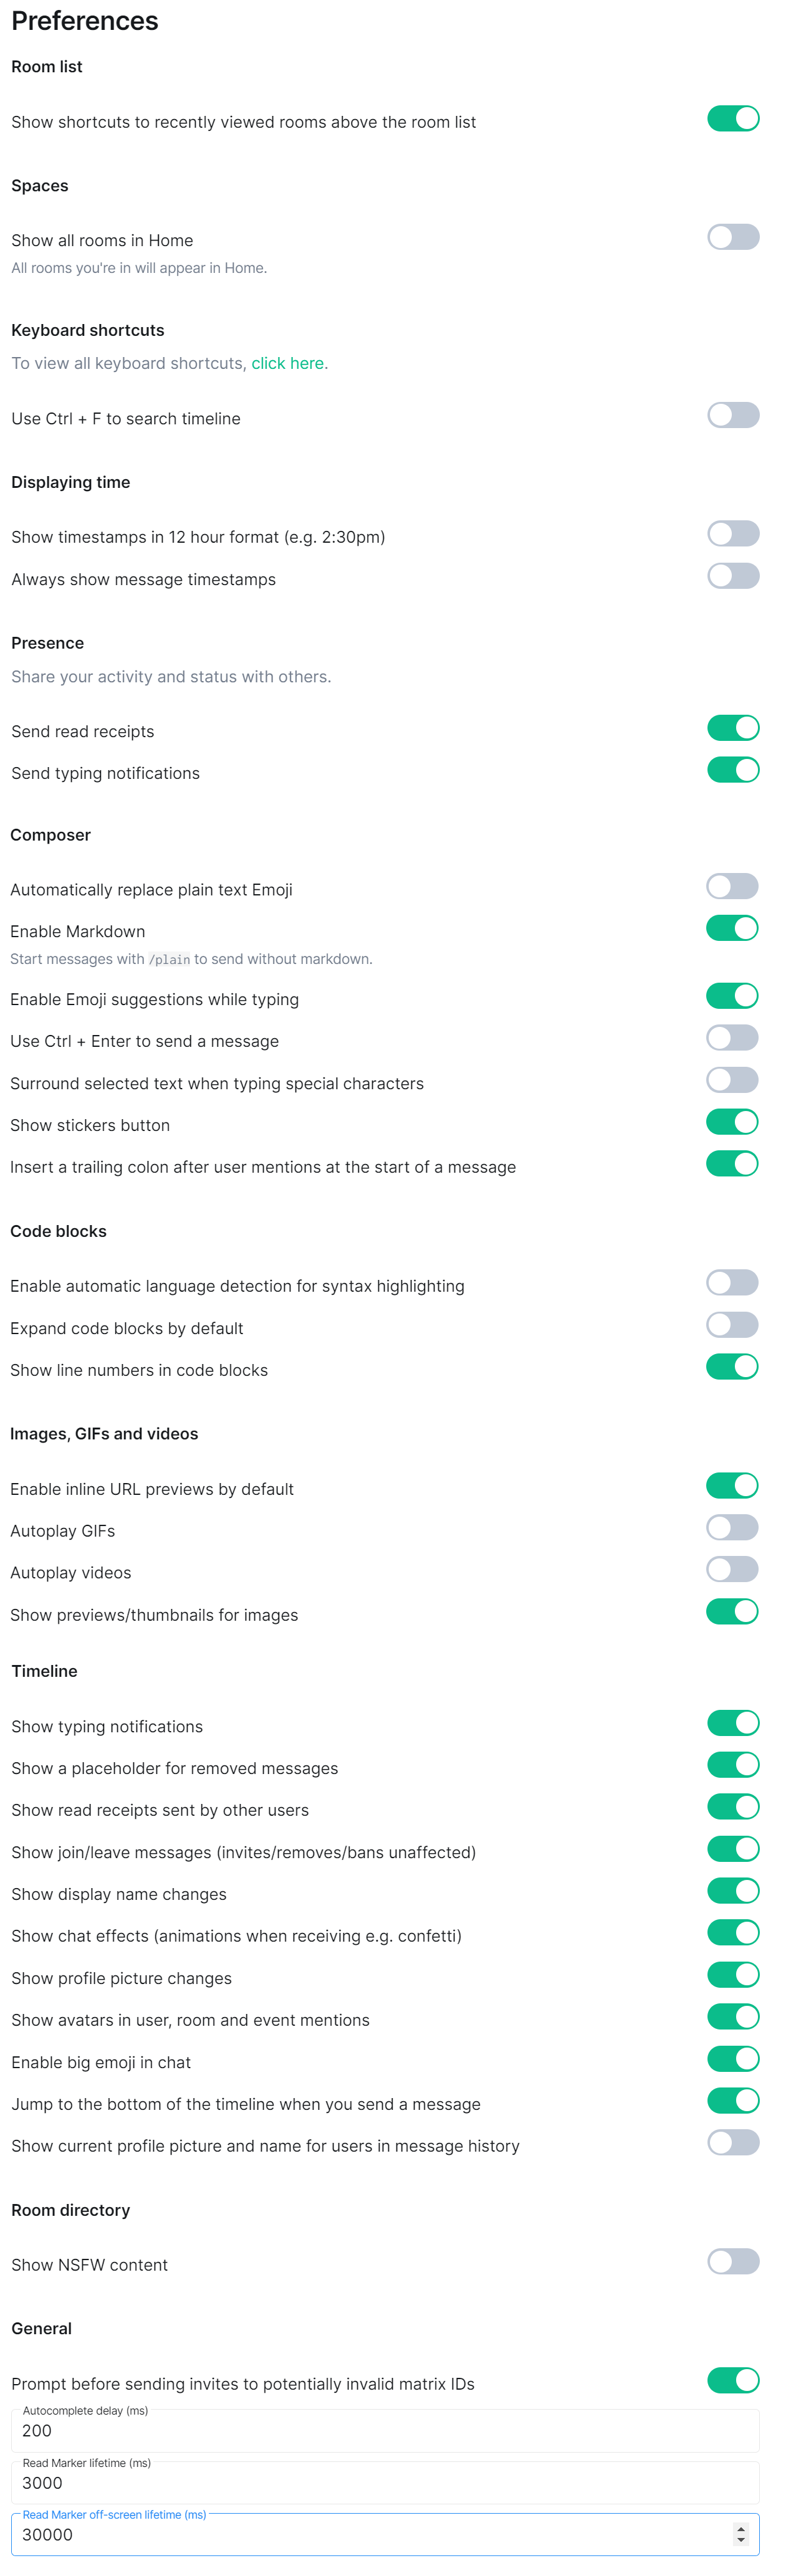
The Preferences view allows you to customize various aspects of the Element client organized by each area of the application. Each preference is explained next to the toggle to enable or disable the option.
Keyboard Settings
Disclaimer: This guide refers to using the Element Matrix clients, Element Web or Element Desktop apps
Accessing Keyboard Settings
You can change your Matrix account settings by clicking your profile icon in the top left of the Element client. By default, this will be a colored circle with the first letter of your Matrix ID. From the presented drop-down menu, you'll be able to jump into specific settings straight away, or access All Settings. Clicking All Settings will take you first to General settings, click Keyboard in the vertical navigation menu on the left to open Keyboard settings.
Info: The below setting layout / order may change in subsequent client updates, however generally most settings will still perform the same function.
Keyboard Settings
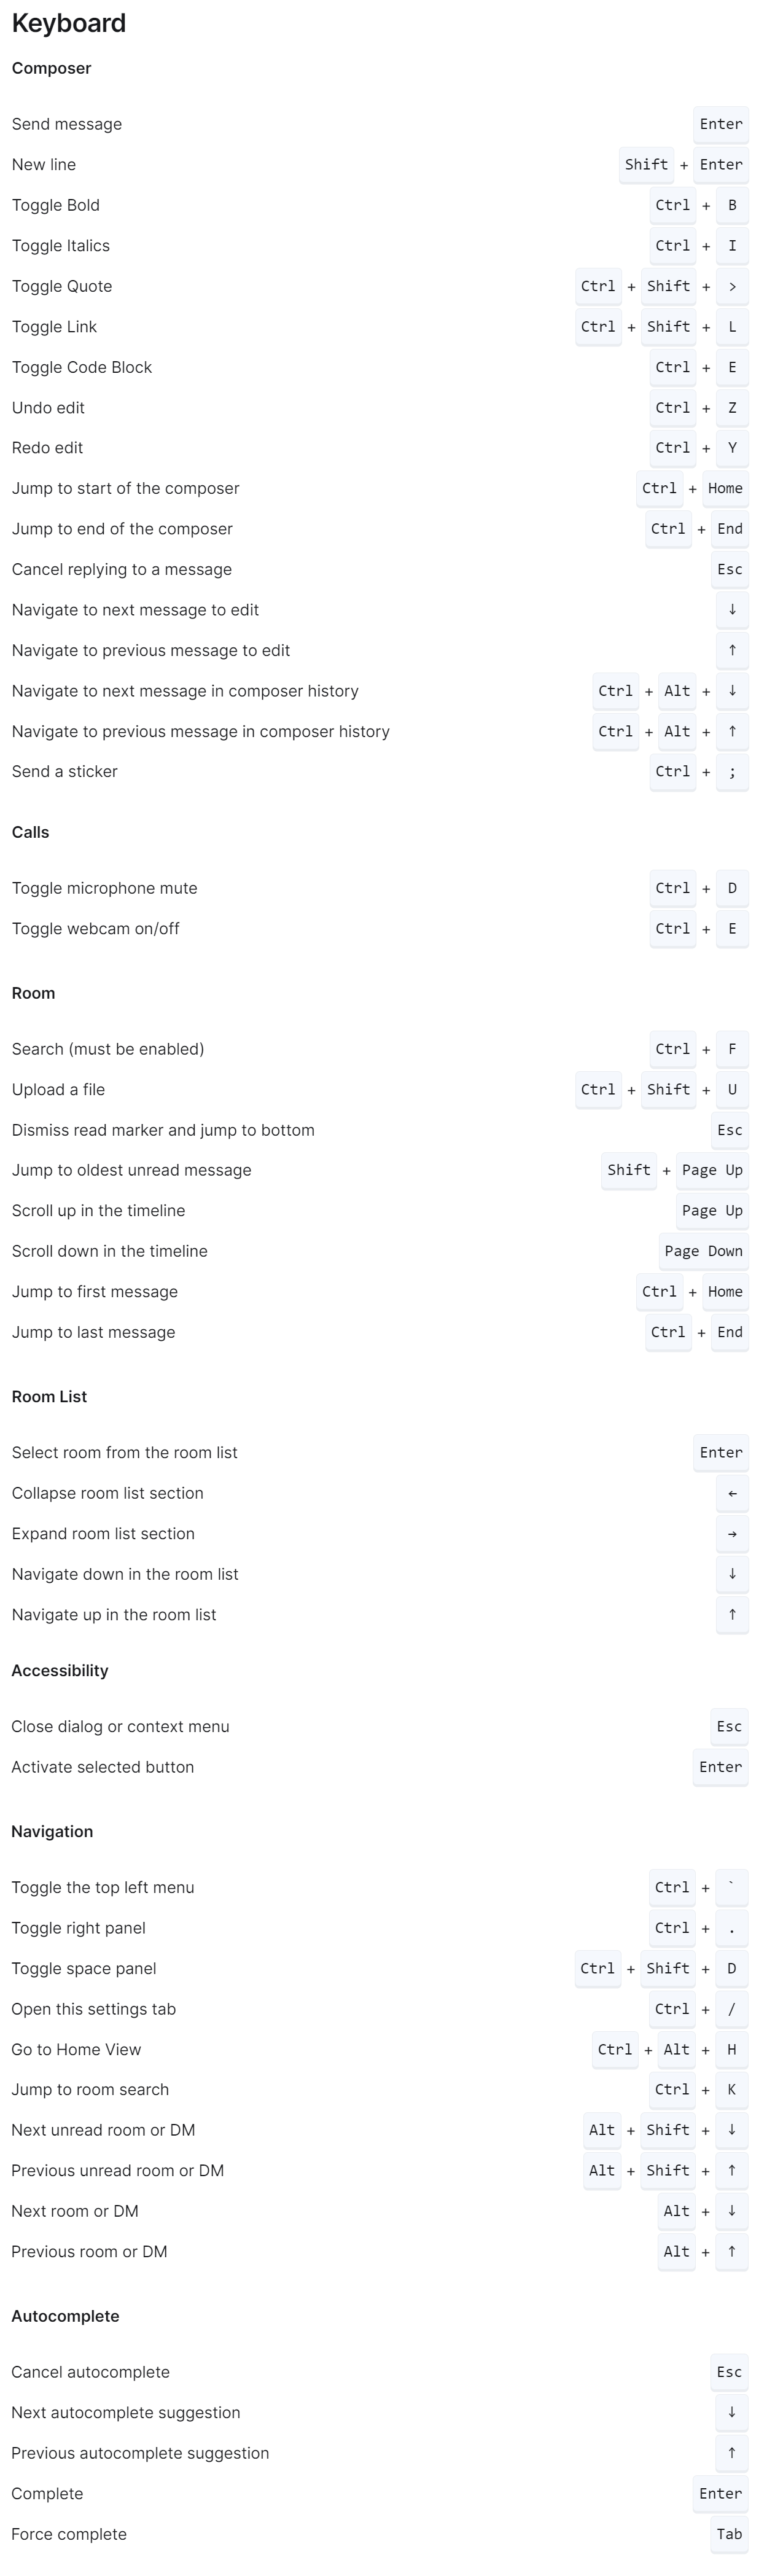
The Keyboard settings view allows you to view all Keyboard shortcuts you can use with the Element client organized by each area of the application.
Sidebar Settings
Disclaimer: This guide refers to using the Element Matrix clients, Element Web or Element Desktop apps
Accessing Sidebar Settings
You can change your Matrix account settings by clicking your profile icon in the top left of the Element client. By default, this will be a colored circle with the first letter of your Matrix ID. From the presented drop-down menu, you'll be able to jump into specific settings straight away, or access All Settings. Clicking All Settings will take you first to General settings, click Sidebar in the vertical navigation menu on the left to open Sidebar settings.
Info: The below setting layout / order may change in subsequent client updates, however generally most settings will still perform the same function.
Sidebar Settings
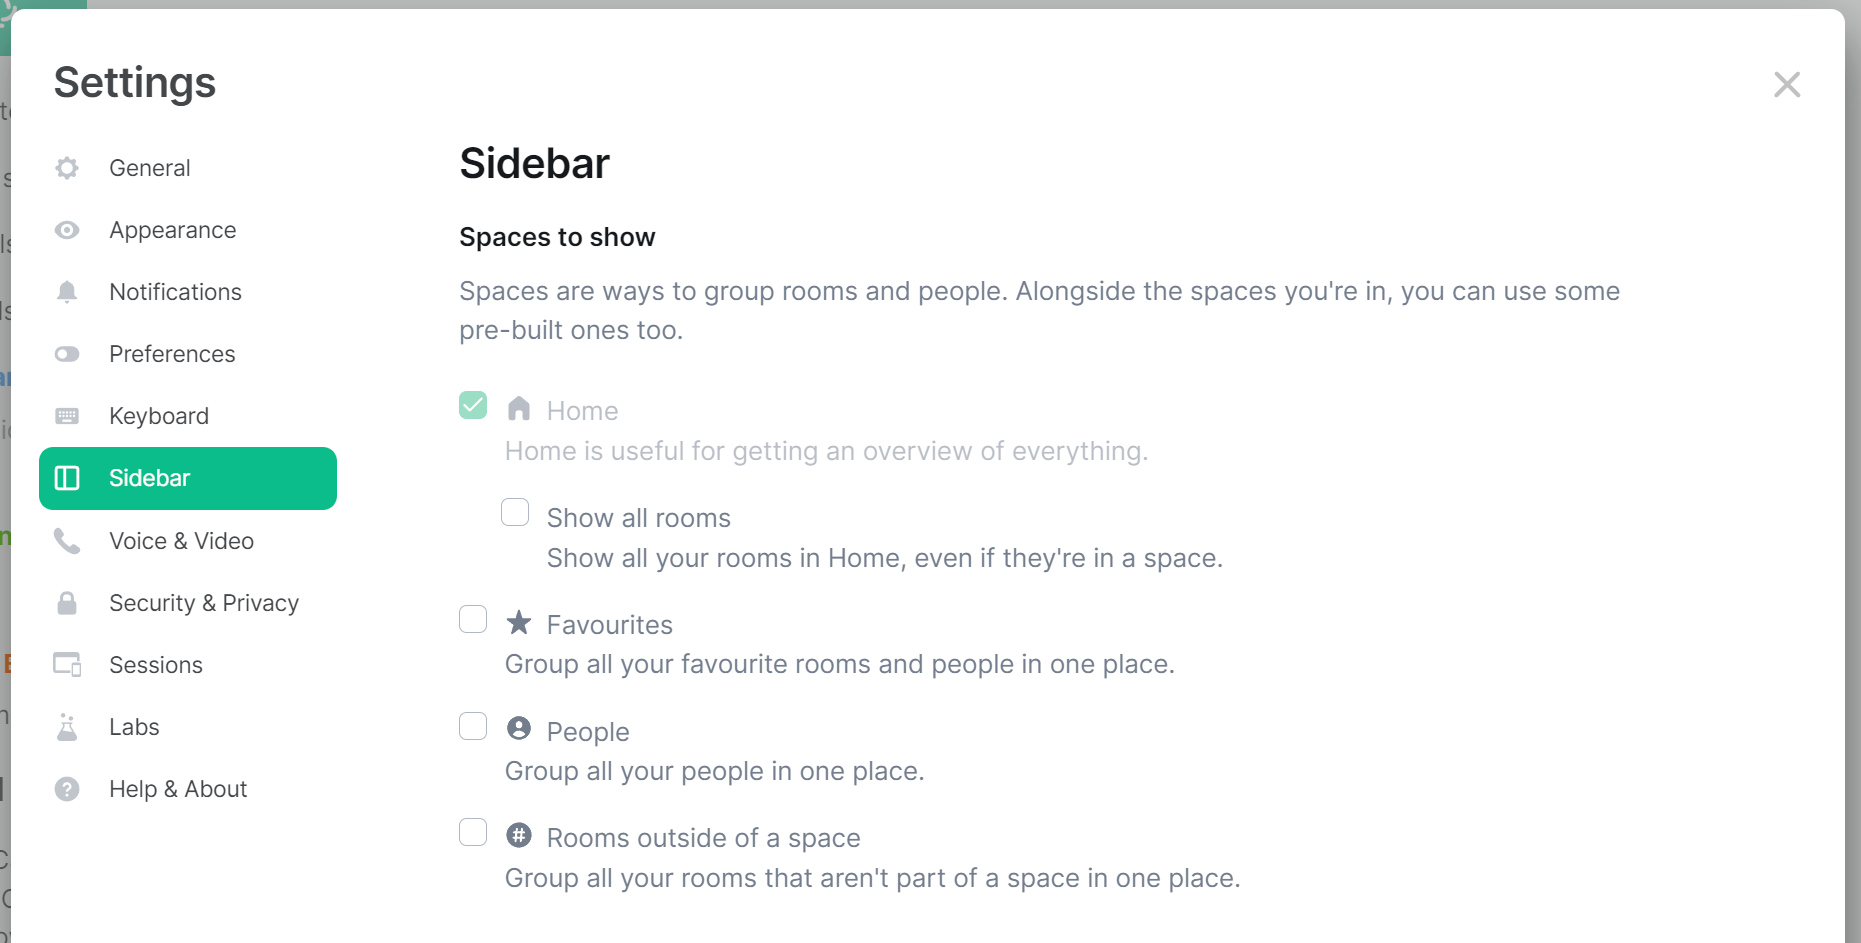
Home: Home is useful for getting an overview of everything.
- Show all rooms: Show all your rooms in Home, even if they're in a space.
Favorites: Group all your favorite rooms and people in one place.
People: Group all your people in one place.
Rooms outside of a space: Group all your rooms that aren't part of a space in one place.
See the below example of a sidebar with these options enabled:

Voice & Video Settings
Disclaimer: This guide refers to using the Element Matrix clients, Element Web or Element Desktop apps
Accessing Voice & Video Settings
You can change your Matrix account settings by clicking your profile icon in the top left of the Element client. By default, this will be a colored circle with the first letter of your Matrix ID. From the presented drop-down menu, you'll be able to jump into specific settings straight away, or access All Settings. Clicking All Settings will take you first to General settings, click Voice & Video in the vertical navigation menu on the left to open Voice & Video settings.
Info: The below setting layout / order may change in subsequent client updates, however generally most settings will still perform the same function.
Voice & Video Settings
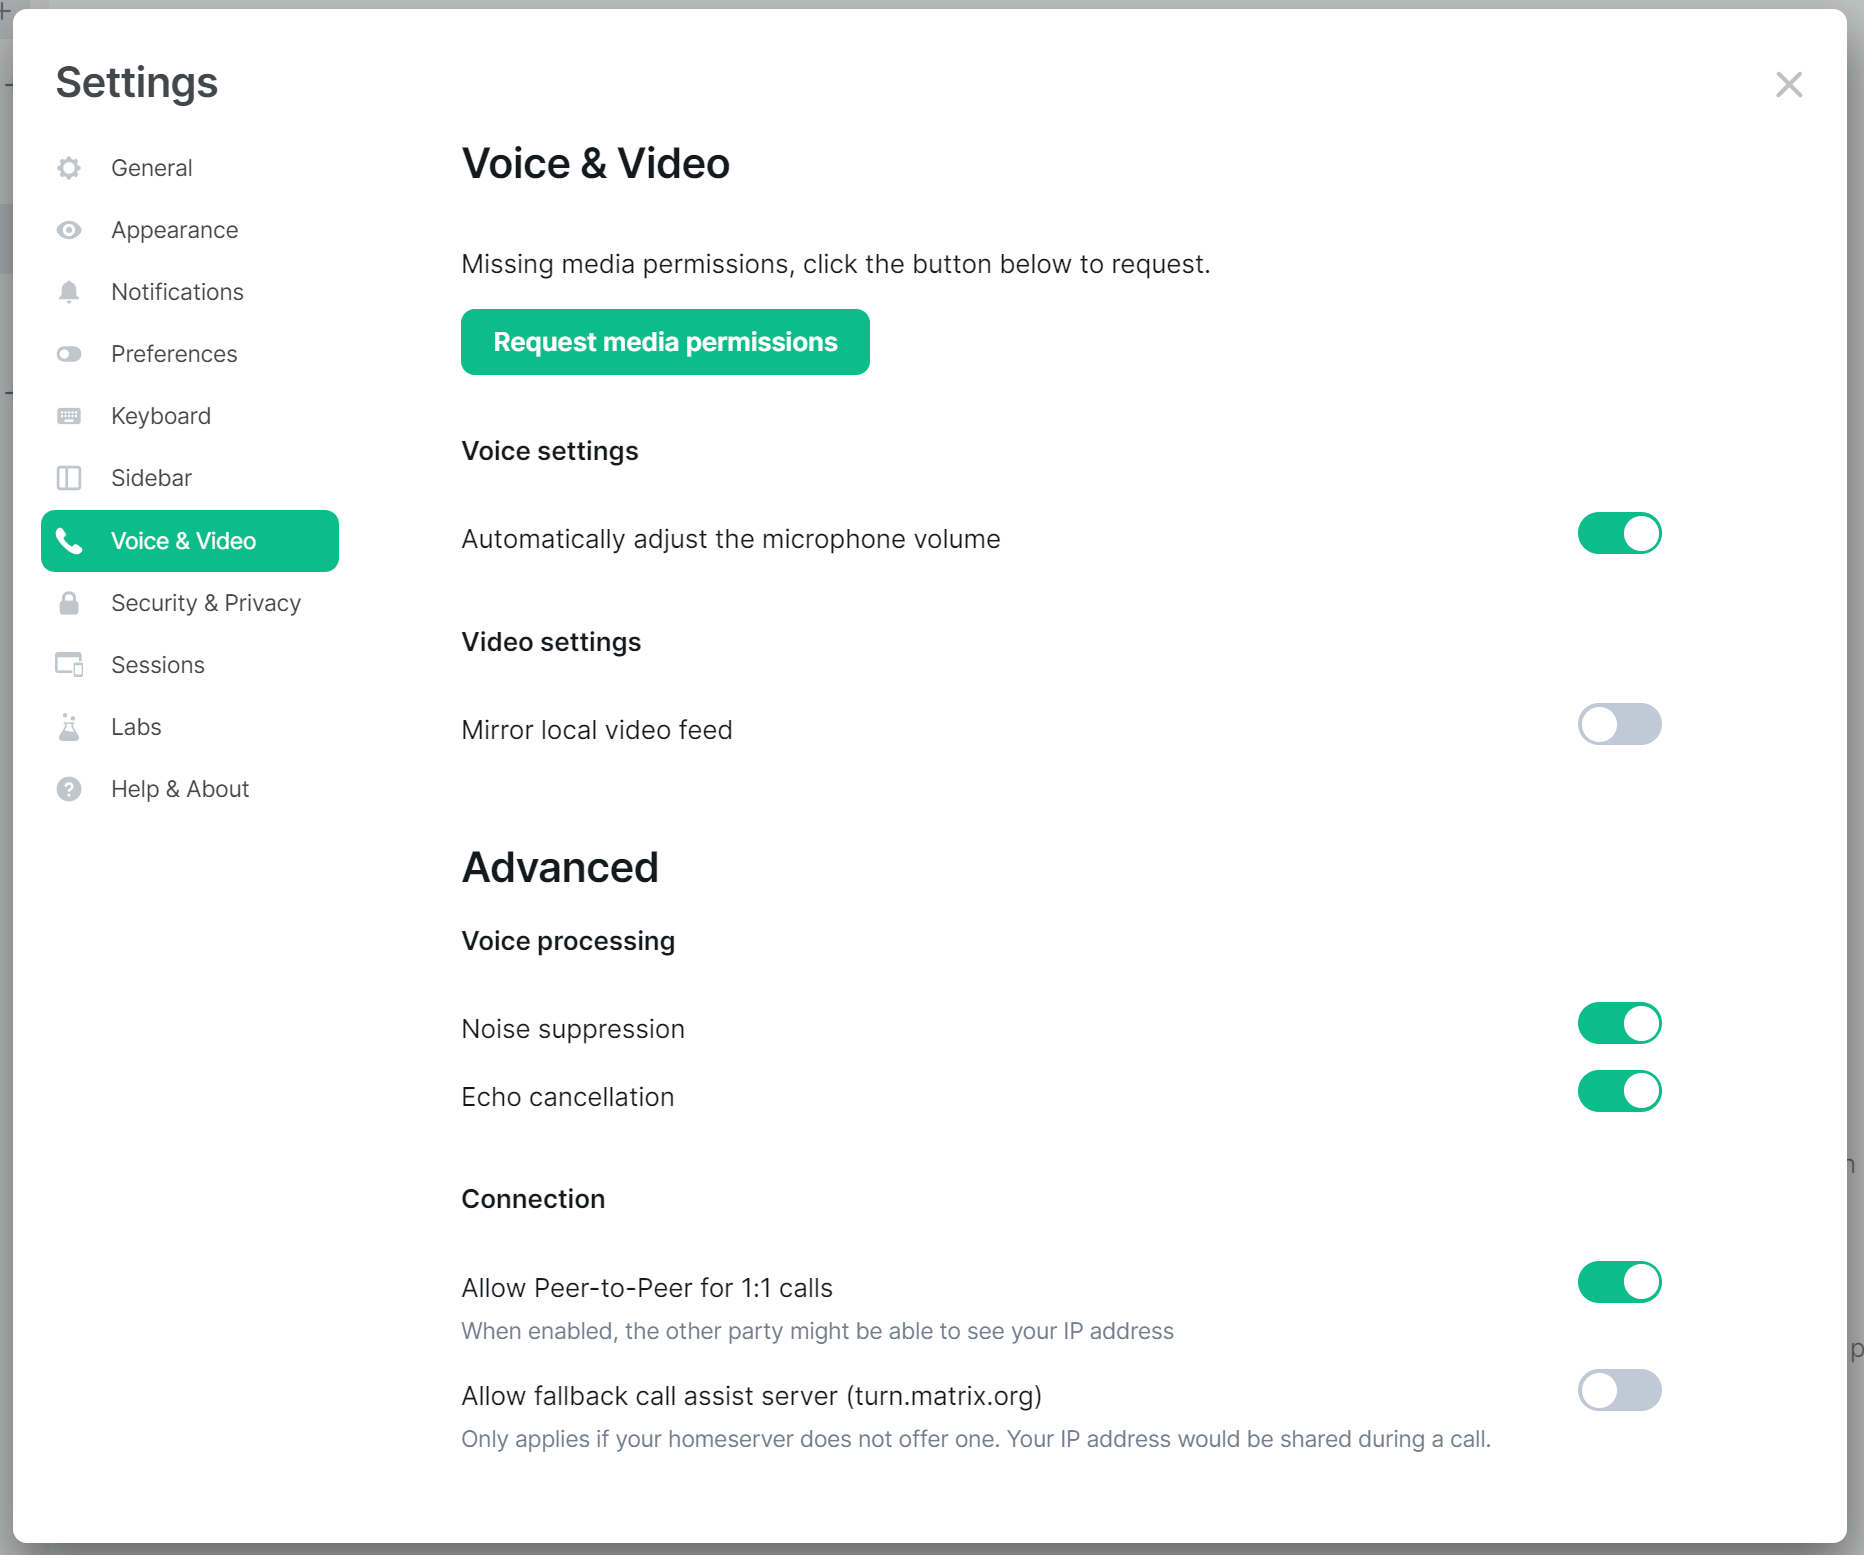
The Voice & Video settings section allows you to change your default audio and microphone devices, individual voice and video preferences as well as configure advanced options relating to Video Processing and your Connection.
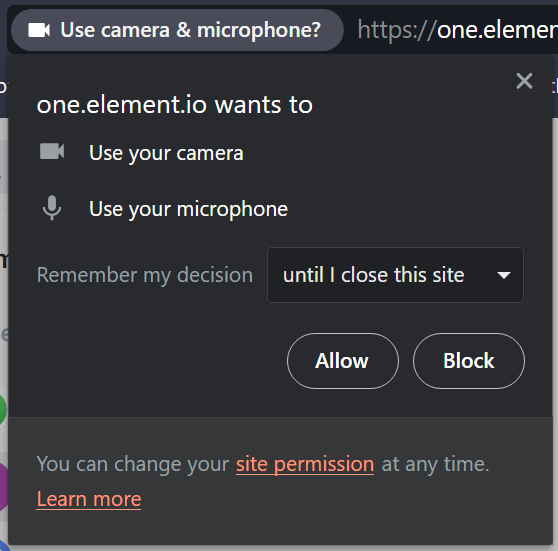
To start, if you haven't yet made use of Voice & Video, you may see a Requests media permissions prompt, you will need to do this, then accept the prompt in your browser to allow the Element client to see, and use your Camera and Microphone.
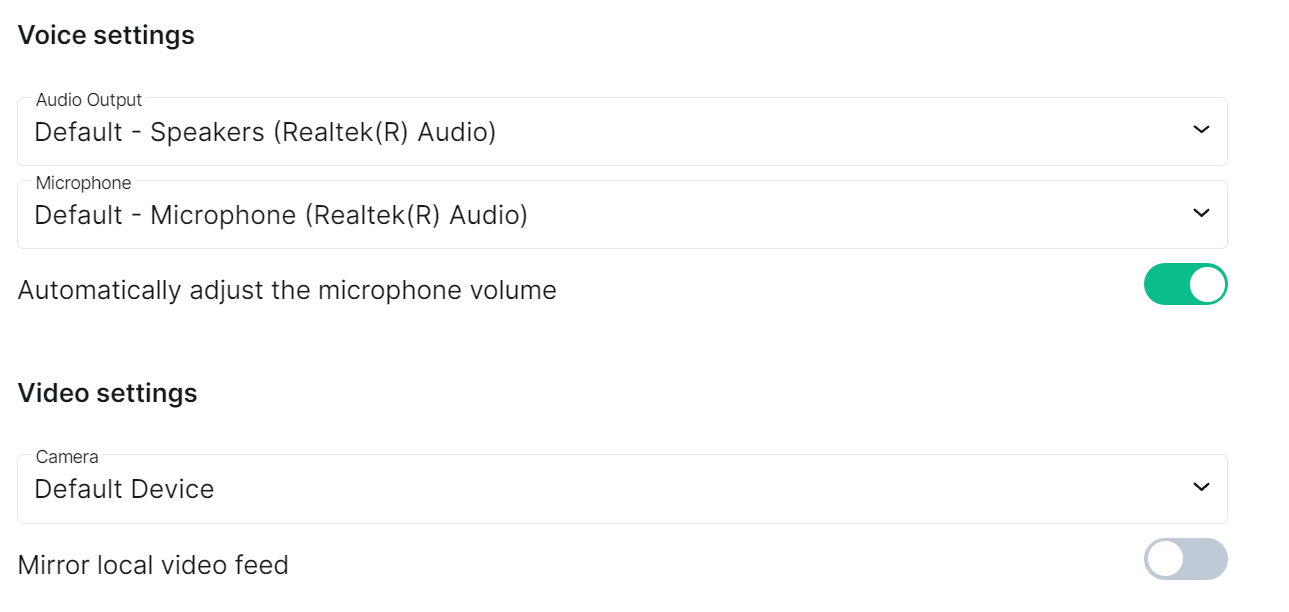
Once you have provided media permissions, you will be able to customize you default Audio and Microphone devices under Voice Settings, and the default Camera to use under Video settings.
WIP Security & Privacy Settings
Disclaimer: This guide refers to using the Element Matrix clients, Element Web or Element Desktop apps
Accessing Security & Privacy Settings
You can change your Matrix account settings by clicking your profile icon in the top left of the Element client. By default, this will be a colored circle with the first letter of your Matrix ID. From the presented drop-down menu, you'll be able to jump into specific settings straight away, or access All Settings. Clicking All Settings will take you first to General settings, click Security & Privacy in the vertical navigation menu on the left to open Security & Privacy settings.
Info: The below setting layout / order may change in subsequent client updates, however generally most settings will still perform the same function.
Security & Privacy Settings
Sessions
Disclaimer: This guide refers to using the Element Matrix clients, Element Web or Element Desktop apps
Accessing Sessions
You can change your Matrix account settings by clicking your profile icon in the top left of the Element client. By default, this will be a colored circle with the first letter of your Matrix ID. From the presented drop-down menu, you'll be able to jump into specific settings straight away, or access All Settings. Clicking All Settings will take you first to General settings, click Sessions in the vertical navigation menu on the left to open Sessions settings.
Info: The below setting layout / order may change in subsequent client updates, however generally most settings will still perform the same function.
Sessions
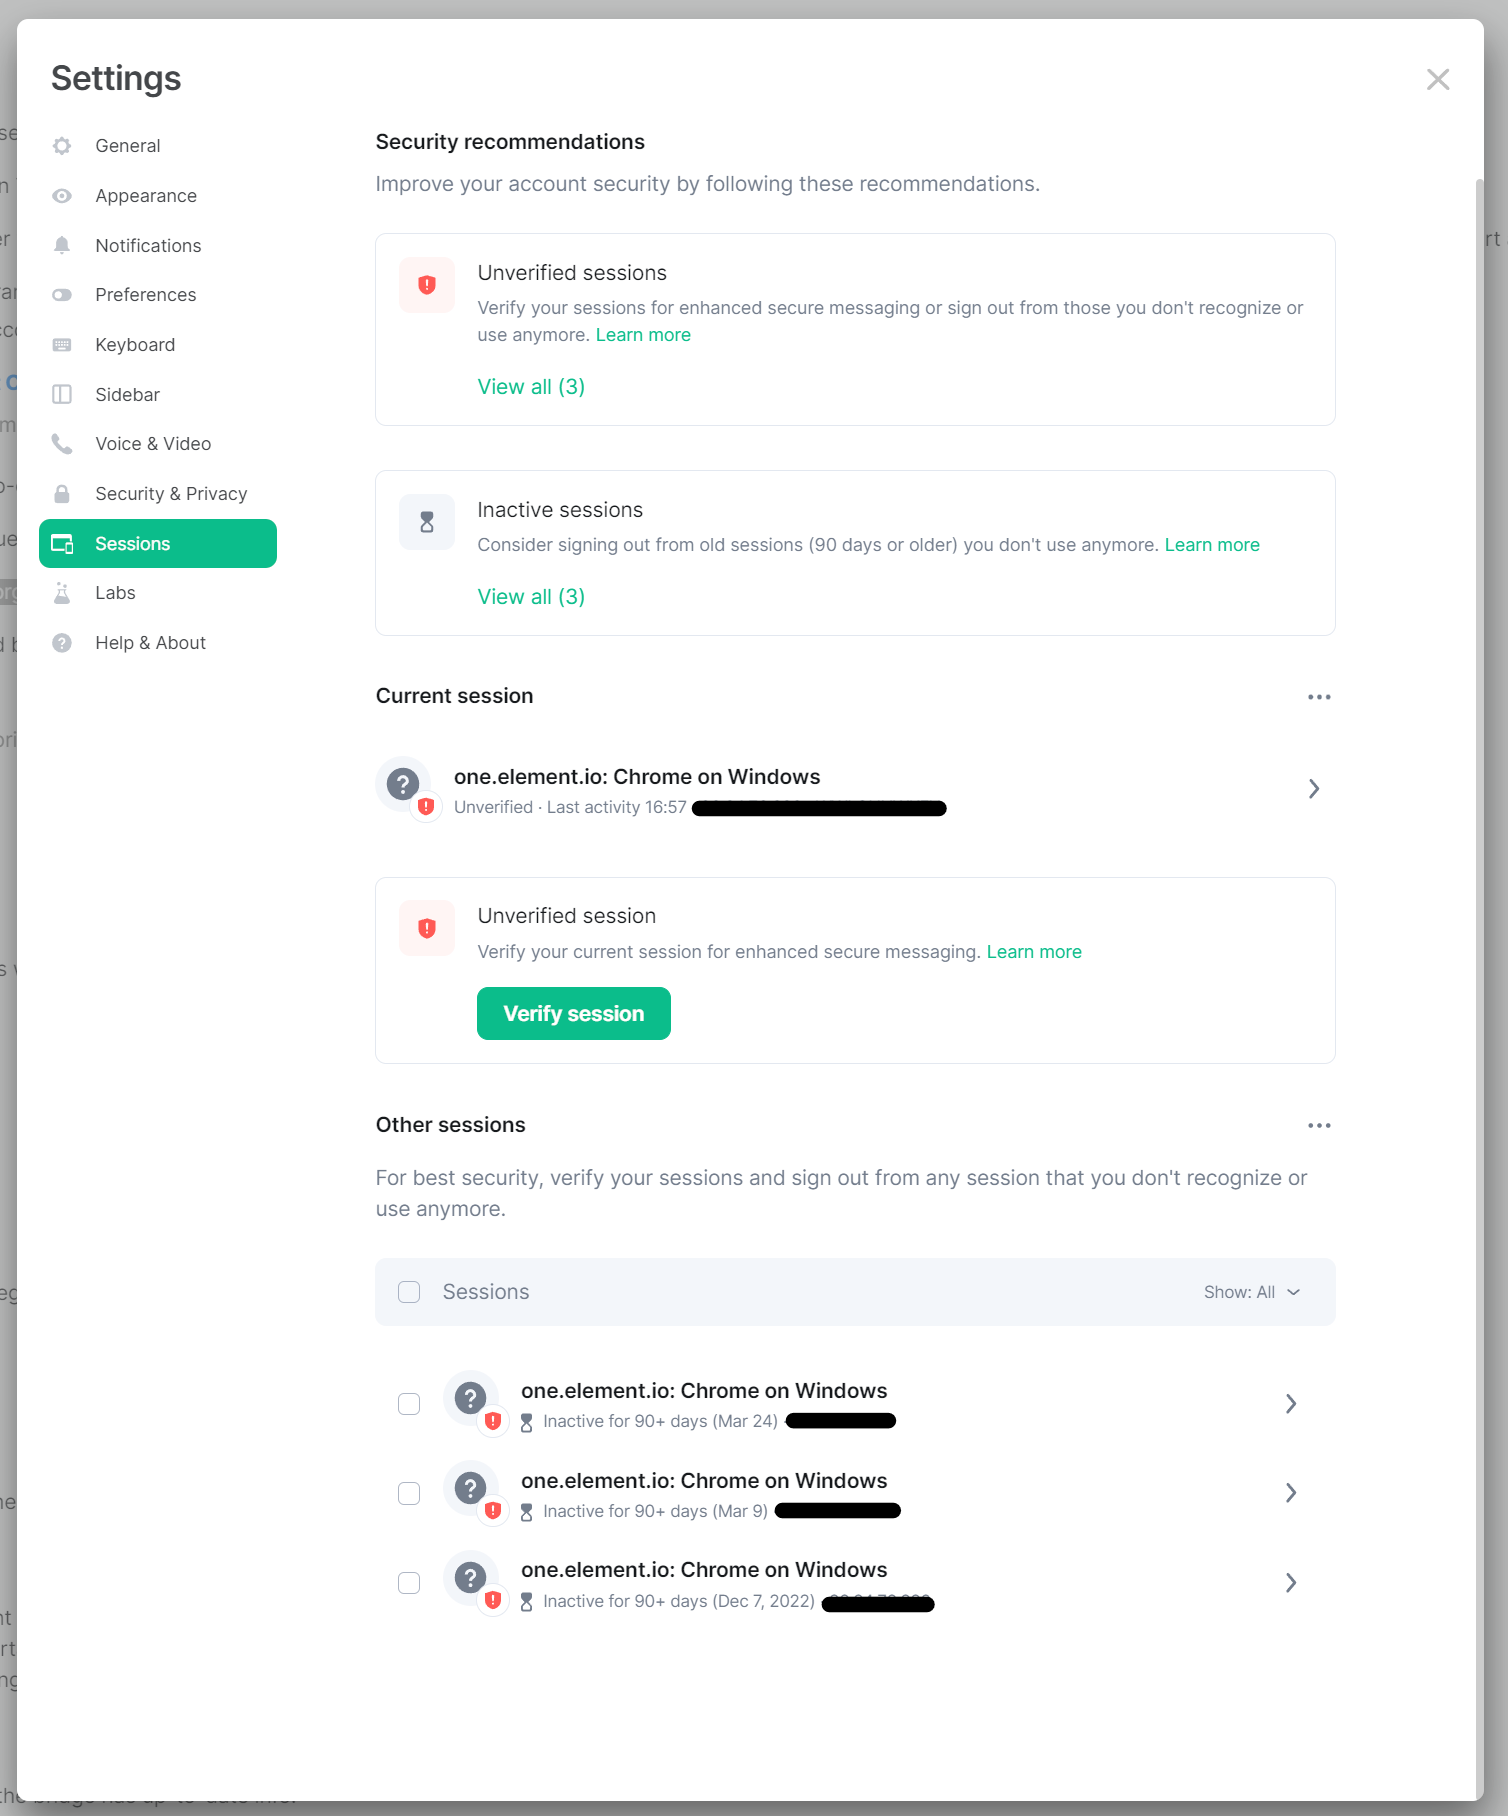
The Sessions section allows you to manage the existing logged in sessions you have open across various devices and whether they are verified.
Security Recommendations
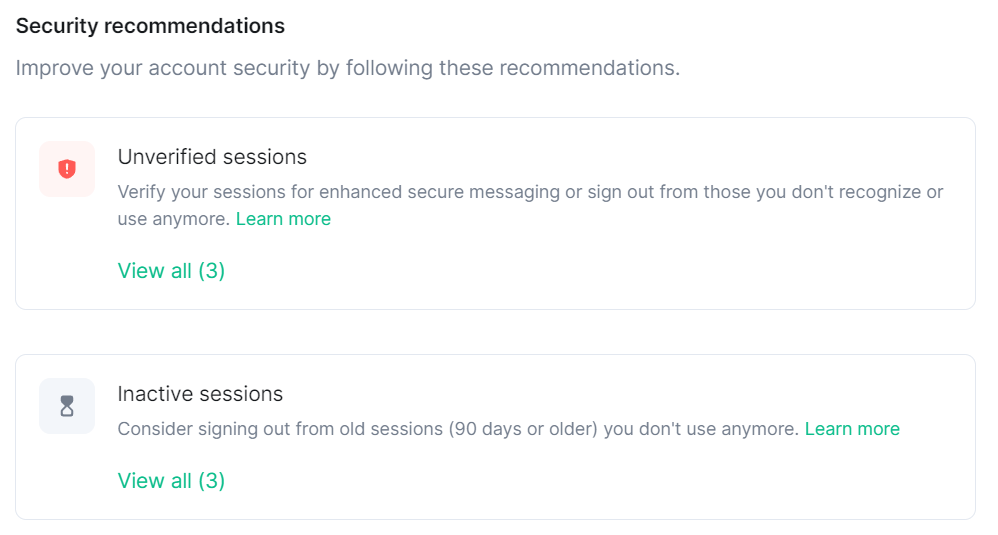
This first section will only appear if there are recommendations about your existing sessions to enhance the security of your account. In the example above, 3 unverified sessions exist, as well as 2 Inactive sessions (in this scenario, they are the same three sessions). Clicking on View All will filter the Other Sessions section on the recommendation clicked.
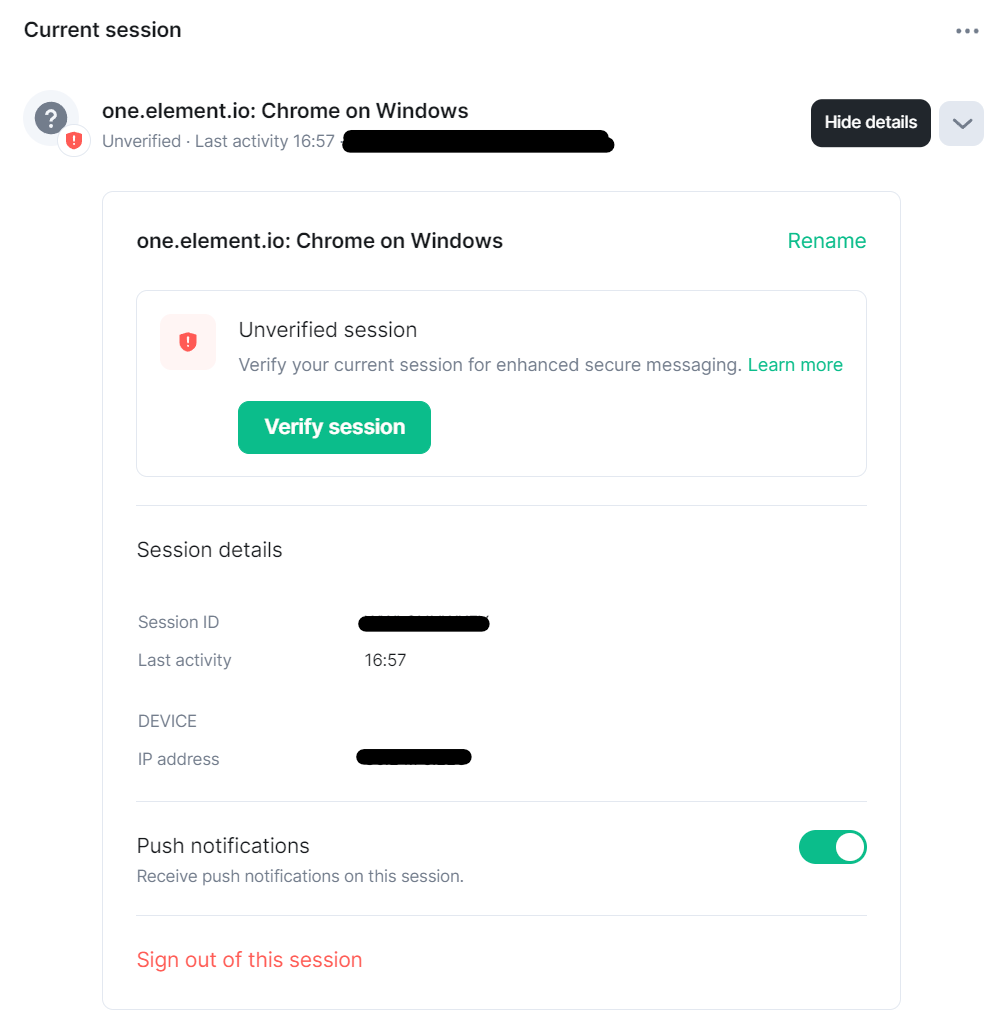
Current Session
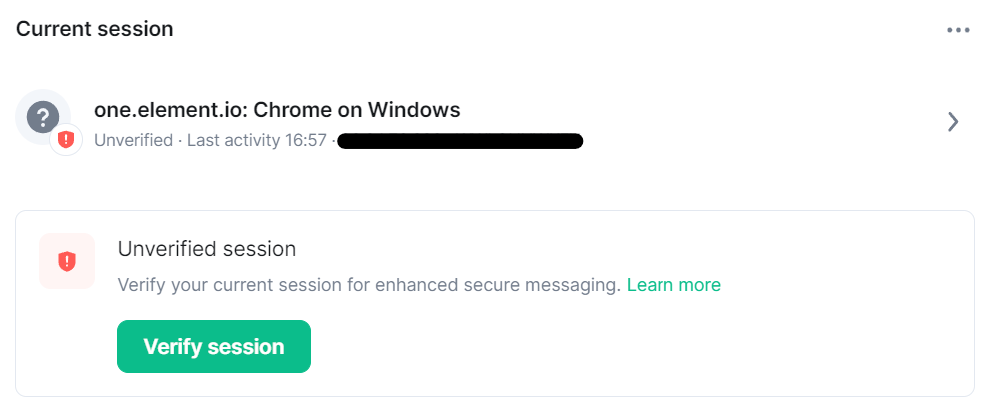
This section will show the details of your current session, i.e. the logged in session on the client you are using. Note, you can have multiple sessions on the same device, for instance, if you are logged in to both the Element Web client and the Desktop client. If the current session is unverified, you will be provided a prompt to begin verification of the session.
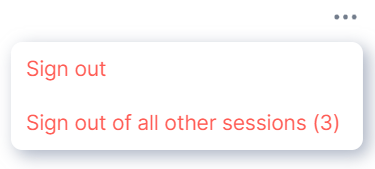
Clicking the 3-dot menu in the top right, will open a menu to sign out of the current session (or all sessions). Warning, this will sign you out and you will need to log back into your session on the client.
Clicking the right pointing arrow beneath the 3-dot menu, will expand to show more details about the session. Additional options include Signing out of this session, Rename-ing a session and toggling of Push notifications.
Other Sessions
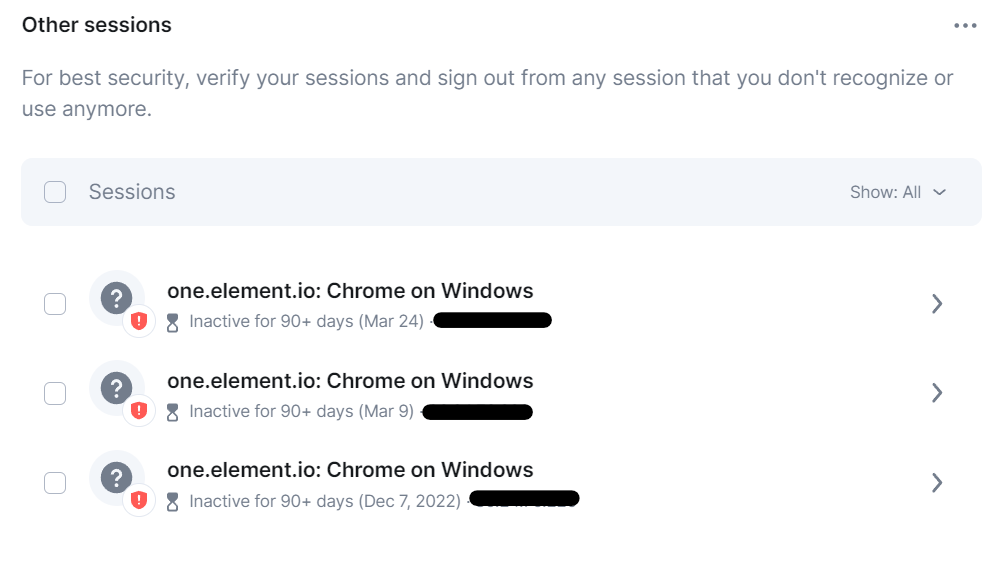
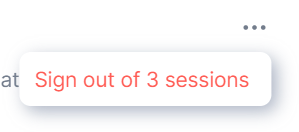
Much like the section above, this sections shows all other sessions you currently have. As above, the 3-dot menu will reveal the option to sign out of all of these other sessions. You could also individually tick various sessions and then click the then revealed Sign out button to customize which should be signed out.

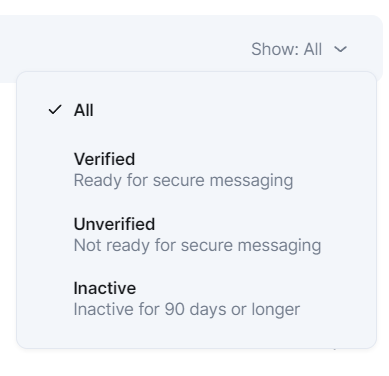
Along the grey bar, you can also filter the view of other sessions on various options:
- All
- Verified: Ready for secure messaging
- Unverified: Not ready for secure messaging
- Inactive: Inactive for 90 days or longer
Clicking the right pointing arrow beneath the 3-dot menu, will expand to show more details about the session (see above). Additional options include Signing out of this session, Rename-ing a session and toggling of Push notifications.
Labs
Disclaimer: This guide refers to using the Element Matrix clients, Element Web or Element Desktop apps
Accessing Labs
You can change your Matrix account settings by clicking your profile icon in the top left of the Element client. By default, this will be a colored circle with the first letter of your Matrix ID. From the presented drop-down menu, you'll be able to jump into specific settings straight away, or access All Settings. Clicking All Settings will take you first to General settings, click Labs in the vertical navigation menu on the left to open the Labs page.
Info: The below setting layout / order may change in subsequent client updates, however generally most settings will still perform the same function.
Labs
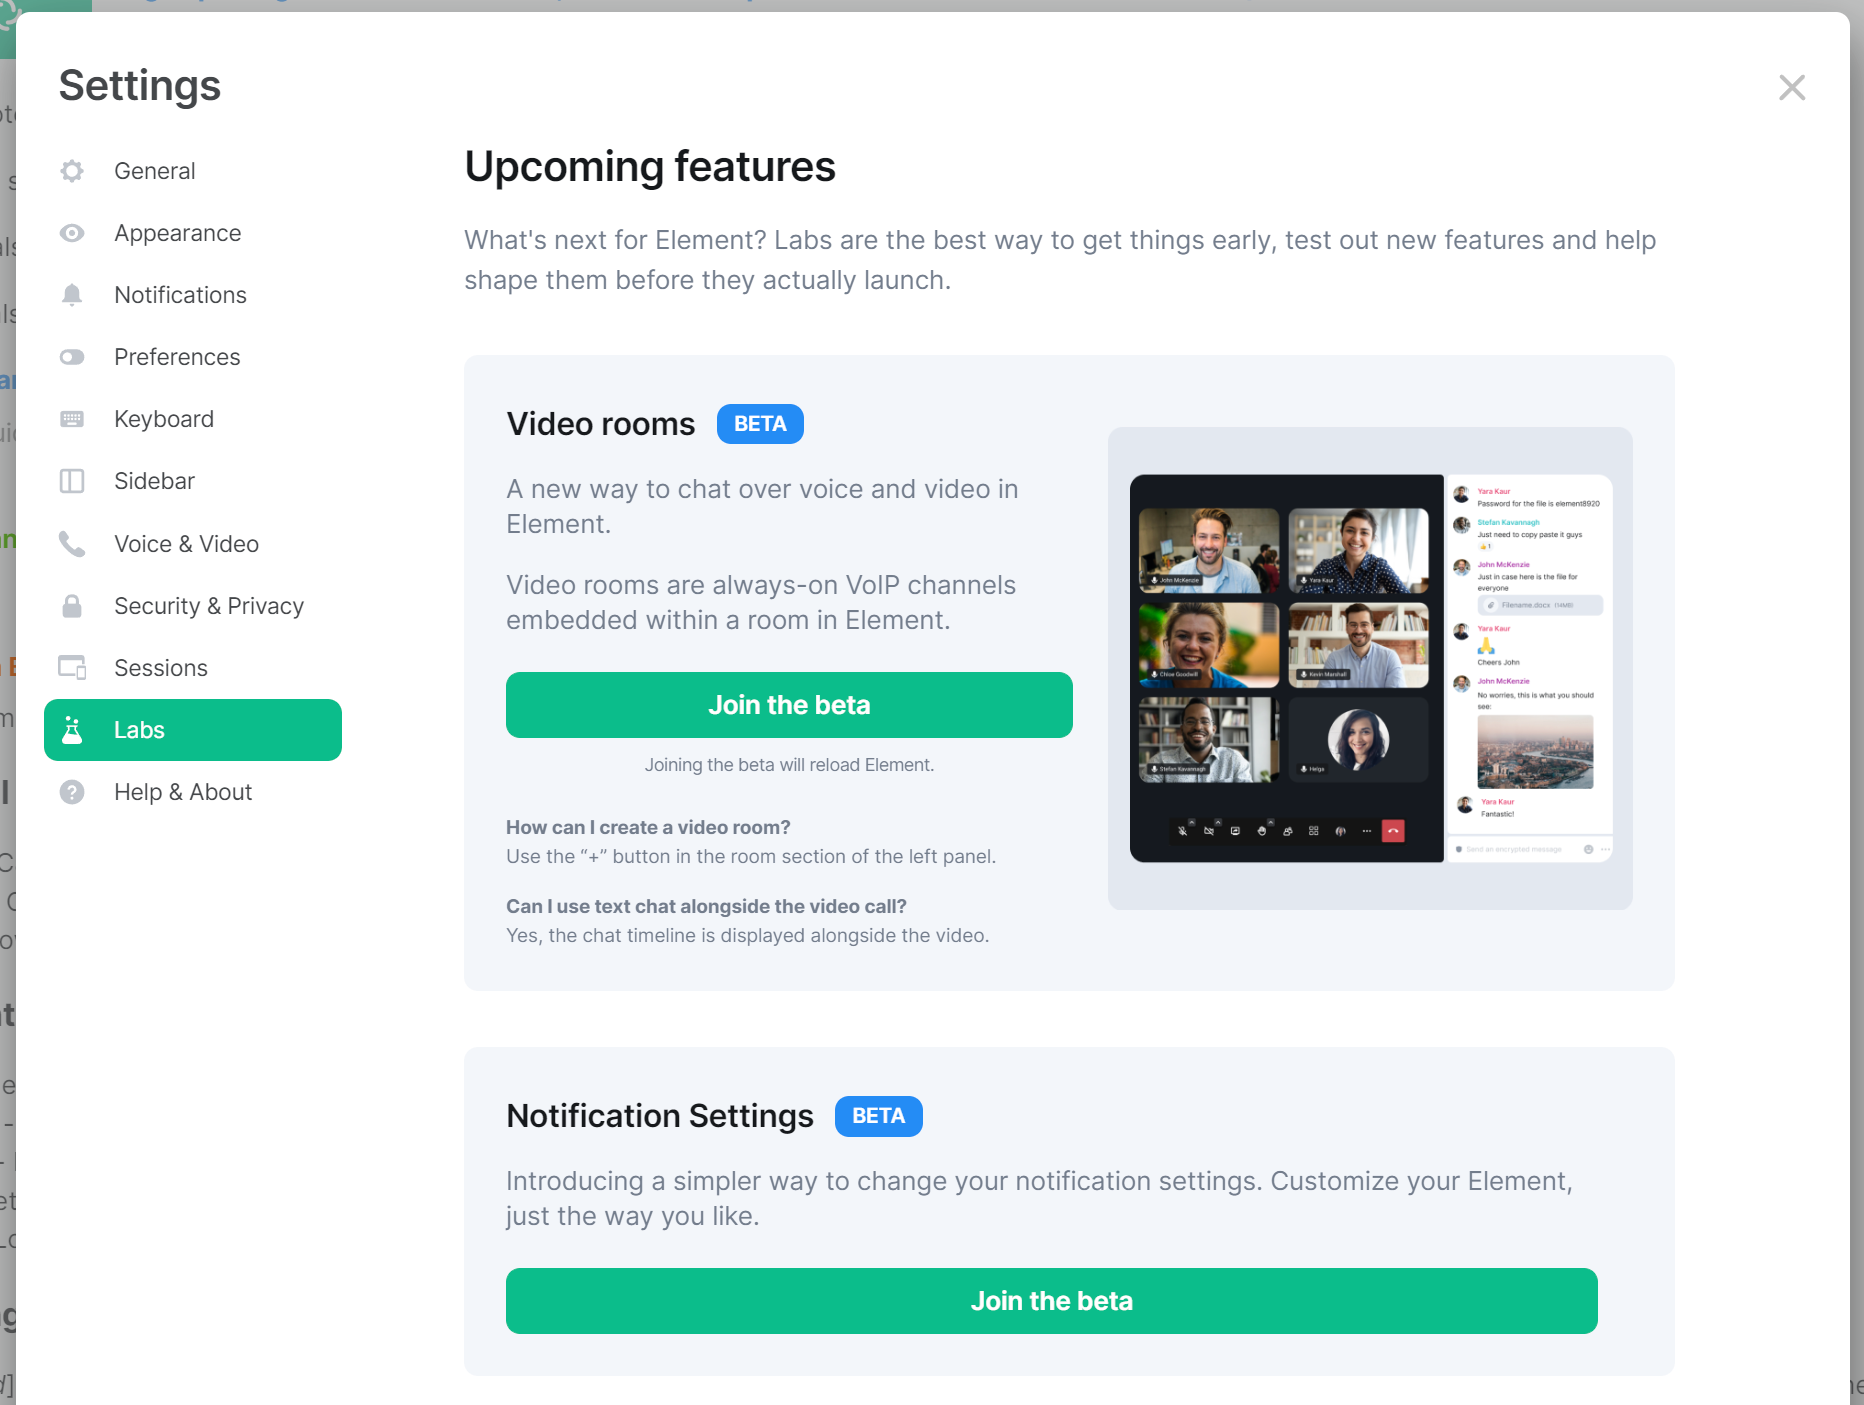
The Labs sections contains experimental options you can turn on to test out new / upcoming features. It is not recommended to enable Lab options unless you are happy to accept enabling of beta functionality.
Help & About
Disclaimer: This guide refers to using the Element Matrix clients, Element Web or Element Desktop apps
Accessing Help & About
You can change your Matrix account settings by clicking your profile icon in the top left of the Element client. By default, this will be a colored circle with the first letter of your Matrix ID. From the presented drop-down menu, you'll be able to jump into specific settings straight away, or access All Settings. Clicking All Settings will take you first to General settings, click Help & About in the vertical navigation menu on the left to open the Help & About page.
Info: The below setting layout / order may change in subsequent client updates, however generally most settings will still perform the same function.
Help & About
From Help & About you can find important information related to the client itself, such as it's current version, your homeserver and identity server details as well as links to our FAQ, Legal documents and credits.
Your Access Token
Your access token gives full access to your account via the use of Matrix APIs, you can read more about them depending on your needs. If you are an Admin of a homeserver, and are using an account with Admin access, you can make use of the Synapse Admin API. For both admins and regular users, the Matrix APIs can be found from the latest Matrix Spec page - these include:
Bug Reporting
If you've experience a bug, the best place to report it is by submitting a bug report to the appropriate Github repository for your client, the Element account.