Installation of Core Components
- Host Section
- Domains Section
- Certificates Section
- Database Section
- Media Section
- Authentication Section
- Cluster Section
- Synapse Section
- Synapse Section: Federation
- Element Web Section
- Homeserver Admin Section
- Integrator Section
Host Section
Initial configuration options specific to the installer, including how ESS should be deployed.
The first section of the ESS installer GUI is the Host section, here you will configure essential details of how ESS will be installed including; deployment type; subscription credentials; PostgreSQL to use; and whether or not your setup is airgapped.
Settings configured via the UI in this section will mainly be saved to your cluster.yml. If performing a Kubernetes deployment, you will also be able to config Host Admin settings which will save configuration into both internal.yml and deployment.yml.
Depending on your environment you will need to select either Standalone or Kubernetes Application. Standalone will install microk8s locally on your machine, and deploy to it so all pods are running locally on the host machine. Kubernetes Application will deploy to your Kubernetes infrastructure in a context you will need to have already setup via your kube config.
Deployment (Standalone)
Install

Config Example
spec:
  connectivity:
    dockerhub:
      password: example
      username: example
  install:
    emsImageStore:
      password: example
      username: example
    webhooks:
      caPassphrase: example
  	# Options unique to selecting Standalone
    certManager:
      adminEmail: example@Dexample.com
    microk8s:
      dnsResolvers:
        - 8.8.8.8
        - 8.8.4.4
      postgresInCluster:
        hostPath: /data/postgres
        passwordsSeed: example
    operatorUpdaterDebugLogs: false
    useLegacyAuth: false
An example of the cluster.yml config generated when selecting Standalone, note that no specific flag is used within the config to specify selecting between Standalone or Kubernetes. If you choose to manually configure ESS bypassing the GUI, ensure only config options specific to how you wish to deploy are provided.
Select your deployment type here, if you've jumped ahead you should first read our Introduction to Element Server Suite and then see our Requirements and Recommendations which details the environment specifics needed for each deployment type.
Debug Logging

Config Example
spec:
  install:
    operatorUpdaterDebugLogs: false
Enabling this option will run the operator and updator with debug logging. You should leave this disabled by default unless you are experiencing issues.
Legacy Auth

Config Example
spec:
  install:
    useLegacyAuth: false
Disabled by default, unless upgrading from a previous LTS version lacking MAS support. Migrating to MAS from legacy authenication is not currently supported.
New to LTS 24.10, authentication by defualt uses the Matrix Authentication Service. This configurable option allows you to disable the use of MAS and revert back to the legacy authentication offered in previous versions of ESS.
Once you have deployed for the first time, you cannot enable / disable Legacy Auth. Ensure if you require SAML delegated authentication, or wish to use the GroupSync integration, you enable Legacy Authentication prior to deployment.
Cert Manager

Config Example
spec:
  install:
    # certManager: {} # When 'Skip Cert Manager' selected
    certManager:
      adminEmail: example@example.com
You should keep this enabled if you will be using Let's Encrypt to verify your domain and generate your certificates, simply provide the username where due to expire certificate notices will be sent.
If you plan to upload your own certificates, or they will be Externally Managed, you should select Skip Cert Manager.
EMS Image Store
Config Example
spec:
  install:
    emsImageStore:
      password: token
      username: test
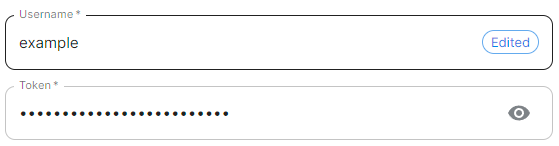
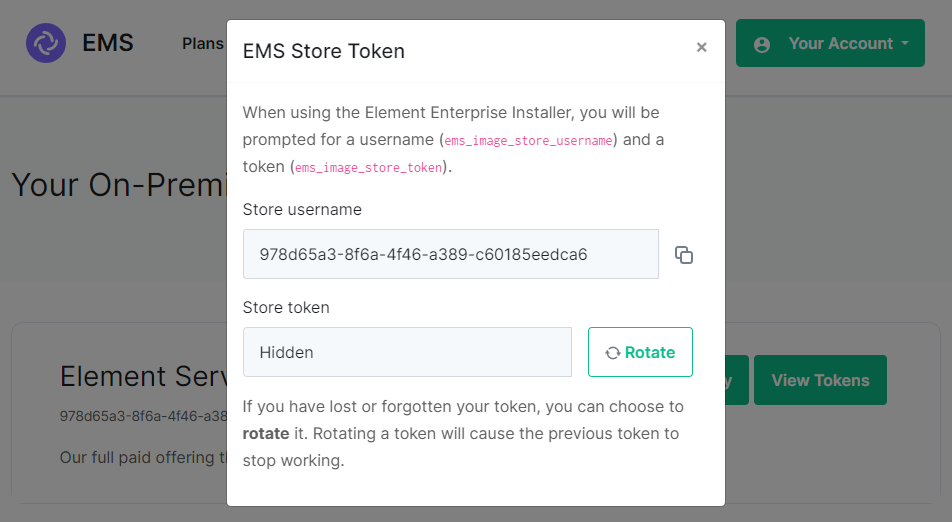
Here you will need to provide your EMS Image Store Username and Token associated with your subscription, which you can find at https://ems.element.io/on-premise/subscriptions.
If you forget your token and hit 'Refresh' in the EMS Control Panel, you will need to ensure you redeploy your instance with the new token - otherwise subsequent deployments will fail.
MicroK8s
Config Example
spec:
install:
microk8s:
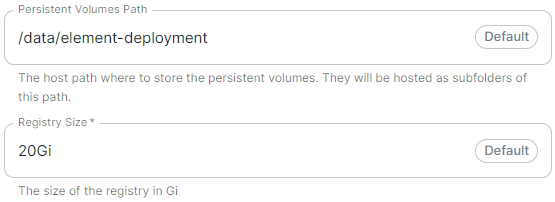
persistentVolumesPath: /data/element-deployment
registrySize: 25Gi
It is unlikely you should need to adjust these values and it is highly recommended to leave this as their defaults.
If you encounter a requirement to clean up your images cache, see the Cleaning up images cache section from the Post-Installation Essentials page.
DNS Resolvers
Config Example
spec:
  install:
    microk8s:
      dnsResolvers:
        - 8.8.8.8
        - 8.8.4.4
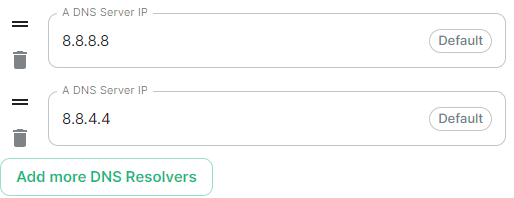
Defaulting to 8.8.8.8 and 8.8.4.4, the DNS server IPs set here will be used by all deployed pods. Click Add more DNS Resolvers to add additional entries as required.
Nginx Extra Configuration

Config Example
spec:
  install:
    microk8s:
      # Not present when disabled
      nginxExtraConfiguration:
        custom-http-errors: '"404"'
        server-snippet: >-
          error_page 404 /404.html; location = /404.html { internal; return 200
          "<p>Hello World!</p>"; }
As linked via the ESS installer GUI, see the Ingress-Nginx Controller ConfigMaps documentation for the options that can be configured.
Example
The below example is for demonstration purposes only, you should follow the linked guidance before adding extra configuration.
For example, if you wanted to replace the standard 404 error page, you could do this using both custom-http-errors and server-snippet. To configure via the installer, simply add the specify custom-http-errors as the Name and click Add to Nginx Extra Configuration, then provide the required value in the newly created field:

Repeat for server-snippet:

The above example is used to explain how to configure the Nginx Extra Configuration, and so is for demonstration purposes only, it is not recommended to use this example config. Ideally your web server should manage traffic that would otherwise hit a 404 being served by ESS.
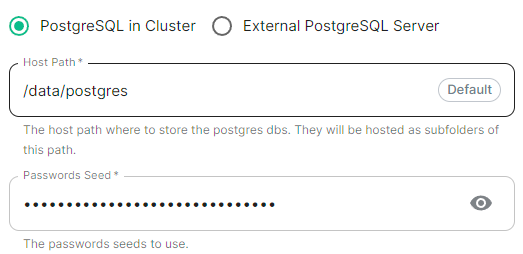
PostgreSQL in Cluster
Config Example
spec:
  install:
    microk8s:
      # postgresInCluster: {} # If 'External PostgreSQL Server' selected
      postgresInCluster:
        hostPath: /data/postgres
        passwordsSeed: example
Only available in Standalone deployments you can have the installer deploy PostgreSQL for you, this will remove the requirement to configure PostgreSQL connection and authentication credentials in later parts of the installer. It is highly recommended to keep the default settings if you opt for this approach.
If you already have an external PostgreSQL server you wish to use, make sure you have followed the PostgreSQL Standalone Environment Prerequisites detailed on the Requirements and Recommendations page. Selecting this option will present an additional Database section in the installer process.
Internal Webhooks

Config Example
spec:
  install:
    webhooks:
      caPassphrase: YpiNQMMzBjalfVPQqxcxO4e211YFR5
You should not need to change this, a unique CA passphrase will b generated on first run of the installer and is used by the interal CA to self-sign certificates.
Deployment (Kubernetes Application)
Install

Config Example
spec:
  connectivity:
    dockerhub:
      password: example
      username: example
  install:
    emsImageStore:
      password: example
      username: example
    webhooks:
      caPassphrase: example
  	# Options unique to selecting Standalone
    clusterDeployment: true
    kubeContextName: example
    namespaces: {}
    skipElementCrdsSetup: false
    skipOperatorSetup: false
    skipUpdaterSetup: false
    operatorUpdaterDebugLogs: false
    useLegacyAuth: false
An example of the cluster.yml config generated when selecting Kubernetes, note that no specific flag is used within the config to specify selecting between Standalone or Kubernetes. If you choose to manually configure ESS bypassing the GUI, ensure only config options specific to how you wish to deploy are provided.
Select your deployment type here, if you've jumped ahead you should first read our Introduction to Element Server Suite and then see our Requirements and Recommendations which details the environment specifics needed for each deployment type.
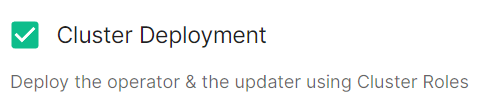
Cluster Deployment
Config Example
spec:
  install:
    clusterDeployment: true
Deploy the operator & the updater using Cluster Roles.
Kube Context Name

Config Example
spec:
  install:
    kubeContextName: example
The name of the Kubernetes context you have already setup that ESS should be deployed into.
Debug Logging
Config Example
spec:
  install:
    operatorUpdaterDebugLogs: false
Enabling this option will run the operator and updator with debug logging. You should leave this disabled by default unless you are experiencing issues.
Legacy Auth
Config Example
spec:
  install:
    useLegacyAuth: false
Disabled by default, unless upgrading from a previous LTS version lacking MAS support. Migrating to MAS from legacy authenication is not currently supported.
New to LTS 24.10, authentication by defualt uses the Matrix Authentication Service. This configurable option allows you to disable the use of MAS and revert back to the legacy authentication offered in previous versions of ESS.
Once you have deployed for the first time, you cannot enable / disable Legacy Auth. Ensure if you require SAML delegated authentication, or wish to use the GroupSync integration, you enable Legacy Authentication prior to deployment.
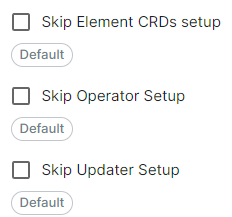
Skip Setup Options
Config Example
spec:
  install:
    skipElementCrdsSetup: false
    skipOperatorSetup: false
    skipUpdaterSetup: false
Selecting these will allow you to skip the setup of the Element CRDs, Operator and Updater as required.
EMS Image Store
Config Example
spec:
  install:
    emsImageStore:
      password: token
      username: test
Here you will need to provide your EMS Image Store Username and Token associated with your subscription, which you can find at https://ems.element.io/on-premise/subscriptions.
If you forget your token and hit 'Refresh' in the EMS Control Panel, you will need to ensure you redeploy your instance with the new token - otherwise subsequent deployments will fail.
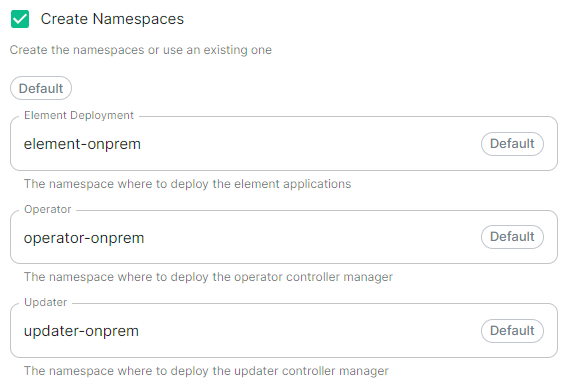
Namespaces
Config Example
spec:
  install:
    # namespaces: {} # When left as default namespaces
    # namespaces: # When `Create Namespaces` is disabled
    #   createNamespaces: false
    namespaces: # When custom namespaces are provided
      elementDeployment: element-example # Omit any that should remain as default
      operator: operator-example
      updater: updater-example
Allows you to specify the namespaces you wish to deploy into, with the additional option to create them if they don't exist.
Namespace-scoped Deployments
Namespace-scoped deployments in Kubernetes offer a way to organize and manage resources within specific namespaces rather than globally across the entire cluster.
Preparing the Cluster
Installing the Helm Chart Repositories
The first step is to start on a machine with helm v3 installed and configured with your kubernetes cluster and pull down the two charts that you will need.
First, let's add the element-updater repository to helm:
helm repo add element-updater https://registry.element.io/helm/element-updater --username
ems_image_store_username --password 'ems_image_store_token'
Replace ems_image_store_username and ems_image_store_token with the values provided to you by Element.
Secondly, let's add the element-operator repository to helm:
helm repo add element-operator https://registry.element.io/helm/element-operator --username ems_image_store_username --password 'ems_image_store_token'
Replace ems_image_store_username and ems_image_store_token with the values provided to you by Element.
Now that we have the repositories configured, we can verify this by:
helm repo list
and should see the following in that output:
NAME                    URL
element-operator        https://registry.element.io/helm/element-operator
element-updater         https://registry.element.io/helm/element-updater
Deploy the CRDs
Write the following values.yaml file:
clusterDeployment: true
deployCrds: true
deployCrdRoles: true
deployManager: false
To install the CRDs with the helm charts, simply run:
helm install element-updater element-updater/element-updater -f values.yaml
helm install element-operator element-operator/element-operator -f values.yaml
Now at this point, you should have the following two CRDs available:
[user@helm ~]$  kubectl get crds | grep element.io
elementwebs.matrix.element.io                         2023-10-11T13:23:14Z
wellknowndelegations.matrix.element.io                2023-10-11T13:23:14Z
elementcalls.matrix.element.io                        2023-10-11T13:23:14Z
hydrogens.matrix.element.io                           2023-10-11T13:23:14Z
mautrixtelegrams.matrix.element.io                    2023-10-11T13:23:14Z
sydents.matrix.element.io                             2023-10-11T13:23:14Z
synapseusers.matrix.element.io                        2023-10-11T13:23:14Z
bifrosts.matrix.element.io                            2023-10-11T13:23:14Z
lowbandwidths.matrix.element.io                       2023-10-11T13:23:14Z
synapsemoduleconfigs.matrix.element.io                2023-10-11T13:23:14Z
matrixauthenticationservices.matrix.element.io        2023-10-11T13:23:14Z
ircbridges.matrix.element.io                          2023-10-11T13:23:14Z
slidingsyncs.matrix.element.io                        2023-10-11T13:23:14Z
securebordergateways.matrix.element.io                2023-10-11T13:23:14Z
hookshots.matrix.element.io                           2023-10-11T13:23:14Z
matrixcontentscanners.matrix.element.io               2023-10-11T13:23:14Z
sygnals.matrix.element.io                             2023-10-11T13:23:14Z
sipbridges.matrix.element.io                          2023-10-11T13:23:14Z
livekits.matrix.element.io                            2023-10-11T13:23:14Z
integrators.matrix.element.io                         2023-10-11T13:23:14Z
jitsis.matrix.element.io                              2023-10-11T13:23:14Z
mautrixwhatsapps.matrix.element.io                    2023-11-15T09:03:48Z
synapseadminuis.matrix.element.io                     2023-10-11T13:23:14Z
synapses.matrix.element.io                            2023-10-11T13:23:14Z
groupsyncs.matrix.element.io                          2023-10-11T13:23:14Z
pipes.matrix.element.io                               2023-10-11T13:23:14Z
elementdeployments.matrix.element.io                  2023-10-11T13:34:25Z
chatterboxes.matrix.element.io                        2023-11-21T15:55:59Z
Namespace-scoped role
In the namespace where the ESS deployment will happen, to give a user permissions to deploy ESS, please create the following role and roles bindings:
-
User role:
apiVersion: rbac.authorization.k8s.io/v1 kind: Role metadata: name: ess-additional rules: - apiGroups: - apiextensions.k8s.io resources: - customresourcedefinitions verbs: - list - watch - get - apiGroups: - project.openshift.io resources: - projects verbs: - get - list - watch -
User roles bindings:
apiVersion: rbac.authorization.k8s.io/v1
kind: RoleBinding
metadata:
  name: ess-additional
roleRef:
  apiGroup: rbac.authorization.k8s.io
  kind: Role
  name: ess-additional
subjects:
# role subjects which maps to the user or its groups
apiVersion: rbac.authorization.k8s.io/v1
kind: RoleBinding
metadata:
  name: ess
roleRef:
  apiGroup: rbac.authorization.k8s.io
  kind: ClusterRole
  name: edit
subjects:
# role subjects which maps to the user or its groups
Once your cluster is prepared, you can setup your namespace-scoped deployment by configuring these settings:
-
Skip Operator Setup.
Unchecked -
Skip Updater Setup.
Unchecked -
Skip Element CRDs Setup.
Checked -
Cluster Deployment.
Unchecked -
Kube Context Name.
Set touser_kube_context_name -
Namespaces.
-
Create Namespaces.
Unchecked -
Operator.
Set tonamespace_to_deploy_ess -
Updater.
Set to same as Operator,namespace_to_deploy_ess -
Element Deployment.
Set to same as Operator,namespace_to_deploy_ess
-
Create Namespaces.
Internal Webhooks
Config Example
spec:
  install:
    webhooks:
      caPassphrase: YpiNQMMzBjalfVPQqxcxO4e211YFR5
Connectivity

Config Example
spec:
  connectivity:
Connected
Config Example
spec:
  connectivity:
    # dockerhub: {} # When Username & Password is disabled per default
    dockerhub:
      password: password
      username: test
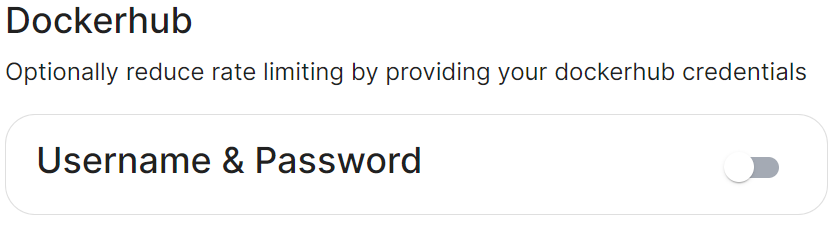
Connected means the installer will use the previously provided EMS Image Store credentials to pull the required pod images as part of deployment, optionally, you can specify DockerHub credentials to reduce potential rate limiting.
Airgapped
 |
 |
Config Example
spec:
  connectivity:
    airgapped:
      localRegistry: localhost:32000
      sourceDirectory: /home/ubuntu/airgapped/
  	  # uploadCredentials not present if `Target an Existing Local Image Registry` selected
      # uploadCredentials: {} # If 'Upload without Authentication'
      uploadCredentials:
        password: example
        username: example
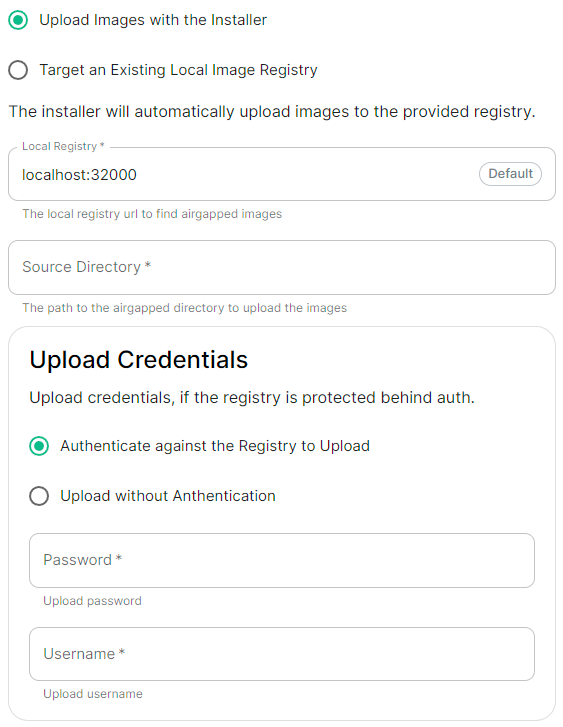
An airgapped environment is any environment in which the running hosts will not have access to the greater internet. This proposes a situation in which these hosts are unable to get access to various needed bits of software from Element and also are unable to share telemetry data back with Element.
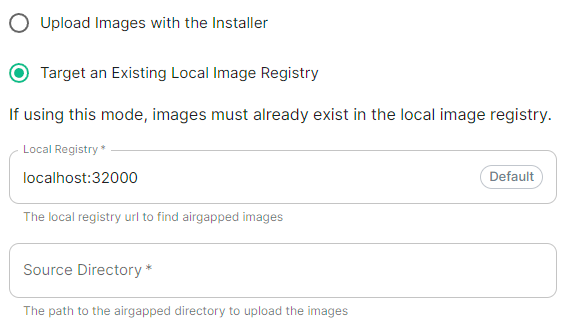
Selecting Airgapped means the installer will rely on images stored in a registry local to your environment, by default the installer will host this registry uploading images found within the specified Source Directory, however you can alternatively specify one already present in your environment instead.
Getting setup within an Airgapped environment
Alongside each Installer binary available for download, for those customers with airgapped permissions, is an equivalent airgapped package element-enterprise-installer-airgapped-<version>-gui.tar.gz. Download and copy this archive to the machine running the installer, then use tar -xzvf element-enterprise-installer-airgapped-<version>-gui.tar.gz to extract out its contents, you should see a folder airgapped with the following directories within:
-
pip -
galaxy -
snaps -
containerd -
images
Copy the full path of the root airgapped folder, for instance, /home/ubuntu/airgapped and paste that into the Source Directory field. Should you ever update the ESS installer binary, you will need to ensure you delete and replace this airgapped folder, with its updated equivalent.
Your airgapped machine will still require access to airgapped linux repositories depending on your OS. If using Red Hat Enterprise Linux, you will also need access to the EPEL repository in your airgapped environment.
Host Admin
Config Example
-
internal.ymlspec: fqdn: admin.example.com tls: # When selecting `Self Signed` # mode: self-signed # When selecting `Automatic Let's Encrypt` mode: automatic automatic: adminEmail: example@example.com # When selecting `Certificate File` # mode: certfile # certificate: # certFile: "example" # Base64 encoded string from certificate # privateKey: "example" # Base64 encoded string from certificate key # When selecting `Exsiting TLS Certificates in the Cluster` # mode: existing # secretName: example # When selecting `Externally Managed` # mode: external -
deployment.ymlspec: components: synapseAdmin: config: hostOrigin: >- https://admin.example.com,https://admin.example.com:8443
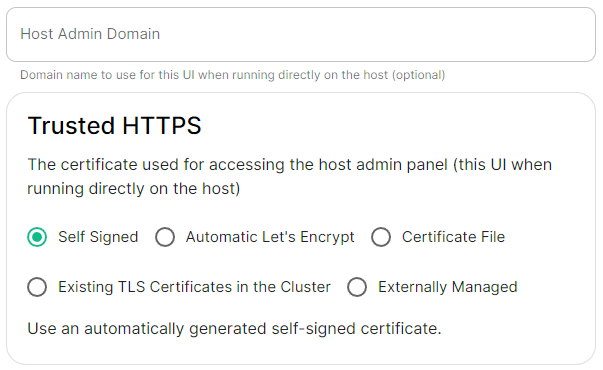
The Host Admin section allows you to configure the domain name and certificates to use when serving the ESS installer GUI, when running directly on the host - changes here will take affect the next time you run the installer.
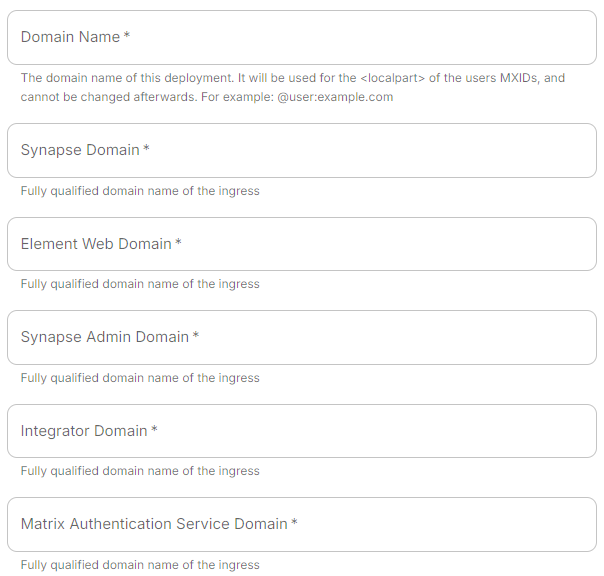
Domains Section
Configure the domains ESS should use for the main components deployed by ESS.
The second section of the ESS installer GUI is the Domains section, here you will configure the fully-qualified domain names for each of the main components that will be deployed by ESS.
The domain names configured via the UI in this section will be saved to your deployment.yml under each of the components' k8s: ingress: configuration.
This section covers all domain names used by the main components present in the installer, additional domains may be required when enabling specific integrations - you will specify integration specific domain names on each respective integrations' page.
Config Example
spec:
components:
elementWeb:
k8s:
ingress:
fqdn: element.example.com
integrator:
k8s:
ingress:
fqdn: integrator.example.com
matrixAuthenticationService:
k8s:
ingress:
fqdn: mas.example.com
synapse:
k8s:
ingress:
fqdn: synapse.example.com
synapseAdmin:
k8s:
ingress:
fqdn: admin.example.com
global:
config:
domainName: example.com
Simply provide the base domain name for your deployment, then you need to provide the sub-domains to use for Synapse (Matrix Homeserver), Element Web (Hosted Matrix Client), Synapse Admin (Hosted Admin Console) and Integrator.
Changing your base Domain Name
If you have already deployed your server, it is not possible to change your base domain name. To do so, you will need to wipe all data and start anew.
Certificates Section
Configure and/or provide the certificates that should be used for each domain served by ESS.
The third section of the ESS installer GUI is the Domains section, here you will configure the certificates to use for each previously specified domain name.
Certificate details configured via the UI in this section will be saved to your deployment.yml under each of the components' k8s: ingress: configuration with the cert contents (if manually uploaded) being saved to a secrets.yml in Base64.
This section covers all certificates to be used by the main components deployed by the installer, additional certificates may be required when enabling specific integrations - you will specify integration specific certificates on each respective integrations' page.
Config Example
-
deployment.ymlspec: components: elementWeb: k8s: ingress: tls: # Selecting `Certmanager Let's Encrypt` certmanager: issuer: letsencrypt mode: certmanager secretName: element-web integrator: k8s: ingress: tls: # Selecting `Certificate File` certificate: certFileSecretKey: integratorCertificate privateKeySecretKey: integratorPrivateKey mode: certfile secretName: integrator matrixAuthenticationService: k8s: ingress: fqdn: mas.example.com tls: certmanager: issuer: letsencrypt mode: certmanager secretName: matrix-authentication-service synapse: k8s: ingress: tls: # Selecting `Existing TLS Certificates in the Cluster` mode: existing secretName: example secretName: synapse synapseAdmin: k8s: ingress: tls: # Selecting `Externally Managed` mode: external secretName: synapse-admin wellKnownDelegation: k8s: ingress: tls: mode: external secretName: well-known-delegation -
secrets.ymlapiVersion: v1 kind: Secret metadata: name: element-web namespace: element-onprem data: elementWebCertificate: >- exampleBase64EncodedString elementWebPrivateKey: >- exampleBase64EncodedString --- apiVersion: v1 kind: Secret metadata: name: integrator namespace: element-onprem data: certificate: >- exampleBase64EncodedString privateKey: >- exampleBase64EncodedString --- apiVersion: v1 kind: Secret metadata: name: matrix-authentication-service namespace: element-onprem data: certificate: >- exampleBase64EncodedString privateKey: >- exampleBase64EncodedString --- apiVersion: v1 kind: Secret metadata: name: synapse namespace: element-onprem data: synapseCertificate: >- exampleBase64EncodedString synapsePrivateKey: >- exampleBase64EncodedString --- apiVersion: v1 kind: Secret metadata: name: synapse-admin namespace: element-onprem data: synapseAdminUICertificate: >- exampleBase64EncodedString synapseAdminUIPrivateKey: >- exampleBase64EncodedString --- apiVersion: v1 kind: Secret metadata: name: well-known-delegation namespace: element-onprem data: wellKnownDelegationCertificate: >- exampleBase64EncodedString wellKnownDelegationPrivateKey: >- exampleBase64EncodedString
You will need to configure certificates for the following components:
- Well-Known Delegation
- Well-Known files are served on the base domain, i.e.
https://example.com/.well-known/matrix/clientandhttps://example.com/.well-known/matrix/server.
- Well-Known files are served on the base domain, i.e.
- Synapse
- Please note, if you opt to turn on DNS SRV (via the Cluster Section), the Synapse certificate MUST include the base domain as an additional name.
- Element Web
- Synapse Admin
- Integrator
- Matrix Authenication Service
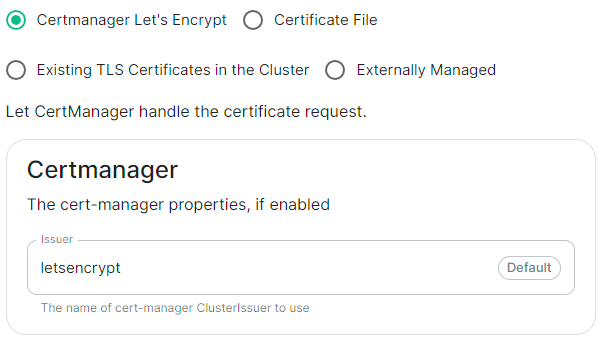
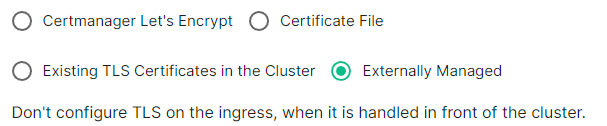
For each component, you will be presented with 4 options on how to configure the certificate.
Certmanager Let's Encrypt
Config Example
spec:
components:
componentName: # `elementWeb`, `integrator`, `synapse`, `synapseAdmin`, `wellKnownDelegation`
k8s:
ingress:
tls:
certmanager:
issuer: letsencrypt
mode: certmanager
secretName: component # Not used with 'Certmanager Let's Encrypt'
Select this to use Let's Encrypt to generate the certificates used, do not edit the Issuer field as no other options are available at this time.
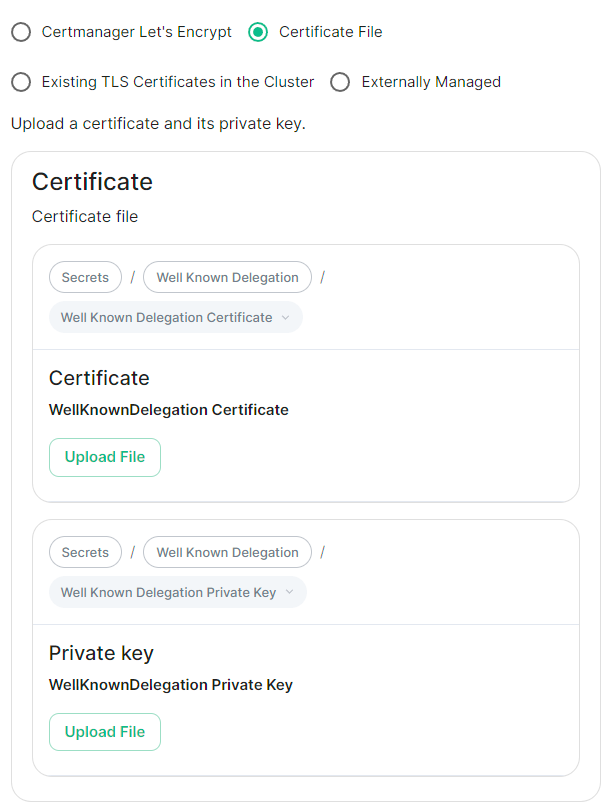
Certificate File
Config Example
-
deployment.yml
spec:
components:
componentName: # `elementWeb`, `integrator`, `synapse`, `synapseAdmin`, `wellKnownDelegation`
k8s:
ingress:
tls:
mode: certfile
certificate:
certFileSecretKey: componentCertificate
privateKeySecretKey: componentPrivateKey
secretName: component
-
secrets.yml
apiVersion: v1
kind: Secret
metadata:
name: component
namespace: element-onprem
data:
componentCertificate: >-
exampleBase64EncodedString
componentPrivateKey: >-
exampleBase64EncodedString
---
Select this option to be able to manually upload the certificates that should be used to serve the specified domain. Make sure you certificate files are in the PEM encoded format and it is strongly advised to include the full certificate chain within the file to reduce likelihood of certificate-based issues post deployment.
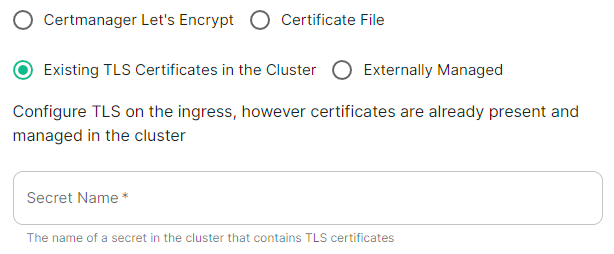
Existing TLS Certificates in the Cluster
Config Example
spec:
components:
componentName: # `elementWeb`, `integrator`, `synapse`, `synapseAdmin`, `wellKnownDelegation`
k8s:
ingress:
tls:
mode: existing
secretName: example
secretName: component # Not used with 'Existing TLS Certificates in the Cluster'
This option is most applicable to Kubernetes deployments, however can be used with Standalone. Select this option when secrets containing the certificates are already present and managed within the cluster, provide the secret name that contains the TLS certificates for ESS to use them.
Externally Managed
Config Example
spec:
components:
componentName: # `elementWeb`, `integrator`, `synapse`, `synapseAdmin`, `wellKnownDelegation`
k8s:
ingress:
tls:
mode: external
secretName: component # Not used with 'Externally Managed'
Select this option is certificates are handled in front of the cluster, TLS will not be configured on the ingress for each component.
Well-Known Delegation
If you already host a site on your base domain, i.e. example.com, then you should either ensure your web server defers to the Well-Known Delegation component to serve the .well-known files or you should set Well-Known Delegation to Externally Managed and manually serve those files.
This is because Matrix clients and servers need to be able to request https://example.com/.well-known/matrix/client and https://example.com/.well-known/matrix/server respectively to work properly.
The web server hosting the base domain should either forward requests for /.well-known/matrix/client and /.well-known/matrix/server to the Well-Known Delegation component for it to serve, or a copy of the .well-known files will need to be added directly on the example.com web server.
If you don't already host a base domain example.com, then the Well-Known Delegation component hosts the .well-known files and serves the base domain i.e. example.com
Getting the contents of the .well-known files
-
Run
kubectl get cm/first-element-deployment-well-known -n element-onprem -o yamlon your ESS host, it will output something similar to the below:Config Example
apiVersion: v1 data: client: |- { "m.homeserver": { "base_url": "https://synapse.example.com" } } server: |- { "m.server": "synapse.example.com:443" } kind: ConfigMap metadata: creationTimestamp: "2024-06-13T09:32:52Z" labels: app.kubernetes.io/component: matrix-delegation app.kubernetes.io/instance: first-element-deployment-well-known app.kubernetes.io/managed-by: element-operator app.kubernetes.io/name: well-known app.kubernetes.io/part-of: matrix-stack app.kubernetes.io/version: 1.24-alpine-slim k8s.element.io/crdhash: 9091d9610bf403eada3eb086ed2a64ab70cc90a8 name: first-element-deployment-well-known namespace: element-onprem ownerReferences: - apiVersion: matrix.element.io/v1alpha1 kind: WellKnownDelegation name: first-element-deployment uid: 24659493-cda0-40f0-b4db-bae7e15d8f3f resourceVersion: "3629" uid: 7b0082a9-6773-4a28-a2a9-588a4a7f7602 -
Copy the contents of the two supplied files (client and server) from the output into their own files:
-
Filename:
client{ "m.homeserver": { "base_url": "https://synapse.example.com" } } -
Filename:
server{ "m.server": "synapse.example.com:443" }
-
Filename:
-
Configure your webserver such that each file is served correctly at, i.e for a base domain of
example.com:-
https://example.com/.well-known/matrix/client -
https://example.com/.well-known/matrix/server
-
Database Section
Configuration options for how ESS can communicate with your PostgreSQL database.
This section of the ESS installer GUI will only be present if you are using the Kubernetes deployment option or you have opted to use your own PostgreSQL for a Standalone deployment.
If you have not yet set up your PostgreSQL, you should ensure you have done so before proceeding, see the relevant PostgreSQL section from the Requirements and Recommendations page:
All settings configured via the UI in this section will be saved to your deployment.yml, with the contents of secrets being saved to secrets.yml. You will find specific configuration examples in each section.
Config Example
-
deployment.ymlspec: components: synapse: config: postgresql: -
secrets.ymlapiVersion: v1 kind: Secret metadata: name: synapse namespace: element-onprem data: postgresPassword:
By default, if you do not change any settings on this page, defaults will be added to your configuration file/s (see example below).
Config Example
spec:
components:
synapse:
config:
postgresql:
database: synapse
host: db.example.com
passwordSecretKey: postgresPassword
user: test-username
PostgreSQL
Database

Config Example
spec:
components:
synapse:
config:
postgresql:
database: synapse
Enter the name of the PostgreSQL Database you configured per the previously mentioned Requirements and Recommendations to use for Synapse.
Host

Config Example
spec:
components:
synapse:
config:
postgresql:
host: db.example.com
Enter the fully qualified domain name of the PostgreSQL Database you configured per the previously mentioned Requirements and Recommendations to use for Synapse.
Port

Config Example
spec:
components:
synapse:
config:
postgresql:
# port not present when left as default 5432
port: 5432
Defaults to 5432, either keep if correct or provide the required port of the PostgreSQL Database you configured per the previously mentioned Requirements and Recommendations to use for Synapse.
SSL Mode

Config Example
spec:
components:
synapse:
config:
postgresql:
# sslMode not present when left as default `require`
sslMode: require
# sslMode: disable
# sslMode: allow
# sslMode: prefer
# sslMode: verify-ca
# sslMode: verify-full
Defaults to Require - it is not recommended to disable SSL, so for most setups, this setting should be left as default.
You should adjust to accommodate your environment as required, the options available are:
- Disable
- Allow
- Prefer
- Require
- Verify CA
- Verify Full
User

Config Example
spec:
components:
synapse:
config:
postgresql:
user: test-username
Enter the username of a user who can access the PostgreSQL Database you configured per the previously mentioned Requirements and Recommendations to use for Synapse.
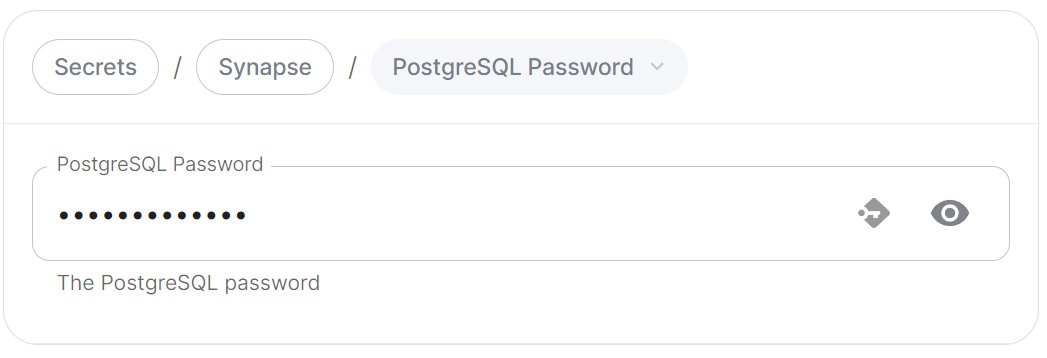
PostgreSQL Password
Config Example
-
secrets.ymlapiVersion: v1 kind: Secret metadata: name: synapse namespace: element-onprem data: postgresPassword: dGVzdC1wYXNzd29yZA==
Enter the password for the specified user who can access the PostgreSQL Database you configured per the previously mentioned Requirements and Recommendations to use for Synapse.
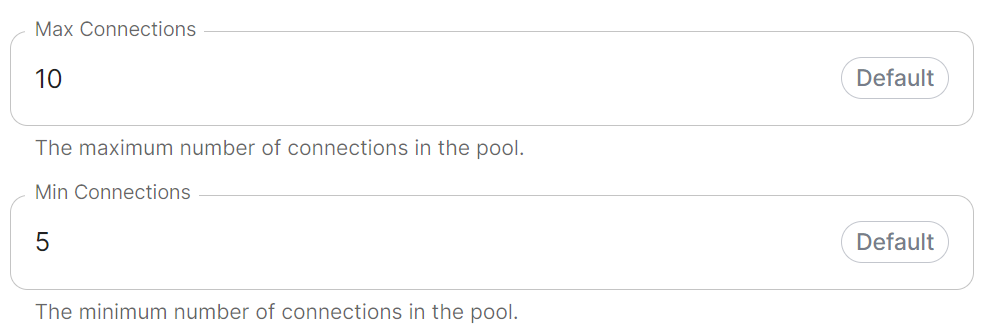
Advanced
Connection Pool
Max / Min Connections
Config Example
spec:
components:
synapse:
config:
postgresql:
# connectionPool not present when left as default
connectionPool:
maxConnections: 10
minConnections: 5
In most deployments you should not need to configure these settings, however if required, you can adjust both the minimum and maximum connections in the Synapse connection pool.
Media Section
Configuration options relating to how Media uploaded to your homeserver is handled by ESS.
The Media section allows you to customise where media uploaded to your homeserver should be stored and the maximum upload size. By default this is to a Persistent Volume Claim (PVC) however you can also configure options for using S3.
All settings configured via the UI in this section will be saved to your deployment.yml, with the contents of secrets being saved to secrets.yml. You will find specific configuration examples in each section.
Config Example
-
deployment.ymlmetadata: annotations: ui.element.io/layer: | components: synapse: config: media: spec: components: synapse: config: media: -
secrets.ymlkind: Secret metadata: name: synapse namespace: element-onprem data:
By default, if you do not change any settings on this page, defaults will be added to your configuration file/s (see example below).
Config Example
-
deployment.ymlspec: components: synapse: config: media: maxUploadSize: 100M volume: size: 50Gi
Config
Media
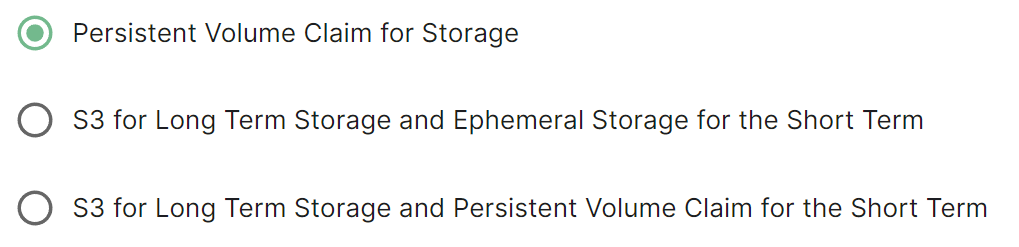
Config Example
```yml spec: components: synapse: config: media: volume: # Present if you select either Persistent Volume Claim option size: 50Gi ```Selecting either Persistent Volume Claim configuration option will default to using a 50Gi volume for media.
S3
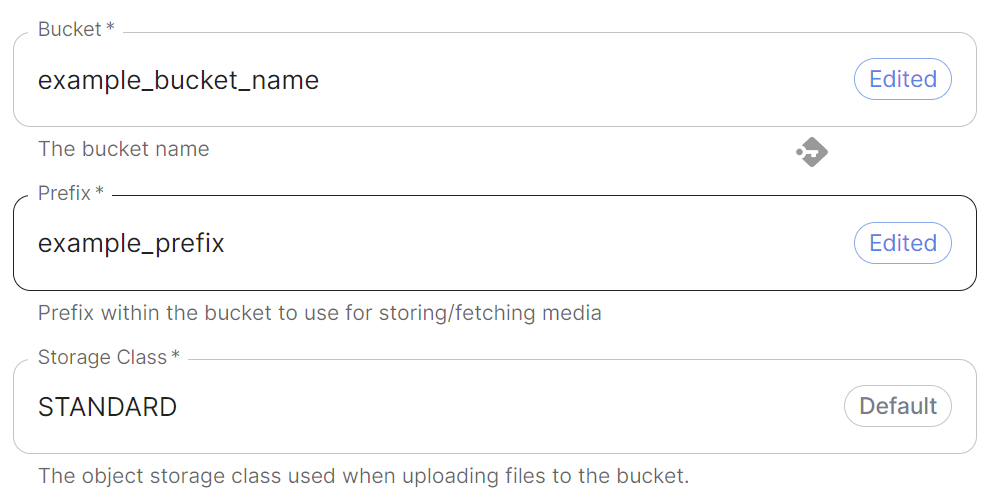
Config Example
spec:
components:
synapse:
config:
media:
s3:
bucket: example_bucket_name
prefix: example_prefix
storageClass: STANDARD # Not present if left as default
Provide your bucket name and a prefix within the bucket to use. You can also adjust the storage class however it is recommended to leave it as STANDARD unless you have a specific requirement to change.
Authentication
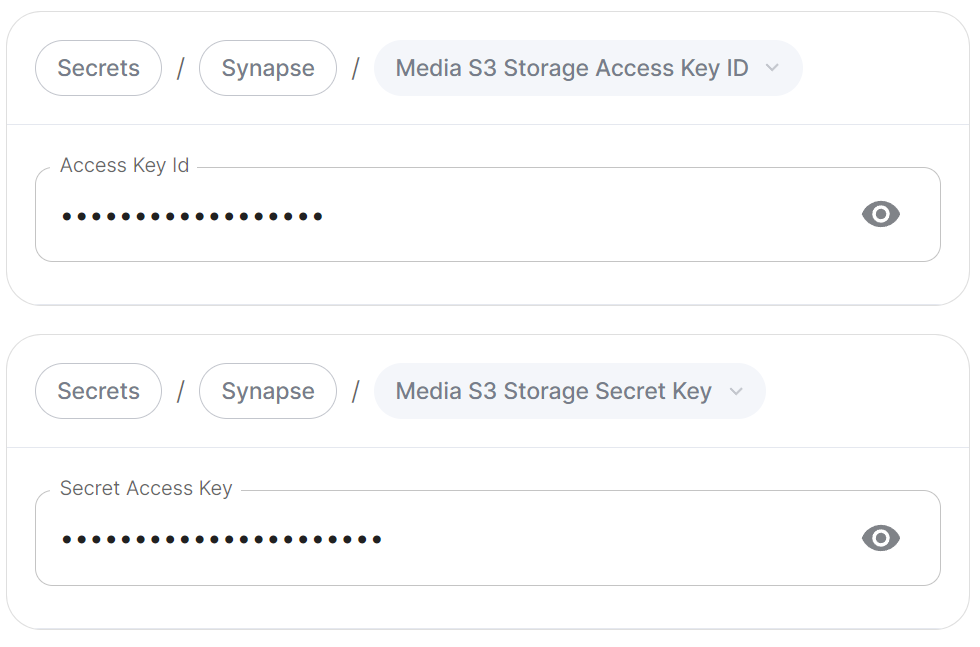
Config Example
-
secrets.ymlapiVersion: v1 kind: Secret metadata: name: synapse namespace: element-onprem data: mediaS3StorageAccessKeyId: ZXhhbXBsZWFjY2Vzc2tleWlk mediaS3StorageSecretKey: ZXhhbXBsZXNlY3JldGFjY2Vzc2tleQ==
Provide any credentials (Access Key ID and Secret Access Key) required to authenticate access to the specified S3 bucket.
Region
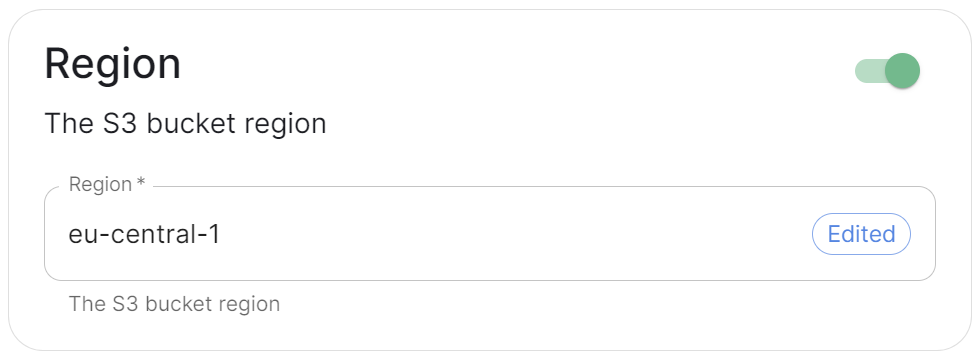
Config Example
spec:
components:
synapse:
config:
media:
s3:
region: eu-central-1 # Not present if disabled
Toggle on this section to be able to specify the S3 bucket region you wish to use.
Endpoint URL
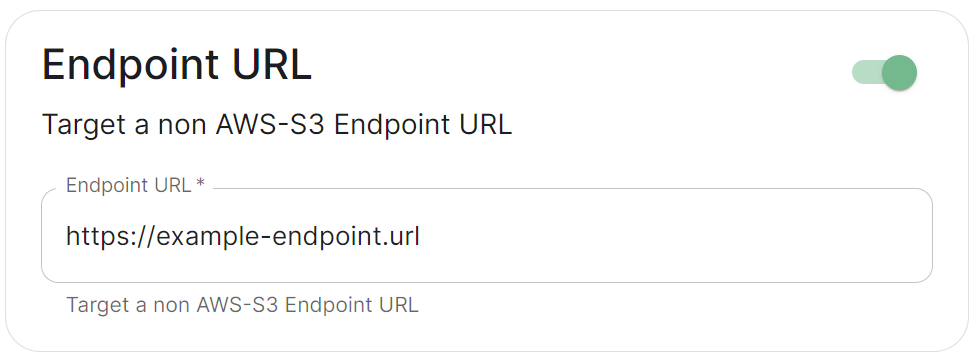
Config Example
spec:
components:
synapse:
config:
media:
s3:
endpointUrl: https://example-endpoint.url # Not present if disabled
Toggle on this section to be able to specify a non-AWS S3 endpoint URL.
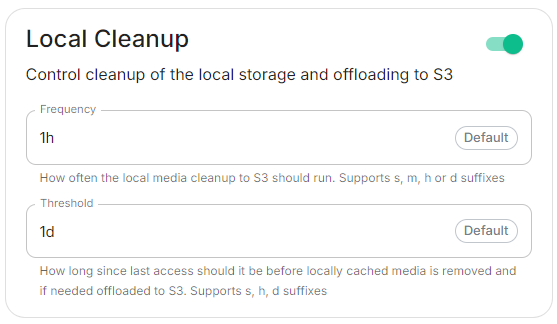
Local Cleanup
Config Example
spec:
components:
synapse:
config:
media:
s3:
# Not present if disabled
# localCleanup: {} # If defaults left as-is
localCleanup:
frequency: 2h # Only present if changed from default
threshold: 2d # Only present if changed from default
Toggle on this section to control the frequency of local storage cleanup and the threshold since media was last accessed before it should be offloaded to S3.
Max Upload Size

Config Example
spec:
components:
synapse:
config:
media:
maxUploadSize: 100M
By default the Max Upload size is 100M, here you can adjust this value to allow for larger or smaller uploads on your homeserver. The desired file size should be specified in bytes ending with M or K.
Authentication Section
A detailed look at Delegated Authentication options available and setup examples.
This is a new section introduced in LTS 24.10 which replaces the previous Delegated Authentication options found within the Synapse section. Your previous configuration will be upgraded on first-run of the newer LTS.
In the Authentication section you will find options to configure settings specific to Authentication. Regardless of if you are using the Matrix Authentication Server, or have enabled Legacy Auth, the settings on this page will remain the same.
However please note, MAS does not support delegated authentication with SAML or GroupSync - if you wish to enable either of these you will need to return to the Host section and enable Legacy Auth.
All settings configured via the UI in this section will be saved to your deployment.yml, with the contents of secrets being saved to secrets.yml. You will find specific configuration examples in each section.
Config Example
-
deployment.ymlmetadata: annotations: ui.element.io/layer: | components: synapse: spec: components: synapse: config: delegatedAuth: -
secrets.ymlkind: Secret metadata: name: synapse namespace: element-onprem data:
By default, if you do not change any settings on this page, defaults will be added to your configuration file/s (see example below).
Config Example
-
deployment.ymlmetadata: annotations: ui.element.io/layer: | components: spec: synapse: config: delegatedAuth: localPasswordDatabase: enableRegistration: false # Note, if you deploy without any authentication methods enabled, the installer will default to Local Accounts. -
secrets.ymlapiVersion: v1 kind: Secret metadata: data: ldapBindPassword: examplePassword
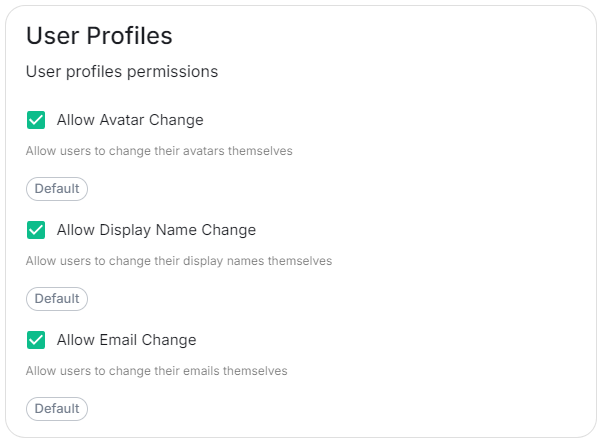
User Profiles
Config Example
spec:
components:
synapse:
config:
delegatedAuth:
userProfiles:
allowAvatarChange: true # Not present if left as default
allowDisplayNameChange: true # Not present if left as default
allowEmailChange: true # Not present if left as default
The User Profiles section provides some self-explanatory config options to adjust what changes users are allowed to make to their User Profile, such as changing their Display Name. You may wish to restrict this if you'd prefer to delegate the setting of these values to the associated Identity Provider.
OIDC
You can add and configure one, or multiple, OIDC providers - to do so you will need to click the Add OIDC / Add more OIDC button found after toggling on the ODIC section:
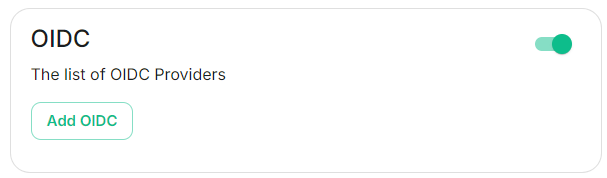
Once an OIDC provider is added, you can remove any providers by clicking the rubbish bin icon found to the left of the provider.
Config Example
spec:
components:
synapse:
config:
delegatedAuth:
oidc:
-
IdP Name

Config Example
spec:
components:
synapse:
config:
delegatedAuth:
oidc:
idpName: example_name # Required
IdP ID

Config Example
spec:
components:
synapse:
config:
delegatedAuth:
oidc:
idpId: 01JDS2WKNYTQS21GFAKM9AKD9R # Required
IdP Brand

Config Example
spec:
components:
synapse:
config:
delegatedAuth:
oidc:
idpBrand: example_brand
Issuer

Config Example
spec:
components:
synapse:
config:
delegatedAuth:
oidc:
issuer: https://issuer.example.com/ # Required
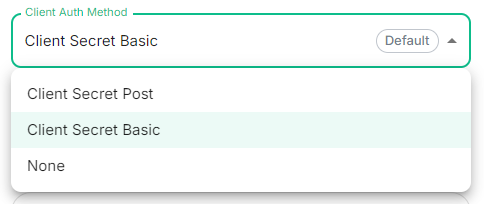
Client Auth Method
Config Example
spec:
components:
synapse:
config:
delegatedAuth:
oidc:
clientAuthMethod: client_secret_basic # If no `clientAuthMethod` defined, will default to `client_secret_basic`
# clientAuthMethod: client_secret_post
# clientAuthMethod: none
Client ID

Config Example
spec:
components:
synapse:
config:
delegatedAuth:
oidc:
clientId: example_client_id
Client Secret
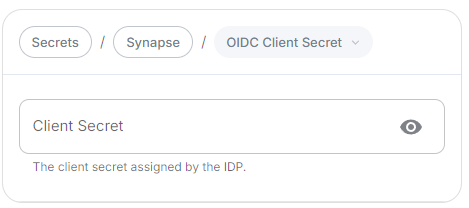
Config Example
-
deployment.ymlspec: components: synapse: config: delegatedAuth: oidc: clientSecretSecretKey: oidcClientSecret -
secrets.ymlapiVersion: v1 kind: Secret metadata: name: synapse namespace: element-onprem data: oidcClientSecret: U2VjdXJlT0lEQ0NsaWVudFNlY3JldA==
Allow Existing Users

Config Example
spec:
components:
synapse:
config:
delegatedAuth:
oidc:
Scopes
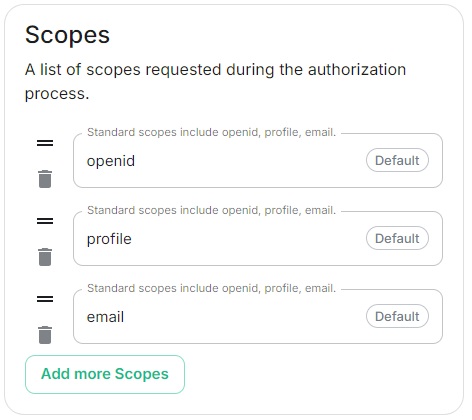
Config Example
spec:
components:
synapse:
config:
delegatedAuth:
oidc:
scopes:
- openid
- profile
- email
User Mapping Provider
Config Example
spec:
components:
synapse:
config:
delegatedAuth:
oidc:
userMappingProvider:
Subject Template
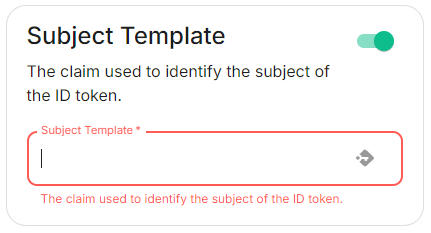
Config Example
spec:
components:
synapse:
config:
delegatedAuth:
oidc:
userMappingProvider:
subjectTemplate: '{{ user.subject }}'
Localpart Template
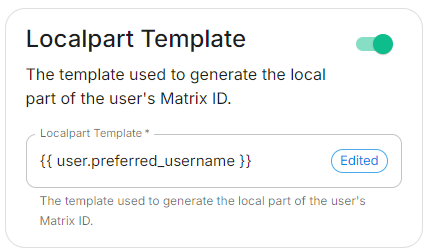
Config Example
spec:
components:
synapse:
config:
delegatedAuth:
oidc:
userMappingProvider:
localpartTemplate: '{{ user.preferred_username }}'
If using legacy auth, you should use jinja python to format your template; if using MAS, you should use jinja rust formatting instead. For example, to get the a valid localpart from an email, you would use {{ user.preferred_username.split('@')[0] }} if using Legacy Auth, or {{ (user.preferred_username | split('@'))[0] }} if using MAS.
Display Name Template
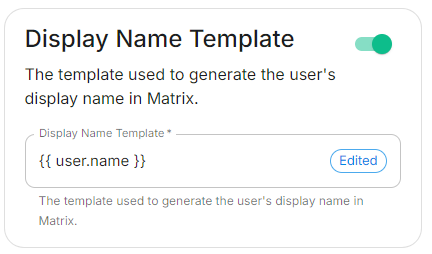
Config Example
spec:
components:
synapse:
config:
delegatedAuth:
oidc:
userMappingProvider:
displayNameTemplate: '{{ user.name }}'
Email Template
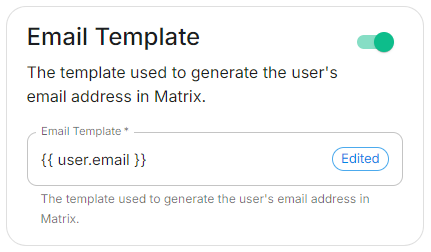
Config Example
spec:
components:
synapse:
config:
delegatedAuth:
oidc:
userMappingProvider:
emailTemplate: '{{ user.email }}'
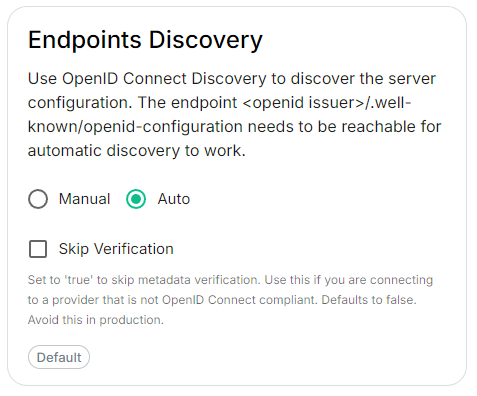
Endpoints Discovery
Auto Discovery
Config Example
spec:
components:
synapse:
config:
delegatedAuth:
oidc:
- clientId: synapsekieranml
clientSecretSecretKey: oidcClientSecret
endpointsDiscovery:
skipVerification: false
idpId: 01JDS2WKNYTQS21GFAKM9AKD9R
idpName: Keycloak
issuer: https://keycloak.ems-support.element.dev/realms/matrix
scopes:
- openid
- profile
- email
userMappingProvider:
displayNameTemplate: '{{ user.name }}'
emailTemplate: '{{ user.email }}'
Skip Verification
Config Example
spec:
components:
synapse:
config:
delegatedAuth:
oidc:
- clientId: synapsekieranml
clientSecretSecretKey: oidcClientSecret
endpointsDiscovery:
skipVerification: false
idpId: 01JDS2WKNYTQS21GFAKM9AKD9R
idpName: Keycloak
issuer: https://keycloak.ems-support.element.dev/realms/matrix
scopes:
- openid
- profile
- email
userMappingProvider:
displayNameTemplate: '{{ user.name }}'
emailTemplate: '{{ user.email }}'
Backchannel Logout Enabled
The Matrix Authentication Service does not support configuring Backchannel Logout. You can only configure Backchannel logout if you have enabled Legacy Auth from the Host Section.

Config Example
spec:
components:
synapse:
config:
delegatedAuth:
oidc:
- clientId: synapsekieranml
clientSecretSecretKey: oidcClientSecret
endpointsDiscovery:
skipVerification: false
idpId: 01JDS2WKNYTQS21GFAKM9AKD9R
idpName: Keycloak
issuer: https://keycloak.ems-support.element.dev/realms/matrix
scopes:
- openid
- profile
- email
userMappingProvider:
displayNameTemplate: '{{ user.name }}'
emailTemplate: '{{ user.email }}'
SAML
The Matrix Authentication Service does not support SAML and it is recommended to switch to OIDC. You can only enable SAML authentication if you have enabled Legacy Auth from the Host Section.
LDAP
Local Accounts
Cluster Section
Settings specific to the environment which you are deploying ESS into such as CA.
In the Cluster section you will find options to configure settings specific to the cluster which Element Deployment will run on top of. Initially only one option is presented, however some additional options are presented under 'Advanced'. By default, it is unlikely you should need to configure anything on this page.
All settings configured via the UI in this section will be saved to your deployment.yml, with the contents of secrets being saved to secrets.yml. You will find specific configuration examples in each section.
Config Example
metadata:
annotations:
ui.element.io/layer: |
global:
config:
adminAllowIps:
_value: defaulted
k8s:
ingresses:
tls:
certmanager:
_value: defaulted
spec:
  components:
    synapseAdmin:
      config:
        hostOrigin: >-
          https://admin.example.com,https://admin.example.com:8443
global:
config:
adminAllowIps:
- 0.0.0.0/0
- '::/0'
k8s:
ingresses:
tls:
certmanager:
issuer: letsencrypt
mode: certmanager
Config
Certificate Authority
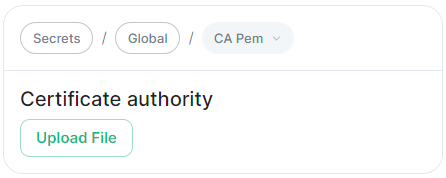
Config Example
-
secrets.ymlapiVersion: v1 kind: Secret metadata: name: global namespace: element-onprem data: # Added to the `global`, `element-onprem` secret as `ca.pem` under the `data` section. Other values may also be present here. ca.pem: >- base64encodedCAinPEMformatString
If you are using self-signed certificates, you will need to provide the certificate of the Certificate Authority in PEM encoded format. Just like with any certificate file uploaded to the Certificates section (and those yet to be uploaded for specific integrations), it is strongly advised to include the full certificate chain to reduce the liklihood of certificate-based issues post deployment.
Advanced
Config
Images Digests Config Map

Config Example
-
deployment.ymlmetadata: annotations: ui.element.io/layer: | global: config: imagesDigestsConfigMap: {} # Remove if no longer defined in `spec`, `global`, `config` spec: global: config: imagesDigestsConfigMap: example # Remove if no longer required
Used when you want to Customise container images used by ESS, see that guide for a detailed breakdown of using this option.
DNS Delegation

Config Example
-
deployment.ymlmetadata: annotations: ui.element.io/layer: | global: config: supportDnsFederationDelegation: {} # Remove if no longer defined in `spec`, `global`, `config` spec: global: config: # supportDnsFederationDelegation: false # Default value when not defined supportDnsFederationDelegation: true
It is highly discouraged from enabling support for DNS Federation Delegation, a significant number of features across ESS components are configured via .well-known files deployed by WellKnownDelegation. Enabling this will prevent those features from working so you may have a degraded experience.
This option should be used to allow Federation Delegation via a DNS SRV record instead of the standard .well-known method. You will need to enable this option if you wish to deploy a homeserver to a base domain where you cannot direct requests to /.well-known/matrix/client and /.well-known/matrix/server to the WellKnown pod (or host the files at those URLs manually).
You can read more about SRV DNS Record Delegation and the Matrix Server Spec Resolving Server Names for more information, but once enabled you should ensure you have configured a DNS SRV record in the below format which points to your specified Synapse domain:
_matrix-fed._tcp.<hostname>
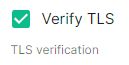
TLS Verification
Config Example
-
deployment.ymlmetadata: annotations: ui.element.io/layer: | global: config: verifyTls: {} # Remove if no longer defined in `spec`, `global`, `config` spec: global: config: # verifyTls: true # Default value when not defined verifyTls: false
You can toggle TLS verification off via this option, however, it is strongly advised to keep this enabled unless you have a specific requirement.
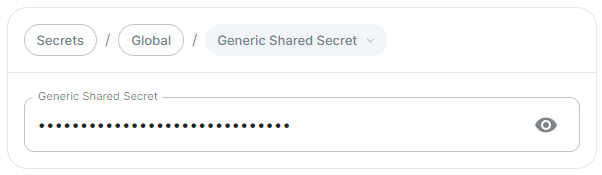
Generic Shared Secret
Config Example
-
secrets.ymlapiVersion: v1 kind: Secret metadata: name: global namespace: element-onprem data: # Added to the `global`, `element-onprem` secret as `genericSharedSecret` under the `data` section. Other values may also be present here. genericSharedSecret: QmdrWkVzRE5aVFJSOTNKWVJGNXROTG10UTFMVWF2
A random Generic Shared Secret will be generated and set when you run the installer for the first time, you shouldn't need to change this unless specifically advised.
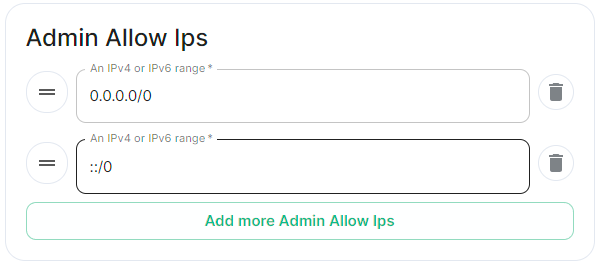
Admin Allow IPs
Config Example
-
deployment.ymlmetadata: annotations: ui.element.io/layer: | global: config: adminAllowIps: # _value: defaulted # Default value '0': {} '1': {} spec: global: config: # adminAllowIps: # Default values # - 0.0.0.0/0 # - '::/0' adminAllowIps: - 192.168.0.1/24 - 127.0.0.1/24
This option allows you to configure the IP addresses (specifically or range/s) allowed to access the deployed Synapse Admin, in most cases, you shouldn't need to configure this as access to any administration requires logging in with a Matrix ID designated as a Synapse Admin.
Synapse Section
The Synapse configuration options for your Matrix Homeserver incl. registration & encryption.
Synapse is the Matrix homeserver that powers ESS, in this section you will be customising settings relating to your homeserver, analogous with settings you'd set in the homeserver.yml if configuring Synapse manually.
All settings configured via the UI in this section will be saved to your deployment.yml, with the contents of secrets being saved to secrets.yml. You will find specific configuration examples in each section.
Config Example
-
deployment.ymlmetadata: annotations: ui.element.io/layer: | components: synapse: spec: components: synapse: -
secrets.ymlkind: Secret metadata: name: synapse namespace: element-onprem data:
By default, if you do not change any settings on this page, defaults will be added to your configuration file/s (see example below).
Config Example
-
deployment.ymlmetadata: annotations: ui.element.io/layer: | components: synapse: config: _value: defaulted k8s: haproxy: _value: defaulted redis: _value: defaulted synapse: _value: defaulted spec: components: synapse: config: maxMauUsers: 250 media: volume: size: 50Gi urlPreview: config: acceptLanguage: - en k8s: haproxy: workloads: resources: limits: memory: 200Mi requests: cpu: 100m memory: 100Mi redis: workloads: resources: limits: memory: 50Mi requests: cpu: 50m memory: 50Mi synapse: workloads: resources: limits: memory: 4Gi requests: cpu: 100m memory: 100Mi -
secrets.ymlapiVersion: v1 kind: Secret metadata: name: synapse namespace: element-onprem data: adminPassword: exampleAdminPassword macaroon: exampleMacaroon registrationSharedSecret: exampleRegistrationSharedSecret signingKey: >- exampleBase64EncodedSigningKey
Profile
The profile section automatically configures Synapse Workers so you don't have to, optimising your deployment to align with the settings you define based on our recommendations.
The options you set here do not have to align with what you configure for your homeserver.
For example, you may wish for your server to be able to handle greater than 500 Monthly Active Users, so you select 2500 users. When you later define the Max MAU Users in the Config section below, you can choose any number you wish.
The same applies with Federation, you can optimise your deployment to suit Open Federation but opt to close it in the dedicated Federation section.
Monthly Active Users

Config Example
metadata:
  annotations:
    ui.element.io/profile: |
      components:
        synapse:
          _subvalues:
            mau: 500
            # mau: 2500
            # mau: 10000
Here you should select the option that covers how many Monthly Active Users i.e. if you think you'll have ~800 users, you should select 2500 to optimise your setup to handle those users.
Federation Type

Config Example
metadata:
  annotations:
    ui.element.io/profile: |
      components:
        synapse:
          _subvalues:
            fed: closed
            # fed: limited
            # fed: open
It is recommended to align with how you plan to configure Federation to ensure you're Synapse Workers are setup to handle the associated federation.
Config
Accept Invites

Config Example
spec:
  components:
    synapse:
      config:
        acceptInvites: manual
        # acceptInvites: auto
        # acceptInvites: auto_dm_only
This enables a Synapse module called Auto-Accept Invite which is used to automatically accept invites.
Manual retains the original behaviour, requiring users to accept invites to rooms, including Direct Messages.
Auto will automatically accept all invites to rooms, including Direct Messages.
Auto DM Only will only automatically accept invites to Direct Messages.
Max MAU Users

Config Example
spec:
  components:
    synapse:
      config:
        maxMauUsers: 250
Synapse can be configured to record the number of Monthly Active Users (also referred to as MAU) on a given homeserver, MAU only tracks local users. This option sets the hard limit of monthly active users above which the server will start blocking users. See Monthly Active Users from the Synapse documentation, including max_mau_value and limit_usage_by_mau to learn more.
Registration

Config Example
spec:
  components:
    synapse:
      config:
        registration: open
        # registration: custom
        # registration: closed
Open enables registration for new users, users will be able create an account via Matrix clients that support it, i.e. Element Web. Specifically, setting this option is the equivalent to setting both enable_registration and enable_registration_without_verification to true.
Closed disables registration for new users, users will only be presented the option to login to the homeserver. You will need to either manually setup users via the Admin Console / Admin API or be using something like Delegated Authentication.
Custom, allows you to completely customise your configuration of Registration via the Additional Config section found under Advanced, you could then use it to enable verification by setting enable_registration_without_verification to false or other similar settings, i.e. registrations_require_3pid.
Open or Closed registration will not affect the creation of new Matrix Accounts via Delegated Authentication. New users via Delegated Authentication i.e. LDAP, SAML or OIDC, who have yet to login to the homeserver and technically do not yet have a created Matrix ID, will still have one created when they successfully authenticate regardless of if registration is Closed.
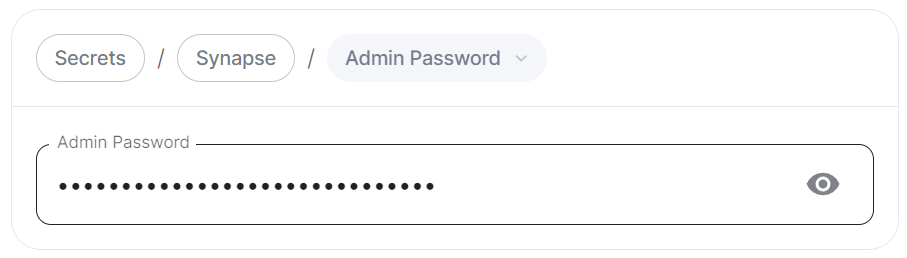
Admin Password
Config Example
-
deployment.ymlspec: components: synapse: config: adminPasswordSecretKey: adminPassword -
secrets.ymldata: adminPassword: ExampleAdminPasswordBase64EncodedString
Password for the @onprem-admin-donotdelete user, a Synapse Admin user automatically created to allow you to use the Admin Console. You should use this account to promote Matrix accounts you setup to Synapse Admins. When using the Admin Console via the Installer (:8443), you should auto-login as this account, no password required.
If you are experiencing issues with accessing the Admin Console following a wipe and reinstall, ensure you do not have the previous install credentials cached. You can clear them via your browsers' settings, then refresh the page (you will be provided with a new link via the Installer CLI) to resolve.
Log
Unlike with most other sections, logging values set here are analogous to creating a <SERVERNAME>.log.config instead of the homeserver.yml. See the Logging Sample Config File for further reference.
Root Level

Config Example
spec:
  components:
    synapse:
      config:
        log:
          rootLevel: Info
          # rootLevel: Debug
          # rootLevel: Warning
          # rootLevel: Error
          # rootLevel: Critical
As defined under the Configuration file format section of the Python docs, the available options presented by the Installer are DEBUG, INFO, WARNING, ERROR and CRITICAL. These represent different severity levels for log messages and help control the verbosity of log output which help to filter messages based on their importance.
-
DEBUG: Detailed information, typically used for debugging purposes. Messages at this level provide the most fine-grained and detailed logging. -
INFO: General information about the program's operation. This level is used to confirm that things are working as expected. -
WARNING: Indicates a potential issue or something that might cause problems in the future. It doesn't necessarily mean an error has occurred, but it's a warning about a possible concern. -
ERROR: Indicates a more serious issue or error in the program. When an error occurs, it might impact the functionality of the application. -
CRITICAL: Indicates a very severe error that may lead to the program's termination. Critical messages suggest a problem that should be addressed immediately.
When troubleshooting, increasing the log level and redeploying can help narrow down where you're experiencing issues. By default, DEBUG is a good option to include everything allowing you to identify a problem.
It is not advised to leave your Logging Level at anything other than the default, as more verbose logging may expose information that should otherwise not be accessible. When sharing logs, remember to redact any sensitive information you do not wish to share.
Sentry DSN

Config Example
spec:
  components:
    synapse:
      config:
        log:
          sentryDsn: https://publickey:secretkey@sentry.io/projectid
Here you can specify a Sentry Data Source Name (DSN) to connect Synapse logging to a specific project within your Sentry account. A typical Sentry DSN looks like:
https://<public_key>:<secret_key>@sentry.io/<project_id>
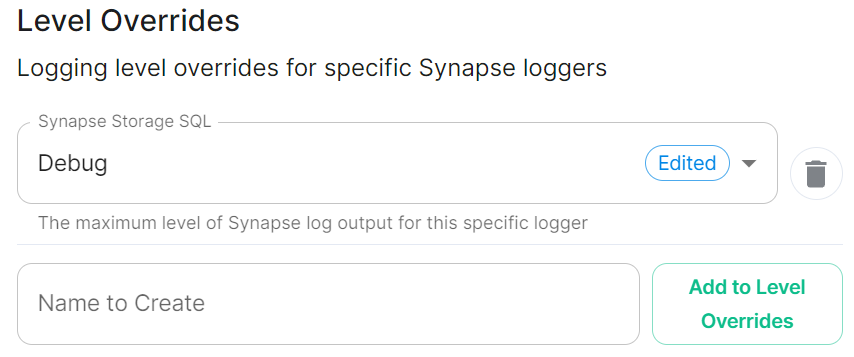
Level Overrides
Config Example
spec:
  components:
    synapse:
      config:
        log:
          levelOverrides:
            synapse.storage.SQL: Info
            # synapse.storage.SQL: Debug
            # synapse.storage.SQL: Error
            # synapse.storage.SQL: Warning
            # synapse.storage.SQL: Critical
Here you can configure custom logging levels for specific Synapse loggers, i.e. synapse.storage.SQL. Simply add the Synapse logger and click Add to Level Overrides. You will then be able to select the desired logging level for that logger:
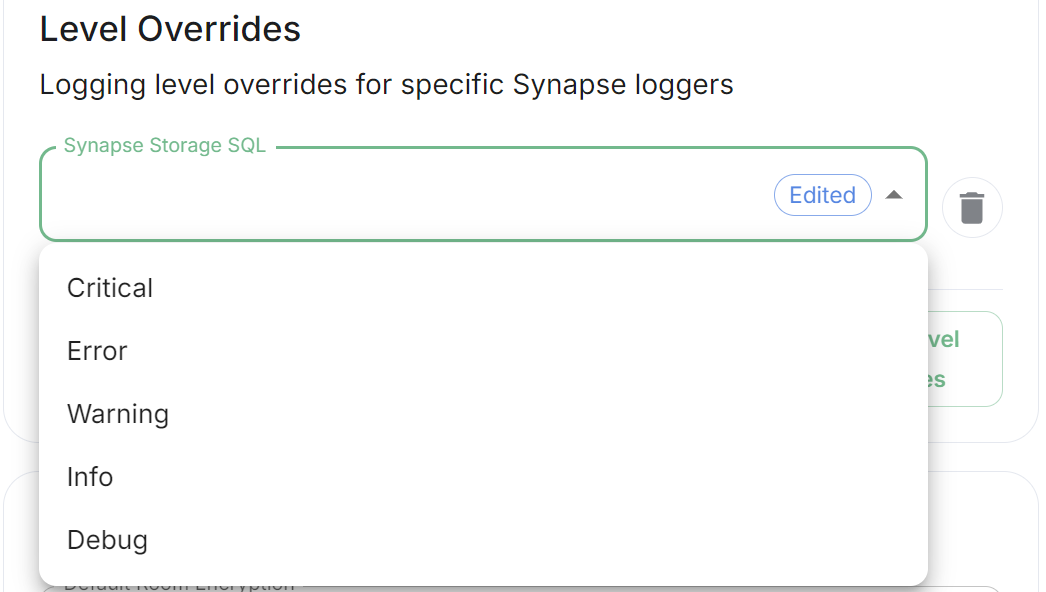
You can read up more on Structured Logging from the Structured Logging Synapse doc for more detailed guidance.
Security
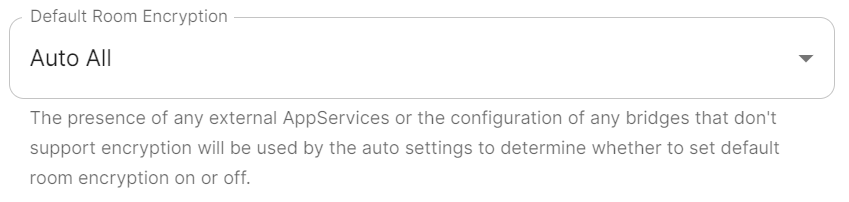
Default Room Encryption
encryption_enabled_by_default_for_room_type
Config Example
spec:
  components:
    synapse:
      config:
        security:
          defaultRoomEncryption: auto_all
          # defaultRoomEncryption: auto_invite
          # defaultRoomEncryption: forced_all
          # defaultRoomEncryption: forced_invite
          # defaultRoomEncryption: not_set
Controls whether locally-created rooms should be end-to-end encrypted by default.
This option will only affect rooms created after it is set and will not affect rooms created by other servers.
-
auto_all- Automatically enables encryption for all rooms created on the local server if all present integrations support it.
-
auto_invite- Automatically enables encryption for private rooms and private messages if all present integrations support it.
-
forced_all- Enforces encryption for all rooms created on the local server, regardless of the integrations supporting encryption.
-
forced_invite- Enforces encryption for private rooms and private messages, regardless of the integrations supporting encryption.
-
not_set- Does not enforce encryption, leaving room encryption configuration choice to room admins.
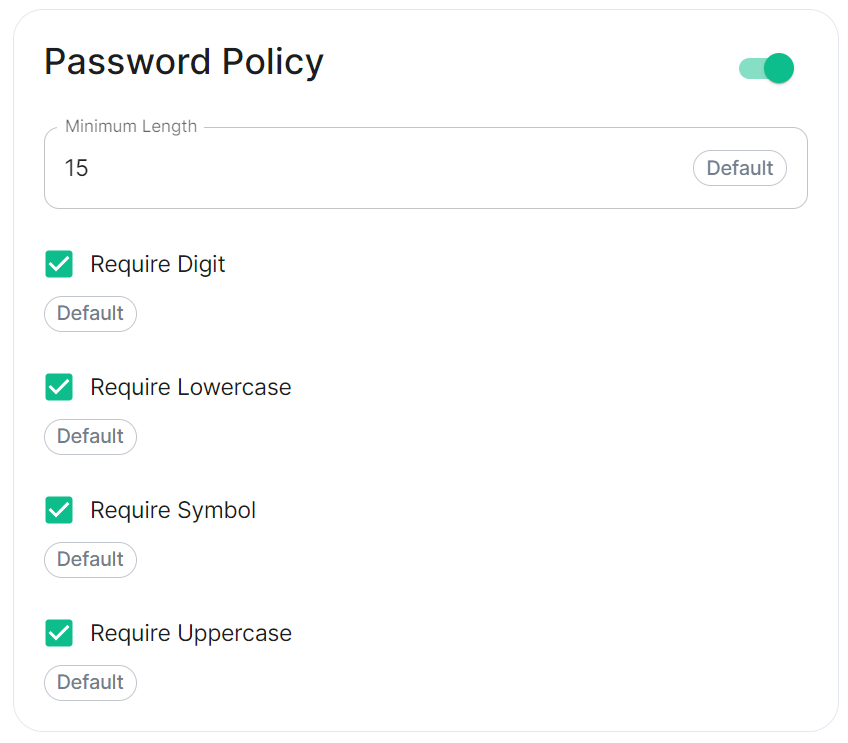
Password Policy
Config Example
spec:
  components:
    synapse:
      config:
        security:
          # Not present when disabled
          # passwordPolicy: # {} When enabled with default settings
          passwordPolicy: # Only configured like so when values changed from thier defaults
            minimumLength: 20 # Default: 15
            requireDigit: false # Default: true
            requireLowercase: false # Default: true
            requireSymbol: false # Default: true
            requireUppercase: false # Default: true
Turning on Password Policy will allow you to define and enforce a password policy for users' accounts on your homeserver.
You may notice that despite this not being enabled, users are required when registering to set secure passwords when doing do via the Element Web client. This is because the client itself enforces secure passwords, this setting is required should you wish to ensure all accounts have enforces password requirements, as other Matrix clients may not themselves enforce secure passwords.
Telemetry
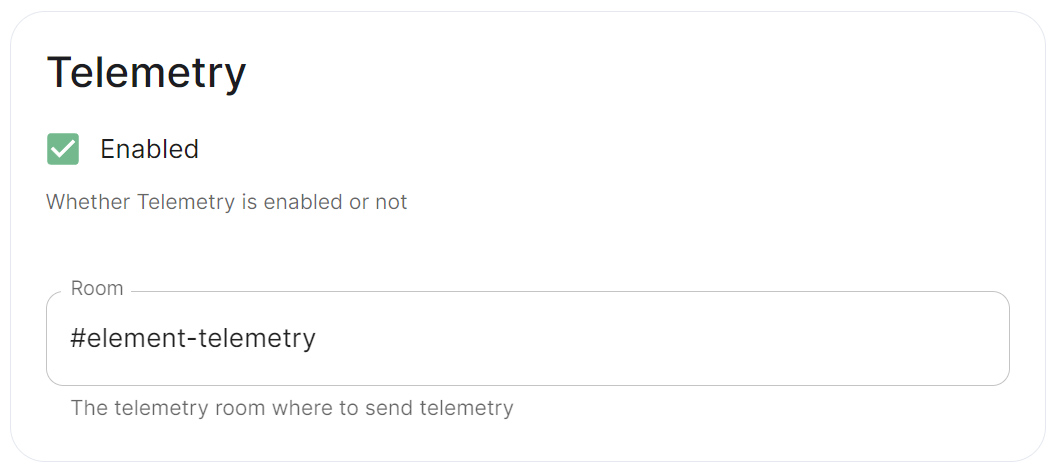
Config Example
spec:
  components:
    synapse:
      config:
        telemetry:
          enabled: true
          passwordSecretKey: telemetryPassword
          room: '#element-telemetry'
Element collects telemetry data to understand whether or not customers are in compliance with what they've purchased, so should be left enabled unless automatic sending of telemetry is not possible (i.e. Airgapped setups). By default, ESS servers connected to the internet will automatically send telemetry to Element. Please allow this to happen by making sure you have not blocked ems.element.io on port 443 from your homeserver.
What Telemetry Data is Collected by Element?
The following is a sample telemetry packet generated by Element On-Premise:
Config Example
{
    "_id" : ObjectId("6363bdd7d51c84d1f10a8126"),
    "onPremiseSubscription" : ObjectId("62f14dd303c67b542efddc4f"),
    "payload" : {
        "data" : {
            "activeUsers" : {
                "count" : 1,
                "identifiers" : {
                    "native" : [
                        "5d3510fc361b95a5d67a464a188dc3686f5eaf14f0e72733591ef6b8da478a18"
                    ]
                },
                "period" : {
                    "end" : 1667481013777,
                    "start" : 1666970260518
                }
            }
        },
        "generationTime" : 1667481013777,
        "hostname" : "element.demo",
        "instanceId" : "bd3bbf92-ac8c-472e-abb5-74b659a04eec",
        "type" : "synapse",
        "version" : 1
    },
    "request" : {
        "clientIp" : "71.70.145.71",
        "userAgent" : "Synapse/1.65.0"
    },
    "schemaVersion" : 1,
    "creationTimestamp" : ISODate("2022-11-03T13:10:47.476Z")
}
Submitting Telemetry Data to Element
If you are unable to allow Element's telemetry upload to take place, either because you are airgapped or need to block ems.element.io then you will need to manually submit telemetry data to Element.
In order to gather telemetry data, you will need to use the element-telemetry-export.py script, which comes with the installer.
To do this, run:
cd ~/.element-enterprise-server/installer/lib
/usr/bin/env python3 ./element-telemetry-export.py
You will be prompted for an access token:
Matrix user access token not specified in the "MATRIX_USER_ACCESS_TOKEN" environment variable. Please provide the access token and hit enter:
You will need to provide a valid access token for a user who has access to the telemetry room. This can be found by logging in to Element Web as this user, going to "All Settings", then clicking "Help & About" and finally expanding the section for "Access Token".
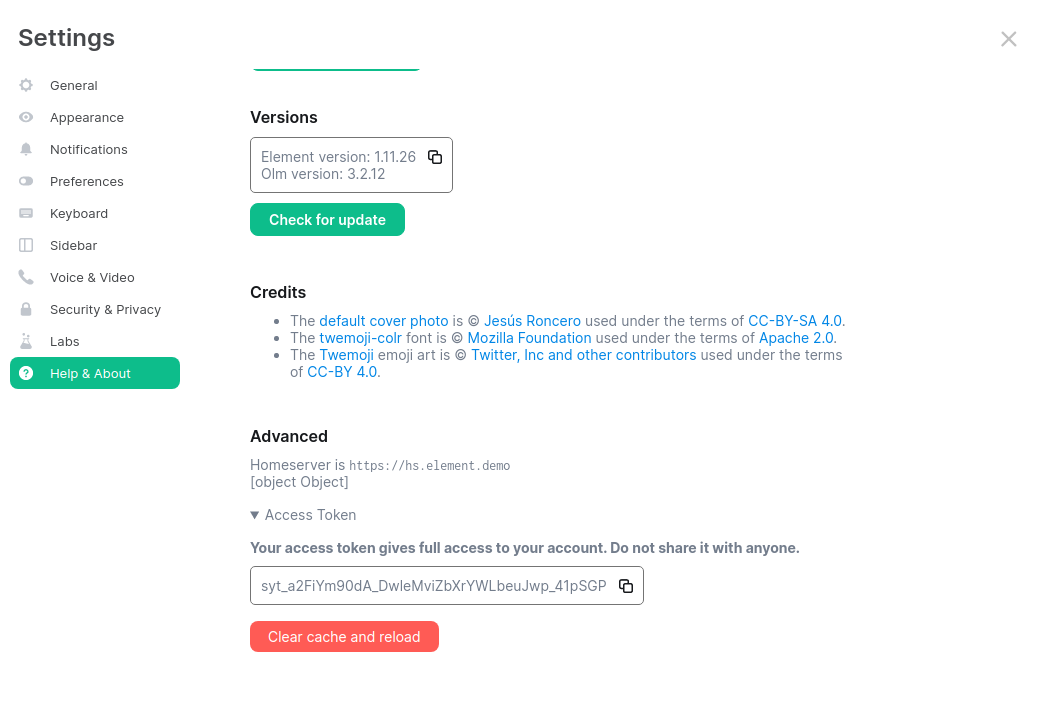
Provide the access token to the prompt and hit enter.
2023-04-18 15:36:41,580:INFO:Parsing configuration file (/home/karl1/.element-enterprise-server/config/telemetry-config.json)
2023-04-18 15:36:41,581:INFO:Performing Matrix sync with homeserver (https://hs.element.demo)
2023-04-18 15:36:41,643:INFO:Scanning page 1
2023-04-18 15:36:41,716:INFO:Scanning page 2
2023-04-18 15:36:41,782:INFO:Writing 19 telemetry events to ZIP file (/home/karl1/.element-enterprise-server/installer/lib/telemetry_2023-04-18.zip)
2023-04-18 15:36:41,783:INFO:Saving some internal state (for next time)
Once you have done this, you will have some messages that look similar to the above and you will have a new zip file in this directory with a date stamp in the format telemetry_YYYY-MM-DD.zip. In my case, I have telemetry_2023-04-18.zip.
If you are having SSL connectivity issues with the exporter, you may wish to either disable TLS verification or provide a CA certificate to the exporter with these optional command line parameters:
  --disable-tls-verification
                        Do not check SSL certificate validity when querying the Matrix server
  --ca-cert-path CA_CERT_PATH
                        Specify the path to the CA file (or a directory) to use when verifying Matrix server's
                        SSL certificate. Consult README.md for more details
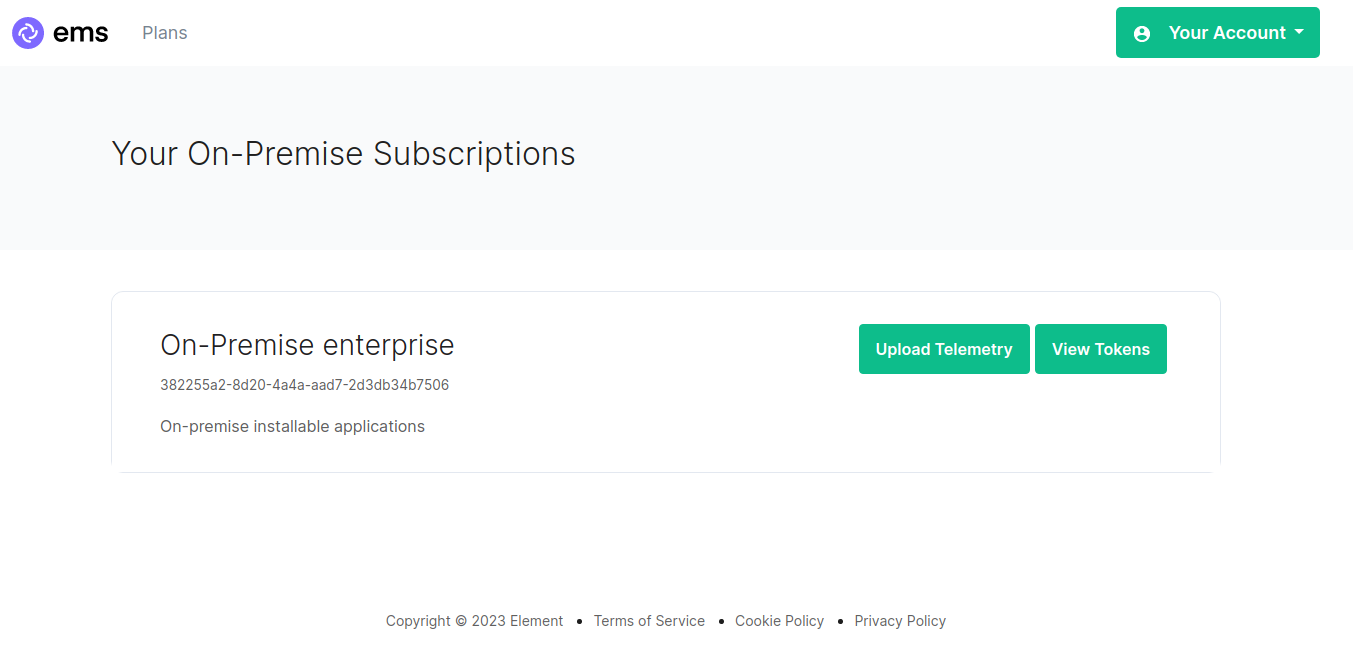
Then browse to https://ems.element.io/on-premise/subscriptions and click "Upload Telemetry" next to the subscription you are uploading the data for:
Click browse, find the telemetry file then click "Submit Telemetry":
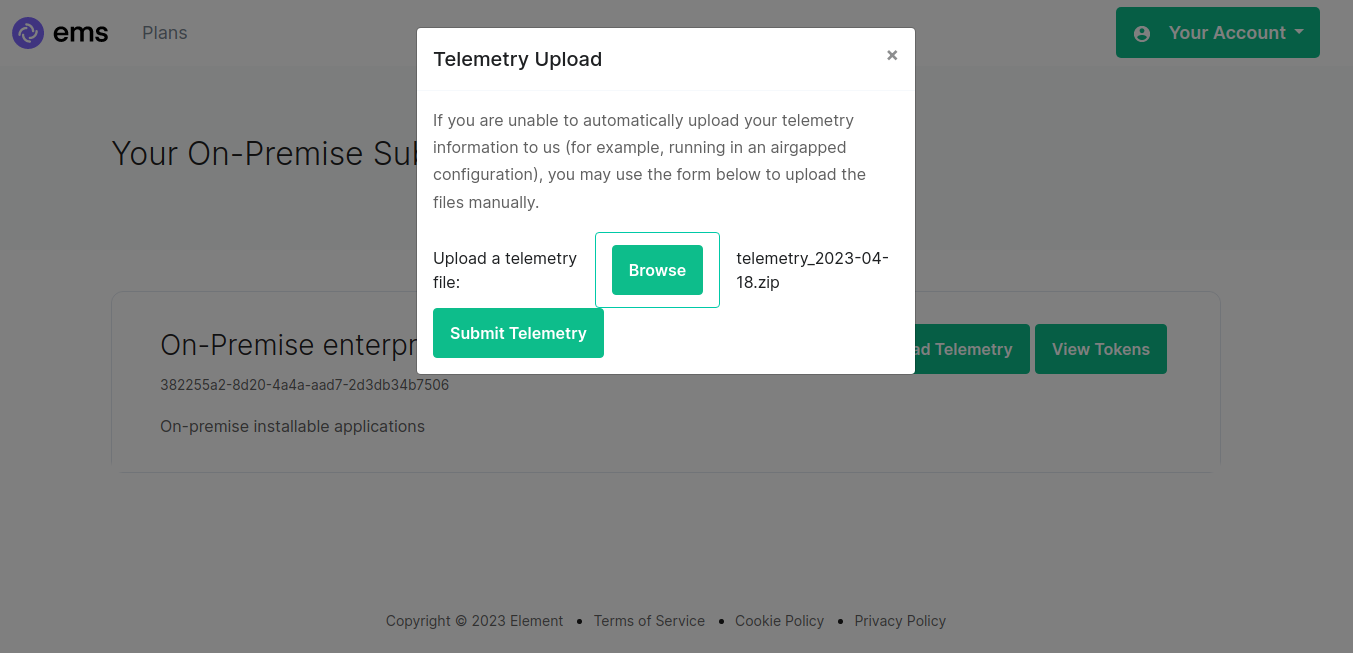
Once successful, you will see this screen:

You can then close the upload window.
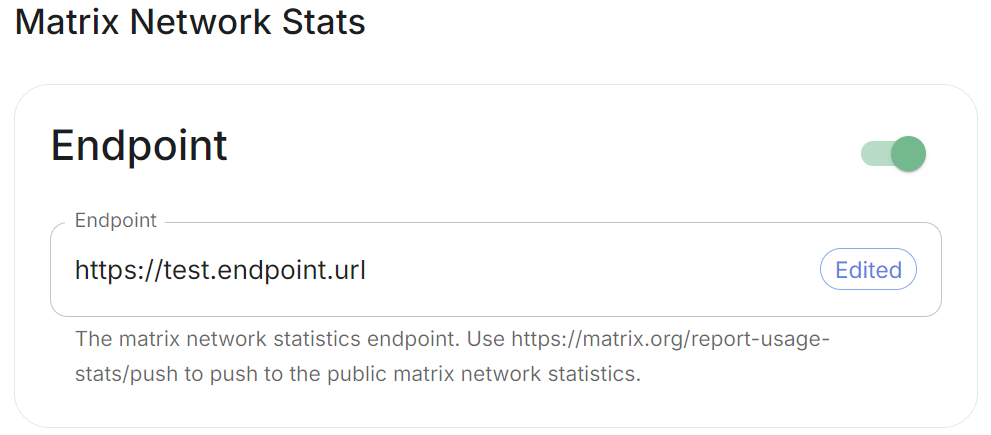
Matrix Network Stats
Config Example
spec:
  components:
    synapse:
      config:
        telemetry:
          matrixNetworkStats:
            endpoint: https://test.endpoint.url
Enable Matrix Network Stats if you'd like to report your homeserver usage statistics to a statistics collection server. Per the tooltip, you can enter https://matrix.org/report-usage-stats/push to contribute to the public Matrix network statistics collection or enter your own endpoint.
See Reporting Homeserver Usage Statistics for more information on the statistics available and Using a Custom Statistics Collection Server to see how-to setup your own statistics endpoint.
URL Preview

Config Example
spec:
  components:
    synapse:
      config:
        urlPreview: {} # {} When disabled, otherwise enabled with config as detailed in sections below.
URL previews involve fetching information from a URL (e.g., a website link) and displaying a preview of the content, such as a title, description, and an image. This feature can be useful for enhancing the user experience by providing more context about shared URLs in chat messages.
Enabling or disabling URL previews can impact the amount of information displayed in the chat interface, and it can also have privacy implications as fetching URL previews involves making requests to external servers to retrieve metadata.
Default Blacklist
When enabling URL Preview, a default blacklist using url_preview_ip_range_blacklist is configured for all private networks (see ranged below) to avoid leaking information by asking for preview of links pointing to private paths of the infrastructure. While this blacklist cannot be changed, you can whitelist specific ranges using IP Range Allowed.
Config Example
url_preview_ip_range_blacklist:
- '192.168.0.0/16'
- '100.64.0.0/10'
- '192.0.0.0/24'
- '169.254.0.0/16'
- '192.88.99.0/24'
- '198.18.0.0/15'
- '192.0.2.0/24'
- '198.51.100.0/24'
- '203.0.113.0/24'
- '224.0.0.0/4'
- '::1/128'
- 'fe80::/10'
- 'fc00::/7'
- '2001:db8::/32'
- 'ff00::/8'
- 'fec0::/10'
Config
Accept Language

Config Example
spec:
  components:
    synapse:
      config:
        urlPreview:
          config:
            acceptLanguage:
              - en
By setting this configuration option, you can control the language preference that Matrix Synapse communicates to external servers when fetching URL previews. This can be useful if you want to influence the language of the content retrieved for URL previews based on the preferred language of your users.
To do so, specify the Localisation country sub-code (e.g., en) that should be used as the Accept-Language header value that the server should send when fetching URL previews from external websites. The Accept-Language header is an HTTP header used by web browsers and other clients to indicate the preferred language(s) for the response.
Each value is a IETF language tag; a 2-3 letter identifier for a language, optionally followed by sub-tags separated by '-', specifying a country or region variant. Multiple values can be provided by clicking Add more Accept Language, and a weight can be added to each by using quality value syntax (;q=). '*' translates to any language.
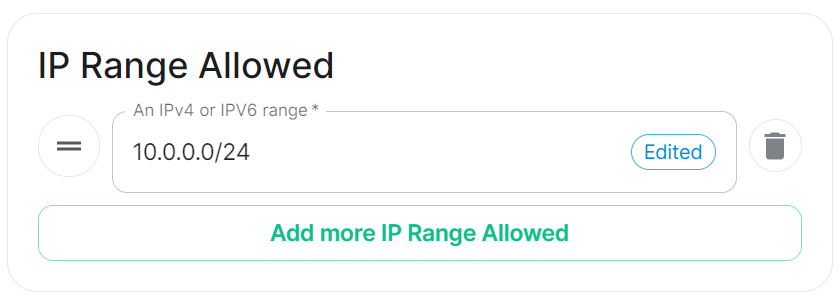
IP Range Allowed
url_preview_ip_range_whitelist
Config Example
spec:
  components:
    synapse:
      config:
        urlPreview:
          config:
            ipRangeAllowed:
              - 10.0.0.0/24
This option allows you to provide a list of IP address CIDR ranges that URL Preview is allowed to access even if they are specified in the Default Blacklist.
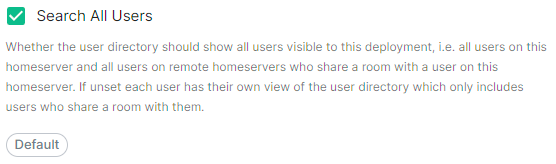
User Directory
Config Example
spec:
  components:
    synapse:
      config:
        userDirectory: # Not present when left as default, `true`
          # searchAllUsers: true
          searchAllUsers: false
This option defines whether to search all users visible to your homeserver at the time the search is performed. If set to true, Synapse will return all users on the homeserver who match the search. If false, search results will only contain users visible in public rooms and users sharing a room with the requester.
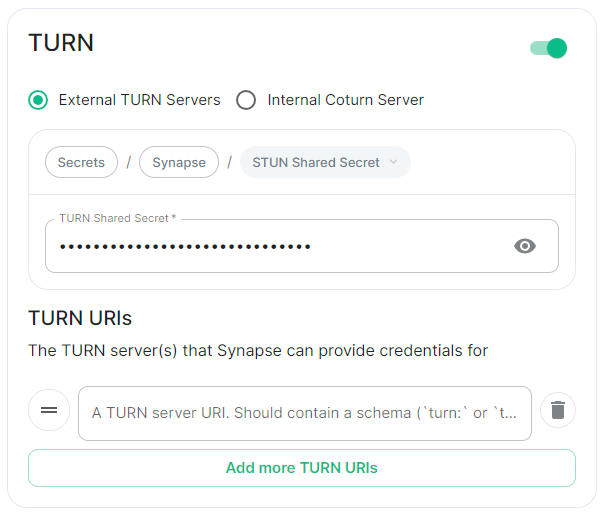
TURN
Config Example
-
deployment.ymlspec: components: synapse: config: # Not present if disabled # stun: {} # If `Internal Coturn Server` selected stun: sharedSecretSecretKey: stunSharedSecret turnUris: - turn:turn.example.com - turns:turns.example.com -
secrets.ymldata: stunSharedSecret: ExampleSTUNSharedSecretBase64EncodedString
Any provided TURN server URI should contain a schema (turn: or turns:), a hostname, optionally a port and optionally a transport parameter (?transport=udp or ?transport=tcp).
Identity Server
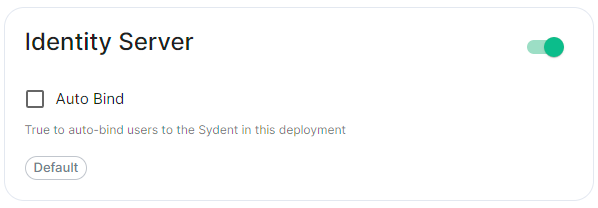
Config Example
spec:
  components:
    synapse:
      config:
  		# Not present if disabled
  		# identityServer: {} # If enabled but `autoBind` not selected
        identityServer:
          autoBind: true
HTTP Proxy
http_proxy, https_proxy, no_proxy
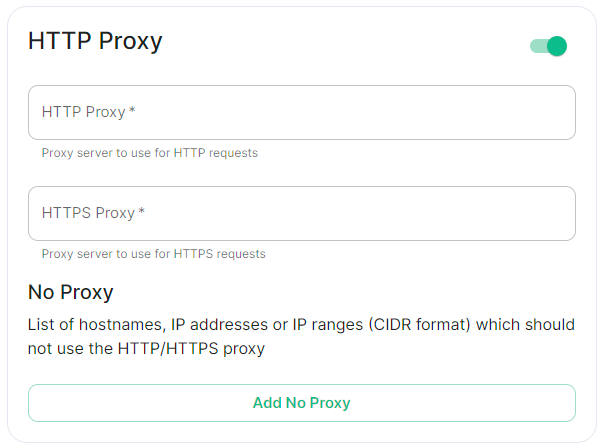
Config Example
spec:
  components:
    synapse:
      config:
        httpProxy:
          httpProxy: http_proxy.example.com
          httpsProxy: https_proxy.example.com
You can use Synapse with a forward or outbound proxy. An example of when this is necessary is in corporate environments behind a DMZ (demilitarized zone). Synapse supports routing outbound HTTP(S) requests via a proxy - Note: Only HTTP(S) proxy is supported, SOCKS / alternatives are no supported.
-
HTTP Proxy.
- Proxy server to use for HTTP requests.
-
HTTPS Proxy.
- Proxy server to use for HTTPS requests.
No Proxy
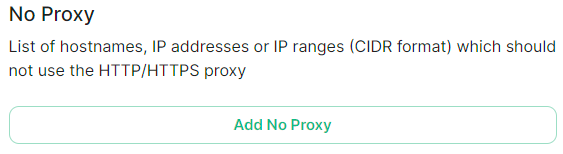
Config Example
spec:
  components:
    synapse:
      config:
        httpProxy:
          noProxy:
            - no_proxy.example.com # Hostname example
            - 192.168.0.123 # IP example
            - 192.168.1.1/24 # IP range example
Here you can specify a list of hostnames, IP addresses or IP ranges (CIDR format) which should not use the HTTP/HTTPS proxy
Data Retention
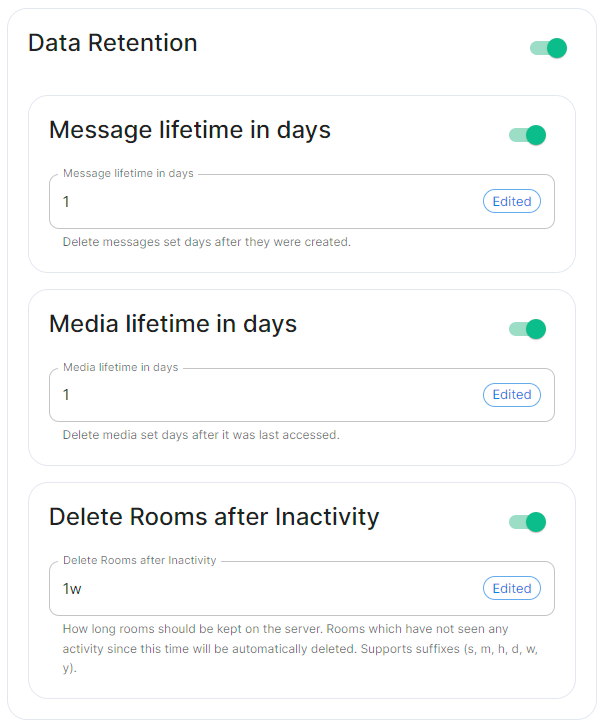
If this feature is enabled, Synapse will regularly look for and purge events which are older than the below specified lifetimes.
Message Lifetime in Days
Config Example
spec:
  components:
    synapse:
      config:
        dataRetention:
          messageLifetime: 1
Used to specify the number of days after a message is created that it should be deleted.
Media Lifetime in Days
Config Example
spec:
  components:
    synapse:
      config:
        dataRetention:
          mediaLifetime: 1
Used to specify the number of days after media is uploaded that it should be deleted.
Delete Rooms After Inactivity
Config Example
spec:
  components:
    synapse:
      config:
        dataRetention:
          deleteRoomsAfterInactivity: 1w
Used to specifiy how long rooms, which have not seen any activity, should be kept on the server. Rooms inactive after the specified time will be automatically deleted. Supports suffixes:
-
s: Seconds -
m: Minutes -
h: Hours -
d: Days -
w: Weeks -
y: Years
Advanced
Config
Macaroon
Config Example
-
secrets.ymldata: macaroon: ExampleMacaroonBase64EncodedString
A secret which is used to sign the:
- Access token for guest users
- Short-term login token used during SSO logins (OIDC or SAML2)
- Token used for unsubscribing from email notifications.
Registration Shared Secret
Config Example
-
secrets.ymldata: registrationSharedSecret: ExampleRegistrationSharedSecretBase64EncodedString
Allows registration of standard or admin accounts by anyone who has the shared secret, even if enable_registration is not Open, see Registration.
Signing Key
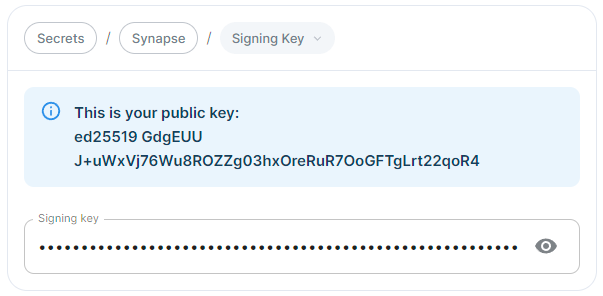
Config Example
-
secrets.ymldata: signingKey: >- ExampleSigningKeyBase64EncodedString
See the dedicated page on Synapse Federation configuration, Synapse Section: Federation for more details on how the Signing Key is used.
Additional
See the dedicated page on additional Synapse configuration, Synapse Section: Additional Config
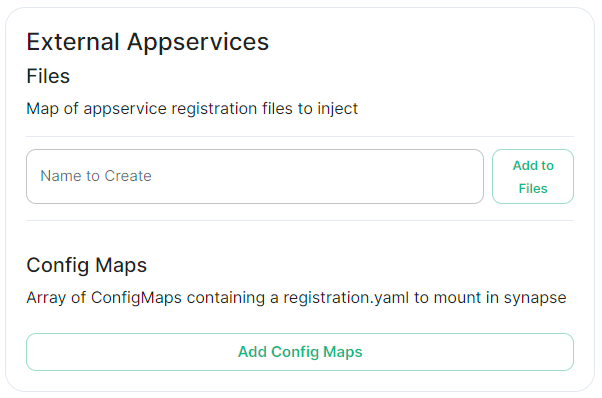
External Appservices
Federation
See the dedicated page on Synapse Federation configuration, Synapse Section: Federation
Synapse configuration options not available within the UI
We strongly advise against including any config not configurable via the UI as it will most likely interfere with settings automatically computed by the updater. Additional configuration options are not supported so we encourage you to first raise your requirements to Support where we can best advise on them.
An Additional Config section, which allows including config not currently configurable via the UI from the Configuration Manual, is available under the 'Advanced' section of this page. See the dedicated page on additional Synapse configuration, Synapse Section: Additional Config
Synapse Section: Federation
Detailed information on configuring homeserver Federation including Trusted Key Servers.
Federation is the process by which users on different servers can participate in the same room. For this to work, all servers participating in a room must be able to talk to each other.
When Federation is Open, you will not need to configure anything further, however to privately federate you will need to make use of the Federation section found under Advanced.
How do I turn Federation On / Off?
How Federation is enabled is automatic based on how you configure it within this Federation section.
By default Federation is enabled, to close Federation simply enable the Allow List without adding any allowed servers.
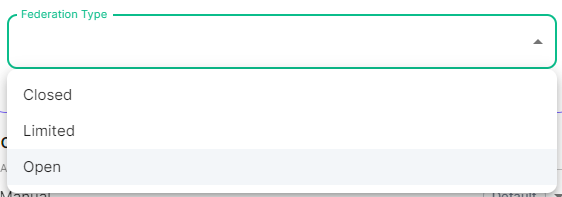
Federation Profile
At the top of the Synapse Section you can configure a Federation Type. This Profile section specifically configures the performance profile of your deployed homeserver.
As such, setting this to Open will automatically configure Synapse Workers for Federation Endpoints to better support an openly federating server.
This should not be confused with the Federation section detailed in this document.
Previous setups may have used the Synapse Additional config. Configuration of Federation settings via Additional Config, that are in conflict with any set via the UI, will not override the UI set values. As such, we do not advise including them or any related settings within the Additional Config as they are of increased risk to causing issues with your deployment and are not supported.
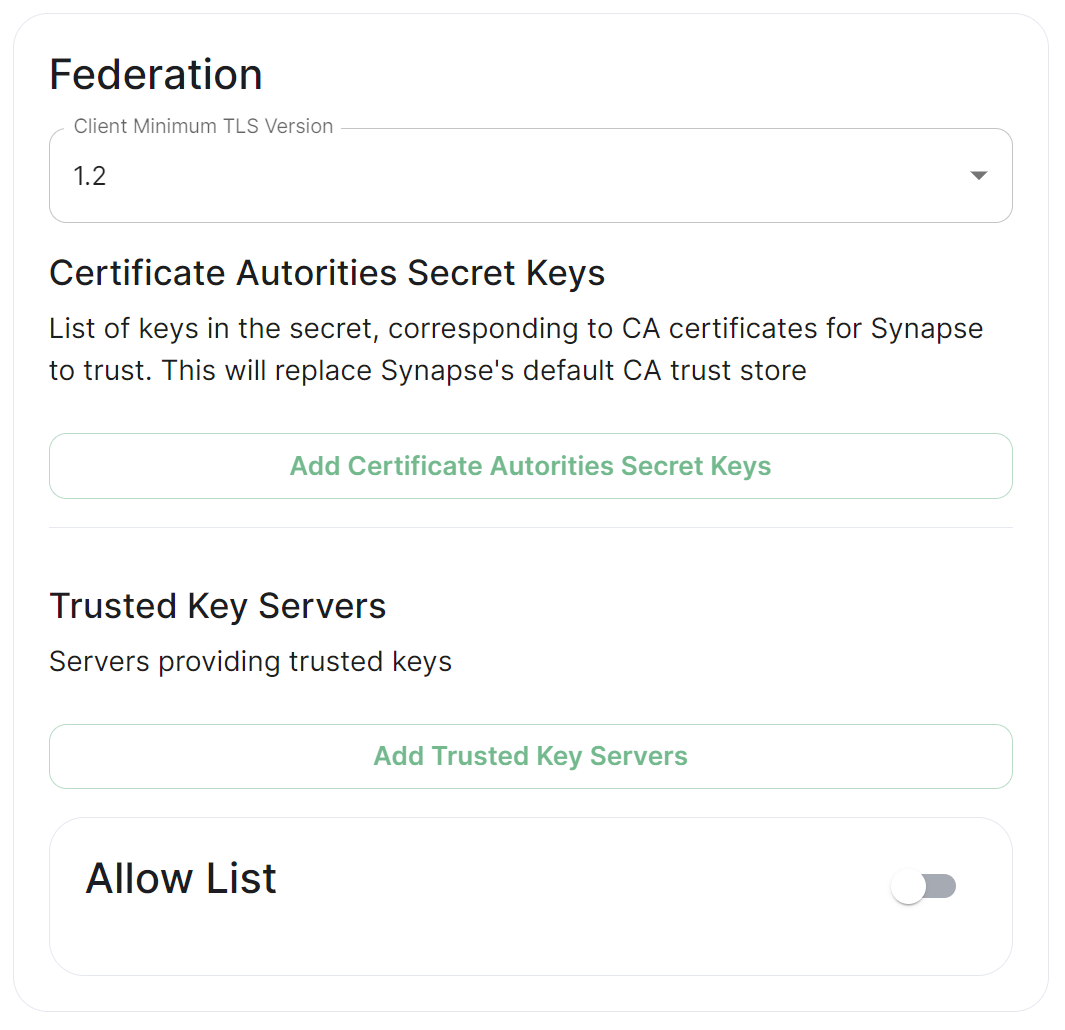
Client Minimum TLS Version
federation_client_minimum_tls_version

Allows you to choose the minimum TLS version that will be used for outbound federation requests. Defaults to "1.2". Configurable to "1.2" or "1.3".
Setting this value higher than "1.2" will prevent federation to most of the public Matrix network: only configure it to "1.3" if you have an entirely private federation setup and you can ensure TLS 1.3 support.
Certificate Autorities Secret Keys
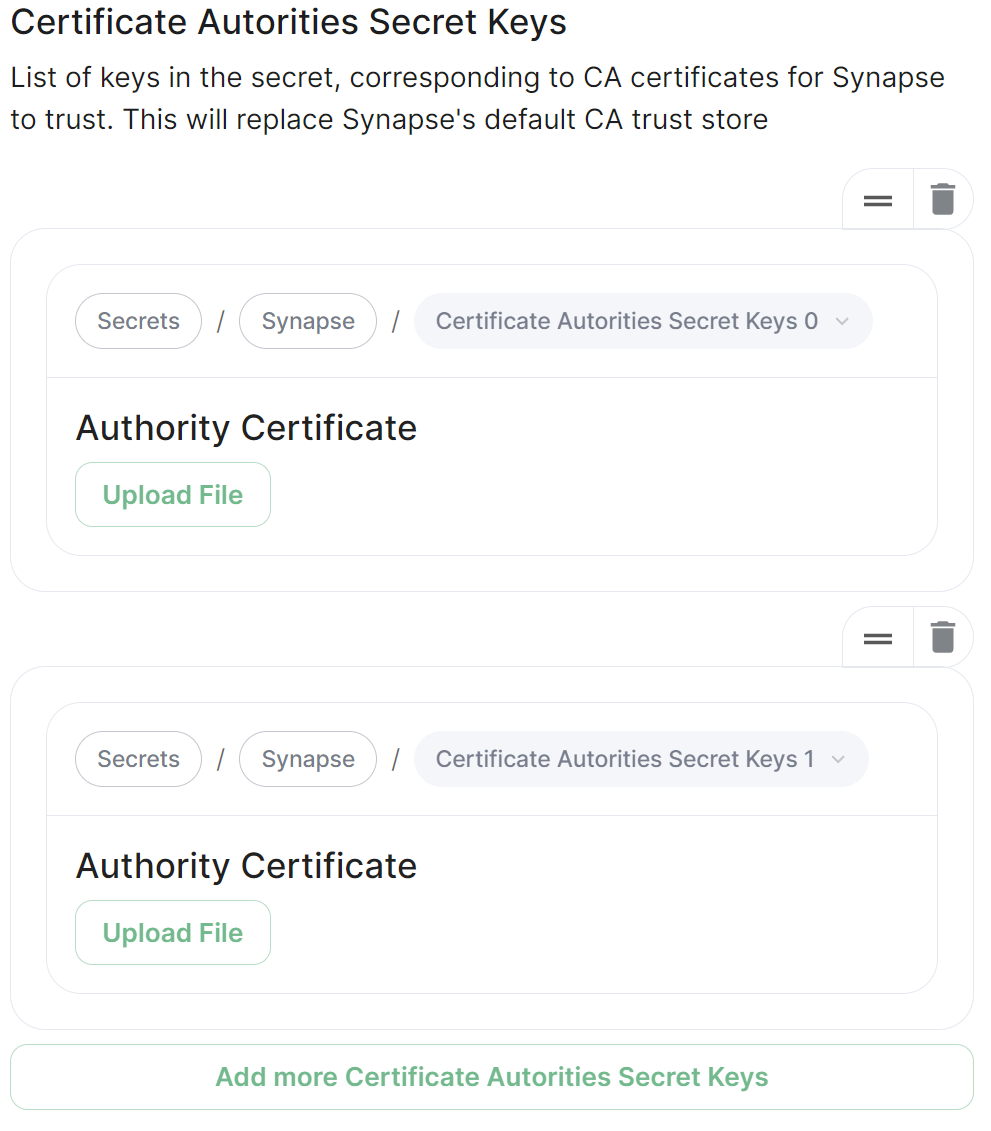
Configure when you are federating between homeservers' whose certificates are signed by different Certificate Authorities, click the Add Certificate Authorities Secret Keys / Add More Certificate Authorities Secret Keys button to reveal the option to upload your CA certificate.
Uploaded certificates should be PEM encoded and include the full chain of intermediate CAs and the root CA. You can simply concatenate these files prior to uploading.
Trusted Key Servers
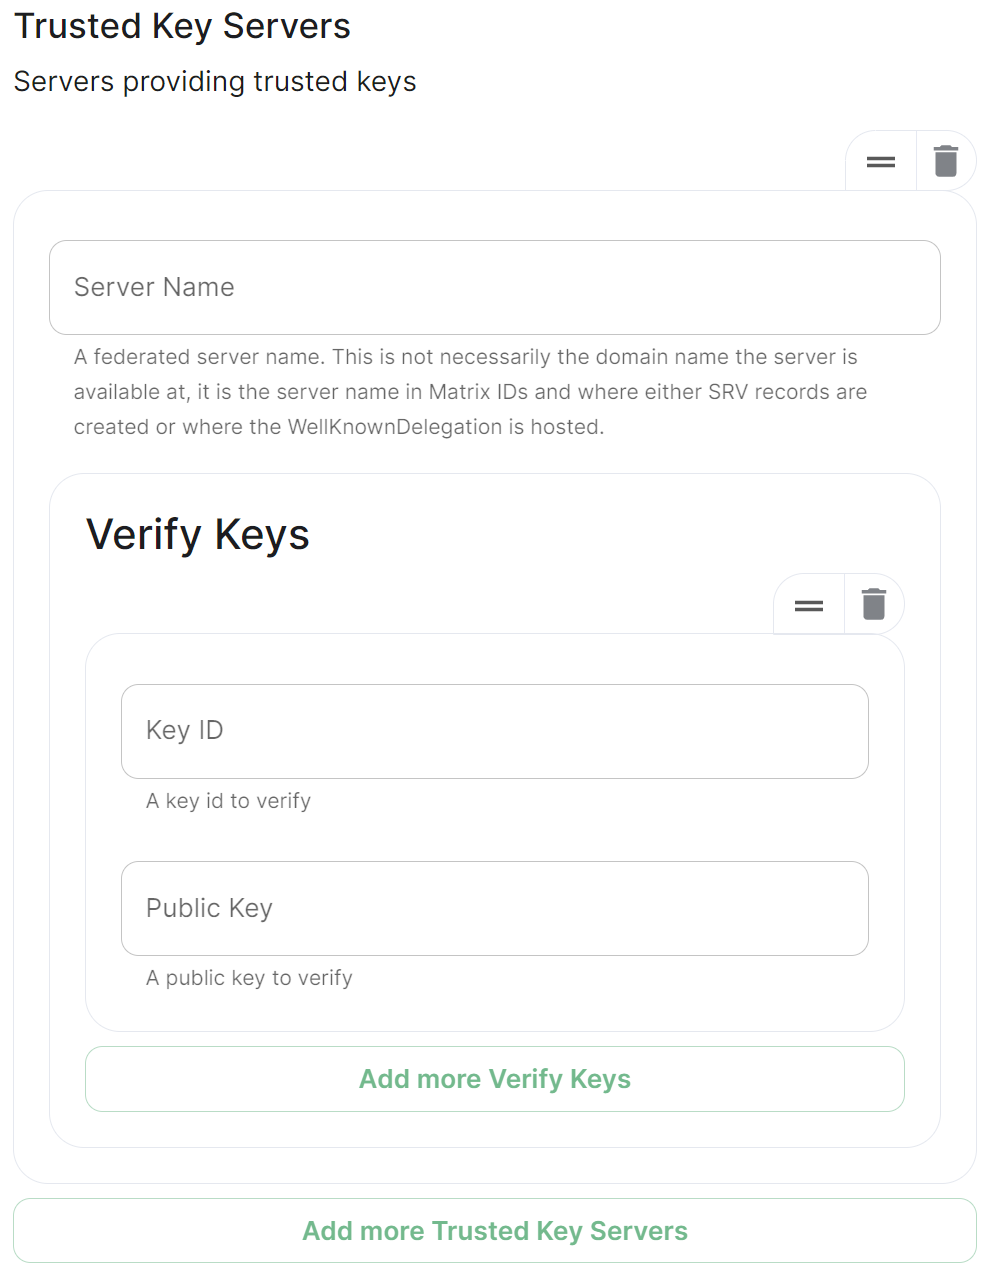
Used to specify the trusted servers to download signing keys from. When synapse needs to fetch a signing key, each server is tried in parallel. Normally, the connection to the key server is validated via TLS certificates. Verify keys provide additional security by making synapse check that the response is signed by that key.
Click Add Trusted Key Servers / Add More Trusted Key Servers to add a new key server, then provide the homeservers' federated server name, i.e. the base domain of the homeserver you with to federate with. Under Verify Keys for the server, you will need to provide it's Key ID and Public Key.
Getting a Homeservers' Key ID and Public Key from your browser
Simply access the Synapse endpoint GET /_matrix/key/v2/server. You must use the domain where your Synapse is exposed, this might be different than the domain you have in your Matrix IDs. For example https://matrix.yourcomapany.com/_matrix/key/v2/server.
For the element.io homeserver, https://element.ems.host/_matrix/key/v2/server returns
{
  "old_verify_keys": {},
  "server_name": "element.io",
  "signatures": {
    "element.io": {
      "ed25519:DnK8xk": "oOgEpir32XvnuMXQs+GvB6nOuIWgYathJ8kbzDhh9TT/BVSEH116Kk9NYUVPeXHJO0HhzBeTjmAiuUTVFS8nCg"
    }
  },
  "valid_until_ts": 1715307962481,
  "verify_keys": {
    "ed25519:DnK8xk": {
      "key": "EgdGx+0oy/9IX5k7tCobr0JoiwMvmmQ8sDOVlZODh/o"
    }
  }
}
Under verify_keys, ed25519:DnK8xk is the Key ID and EgdGx+0oy/9IX5k7tCobr0JoiwMvmmQ8sDOVlZODh/o is the Public Key.
Getting an On-Premise Homeservers' Key ID and Public Key via the Installer
You can retrieve the Public Key of an On-Premise Homeserver by re-running the installer on the host, then navigating to the Synapse section. Under Advanced, Config you will be presented with the homeservers' Public Key in a blue box.
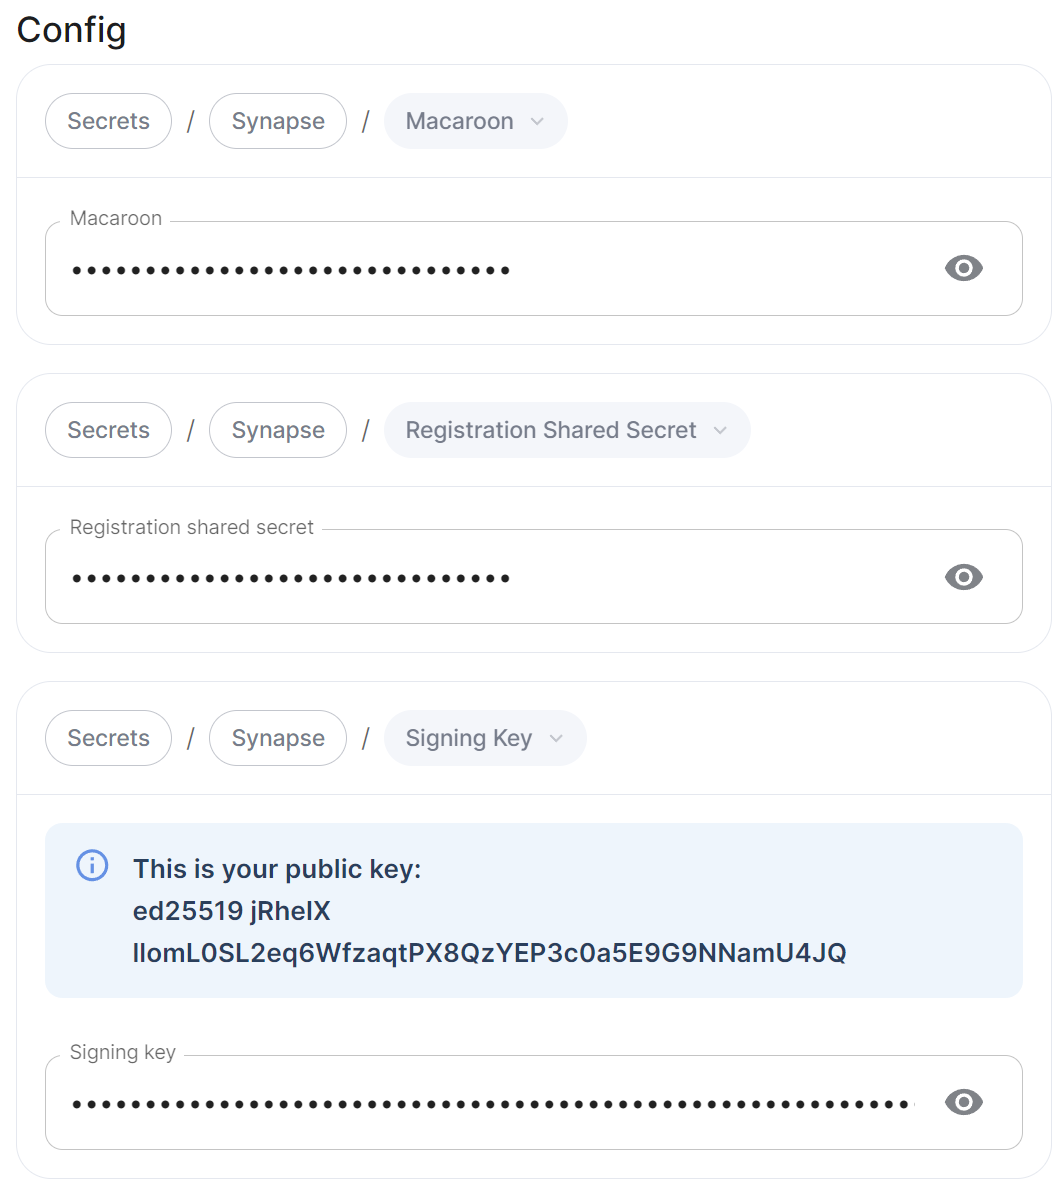
Copy the entire string, taking the example above, it would be ed25519 jRheIX llomL0SL2eq6WfzaqtPX8QzYEP3c0a5E9G9NNamU4JQ. From this string, you can derive the Key ID and Public Key required when you wish to add this homeserver to another homeservers' Federation Trusted Key Servers.
- The
Key IDis the first two sections joined with a:, soed25519:jRheIX - The
Public Keyis the remainder of the string, sollomL0SL2eq6WfzaqtPX8QzYEP3c0a5E9G9NNamU4JQ

Allow List
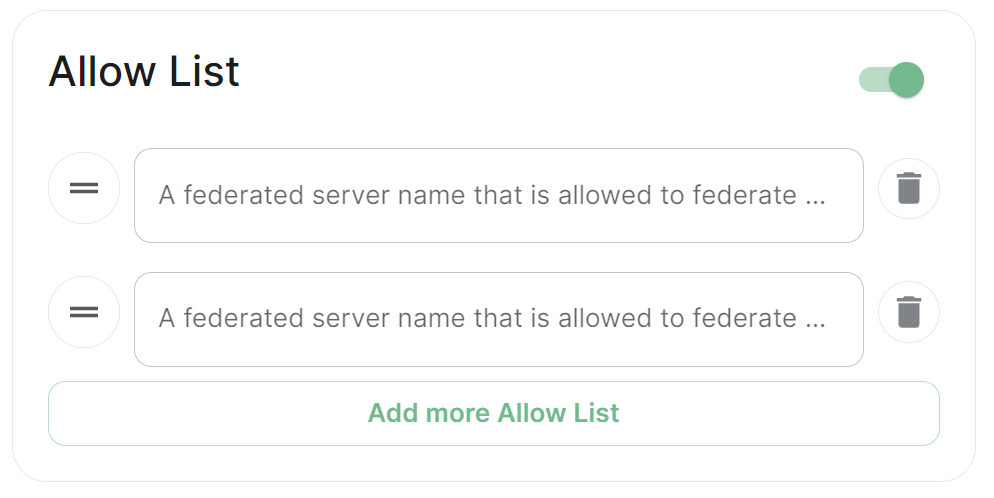
Use the Allow List to restrict federation to the given whitelist of domains, if not specified, the default is to whitelist everything. Simply provide the homeservers' federated server name, i.e. the base domain of the homeservers' you with to federate with.
We recommend also firewalling your federation listener to limit inbound federation traffic as early as possible, rather than relying purely on this application-layer restriction.
This does not stop a server from joining rooms that servers not on the whitelist are in. As such, this option is really only useful to establish a "private federation", where a group of servers all whitelist each other and have the same whitelist.
Please also note that by default an ip_range_blacklist is configured to block all private IP address ranges. If your servers require communicating on any of the below ranges, you will need to configure ip_range_whitelist. See Allowing Private Federation via ip_range_whitelist for information on configuring this.
Element Web Section
Configuration options relating to the deployed Element Web instance provided by ESS.
Element Web is the web-based client for the Matrix communication protocol. Element Web serves as a user interface for accessing Matrix homeservers, allowing users to send messages, join rooms, share files, and participate in group chats.
All settings configured via the UI in this section will be saved to your deployment.yml, with the contents of secrets being saved to secrets.yml. You will find specific configuration examples in each section.
Config Example
spec:
  components:
    elementWeb:
By default, if you do not change any settings on this page, default Element Web pod CPU and Memory requirements will be added to your configuration file/s (see example below).
Config Example
spec:
  components:
    elementWeb:
      k8s:
        workloads:
          resources:
            limits:
              memory: 200Mi
            requests:
              cpu: 50m
              memory: 50Mi
Advanced
Use Own URL for Sharing Links

Config Example
spec:
  components:
    elementWeb:
      config:
  		# Not present if disabled
        useOwnUrlForSharingLinks: true
Whether the sharing links generated by this Element Web instance should use the URL of this Element Web. If turned off the sharing links use https://matrix.to unless a custom permalink prefix is set in the Additional Config section. If turned on, mobile clients will not detect links using the URL of this Element Web (or any other custom permalink prefix) unless they've been explicitly configured by Mobile Device Management (MDM).
Additional Configuration
There are no Element Web specific UI options available to configure, however you can inject custom config within the Additional Configuration section found under Advanced. Config added here is analogous with what you would add to the config.json when manually self-hosting Element Web (or when using Element Desktop), you can read more on this and see config examples via the Element Web Configuration Doc.
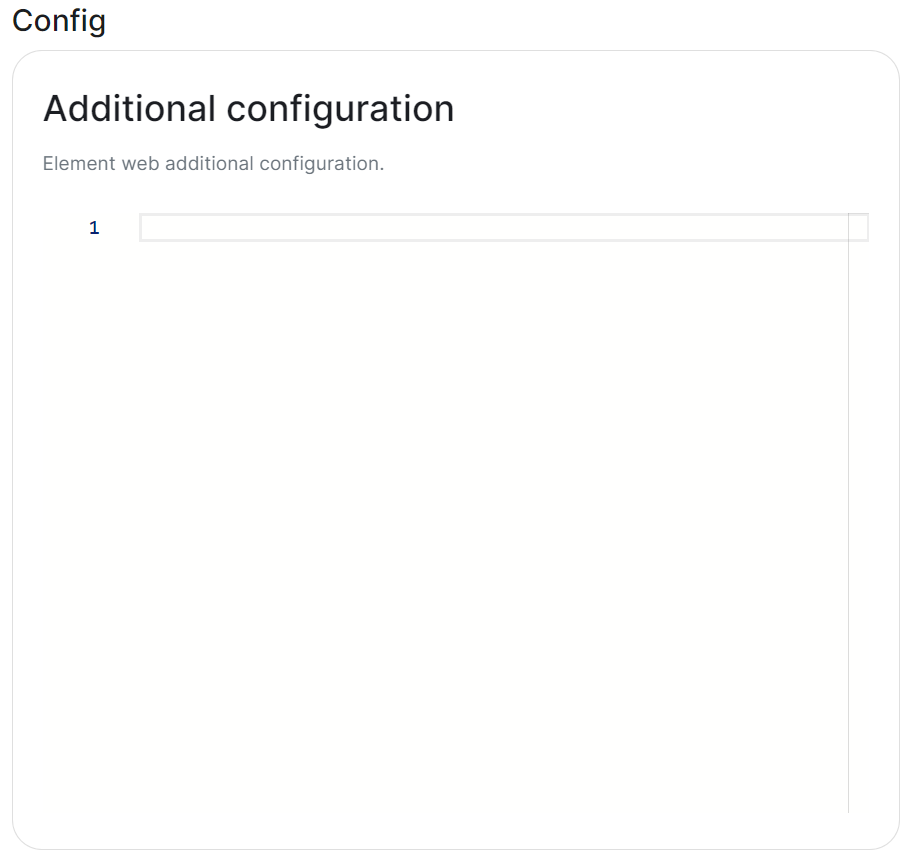
Config Example
spec:
  components:
    elementWeb:
      config:
        additionalConfig: |-
          "setting_defaults": {
                  "custom_themes": [
                      {
                          "name": "Electric Blue",
                          "is_dark": false,
                          "fonts": {
                              "faces": [
                                  {
                                      "font-family": "Inter",
                                      "src": [{"url": "/fonts/Inter.ttf", "format": "ttf"}]
                                  }
                              ],
                              "general": "Inter, sans",
                              "monospace": "'Courier New'"
                          },
                          "colors": {
                              "accent-color": "#3596fc",
                              "primary-color": "#368bd6",
                              "warning-color": "#ff4b55",
                              "sidebar-color": "#27303a",
                              "roomlist-background-color": "#f3f8fd",
                              "roomlist-text-color": "#2e2f32",
                              "roomlist-text-secondary-color": "#61708b",
                              "roomlist-highlights-color": "#ffffff",
                              "roomlist-separator-color": "#e3e8f0",
                              "timeline-background-color": "#ffffff",
                              "timeline-text-color": "#2e2f32",
                              "timeline-text-secondary-color": "#61708b",
                              "timeline-highlights-color": "#f3f8fd",
                              "username-colors": ["#ff0000", ...]
                              "avatar-background-colors": ["#cc0000", ...]
                          }
                      }
                  ]
              }
Common Configurations
Permalinks
If you would like to override the default permalink matrix.to for your homeserver, you can do so by adding the following entry to your Additional Configuration
"permalinkPrefix": "https://<element fqdn>"
Theming
Refer to the Element Web Theming Documentation for more information, see an example below where a custom theme has been applied to change the look and feel of the deployed Element Client. For some public examples of customised login screens see Mozilla and Fedora's customised clients.
"setting_defaults": {
        "custom_themes": [
            {
                "name": "Electric Blue",
                "is_dark": false,
                "fonts": {
                    "faces": [
                        {
                            "font-family": "Inter",
                            "src": [{"url": "/fonts/Inter.ttf", "format": "ttf"}]
                        }
                    ],
                    "general": "Inter, sans",
                    "monospace": "'Courier New'"
                },
                "colors": {
                    "accent-color": "#3596fc",
                    "primary-color": "#368bd6",
                    "warning-color": "#ff4b55",
                    "sidebar-color": "#27303a",
                    "roomlist-background-color": "#f3f8fd",
                    "roomlist-text-color": "#2e2f32",
                    "roomlist-text-secondary-color": "#61708b",
                    "roomlist-highlights-color": "#ffffff",
                    "roomlist-separator-color": "#e3e8f0",
                    "timeline-background-color": "#ffffff",
                    "timeline-text-color": "#2e2f32",
                    "timeline-text-secondary-color": "#61708b",
                    "timeline-highlights-color": "#f3f8fd",
                    "username-colors": ["#ff0000", ...]
                    "avatar-background-colors": ["#cc0000", ...]
                }
            }
        ]
    }
You can also modify the homepage for the Element Web client, to do so requires modification to your Well-Known Delegations' Additional Configuration, see Element Web Custom Home for more information and specifically the Well-Known Delegation documentation page under the Integrations chapter.
Homeserver Admin Section
Configuration options relating to the deployed Homeserver Admin instance provided by ESS.
Homeserver Admin is the web-based client for the Synapse Admin API. Homeserver Admin serves as a user interface for administering Synapse homeservers, allowing management of users, rooms, federation and more.
All settings configured via the UI in this section will be saved to your deployment.yml, with the contents of secrets being saved to secrets.yml. You will find specific configuration examples in each section.
Config Example
spec:
  components:
    synapseAdmin:
By default, if you do not change any settings on this page, default Homeserver Admin pod CPU and Memory requirements will be added to your configuration file/s (see example below).
Config Example
spec:
  components:
    synapseAdmin:
      k8s:
        workloads:
          resources:
            limits:
              memory: 500Mi
            requests:
              cpu: 50m
              memory: 50Mi
Advanced
Verify TLS

Config Example
spec:
  components:
    synapseAdmin:
      # Not present if 'Use Global Setting' selected
      config:
  		# verifyTls: useGlobalSetting
        # verifyTls: force
  		verifyTls: disable
Configures TLS verification, options include:
-
Use Global Setting -
Force -
Disable
It is not recommended to change this setting.
Delegated Authentication
If you are using delegated authentication and have kept Allow Local Users Login as Auto or set have directly set to Disabled then the built-in defualt Synapse Admin user onprem-admin-donotdelete will not be able to login.
Once deployed, to promote a user from your identity provider to Synapse Admin i.e. Bob:
- Ensure they have logged in once. so that their Matrix ID has been created, i.e. @bob:example.com
- Use the following to promote them to Synapse Admin:
kubectl exec -n element-onprem -it pods/synapse-postgres-0 -- /usr/bin/psql -d synapse -U synapse_user -c "update users set admin = 1 where name = '@bob:example.com';"
Integrator Section
Configuration options relating to the Integrator provided by ESS.
In the Integrator section you will find options to configure settings specific to the integrator which is used to send messages to external services. By default, it is unlikely you should need to configure anything on this page, unless you wish to enable the use of Custom Widgets.
All settings configured via the UI in this section will be saved to your deployment.yml, with the contents of secrets being saved to secrets.yml. You will find specific configuration examples in each section.
Config Example
apiVersion: matrix.element.io/v1alpha2
kind: ElementDeployment
metadata:
  annotations:
    ui.element.io/layer: |
        integrator:
spec:
  components:
    integrator:
By default, if you do not change any settings on this page, defaults will be added to your configuration file/s (see example below).
Config Example
apiVersion: matrix.element.io/v1alpha2
kind: ElementDeployment
metadata:
  annotations:
    ui.element.io/layer: |
        integrator:
          k8s:
            workloads:
              _value: defaulted
spec:
  components:
    integrator:
      k8s:
        workloads:
          resources:
            appstore:
              limits:
                memory: 400Mi
              requests:
                cpu: 50m
                memory: 100Mi
            integrator:
              limits:
                memory: 350Mi
              requests:
                cpu: 100m
                memory: 100Mi
            modularWidgets:
              limits:
                memory: 200Mi
              requests:
                cpu: 50m
                memory: 50Mi
            scalarWeb:
              limits:
                memory: 200Mi
              requests:
                cpu: 50m
                memory: 50Mi
Config
Custom Widgets
Config Example
spec:
  components:
    integrator:
      config:
        # Not present if 'false' is selected
        # enableCustomWidgets: false
        enableCustomWidgets: true
Gives users the ability to add Custom Widgets to their rooms which can display an embedded a web page.

Verify TLS
Config Example
spec:
  components:
    integrator:
      # Not present if 'Use Global Setting' selected
      config:
  		# verifyTls: useGlobalSetting
        # verifyTls: force
  		verifyTls: disable
Configures TLS verification, options include:
-
Use Global Setting -
Force -
Disable
It is not recommended to change this setting.
Log
Root Level

Config Example
spec:
  components:
    integrator:
      config:
        log:
          # Not present if left at default 'info'
          level: info
          # level: debug
          # level: warning
          # level: error
As defined under the Configuration file format section of the Python docs, the available options presented by the Installer are DEBUG, INFO, WARNING, ERROR and CRITICAL. These represent different severity levels for log messages and help control the verbosity of log output which help to filter messages based on their importance.
-
DEBUG: Detailed information, typically used for debugging purposes. Messages at this level provide the most fine-grained and detailed logging. -
INFO: General information about the program's operation. This level is used to confirm that things are working as expected. -
WARNING: Indicates a potential issue or something that might cause problems in the future. It doesn't necessarily mean an error has occurred, but it's a warning about a possible concern. -
ERROR: Indicates a more serious issue or error in the program. When an error occurs, it might impact the functionality of the application.
When troubleshooting, increasing the log level and redeploying can help narrow down where you're experiencing issues. By default, DEBUG is a good option to include everything allowing you to identify a problem.
It is not advised to leave your Logging Level at anything other than the default, as more verbose logging may expose information that should otherwise not be accessible. When sharing logs, remember to redact any sensitive information you do not wish to share.
Structured

Config Example
spec:
  components:
    integrator:
      config:
        log:
          # Not present if left at default 'false'
          # structured: false
          structured: true
Disabled by default, turn on to output logs in logstash format. Otherwise, logs are output in a console friendly format.
Postgres
If you are performing a Standalone deployment and letting the installer deploy Postgres for you, you will not need to configure any options here:

For all other deployments, you will need to configure your PostgreSQL database connection details.
Database

Config Example
spec:
  components:
    integrator:
      config:
        postgresql:
          database: integrator
Enter the name of the PostgreSQL Database you configured per the previously mentioned Requirements and Recommendations to use for Integrator.
Host
Config Example
spec:
  components:
    integrator:
      config:
        postgresql:
          host: db.example.com
Enter the fully qualified domain name of the PostgreSQL Database you configured per the previously mentioned Requirements and Recommendations to use for Integrator.
Port
Config Example
spec:
  components:
    integrator:
      config:
        postgresql:
          # port not present when left as default 5432
          port: 5432
Defaults to 5432, either keep if correct or provide the required port of the PostgreSQL Database you configured per the previously mentioned Requirements and Recommendations to use for Integrator.
SSL Mode
Config Example
spec:
  components:
    integrator:
      config:
        postgresql:
          # sslMode not present when left as default `require`
          sslMode: require
          # sslMode: disable
          # sslMode: no-verify
          # sslMode: verify-full
Defaults to No Verify - it is not recommended to disable SSL, so for most setups, this setting should be left as default.
You should adjust to accommodate your environment as required, the options available are:
- Disable
- No Verify
- Verify Full
User
Config Example
spec:
  components:
    integrator:
      config:
        postgresql:
          user: test-username
Enter the username of a user who can access the PostgreSQL Database you configured per the previously mentioned Requirements and Recommendations to use for Synapse.
PostgreSQL Password
Config Example
-
secrets.ymlapiVersion: v1 kind: Secret metadata: name: integrator namespace: element-onprem data: postgresPassword: dGVzdC1wYXNzd29yZA==
Enter the password for the specified user who can access the PostgreSQL Database you configured per the previously mentioned Requirements and Recommendations to use for Synapse.
Jitsi Domain
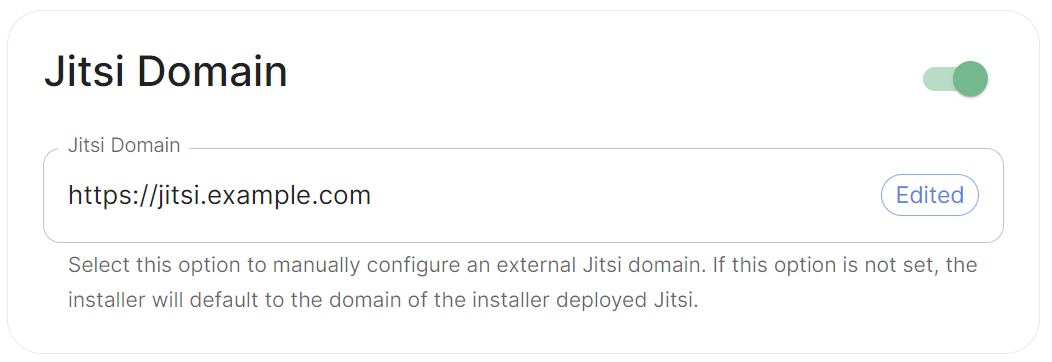
Config Example
spec:
  components:
    integrator:
      config:
        jitsiDomain: https://jitsi.example.com
Enable this option to manually configure an external Jitsi domain. If this option is not set, the installer will default to the domain of the installer deployed Jitsi (if applicable).