# 🗃️ Element Server Suite Classic Documentation LTS 24.04
We recommend upgrading to the latest **LTS 24.10**, before doing so please upgrade to the latest patch release available.
For customers using the [GroupSync integration](https://ems-docs.element.io/books/element-server-suite-documentation-lts-2404/page/setting-up-group-sync-with-the-installer), it is recommended to turn on Dry Run mode before performing an upgrade.
# Introduction to Element Server Suite
What is Element Server Suite and how does it work?
Element Server Suite provides an enterprise-grade secure communications platform. It can be deployed to either your own environment or in our Element Cloud. Element Server Suite includes the Element Matrix Server, which provides a host of security and privacy features, including:
- Built on the Matrix open communications standard.
- Provides end-to-end encrypted messaging, voice, and video through a consumer style messenger with the power of a collaboration tool.
- Delivers data sovereignty.
- Affords a high degree of flexibility that can be tailored to many use cases.
- Allows secure federation within a single organization or across a supply chain or ecosystem.
- Receives regular security and feature updates
Further, we also offer Enterprise Support, giving you access to experts in federated, secure communications. This should give you confidence to deploy our platform for your most critical secure communications needs.
Given the flexibility afforded by this platform, there are a number of moving parts to configure. This documentation will step you through configuring and deploying Element Enterprise On-Premise.
The first question you'll face is how you want to deploy!
### Deploying Element Server Suite
**Support for Standalone and Kubernetes deployments****.**
Element Enterprise On-Premise can be deployed both to a full Kubernetes (a lightweight container orchestration platform) installation or onto a standalone server based on a single-node Kubernetes installation.
One key benefit of going with a full Kubernetes installation is that you can add more resources and nodes to a cluster as you need them, whereas you are capped at one node with our standalone server.
In the case of our standalone server installation, we deploy to `microk8s` (a smaller lightweight distribution of Kubernetes), which we then use for deploying our Element application.
### Versions
Element Server Suite comes in three subscriptions, with differing feature sets. You can register for a trial of Enterprise Edition by visiting [here](https://ems.element.io/server-registration/self-host/trial).
- **Enterprise Edition****.** The paid version of our Element Server Suite. See below for all supported components. Follow this documentation to get started.
- **Enterprise Edition with Airgapped Support****.** The paid version of our Element Server Suite, including an airgapped archive to support non-connected installation. Follow the documentation for how to extract and setup your install for airgapped.
### Components
Element Server Suite comprises of the following components:
#### Core Components
- **Synapse****.** The homeserver itself.
- **Element Web****.** The Element Web client.
- **Integrator****.** Our integration manager.
- **Synapse Admin UI****.** Our Element Enterprise Administrator Dashboard.
#### Optional Components
- **PostgreSQL****.** Our database. Only optional if you already have a separate PostgreSQL database, which is required for a multiple node setup. Use an external DB if you have more than 300 users.
- **GroupSync****.** Our group sync software
- **AdminBot****.** Our bot for admin tasks.
- **AuditBot****.** Our bot that provides auditing capability.
- **Hookshot****.** Our integrations with gitlab, github, jira, and custom webhooks.
- **Hydrogen****.** A light weight alternative chat client.
##### VOIP
- **Jitsi****.** Our VoIP platform for group conferencing.
- **Coturn****.** TURN server. Required if deploying VoIP.
- **Element Call****.** Our new VoIP platform for group conferencing
- **SFU****.** Element Call LiveKit component for scalable conferencing
##### Monitoring
- **Prometheus****.** Provides metrics about the application and platform.
- **Grafana****.** Graphs metrics to make them consumable.
##### Bridges
- **Telegram Bridge****.** Bridge to connect Element to Telegram.
- **Teams Bridge****.** Bridge to connect Element to MS Teams.
- **XMPP Bridge****.** Bridge to connect Element to XMPP.
- **IRC Bridge****.** Bridge to connect Element to IRC.
- **SIP Bridge****.** Bridge to connect Element to SIP.
### Architecture
This document gives an overview of our secure communications platform architecture:
[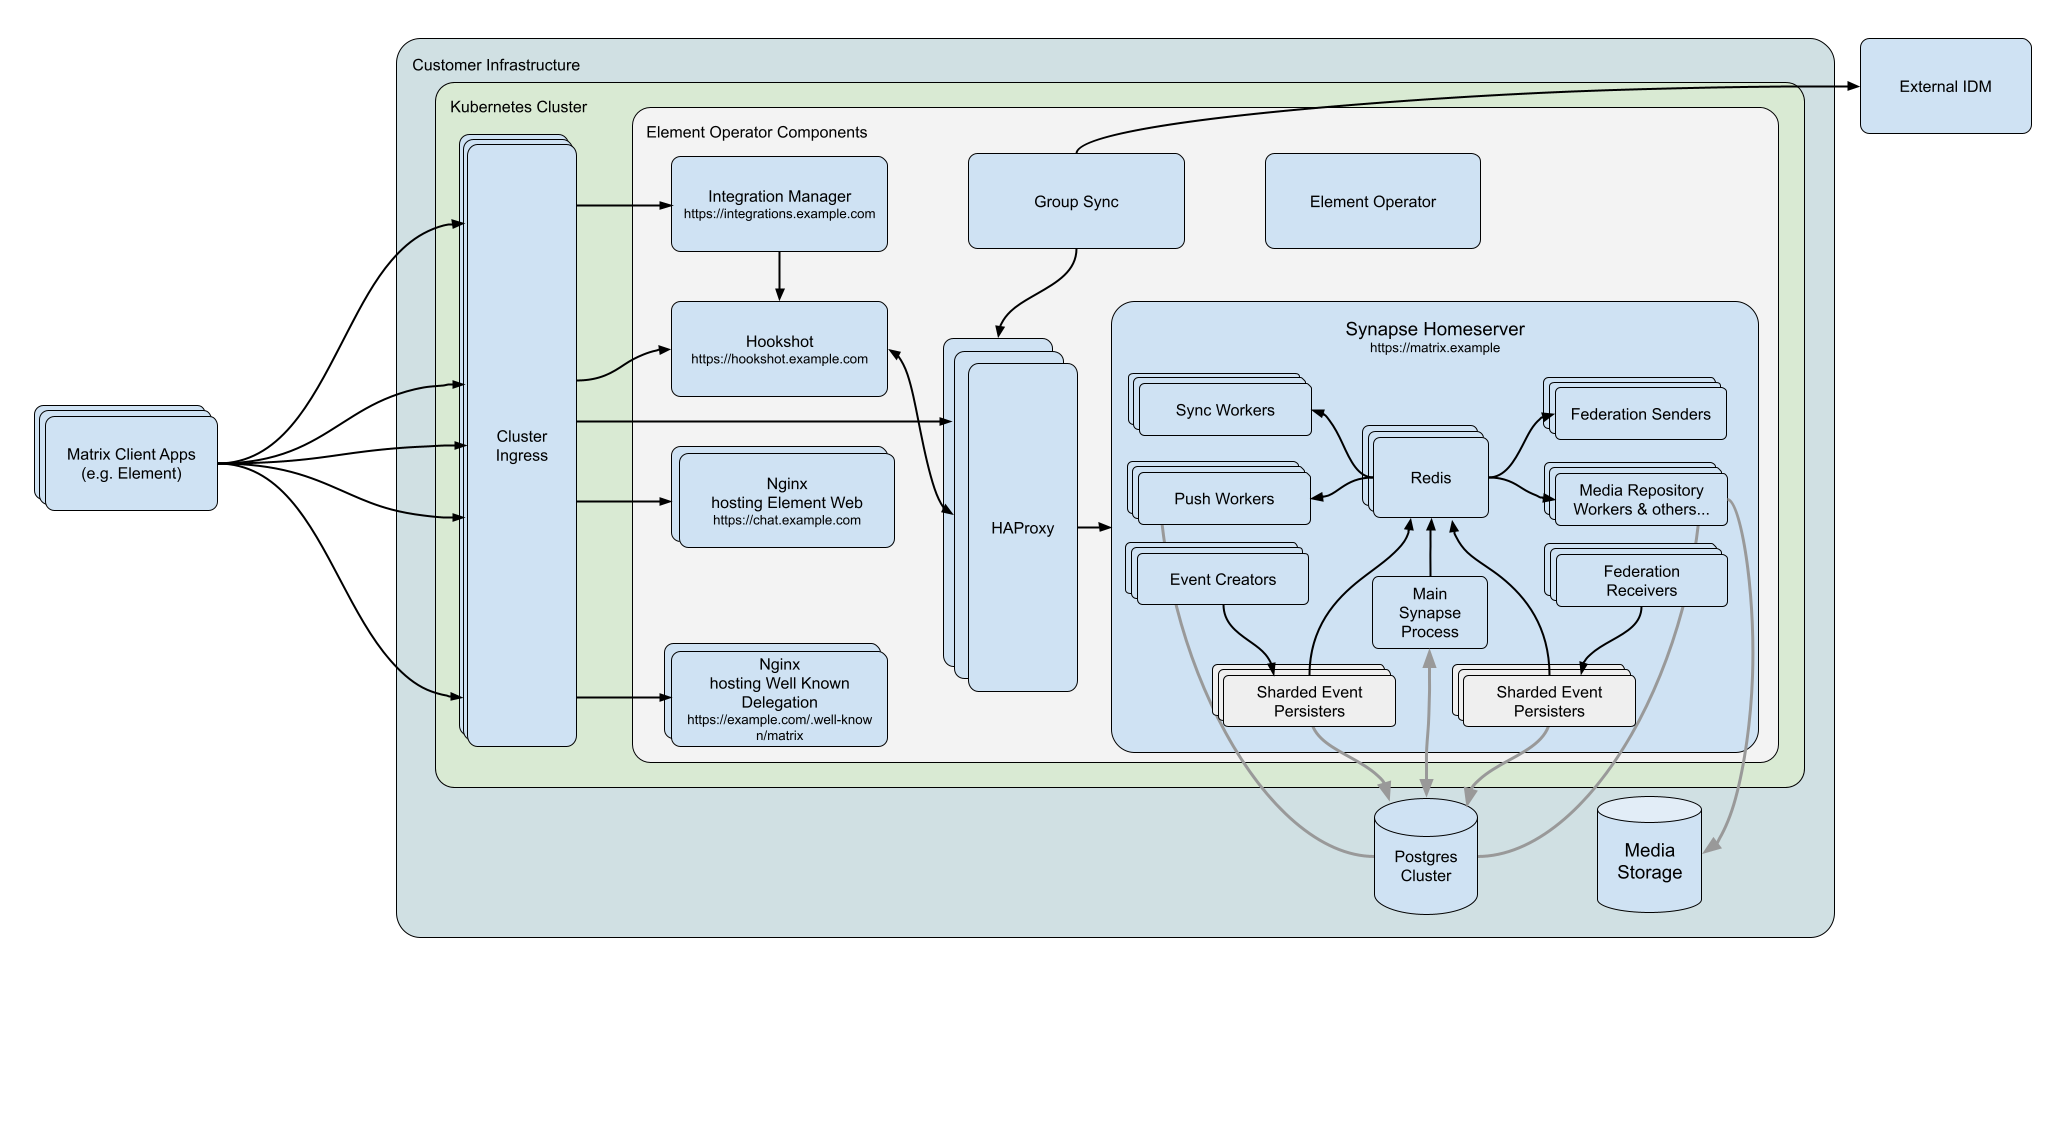](https://ems-docs.element.io/uploads/images/gallery/2022-07/matrix-architecture-generic-kubernetes-deployment.png)
(Please click on the image to view it at 100%.)
# Requirements and Recommendations
What do you need to get started, covering hardware, software and your environment?
### Software
#### Element Enterprise Server
[Element Server Suite Download Page](https://ems.element.io/on-premise/download)
To download the installer you require a [Element Server Suite](https://element.io/pricing) subscription tied with your [EMS Account](https://ems-docs.element.io/link/372#bkmrk-ems-account). If you are already logged in, click the link above to access the download page, otherwise login and then click the `Your Account` button found in the top-right of the page. Select `Downloads` under the `On-Premise` section.
It is highly recommended that you stay on the latest LTS version; by default, only LTS releases will be displayed. However you can untick the `Show LTS Only` toggle to see our monthly releases.
[](https://ems-docs.element.io/uploads/images/gallery/2024-05/image-1714561143314.png)
For each release you will see download options for the installer, the airgapped package (if your subscription allows) and Element Desktop MSIs:
- **Installer****.** `element-installer-enterprise-edition-YY.MM.00-gui.bin` Where `YY` is a year indicator, `MM` is the month indicator and `00` is the version.
- **Airgapped Package****.** `element-installer-enterprise-edition-airgapped-YY.MM.00-gui.tar.gz` Where `YY` is a year indicator, `MM` is the month indicator and `00` is the version.
- **Element Desktop MSI****.** `Element 1.11.66 ia32.msi` & `Element 1.11.66.msi`
Once downloaded, copy the installer binary (and the airgapped package if needed) to the machine in which you will be running the installer from. Remember to ensure you've followed the [Requirements and Recommendations](https://ems-docs.element.io/books/element-server-suite-classic-documentation-lts-2404/page/requirements-and-recommendations) page for your environment and specifically the [Operating System](https://ems-docs.element.io/link/475#bkmrk-operating-system) specific Prerequisites for your intended deployment method (Standalone or Kubernetes).
#### Operating System
The installer binary requires a Linux OS to run, supported platforms include:
Please note that Ubuntu 24.04 LTS is only supported on ESS LTS 24.10 and later. For earlier versions, while configuration can be generated, deployment will fail.
Element Server Suite 24.04 currently only supports up to Python 3.11
- **Ubuntu****.**
- Ubuntu Server 20.04
- Ubuntu Server 22.04
Ubuntu Prerequisites
**Standalone Deployments**
During installation you should select docker as a package option and set up ssh.
```bash
sudo apt-get update
sudo apt-get upgrade
sudo apt-get install git
```
The installer requires that it is run as a non-root user who has sudo permissions, make sure that you have a user who can use `sudo`. You could create a user called `element-demo` that can use `sudo` by using the following commands (run as root):
```bash
useradd element-demo
gpasswd -a element-demo sudo
```
The installer also requires that your non-root user has a home directory in `/home`.
**Kubernetes Deployments**
The installer needs `python3`, `pip3` and `python3-venv` installed to run and uses your currently active `kubectl` context. This can be determined with `kubectl config current-context`, make sure this is the correct context as all subsequent operations will be performed under it.
More information on configuring this can be found in the [upstream kubectl docs](https://kubernetes.io/docs/reference/kubectl/cheatsheet/#kubectl-context-and-configuration)
Be sure to `export K8S_AUTH_CONTEXT=kube_context_name` for the Installer if you need to use a context aside from your currently active one.
**Other Debian based distros**
While we only officially support the above Ubuntu versions, other Debian based distos are known to work. FOr example Debian. Make sure you
- **Enterprise Linux****.** RHEL, CentOS Stream, etc.
- Enterprise Linux 8
- Enterprise Linux 9
Enterprise Linux Prerequisites
**Standalone Deployments**
During installation make sure to select "Container Management" in the "Additional Software" section.
```bash
sudo yum update -y
sudo yum install python39-pip python39-devel make gcc git -y
sudo yum install https://dl.fedoraproject.org/pub/epel/epel-release-latest-8.noarch.rpm -y
sudo update-alternatives --config python3
```
On minimal installations, you may also need to install `tar` and `python3-libsemanage`
You should also follow the steps linked here to [Install microk8s on RHEL](https://snapcraft.io/install/microk8s/rhel), or included below, if you run into `Error: System does not fully support snapd: cannot mount squashfs image using "squashfs"`:
1. Install the EPEL repository
- **RHEL9**:
```bash
sudo dnf install https://dl.fedoraproject.org/pub/epel/epel-release-latest-9.noarch.rpm
sudo dnf upgrade
```
- **RHEL8**:
```bash
sudo dnf install https://dl.fedoraproject.org/pub/epel/epel-release-latest-8.noarch.rpm
sudo dnf upgrade
```
1. Install Snap, enable main snap communication socket and enable classic snap support
```bash
sudo yum install snapd
sudo systemctl enable --now snapd.socket
sudo ln -s /var/lib/snapd/snap /snap
```
1. Reboot
On the `update-alternatives` command, if you see more than one option, select the option with a command string of `/usr/bin/python3.9`.
The installer requires that it is run as a non-root user who has sudo permissions, make sure that you have a user who can use `sudo`. You could create a user called `element-demo` that can use `sudo` by using the following commands (run as root):
```bash
useradd element-demo
gpasswd -a element-demo wheel
```
The installer also requires that your non-root user has a home directory in `/home`.
**Kubernetes Deployments**
The installer needs `python3`, `pip3` and `python3-venv` installed to run and uses your currently active `kubectl` context. This can be determined with `kubectl config current-context`, make sure this is the correct context as all subsequent operations will be performed under it.
More information on configuring this can be found in the [upstream kubectl docs](https://kubernetes.io/docs/reference/kubectl/cheatsheet/#kubectl-context-and-configuration)
Be sure to `export K8S_AUTH_CONTEXT=kube_context_name` for the Installer if you need to use a context aside from your currently active one.
For installation in Standalone mode, i.e. onto the host itself, only the above OS's are supported, otherwise for an installation into a Kubernetes environment, make sure you have a Kubernetes platform deployed that you have access to from the host running the installer.
Network Requirements
Element Enterprise Server needs to bind and serve content over:
- Port 80 TCP
- Port 443 TCP
- Port 8443 TCP ( Installer GUI )
`microk8s` specifically will need to bind and serve content over:
- Port 16443 TCP
- Port 10250 TCP
- Port 10255 TCP
- Port 25000 TCP
- Port 12379 TCP
- Port 10257 TCP
- Port 10259 TCP
- Port 19001 TCP
For more information, see https://microk8s.io/docs/ports.
In a default Ubuntu installation, these ports are allowed through the firewall. You will need to ensure that these ports are passed through your firewall.
For RHEL instances with firewalld enabled, the installer will take care of opening these ports for you.
Further, you need to make sure that your host is able to access the following hosts on the internet:
- `api.snapcraft.io`
- `*.snapcraftcontent.com`
- `gitlab.matrix.org`
- `gitlab-registry.matrix.org`
- `pypi.org`
- `docker.io`
- `*.docker.com`
- `get.helm.sh`
- `k8s.gcr.io`
- `cloud.google.com`
- `storage.googleapis.com`
- `registry.k8s.io`
- `fastly.net`
- `GitHub.com`
In addition, you will also need to make sure that your host can access your distributions' package repositories. As these hostnames can vary, it is beyond the scope of this documentation to enumerate them.
### Hardware
Regardless of if you pick the standalone server or Kubernetes deployment, you will need a base level of hardware to support the application. The general guidance for server requirements is dependant on your Federation settings:
- **Open Federation****.** Element recommends a minimum of 8 vCPUs/CPUs and 32GB ram for the host(s) running synapse pods.
- **Closed Federation****.** Element recommends a minimum of 6 vCPUs/CPUs and 16GB ram for the host(s) running synapse pods.
The installer binary requires support for the x86_64 architecture. Note that for Standalone deployments, hosts will need 2 GiB of memory to run both the OS and microk8s and should have at least 50Gb free space in `/var`.
#### Component-Level Requirements
Please note that these values below are indicative and might vary a lot depending on your setup, the volume of federation traffic, active usage, bridged use-cases, integrations enabled, etc. For each profile below:
- CPU is the maximum cpu cores the Homeserver can request
- Memory is the average memory the Homeserver will require
##### Synapse Homeserver
The installer comes with default installation profiles which configure workers depending on your setup.
Federation
1 - 500 Users
501 - 2500 Users
2501 - 10,000 Users
Closed
2 CPU 2000 MiB RAM
6 CPU 5650 MiB RAM
10 CPU 8150 MiB RAM
Limited
2 CPU 2000 MiB RAM
6 CPU 5650 MiB RAM
10 CPU 8150 MiB RAM
Open
5 CPU 4500 MiB RAM
9 CPU 8150 MiB RAM
15 CPU 11650 MiB RAM
##### Synapse Postgres Server
Synapse postgres server will require the following resources :
Federation
1 - 500 Users
501 - 2500 Users
2501 - 10,000 Users
Closed
1 CPU 4 GiB RAM
2 CPU 12 GiB RAM
4 CPU 16 GiB RAM
Limited
2 CPU 6 GiB RAM
4 CPU 18 GiB RAM
8 CPU 28 GiB RAM
Open
3 CPU 8 GiB RAM
5 CPU 24 GiB RAM
10 CPU 32 GiB RAM
##### Operator & Updater
The Updater memory usage remains at `256Mi`. At least 1 CPU should be provisioned for the operator and the updater.
The Operator memory usage scales linearly with the number of integrations you deploy with ESS. It's memory usage will remain low, but might spike up to `256Mi x Nb Integrations` during deployment and configuration changes.
##### Synapse Media
The disk usage to expect after a year can be calculated using the following formula:
- `average media size` × ( `average number of media uploaded` ÷ `day` ) × `active users` × `365`.
Media retention can be configured with the configuration option in Synapse/Config/Data Retention of the installer.
##### Postgres DB size
The disk usage to expect after a year can be calculated using the following formula:
- If Federation is enabled, `active users` × `0.9GB`.
- If Federation is disabled or limited, `active users` × `0.6GB`.
### Environment
For each of the components you choose to deploy (excluding postgresql, groupsync and prometheus), you must provide a hostname on your network that meets this criteria:
- Fully resolvable to an IP address that is accessible from your clients.
- Signed PEM encoded certificates for the hostname in a crt/key pair. Certificates should be signed by an internet recognised authority, an internal to your company authority, or LetsEncrypt.
It is possible to deploy Element Enterprise On-Premise with self-signed certificates and without proper DNS in place, but this is not ideal as the mobile clients and federation do not work with self-signed certificates.
In addition to hostnames for each component, you will also need a hostname and PEM encoded certificate key/cert pair for your base domain. If we were deploying a domain called `example.com` and wanted to deploy all of the software, we would have the following hostnames in our environment that needed to meet the above criteria:
Wildcard certificates do work with our application and it would be possible to have a certificate that validated *.example.com and example.com for the above scenario. It is key to do both the base domain and the wildcard in the same certificate in order for this to work.
Further, if you want to do voice or video across network boundaries (ie: between people not on the same local network), you will need a TURN server. If you already have one, you do not have to set up coturn. If you do not already have a TURN server, you will want to set up coturn (our installer can do this for you) and if your server is behind NAT, you will need to have an external IP in order for coturn to work.
#### Standalone Environment Prerequisites
Before beginning the installation of a Kubernetes deployment, there are a few things that must be prepared to ensure a successful deployment and functioning installation.
##### Server Minimum Requirements
It is **crucial** that your storage provider supports `fsync` for data integrity.
- `/var`: 50GB
- `/data/element-deployment`: The default directory that Will contain your Synapse media. See the [Synapse Media](https://ems-docs.element.io/link/475#bkmrk-synapse-media) section above to find an estimation of the expected size growth.
- `/data/postgres`: The default directory that Will contain your Postgres database. See the [Postgres DB size](https://ems-docs.element.io/link/475#bkmrk-postgres-db-size) section above to find an estimation of the expected size.
Check out the [ESS Sizing Calculator](https://ems-docs.element.io/books/element-server-suite-classic-documentation-lts-2404/page/ess-sizing-calculator) for further guidance which you can tailor to your specific desired configuration.
##### Kernel Modules
While above the supported Operating Systems should have this already, please note that `microk8s` requires the kernel module `nf_conntrack` to be enabled.
```bash
if ! grep nf_conntrack /proc/modules; then
echo "nf_conntrack" | sudo tee --append /etc/modules
sudo modprobe nf_conntrack
fi
```
##### Network Proxy
If your environment requires proxy access to get to the internet, you will need to make the folllowing changes to your operating system configuration to enable our installer to access the resources it needs over the internet.
Ubuntu Specific Steps
If your company's proxy is `http://corporate.proxy:3128`, you would edit `/etc/environment` and add the following lines:
```plaintext
HTTPS_PROXY=http://corporate.proxy:3128
HTTP_PROXY=http://corporate.proxy:3128
https_proxy=http://corporate.proxy:3128
http_proxy=http://corporate.proxy:3128
NO_PROXY=10.1.0.0/16,10.152.183.0/24,127.0.0.1,*.svc
no_proxy=10.1.0.0/16,10.152.183.0/24,127.0.0.1,*.svc
```
The IP Ranges specified to `NO_PROXY` and `no_proxy` are specific to the microk8s cluster and prevent microk8s traffic from going over the proxy.
Enterprise Linux Specific Steps
If your company's proxy is `http://corporate.proxy:3128`, you would edit `/etc/profile.d/http_proxy.sh` and add the following lines:
```plaintext
export HTTP_PROXY=http://corporate.proxy:3128
export HTTPS_PROXY=http://corporate.proxy:3128
export http_proxy=http://corporate.proxy:3128
export https_proxy=http://corporate.proxy:3128
export NO_PROXY=10.1.0.0/16,10.152.183.0/24,127.0.0.1,localhost,*.svc
export no_proxy=10.1.0.0/16,10.152.183.0/24,127.0.0.1,localhost,*.svc
```
The IP Ranges specified to `NO_PROXY` and `no_proxy` are specific to the microk8s cluster and prevent microk8s traffic from going over the proxy.
Once your OS specific steps are complete, you will need to log out and back in for the environment variables to be re-read after setting them. If you already have `microk8s` running, you will need to run the following to have `microk8s` reload the new environment variables:
```bash
microk8s.stop
microk8s.start
```
If you need to use an authenticated proxy, then the URL schema for both EL and Ubuntu is as follows:
```
protocol:user:password@host:port
```
So if your proxy is `corporate.proxy` and listens on port 3128 without SSL and requires a username of `bob` and a password of `inmye1em3nt` then your url would be formatted:
```
http://bob:inmye1em3nt@corporate.proxy:3128
```
For further help with proxies, we suggest that you contact your proxy administrator or operating system vendor.
##### PostgreSQL
The installation requires that you have a postgresql database; if you do not already have a database, then the standalone installer will set up PostgreSQL on your behalf.
If you already have PostgreSQL, the installation requires that the database is setup with a locale of C and use UTF8 encoding
See [Synapse Postgres Setup Docs](https://element-hq.github.io/synapse/latest/postgres.html#set-up-database) for further details.
Once setup, or if you have this already, make note of the database name, user, and password as you will need these when configuring ESS via the installater GUI.
#### Kubernetes Environment Prerequisites
Before beginning the installation of a Kubernetes deployment, there are a few things that must be prepared to ensure a successful deployment and functioning installation.
##### PostgreSQL
Before you can begin with the installation you must have a PostgreSQL database instance available. The installer does not manage databases itself.
The database you use must be set to a locale of C and use UTF8 encoding
Look at the [Synapse Postgres Setup Docs](https://element-hq.github.io/synapse/latest/postgres.html#set-up-database) for further details as they relate to Synapse. If the locale / encoding are incorrect, Synapse will fail to initialize the database and get stuck in a `CrashLoopBackoff` cycle.
Please make note of the database hostname, database name, user, and password as you will need these to begin the installation. For testing and evaluation purposes, you can deploy PostgreSQL to k8s before you begin the installation process:
Kubernetes PostgreSQL Quick Start Example
For testing and evaluation purposes only - Element cannot guarantee production readiness with these sample configurations.
Requires [Helm](https://helm.sh/docs/intro/install/) installed locally
If you do not have a database present, it is possible to deploy PostgreSQL to your Kubernetes cluster.
This is great for testing and *can* work great in a production environment, but only for those with a high degree of comfort with PostgreSQL as well as the trade offs involved with k8s-managed databases.
There are many different ways to do this depending on your organization's preferences - as long as it can create an instance / database with the required locale and encoding it will work just fine. For a simple non-production deployment, we will demonstrate deployment of the [bitnami/postgresql](https://github.com/bitnami/charts/tree/main/bitnami/postgresql) into your cluster using [Helm](https://helm.sh/docs/intro/install/).
You can add the `bitnami` repo with a few commands:
``` bash
helm repo add bitnami https://charts.bitnami.com/bitnami
helm repo update
helm search repo bitnami/postgresql ~/Desktop
NAME CHART VERSION APP VERSION DESCRIPTION
bitnami/postgresql 12.5.7 15.3.0 PostgreSQL (Postgres) is an open source object-...
bitnami/postgresql-ha 11.7.5 15.3.0 This PostgreSQL cluster solution includes the P...
```
Next, you'll need to create a `values.yaml` file to configure your PostgreSQL instance. This example is enough to get started, but please consult the chart's [README](https://github.com/bitnami/charts/tree/main/bitnami/postgresql#readme) and [values.yaml](https://github.com/bitnami/charts/blob/main/bitnami/postgresql/values.yaml) for a list of full parameters and options.
``` yaml
auth:
# This is the necessary configuration you will need for the Installer, minus the hostname
database: "synapse"
username: "synapse"
password: "PleaseChangeMe!"
primary:
initdb:
# This ensures that the initial database will be created with the proper collation settings
args: "--lc-collate=C --lc-ctype=C"
persistence:
enabled: true
# Set this value if you need to use a non-default StorageClass for your database's PVC
# storageClass: ""
size: 20Gi
# Optional - resource requests / requirements
# These are sufficient for a 10 - 20 user server
resources:
requests:
cpu: 500m
memory: 512Mi
limits:
memory: 2Gi
```
This example `values.yaml` file is enough to get you started for testing purposes, but things such as TLS configuration, backups, HA and maintenance tasks are outside of the scope of the installer and this document.
Next, pick a namespace to deploy it to - this can be the same as the Installer's target namespace if you desire. For this example we'll use the `postgresql` namespace.
Then it's just a single Helm command to install:
``` bash
# format:
# helm install --create-namespace -n -f (-f )
helm install --create-namespace -n postgresql postgresql bitnami/postgresql -f values.yaml
```
Which should output something like this when it is successful:
```
-- snip --
PostgreSQL can be accessed via port 5432 on the following DNS names from within your cluster:
postgresql.postgresql.svc.cluster.local - Read/Write connection
-- snip --
```
This is telling us that `postgresql.postgresql.svc.cluster.local` will be our hostname for PostgreSQL connections, which is the remaining bit of configuration required for the Installer in addition to the database/username/password set in `values.yaml`. This will differ depending on what namespace you deploy to, so be sure to check everything over.
If needed, this output can be re-displayed with `helm get notes -n `, which for this example would be `helm get notes -n postgresql postgresql`)
##### Kubernetes Ingress Controller
The installer does not manage cluster Ingress capabilities since this is typically a cluster-wide concern - You must have this available prior to installation.
Without a working Ingress Controller you will be unable to route traffic to your services without manual configuration.
If you do not have an Ingress Controller deployed please see [Kubernetes Installations - Quick Start - Deploying ingress-nginx to Kubernetes](https://ems-docs.element.io/books/element-server-suite-classic-documentation-lts-2310/page/kubernetes-installations-quick-start#Deploying%20ingress-nginx%20controller) for information on how to set up a bare-bones `ingress-nginx` installation to your cluster.
Kubernetes Ingress (nginx) Quick Start Example
For testing and evaluation purposes only - Element cannot guarantee production readiness with these sample configurations.
Requires [Helm](https://helm.sh/docs/intro/install/) installed locally
Similar to the PostgreSQL quick start example, this requires [Helm](https://helm.sh/docs/intro/install/)
The [kubernetes/ingress-nginx](https://github.com/kubernetes/ingress-nginx/tree/main/charts/ingress-nginx) chart is an easy way to get a cluster outfitted with Ingress capabilities.
In an environment where LoadBalancer services are handled transparently, such as in a simple test k3s environment with `svclb` enabled there's a minimal amount of configuration.
This example `values.yaml` file will create an IngressClass named `nginx` that will be used by default for any `Ingress` objects in the cluster.
``` yaml
controller:
ingressClassResource:
name: nginx
default: true
enabled: true
```
However, depending on your cloud provider / vendor (i.e. AWS ALB, Google Cloud Load Balancing etc) the configuration for this can vary widely. There are several example configurations for many cloud providers in the chart's [README](https://github.com/kubernetes/ingress-nginx/tree/main/charts/ingress-nginx#configuration)
You can see what your resulting HTTP / HTTPS IP address for this ingress controller by examining the service it creates - for example, in my test environment I have an installed release of the `ingress-nginx` chart called `k3s` under the `ingress-nginx` namespace, so I can run the following:
``` bash
# format:
# kubectl get service -n -ingress-nginx-controller
$ kubectl get service -n ingress-nginx k3s-ingress-nginx-controller
NAME TYPE CLUSTER-IP EXTERNAL-IP PORT(S) AGE
k3s-ingress-nginx-controller LoadBalancer 10.43.254.210 192.168.1.129 80:30634/TCP,443:31500/TCP 79d
```
The value of `EXTERNAL-IP` will be the address that you'll need your DNS to point to (either locally via /etc/hosts or LAN / WAN DNS configuration) to access your installer-provisioned services.
###### Use an existing Ingress Controller
If you have an Ingress Controller deployed already and it is set to the default class for the cluster, you shouldn't have to do anything else.
If you're unsure you can see which providers are available in your cluster with the following command:
``` bash
$ kubectl get IngressClass
NAME CONTROLLER PARAMETERS AGE
nginx k8s.io/ingress-nginx 40d
```
And you can check to see whether an IngressClass is set to default using kubectl, for example:
``` bash
$ kubectl describe IngressClass nginx
Name: nginx
Labels: app.kubernetes.io/component=controller
app.kubernetes.io/instance=ingress-nginx
app.kubernetes.io/managed-by=Helm
app.kubernetes.io/name=ingress-nginx
app.kubernetes.io/part-of=ingress-nginx
app.kubernetes.io/version=1.1.1
argocd.argoproj.io/instance=ingress-nginx
helm.sh/chart=ingress-nginx-4.0.17
Annotations: ingressclass.kubernetes.io/is-default-class: true
Controller: k8s.io/ingress-nginx
Events:
```
In this example cluster there is only an `nginx` IngressClass and it is already default, but depending on the cluster you are deploying to this may be something you must manually set.
#### Airgapped Environments
An airgapped environment is any environment in which the running hosts will not have access to the greater Internet. As such these hosts will be unable to get access to the required software from Element and will also be unable to share telemetry data back with Element.
Your airgapped machine will still require access to airgapped linux repositories depending on your OS. If using Red Hat Enterprise Linux, you will also need access to the EPEL Repository in your airgapped environment.
If you are going to be installing into an airgapped environment, you will need a subscription including airgapped access and to then download the airgapped dependencies `element-enterprise-installer-airgapped--gui.tar.gz` file, which is a ~6GB archive that will need to be transferred to your airgapped environment.
Extract the archive, using `tar -xzvf element-enterprise-installer-airgapped--gui.tar.gz` so that you have an `airgapped` directory. Once complete, your host will be successfully setup for airgapped and ready for when you need to point the installer to that directory during installation.
For Kubernetes deployments, please note that once the image upload has been done, you will need to copy the `airgapped/images/images_digests.yml` file to the same path on the machine which will be used to render or deploy element services. Doing this, the new image digests will be used correctly in the kubernetes manifests used for deployment.
# ESS Sizing Calculator
Use this tool to understand the recommended resources for your desired ESS configuration.
Use this tool to understand the required / recommended resources for your desired ESS configuration.
Deployment
Base
Name
imageName
Enabled
Standalone
microk8s
Admin UI
synapseAdminUI
Element Web Client
elementWeb
Well-Known Webserver
wellknownDelegation
Synapse
synapse
VOIP
Jitsi
jitsi
Element Call
elementCall
livekit
ElementX
Matrix Authentication Service
matrixAuthenticationService
Sliding Sync
slidingSync
Auditing
AuditBot
pipe
AdminBot
pipe
Data Sovereignty & Security
Identity Server
sydent
Secure Border Gateway
secureBorderGateway
Matrix Content Scanner
matrixContentScanner
Push Gateway
sygnal
Integrations
Webhook Integrations
hookshot
GroupSync
groupsync
Integrator
integrator
Bridges
SIP Bridge
sipbridge
XMPP Bridge
bifrost
IRC Bridge
ircbridge
Telegram Bridge
mautrixTelegram
Skype Bridge
skypeForBusinessBridge
WhatsApp Bridge
mautrixWhatsapp
Minimum Resources
vCPU (Cores)
Memory (MiB)
TOTAL
Recommended Resources
vCPU (Cores)
Memory (MiB)
TOTAL
Resource Breakdown
vCPU (Cores)
Memory (MiB)
Components
Postgres in Cluster
Operator + Updater
microk8s
# Preparing Element Server Suite PoC
Please [reach out our Element Sales Team](https://element.io/contact-sales) if you want to run a Proof of Concept for Element Server Suite.
**Note** This guide is for running Proof of Concepts. We don't aim to show every feature here, we want to get you up and running most quickly. This guide is focusing on connected standalone installations currently. There are scenarios currently not covered by this guide, including installing into airgapped / disconnected environments, or testing our Cloud Based offering.
A Proof-of-Concept is done in preparation of a subscription sale with the goal of demonstrating the required capabilities.
### Create an account on element.io
Please create an account on [element.io](https://ems.element.io/user/hosting). We will enable this account as part of the PoC process and grant you access to the Element Server Suite software packages.
### Communication via matrix room
The account team will create a matrix room to improve communication and invite you. To do this We will need your Matrix ID (MXID) to invite you.
If you don't already have a MXID, you can create one [here](https://app.element.io/) by signing up. This will create an account on matrix.org, you can authenticate via several identity providers.
When you have a MXID, we recommend adding it to your EMS Account via `Your Account`, `Account`. You should then send this to the account team so they can add you to the room. You could use the Element Web Client that you used to create the account or install one of the Element Mobile apps from the App or Playstore.
## PoC preparation
Element Server Suite can be installed in a Kubernetes Cluster or as a standalone installation on top of an Operating System (RHEL 8/9 or Ubuntu 20.04/22.04). Most Proof-of-Concept installations will select the Standalone Installation on top of a VM which we recommend for speed and ease of operation.
[Click here](https://ems-docs.element.io/books/element-server-suite-classic-documentation-lts-2310/page/introduction-to-element-server-suite) for an overview of the Element Server Suite. [Here is the link](https://ems-docs.element.io/books/element-server-suite-classic-documentation-lts-2310/page/single-node-installations) detailing the single node installation.
#### Preparation of the VM and Ports
Please set up a VM with **8 vCPUs** and **32GB RAM** and **100 GB Storage**. If this sounds like a lot of resources to you, the requirements do in fact vary and could be scaled down later if required. Install Ubuntu 20.04 LTS or RHEL8. Update the system to the latest available patches and create a user to be used for maintaining the Element Server Suite. See our documentation for this step [here](https://ems-docs.element.io/books/element-server-suite-classic-documentation-lts-2310/page/single-node-installations).
You will need to be able to reach the VM on Ports 80, 443 and 8443.
#### DNS Names and Certificates
You need to select a base domain for the Server. This can differ from the base domain of the matrix IDs but is often the same. Read more about this in the section on Matrix IDs and Well Known delegation below.
You have chosen eng.acme.com. The following DNS entries must be prepared and point to the external IP of the VM.
This results in the following hostnames for you :
- eng.acme.com (base domain - might already exist )
- matrix.eng.acme.com (the synapse homeserver)
- element.eng.acme.com (element web)
- admin.eng.acme.com (admin dashboard)
- integrator.eng.acme.com (integration manager)
- hookshot.eng.acme.com (Our integrations)
Optional for Monitoring and Integrations :
- grafana.eng.acme.com (Our Grafana server)
Optional for Video Chat with Jitsi :
- jitsi.eng.acme.com (Our VoIP platform)
- coturn.eng.acme.com (Our TURN server)
Optional for Video Chat with Element Call :
- call.acme.com (Element Call)
- sfu.acme.com (Selective Forwarding Unit)
Opitonal for Element X support :
- sliding-sync.acme.com
Optional for the Admin / Audit functionality :
- roomadmin.eng.acme.com
- audit.eng.acme.com
We require certificates for all these hostnames including the base domain to enable SSL/TLS encryption. The quick and easy way is to use the embedded letsencrypt. This is only available if you are in a connected environment. You can provide and use your [own certificates](https://ems-docs.element.io/books/element-server-suite-classic-documentation-lts-2310/page/single-node-installations#bkmrk-the-certificates-scr).
#### Matrix IDs & Well Know delegation
Matrix IDs have the following format :
**@USER:SERVER**
In our example case the matrix server is matrix.eng.acme.com. If a user Tom Maier has a username **tmaier** in your LDAP, this would lead to an MXID **@tmaier:matrix.eng.acme.com**. This is often not desired as we like to keep the MXIDs short. It is more elegant to drop the "matrix" host name from the MXIDs. Tom's MXID would look like this **@tmaier:eng.acme.com** .
In order to be able to offer matrix IDs with the base domain, we recommend setting up a reverse proxy on eng.acme.com, which forwards https://eng.acme.com/.well-known/matrix/ to the matrix/synapse server on https://matrix.eng.acme.com/.well-known/matrix . Or you shorten the hostname part of your MXIDs even more to acme.com, this would require you to put the reverse proxy onto acme.com.
The configuration on your Apache WebServer should be similar to this :
```
ProxyPass /.well-known/matrix/ https://matrix.eng.acme.com/.well-known/matrix/
ProxyPassReverse /.well-known/matrix/ https://matrix.eng.acme.com/.well-known/matrix/
ProxyPreserveHost On
```
More about well-known and MXIDs can be found in our Upstream Documentation [here](https://matrix.org/docs/guides/understanding-synapse-hosting#how-our-matrixid-will-look-like) and [here](https://github.com/element-hq/synapse/blob/develop/docs/delegate.md).
Further configurations can be made using the well-known mechanism. An example is documented [here](https://ems-docs.element.io/books/element-server-suite-classic-documentation-lts-2310/page/setting-up-well-known-delegation).
#### Authentication and Postgres DB
The quickest setup is using local authentication and users only. This is what we recommend in a Proof-of-Concept situation. User accounts are created in the local Postgresql DB (recommended only up to 300 users) through our Admin UI or through API scripts for automation in this case. We support many mechanisms for AUthentication like LDAP, SAML2 and OIDC. We recommend to configure these as a 2nd step only if required.
You have the option to use an internal or external Postgres DB. We do recommend to use the internal Postgres DB for Proof-of-Concept installations. The internal Postgres DB is only available when you are opting for the Standalone Installation on top of an Operating System. You will need an external Postgres DB when installing into an existing Kubernetes cluster.
### Checklist before starting the installation
Please prepare the above items before starting the installation. Make sure you have :
- created and communicated your MXID to the Element Sales Team
- registered an account on element.io
- created and prepared your vm / machine with enough resources
- created DNS entries
- decided on letsencrypt / created host certificates for your hostnames
- installed the reverse proxy on the webserver of your MXID URL e.g. eng.acme.com or acme.com
Don't hesitate to reach out to your Element Sales Team for support. We are here to guide you.
# Installing Element Server Suite
First-time installation, Upgrading or Reconfiguring ESS? See here for advice on getting started.
### First-Time Installation
Make sure you've read the [Requirements and Recommendations](https://ems-docs.element.io/books/element-server-suite-classic-documentation-lts-2404/page/requirements-and-recommendations) page so your environment is ready for installation.
#### Running the Installer
Once the binary is on the device you wish to run the installer from, make it executable using `chmod +x` then run it to begin:
```bash
chmod +x ./element-installer-enterprise-edition-YY.MM.00-gui.bin
```
Kubernetes Deployment Note
If you are performing a Kubernetes deployment and have multiple kubernetes clusters configured in your kubeconfig, you will have to export the `K8S_AUTH_CONTEXT` variable before running the installer, as per the [Operating System](https://ems-docs.element.io/books/element-server-suite-classic-documentation-lts-2404/page/requirements-and-recommendations#bkmrk-operating-system) notes from the [Requirements and Recommendations](https://ems-docs.element.io/books/element-server-suite-classic-documentation-lts-2404/page/requirements-and-recommendations) page:
```
export K8S_AUTH_CONTEXT=kube_context_name
```
```
./element-installer-enterprise-edition-YY.MM.00-gui.bin
```
[](https://ems-docs.element.io/uploads/images/gallery/2024-06/image-1718107379489.png)
With the installer running you will need to open a web browser and browse to one of the presented IPs. You may need to open port 8443 in your firewall to be able to access this address from a different machine. If you are unable to open port 8443 or you are having difficulty connecting from a different machine, you may want to try ssh port forwarding in which you would run:
```bash
ssh -L 8443:127.0.0.1:8443
```
Replacing host with the IP address or hostname of the machine that is running the installer. At this point, with ssh connected in this manner, you should be able to use the link which will then forward that request to the installer box via ssh.
Upon loading this address for the first time, you may be greeted with a message informing you that your connection isn't private, this is due to the installer initially using a self-signed certificate. Once you have completed deployment, the installer will use a certificate you specify or the certficate supplied for the admin domain on the Domains Section.
To proceed, click 'Advanced' then 'Continue', exact wording may vary across browsers.
[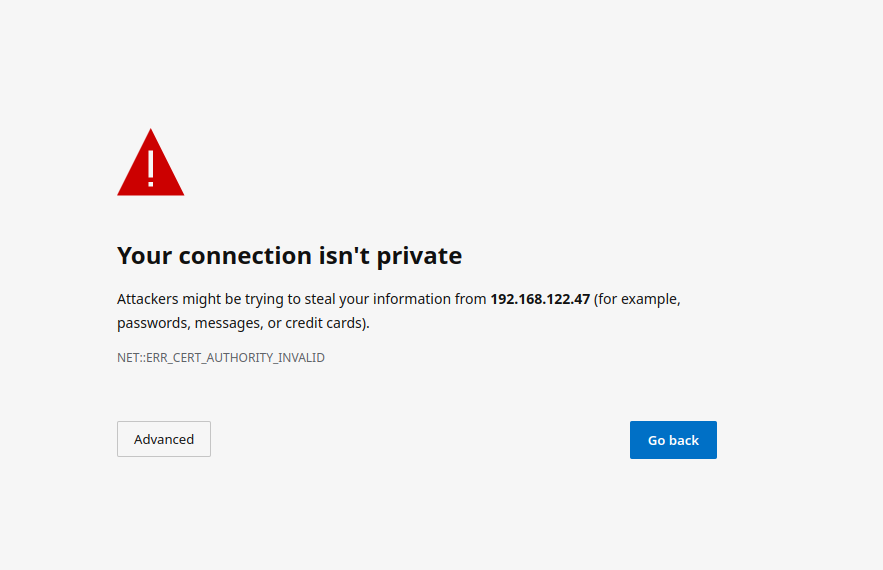](https://ems-docs.element.io/uploads/images/gallery/2023-02/not-private.png)
#### The Installer
With the installer running, you will initially be presented with a 'Welcome to Element!' screen, from here you can click the 'Let's Go!' button to start configuring your ESS deployment. The installer has a number of sections to work through to configure your config before starting deployment, below will detail each section and what you can configure.
You can click on any sections' header, or the provided link below it, to visit that sections' detailed breakdown page which runs through what each specific option in that section does - however do please note that not all setups will require changing from the default settings.
#### [Host Section](https://ems-docs.element.io/books/element-server-suite-classic-documentation-lts-2404/page/host-section).
The first section of the ESS installer GUI is the Host section, here you will configure essential details of how ESS will be installed including; deployment type; subscription credentials; PostgreSQL to use; and whether or not your setup is airgapped.
[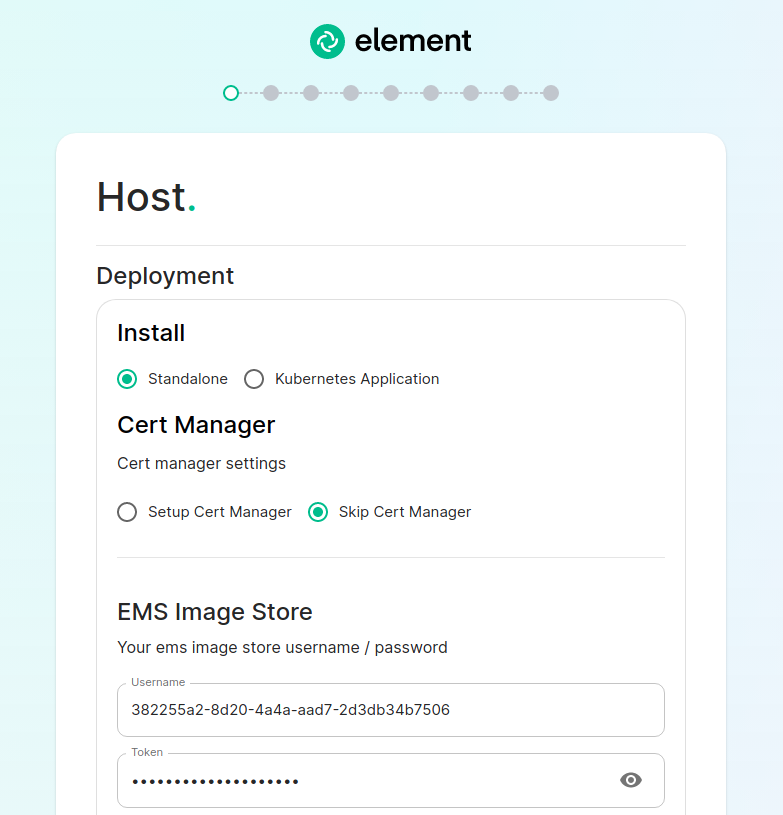](https://ems-docs.element.io/uploads/images/gallery/2023-08/host-page1.png)
For detailed guidance / details on each config option, check the [Detailed Section Overview](https://ems-docs.element.io/books/element-server-suite-classic-documentation-lts-2404/page/host-section). Specifically for airgapped deployments, see the [Airgapped](https://ems-docs.element.io/link/449#bkmrk-airgapped) notes.
##### Standalone Deployment
Ensure `Standalone` is selected, then if you are using LetsEncrypt for your certificates, you will want to make sure that you select `Setup Cert Manager` and enter an email address for LetsEncrypt to associate with your certificates. If you are using custom certificates or electing to manage SSL certificates yourself, then you will want to select `Skip Cert Manager`.
Provide your EMS Image Store Username and Token associated with your subscription, which you can find at .
By default, microk8s will set up persistent volumes in `/data/element-deployment` and will allow 20GB of space to do this; ESS will configure the default DNS resolvers to Google (8.8.8.8 and 8.8.4.4); and a PostgreSQL database will be created for you. These defaults are suitable for most setups however change as needed i.e. if you need to use your company's DNS servers. If you elect to setup your own PostgreSQL database, make sure it is configured per the [Requirements and Recommendations](https://ems-docs.element.io/books/element-server-suite-classic-documentation-lts-2404/page/requirements-and-recommendations#bkmrk-postgresql).
##### Kubernetes Deployment
Ensure `Kubernetes Application` is selected, then specify the Kubernetes context name for which you are deploying into. You can use `kubectl config view` to see which contexts you have access to. You can opt to skip the update setup or the operator setup, but unless you know why you are doing that, you should leave those options as default.
Provide your EMS Image Store Username and Token associated with your subscription, which you can find at .
#### [Domains Section](https://ems-docs.element.io/books/element-server-suite-classic-documentation-lts-2404/page/domains-section).
The second section of the ESS installer GUI is the Domains section, here you will configure the fully-qualified domain names for each of the main components that will be deployed by ESS.
[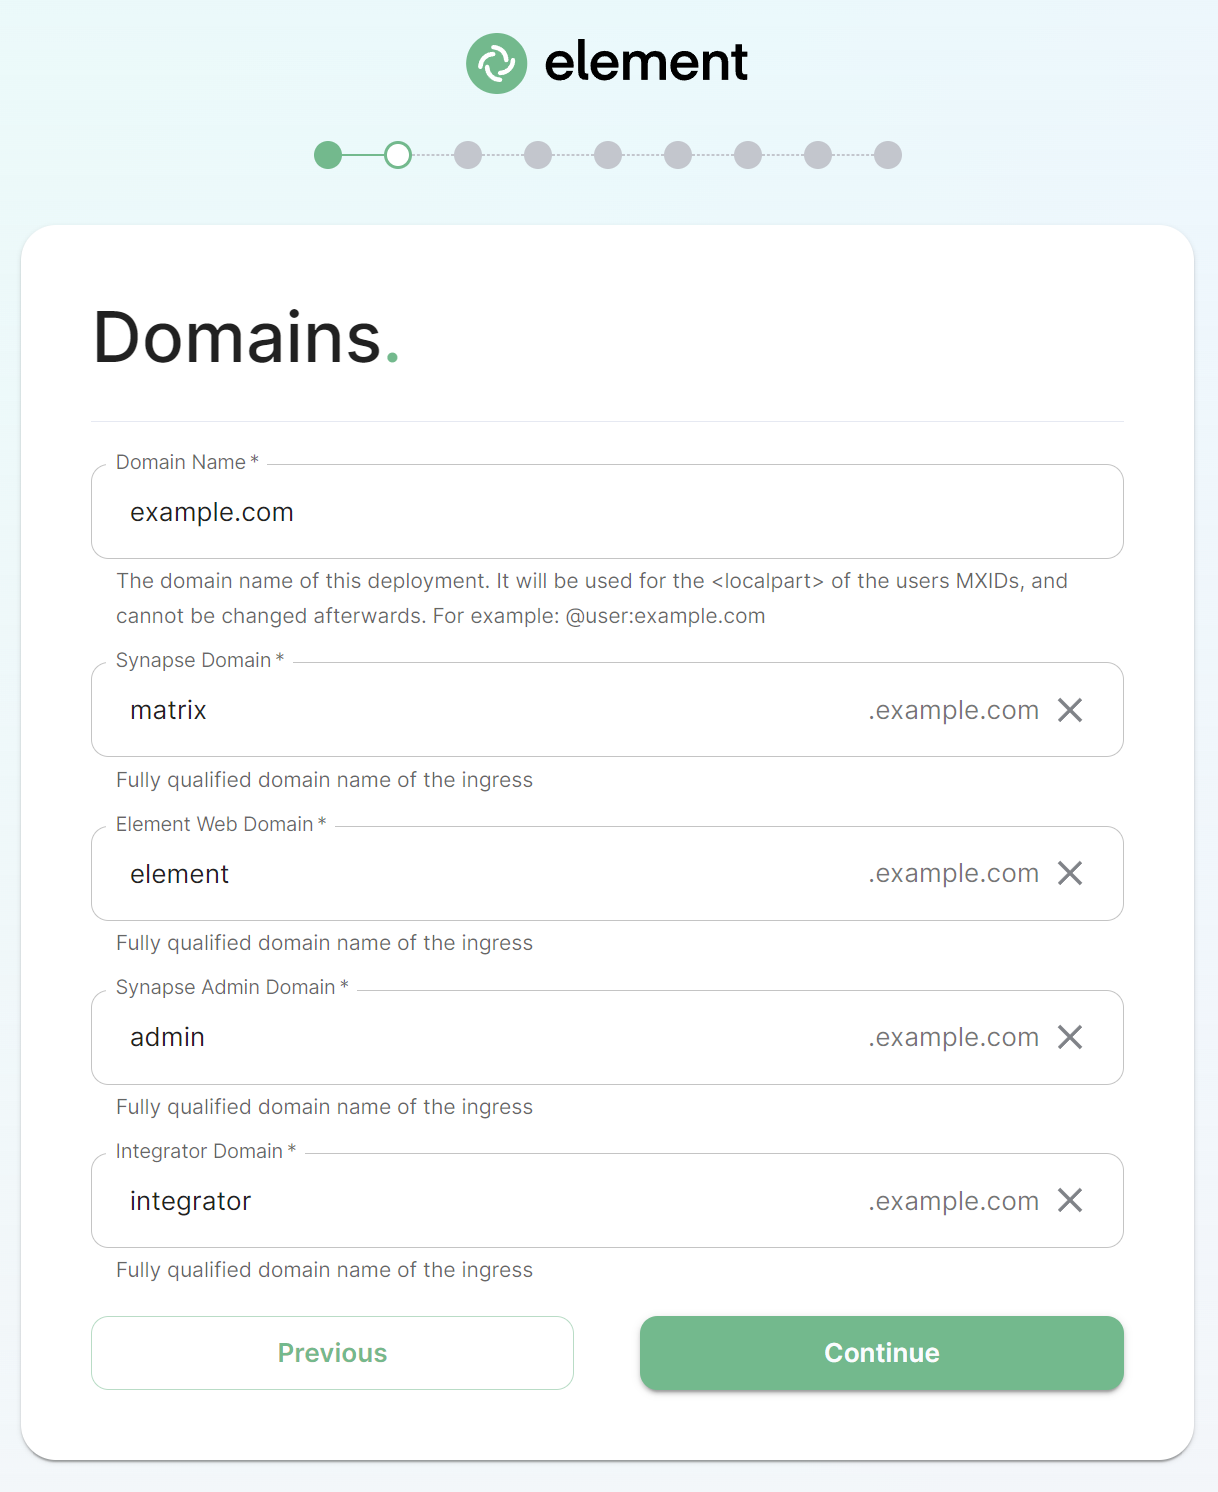](https://ems-docs.element.io/uploads/images/gallery/2024-06/image-1718110038956.png)
On this page, we get to specify the domains for our installation. In this example, we have a domain name of `example.com` and this would mean our MXIDs would look like `@username:example.com`.
The domain page performs a check to ensure that the host names provided resolve. Once you get green checks across the board, you can click continue.
For detailed guidance / details on each config option, check the [Detailed Section Overview](https://ems-docs.element.io/books/element-server-suite-classic-documentation-lts-2404/page/domains-section)
#### [Certificates Section](https://ems-docs.element.io/books/element-server-suite-classic-documentation-lts-2404/page/certificates-section).
The third section of the ESS installer GUI is the Domains section, here you will configure the certificates to use for each previously specified domain name.
[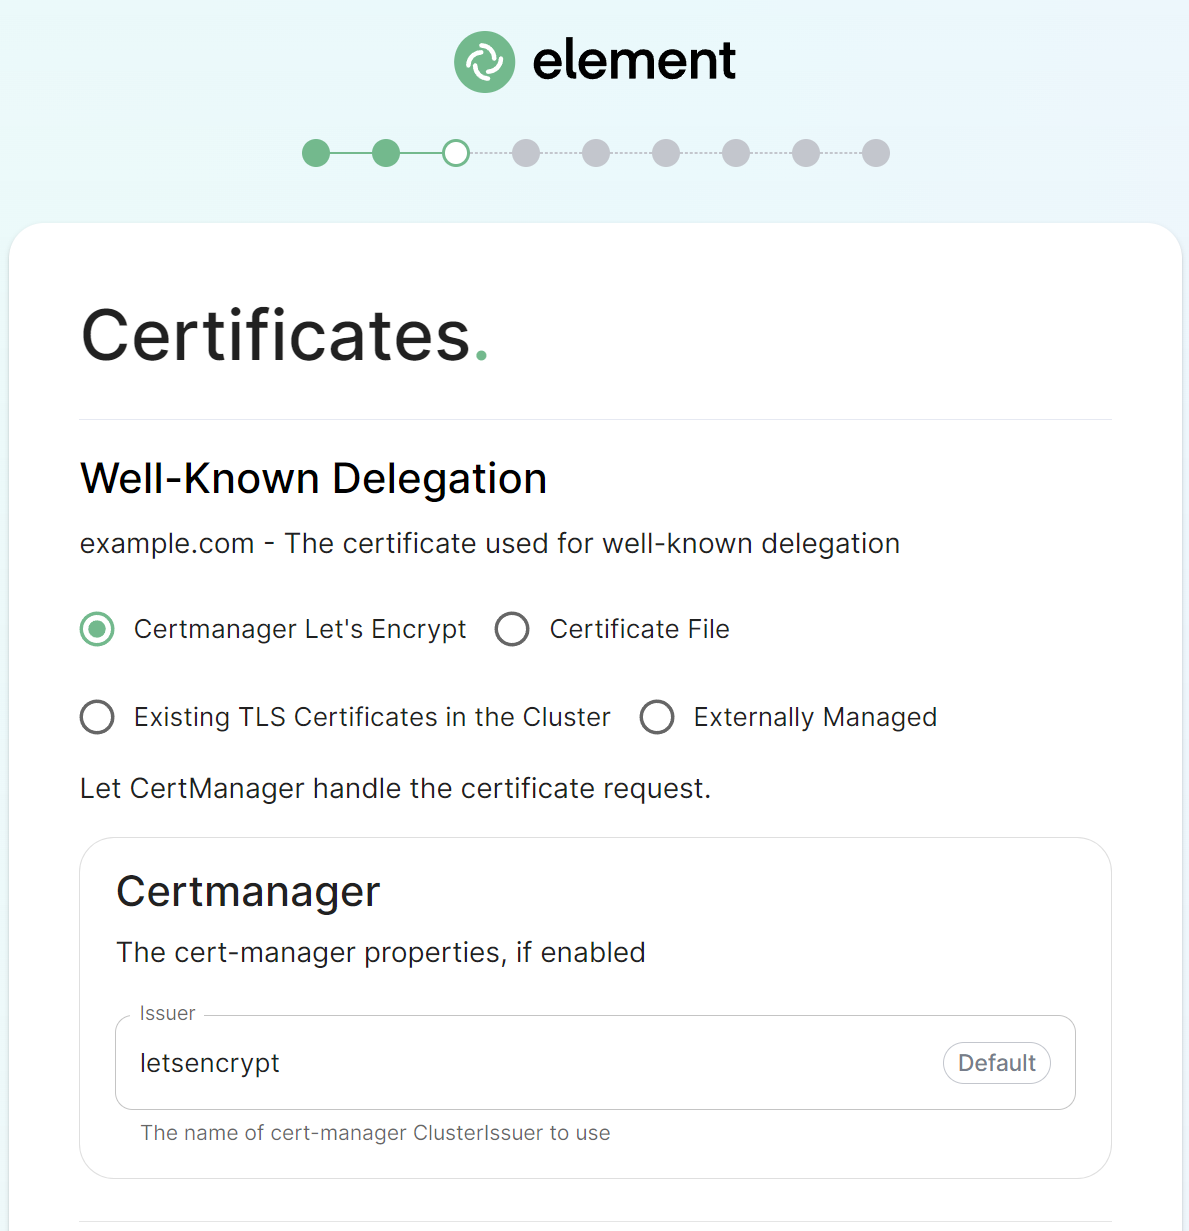](https://ems-docs.element.io/uploads/images/gallery/2024-06/image-1718110263273.png)
If you are already serving content on your base domain, please read the [Well-Known Delegation](https://ems-docs.element.io/link/476#bkmrk-well-known-delegatio-1) notes specifically to understand how you should configure this components' certificates.
If you wish to use your own certificates they must be in PEM encoded format, for detailed guidance / details on each config option, check the [Detailed Section Overview](https://ems-docs.element.io/books/element-server-suite-classic-documentation-lts-2404/page/certificates-section)
#### [Database Section](https://ems-docs.element.io/books/element-server-suite-classic-documentation-lts-2404/page/database-section).
The fourth section of the ESS installer GUI is the Database section, here you will provide the configuration of the PostgreSQL database you will be using for Synapse.
If you're running in Standalone mode, and opted for the installer deployed postgres, you will not see this section.
[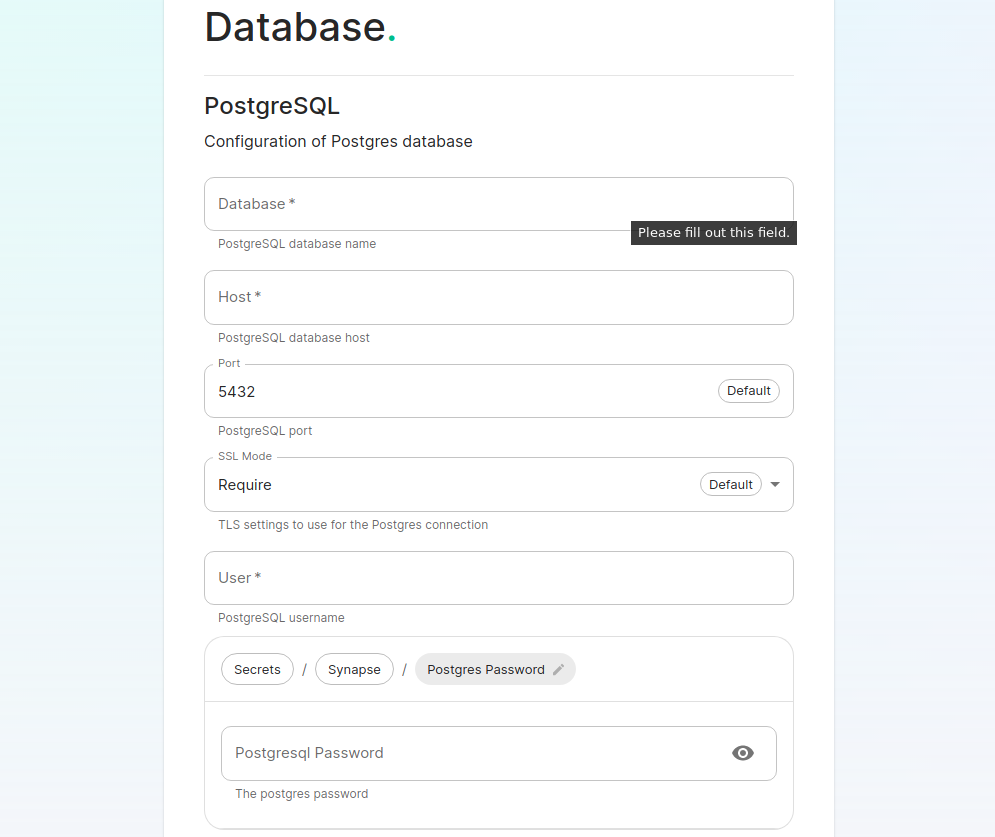](https://ems-docs.element.io/uploads/images/gallery/2023-08/database.png)
Make sure you've read the [Requirements and Recommendations](https://ems-docs.element.io/books/element-server-suite-classic-documentation-lts-2404/page/requirements-and-recommendations) page so your environment is ready for installation. Specifically for PostgreSQL, ensure you have followed the guidance specific to your deployment:
- [Standalone Deployment PostgreSQL Requirements](https://ems-docs.element.io/link/475#bkmrk-postgresql)
- [Kubernetes Deployment PostgreSQL Requirements](https://ems-docs.element.io/link/475#bkmrk-postgresql-1)
On this page you simply need to specify the database name, the database host name, the port to connect to, the SSL mode to use, and finally, the username and password to connect with. Once you have completed this section, simply click continue.
For Standalone Deployments, if your database is installed on the same server you are installing ESS to, esnure that the servers' public IP address is used. As the container is not sharing the host network namespace, entering 127.0.0.1 will resolve to the container itself and cause the installation failure.
For detailed guidance / details on each config option, check the [Detailed Database Section Overview](https://ems-docs.element.io/books/element-server-suite-classic-documentation-lts-2404/page/database-section)
#### [Media Section](https://ems-docs.element.io/books/element-server-suite-classic-documentation-lts-2404/page/media-section).
The fifth section of the ESS installer GUI is the Media section, here you will configure where media will be saved as well as the maximum media upload size.
[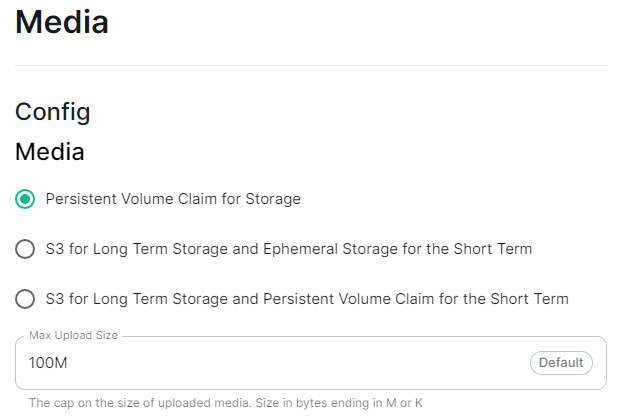](https://ems-docs.element.io/uploads/images/gallery/2024-08/image-1722519803209.png)
You can opt to use either a Persistent Volume Claim (default) or if you wish to use an S3 bucket. Selecting S3 will then require you to provide your S3 connection details and authentication credentials. You will also be able to adjust the maximum media upload size for your homeserver.
For detailed guidance / details on each config option, check the [Detailed Media Section Overview](https://ems-docs.element.io/books/element-server-suite-classic-documentation-lts-2404/page/media-section)
#### [Cluster Section](https://ems-docs.element.io/books/element-server-suite-classic-documentation-lts-2404/page/cluster-section).
The sixth section of the ESS installer GUI is the Cluster section, here you will configure settings specific to the cluster in which Element Deployment will run on top of.
[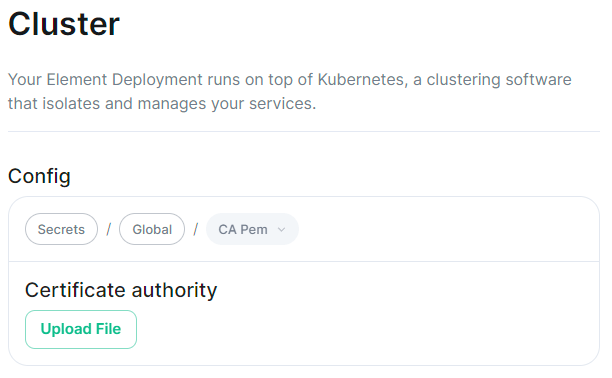](https://ems-docs.element.io/uploads/images/gallery/2024-08/image-1722520830048.png)
On standard setups, no options need configuring here so you can click continue.
For setups where on the certificates section, you uploaded certificates signed by you own private Certificate Authority, you will need to upload it's certificate in PEM encoded format. This should be a full chain certificate, like those upload in the Certificates section, including the Root Certificate Authority as well as any Intermediate Certificate Authorities.
If you are in an environment where you have self-signed certificates, you will want to disable TLS verification, by clicking `Advanced` and then scrolling down and unchecking `Verify TLS`. Please bear in mind that disabling TLS verification and using self-signed certificates is not recommended for production deployments.
If your host names are not DNS resolvable, you need to use host aliases and this can be set up here. You will also click "Advanced" and scroll down to the "Host Aliases" section in "k8s". In here, you will click "Add Host Aliases" and then you will specify an IP and host names that resolve to that IP:
[](https://ems-docs.element.io/uploads/images/gallery/2023-08/hostaliases.png)
For detailed guidance / details on each config option, check the [Detailed Cluster Section Overview](https://ems-docs.element.io/books/element-server-suite-classic-documentation-lts-2404/page/cluster-section)
##### Kubernetes Deployment
If you are not using OpenShift, you will need to set `Force UID GID` and `Set Sec Comp` to `Enable` under the section `Security Context` so that it looks like:
[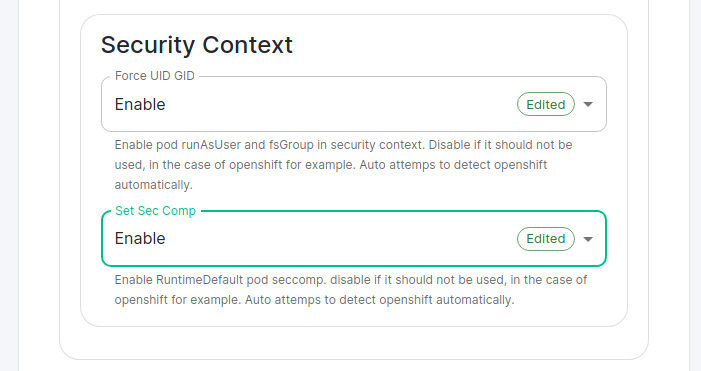](https://ems-docs.element.io/uploads/images/gallery/2023-05/seccontext-enable.png)
If you are using OpenShift, you should leave the values of `Force UID GID` and `Set Sec Comp` set to `Auto`.
#### [Synapse Section](https://ems-docs.element.io/books/element-server-suite-classic-documentation-lts-2404/page/synapse-section).
The seventh section of the ESS installer GUI is the Synapse section, here you will configure settings specific to your homeserver.
[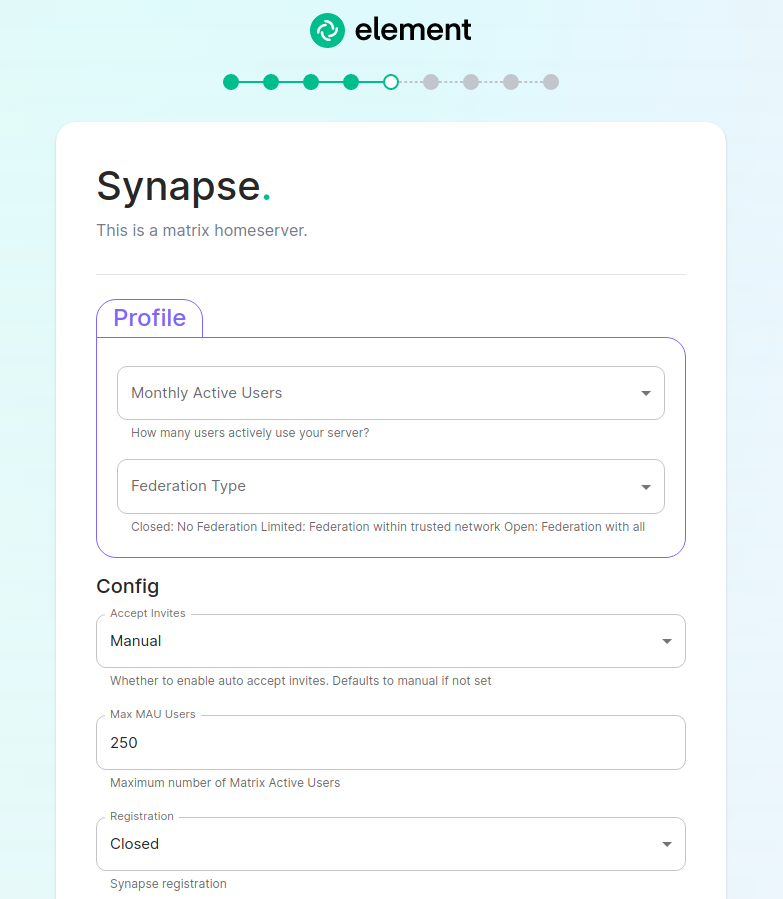](https://ems-docs.element.io/uploads/images/gallery/2023-08/synapse-page.png)
While there are lots of options that can be configured in the section, it is generally recommended to complete the first-time setup before toggling on additional features i.e. Delegated Authentication, Data Retention etc.
Re-running the installer and configuring these individually after first-time setup is recommend to make troubleshooting easier should something in this section be mis-configured.
Generally speaking, for first-time setup the default options here can be left as-is, as they can be altered as needed post-deployment. Simply click continue to advance, however see below for details on some options you may wish to alter.
The first setting that you will come to is our built in performance profiles. Select the appropriate answers for `Monthly Active Users` and `Federation Type` to apply our best practices based on years of running Matrix homeservers.
Setting of Monthly Active Usersaka MAU and Federation Type within the Profile section does not directly set the maximum monthly active users or open/close Federation. These options will simply auto-configure the number of underlying pods deployed to handle the advised values.
You will be able to directly configure your desired maximum MAU and Federation in dedicated sections.
The next setting that you will see is whether you want to auto accept invites. The default of `Manual` will fit most use cases, but you are welcome to change this value.
The next setting is the maximum number of monthly active users (MAU) that you have purchased for your server. Your server will not allow you to go past this value. If you set this higher than your purchased MAU and you go over your purchased MAU, you will need to true up with Element to cover the cost of the unpaid users.
The next setting concerns registration. A server with open registration on the open internet can become a target, so we default to closed registration. You will notice that there is a setting called `Custom` and this requires explicit custom settings in the additional configuration section. Unless instructed by Element, you will not need the `Custom` option and should instead pick `Closed` or `Open` depending on your needs.
After this, you will see that the installer has generated a random admin password for you. You will want to use the eye icon to view the password and copy this down as you will use this with the user `onprem-admin-donotdelete` to log into the admin panel after installation.
[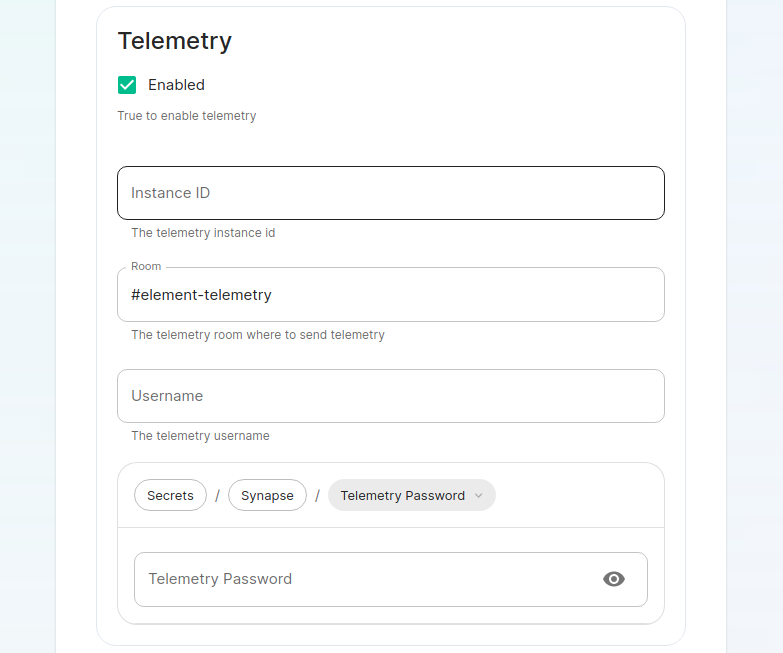](https://ems-docs.element.io/uploads/images/gallery/2023-08/synapse-page2.png)
Continuing, we see telemetry. You should leave this enabled as you are required to report MAU to Element. In the event that you are installing into an enviroment without internet access, you may disable this so that it does not continue to try talking to Element. That said, you are still required to generate an MAU report at regular intervals and share that with Element.
For more information on the data that Element collects, please see: [What Telemetry Data is Collected by Element?](https://ems-docs.element.io/link/447#bkmrk-what-telemetry-data-)
As mentioned above, there are a lot of options that can be configured here, it is recommended to run through the detailed guidance / details on each config option available on the [Detailed Synapse Section Overview](https://ems-docs.element.io/books/element-server-suite-classic-documentation-lts-2404/page/synapse-section)
##### [Delegated Auth](https://ems-docs.element.io/books/element-server-suite-classic-documentation-lts-2404/page/synapse-section-delegated-auth).
A sub-section of the Synapse section is Delegated Authentication, which allows deferring to OIDC, SAML and LDAP Identity Providers for authentication.
It is not recommended to set this up on first-time install, however should you wish please refer to the dedicated [Detailed Delegated Auth Section Overview](https://ems-docs.element.io/books/element-server-suite-classic-documentation-lts-2404/page/synapse-section-delegated-auth) page.
[](https://ems-docs.element.io/uploads/images/gallery/2024-08/image-1722522903330.png)
##### [Federation](https://ems-docs.element.io/books/element-server-suite-classic-documentation-lts-2404/page/synapse-section-federation).
A sub-section of the Synapse section is Federation, found under `Advanced`, which allows configuration of how your homeserver should federate with other homeservers.
It is not recommended to set this up on first-time install, however should you wish please refer to the dedicated [Detailed Federation Section Overview](https://ems-docs.element.io/books/element-server-suite-classic-documentation-lts-2404/page/synapse-section-federation) page.
[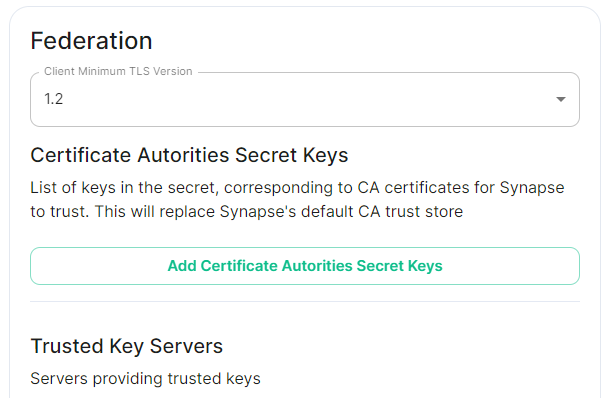](https://ems-docs.element.io/uploads/images/gallery/2024-08/image-1722523174484.png)
#### [Element Web Section](https://ems-docs.element.io/books/element-server-suite-classic-documentation-lts-2404/page/element-web-section).
The eighth section of the ESS installer GUI is the Element Web section, here you can configure settings specific to the deployed Element Web client.
First almost all setups, nothing needs to be configured, simply click continue.
For airgapped environments you should click `Advanced` then enable `Use Own URL for Sharing Links`:
[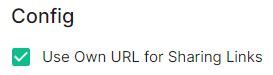](https://ems-docs.element.io/uploads/images/gallery/2024-08/image-1722523623991.png)
For detailed guidance / details on each config option, check the [Detailed Section Overview](https://ems-docs.element.io/books/element-server-suite-classic-documentation-lts-2404/page/element-web-section)
#### [Homeserver Admin Section](https://ems-docs.element.io/books/element-server-suite-classic-documentation-lts-2404/page/homeserver-admin-section).
The ninth section of the ESS installer GUI is the Homeserver Admin section, here you can configure settings specific to the deployed Admin Console.
[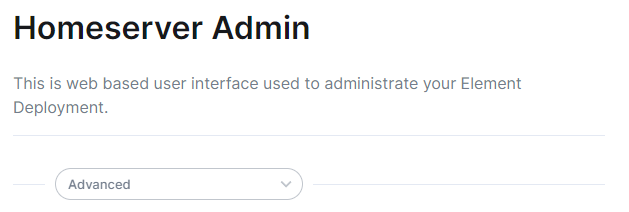](https://ems-docs.element.io/uploads/images/gallery/2024-08/image-1722524205280.png)
Unless advised by Element, you will not need to configure anything in this section, you will be able to access the homeserver admin via the admin domain specified in the Domains section, logging in with the built-in default Synapse Admin user `onprem-admin-donotdelete` whose password is defined in the Synapse section.
If you have enabled Delegated Authentication, the built-in Synapse Admin user onprem-admin-donotdelete will be unable to login unless Allow Local Users Login has been set to Enabled.
See the Delegated Authentication notes for how to promote a user from your Identity Provider to Synapse Admin
For detailed guidance / details on each config option, check the [Detailed Section Overview](https://ems-docs.element.io/books/element-server-suite-classic-documentation-lts-2404/page/homeserver-admin-section)
#### [Integrator Section](https://ems-docs.element.io/books/element-server-suite-classic-documentation-lts-2404/page/integrator-section).
The final section of the ESS installer GUI when running for the first-time is the Integrator section, here you can configure settings specific to the integrator which is used to send messages to external services.
[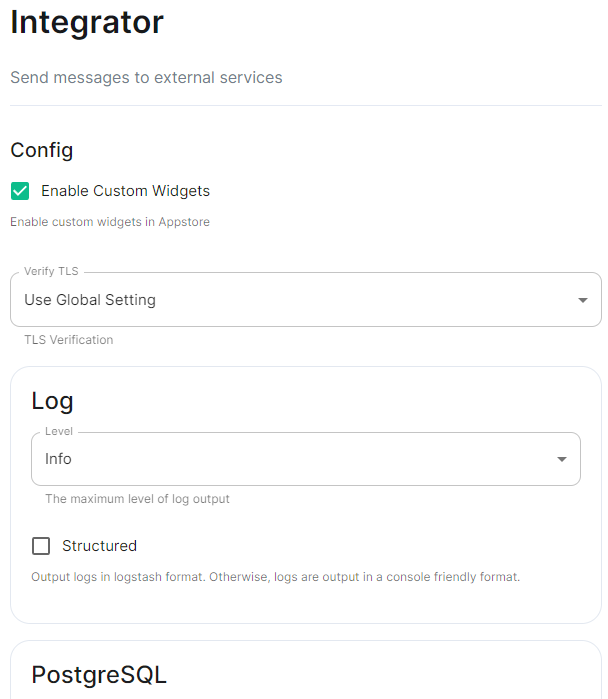](https://ems-docs.element.io/uploads/images/gallery/2024-08/image-1722524274161.png)
On first-time setup only PostgreSQL will need to be configured for Standalone Deployments where you are using an external PostgreSQL or Kubernetes Deployments where an external PostgreSQL is required.
For Standalone Deployments where the installer is deploying PostgreSQL for you, you will not need to configure anything.
For detailed guidance / details on each config option, check the [Detailed Section Overview](https://ems-docs.element.io/books/element-server-suite-classic-documentation-lts-2404/page/integrator-section)
#### The Installation Screen
After all sections you will finally be ready to begin the installation, simply click Install to begin.
[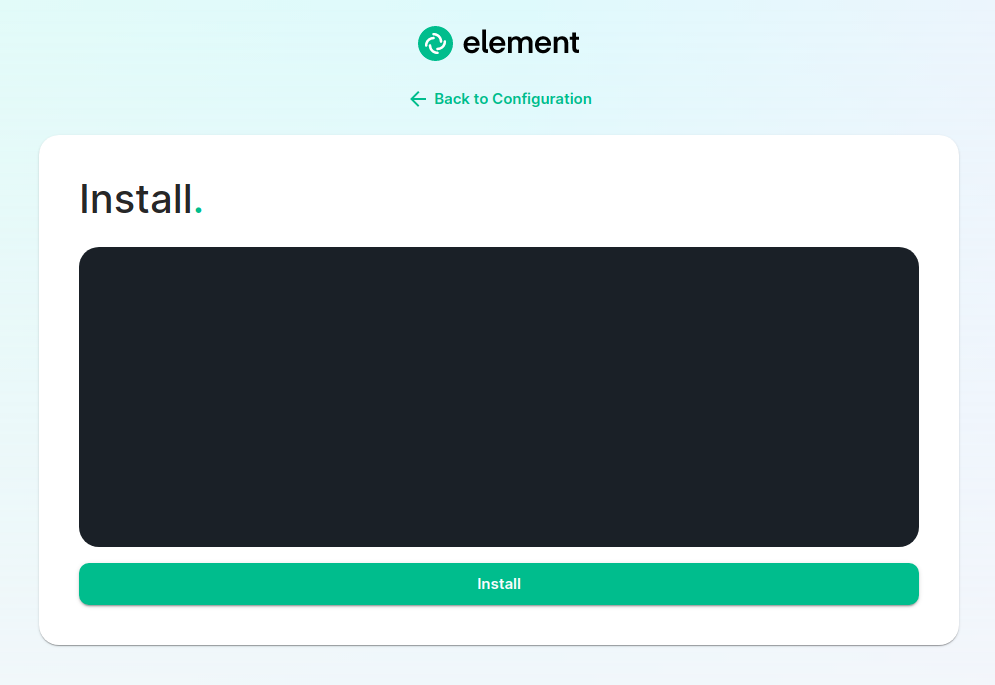](https://ems-docs.element.io/uploads/images/gallery/2023-08/installscreen.png)
Depending on your OS setup, you may notice the installer hang, or directly ask for a password. Simply go back to the terminal where you are running the installer, you will see that you are being asked for the sudo password:
[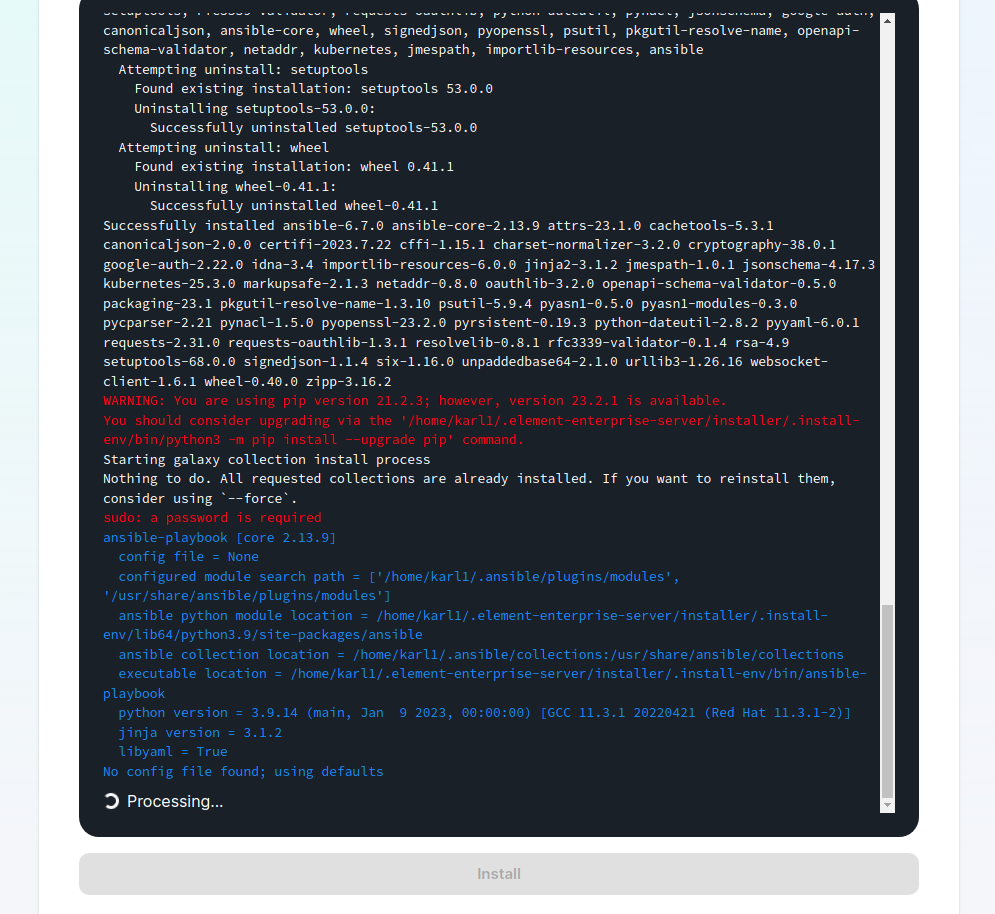](https://ems-docs.element.io/uploads/images/gallery/2023-08/installstart.png)
[](https://ems-docs.element.io/uploads/images/gallery/2023-02/sudoask.png)
Provide your sudo password and the installation will continue. You will know the installer has finished when you see the Play Recap, as long as nothing failed the install was a success.
For Standalone Deployments, when running the installer for the first-time, you will be prompted to log out and back in again to allow Linux group membership changes to be refreshed. It is advised to simply cancel the running installer CTRL + C then reboot i.e. sudo reboot now. Then re-run the installer, return to the Installation Screen and click Install again. You will only have to perform this step once per server.
#### Verifying Your Installation
Once the installation has finished, it can take as much as 15 minutes on a first run for everything to be configured and set up. You can use:
```bash
watch kubectl get pods -n element-onprem
```
This will show the status of all pods, simply wait until all pods have come up and stablised showing as `Ready`. You can also keep track of the `Current Deployment Status` on the Installation Screen, once fully ready you should see:
[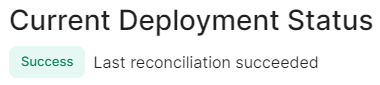](https://ems-docs.element.io/uploads/images/gallery/2024-08/image-1722525932639.png)
#### What's Next?
Once your installation has been verified you should stop the running installer with `CTRL + C` then re-run it. You should notice instead of an IP you are given a URL matching the Synapse Admin domain you configured on the Domains section but on port `8443`.
When the installer detects a successful installation, it will change from the first-time run interface to the Admin Console UI. Here you can:
- Run through any section previously configured and adjust your settings
- Access a new section called `Integrations` to setup additional components like Bridges, VOIP, Monitoring etc.
- Use the Admin tab to administer your homeserver (also deployed without requiring running the installer at the Synapse Admin Domain)
[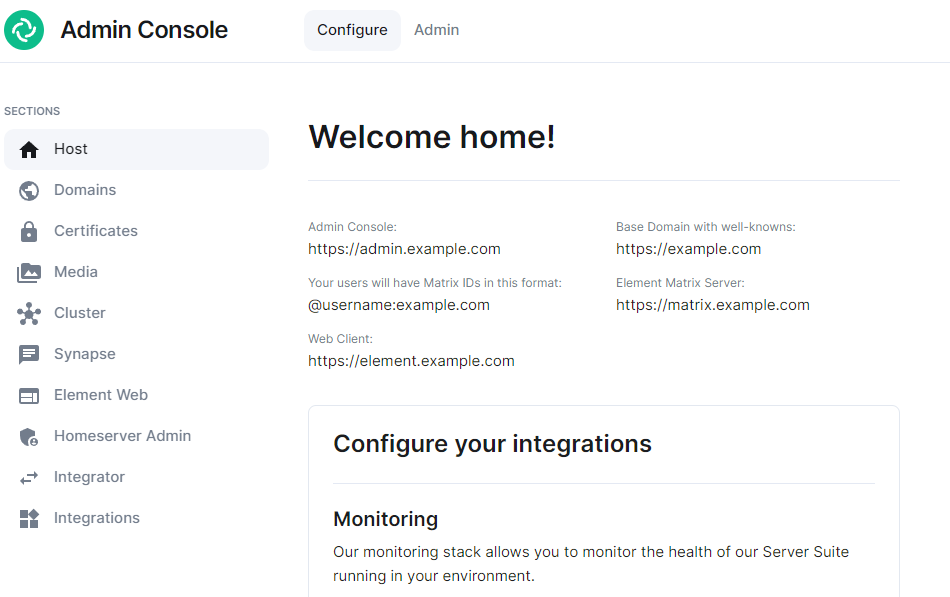](https://ems-docs.element.io/uploads/images/gallery/2024-08/image-1722598587776.png)
Check out the [Post-Installation Essentials](https://ems-docs.element.io/books/element-server-suite-classic-documentation-lts-2404/page/post-installation-essentials) for additional information and resources.
##### Core Component Sections
You already run through all these sections, however you may wish to dive deeper into each to fine-tune your configuration as required. You can find detailed breakdowns of each config option for these sections in the [Installation of Core Components](https://ems-docs.element.io/books/element-server-suite-classic-documentation-lts-2404/chapter/installation-of-core-components) chapter, as well more advanced options detailed within the [Advanced Configuration](https://ems-docs.element.io/books/element-server-suite-classic-documentation-lts-2404/chapter/advanced-configuration) chapter.
##### The Integrations Section
This new section allows you to install new integrations to your deployment, you can find detailed installation instructions for each integration in the [Integrations](https://ems-docs.element.io/books/element-server-suite-classic-documentation-lts-2404/chapter/integrations) chapter.
[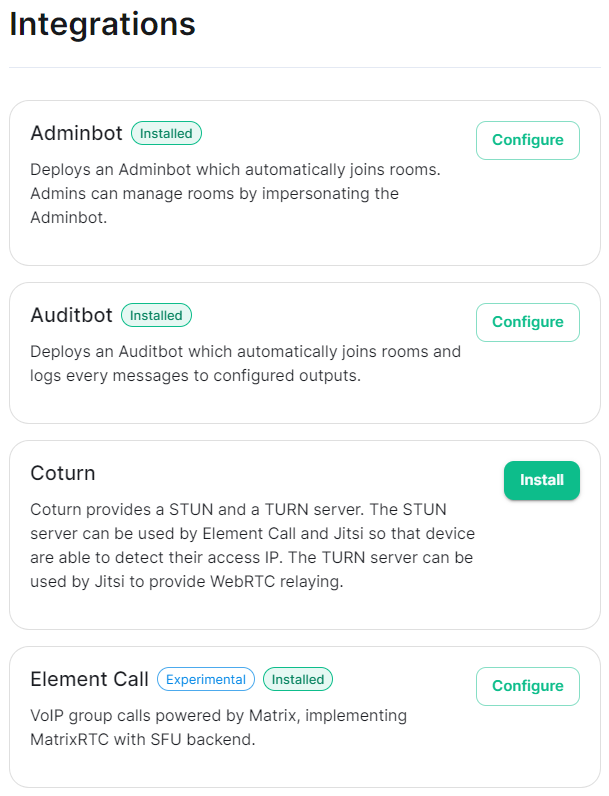](https://ems-docs.element.io/uploads/images/gallery/2024-08/image-1722599074625.png)
You can find a full list of integrations available from the [Introduction to Element Server Suite](https://ems-docs.element.io/link/473#bkmrk-components) page.
### Reconfiguring an existing Installation
Simply re-run the installer and run through any sections you wish to adjust your config on. Make sure to hit `Save` at the bottom of any changed sections, then hit `Deploy` and `Start Deployment`
### Upgrading an existing Installation
First, before downloading a new version of the installer, it is important to check all upgrade notes that may affect you (any since the version you are currently on). You can check all upgrade notes specific to an LTS from it's associated book's `ESS LTS YY.MM Change Logs and Upgrade Notes` page, i.e. from this book (LTS 24.04) see [ESS LTS 24.04 Change Logs and Upgrade Notes](https://ems-docs.element.io/books/element-server-suite-classic-documentation-lts-2404/page/ess-lts-2404-change-logs-and-upgrade-notes)
If upgrading from an older LTS to a newer one, it is highly recommended to first upgrade to the latest version of the LTS you are currently running. Then perform another upgrade to the latest version of the next LTS.
Next, download the latest version of the installer, transfer it to the device where your `.element-enterprise-server` configuration exists and make it executable using `chmod +x`.
When you first run a new version of the installer, your config may be upgraded. It is highly recommended to make a backup of your config directory. See Where are the Installer Configuration Files for more information.
On first run of a new version of the installer, your config may be upgraded, once this is complete you will be able to access the installer UI. Simply go through all sections within the installer, re-confirm all options (making sure to save any changes / click save on any pages that do not have it greyed out), then hit Deploy.
#### Performing upgrades with GroupSync installed
If you have the GroupSync integration installed, please ensure you enable `Dry Run` mode.
[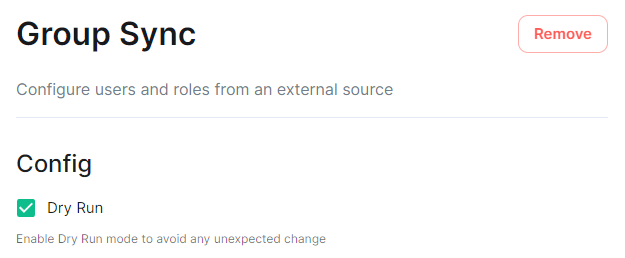](https://ems-docs.element.io/uploads/images/gallery/2024-08/image-1722597927265.png)
Once deployment is complete, you can confirm via the GroupSync pod logs that everything is running as expected:
```bash
# Confirm the GroupSync Pod Name
kubectl get pods -n element-onprem | grep group
# Replace POD_NAME in the command below
kubectl logs POD_NAME -n element-onprem
```
If everything looks as expected, please re-deploy with `Dry Run` disabled to resume GroupSync functionality.
# Post-Installation Essentials
You've installed Element Server Suite, what do you need to know? Check here for some essentials.
### End-User Documentation
After completing the installation you can share our [User Guide PDF](https://static.element.io/pdfs/element-user-guide.pdf) to help orient and onboard your users to Element! Or visit the [Element Support](https://ems-docs.element.io/books/element-support) book.
### Where are the Installer Configuration Files
Everything that you have configured via the Element Server Suite installer is saved to configuration files placed in the `.element-enterprise-server` directory, found in the home directory of the user who ran the installer. In this directory, you will find a subdirectory called `config` that contains the actual configuration files - keep these backed up.
### Running the Installer unattended
It is possible to run the installer without using the GUI provided that you have a valid set of configuration files in the `.element-enterprise-server/config` directory.
Using this method, you could use the GUI as a configuration editor and then take the resulting configuration and modify it as needed for further installations.
This method also makes it possible to set things up once and then run future updates without having to use the GUI.
See the [Running the installer unattended](https://ems-docs.element.io/link/536#bkmrk-running-the-installe) section from the [Automating ESS Deployment](https://ems-docs.element.io/books/element-server-suite-classic-documentation-lts-2404/page/automating-ess-deployment) doc.
### Manually creating your first user
It is highly recommended to use the Admin Console to create new users, you can see the [Using the Admin Tab](https://ems-docs.element.io/books/element-server-suite-classic-documentation-lts-2404/page/using-the-admin-tab) page for more details, specifically the [Adding Users](https://ems-docs.element.io/books/element-server-suite-classic-documentation-lts-2404/page/using-the-admin-tab#bkmrk-adding-users) section.
[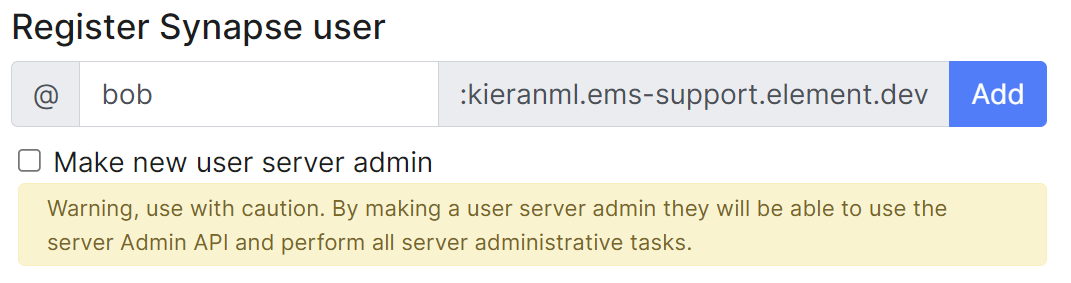](https://ems-docs.element.io/uploads/images/gallery/2023-11/image-1699362765678.png)
However, if wish to create users from your terminal, you can run the following command:
```bash
$ kubectl --namespace element-onprem exec --stdin --tty \
first-element-deployment-synapse-main-0 \
-- register_new_matrix_user --config /config/rendered/instance.yaml
New user localpart: your_username
Password:
Confirm password:
Make admin [no]: yes
Sending registration request...
Success!
```
Make sure to enter `yes` on `Make admin` if you wish to use this user on the installer or standalone Admin page.
Please note, you should be using the [Admin page](https://ems-docs.element.io/books/element-server-suite-classic-documentation-lts-2404/page/using-the-admin-tab) or the [Synapse Admin API](https://ems-docs.element.io/books/element-support/page/getting-started-using-the-admin-api) instead of `kubectl`/`register_new_matrix_user` to create subsequent users.
### Standalone Deployment `microk8s` Specifics
#### Cleaning up images cache
The installer, from version 24.02, comes with the tool `crictl` which lets you interact with microk8s containerd daemon.
After upgrading, once all pods are running, you might want to run the following command to clean-up old images :
```bash
~/.element-enterprise-server/installer/.install-env/bin/crictl -r unix:///var/snap/microk8s/common/run/containerd.sock rmi --prune
```
#### Upgrading microk8s
##### Prior to versions 24.04.05
Upgrading microk8s rely on uninstalling, rebooting the machine, and reinstalling ESS on the new version. It thus involves a downtime.
To upgrade microk8s, please run the installer with : `./.bin --upgrade-cluster`.
The machine will reboot during the process. Once it has rebooted, log in as the same user, and run : `./.bin unattended`. ESS will be reinstalled on the upgraded microk8s cluster.
##### After versions 24.04.05
Microk8s will be upgraded gracefully automatically when the new installer is used. The upgrade involves upgrading the addons, and might involve a downtime of a couple of minutes while it runs.
### Upgrading an existing Installation
See [Upgrading an existing Installation](https://ems-docs.element.io/link/474#bkmrk-upgrading-an-existin) from the [Installing Element Server Suite](https://ems-docs.element.io/books/element-server-suite-classic-documentation-lts-2404/page/installing-element-server-suite) page for details.
# Installation of Core Components
Breakdown of each section present within the installer, detailing each configurable option. Including how each choice functions, the config it generates and general guidance.
# Host Section
Initial configuration options specific to the installer, including how ESS should be deployed.
The first section of the ESS installer GUI is the Host section, here you will configure essential details of how ESS will be installed including; deployment type; subscription credentials; PostgreSQL to use; and whether or not your setup is airgapped.
Settings configured via the UI in this section will mainly be saved to your `cluster.yml`. If performing a Kubernetes deployment, you will also be able to config Host Admin settings which will save configuration into both `internal.yml` and `deployment.yml`.
Depending on your environment you will need to select either `Standalone` or `Kubernetes Application`. `Standalone` will install `microk8s` locally on your machine, and deploy to it so all pods are running locally on the host machine. `Kubernetes Application` will deploy to your Kubernetes infrastructure in a context you will need to have already setup via your kube config.
### Deployment (Standalone)
#### Install
[](https://ems-docs.element.io/uploads/images/gallery/2024-02/image-1708075153739.png)
Config Example
```yml
spec:
connectivity:
dockerhub:
password: example
username: example
install:
emsImageStore:
password: example
username: example
webhooks:
caPassphrase: example
# Options unique to selecting Standalone
certManager:
adminEmail: example@Dexample.com
microk8s:
dnsResolvers:
- 8.8.8.8
- 8.8.4.4
postgresInCluster:
hostPath: /data/postgres
passwordsSeed: example
```
An example of the cluster.yml config generated when selecting Standalone, note that no specific flag is used within the config to specify selecting between Standalone or Kubernetes. If you choose to manually configure ESS bypassing the GUI, ensure only config options specific to how you wish to deploy are provided.
Select your deployment type here, if you've jumped ahead you should first read our [Introduction to Element Server Suite](https://ems-docs.element.io/books/element-server-suite-classic-documentation-lts-2404/page/introduction-to-element-server-suite) and then see our [Requirements and Recommendations](https://ems-docs.element.io/books/element-server-suite-classic-documentation-lts-2404/page/requirements-and-recommendations) which details the environment specifics needed for each deployment type.
#### Cert Manager
[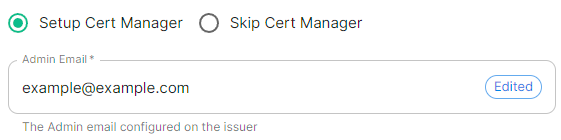](https://ems-docs.element.io/uploads/images/gallery/2024-04/image-1714496045157.png)
Config Example
```yml
spec:
install:
# certManager: {} # When 'Skip Cert Manager' selected
certManager:
adminEmail: example@example.com
```
You should keep this enabled if you will be using Let's Encrypt to verify your domain and generate your certificates, simply provide the username where due to expire certificate notices will be sent.
If you plan to upload your own certificates, or they will be Externally Managed, you should select `Skip Cert Manager`.
#### EMS Image Store
[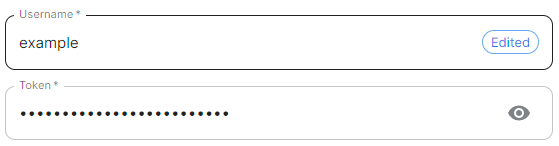](https://ems-docs.element.io/uploads/images/gallery/2024-04/image-1714496065638.png)
Config Example
```yml
spec:
install:
emsImageStore:
password: token
username: test
```
Here you will need to provide your EMS Image Store Username and Token associated with your subscription, which you can find at .
If you forget your token and hit 'Refresh' in the EMS Control Panel, you will need to ensure you redeploy your instance with the new token - otherwise subsequent deployments will fail.
[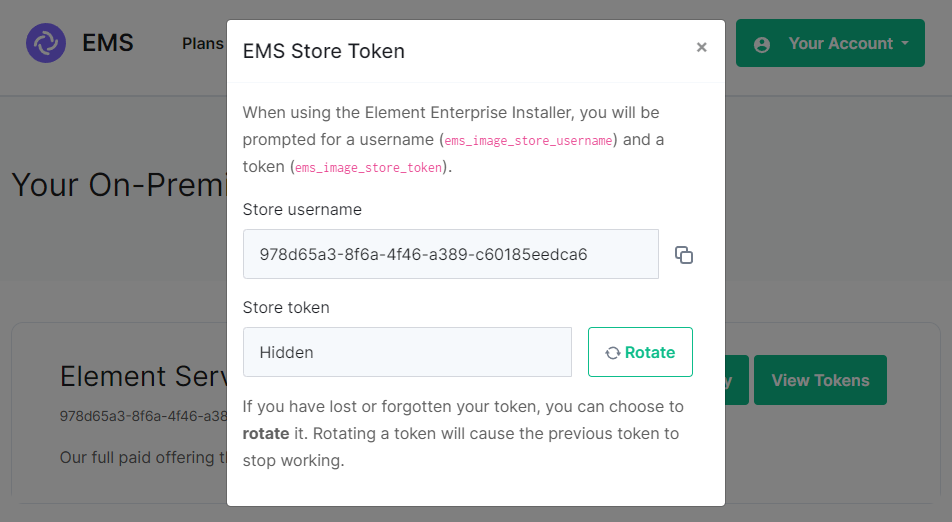](https://ems-docs.element.io/uploads/images/gallery/2024-08/image-1722600415206.png)
#### MicroK8s
[](https://ems-docs.element.io/uploads/images/gallery/2024-04/image-1714496085591.png)
Config Example
```yml
spec:
install:
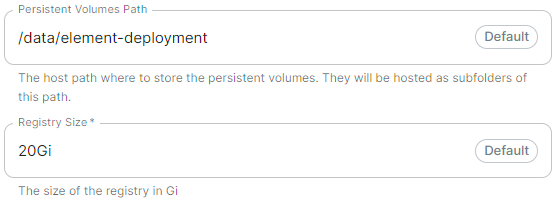
microk8s:
persistentVolumesPath: /data/element-deployment
registrySize: 25Gi
```
It is unlikely you should need to adjust these values and it is highly recommended to leave this as their defaults.
If you encounter a requirement to clean up your images cache, see the [Cleaning up images cache](https://ems-docs.element.io/link/565#bkmrk-cleaning-up-images-c) section from the [Post-Installation Essentials](https://ems-docs.element.io/books/element-server-suite-classic-documentation-lts-2404/page/post-installation-essentials) page.
#### DNS Resolvers
[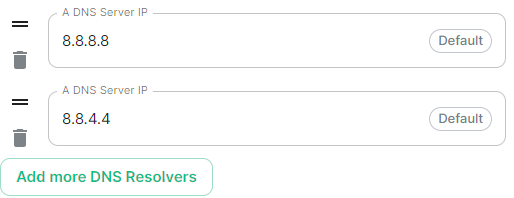](https://ems-docs.element.io/uploads/images/gallery/2024-04/image-1714496102751.png)
Config Example
```yml
spec:
install:
microk8s:
dnsResolvers:
- 8.8.8.8
- 8.8.4.4
```
Defaulting to `8.8.8.8` and `8.8.4.4`, the DNS server IPs set here will be used by all deployed pods. Click `Add more DNS Resolvers` to add additional entries as required.
#### Nginx Extra Configuration
[](https://ems-docs.element.io/uploads/images/gallery/2024-04/image-1714496120331.png)
Config Example
```yml
spec:
install:
microk8s:
# Not present when disabled
nginxExtraConfiguration:
custom-http-errors: '"404"'
server-snippet: >-
error_page 404 /404.html; location = /404.html { internal; return 200
"
Hello World!
"; }
```
As linked via the ESS installer GUI, see the [Ingress-Nginx Controller ConfigMaps](https://kubernetes.github.io/ingress-nginx/user-guide/nginx-configuration/configmap/#configuration-options) documentation for the options that can be configured.
##### Example
The below example is for demonstration purposes only, you should follow the linked guidance before adding extra configuration.
For example, if you wanted to replace the standard 404 error page, you could do this using both [`custom-http-errors`](https://kubernetes.github.io/ingress-nginx/user-guide/nginx-configuration/configmap/#custom-http-errors) and [`server-snippet`](https://kubernetes.github.io/ingress-nginx/user-guide/nginx-configuration/configmap/#server-snippet). To configure via the installer, simply add the specify `custom-http-errors` as the `Name` and click `Add to Nginx Extra Configuration`, then provide the required value in the newly created field:
[](https://ems-docs.element.io/uploads/images/gallery/2024-02/image-1708078830743.png)
Repeat for `server-snippet`:
[](https://ems-docs.element.io/uploads/images/gallery/2024-02/image-1708078877553.png)
The above example is used to explain how to configure the Nginx Extra Configuration, and so is for demonstration purposes only, it is not recommended to use this example config. Ideally your web server should manage traffic that would otherwise hit a 404 being served by ESS.
#### PostgreSQL in Cluster
[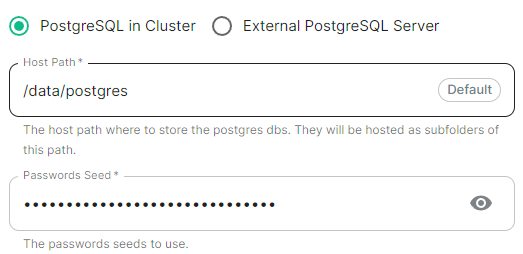](https://ems-docs.element.io/uploads/images/gallery/2024-04/image-1714496148674.png)
Config Example
```yml
spec:
install:
microk8s:
# postgresInCluster: {} # If 'External PostgreSQL Server' selected
postgresInCluster:
hostPath: /data/postgres
passwordsSeed: example
```
Only available in Standalone deployments you can have the installer deploy PostgreSQL for you, this will remove the requirement to configure PostgreSQL connection and authentication credentials in later parts of the installer. It is highly recommended to keep the default settings if you opt for this approach.
If you already have an external PostgreSQL server you wish to use, make sure you have followed the [PostgreSQL Standalone Environment Prerequisites](https://ems-docs.element.io/books/element-server-suite-classic-documentation-lts-2404/page/requirements-and-recommendations#bkmrk-postgresql) detailed on the [Requirements and Recommendations](https://ems-docs.element.io/books/element-server-suite-classic-documentation-lts-2404/page/requirements-and-recommendations#bkmrk-postgresql) page. Selecting this option will present an additional `Database` section in the installer process.
#### Internal Webhooks
[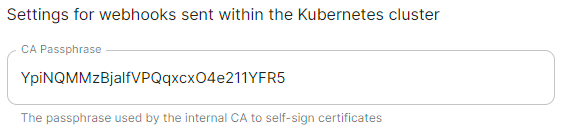](https://ems-docs.element.io/uploads/images/gallery/2024-05/image-1716365980592.png)
Config Example
```yml
spec:
install:
webhooks:
caPassphrase: YpiNQMMzBjalfVPQqxcxO4e211YFR5
```
You should not need to change this, a unique CA passphrase will b generated on first run of the installer and is used by the interal CA to self-sign certificates.
### Deployment (Kubernetes Application)
#### Install
[](https://ems-docs.element.io/uploads/images/gallery/2024-04/image-1714488149825.png)
Config Example
```yml
spec:
connectivity:
dockerhub:
password: example
username: example
install:
emsImageStore:
password: example
username: example
webhooks:
caPassphrase: example
# Options unique to selecting Standalone
clusterDeployment: true
kubeContextName: example
namespaces: {}
skipElementCrdsSetup: false
skipOperatorSetup: false
skipUpdaterSetup: false
```
An example of the cluster.yml config generated when selecting Kubernetes, note that no specific flag is used within the config to specify selecting between Standalone or Kubernetes. If you choose to manually configure ESS bypassing the GUI, ensure only config options specific to how you wish to deploy are provided.
Select your deployment type here, if you've jumped ahead you should first read our [Introduction to Element Server Suite](https://ems-docs.element.io/books/element-server-suite-classic-documentation-lts-2404/page/introduction-to-element-server-suite) and then see our [Requirements and Recommendations](https://ems-docs.element.io/books/element-server-suite-classic-documentation-lts-2404/page/requirements-and-recommendations) which details the environment specifics needed for each deployment type.
##### Cluster Deployment
[](https://ems-docs.element.io/uploads/images/gallery/2024-02/image-1708075404378.png)
Config Example
```yml
spec:
install:
clusterDeployment: true
```
Deploy the operator & the updater using Cluster Roles.
#### Kube Context Name
[](https://ems-docs.element.io/uploads/images/gallery/2024-04/image-1714488225063.png)
Config Example
```yml
spec:
install:
kubeContextName: example
```
The name of the Kubernetes context you have already setup that ESS should be deployed into.
#### Skip Setup Options
[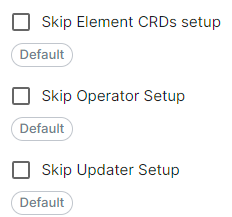](https://ems-docs.element.io/uploads/images/gallery/2024-04/image-1714488379545.png)
Config Example
```yml
spec:
install:
skipElementCrdsSetup: false
skipOperatorSetup: false
skipUpdaterSetup: false
```
Selecting these will allow you to skip the setup of the Element CRDs, Operator and Updater as required.
#### Namespaces
[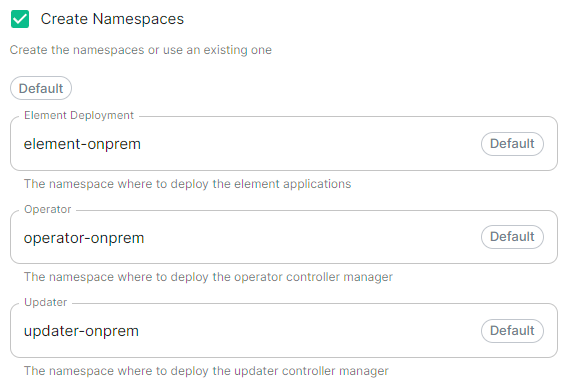](https://ems-docs.element.io/uploads/images/gallery/2024-04/image-1714488532648.png)
Config Example
```yml
spec:
install:
# namespaces: {} # When left as default namespaces
# namespaces: # When `Create Namespaces` is disabled
# createNamespaces: false
namespaces: # When custom namespaces are provided
elementDeployment: element-example # Omit any that should remain as default
operator: operator-example
updater: updater-example
```
Allows you to specify the namespaces you wish to deploy into, with the additional option to create them if they don't exist.
#### Namespace-scoped Deployments
Namespace-scoped deployments in Kubernetes offer a way to organize and manage resources within specific namespaces rather than globally across the entire cluster.
Preparing the Cluster
**Installing the Helm Chart Repositories**
The first step is to start on a machine with helm v3 installed and configured with your kubernetes cluster and pull down the two charts that you will need.
First, let's add the element-updater repository to helm:
```
helm repo add element-updater https://registry.element.io/helm/element-updater --username
ems_image_store_username --password 'ems_image_store_token'
```
Replace `ems_image_store_username` and `ems_image_store_token` with the values provided to you by Element.
Secondly, let's add the element-operator repository to helm:
```
helm repo add element-operator https://registry.element.io/helm/element-operator --username ems_image_store_username --password 'ems_image_store_token'
```
Replace `ems_image_store_username` and `ems_image_store_token` with the values provided to you by Element.
Now that we have the repositories configured, we can verify this by:
```
helm repo list
```
and should see the following in that output:
```
NAME URL
element-operator https://registry.element.io/helm/element-operator
element-updater https://registry.element.io/helm/element-updater
```
**Deploy the CRDs**
Write the following `values.yaml` file:
```
clusterDeployment: true
deployCrds: true
deployCrdRoles: true
deployManager: false
```
To install the CRDs with the helm charts, simply run:
```
helm install element-updater element-updater/element-updater -f values.yaml
helm install element-operator element-operator/element-operator -f values.yaml
```
Now at this point, you should have the following two CRDs available:
```
[user@helm ~]$ kubectl get crds | grep element.io
elementwebs.matrix.element.io 2023-10-11T13:23:14Z
wellknowndelegations.matrix.element.io 2023-10-11T13:23:14Z
elementcalls.matrix.element.io 2023-10-11T13:23:14Z
hydrogens.matrix.element.io 2023-10-11T13:23:14Z
mautrixtelegrams.matrix.element.io 2023-10-11T13:23:14Z
sydents.matrix.element.io 2023-10-11T13:23:14Z
synapseusers.matrix.element.io 2023-10-11T13:23:14Z
bifrosts.matrix.element.io 2023-10-11T13:23:14Z
lowbandwidths.matrix.element.io 2023-10-11T13:23:14Z
synapsemoduleconfigs.matrix.element.io 2023-10-11T13:23:14Z
matrixauthenticationservices.matrix.element.io 2023-10-11T13:23:14Z
ircbridges.matrix.element.io 2023-10-11T13:23:14Z
slidingsyncs.matrix.element.io 2023-10-11T13:23:14Z
securebordergateways.matrix.element.io 2023-10-11T13:23:14Z
hookshots.matrix.element.io 2023-10-11T13:23:14Z
matrixcontentscanners.matrix.element.io 2023-10-11T13:23:14Z
sygnals.matrix.element.io 2023-10-11T13:23:14Z
sipbridges.matrix.element.io 2023-10-11T13:23:14Z
livekits.matrix.element.io 2023-10-11T13:23:14Z
integrators.matrix.element.io 2023-10-11T13:23:14Z
jitsis.matrix.element.io 2023-10-11T13:23:14Z
mautrixwhatsapps.matrix.element.io 2023-11-15T09:03:48Z
synapseadminuis.matrix.element.io 2023-10-11T13:23:14Z
synapses.matrix.element.io 2023-10-11T13:23:14Z
groupsyncs.matrix.element.io 2023-10-11T13:23:14Z
pipes.matrix.element.io 2023-10-11T13:23:14Z
elementdeployments.matrix.element.io 2023-10-11T13:34:25Z
chatterboxes.matrix.element.io 2023-11-21T15:55:59Z
```
**Namespace-scoped role**
In the namespace where the ESS deployment will happen, to give a user permissions to deploy ESS, please create the following role and roles bindings:
- User role:
```
apiVersion: rbac.authorization.k8s.io/v1
kind: Role
metadata:
name: ess-additional
rules:
- apiGroups:
- apiextensions.k8s.io
resources:
- customresourcedefinitions
verbs:
- list
- watch
- get
- apiGroups:
- project.openshift.io
resources:
- projects
verbs:
- get
- list
- watch
```
- User roles bindings:
```
apiVersion: rbac.authorization.k8s.io/v1
kind: RoleBinding
metadata:
name: ess-additional
roleRef:
apiGroup: rbac.authorization.k8s.io
kind: Role
name: ess-additional
subjects:
# role subjects which maps to the user or its groups
```
```
apiVersion: rbac.authorization.k8s.io/v1
kind: RoleBinding
metadata:
name: ess
roleRef:
apiGroup: rbac.authorization.k8s.io
kind: ClusterRole
name: edit
subjects:
# role subjects which maps to the user or its groups
```
Once your cluster is prepared, you can setup your namespace-scoped deployment by configuring these settings:
- **Skip Operator Setup****.** Unchecked
- **Skip Updater Setup****.** Unchecked
- **Skip Element CRDs Setup****.** Checked
- **Cluster Deployment****.** Unchecked
- **Kube Context Name****.** Set to `user_kube_context_name`
- **Namespaces****.**
- **Create Namespaces****.** Unchecked
- **Operator****.** Set to `namespace_to_deploy_ess`
- **Updater****.** Set to same as Operator, `namespace_to_deploy_ess`
- **Element Deployment****.** Set to same as Operator, `namespace_to_deploy_ess`
#### Internal Webhooks
[](https://ems-docs.element.io/uploads/images/gallery/2024-05/image-1716365980592.png)
Config Example
```yml
spec:
install:
webhooks:
caPassphrase: YpiNQMMzBjalfVPQqxcxO4e211YFR5
```
### Connectivity
[](https://ems-docs.element.io/uploads/images/gallery/2024-02/image-1708076541524.png)
Config Example
```yml
spec:
connectivity:
```
#### Connected
[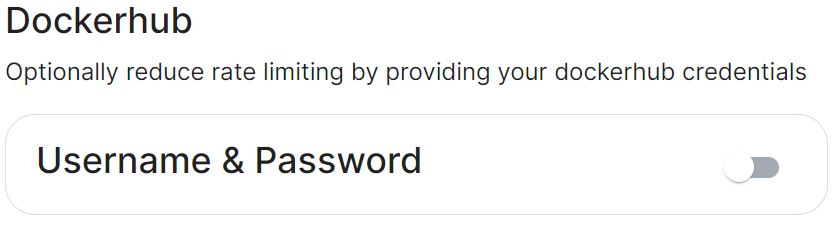](https://ems-docs.element.io/uploads/images/gallery/2024-02/image-1708076586708.png)
Config Example
```yml
spec:
connectivity:
# dockerhub: {} # When Username & Password is disabled per default
dockerhub:
password: password
username: test
```
Connected means the installer will use the previously provided [EMS Image Store](#bkmrk-ems-image-store) credentials to pull the required pod images as part of deployment, optionally, you can specify DockerHub credentials to reduce potential rate limiting.
#### Airgapped
Config Example
```yml
spec:
connectivity:
airgapped:
localRegistry: localhost:32000
sourceDirectory: /home/ubuntu/airgapped/
# uploadCredentials not present if `Target an Existing Local Image Registry` selected
# uploadCredentials: {} # If 'Upload without Authentication'
uploadCredentials:
password: example
username: example
```
An airgapped environment is any environment in which the running hosts will not have access to the greater internet. This proposes a situation in which these hosts are unable to get access to various needed bits of software from Element and also are unable to share telemetry data back with Element.
Selecting Airgapped means the installer will rely on images stored in a registry local to your environment, by default the installer will host this registry uploading images found within the specified `Source Directory`, however you can alternatively specify one already present in your environment instead.
##### Getting setup within an Airgapped environment
Alongside each Installer binary available for download, for those customers with airgapped permissions, is an equivalent airgapped package `element-enterprise-installer-airgapped--gui.tar.gz`. Download and copy this archive to the machine running the installer, then use `tar -xzvf element-enterprise-installer-airgapped--gui.tar.gz` to extract out its contents, you should see a folder `airgapped` with the following directories within:
- `pip`
- `galaxy`
- `snaps`
- `containerd`
- `images`
Copy the full path of the root `airgapped` folder, for instance, `/home/ubuntu/airgapped` and paste that into the `Source Directory` field. Should you ever update the ESS installer binary, you will need to ensure you delete and replace this `airgapped` folder, with its updated equivalent.
Your airgapped machine will still require access to airgapped linux repositories depending on your OS. If using Red Hat Enterprise Linux, you will also need access to the EPEL repository in your airgapped environment.
### Host Admin
[](https://ems-docs.element.io/uploads/images/gallery/2024-04/image-1714496264422.png)
Config Example
- `internal.yml`
```yml
spec:
fqdn: admin.example.com
tls:
# When selecting `Self Signed`
# mode: self-signed
# When selecting `Automatic Let's Encrypt`
mode: automatic
automatic:
adminEmail: example@example.com
# When selecting `Certificate File`
# mode: certfile
# certificate:
# certFile: "example" # Base64 encoded string from certificate
# privateKey: "example" # Base64 encoded string from certificate key
# When selecting `Exsiting TLS Certificates in the Cluster`
# mode: existing
# secretName: example
# When selecting `Externally Managed`
# mode: external
```
- `deployment.yml`
```yml
spec:
components:
synapseAdmin:
config:
hostOrigin: >-
https://admin.example.com,https://admin.example.com:8443
```
The Host Admin section allows you to configure the domain name and certificates to use when serving the ESS installer GUI, when running directly on the host - changes here will take affect the next time you run the installer.
# Domains Section
Configure the domains ESS should use for the main components deployed by ESS.
The second section of the ESS installer GUI is the Domains section, here you will configure the fully-qualified domain names for each of the main components that will be deployed by ESS.
The domain names configured via the UI in this section will be saved to your deployment.yml under each of the components' k8s: ingress: configuration.
This section covers all domain names used by the main components present in the installer, additional domains may be required when enabling specific integrations - you will specify integration specific domain names on each respective integrations' page.
[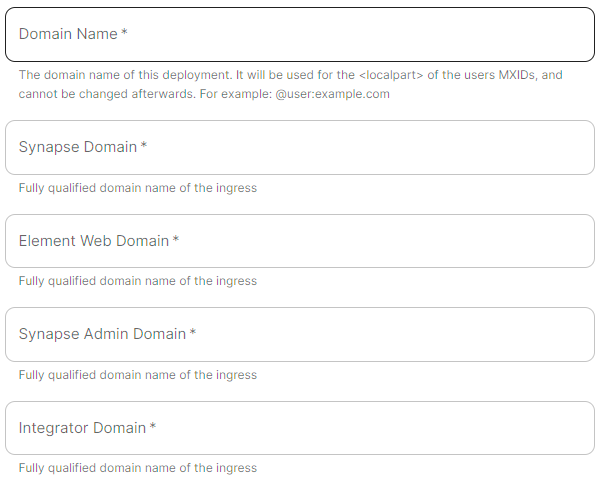](https://ems-docs.element.io/uploads/images/gallery/2024-04/image-1714490472019.png)
Config Example
```yml
spec:
components:
elementWeb:
k8s:
ingress:
fqdn: element.example.com
integrator:
k8s:
ingress:
fqdn: integrator.example.com
synapse:
k8s:
ingress:
fqdn: synapse.example.com
synapseAdmin:
k8s:
ingress:
fqdn: admin.example.com
global:
config:
domainName: example.com
```
Simply provide the base domain name for your deployment, then you need to provide the sub-domains to use for Synapse (Matrix Homeserver), Element Web (Hosted Matrix Client), Synapse Admin (Hosted Admin Console) and Integrator.
##### Changing your base Domain Name
If you have already deployed your server, it is not possible to change your base domain name. To do so, you will need to wipe all data and start anew.
# Certificates Section
Configure and/or provide the certificates that should be used for each domain served by ESS.
The third section of the ESS installer GUI is the Domains section, here you will configure the certificates to use for each previously specified domain name.
Certificate details configured via the UI in this section will be saved to your deployment.yml under each of the components' k8s: ingress: configuration with the cert contents (if manually uploaded) being saved to a secrets.yml in Base64.
This section covers all certificates to be used by the main components deployed by the installer, additional certificates may be required when enabling specific integrations - you will specify integration specific certificates on each respective integrations' page.
Config Example
- `deployment.yml`
```yml
spec:
components:
elementWeb:
k8s:
ingress:
tls: # Selecting `Certmanager Let's Encrypt`
certmanager:
issuer: letsencrypt
mode: certmanager
secretName: element-web
integrator:
k8s:
ingress:
tls: # Selecting `Certificate File`
certificate:
certFileSecretKey: integratorCertificate
privateKeySecretKey: integratorPrivateKey
mode: certfile
secretName: integrator
synapse:
k8s:
ingress:
tls: # Selecting `Existing TLS Certificates in the Cluster`
mode: existing
secretName: example
secretName: synapse
synapseAdmin:
k8s:
ingress:
tls: # Selecting `Externally Managed`
mode: external
secretName: synapse-admin
wellKnownDelegation:
k8s:
ingress:
tls:
mode: external
secretName: well-known-delegation
```
- `secrets.yml`
```yml
apiVersion: v1
kind: Secret
metadata:
name: element-web
namespace: element-onprem
data:
elementWebCertificate: >-
exampleBase64EncodedString
elementWebPrivateKey: >-
exampleBase64EncodedString
---
apiVersion: v1
kind: Secret
metadata:
name: integrator
namespace: element-onprem
data:
certificate: >-
exampleBase64EncodedString
privateKey: >-
exampleBase64EncodedString
---
apiVersion: v1
kind: Secret
metadata:
name: synapse
namespace: element-onprem
data:
synapseCertificate: >-
exampleBase64EncodedString
synapsePrivateKey: >-
exampleBase64EncodedString
---
apiVersion: v1
kind: Secret
metadata:
name: synapse-admin
namespace: element-onprem
data:
synapseAdminUICertificate: >-
exampleBase64EncodedString
synapseAdminUIPrivateKey: >-
exampleBase64EncodedString
---
apiVersion: v1
kind: Secret
metadata:
name: well-known-delegation
namespace: element-onprem
data:
wellKnownDelegationCertificate: >-
exampleBase64EncodedString
wellKnownDelegationPrivateKey: >-
exampleBase64EncodedString
```
You will need to configure certificates for the following components:
- Well-Known Delegation
- Well-Known files are served on the base domain, i.e. `https://example.com/.well-known/matrix/client` and `https://example.com/.well-known/matrix/server`.
- Synapse
- Please note, if you opt to turn on DNS SRV (via the Cluster Section), the Synapse certificate MUST include the base domain as an additional name.
- Element Web
- Synapse Admin
- Integrator
For each component, you will be presented with 4 options on how to configure the certificate.
#### Certmanager Let's Encrypt
[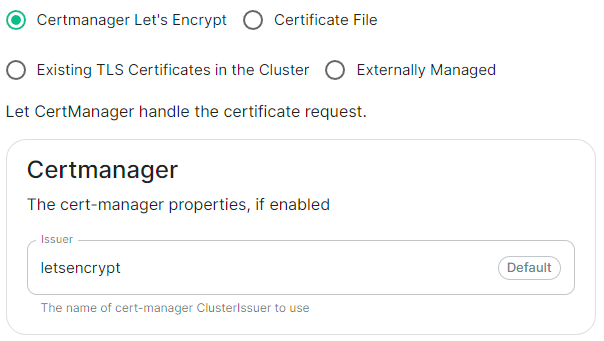](https://ems-docs.element.io/uploads/images/gallery/2024-04/image-1714491991843.png)
Config Example
```yml
spec:
components:
componentName: # `elementWeb`, `integrator`, `synapse`, `synapseAdmin`, `wellKnownDelegation`
k8s:
ingress:
tls:
certmanager:
issuer: letsencrypt
mode: certmanager
secretName: component # Not used with 'Certmanager Let's Encrypt'
```
Select this to use Let's Encrypt to generate the certificates used, do not edit the Issuer field as no other options are available at this time.
#### Certificate File
[](https://ems-docs.element.io/uploads/images/gallery/2024-04/image-1714492004288.png)
Config Example
- `deployment.yml`
```yml
spec:
components:
componentName: # `elementWeb`, `integrator`, `synapse`, `synapseAdmin`, `wellKnownDelegation`
k8s:
ingress:
tls:
mode: certfile
certificate:
certFileSecretKey: componentCertificate
privateKeySecretKey: componentPrivateKey
secretName: component
```
- `secrets.yml`
```yml
apiVersion: v1
kind: Secret
metadata:
name: component
namespace: element-onprem
data:
componentCertificate: >-
exampleBase64EncodedString
componentPrivateKey: >-
exampleBase64EncodedString
---
```
Select this option to be able to manually upload the certificates that should be used to serve the specified domain. Make sure you certificate files are in the PEM encoded format and it is strongly advised to include the full certificate chain within the file to reduce likelihood of certificate-based issues post deployment.
#### Existing TLS Certificates in the Cluster
[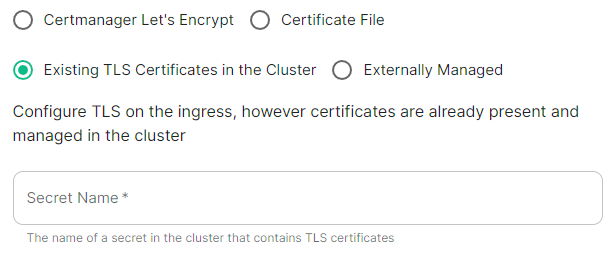](https://ems-docs.element.io/uploads/images/gallery/2024-04/image-1714492016084.png)
Config Example
```yml
spec:
components:
componentName: # `elementWeb`, `integrator`, `synapse`, `synapseAdmin`, `wellKnownDelegation`
k8s:
ingress:
tls:
mode: existing
secretName: example
secretName: component # Not used with 'Existing TLS Certificates in the Cluster'
```
This option is most applicable to Kubernetes deployments, however can be used with Standalone. Select this option when secrets containing the certificates are already present and managed within the cluster, provide the secret name that contains the TLS certificates for ESS to use them.
#### Externally Managed
[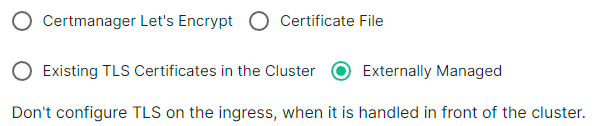](https://ems-docs.element.io/uploads/images/gallery/2024-04/image-1714492026549.png)
Config Example
```yml
spec:
components:
componentName: # `elementWeb`, `integrator`, `synapse`, `synapseAdmin`, `wellKnownDelegation`
k8s:
ingress:
tls:
mode: external
secretName: component # Not used with 'Externally Managed'
```
Select this option is certificates are handled in front of the cluster, TLS will not be configured on the ingress for each component.
##### Well-Known Delegation
If you already host a site on your base domain, i.e. `example.com`, then you should either ensure your web server defers to the Well-Known Delegation component to serve the `.well-known` files or you should set Well-Known Delegation to `Externally Managed` and manually serve those files.
This is because Matrix clients and servers need to be able to request `https://example.com/.well-known/matrix/client` and `https://example.com/.well-known/matrix/server` respectively to work properly.
The web server hosting the base domain should either forward requests for `/.well-known/matrix/client` and `/.well-known/matrix/server` to the Well-Known Delegation component for it to serve, or a copy of the `.well-known` files will need to be added directly on the` example.com` web server.
If you don't already host a base domain `example.com`, then the Well-Known Delegation component hosts the `.well-known` files and serves the base domain i.e. `example.com`
###### Getting the contents of the `.well-known` files
1. Run `kubectl get cm/first-element-deployment-well-known -n element-onprem -o yaml` on your ESS host, it will output something similar to the below:
Config Example
```yaml
apiVersion: v1
data:
client: |-
{
"m.homeserver": {
"base_url": "https://synapse.example.com"
}
}
server: |-
{
"m.server": "synapse.example.com:443"
}
kind: ConfigMap
metadata:
creationTimestamp: "2024-06-13T09:32:52Z"
labels:
app.kubernetes.io/component: matrix-delegation
app.kubernetes.io/instance: first-element-deployment-well-known
app.kubernetes.io/managed-by: element-operator
app.kubernetes.io/name: well-known
app.kubernetes.io/part-of: matrix-stack
app.kubernetes.io/version: 1.24-alpine-slim
k8s.element.io/crdhash: 9091d9610bf403eada3eb086ed2a64ab70cc90a8
name: first-element-deployment-well-known
namespace: element-onprem
ownerReferences:
- apiVersion: matrix.element.io/v1alpha1
kind: WellKnownDelegation
name: first-element-deployment
uid: 24659493-cda0-40f0-b4db-bae7e15d8f3f
resourceVersion: "3629"
uid: 7b0082a9-6773-4a28-a2a9-588a4a7f7602
```
2. Copy the contents of the two supplied files (client and server) from the output into their own files:
- **Filename:** `client`
```json
{
"m.homeserver": {
"base_url": "https://synapse.example.com"
}
}
```
- **Filename:** `server`
```json
{
"m.server": "synapse.example.com:443"
}
```
3. Configure your webserver such that each file is served correctly at, i.e for a base domain of `example.com`:
- `https://example.com/.well-known/matrix/client`
- `https://example.com/.well-known/matrix/server`
# Database Section
Configuration options for how ESS can communicate with your PostgreSQL database.
This section of the ESS installer GUI will only be present if you are using the Kubernetes deployment option or you have opted to use your own PostgreSQL for a Standalone deployment.
If you have not yet set up your PostgreSQL, you should ensure you have done so before proceeding, see the relevant PostgreSQL section from the [Requirements and Recommendations](https://ems-docs.element.io/books/element-server-suite-classic-documentation-lts-2404/page/requirements-and-recommendations) page:
- [Standalone Deployment PostgreSQL Prerequisites](https://ems-docs.element.io/books/element-server-suite-classic-documentation-lts-2404/page/requirements-and-recommendations#bkmrk-postgresql)
- [Kubernetes Deployment PostgreSQL Prerequisites](https://ems-docs.element.io/books/element-server-suite-classic-documentation-lts-2404/page/requirements-and-recommendations#bkmrk-postgresql-1)
All settings configured via the UI in this section will be saved to your deployment.yml, with the contents of secrets being saved to secrets.yml. You will find specific configuration examples in each section.
By default, if you do not change any settings on this page, defaults will be added to your configuration file/s (see example below).
Config Example
```yml
spec:
components:
synapse:
config:
postgresql:
database: synapse
host: db.example.com
passwordSecretKey: postgresPassword
user: test-username
```
### PostgreSQL
#### Database
[](https://ems-docs.element.io/uploads/images/gallery/2024-08/image-1724150284621.png)
Config Example
```yml
spec:
components:
synapse:
config:
postgresql:
database: synapse
```
Enter the name of the PostgreSQL Database you configured per the previously mentioned [Requirements and Recommendations](https://ems-docs.element.io/books/element-server-suite-classic-documentation-lts-2404/page/requirements-and-recommendations) to use for Synapse.
#### Host
[](https://ems-docs.element.io/uploads/images/gallery/2024-08/image-1724150463007.png)
Config Example
```yml
spec:
components:
synapse:
config:
postgresql:
host: db.example.com
```
Enter the fully qualified domain name of the PostgreSQL Database you configured per the previously mentioned [Requirements and Recommendations](https://ems-docs.element.io/books/element-server-suite-classic-documentation-lts-2404/page/requirements-and-recommendations) to use for Synapse.
#### Port
[](https://ems-docs.element.io/uploads/images/gallery/2024-08/image-1724150637542.png)
Config Example
```yml
spec:
components:
synapse:
config:
postgresql:
# port not present when left as default 5432
port: 5432
```
Defaults to `5432`, either keep if correct or provide the required port of the PostgreSQL Database you configured per the previously mentioned [Requirements and Recommendations](https://ems-docs.element.io/books/element-server-suite-classic-documentation-lts-2404/page/requirements-and-recommendations) to use for Synapse.
#### SSL Mode
[](https://ems-docs.element.io/uploads/images/gallery/2024-08/image-1724150860317.png)
Config Example
```yml
spec:
components:
synapse:
config:
postgresql:
# sslMode not present when left as default `require`
sslMode: require
# sslMode: disable
# sslMode: allow
# sslMode: prefer
# sslMode: verify-ca
# sslMode: verify-full
```
Defaults to `Require` - it is not recommended to disable SSL, so for most setups, this setting should be left as default.
You should adjust to accommodate your environment as required, the options available are:
- Disable
- Allow
- Prefer
- Require
- Verify CA
- Verify Full
#### User
[](https://ems-docs.element.io/uploads/images/gallery/2024-08/image-1724151253559.png)
Config Example
```yml
spec:
components:
synapse:
config:
postgresql:
user: test-username
```
Enter the username of a user who can access the PostgreSQL Database you configured per the previously mentioned [Requirements and Recommendations](https://ems-docs.element.io/books/element-server-suite-classic-documentation-lts-2404/page/requirements-and-recommendations) to use for Synapse.
#### PostgreSQL Password
[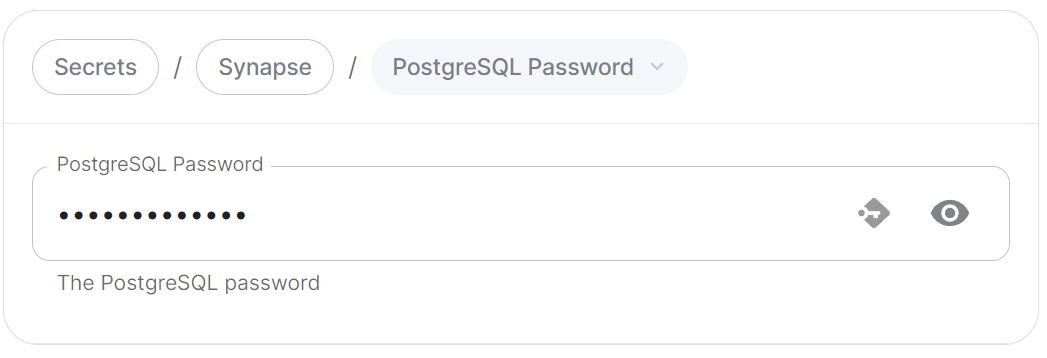](https://ems-docs.element.io/uploads/images/gallery/2024-08/image-1724151325375.png)
Config Example
- `secrets.yml`
```yml
apiVersion: v1
kind: Secret
metadata:
name: synapse
namespace: element-onprem
data:
postgresPassword: dGVzdC1wYXNzd29yZA==
```
Enter the password for the specified user who can access the PostgreSQL Database you configured per the previously mentioned [Requirements and Recommendations](https://ems-docs.element.io/books/element-server-suite-classic-documentation-lts-2404/page/requirements-and-recommendations) to use for Synapse.
### Advanced
#### Connection Pool
##### Max / Min Connections
[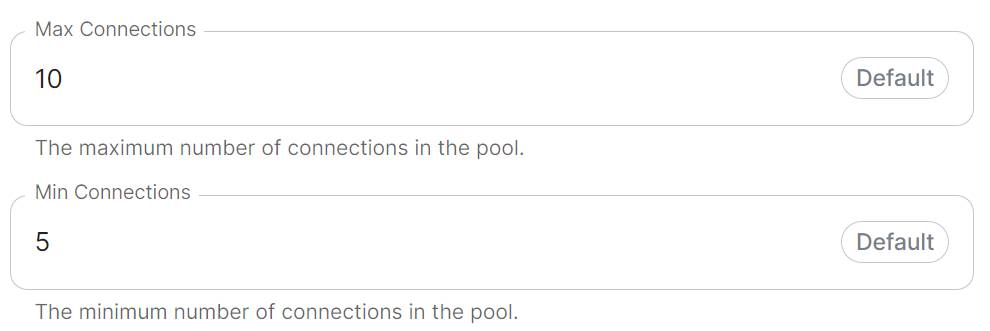](https://ems-docs.element.io/uploads/images/gallery/2024-08/image-1724151480786.png)
Config Example
```yml
spec:
components:
synapse:
config:
postgresql:
# connectionPool not present when left as default
connectionPool:
maxConnections: 10
minConnections: 5
```
In most deployments you should not need to configure these settings, however if required, you can adjust both the minimum and maximum connections in the Synapse connection pool.
# Media Section
Configuration options relating to how Media uploaded to your homeserver is handled by ESS.
The Media section allows you to customise where media uploaded to your homeserver should be stored and the maximum upload size. By default this is to a Persistent Volume Claim (PVC) however you can also configure options for using S3.
All settings configured via the UI in this section will be saved to your deployment.yml, with the contents of secrets being saved to secrets.yml. You will find specific configuration examples in each section.
By default, if you do not change any settings on this page, defaults will be added to your configuration file/s (see example below).
Config Example
- `deployment.yml`
```yml
spec:
components:
synapse:
config:
media:
maxUploadSize: 100M
volume:
size: 50Gi
```
### Config
#### Media
[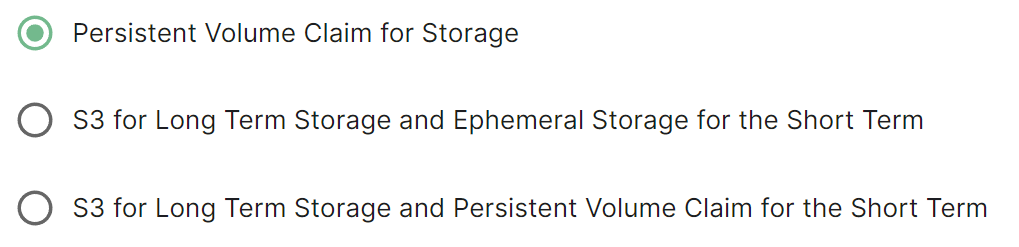](https://ems-docs.element.io/uploads/images/gallery/2024-08/image-1724316136629.png)
Config Example
```yml
spec:
components:
synapse:
config:
media:
volume: # Present if you select either Persistent Volume Claim option
size: 50Gi
```
Selecting either Persistent Volume Claim configuration option will default to using a `50Gi` volume for media.
##### S3
[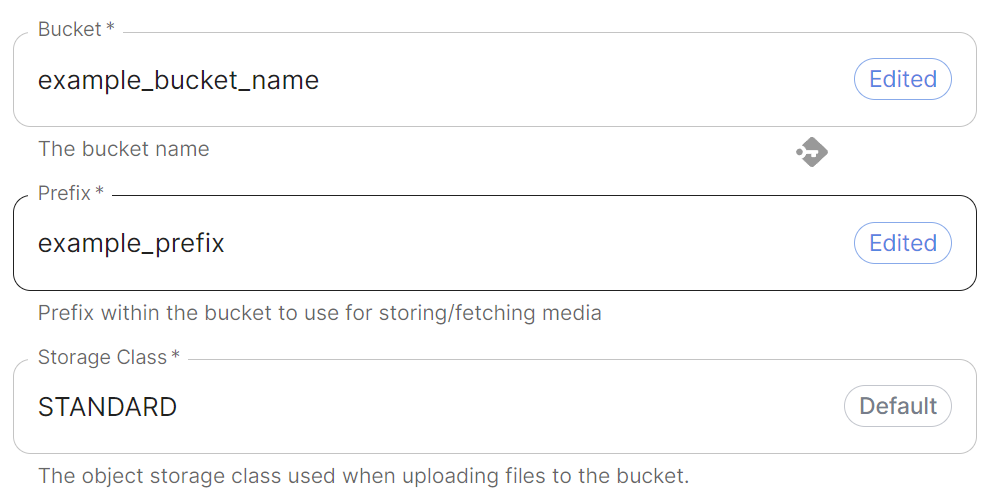](https://ems-docs.element.io/uploads/images/gallery/2024-08/image-1724317207274.png)
Config Example
```yml
spec:
components:
synapse:
config:
media:
s3:
bucket: example_bucket_name
prefix: example_prefix
storageClass: STANDARD # Not present if left as default
```
Provide your bucket name and a prefix within the bucket to use. You can also adjust the storage class however it is recommended to leave it as `STANDARD` unless you have a specific requirement to change.
##### Authentication
[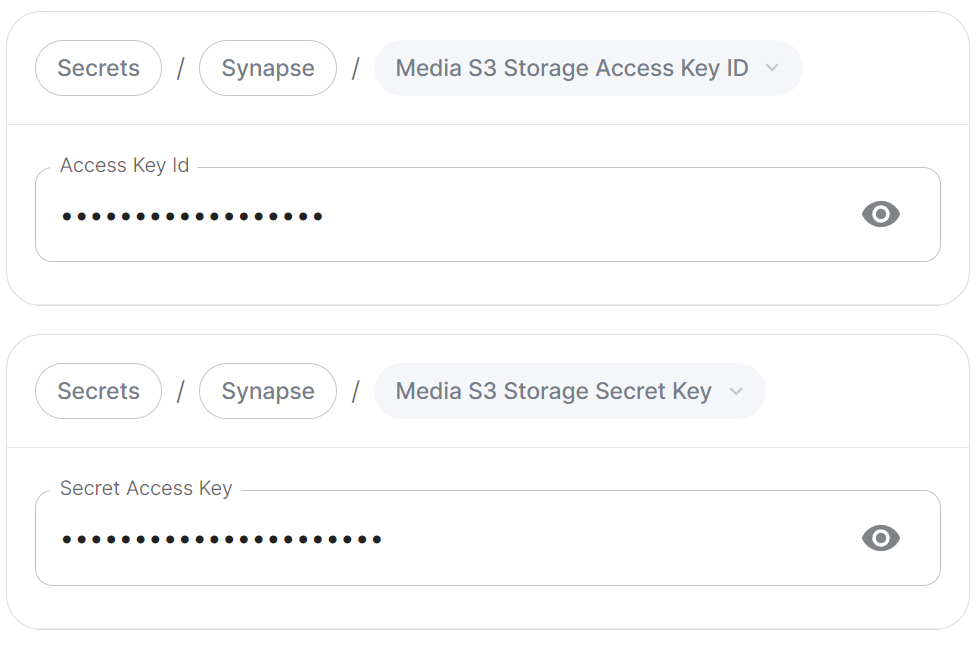](https://ems-docs.element.io/uploads/images/gallery/2024-08/image-1724317470948.png)
Config Example
- `secrets.yml`
```yml
apiVersion: v1
kind: Secret
metadata:
name: synapse
namespace: element-onprem
data:
mediaS3StorageAccessKeyId: ZXhhbXBsZWFjY2Vzc2tleWlk
mediaS3StorageSecretKey: ZXhhbXBsZXNlY3JldGFjY2Vzc2tleQ==
```
Provide any credentials (`Access Key` ID and `Secret Access Key`) required to authenticate access to the specified S3 bucket.
##### Region
[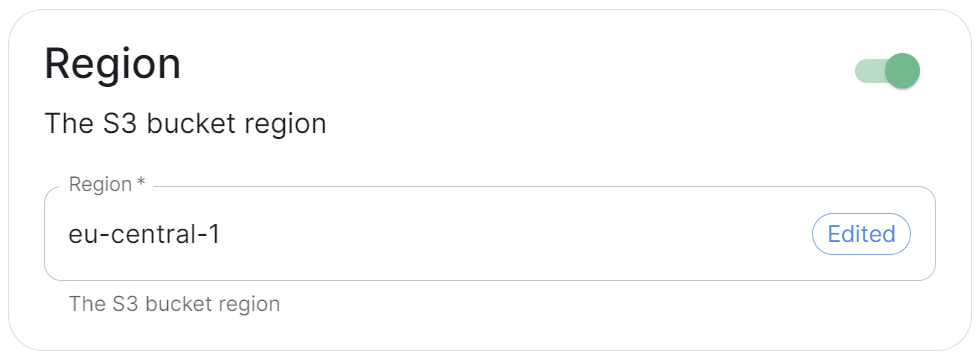](https://ems-docs.element.io/uploads/images/gallery/2024-08/image-1724317725103.png)
Config Example
```yml
spec:
components:
synapse:
config:
media:
s3:
region: eu-central-1 # Not present if disabled
```
Toggle on this section to be able to specify the S3 bucket region you wish to use.
##### Endpoint URL
[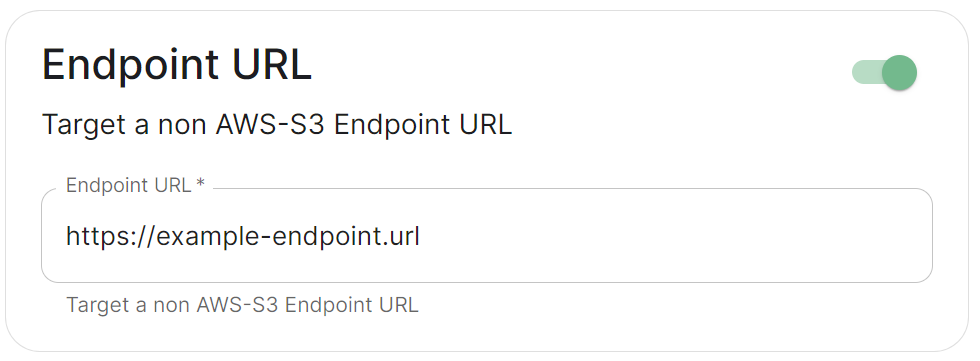](https://ems-docs.element.io/uploads/images/gallery/2024-08/image-1724318298780.png)
Config Example
```yml
spec:
components:
synapse:
config:
media:
s3:
endpointUrl: https://example-endpoint.url # Not present if disabled
```
Toggle on this section to be able to specify a non-AWS S3 endpoint URL.
##### Local Cleanup
Config Example
```yml
spec:
components:
synapse:
config:
media:
s3:
# Not present if disabled
# localCleanup: {} # If defaults left as-is
localCleanup:
frequency: 2h # Only present if changed from default
threshold: 2d # Only present if changed from default
```
Toggle on this section to control the frequency of local storage cleanup and the threshold since media was last accessed before it should be offloaded to S3.
#### Max Upload Size
[](https://ems-docs.element.io/uploads/images/gallery/2024-08/image-1724316586345.png)
Config Example
```yml
spec:
components:
synapse:
config:
media:
maxUploadSize: 100M
```
By default the Max Upload size is `100M`, here you can adjust this value to allow for larger or smaller uploads on your homeserver. The desired file size should be specified in bytes ending with `M` or `K`.
# Cluster Section
Settings specific to the environment which you are deploying ESS into such as CA.
In the Cluster section you will find options to configure settings specific to the cluster which Element Deployment will run on top of. Initially only one option is presented, however some additional options are presented under 'Advanced'. By default, it is unlikely you should need to configure anything on this page.
All settings configured via the UI in this section will be saved to your deployment.yml, with the contents of secrets being saved to secrets.yml. You will find specific configuration examples in each section.
Config Example
```yml
metadata:
annotations:
ui.element.io/layer: |
global:
config:
adminAllowIps:
_value: defaulted
k8s:
ingresses:
tls:
certmanager:
_value: defaulted
spec:
components:
synapseAdmin:
config:
hostOrigin: >-
https://admin.example.com,https://admin.example.com:8443
global:
config:
adminAllowIps:
- 0.0.0.0/0
- '::/0'
k8s:
ingresses:
tls:
certmanager:
issuer: letsencrypt
mode: certmanager
```
### Config
#### Certificate Authority
[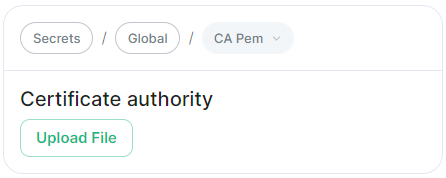](https://ems-docs.element.io/uploads/images/gallery/2024-05/image-1716367827040.png)
Config Example
- `secrets.yml`
```yml
apiVersion: v1
kind: Secret
metadata:
name: global
namespace: element-onprem
data: # Added to the `global`, `element-onprem` secret as `ca.pem` under the `data` section. Other values may also be present here.
ca.pem: >-
base64encodedCAinPEMformatString
```
If you are using self-signed certificates, you will need to provide the certificate of the Certificate Authority in PEM encoded format. Just like with any certificate file uploaded to the Certificates section (and those yet to be uploaded for specific integrations), it is strongly advised to include the full certificate chain to reduce the liklihood of certificate-based issues post deployment.
### Advanced
#### Config
##### Images Digests Config Map
[](https://ems-docs.element.io/uploads/images/gallery/2024-05/image-1716369839915.png)
Config Example
- `deployment.yml`
```yml
metadata:
annotations:
ui.element.io/layer: |
global:
config:
imagesDigestsConfigMap: {} # Remove if no longer defined in `spec`, `global`, `config`
spec:
global:
config:
imagesDigestsConfigMap: example # Remove if no longer required
```
Used when you want to [Customise container images used by ESS](https://ems-docs.element.io/books/element-server-suite-classic-documentation-lts-2404/page/customise-containers-used-by-ess), see that guide for a detailed breakdown of using this option.
##### DNS Delegation
[](https://ems-docs.element.io/uploads/images/gallery/2024-05/image-1716371648843.png)
Config Example
- `deployment.yml`
```yml
metadata:
annotations:
ui.element.io/layer: |
global:
config:
supportDnsFederationDelegation: {} # Remove if no longer defined in `spec`, `global`, `config`
spec:
global:
config:
# supportDnsFederationDelegation: false # Default value when not defined
supportDnsFederationDelegation: true
```
It is highly discouraged from enabling support for DNS Federation Delegation, a significant number of features across ESS components are configured via .well-known files deployed by WellKnownDelegation. Enabling this will prevent those features from working so you may have a degraded experience.
This option should be used to allow Federation Delegation via a DNS SRV record instead of the standard `.well-known` method. You will need to enable this option if you wish to deploy a homeserver to a base domain where you cannot direct requests to `/.well-known/matrix/client` and `/.well-known/matrix/server` to the WellKnown pod (or host the files at those URLs manually).
You can read more about [SRV DNS Record Delegation](https://element-hq.github.io/synapse/latest/delegate.html#srv-dns-record-delegation) and the [Matrix Server Spec Resolving Server Names](https://spec.matrix.org/latest/server-server-api/#resolving-server-names) for more information, but once enabled you should ensure you have configured a DNS SRV record in the below format which points to your specified Synapse domain:
```
_matrix-fed._tcp.
```
##### TLS Verification
[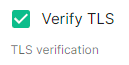](https://ems-docs.element.io/uploads/images/gallery/2024-05/image-1716371659046.png)
Config Example
- `deployment.yml`
```yml
metadata:
annotations:
ui.element.io/layer: |
global:
config:
verifyTls: {} # Remove if no longer defined in `spec`, `global`, `config`
spec:
global:
config:
# verifyTls: true # Default value when not defined
verifyTls: false
```
You can toggle TLS verification off via this option, however, it is strongly advised to keep this enabled unless you have a specific requirement.
##### Generic Shared Secret
[](https://ems-docs.element.io/uploads/images/gallery/2024-05/image-1716371679873.png)
Config Example
- `secrets.yml`
```yml
apiVersion: v1
kind: Secret
metadata:
name: global
namespace: element-onprem
data: # Added to the `global`, `element-onprem` secret as `genericSharedSecret` under the `data` section. Other values may also be present here.
genericSharedSecret: QmdrWkVzRE5aVFJSOTNKWVJGNXROTG10UTFMVWF2
```
A random Generic Shared Secret will be generated and set when you run the installer for the first time, you shouldn't need to change this unless specifically advised.
##### Admin Allow IPs
[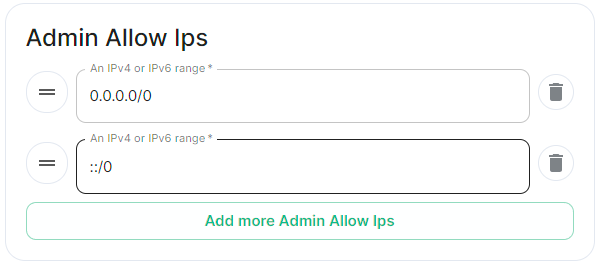](https://ems-docs.element.io/uploads/images/gallery/2024-05/image-1716371743386.png)
Config Example
- `deployment.yml`
```yml
metadata:
annotations:
ui.element.io/layer: |
global:
config:
adminAllowIps:
# _value: defaulted # Default value
'0': {}
'1': {}
spec:
global:
config:
# adminAllowIps: # Default values
# - 0.0.0.0/0
# - '::/0'
adminAllowIps:
- 192.168.0.1/24
- 127.0.0.1/24
```
This option allows you to configure the IP addresses (specifically or range/s) allowed to access the deployed Synapse Admin, in most cases, you shouldn't need to configure this as access to any administration requires logging in with a Matrix ID designated as a Synapse Admin.
# Synapse Section
The Synapse configuration options for your Matrix Homeserver incl. registration & encryption.
Synapse is the Matrix homeserver that powers ESS, in this section you will be customising settings relating to your homeserver, analogous with settings you'd set in the `homeserver.yml` if configuring Synapse manually.
All settings configured via the UI in this section will be saved to your deployment.yml, with the contents of secrets being saved to secrets.yml. You will find specific configuration examples in each section.
By default, if you do not change any settings on this page, defaults will be added to your configuration file/s (see example below).
Config Example
- `deployment.yml`
```yml
metadata:
annotations:
ui.element.io/layer: |
components:
synapse:
config:
_value: defaulted
k8s:
haproxy:
_value: defaulted
redis:
_value: defaulted
synapse:
_value: defaulted
spec:
components:
synapse:
config:
maxMauUsers: 250
media:
volume:
size: 50Gi
urlPreview:
config:
acceptLanguage:
- en
k8s:
haproxy:
workloads:
resources:
limits:
memory: 200Mi
requests:
cpu: 100m
memory: 100Mi
redis:
workloads:
resources:
limits:
memory: 50Mi
requests:
cpu: 50m
memory: 50Mi
synapse:
workloads:
resources:
limits:
memory: 4Gi
requests:
cpu: 100m
memory: 100Mi
```
- `secrets.yml`
```yml
apiVersion: v1
kind: Secret
metadata:
name: synapse
namespace: element-onprem
data:
adminPassword: exampleAdminPassword
macaroon: exampleMacaroon
registrationSharedSecret: exampleRegistrationSharedSecret
signingKey: >-
exampleBase64EncodedSigningKey
```
### Profile
The profile section automatically configures [Synapse Workers](https://ems-docs.element.io/books/element-server-suite-classic-documentation-lts-2404/page/synapse-section-workers) so you don't have to, optimising your deployment to align with the settings you define based on our recommendations.
The options you set here do not have to align with what you configure for your homeserver.
For example, you may wish for your server to be able to handle greater than 500 Monthly Active Users, so you select 2500 users. When you later define the [`Max MAU Users`](https://ems-docs.element.io/link/447#bkmrk-max-mau-users) in the Config section below, you can choose any number you wish.
The same applies with Federation, you can optimise your deployment to suit Open Federation but opt to close it in the dedicated Federation section.
#### Monthly Active Users
[](https://ems-docs.element.io/uploads/images/gallery/2024-08/image-1724313947283.png)
Config Example
```yml
metadata:
annotations:
ui.element.io/profile: |
components:
synapse:
_subvalues:
mau: 500
# mau: 2500
# mau: 10000
```
Here you should select the option that covers how many [Monthly Active Users](https://element-hq.github.io/synapse/latest/usage/administration/monthly_active_users.html) i.e. if you think you'll have ~800 users, you should select 2500 to optimise your setup to handle those users.
#### Federation Type
[](https://ems-docs.element.io/uploads/images/gallery/2024-08/image-1724313960170.png)
Config Example
```yml
metadata:
annotations:
ui.element.io/profile: |
components:
synapse:
_subvalues:
fed: closed
# fed: limited
# fed: open
```
It is recommended to align with how you plan to configure [Federation](https://ems-docs.element.io/books/element-server-suite-classic-documentation-lts-2404/page/synapse-section-federation) to ensure you're Synapse Workers are setup to handle the associated federation.
### Config
#### Accept Invites
[](https://ems-docs.element.io/uploads/images/gallery/2024-02/image-1707395805101.png)
Config Example
```yml
spec:
components:
synapse:
config:
acceptInvites: manual
# acceptInvites: auto
# acceptInvites: auto_dm_only
```
This enables a Synapse module called [Auto-Accept Invite](https://github.com/matrix-org/synapse-auto-accept-invite) which is used to automatically accept invites.
**Manual** retains the original behaviour, requiring users to accept invites to rooms, including Direct Messages.
**Auto** will automatically accept all invites to rooms, including Direct Messages.
**Auto DM Only** will only automatically accept invites to Direct Messages.
#### Max MAU Users
[`max_mau_value`](https://element-hq.github.io/synapse/latest/usage/configuration/config_documentation.html#max_mau_value)
[`limit_usage_by_mau`](https://element-hq.github.io/synapse/latest/usage/configuration/config_documentation.html#limit_usage_by_mau)
[](https://ems-docs.element.io/uploads/images/gallery/2024-02/image-1707395820549.png)
Config Example
```yml
spec:
components:
synapse:
config:
maxMauUsers: 250
```
Synapse can be configured to record the number of [Monthly Active Users](https://element-hq.github.io/synapse/latest/usage/administration/monthly_active_users.html) (also referred to as MAU) on a given homeserver, MAU only tracks local users. This option sets the hard limit of monthly active users above which the server will start blocking users. See [Monthly Active Users](https://element-hq.github.io/synapse/latest/usage/administration/monthly_active_users.html) from the Synapse documentation, including [`max_mau_value`](https://element-hq.github.io/synapse/latest/usage/configuration/config_documentation.html#max_mau_value) and [`limit_usage_by_mau`](https://element-hq.github.io/synapse/latest/usage/configuration/config_documentation.html#limit_usage_by_mau) to learn more.
#### Registration
[`enable_registration`](https://element-hq.github.io/synapse/latest/usage/configuration/config_documentation.html#enable_registration)
[](https://ems-docs.element.io/uploads/images/gallery/2024-02/image-1707395832675.png)
Config Example
```yml
spec:
components:
synapse:
config:
registration: open
# registration: custom
# registration: closed
```
**Open** enables registration for new users, users will be able create an account via Matrix clients that support it, i.e. Element Web. Specifically, setting this option is the equivalent to setting both [`enable_registration`](https://element-hq.github.io/synapse/latest/usage/configuration/config_documentation.html#enable_registration) and [`enable_registration_without_verification`](https://element-hq.github.io/synapse/latest/usage/configuration/config_documentation.html#enable_registration_without_verification) to `true`.
**Closed** disables registration for new users, users will only be presented the option to login to the homeserver. You will need to either manually setup users via the Admin Console / Admin API or be using something like Delegated Authentication. **link to delegated auth page**
**Custom**, allows you to completely customise your configuration of [Registration](https://element-hq.github.io/synapse/latest/usage/configuration/config_documentation.html#registration) via the Additional Config section found under `Advanced`, you could then use it to enable verification by setting [`enable_registration_without_verification`](https://element-hq.github.io/synapse/latest/usage/configuration/config_documentation.html#enable_registration_without_verification) to `false` or other similar settings, i.e. [`registrations_require_3pid`](https://element-hq.github.io/synapse/latest/usage/configuration/config_documentation.html#registrations_require_3pid). **linked to advanced config page**
Open or Closed registration will not affect the creation of new Matrix Accounts via Delegated Authentication. New users via Delegated Authentication i.e. LDAP, SAML or OIDC, who have yet to login to the homeserver and technically do not yet have a created Matrix ID, will still have one created when they successfully authenticate regardless of if registration is Closed.
#### Admin Password
[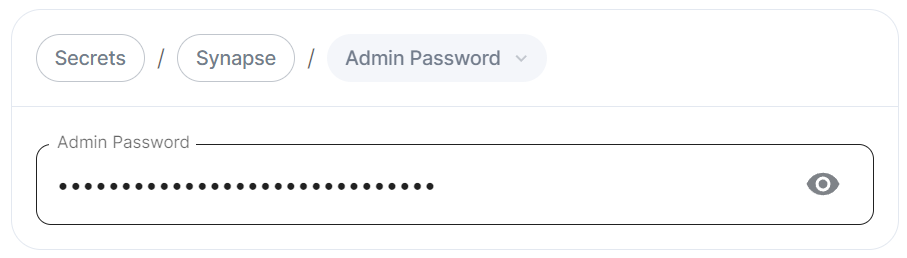](https://ems-docs.element.io/uploads/images/gallery/2024-02/image-1707395849132.png)
Config Example
- `deployment.yml`
```yml
spec:
components:
synapse:
config:
adminPasswordSecretKey: adminPassword
```
- `secrets.yml`
```yml
data:
adminPassword: ExampleAdminPasswordBase64EncodedString
```
Password for the `@onprem-admin-donotdelete` user, a Synapse Admin user automatically created to allow you to use the Admin Console. You should use this account to promote Matrix accounts you setup to Synapse Admins. When using the Admin Console via the Installer (`:8443`), you should auto-login as this account, no password required.
If you are experiencing issues with accessing the Admin Console following a wipe and reinstall, ensure you do not have the previous install credentials cached. You can clear them via your browsers' settings, then refresh the page (you will be provided with a new link via the Installer CLI) to resolve.
### Log
Unlike with most other sections, logging values set here are analogous to creating a `.log.config` instead of the `homeserver.yml`. See the [Logging Sample Config File](https://element-hq.github.io/synapse/latest/usage/configuration/logging_sample_config.html) for further reference.
#### Root Level
[](https://ems-docs.element.io/uploads/images/gallery/2024-02/image-1707395984727.png)
Config Example
```yml
spec:
components:
synapse:
config:
log:
rootLevel: Info
# rootLevel: Debug
# rootLevel: Warning
# rootLevel: Error
# rootLevel: Critical
```
As defined under the [Configuration file format](https://docs.python.org/3/library/logging.config.html#configuration-file-format) section of the Python docs, the available options presented by the Installer are `DEBUG`, `INFO`, `WARNING`, `ERROR` and `CRITICAL`. These represent different severity levels for log messages and help control the verbosity of log output which help to filter messages based on their importance.
- `DEBUG`: Detailed information, typically used for debugging purposes. Messages at this level provide the most fine-grained and detailed logging.
- `INFO`: General information about the program's operation. This level is used to confirm that things are working as expected.
- `WARNING`: Indicates a potential issue or something that might cause problems in the future. It doesn't necessarily mean an error has occurred, but it's a warning about a possible concern.
- `ERROR`: Indicates a more serious issue or error in the program. When an error occurs, it might impact the functionality of the application.
- `CRITICAL`: Indicates a very severe error that may lead to the program's termination. Critical messages suggest a problem that should be addressed immediately.
When troubleshooting, increasing the log level and redeploying can help narrow down where you're experiencing issues. By default, `DEBUG` is a good option to include everything allowing you to identify a problem.
It is not advised to leave your Logging Level at anything other than the default, as more verbose logging may expose information that should otherwise not be accessible. When sharing logs, remember to redact any sensitive information you do not wish to share.
#### Sentry DSN
[](https://ems-docs.element.io/uploads/images/gallery/2024-02/image-1707396003419.png)
Config Example
```yml
spec:
components:
synapse:
config:
log:
sentryDsn: https://publickey:secretkey@sentry.io/projectid
```
Here you can specify a Sentry Data Source Name (DSN) to connect Synapse logging to a specific project within your Sentry account. A typical Sentry DSN looks like:
```php
https://:@sentry.io/
```
#### Level Overrides
[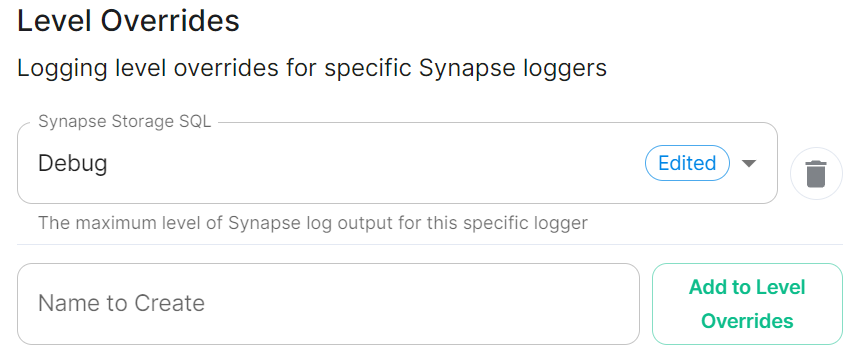](https://ems-docs.element.io/uploads/images/gallery/2024-02/image-1707396036220.png)
Config Example
```yml
spec:
components:
synapse:
config:
log:
levelOverrides:
synapse.storage.SQL: Info
# synapse.storage.SQL: Debug
# synapse.storage.SQL: Error
# synapse.storage.SQL: Warning
# synapse.storage.SQL: Critical
```
Here you can configure custom logging levels for specific Synapse loggers, i.e. `synapse.storage.SQL`. Simply add the Synapse logger and click `Add to Level Overrides`. You will then be able to select the desired logging level for that logger:
[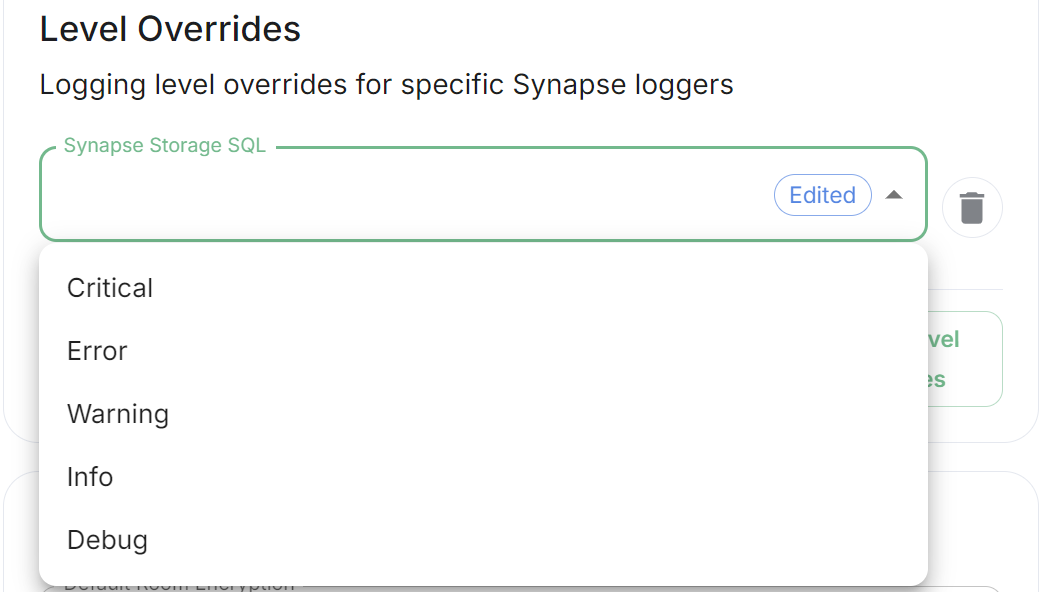](https://ems-docs.element.io/uploads/images/gallery/2024-08/image-1724340852522.png)
You can read up more on Structured Logging from the [Structured Logging](https://element-hq.github.io/synapse/latest/structured_logging.html#structured-logging) Synapse doc for more detailed guidance.
### Security
#### Default Room Encryption
[`encryption_enabled_by_default_for_room_type`](https://element-hq.github.io/synapse/latest/usage/configuration/config_documentation.html#encryption_enabled_by_default_for_room_type)
[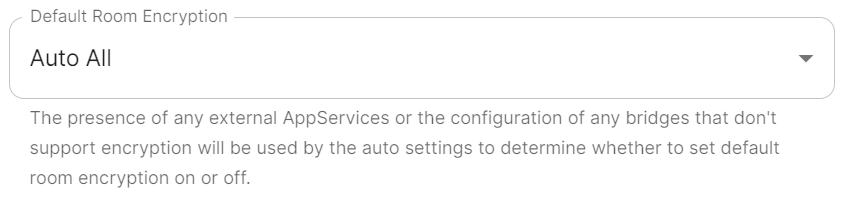](https://ems-docs.element.io/uploads/images/gallery/2024-02/image-1707396080091.png)
Config Example
```yml
spec:
components:
synapse:
config:
security:
defaultRoomEncryption: auto_all
# defaultRoomEncryption: auto_invite
# defaultRoomEncryption: forced_all
# defaultRoomEncryption: forced_invite
# defaultRoomEncryption: not_set
```
Controls whether locally-created rooms should be end-to-end encrypted by default.
This option will only affect rooms created after it is set and will not affect rooms created by other servers.
- `auto_all`
- Automatically enables encryption for all rooms created on the local server if all present integrations support it.
- `auto_invite`
- Automatically enables encryption for private rooms and private messages if all present integrations support it.
- `forced_all`
- Enforces encryption for all rooms created on the local server, regardless of the integrations supporting encryption.
- `forced_invite`
- Enforces encryption for private rooms and private messages, regardless of the integrations supporting encryption.
- `not_set`
- Does not enforce encryption, leaving room encryption configuration choice to room admins.
#### Password Policy
[`password_config`](https://element-hq.github.io/synapse/latest/usage/configuration/config_documentation.html#password_config)
[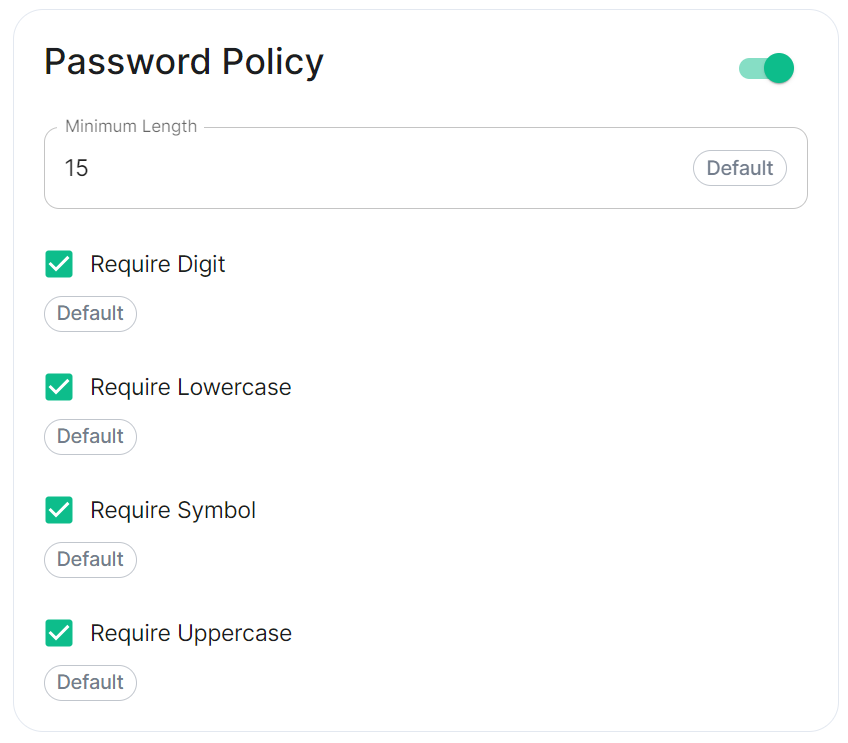](https://ems-docs.element.io/uploads/images/gallery/2024-02/image-1707243135026.png)
Config Example
```yml
spec:
components:
synapse:
config:
security:
# Not present when disabled
# passwordPolicy: # {} When enabled with default settings
passwordPolicy: # Only configured like so when values changed from thier defaults
minimumLength: 20 # Default: 15
requireDigit: false # Default: true
requireLowercase: false # Default: true
requireSymbol: false # Default: true
requireUppercase: false # Default: true
```
Turning on Password Policy will allow you to define and enforce a password policy for users' accounts on your homeserver.
You may notice that despite this not being enabled, users are required when registering to set secure passwords when doing do via the Element Web client. This is because the client itself enforces secure passwords, this setting is required should you wish to ensure all accounts have enforces password requirements, as other Matrix clients may not themselves enforce secure passwords.
### Telemetry
[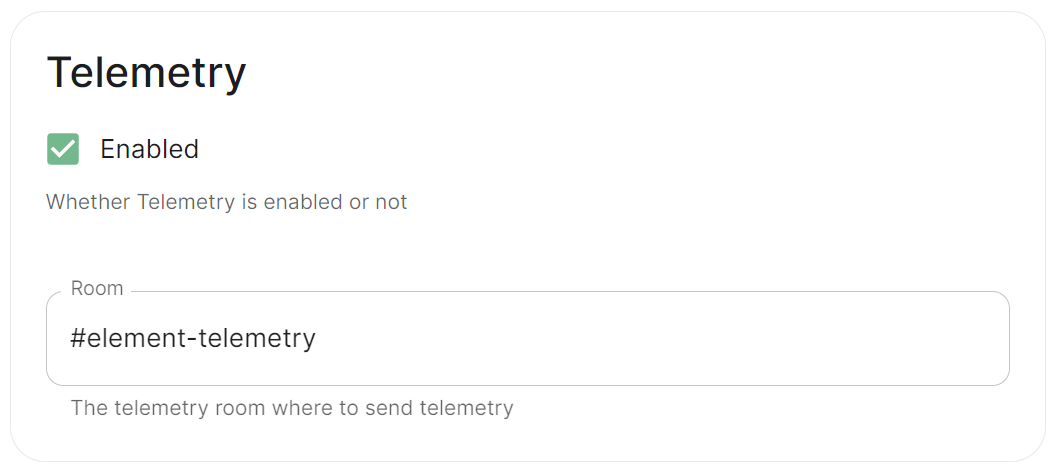](https://ems-docs.element.io/uploads/images/gallery/2024-01/image-1706547000728.png)
Config Example
```yml
spec:
components:
synapse:
config:
telemetry:
enabled: true
passwordSecretKey: telemetryPassword
room: '#element-telemetry'
```
Element collects telemetry data to understand whether or not customers are in compliance with what they've purchased, so should be left enabled unless automatic sending of telemetry is not possible (i.e. Airgapped setups). By default, ESS servers connected to the internet will automatically send telemetry to Element. Please allow this to happen by making sure you have not blocked `ems.element.io` on port `443` from your homeserver.
#### What Telemetry Data is Collected by Element?
The following is a sample telemetry packet generated by Element On-Premise:
Config Example
```
{
"_id" : ObjectId("6363bdd7d51c84d1f10a8126"),
"onPremiseSubscription" : ObjectId("62f14dd303c67b542efddc4f"),
"payload" : {
"data" : {
"activeUsers" : {
"count" : 1,
"identifiers" : {
"native" : [
"5d3510fc361b95a5d67a464a188dc3686f5eaf14f0e72733591ef6b8da478a18"
]
},
"period" : {
"end" : 1667481013777,
"start" : 1666970260518
}
}
},
"generationTime" : 1667481013777,
"hostname" : "element.demo",
"instanceId" : "bd3bbf92-ac8c-472e-abb5-74b659a04eec",
"type" : "synapse",
"version" : 1
},
"request" : {
"clientIp" : "71.70.145.71",
"userAgent" : "Synapse/1.65.0"
},
"schemaVersion" : 1,
"creationTimestamp" : ISODate("2022-11-03T13:10:47.476Z")
}
```
#### Submitting Telemetry Data to Element
If you are unable to allow Element's telemetry upload to take place, either because you are airgapped or need to block `ems.element.io` then you will need to manually submit telemetry data to Element.
In order to gather telemetry data, you will need to use the element-telemetry-export.py script, which comes with the installer.
To do this, run:
```bash
cd ~/.element-enterprise-server/installer/lib
/usr/bin/env python3 ./element-telemetry-export.py
```
You will be prompted for an access token:
```bash
Matrix user access token not specified in the "MATRIX_USER_ACCESS_TOKEN" environment variable. Please provide the access token and hit enter:
```
You will need to provide a valid access token for a user who has access to the telemetry room. This can be found by logging in to Element Web as this user, going to "All Settings", then clicking "Help & About" and finally expanding the section for "Access Token".
[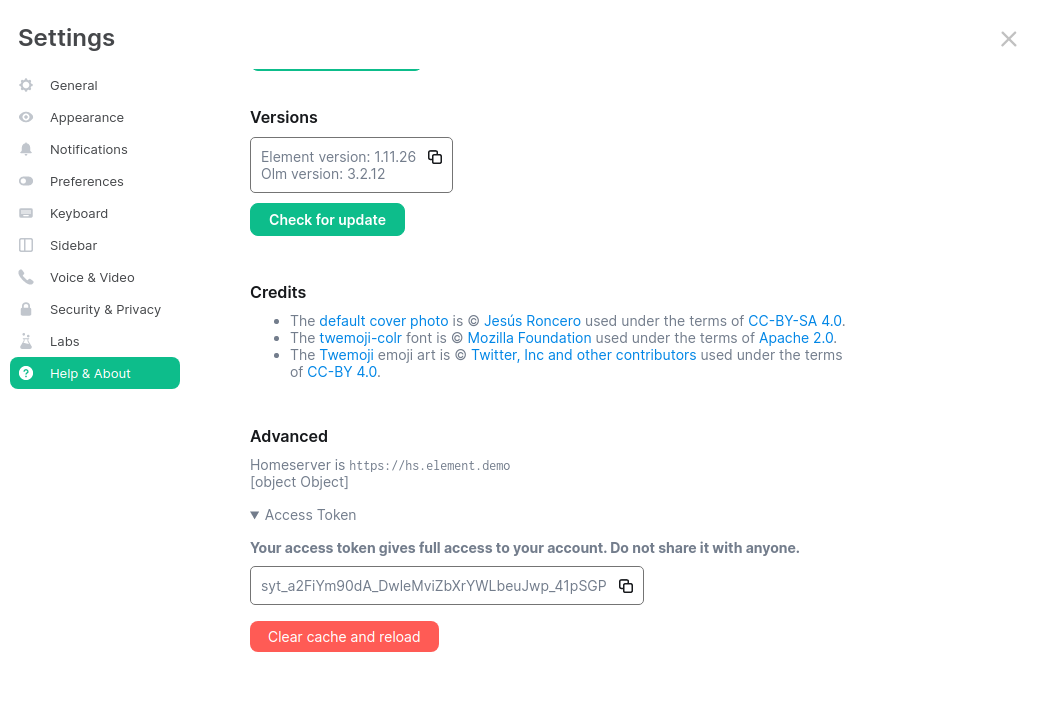](https://ems-docs.element.io/uploads/images/gallery/2023-04/accesstoken.png)
Provide the access token to the prompt and hit enter.
```
2023-04-18 15:36:41,580:INFO:Parsing configuration file (/home/karl1/.element-enterprise-server/config/telemetry-config.json)
2023-04-18 15:36:41,581:INFO:Performing Matrix sync with homeserver (https://hs.element.demo)
2023-04-18 15:36:41,643:INFO:Scanning page 1
2023-04-18 15:36:41,716:INFO:Scanning page 2
2023-04-18 15:36:41,782:INFO:Writing 19 telemetry events to ZIP file (/home/karl1/.element-enterprise-server/installer/lib/telemetry_2023-04-18.zip)
2023-04-18 15:36:41,783:INFO:Saving some internal state (for next time)
```
Once you have done this, you will have some messages that look similar to the above and you will have a new zip file in this directory with a date stamp in the format `telemetry_YYYY-MM-DD.zip`. In my case, I have `telemetry_2023-04-18.zip`.
If you are having SSL connectivity issues with the exporter, you may wish to either disable TLS verification or provide a CA certificate to the exporter with these optional command line parameters:
```
--disable-tls-verification
Do not check SSL certificate validity when querying the Matrix server
--ca-cert-path CA_CERT_PATH
Specify the path to the CA file (or a directory) to use when verifying Matrix server's
SSL certificate. Consult README.md for more details
```
Then browse to and click "Upload Telemetry" next to the subscription you are uploading the data for:
[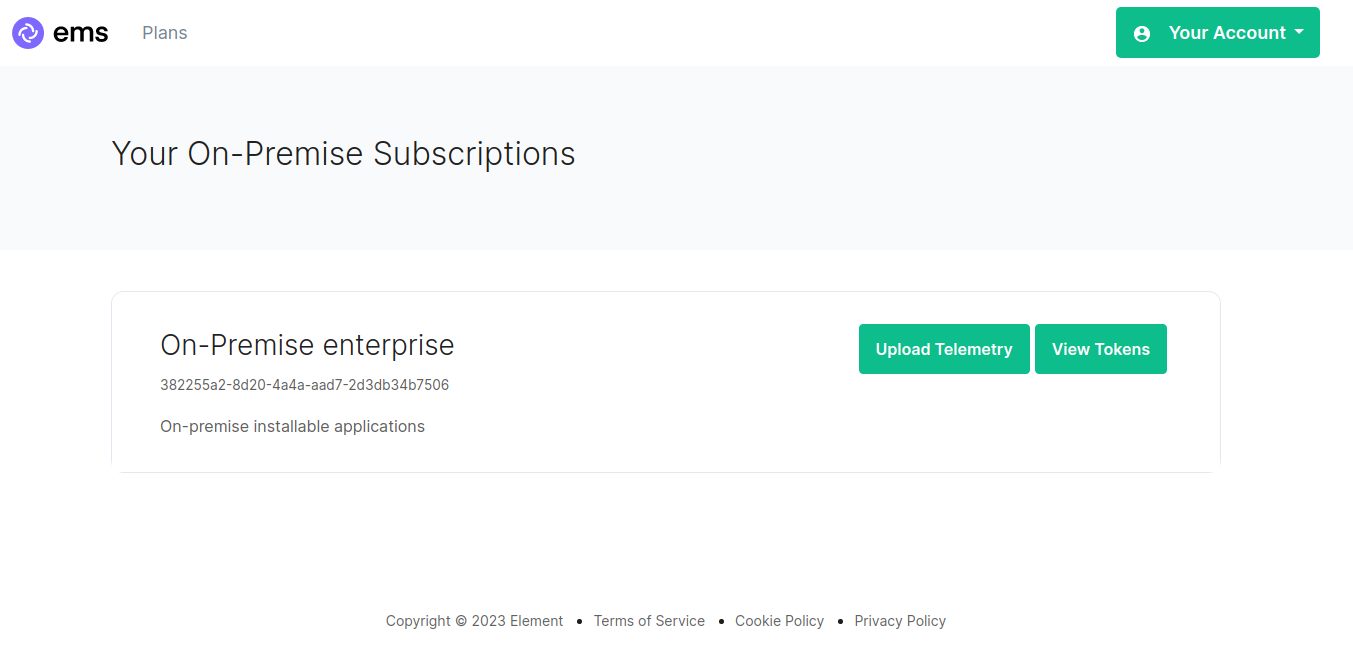](https://ems-docs.element.io/uploads/images/gallery/2023-04/ems-subs.png)
Click browse, find the telemetry file then click "Submit Telemetry":
[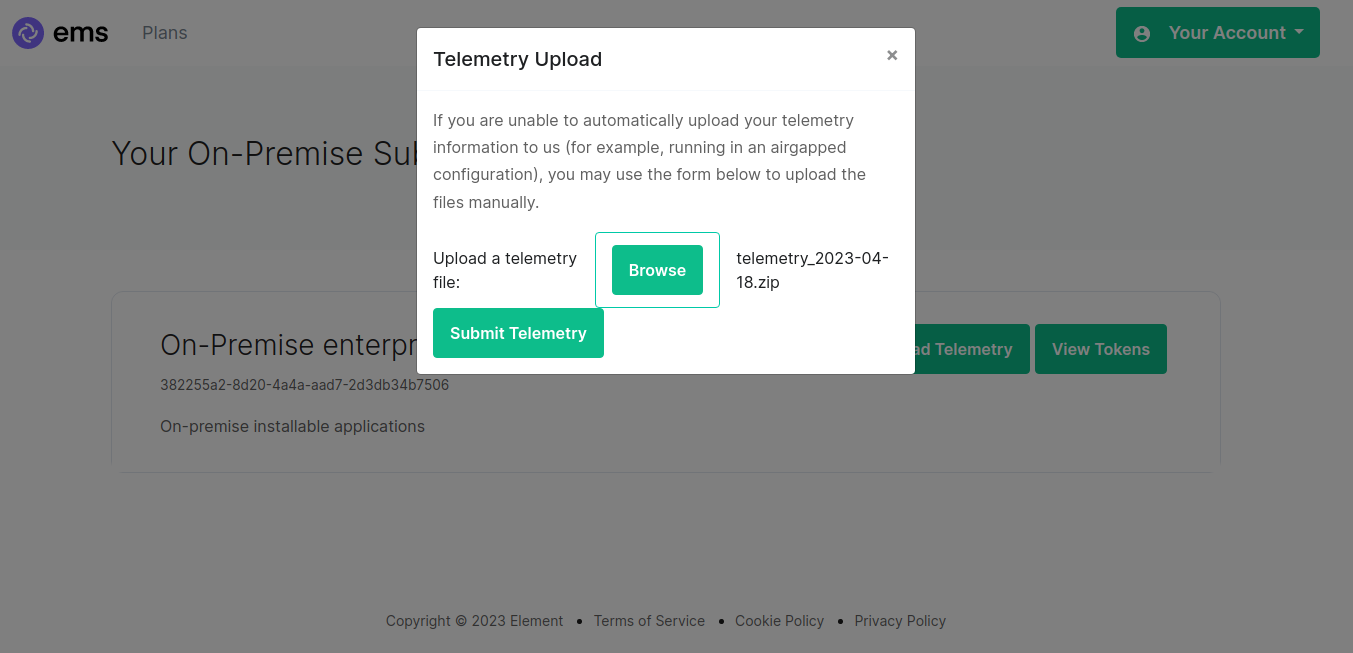](https://ems-docs.element.io/uploads/images/gallery/2023-04/browse-telemetry.png)
Once successful, you will see this screen:
[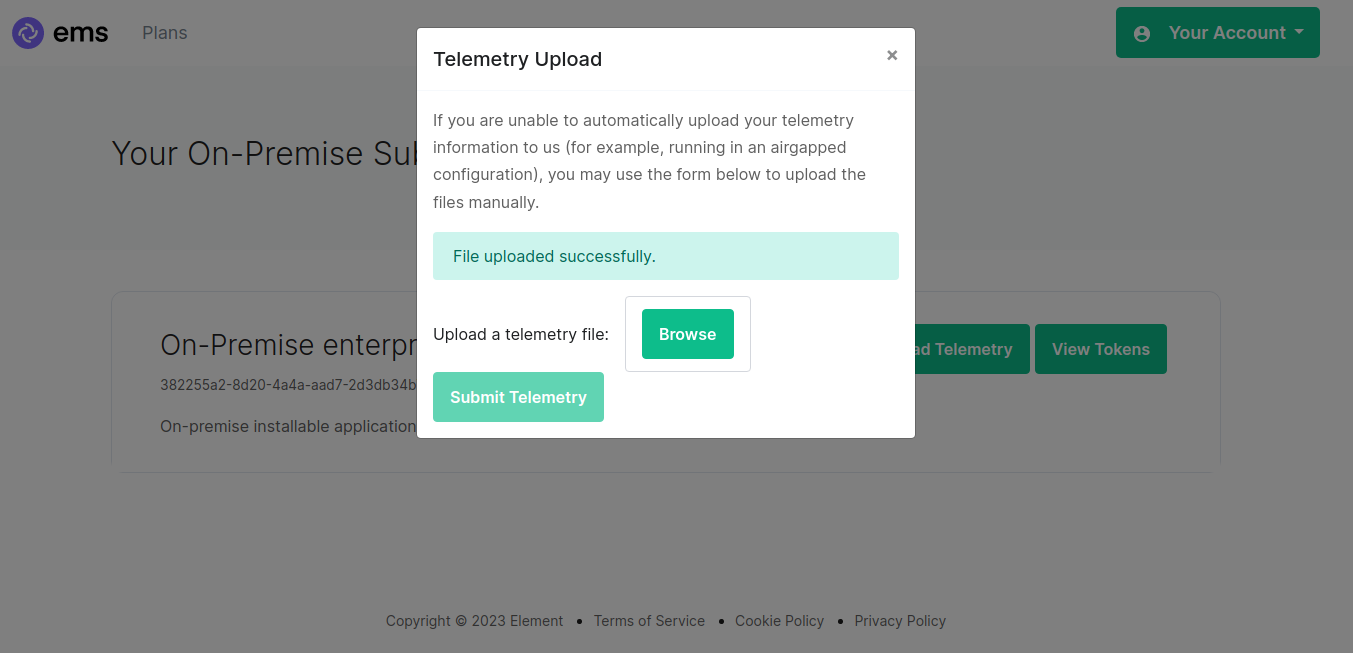](https://ems-docs.element.io/uploads/images/gallery/2023-04/success.png)
You can then close the upload window.
#### Matrix Network Stats
[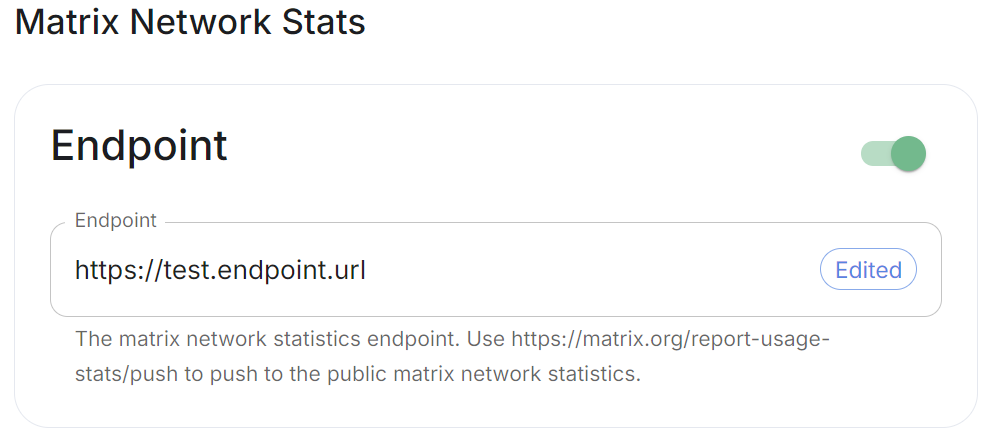](https://ems-docs.element.io/uploads/images/gallery/2024-08/image-1724325098306.png)
Config Example
```yml
spec:
components:
synapse:
config:
telemetry:
matrixNetworkStats:
endpoint: https://test.endpoint.url
```
Enable Matrix Network Stats if you'd like to report your homeserver usage statistics to a statistics collection server. Per the tooltip, you can enter `https://matrix.org/report-usage-stats/push` to contribute to the public Matrix network statistics collection or enter your own endpoint.
See [Reporting Homeserver Usage Statistics](https://element-hq.github.io/synapse/latest/usage/administration/monitoring/reporting_homeserver_usage_statistics.html#reporting-homeserver-usage-statistics) for more information on the statistics available and [Using a Custom Statistics Collection Server](https://element-hq.github.io/synapse/latest/usage/administration/monitoring/reporting_homeserver_usage_statistics.html#reporting-homeserver-usage-statistics) to see how-to setup your own statistics endpoint.
### URL Preview
[`url_preview_enabled`](https://element-hq.github.io/synapse/latest/usage/configuration/config_documentation.html#url_preview_enabled)
[](https://ems-docs.element.io/uploads/images/gallery/2024-02/image-1707396190187.png)
Config Example
```yml
spec:
components:
synapse:
config:
urlPreview: {} # {} When disabled, otherwise enabled with config as detailed in sections below.
```
URL previews involve fetching information from a URL (e.g., a website link) and displaying a preview of the content, such as a title, description, and an image. This feature can be useful for enhancing the user experience by providing more context about shared URLs in chat messages.
Enabling or disabling URL previews can impact the amount of information displayed in the chat interface, and it can also have privacy implications as fetching URL previews involves making requests to external servers to retrieve metadata.
#### Default Blacklist
When enabling URL Preview, a default blacklist using [`url_preview_ip_range_blacklist`](https://element-hq.github.io/synapse/latest/usage/configuration/config_documentation.html#url_preview_ip_range_blacklist) is configured for all private networks (see ranged below) to avoid leaking information by asking for preview of links pointing to private paths of the infrastructure. While this blacklist cannot be changed, you can whitelist specific ranges using [IP Range Allowed](#bkmrk-ip-range-allowed).
Config Example
```yml
url_preview_ip_range_blacklist:
- '192.168.0.0/16'
- '100.64.0.0/10'
- '192.0.0.0/24'
- '169.254.0.0/16'
- '192.88.99.0/24'
- '198.18.0.0/15'
- '192.0.2.0/24'
- '198.51.100.0/24'
- '203.0.113.0/24'
- '224.0.0.0/4'
- '::1/128'
- 'fe80::/10'
- 'fc00::/7'
- '2001:db8::/32'
- 'ff00::/8'
- 'fec0::/10'
```
#### Config
##### Accept Language
[`url_preview_accept_language`](https://matrix-org.github.io/synapse/latest/usage/configuration/config_documentation.html#url_preview_accept_language)
[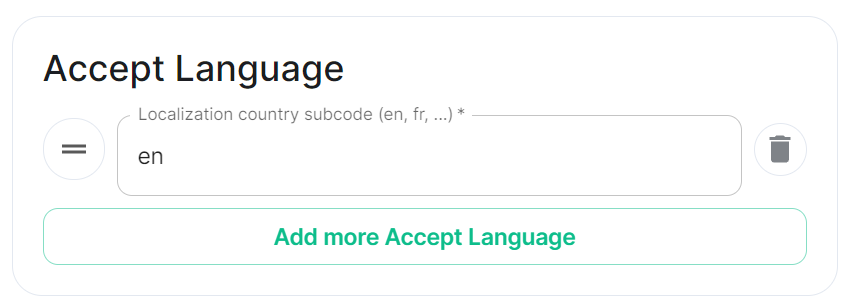](https://ems-docs.element.io/uploads/images/gallery/2024-02/image-1707396225509.png)
Config Example
```yml
spec:
components:
synapse:
config:
urlPreview:
config:
acceptLanguage:
- en
```
By setting this configuration option, you can control the language preference that Matrix Synapse communicates to external servers when fetching URL previews. This can be useful if you want to influence the language of the content retrieved for URL previews based on the preferred language of your users.
To do so, specify the Localisation country sub-code (e.g., `en`) that should be used as the Accept-Language header value that the server should send when fetching URL previews from external websites. The Accept-Language header is an HTTP header used by web browsers and other clients to indicate the preferred language(s) for the response.
Each value is a IETF language tag; a 2-3 letter identifier for a language, optionally followed by sub-tags separated by '-', specifying a country or region variant. Multiple values can be provided by clicking `Add more Accept Language`, and a weight can be added to each by using quality value syntax (;q=). '*' translates to any language.
##### IP Range Allowed
[`url_preview_ip_range_whitelist`](https://element-hq.github.io/synapse/latest/usage/configuration/config_documentation.html#url_preview_ip_range_whitelist)
[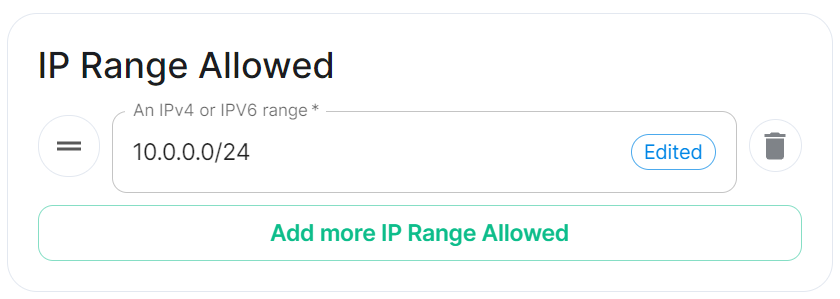](https://ems-docs.element.io/uploads/images/gallery/2024-02/image-1707396247379.png)
Config Example
```yml
spec:
components:
synapse:
config:
urlPreview:
config:
ipRangeAllowed:
- 10.0.0.0/24
```
This option allows you to provide a list of IP address CIDR ranges that URL Preview is allowed to access even if they are specified in the [Default Blacklist](#bkmrk-default-blacklist).
### User Directory
[`user_directory`](https://element-hq.github.io/synapse/latest/usage/configuration/config_documentation.html#user_directory)
[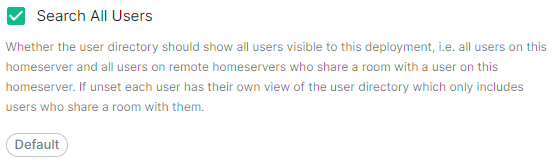](https://ems-docs.element.io/uploads/images/gallery/2024-05/image-1716373343850.png)
Config Example
```yml
spec:
components:
synapse:
config:
userDirectory: # Not present when left as default, `true`
# searchAllUsers: true
searchAllUsers: false
```
This option defines whether to search all users visible to your homeserver at the time the search is performed. If set to `true`, Synapse will return all users on the homeserver who match the search. If `false`, search results will only contain users visible in public rooms and users sharing a room with the requester.
### Delegated Auth
[](https://ems-docs.element.io/uploads/images/gallery/2024-05/image-1716373844952.png)
See the dedicated page on Delegated Authentication, [Synapse Section: Delegated Auth](https://ems-docs.element.io/books/element-server-suite-classic-documentation-lts-2404/page/synapse-section-delegated-auth)
### TURN
[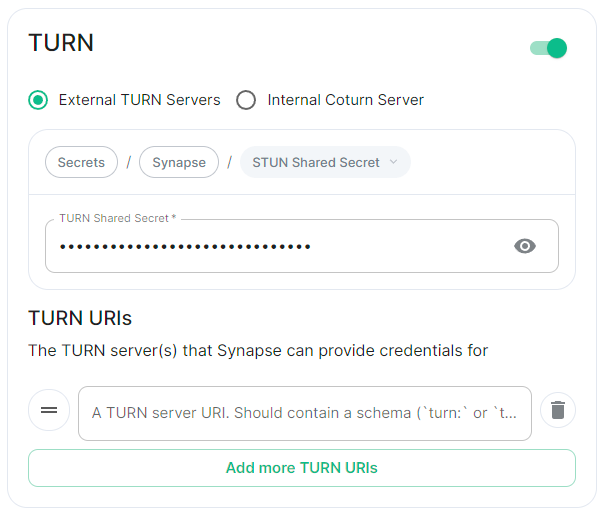](https://ems-docs.element.io/uploads/images/gallery/2024-05/image-1716373885795.png)
Config Example
- `deployment.yml`
```yml
spec:
components:
synapse:
config:
# Not present if disabled
# stun: {} # If `Internal Coturn Server` selected
stun:
sharedSecretSecretKey: stunSharedSecret
turnUris:
- turn:turn.example.com
- turns:turns.example.com
```
- `secrets.yml`
```yml
data:
stunSharedSecret: ExampleSTUNSharedSecretBase64EncodedString
```
Any provided TURN server URI should contain a schema (`turn:` or `turns:`), a hostname, optionally a port and optionally a transport parameter (`?transport=udp` or `?transport=tcp`).
### Identity Server
[`default_identity_server`](https://element-hq.github.io/synapse/latest/usage/configuration/config_documentation.html#default_identity_server)
[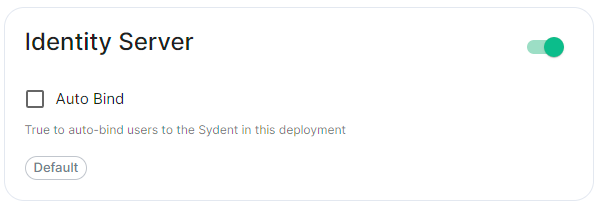](https://ems-docs.element.io/uploads/images/gallery/2024-05/image-1716373906396.png)
Config Example
```yml
spec:
components:
synapse:
config:
# Not present if disabled
# identityServer: {} # If enabled but `autoBind` not selected
identityServer:
autoBind: true
```
### HTTP Proxy
[`http_proxy`, `https_proxy`, `no_proxy`](https://element-hq.github.io/synapse/latest/setup/forward_proxy.html)
[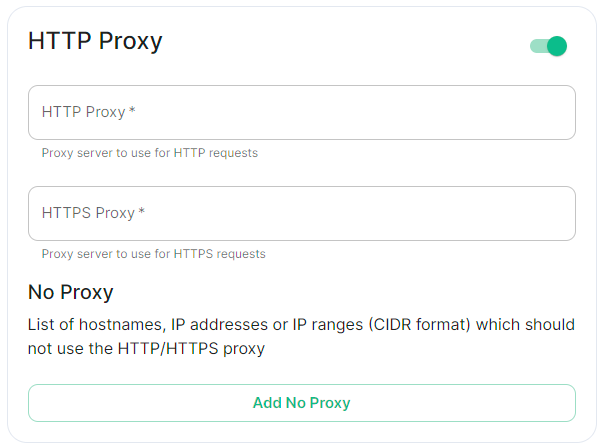](https://ems-docs.element.io/uploads/images/gallery/2024-05/image-1716373952714.png)
Config Example
```yml
spec:
components:
synapse:
config:
httpProxy:
httpProxy: http_proxy.example.com
httpsProxy: https_proxy.example.com
```
You can use Synapse with a forward or outbound proxy. An example of when this is necessary is in corporate environments behind a DMZ (demilitarized zone). Synapse supports routing outbound HTTP(S) requests via a proxy - Note: Only HTTP(S) proxy is supported, SOCKS / alternatives are no supported.
- **HTTP Proxy****.**
- Proxy server to use for HTTP requests.
- **HTTPS Proxy****.**
- Proxy server to use for HTTPS requests.
#### No Proxy
[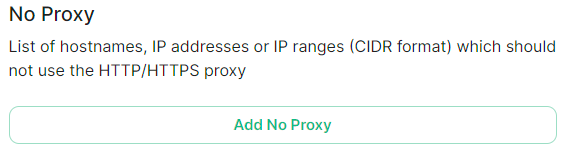](https://ems-docs.element.io/uploads/images/gallery/2024-05/image-1716375119783.png)
Config Example
```yml
spec:
components:
synapse:
config:
httpProxy:
noProxy:
- no_proxy.example.com # Hostname example
- 192.168.0.123 # IP example
- 192.168.1.1/24 # IP range example
```
Here you can specify a list of hostnames, IP addresses or IP ranges (CIDR format) which should not use the HTTP/HTTPS proxy
### Data Retention
[`retention`](https://element-hq.github.io/synapse/latest/usage/configuration/config_documentation.html#retention)
[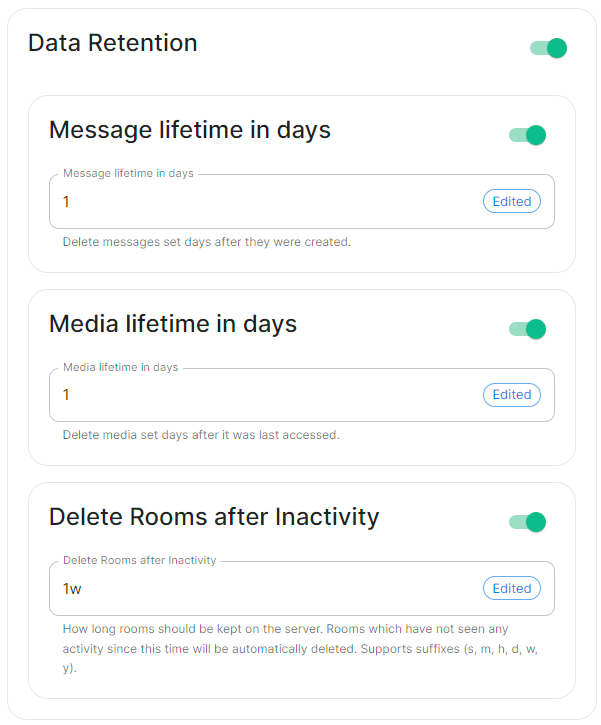](https://ems-docs.element.io/uploads/images/gallery/2024-05/image-1716373996786.png)
If this feature is enabled, Synapse will regularly look for and purge events which are older than the below specified lifetimes.
#### Message Lifetime in Days
Config Example
```yml
spec:
components:
synapse:
config:
dataRetention:
messageLifetime: 1
```
Used to specify the number of days after a message is created that it should be deleted.
#### Media Lifetime in Days
Config Example
```yml
spec:
components:
synapse:
config:
dataRetention:
mediaLifetime: 1
```
Used to specify the number of days after media is uploaded that it should be deleted.
#### Delete Rooms After Inactivity
Config Example
```yml
spec:
components:
synapse:
config:
dataRetention:
deleteRoomsAfterInactivity: 1w
```
Used to specifiy how long rooms, which have not seen any activity, should be kept on the server. Rooms inactive after the specified time will be automatically deleted. Supports suffixes:
- `s` : Seconds
- `m` : Minutes
- `h` : Hours
- `d` : Days
- `w` : Weeks
- `y` : Years
### Advanced
#### Config
##### Macaroon
[`macaroon_secret_key`](https://element-hq.github.io/synapse/latest/usage/configuration/config_documentation.html#macaroon_secret_key)
[](https://ems-docs.element.io/uploads/images/gallery/2024-05/image-1716545532340.png)
Config Example
- `secrets.yml`
```yml
data:
macaroon: ExampleMacaroonBase64EncodedString
```
A secret which is used to sign the:
- Access token for guest users
- Short-term login token used during SSO logins (OIDC or SAML2)
- Token used for unsubscribing from email notifications.
##### Registration Shared Secret
[`registration_shared_secret`](https://element-hq.github.io/synapse/latest/usage/configuration/config_documentation.html#registration_shared_secret)
[](https://ems-docs.element.io/uploads/images/gallery/2024-05/image-1716545551340.png)
Config Example
- `secrets.yml`
```yml
data:
registrationSharedSecret: ExampleRegistrationSharedSecretBase64EncodedString
```
Allows registration of standard or admin accounts by anyone who has the shared secret, even if [`enable_registration`](https://element-hq.github.io/synapse/latest/usage/configuration/config_documentation.html#enable_registration) is not Open, see [Registration](#bkmrk-registration).
##### Signing Key
[`signing-keys`](https://element-hq.github.io/synapse/latest/usage/configuration/config_documentation.html?highlight=signing#signing-keys)
[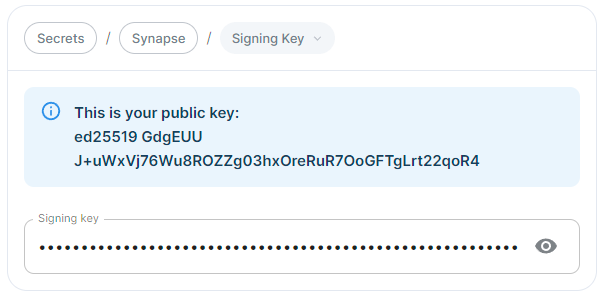](https://ems-docs.element.io/uploads/images/gallery/2024-05/image-1716545569029.png)
Config Example
- `secrets.yml`
```yml
data:
signingKey: >-
ExampleSigningKeyBase64EncodedString
```
See the dedicated page on Synapse Federation configuration, [Synapse Section: Federation](https://ems-docs.element.io/books/element-server-suite-classic-documentation-lts-2404/page/synapse-section-federation) for more details on how the Signing Key is used.
#### Additional
See the dedicated page on additional Synapse configuration, [Synapse Section: Additional Config](https://ems-docs.element.io/books/element-server-suite-classic-documentation-lts-2404/page/synapse-section-additional-config)
#### External Appservices
[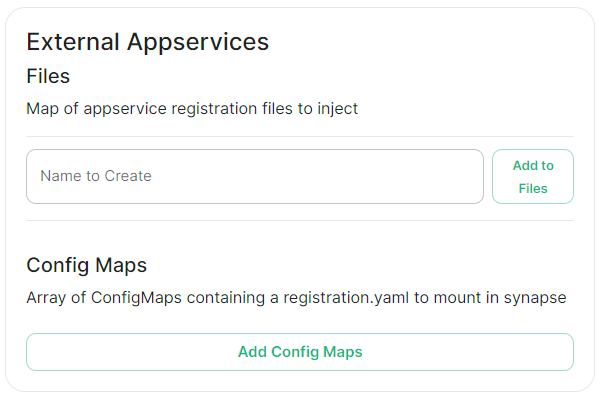](https://ems-docs.element.io/uploads/images/gallery/2024-05/image-1716546127943.png)
#### Federation
See the dedicated page on Synapse Federation configuration, [Synapse Section: Federation](https://ems-docs.element.io/books/element-server-suite-classic-documentation-lts-2404/page/synapse-section-federation)
### Synapse configuration options not available within the UI
We strongly advise against including any config not configurable via the UI as it will most likely interfere with settings automatically computed by the updater. Additional configuration options are not supported so we encourage you to first raise your requirements to Support where we can best advise on them.
An `Additional Config` section, which allows including config not currently configurable via the UI from the [Configuration Manual](https://element-hq.github.io/synapse/latest/usage/configuration/config_documentation.html), is available under the 'Advanced' section of this page. See the dedicated page on additional Synapse configuration, [Synapse Section: Additional Config](https://ems-docs.element.io/books/element-server-suite-classic-documentation-lts-2404/page/synapse-section-additional-config)
# Synapse Section: Delegated Auth
A detailed look at Delegated Authentication options available and setup examples.
At present, we support delegating the authentication of users to the following provider interfaces:
* LDAP
* SAML
* OIDC
When enabling Delegated Auth, you can still allow local users managed by Element to connect to the instance
[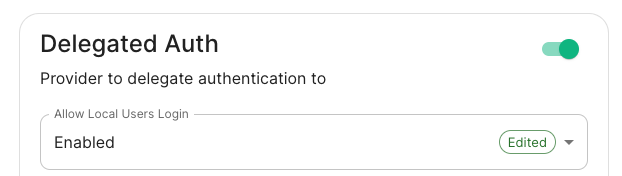](https://ems-docs.element.io/uploads/images/gallery/2023-05/screenshot-2023-05-04-at-09-23-54.png)
When `Allow Local Users Login` is `Enabled`, you can both connect to your instance using your IDP and the local database.
[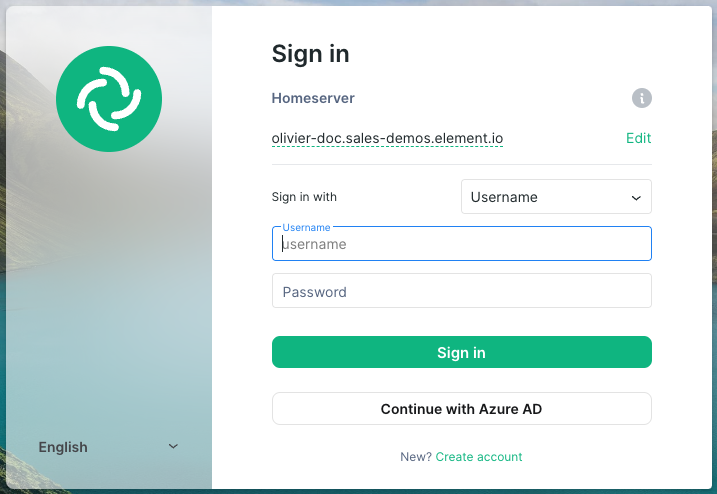](https://ems-docs.element.io/uploads/images/gallery/2023-05/screenshot-2023-05-04-at-14-30-04.png)
Different options are offered by the installer and you can combine two or more options on the same instance like enabling SAML and OIDC delegated authentication.
See the below relevant sections to your environment for specifics on getting configured.
### LDAP on Windows AD
- **Base****.** The distinguished name of the root level Org Unit in your LDAP directory.
- The distinguished name can be displayed by selecting `View` / `Advanced Features` in the Active Directory console and then, right-clicking on the object, selecting `Properties` / `Attributes Editor`.
- **Bind DN****.** The distinguished name of the LDAP account with read access.
- **Filter****.** A [LDAP filter](https://ldap.com/ldap-filters/) to filter out objects under the LDAP Base DN.
- **URI****.** The URI of your LDAP server `ldap://dc.example.com`.
- This is often your Domain Controller, can also pass in `ldaps://` for SSL connectivity.
- The following are the typical ports for Windows AD LDAP servers:
- `ldap://ServerName:389`
- `ldaps://ServerName:636`
- **LDAP Bind Password****.** The password of the AD account with read access.
- **LDAP Attributes****.**
- **Mail****.** `mail`
- **Name****.** `cn`
- **UID****.** `sAMAccountName`
### OpenID on Microsoft Azure
Before configuring within the installer, you have to configure Microsoft Azure Active Directory.
#### Set up Microsoft Azure Active Directory
- You need to create an `App registration`.
- You have to select `Redirect URI (optional)` and set it to the following, where `matrix` is the subdomain of Synapse and `example.com` is your base domain as configured on the Domains section:
```
https://matrix.example.com/_synapse/client/oidc/callback
```
[](https://ems-docs.element.io/uploads/images/gallery/2023-05/screenshot-2023-05-03-at-16-30-06.png)
For the bridge to be able to operate correctly, navigate to API permissions, add Microsoft Graph APIs, choose Delegated Permissions and add:
- `openid`
- `profile`
- `email`
Remember to grant the admin consent for those.
To setup the installer, you'll need:
- The `Application (client) ID`
- The `Directory (tenant) ID`
- A secret generated from `Certificates & Secrets` on the app.
#### Configure the installer
- **IdP Name****.** A user-facing name for this identity provider, which is used to offer the user a choice of login mechanisms in the Element UI.
- **IdP ID****.** A string identifying your identity provider in your configuration, this will be auto-generated for you (but can be changed).
- **IdP Brand****.** An optional brand for this identity provider, allowing clients to style the login flow according to the identity provider in question.
- **Issuer****.** The OIDC issuer. Used to validate tokens and (if discovery is enabled) to discover the provider's endpoints. Use `https://login.microsoftonline.com/DIRECTORY_TENNANT_ID/v2.0` replacing `DIRECTORY_TENNANT_ID`.
- **Client Auth Method****.** Auth method to use when exchanging the token. Set it to `Client Secret Post` or any method supported by your IdP.
- **Client ID****.** Set this to your `Application (client) ID`.
- **Client Secret****.** Set this to the secret value defined under "Certificates and secrets".
- **Scopes****.** By default `openid`, `profile` and `email` are added, you shouldn't need to modify these.
- **User Mapping Provider****.** Configuration for how attributes returned from a OIDC provider are mapped onto a matrix user.
- **Localpart Template****.** Jinja2 template for the localpart of the MXID. Set it to `{{ user.preferred_username.split('@')[0] }}`.
- **Display Name Template****.** Jinja2 template for the display name to set on first login. If unset, no display name will be set. Set it to `{{ user.name }}`.
- **Discover****.** Enable / Disable the use of the OIDC discovery mechanism to discover endpoints.
- **Backchannel Logout Enabled****.** Synapse supports receiving OpenID Connect Back-Channel Logout notifications. This lets the OpenID Connect Provider notify Synapse when a user logs out, so that Synapse can end that user session. This property has to bet set to `https://matrix.example.com/_synapse/client/oidc/backchannel_logout`in your identity provider, where `matrix` is the subdomain of Synapse and `example.com` is your base domain as configured on the Domains section.
### OpenID on Microsoft AD FS
#### Install Microsoft AD FS
Before starting the installation, make sure:
- your Windows computer name is correct since you won't be able to change it after having installed AD FS
- you configured your server with a static IP address
- your server joined a domain and your domain is defined under Server Manager > Local server
- you can resolve your server FQDN like computername.my-domain.com
You can find a checklist [here](https://learn.microsoft.com/en-us/windows-server/identity/ad-fs/deployment/checklist--setting-up-a-federation-server).
Steps to follow:
- Install AD CS (Certificate Server) to issue valid certificates for AD FS. AD CS provides a platform for issuing and managing public key infrastructure [PKI] certificates.
- Install AD FS (Federation Server)
##### Install AD CS
You need to install the AD CS Server Role.
- Follow this [guide](https://learn.microsoft.com/en-us/windows-server/networking/core-network-guide/cncg/server-certs/install-the-certification-authority).
##### Obtain and Configure an SSL Certificate for AD FS
Before installing AD FS, you are required to generate a certificate for your federation service. The SSL certificate is used for securing communications between federation servers and clients.
- Follow this [guide](https://learn.microsoft.com/en-us/previous-versions/windows/it-pro/windows-server-2012-R2-and-2012/dn781428(v=ws.11)).
- Additionally, this [guide](https://learn.microsoft.com/en-us/windows-server/networking/core-network-guide/cncg/server-certs/configure-the-server-certificate-template) provides more details on how to create a certificate template.
##### Install AD FS
You need to install the AD FS Role Service.
- Follow this [guide](https://learn.microsoft.com/en-us/windows-server/identity/ad-fs/deployment/install-the-ad-fs-role-service).
##### Configure the federation service
AD FS is installed but not configured.
- Click on `Configure the federation service on this server` under `Post-deployment configuration` in the `Server Manager`.
- Ensure `Create the first federation server in a federation server farm` and is selected
[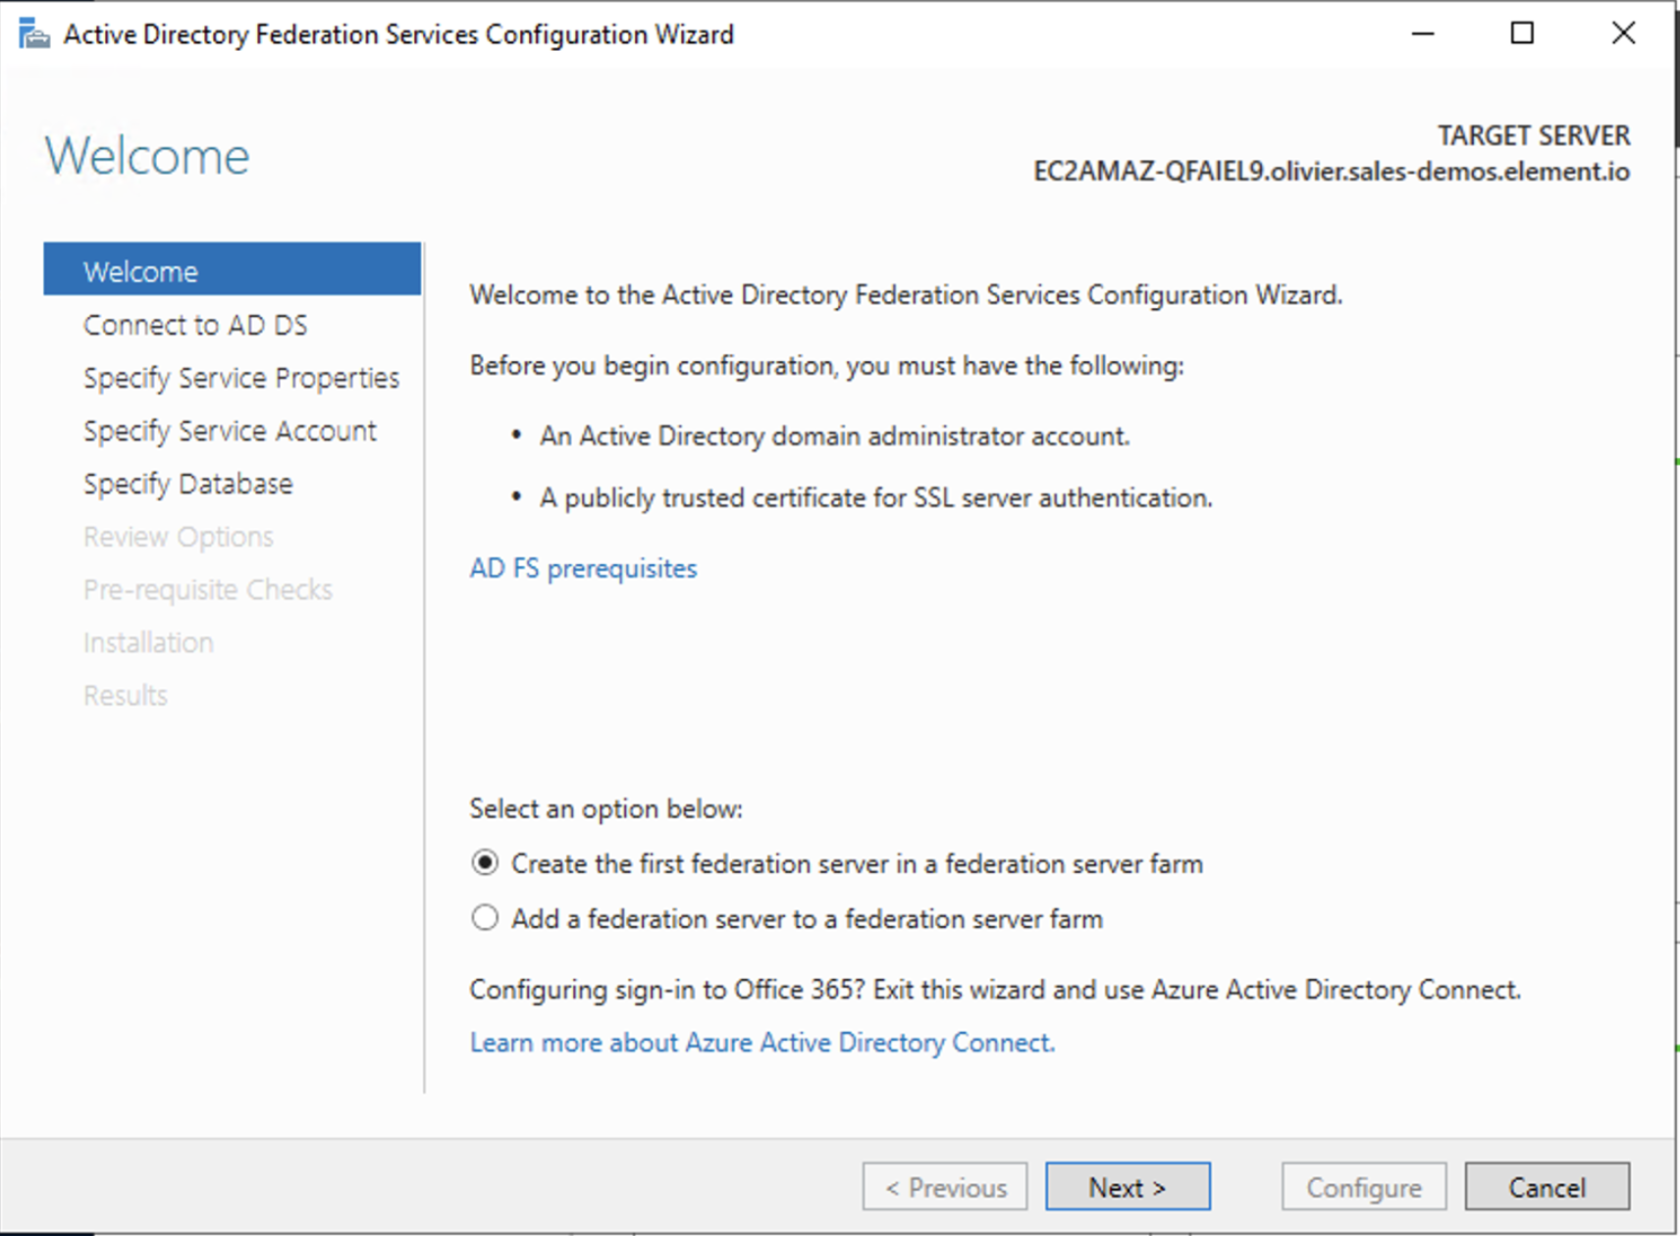](https://ems-docs.element.io/uploads/images/gallery/2023-06/screenshot-2023-06-22-at-15-55-57.png)
- Click `Next`
[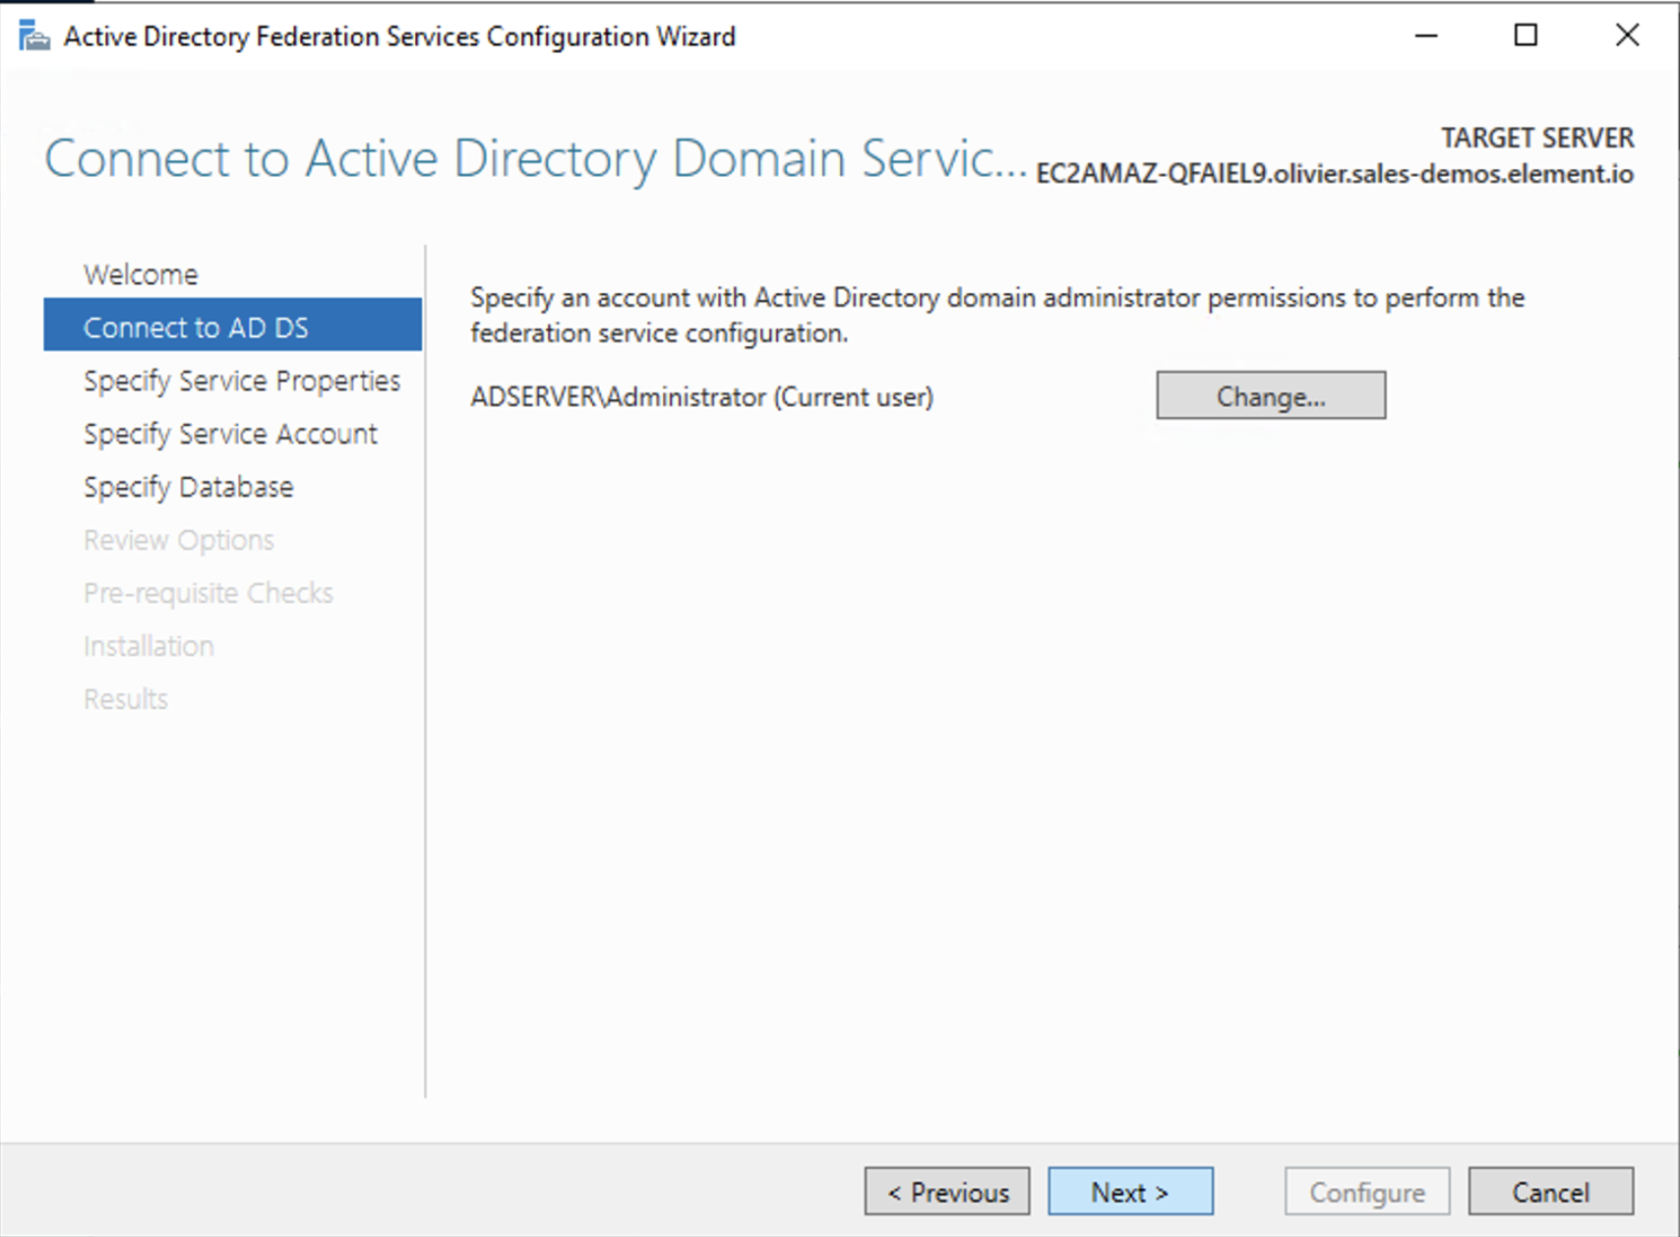](https://ems-docs.element.io/uploads/images/gallery/2023-06/screenshot-2023-06-22-at-15-57-41.png)
- Select the SSL Certificate and set a Federation Service Display Name
[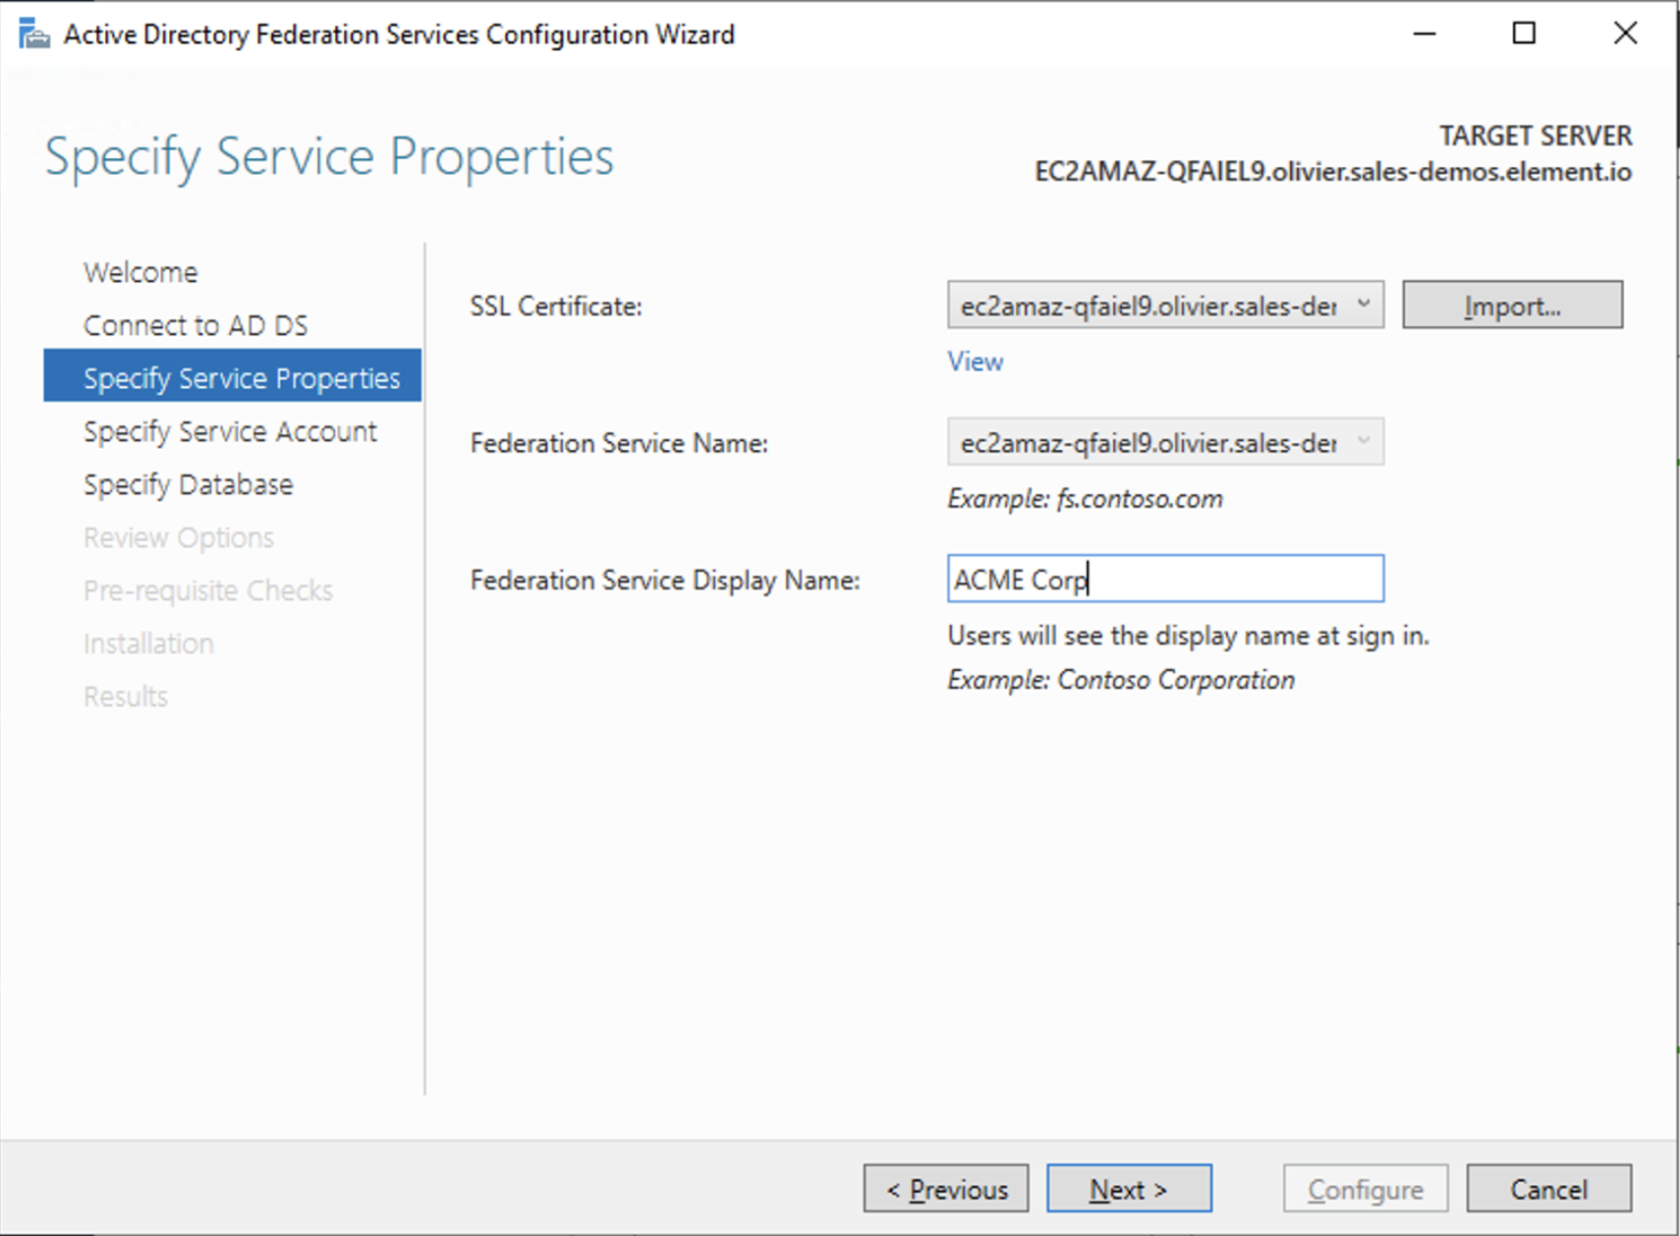](https://ems-docs.element.io/uploads/images/gallery/2023-06/screenshot-2023-06-22-at-15-59-27.png)
- On the Specify Service Account page, you can either Create a Group Managed Service Account (gMSA) or Specify an existing Service or gMSA Account
[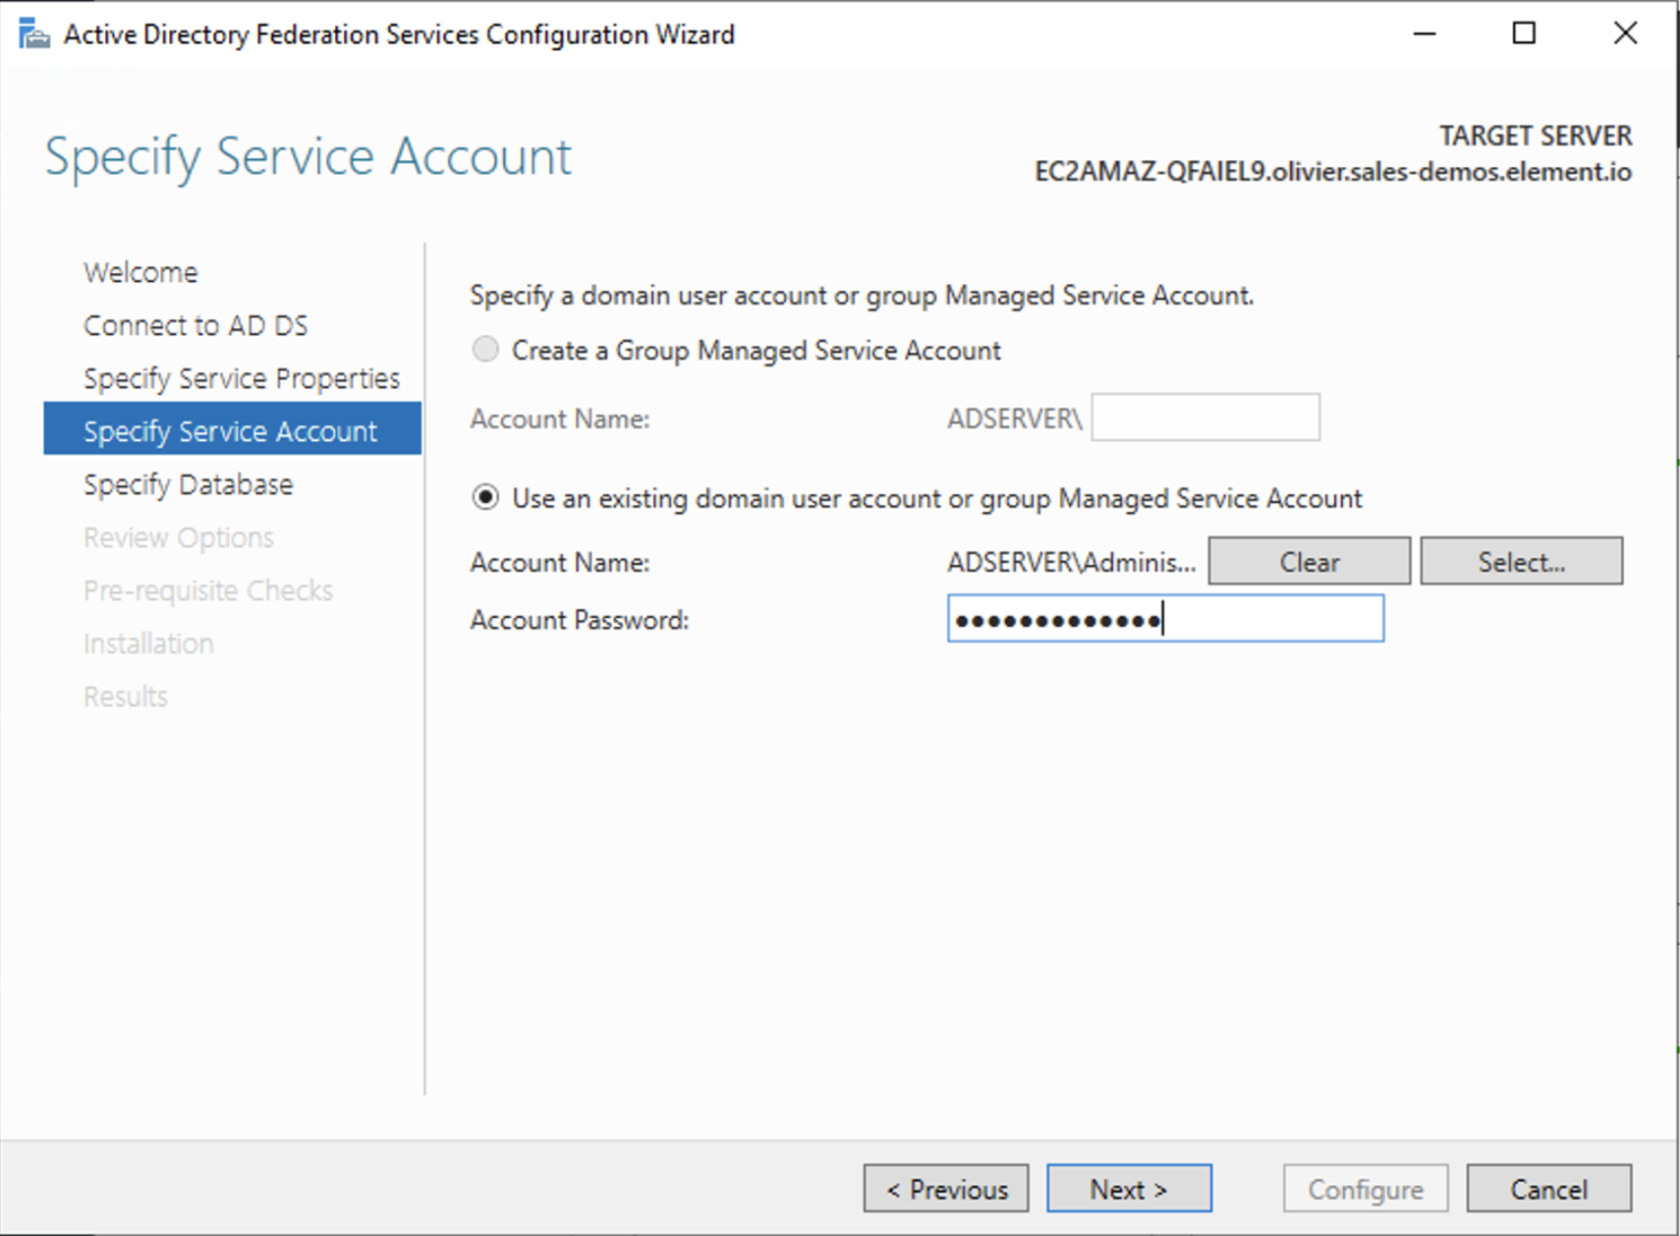](https://ems-docs.element.io/uploads/images/gallery/2023-06/screenshot-2023-06-22-at-16-04-13.png)
- Choose your database
[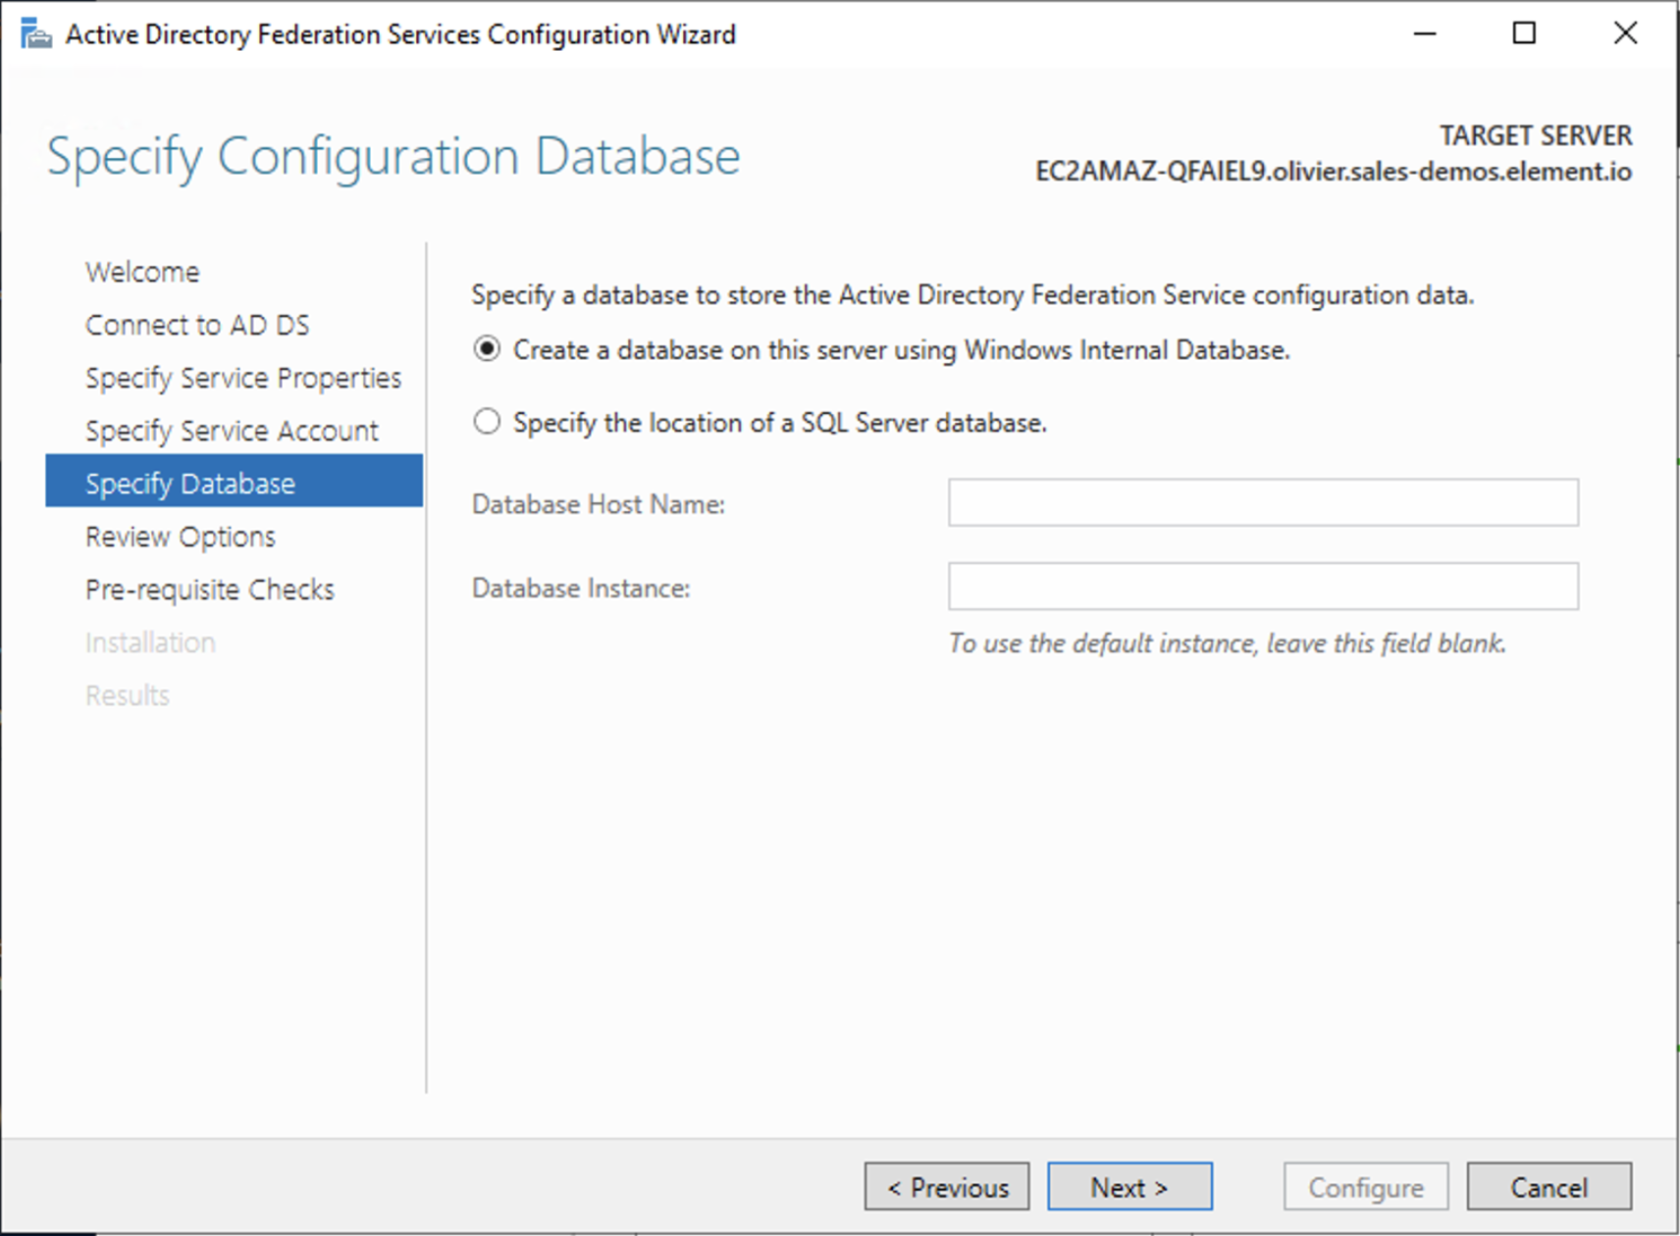](https://ems-docs.element.io/uploads/images/gallery/2023-06/screenshot-2023-06-22-at-16-05-50.png)
- Review Options , check prerequisites are completed and click on `Configure`
- Restart the server
##### Add AD FS as an OpenID Connect identity provider
To enable sign-in for users with an AD FS account, create an Application Group in your AD FS.
To create an Application Group, follow theses steps:
- In `Server Manager`, select `Tools`, and then select `AD FS Management`
- In AD FS Management, right-click on `Application Groups` and select `Add Application Group`
- On the Application Group Wizard `Welcome` screen
- Enter the Name of your application
- Under `Standalone applications` section, select `Server application` and click `Next`
[](https://ems-docs.element.io/uploads/images/gallery/2023-06/screenshot-2023-06-22-at-16-39-52.png)
- Enter `https:///_synapse/client/oidc/callback` in Redirect URI: field, click `Add`, save the `Client Identifier` somewhere, you will need it when setting up Element and click `Next` (e.g. https://matrix.domain.com/_synapse/client/oidc/callback)
[](https://ems-docs.element.io/uploads/images/gallery/2023-06/screenshot-2023-06-22-at-16-45-44.png)
- Select `Generate a shared secret` checkbox and make a note of the generated Secret and press `Next` (Secret needs to be added in the Element Installer GUI in a later step)
- Right click on the created Application Group and select `Properties``
[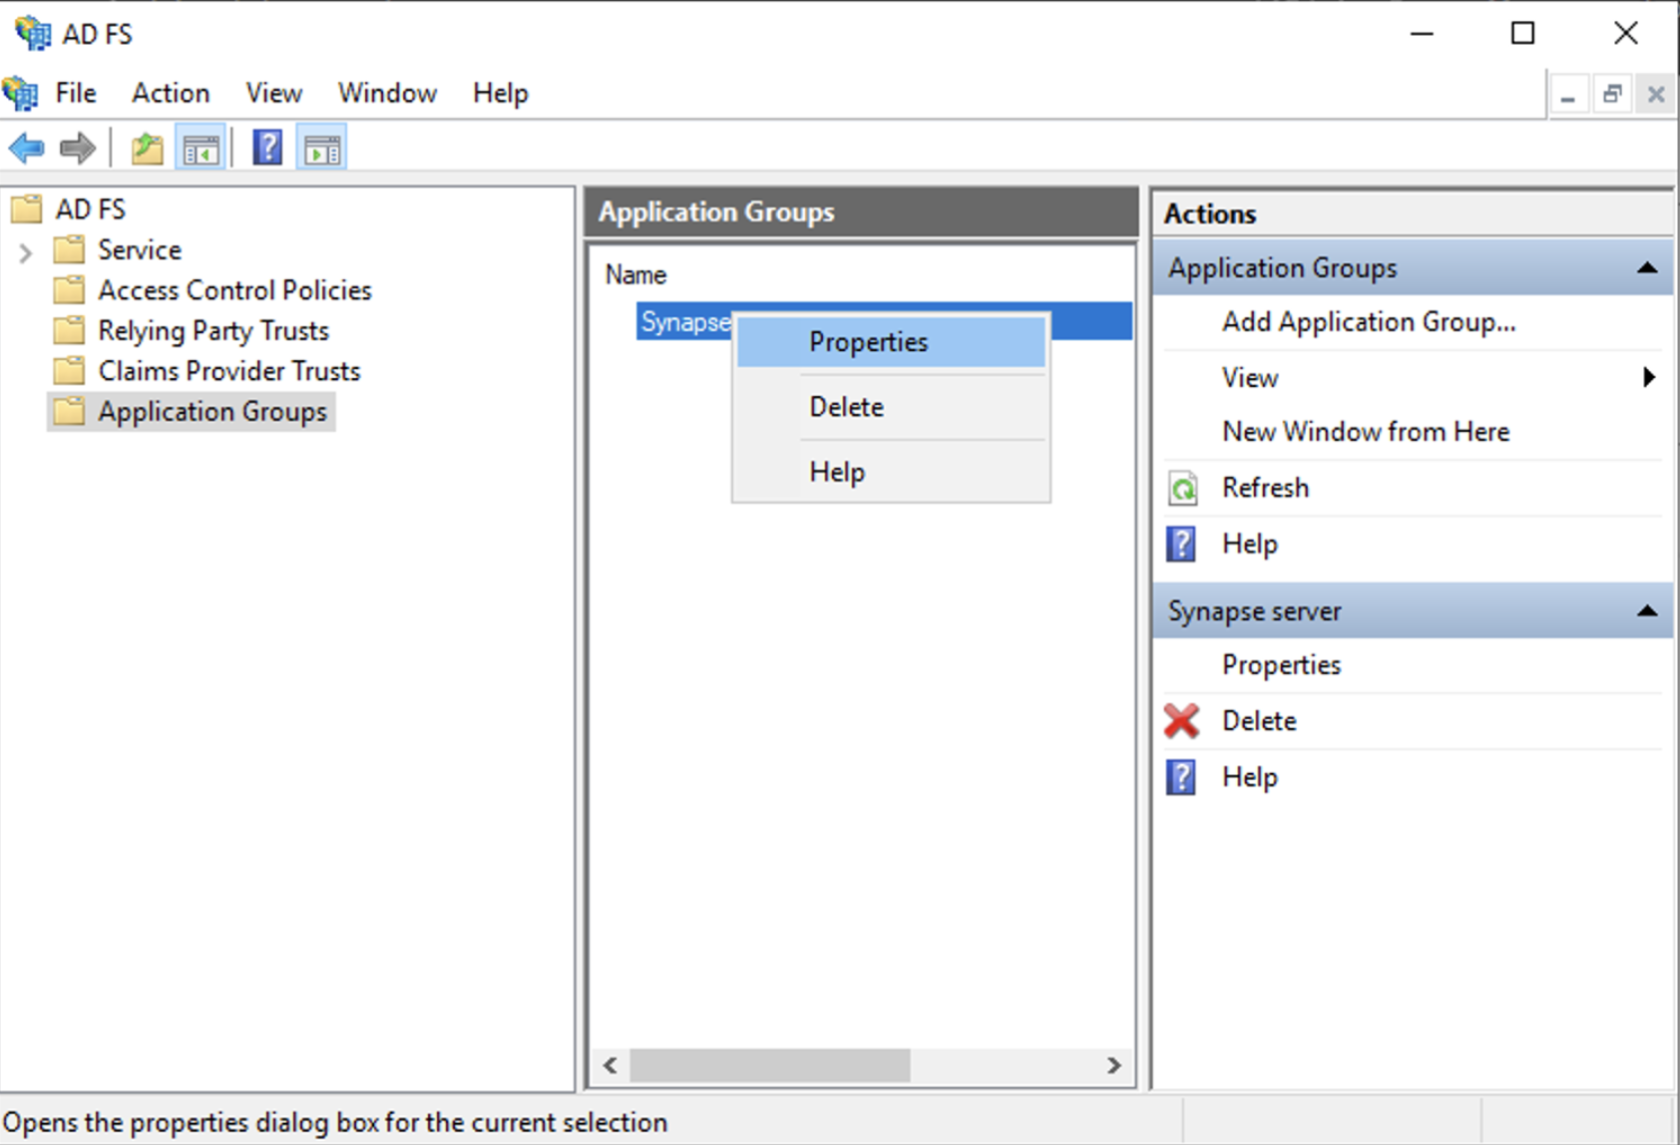](https://ems-docs.element.io/uploads/images/gallery/2023-06/screenshot-2023-06-22-at-16-56-40.png)
- Select `Add application...` button.
- Select `Web API`
- In the `Identifier` field, type in the `client_id` you saved before and click `Next`
[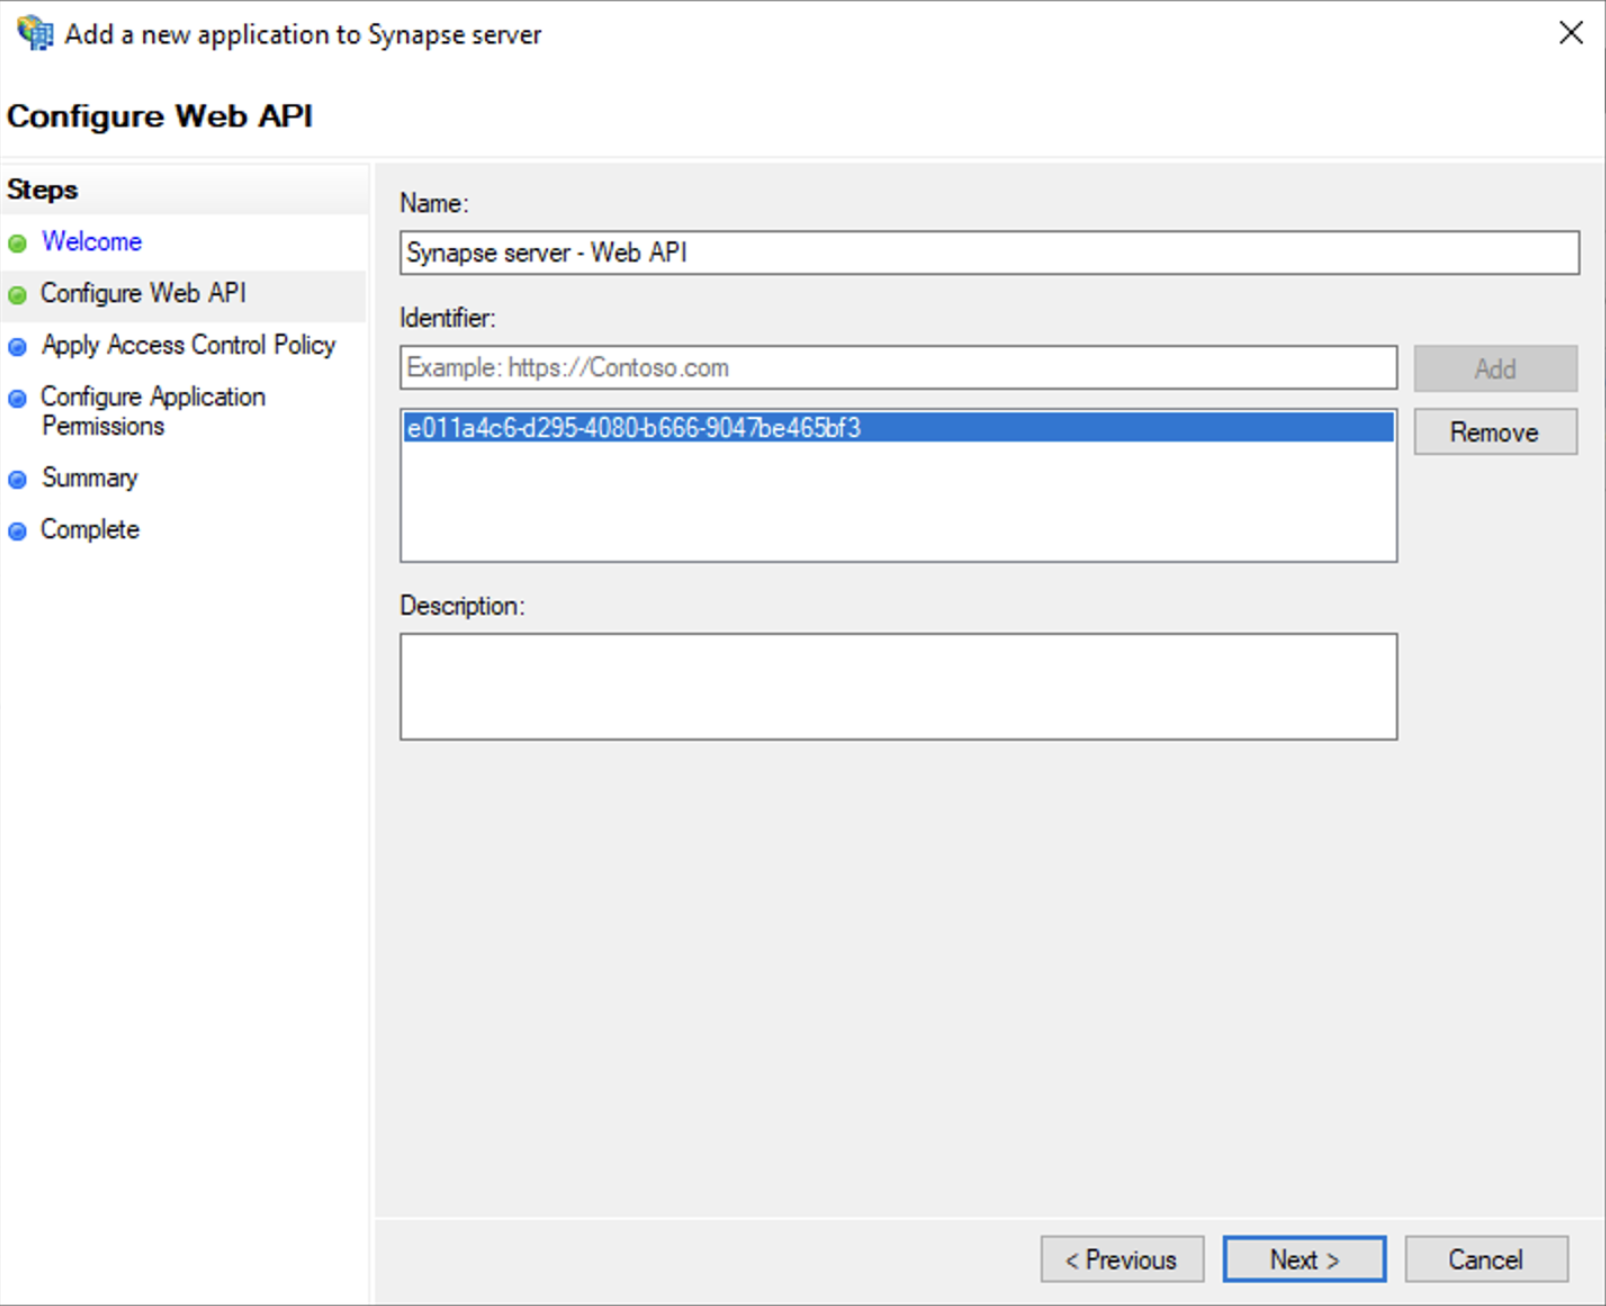](https://ems-docs.element.io/uploads/images/gallery/2023-06/screenshot-2023-06-23-at-09-48-07.png)
- Select `Permit everyone` and click `Next`
- Under Permitted scopes: select `openid` and `profile` and click `Next`
[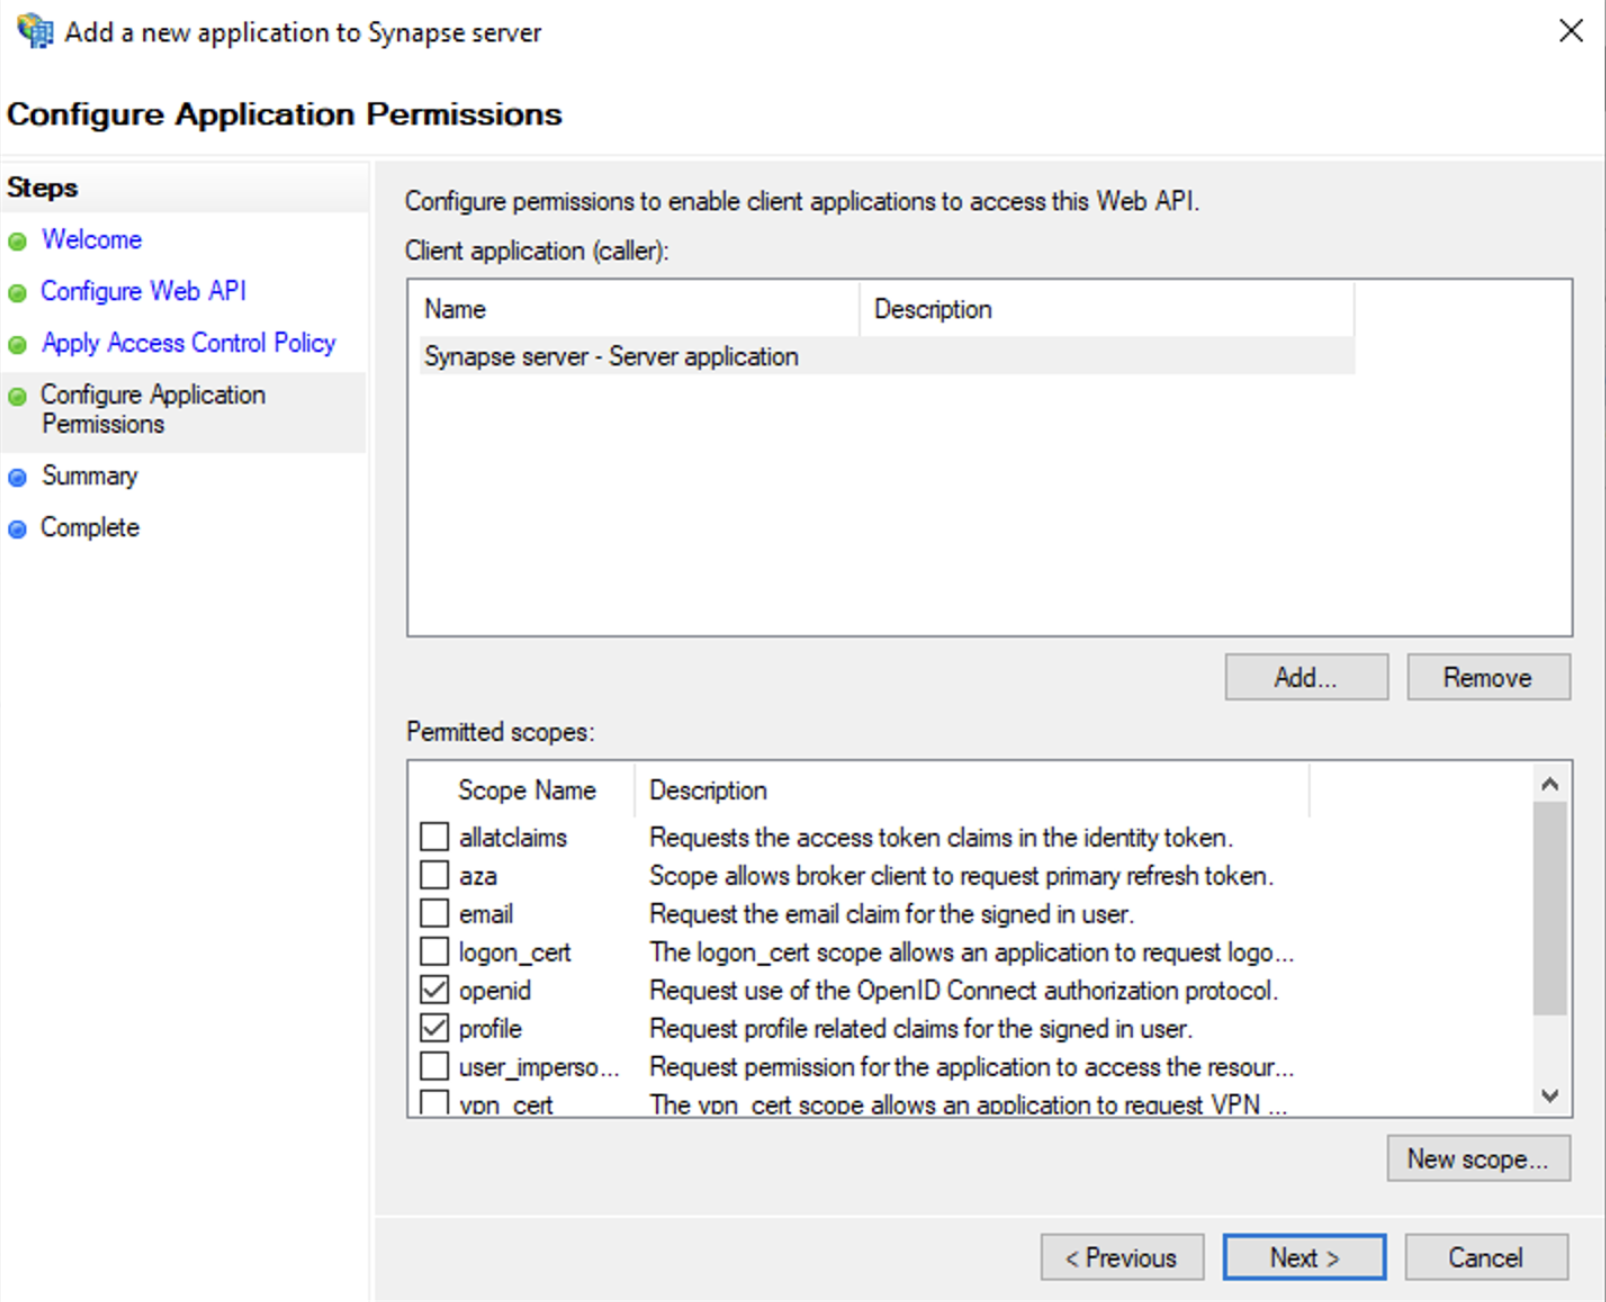](https://ems-docs.element.io/uploads/images/gallery/2023-06/screenshot-2023-06-23-at-09-51-06.png)
- On `Summary` page, click `Next``
- Click `Close` and then `OK`
##### Export Domain Trusted Root Certificate
- Run `mmc.exe`
- Add the `Certificates` snap-in
- File/Add snap-in for `Certificates`, `Computer account`
- Under `Trusted Root Certification Authorities`/`Certificates`, select your DC cert
- Right click and select `All Tasks`/`Export...` and export as `Base-64 encoded X 509 (.CER)`
- Copy file to local machine
#### Configure the installer
Add an OIDC provider in the 'Synapse' configuration after enabling `Delegated Auth` and set the following fields in the installer:
- `Allow Existing Users`: if checked, it allows a user logging in via OIDC to match a pre-existing account instead of failing. This could be used if switching from password logins to OIDC.
- `Authorization Endpoint`: the oauth2 authorization endpoint. Required if provider discovery is disabled.
https://login.microsoftonline.com//oauth2/v2.0/authorize
- `Backchannel Logout Enabled`: Synapse supports receiving OpenID Connect Back-Channel Logout notifications. This lets the OpenID Connect Provider notify Synapse when a user logs out, so that Synapse can end that user session.
- `Client Auth Method`: auth method to use when exchanging the token. Set it to `Client Secret Basic` or any method supported by your Idp
- `Client ID`: the `Client ID` you saved before
- `Discover`: enable/disable the use of the OIDC discovery mechanism to discover endpoints
- `Idp Brand`: an optional brand for this identity provider, allowing clients to style the login flow according to the identity provider in question
- `Idp ID`: a string identifying your identity provider in your configuration
- `Idp Name`: A user-facing name for this identity provider, which is used to offer the user a choice of login mechanisms in the Element UI. In the screenshot bellow, `Idp Name` is set to `Azure AD`
[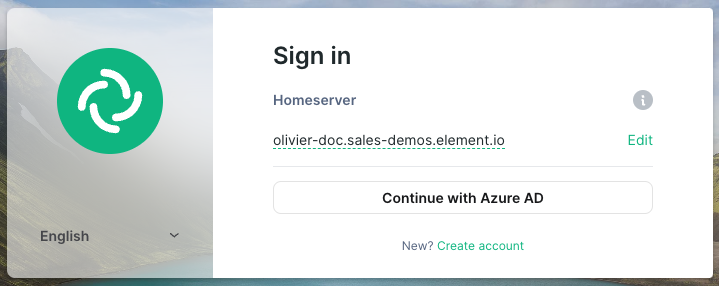](https://ems-docs.element.io/uploads/images/gallery/2023-05/screenshot-2023-05-04-at-10-45-23.png)
- `Issuer`: the OIDC issuer. Used to validate tokens and (if discovery is enabled) to discover the provider's endpoints `https:///adfs/`
- `Token Endpoint`: the oauth2 authorization endpoint. Required if provider discovery is disabled.
- `Client Secret`: your client secret you saved before.
- Scopes: add every scope on a different line
- The openid scope is required which translates to the Sign you in permission in the consent UI
- You might also include other scopes in this request for requesting consent.
[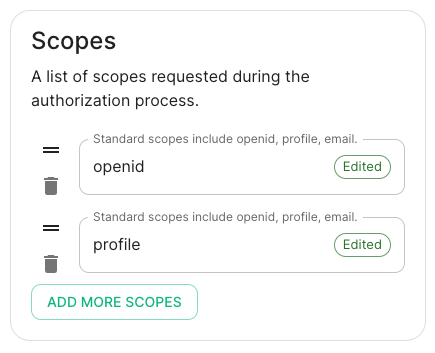](https://ems-docs.element.io/uploads/images/gallery/2023-05/screenshot-2023-05-03-at-17-27-00.png)
- User Mapping Provider: Configuration for how attributes returned from a OIDC provider are mapped onto a matrix user.
- `Localpart Template`: Jinja2 template for the localpart of the MXID. Set it to `{{ user.upn.split('@')[0] }}` for AD FS
Other configurations are documented [here](https://element-hq.github.io/synapse/v1.41/openid.html).
### SAML on Microsoft Azure
Before setting up the installer, you have to configure Microsoft Entra ID.
#### Set up Microsoft Entra ID
With an account with enough rights, go to : `Enterprise Applications`
1. Click on `New Application`
2. Click on `Create your own application` on the top left corner
3. Choose a name for it, and select `Integrate any other application you don't find in the
gallery`
4. Click on "Create"
5. Select `Set up single sign on`
6. Select `SAML`
7. `Edit` on `Basic SAML Configuration`
8. In `Identifier` , add the following URL : `https://synapse_fqdn/_synapse/client/saml2/metadata.xml`
9. Remove the default URL
10. In `Reply URL` , add the following URL : `https://synapse_fqdn/_synapse/client/saml2/authn_response`
11. Click on `Save`
[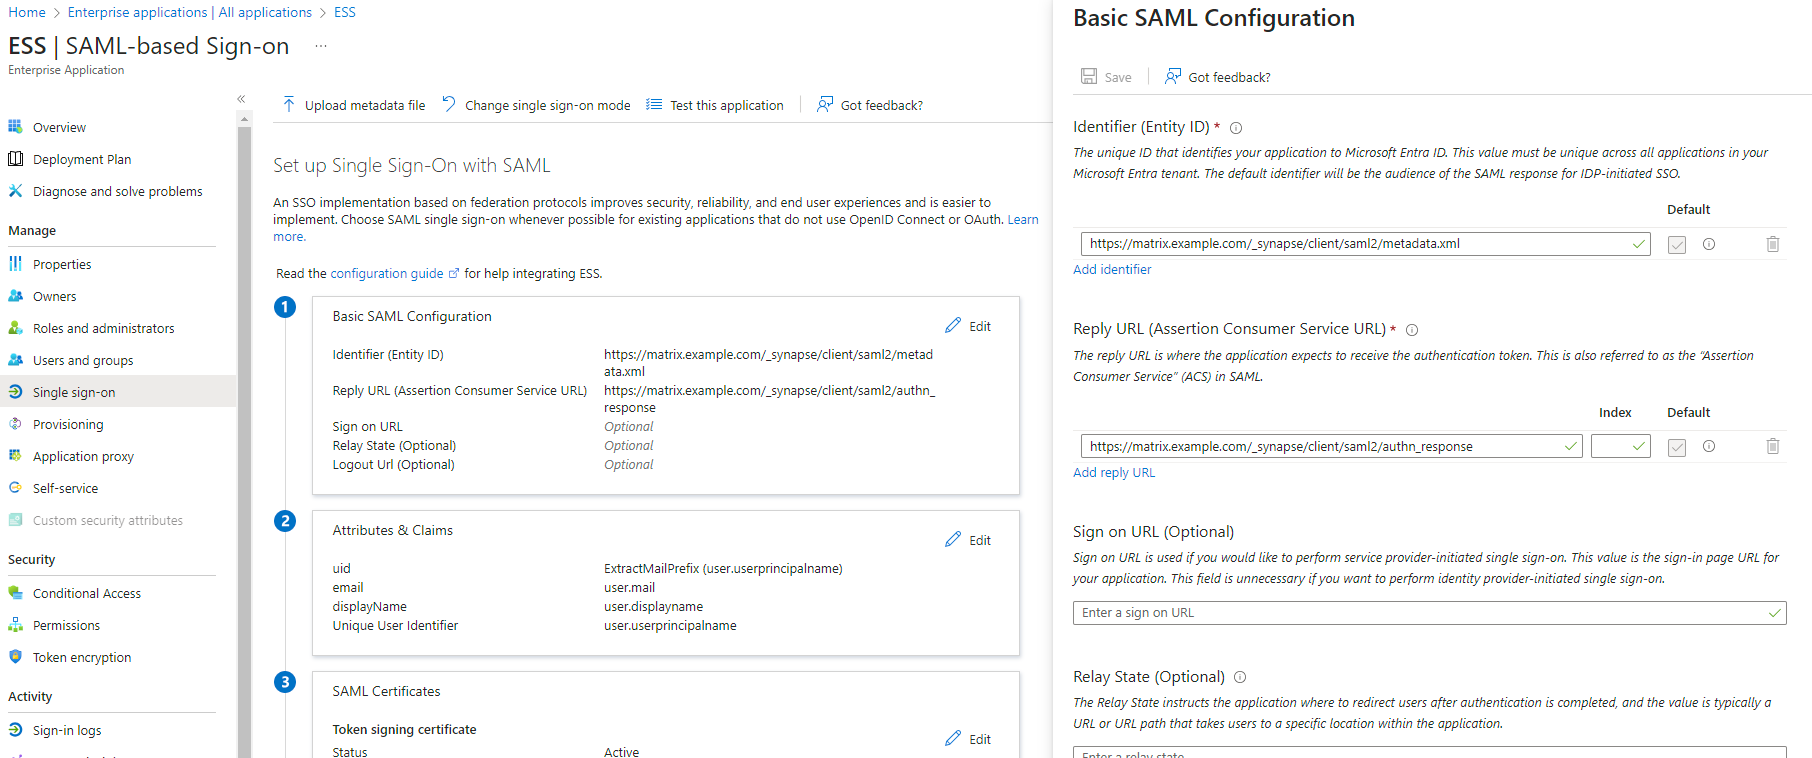](https://ems-docs.element.io/uploads/images/gallery/2023-11/image-1701176026243.png)
12. Make a note of the `App Federation Metadata Url` under `SAML Certificates` as this will be required in a later step.
13. `Edit` on `Attributes & Claims`
14. Remove all defaults for additional claims
15. Click on `Add new claim` to add the following (suggested) claims (the UID will be used as the MXID):
- Name: `uid` , Transformation : `ExtractMailPrefix` , Parameter 1 : `user.userprincipalname`
- Name: `email` , Source attribute : `user.mail`
- Name: `displayName` , Source attribute : `user.displayname`
16. Click on `Save`
[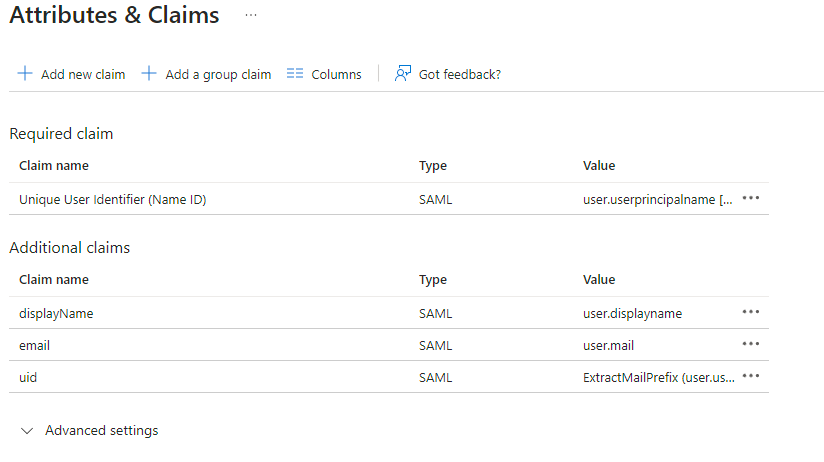](https://ems-docs.element.io/uploads/images/gallery/2023-11/image-1701172980662.png)
17. In the application overview screen select `Users and Groups` and add groups and users which may have access to element
#### Configure the installer
Add a SAML provider in the 'Synapse' configuration after enabling `Delegated Auth` and set the following (suggested) fields in the installer:
- **Allow Unknown Attributes****.** Checked
- **Attribute Map****.** Select `URN:Oasis:Names:TC:SAML:2.0:Attrname Format:Basic` as the `Identifier`
- **Mapping****.** Set the following mappings:
- From: `Primary Email` To: `email`
- From: `First Name` To: `firstname`
- From: `Last Name` To: `lastname`
- **Entity****.**
- **Description****.**
- **Entity ID****.** (From Azure)
- **Name****.**
- **User Mapping Provider****.** Set the following:
- `MXID Mapping`: `Dotreplace`
- `MXID Source Attribute`: `uid`
- **Metadata URL****.** Add the `App Federation Metadata URL` from Azure.
### Troubleshooting
#### Redirection loop on SSO
Synapse needs to have the `X-Forwarded-For` and `X-Forwarded-Proto` headers set by the reverse proxy doing the TLS termination. If you are using a Kubernetes installation with your own reverse proxy terminating TLS, please make sure that the appropriate headers are set.
# Synapse Section: Federation
Detailed information on configuring homeserver Federation including Trusted Key Servers.
Federation is the process by which users on different servers can participate in the same room. For this to work, all servers participating in a room must be able to talk to each other.
When Federation is `Open`, you will not need to configure anything further, however to privately federate you will need to make use of the `Federation` section found under `Advanced`.
[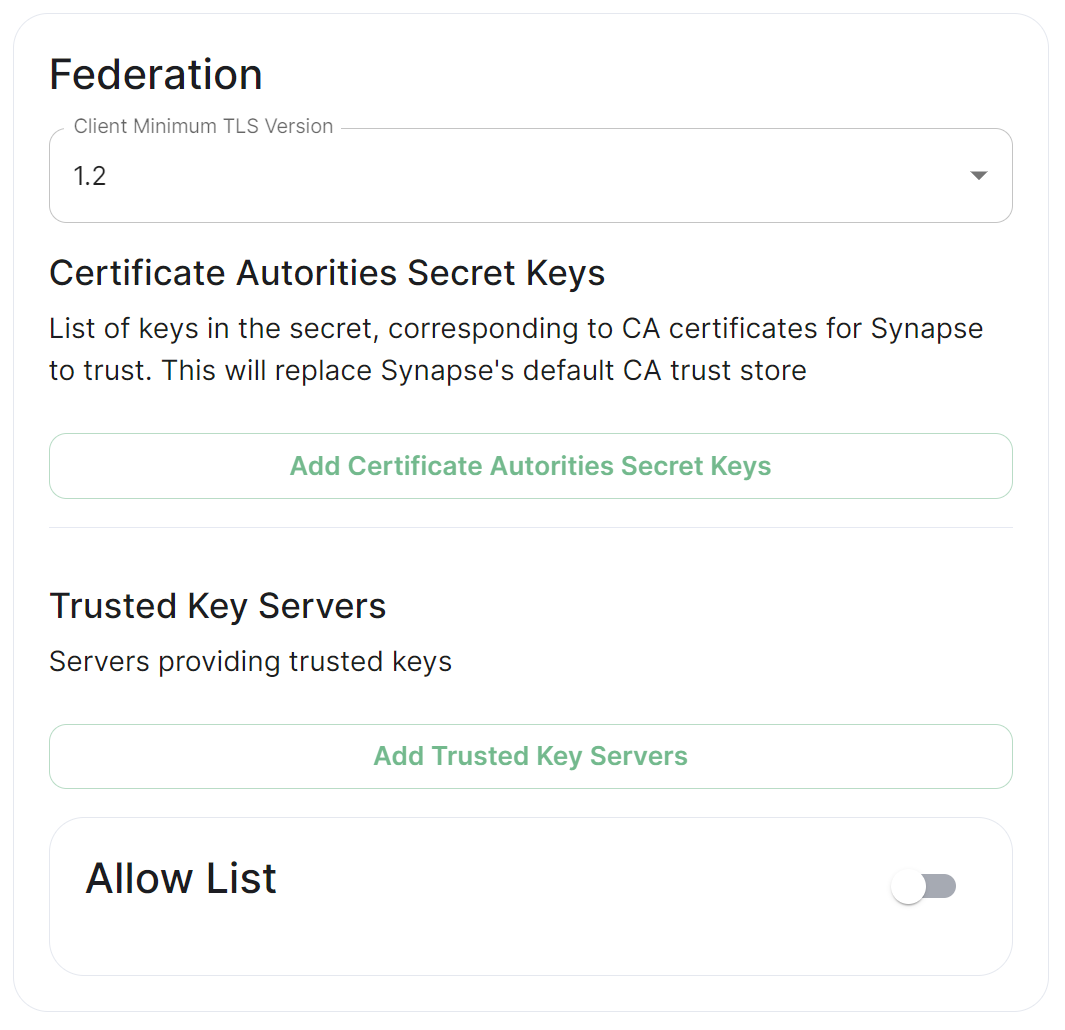](https://ems-docs.element.io/uploads/images/gallery/2024-01/image-1706542780463.png)
## Where do I set Federation Type?
How Federation is enabled is automatic based on how you configure it within the Federation section, however you will find at the top of the [Synapse Section](https://ems-docs.element.io/link/447#bkmrk-federation-type) you configure the Federation Type, `Open`, `Limited` or `Closed` within the Profile options. Options configured here will automatically create Synapse Workers to support the desired Federation - Set to `Open` when Federating with all homeservers, `Limited` when Federating within a trusted network or `Closed` when Federation will not be enabled.
[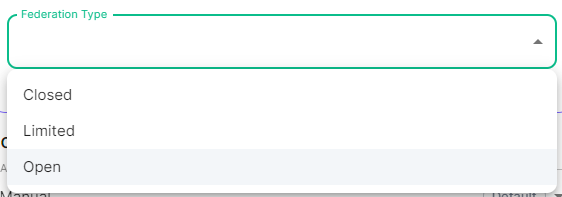](https://ems-docs.element.io/uploads/images/gallery/2024-05/image-1715244469299.png)
Previous setups may have used the Synapse Additional config. Configuration of Federation settings via Additional Config, that are in conflict with any set via the UI, will not override the UI set values. As such, we do not advise including them or any related settings within the Additional Config as they are of increased risk to causing issues with your deployment and are not supported.
## Client Minimum TLS Version
[`federation_client_minimum_tls_version`](https://element-hq.github.io/synapse/latest/usage/configuration/config_documentation.html#federation_client_minimum_tls_version)
[](https://ems-docs.element.io/uploads/images/gallery/2024-01/image-1706544124637.png)
Allows you to choose the minimum TLS version that will be used for outbound federation requests. Defaults to "1.2". Configurable to "1.2" or "1.3".
Setting this value higher than "1.2" will prevent federation to most of the public Matrix network: only configure it to "1.3" if you have an entirely private federation setup and you can ensure TLS 1.3 support.
## Certificate Autorities Secret Keys
[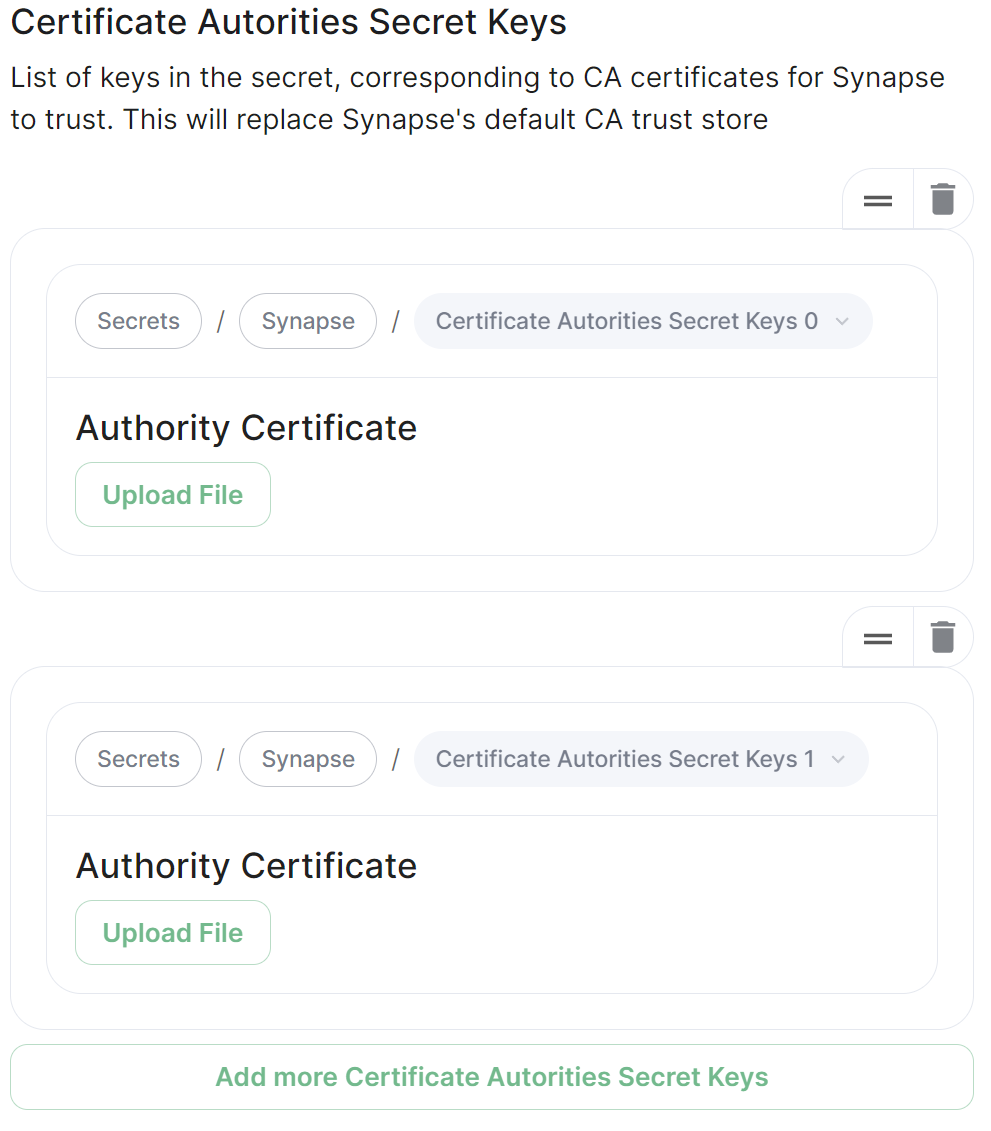](https://ems-docs.element.io/uploads/images/gallery/2024-01/image-1706543999452.png)
Configure when you are federating between homeservers' whose certificates are signed by different Certificate Authorities, click the `Add Certificate Authorities Secret Keys` / `Add More Certificate Authorities Secret Keys` button to reveal the option to upload your CA certificate.
Uploaded certificates should be PEM encoded and include the full chain of intermediate CAs and the root CA. You can simply concatenate these files prior to uploading.
## Trusted Key Servers
[`trusted_key_servers`](https://element-hq.github.io/synapse/latest/usage/configuration/config_documentation.html#trusted_key_servers)
[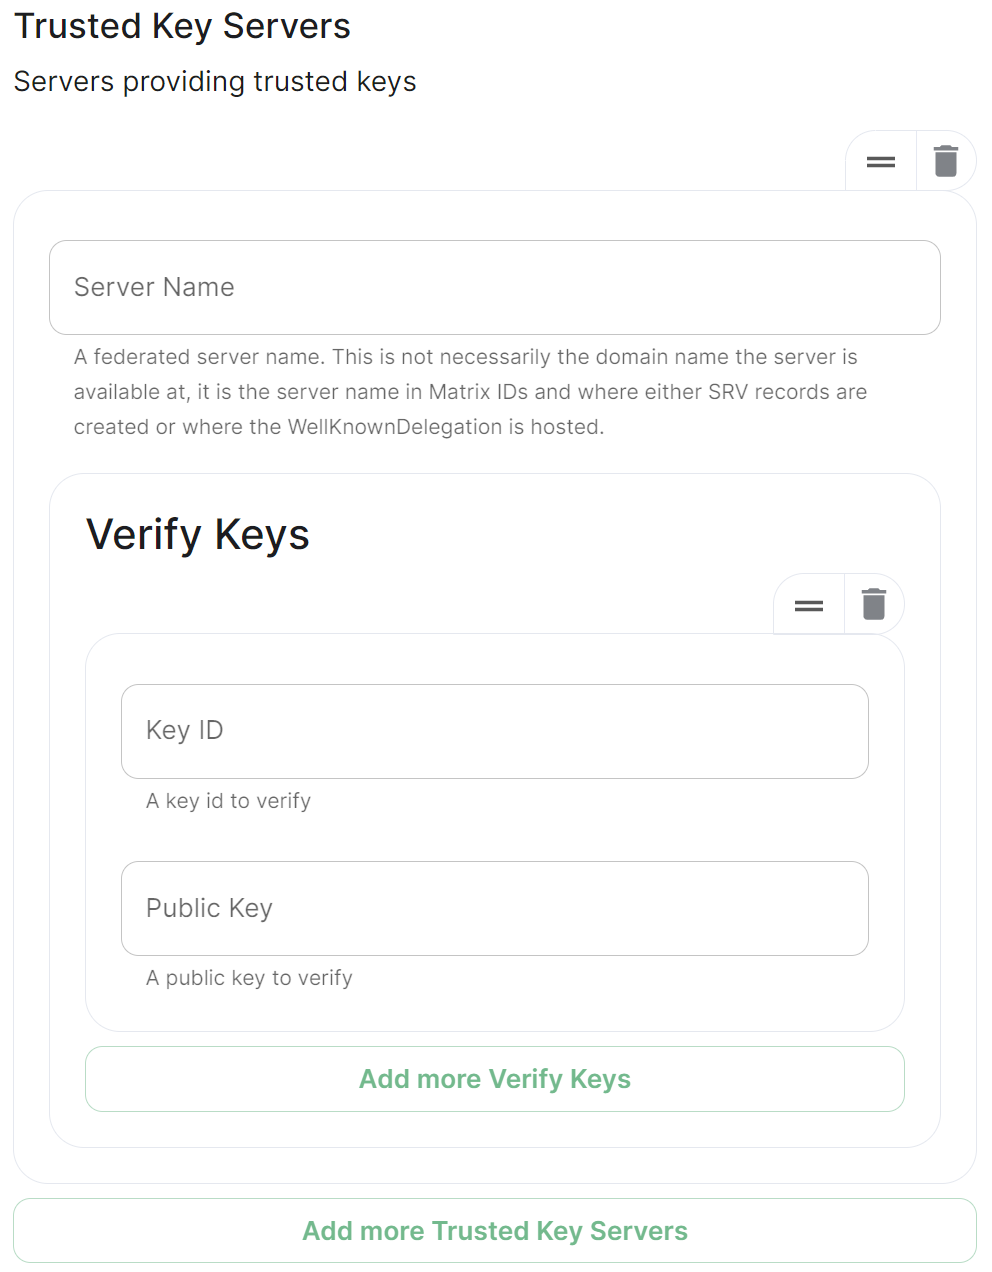](https://ems-docs.element.io/uploads/images/gallery/2024-01/image-1706544582026.png)
Used to specify the trusted servers to download signing keys from. When synapse needs to fetch a signing key, each server is tried in parallel. Normally, the connection to the key server is validated via TLS certificates. Verify keys provide additional security by making synapse check that the response is signed by that key.
Click `Add Trusted Key Servers` / `Add More Trusted Key Servers` to add a new key server, then provide the homeservers' federated server name, i.e. the base domain of the homeserver you with to federate with. Under `Verify Keys` for the server, you will need to provide it's `Key ID` and `Public Key`.
### Getting a Homeservers' `Key ID` and `Public Key` from your browser
Simply access the Synapse endpoint `GET /_matrix/key/v2/server`. You must use the domain where your Synapse is exposed, this might be different than the domain you have in your Matrix IDs. For example `https://matrix.yourcomapany.com/_matrix/key/v2/server`.
For the element.io homeserver, returns
```json
{
"old_verify_keys": {},
"server_name": "element.io",
"signatures": {
"element.io": {
"ed25519:DnK8xk": "oOgEpir32XvnuMXQs+GvB6nOuIWgYathJ8kbzDhh9TT/BVSEH116Kk9NYUVPeXHJO0HhzBeTjmAiuUTVFS8nCg"
}
},
"valid_until_ts": 1715307962481,
"verify_keys": {
"ed25519:DnK8xk": {
"key": "EgdGx+0oy/9IX5k7tCobr0JoiwMvmmQ8sDOVlZODh/o"
}
}
}
```
Under `verify_keys`, `ed25519:DnK8xk` is the Key ID and `EgdGx+0oy/9IX5k7tCobr0JoiwMvmmQ8sDOVlZODh/o` is the Public Key.
### Getting an On-Premise Homeservers' `Key ID` and `Public Key` via the Installer
You can retrieve the `Public Key` of an On-Premise Homeserver by re-running the installer on the host, then navigating to the `Synapse` section. Under `Advanced`, `Config` you will be presented with the homeservers' Public Key in a blue box.
[](https://ems-docs.element.io/uploads/images/gallery/2024-01/image-1706544854045.png)
Copy the entire string, taking the example above, it would be `ed25519 jRheIX llomL0SL2eq6WfzaqtPX8QzYEP3c0a5E9G9NNamU4JQ`. From this string, you can derive the `Key ID` and `Public Key` required when you wish to add this homeserver to another homeservers' Federation Trusted Key Servers.
1. The `Key ID` is the first two sections joined with a `:`, so `ed25519:jRheIX`
2. The `Public Key` is the remainder of the string, so `llomL0SL2eq6WfzaqtPX8QzYEP3c0a5E9G9NNamU4JQ`
[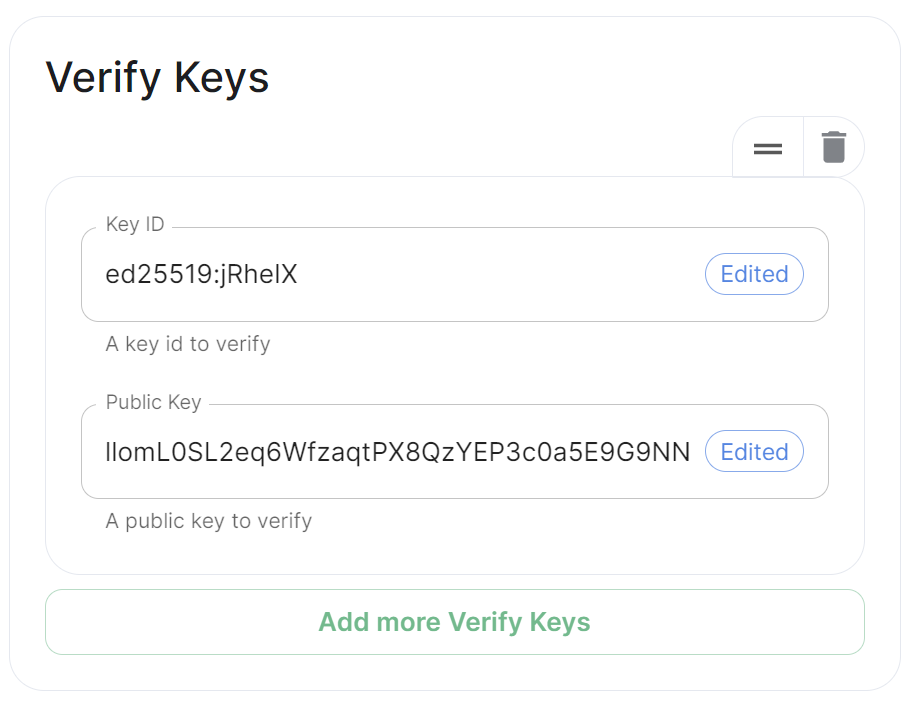](https://ems-docs.element.io/uploads/images/gallery/2024-01/image-1706546009350.png)
## Allow List
[`federation_domain_whitelist`](https://element-hq.github.io/synapse/latest/usage/configuration/config_documentation.html#federation_domain_whitelist)
[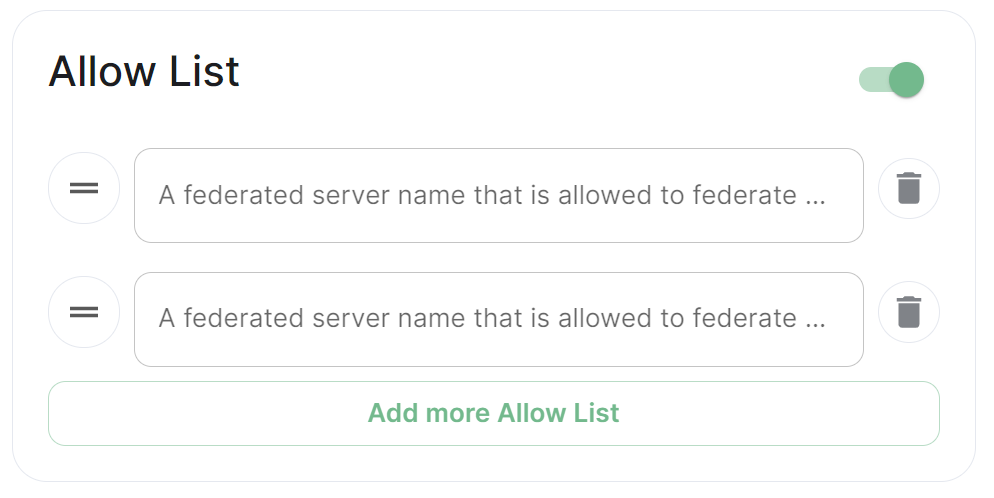](https://ems-docs.element.io/uploads/images/gallery/2024-01/image-1706545151897.png)
Use the Allow List to restrict federation to the given whitelist of domains, if not specified, the default is to whitelist everything. Simply provide the homeservers' federated server name, i.e. the base domain of the homeservers' you with to federate with.
We recommend also firewalling your federation listener to limit inbound federation traffic as early as possible, rather than relying purely on this application-layer restriction.
This does not stop a server from joining rooms that servers not on the whitelist are in. As such, this option is really only useful to establish a "private federation", where a group of servers all whitelist each other and have the same whitelist.
Please also note that by default an [`ip_range_blacklist`](https://element-hq.github.io/synapse/latest/usage/configuration/config_documentation.html#ip_range_blacklist) is configured to block all private IP address ranges. If your servers require communicating on any of the below ranges, you will need to configure [`ip_range_whitelist`](https://element-hq.github.io/synapse/latest/usage/configuration/config_documentation.html#ip_range_whitelist). See [Allowing Private Federation via `ip_range_whitelist`](https://ems-docs.element.io/books/element-server-suite-classic-documentation-lts-2404/page/synapse-section-additional-config) for information on configuring this.
# Element Web Section
Configuration options relating to the deployed Element Web instance provided by ESS.
Element Web is the web-based client for the Matrix communication protocol. Element Web serves as a user interface for accessing Matrix homeservers, allowing users to send messages, join rooms, share files, and participate in group chats.
All settings configured via the UI in this section will be saved to your deployment.yml, with the contents of secrets being saved to secrets.yml. You will find specific configuration examples in each section.
Config Example
```yml
spec:
components:
elementWeb:
```
By default, if you do not change any settings on this page, default Element Web pod CPU and Memory requirements will be added to your configuration file/s (see example below).
Config Example
```yml
spec:
components:
elementWeb:
k8s:
workloads:
resources:
limits:
memory: 200Mi
requests:
cpu: 50m
memory: 50Mi
```
### Advanced
#### Use Own URL for Sharing Links
[`permalink_prefix`](https://web-docs.element.dev/Element%20Web/config.html?highlight=permalink_prefix#customisation--branding)
[](https://ems-docs.element.io/uploads/images/gallery/2024-05/image-1716547007689.png)
Config Example
```yml
spec:
components:
elementWeb:
config:
# Not present if disabled
useOwnUrlForSharingLinks: true
```
Whether the sharing links generated by this Element Web instance should use the URL of this Element Web. If turned off the sharing links use unless a custom permalink prefix is set in the Additional Config section. If turned on, mobile clients will not detect links using the URL of this Element Web (or any other custom permalink prefix) unless they've been explicitly configured by Mobile Device Management (MDM).
#### Additional Configuration
There are no Element Web specific UI options available to configure, however you can inject custom config within the `Additional Configuration` section found under `Advanced`. Config added here is analogous with what you would add to the `config.json` when manually self-hosting Element Web (or when using Element Desktop), you can read more on this and see config examples via the [Element Web Configuration Doc](https://web-docs.element.dev/Element%20Web/config.html#configuration).
[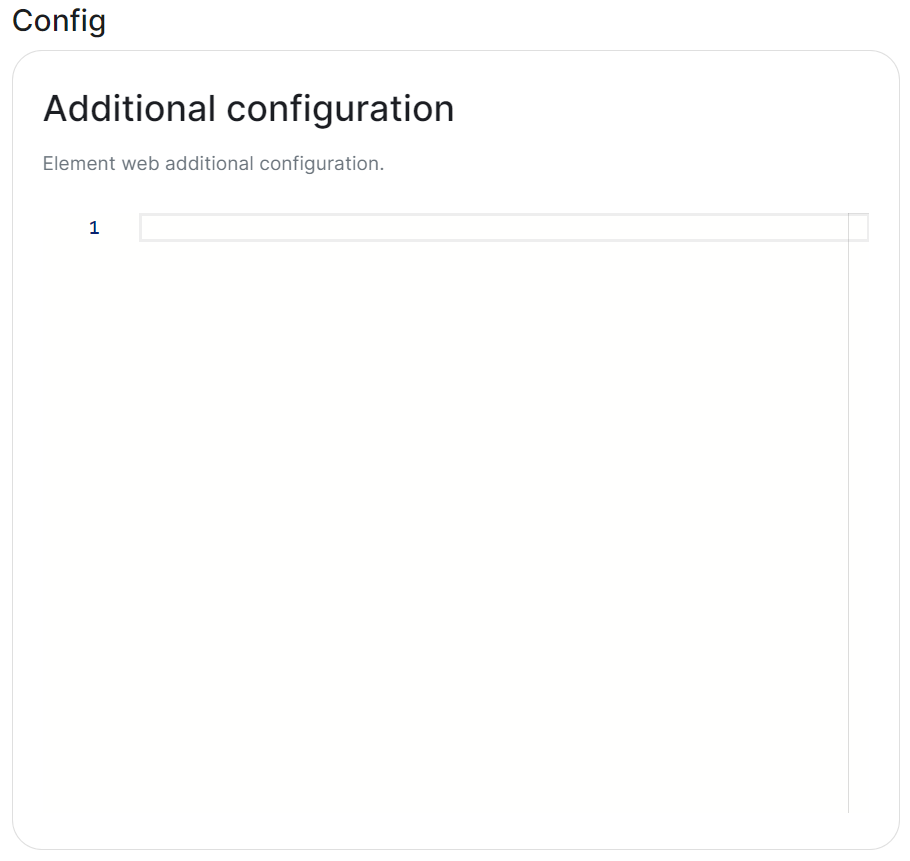](https://ems-docs.element.io/uploads/images/gallery/2024-02/image-1707244011153.png)
Config Example
```yml
spec:
components:
elementWeb:
config:
additionalConfig: |-
"setting_defaults": {
"custom_themes": [
{
"name": "Electric Blue",
"is_dark": false,
"fonts": {
"faces": [
{
"font-family": "Inter",
"src": [{"url": "/fonts/Inter.ttf", "format": "ttf"}]
}
],
"general": "Inter, sans",
"monospace": "'Courier New'"
},
"colors": {
"accent-color": "#3596fc",
"primary-color": "#368bd6",
"warning-color": "#ff4b55",
"sidebar-color": "#27303a",
"roomlist-background-color": "#f3f8fd",
"roomlist-text-color": "#2e2f32",
"roomlist-text-secondary-color": "#61708b",
"roomlist-highlights-color": "#ffffff",
"roomlist-separator-color": "#e3e8f0",
"timeline-background-color": "#ffffff",
"timeline-text-color": "#2e2f32",
"timeline-text-secondary-color": "#61708b",
"timeline-highlights-color": "#f3f8fd",
"username-colors": ["#ff0000", ...]
"avatar-background-colors": ["#cc0000", ...]
}
}
]
}
```
##### Common Configurations
###### Permalinks
If you would like to override the default permalink `matrix.to` for your homeserver, you can do so by adding the following entry to your `Additional Configuration`
```json
"permalinkPrefix": "https://"
```
###### Theming
Refer to the [Element Web Theming Documentation](https://web-docs.element.dev/Element%20Web/theming.html) for more information, see an example below where a custom theme has been applied to change the look and feel of the deployed Element Client. For some public examples of customised login screens see [Mozilla](https://chat.mozilla.org/#/welcome) and [Fedora](https://chat.fedoraproject.org/#/welcome)'s customised clients.
```json
"setting_defaults": {
"custom_themes": [
{
"name": "Electric Blue",
"is_dark": false,
"fonts": {
"faces": [
{
"font-family": "Inter",
"src": [{"url": "/fonts/Inter.ttf", "format": "ttf"}]
}
],
"general": "Inter, sans",
"monospace": "'Courier New'"
},
"colors": {
"accent-color": "#3596fc",
"primary-color": "#368bd6",
"warning-color": "#ff4b55",
"sidebar-color": "#27303a",
"roomlist-background-color": "#f3f8fd",
"roomlist-text-color": "#2e2f32",
"roomlist-text-secondary-color": "#61708b",
"roomlist-highlights-color": "#ffffff",
"roomlist-separator-color": "#e3e8f0",
"timeline-background-color": "#ffffff",
"timeline-text-color": "#2e2f32",
"timeline-text-secondary-color": "#61708b",
"timeline-highlights-color": "#f3f8fd",
"username-colors": ["#ff0000", ...]
"avatar-background-colors": ["#cc0000", ...]
}
}
]
}
```
You can also modify the homepage for the Element Web client, to do so requires modification to your Well-Known Delegations' `Additional Configuration`, see [Element Web Custom Home](https://web-docs.element.dev/Element%20Web/custom-home.html) for more information and specifically the Well-Known Delegation documentation page under the Integrations chapter.
# Homeserver Admin Section
Configuration options relating to the deployed Homeserver Admin instance provided by ESS.
Homeserver Admin is the web-based client for the Synapse Admin API. Homeserver Admin serves as a user interface for administering Synapse homeservers, allowing management of users, rooms, federation and more.
All settings configured via the UI in this section will be saved to your deployment.yml, with the contents of secrets being saved to secrets.yml. You will find specific configuration examples in each section.
Config Example
```yml
spec:
components:
synapseAdmin:
```
By default, if you do not change any settings on this page, default Homeserver Admin pod CPU and Memory requirements will be added to your configuration file/s (see example below).
Config Example
```yml
spec:
components:
synapseAdmin:
k8s:
workloads:
resources:
limits:
memory: 500Mi
requests:
cpu: 50m
memory: 50Mi
```
### Advanced
#### Verify TLS
[](https://ems-docs.element.io/uploads/images/gallery/2024-05/image-1716547797875.png)
Config Example
```yml
spec:
components:
synapseAdmin:
# Not present if 'Use Global Setting' selected
config:
# verifyTls: useGlobalSetting
# verifyTls: force
verifyTls: disable
```
Configures TLS verification, options include:
- `Use Global Setting`
- `Force`
- `Disable`
It is not recommended to change this setting.
### Delegated Authentication
If you are using delegated authentication and have kept `Allow Local Users Login` as `Auto` or set have directly set to `Disabled` then the built-in defualt Synapse Admin user `onprem-admin-donotdelete` will not be able to login.
Once deployed, to promote a user from your identity provider to Synapse Admin i.e. Bob:
1. Ensure they have logged in once. so that their Matrix ID has been created, i.e. @bob:example.com
2. Use the following to promote them to Synapse Admin:
```bash
kubectl exec -n element-onprem -it pods/synapse-postgres-0 -- /usr/bin/psql -d synapse -U synapse_user -c "update users set admin = 1 where name = '@bob:example.com';"
```
# Integrator Section
Configuration options relating to the Integrator provided by ESS.
In the Integrator section you will find options to configure settings specific to the integrator which is used to send messages to external services. By default, it is unlikely you should need to configure anything on this page, unless you wish to enable the use of Custom Widgets.
All settings configured via the UI in this section will be saved to your deployment.yml, with the contents of secrets being saved to secrets.yml. You will find specific configuration examples in each section.
By default, if you do not change any settings on this page, defaults will be added to your configuration file/s (see example below).
Config Example
```yml
apiVersion: matrix.element.io/v1alpha2
kind: ElementDeployment
metadata:
annotations:
ui.element.io/layer: |
integrator:
k8s:
workloads:
_value: defaulted
spec:
components:
integrator:
k8s:
workloads:
resources:
appstore:
limits:
memory: 400Mi
requests:
cpu: 50m
memory: 100Mi
integrator:
limits:
memory: 350Mi
requests:
cpu: 100m
memory: 100Mi
modularWidgets:
limits:
memory: 200Mi
requests:
cpu: 50m
memory: 50Mi
scalarWeb:
limits:
memory: 200Mi
requests:
cpu: 50m
memory: 50Mi
```
### Config
#### Custom Widgets
[](https://ems-docs.element.io/uploads/images/gallery/2024-06/image-1718016387622.png)
Config Example
```yml
spec:
components:
integrator:
config:
# Not present if 'false' is selected
# enableCustomWidgets: false
enableCustomWidgets: true
```
Gives users the ability to add Custom Widgets to their rooms which can display an embedded a web page.
[](https://ems-docs.element.io/uploads/images/gallery/2024-06/image-1718017391299.png)
#### Verify TLS
[](https://ems-docs.element.io/uploads/images/gallery/2024-05/image-1716547797875.png)
Config Example
```yml
spec:
components:
integrator:
# Not present if 'Use Global Setting' selected
config:
# verifyTls: useGlobalSetting
# verifyTls: force
verifyTls: disable
```
Configures TLS verification, options include:
- `Use Global Setting`
- `Force`
- `Disable`
It is not recommended to change this setting.
### Log
#### Root Level
[](https://ems-docs.element.io/uploads/images/gallery/2024-06/image-1718017894395.png)
Config Example
```yml
spec:
components:
integrator:
config:
log:
# Not present if left at default 'info'
level: info
# level: debug
# level: warning
# level: error
```
As defined under the [Configuration file format](https://docs.python.org/3/library/logging.config.html#configuration-file-format) section of the Python docs, the available options presented by the Installer are `DEBUG`, `INFO`, `WARNING`, `ERROR` and `CRITICAL`. These represent different severity levels for log messages and help control the verbosity of log output which help to filter messages based on their importance.
- `DEBUG`: Detailed information, typically used for debugging purposes. Messages at this level provide the most fine-grained and detailed logging.
- `INFO`: General information about the program's operation. This level is used to confirm that things are working as expected.
- `WARNING`: Indicates a potential issue or something that might cause problems in the future. It doesn't necessarily mean an error has occurred, but it's a warning about a possible concern.
- `ERROR`: Indicates a more serious issue or error in the program. When an error occurs, it might impact the functionality of the application.
When troubleshooting, increasing the log level and redeploying can help narrow down where you're experiencing issues. By default, `DEBUG` is a good option to include everything allowing you to identify a problem.
It is not advised to leave your Logging Level at anything other than the default, as more verbose logging may expose information that should otherwise not be accessible. When sharing logs, remember to redact any sensitive information you do not wish to share.
#### Structured
[](https://ems-docs.element.io/uploads/images/gallery/2024-06/image-1718018012799.png)
Config Example
```yml
spec:
components:
integrator:
config:
log:
# Not present if left at default 'false'
# structured: false
structured: true
```
Disabled by default, turn on to output logs in logstash format. Otherwise, logs are output in a console friendly format.
### Postgres
If you are performing a Standalone deployment and letting the installer deploy Postgres for you, you will not need to configure any options here:
[](https://ems-docs.element.io/uploads/images/gallery/2024-06/image-1718018164390.png)
For all other deployments, you will need to configure your PostgreSQL database connection details.
#### Database
[](https://ems-docs.element.io/uploads/images/gallery/2024-08/image-1724338606653.png)
Config Example
```yml
spec:
components:
integrator:
config:
postgresql:
database: integrator
```
Enter the name of the PostgreSQL Database you configured per the previously mentioned [Requirements and Recommendations](https://ems-docs.element.io/books/element-server-suite-classic-documentation-lts-2404/page/requirements-and-recommendations) to use for Integrator.
#### Host
[](https://ems-docs.element.io/uploads/images/gallery/2024-08/image-1724150463007.png)
Config Example
```yml
spec:
components:
integrator:
config:
postgresql:
host: db.example.com
```
Enter the fully qualified domain name of the PostgreSQL Database you configured per the previously mentioned [Requirements and Recommendations](https://ems-docs.element.io/books/element-server-suite-classic-documentation-lts-2404/page/requirements-and-recommendations) to use for Integrator.
#### Port
[](https://ems-docs.element.io/uploads/images/gallery/2024-08/image-1724150637542.png)
Config Example
```yml
spec:
components:
integrator:
config:
postgresql:
# port not present when left as default 5432
port: 5432
```
Defaults to `5432`, either keep if correct or provide the required port of the PostgreSQL Database you configured per the previously mentioned [Requirements and Recommendations](https://ems-docs.element.io/books/element-server-suite-classic-documentation-lts-2404/page/requirements-and-recommendations) to use for Integrator.
#### SSL Mode
[](https://ems-docs.element.io/uploads/images/gallery/2024-08/image-1724150860317.png)
Config Example
```yml
spec:
components:
integrator:
config:
postgresql:
# sslMode not present when left as default `require`
sslMode: require
# sslMode: disable
# sslMode: no-verify
# sslMode: verify-full
```
Defaults to `No Verify` - it is not recommended to disable SSL, so for most setups, this setting should be left as default.
You should adjust to accommodate your environment as required, the options available are:
- Disable
- No Verify
- Verify Full
#### User
[](https://ems-docs.element.io/uploads/images/gallery/2024-08/image-1724151253559.png)
Config Example
```yml
spec:
components:
integrator:
config:
postgresql:
user: test-username
```
Enter the username of a user who can access the PostgreSQL Database you configured per the previously mentioned [Requirements and Recommendations](https://ems-docs.element.io/books/element-server-suite-classic-documentation-lts-2404/page/requirements-and-recommendations) to use for Synapse.
#### PostgreSQL Password
[](https://ems-docs.element.io/uploads/images/gallery/2024-08/image-1724151325375.png)
Config Example
- `secrets.yml`
```yml
apiVersion: v1
kind: Secret
metadata:
name: integrator
namespace: element-onprem
data:
postgresPassword: dGVzdC1wYXNzd29yZA==
```
Enter the password for the specified user who can access the PostgreSQL Database you configured per the previously mentioned [Requirements and Recommendations](https://ems-docs.element.io/books/element-server-suite-classic-documentation-lts-2404/page/requirements-and-recommendations) to use for Synapse.
### Jitsi Domain
[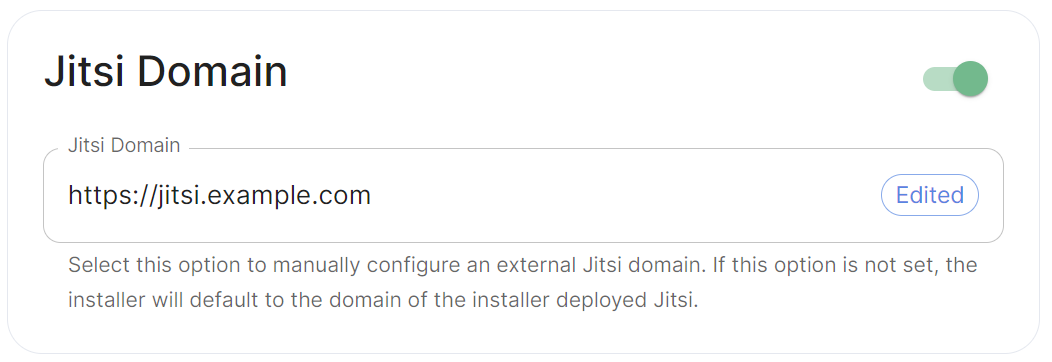](https://ems-docs.element.io/uploads/images/gallery/2024-06/image-1718018184784.png)
Config Example
```yml
spec:
components:
integrator:
config:
jitsiDomain: https://jitsi.example.com
```
Enable this option to manually configure an external Jitsi domain. If this option is not set, the installer will default to the domain of the installer deployed Jitsi (if applicable).
# Integrations
# Setting Up Jitsi and TURN With the Installer
## Configure the Installer to install Jitsi and TURN
### Prerequisites
#### Firewall
You will have to open the following ports to your microk8s host (or k8s cluster) to enable coturn and jitsi :
For jitsi :
- `30301/tcp`
- `30300/udp`
For coturn, allow the following ports :
- `3478/tcp`
- `3478/udp`
- `5349/tcp`
- `5349/udp`
You will also have to allow the following port range, depending on the settings you define in the installer (see below) :
- `-/udp`
#### DNS
The jitsi and coturn domain names must resolve to the VM access IP. You must not use `host_aliases` for these hosts to resolve to the private IP locally on your setup.
### Coturn
From the Installer's Integrations page, click "Install" under "Coturn".
For the coturn.yml presented by the installer, edit the file and ensure the following values are set:
- `coturn_fqdn`: The access address to coturn. It should match something like `coturn.`. **It must resolve to the public-facing IP of the VM**.
- `shared_secret`: A random value, you can generate it with `pwgen 32`
- `min_port`: The minimal UDP Port used by coturn for relaying UDP Packets, in range 32769-65535
- `max_port`: The maximum UDP Port used by coturn for relaying UDP Packets, in range 32769-65535
Further, if you are using your own certificates instead of letsencrypt, for the `coturn_fqdn`, you will need to provide certificates for the installer outside of the GUI. Please find your `~/.element-enterprise-server/config` directory and create a directory called `~/.element-enterprise-server/config/legacy/certs` under which to put a .crt/.key PEM encoded certificate for this fqdn. If your fqdn was coturn.airgap.local, your filenames would need to be `coturn.airgap.local.crt` and `coturn.airgap.local.key`. You will need to have these certificate files in place before running the installer.
### Jitsi
From the Installer's Integrations page, click "Install" under "Jitsi".
For the jitsi.yml presented by the installer, edit the file and ensure the following values are set:
- `jitsi_fqdn`: The access address to jitsi. It should match something like `jitsi.`. **It must resolve to the public-facing IP of the VM**.
- `jicofo_auth_password`: # a secret internal password for jicofo auth
- `jicofo_component_secret`: # a secret internal password for jicofo component
- `jvb_auth_password`: # a secret internal password for jvb
- `helm_override_values`: {} # if needed, to override helm settings automatically set by the installer; For Helm values that can be overriden, see For environment variables that can be passed in via Helm overrides, see
- `timezone`: Europe/Paris # The timezone in [TZ format](https://en.wikipedia.org/wiki/List_of_tz_database_time_zones)
- `stun_servers`: Needed if you don't setup coturn using the installer. Should be a yaml list of server:port entries. Example:
```
stun_servers:
- ip:port
- ip:port
```
Further, for the `jitsi_fqdn`, you will need to provide .crt/.key PEM encoded certificates. These can be entered in the installer UI. If your fqdn was jitsi.airgap.local, your filenames would need to be `jitsi.airgap.local.crt` and `jitsi.airgap.local.key`. You will need to edit the file name field in the UI before pressing "Choose File" button when selecting the certificates.
If your network does not have any NAT, Jitsi cannot use the local coturn server to determine the IP it should advertise to the users. In this case, you might have issues with your calls and video. To workaround it, you can use the following configuration :
```yaml
provide_node_address_as_public_ip: true
helm_override_values:
jvb:
extraEnvs:
- name: JVB_ADVERTISE_IPS
value: "public ip of jitsi"
- name: JVB_ADVERTISE_PRIVATE_CANDIDATES
value: "true"
```
### Element
Please go to the "Element Web" page of the installer, click on "Advanced" and add the following to "Additional Configuration":
```text
{
"jitsi": {
"preferred_domain": ""
}
}
```
In the above text, you will want to replace `` with the actual fqdn.
## Configure the installer to use an existing Jitsi instance
Please go to the "Element Web" page of the installer, click on "Advanced" and add the following to "Additional Configuration":
```lang-none
{
"jitsi": {
"preferred_domain": "your.jitsi.example.org"
}
}
```
replacing `your.jitsi.example.org` with the hostname of your Jitsi server.
You will need to re-run the installer for this change to take effect.
# Setting up Group Sync with the Installer
## What is Group Sync?
Group Sync allows you to use the ACLs from your identity infrastructure
in order to set up permissions on Spaces and Rooms in the Element
Ecosystem. Please note that the initial version we are providing
only supports a single node, non-federated configuration.
## Configuring Group Sync
From the Installer's Integrations page, click "Install" under "Group Sync".
[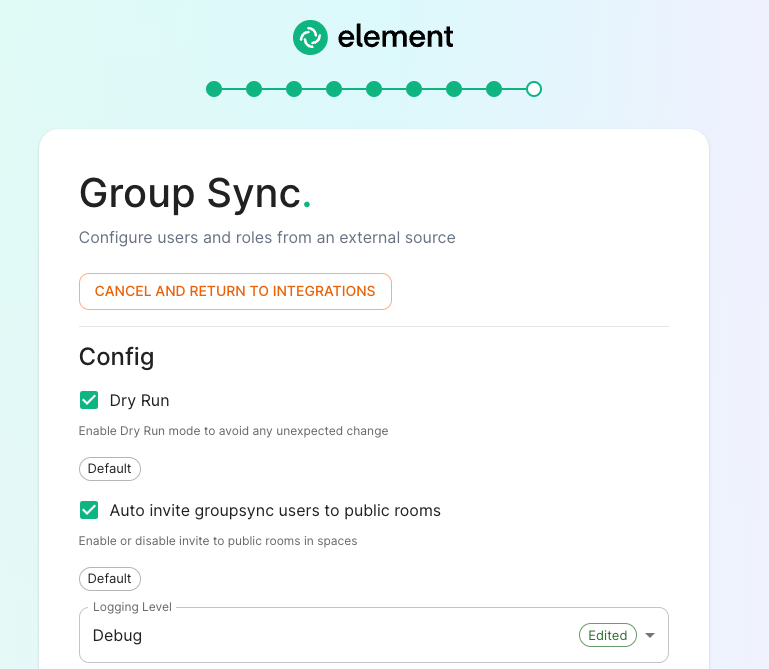](https://ems-docs.element.io/uploads/images/gallery/2023-04/basic-config.png)
- Leaving `Dry Run` checked in combination with `Logging Level` set to `Debug` gives you the ability to visualize in the pod's log file what result group sync will produce without effectively creating spaces and potentially corrupting your database. Otherwise, uncheck `Dry Run` to create spaces according to your spaces mappings defined in the `Space mapping` section.
- `Auto invite groupsync users to public room` determines whether users will be automatically invited to rooms (default, public and space-joinable). Users will still get invited to spaces regardless of this setting.
## Configuring the source
### LDAP Servers
- You should create a LDAP account with read access.
- This account should use password authentication.
- `LDAP Base DN`: the distinguished name of the root level Org Unit in your LDAP directory. In our example, `Demo Corp` is our root level, spaces are mapped against Org Units , but you can map a space against any object (groups, security groups,..) belonging to this root level. **The root level must contain all the Users, Groups and OUs used in the space mapping.**
[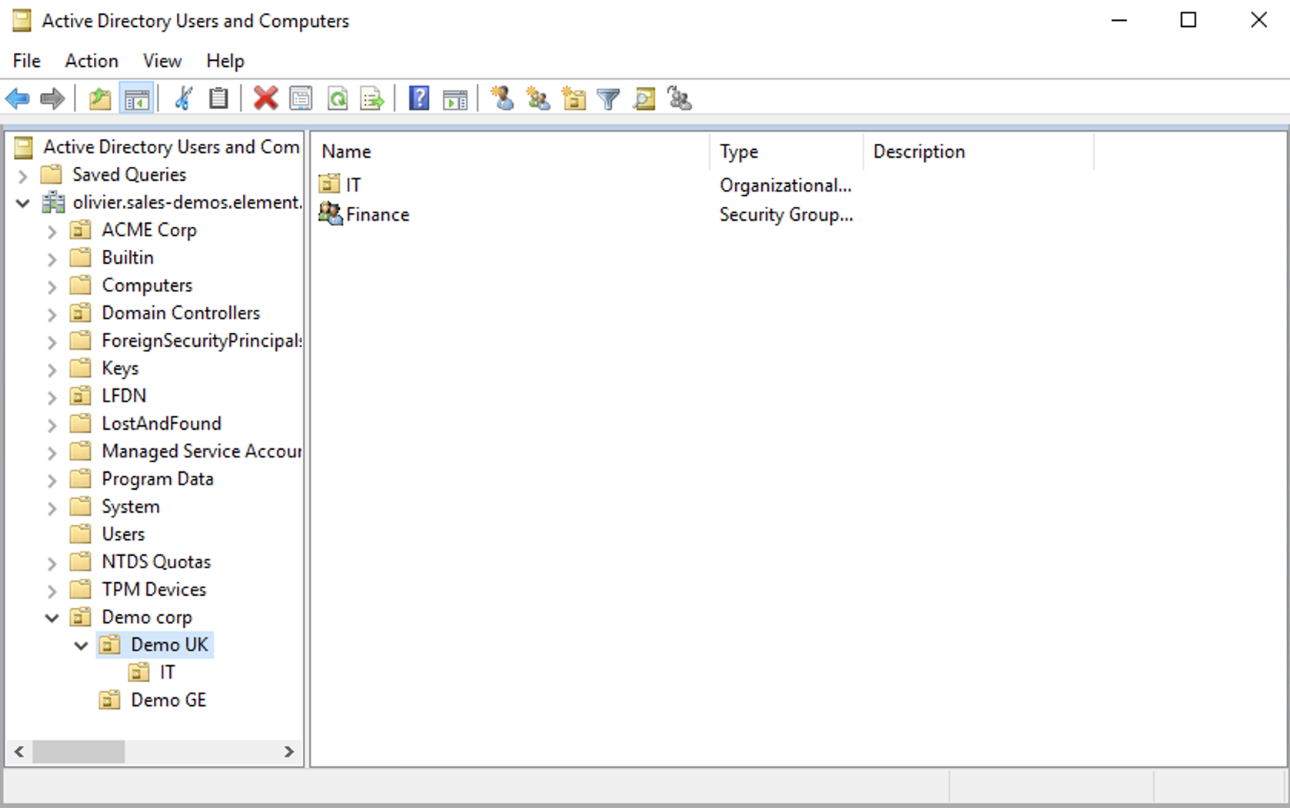](https://ems-docs.element.io/uploads/images/gallery/2023-04/OGQscreenshot-2023-04-28-at-14-05-43.png)
The distinguished name can be displayed by selecting `View`/`Advanced Features` in the Active Directory console and then, right-clicking on the object, selecting `Properties`/`Attributes Editor`.
The DN is `OU=Demo corp,DC=olivier,DC=sales-demos,DC=element,DC=io`.
- `Mapping attribute for room name`: LDAP attribute used to give an internal ID to the space (visible when setting the log in debug mode)
- `Mapping attribute for username`: LDAP attribute like `sAMAccountName` used to map the localpart of the mxid against the value of this attribute.
If `@bob:my-domain.org` is the mxid, `bob` is the localpart and groupsync expects to match this value in the LDAP attribute `sAMAccountName`.
- `LDAP Bind DN`: the distinguished name of the LDAP account with read access.
- `Check interval in seconds`: the frequency Group sync refreshes the space mapping in Element.
- `LDAP Filter`: an [LDAP filter](https://ldap.com/ldap-filters/) to filter out objects under the LDAP Base DN. **The filter must be able to capture Users, Groups and OUs used in the space mapping.**
- `LDAP URI`: the URI of your LDAP server.
- `LDAP Bind Password`: the password of the LDAP account with read access.
### MS Graph (Azure AD)
- You need to create an `App registration`. You'll need the `Tenant ID` of
the organization, the `Application (client ID)` and a secret generated from
`Certificates & secrets` on the app.
- For the bridge to be able to operate correctly, navigate to API permissions
and ensure it has access to Group.Read.All, GroupMember.Read.All and
User.Read.All. Ensure that these are Application permissions (rather than Delegated).
- Remember to grant the admin consent for those.
- To use MSGraph source, select MSGraph as your source.
- `msgraph_tenant_id`: This is the "Tenant ID" from your Azure Active
Directory Overview
- `msgraph_client_id`: Register your app in "App registrations". This
will be its "Application (client) ID"
- `msgraph_client_secret` : Go to "Certificates & secrets", and click
on "New client secret". This will be the "Value" of the created secret
(not the "Secret ID").
## Space Mapping
The space mapping mechanism allows us to configure spaces that Group Sync will maintain, beyond the ones that you can create manually.
It is optional – the configuration can be skipped but if you enable Group Sync, you have to edit the Space mapping by clicking on the `EDIT` button and rename the `(unnamed space)`to something meaningful.
[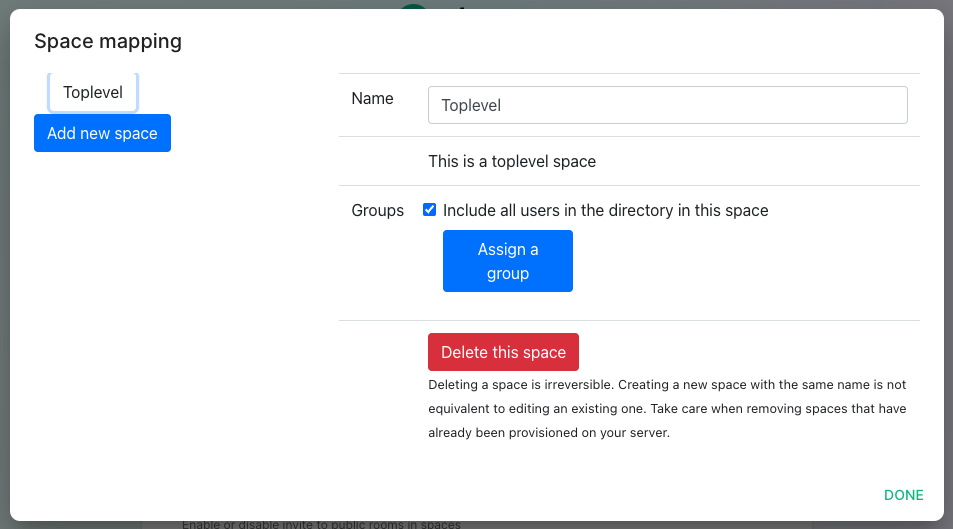](https://ems-docs.element.io/uploads/images/gallery/2023-05/screenshot-2023-05-03-at-14-30-55.png)
`Include all users in the directory in this space`: all available users, regardless of group memberships join the space. This option is convenient when creating a common subspace shared between all users.
[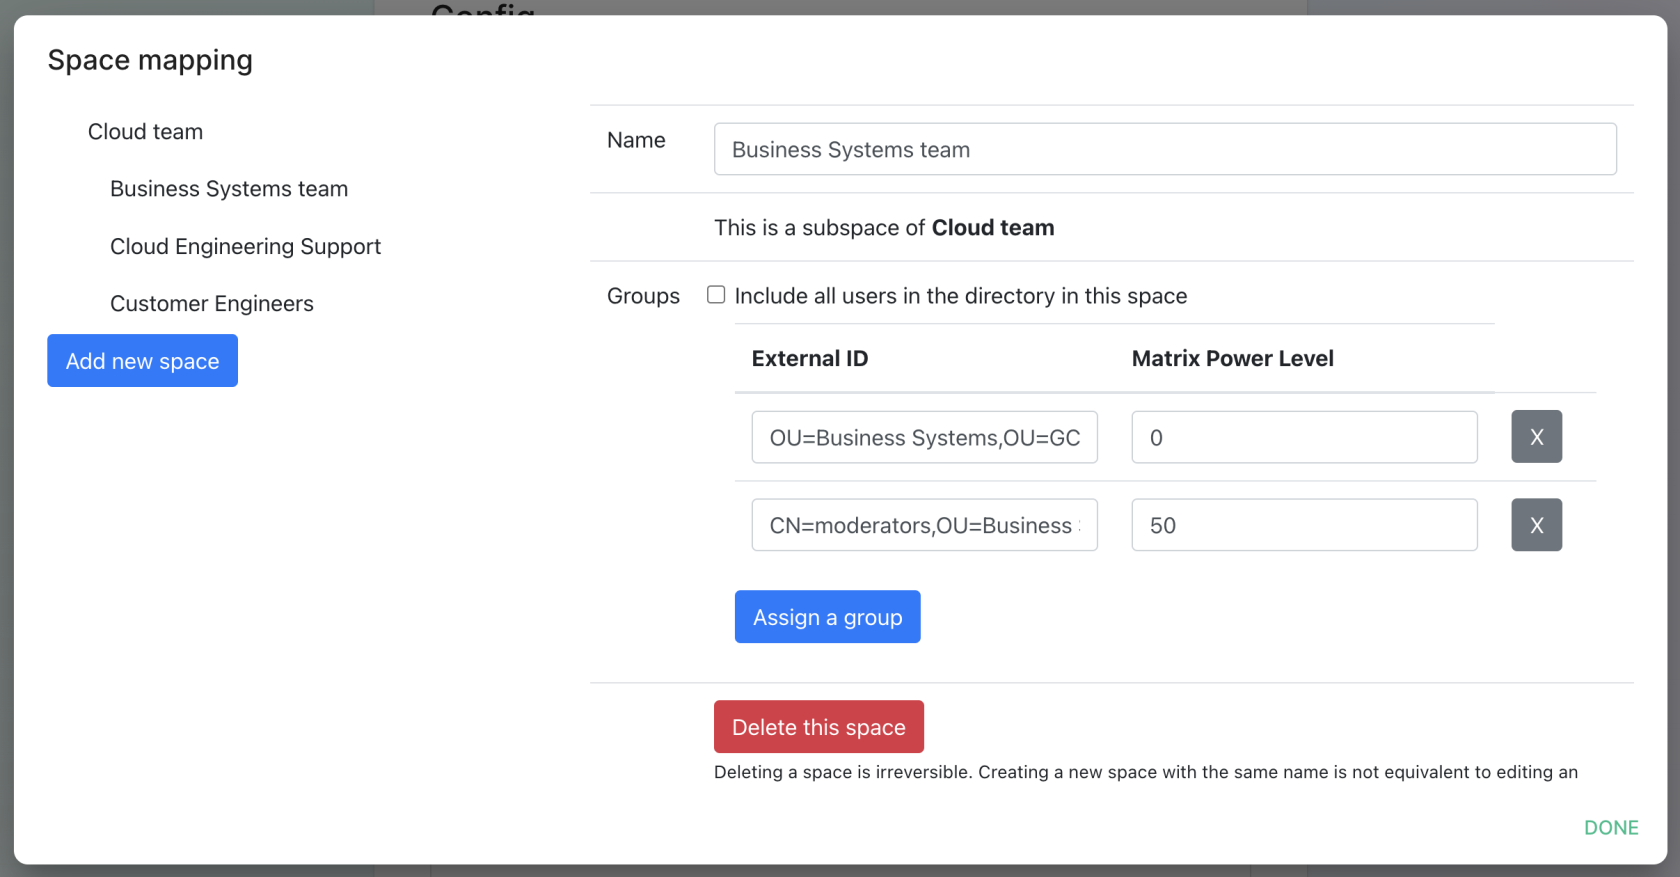](https://ems-docs.element.io/uploads/images/gallery/2023-05/screenshot-2023-05-09-at-16-57-23.png)
When clicking on `Add new space`, you can leave the space as a top level space or you can drag and drop this space onto an existing space, making this space a subspace of the existing space.
You can then map an external ID (the LDAP distinguished name) against a power level. Every user belonging to this external ID is granted the power level set in the interface. This external ID that can be any LDAP object like an OrgUnit, a Group or a Security Group. **The external ID is case-sensitive**
A power level 0 is a default user that can write messages, react to messages and delete his own messages.
A power level 50 is a moderator that can creates rooms, delete messages from members.
A power level 100 is an administrator but since GroupSync manages spaces, invitations to the rooms, it does not make sense to map a group against a power level 100.
Custom power levels other than 0 and 50 are not supported yet.
## Users allowed in every GroupSync room
[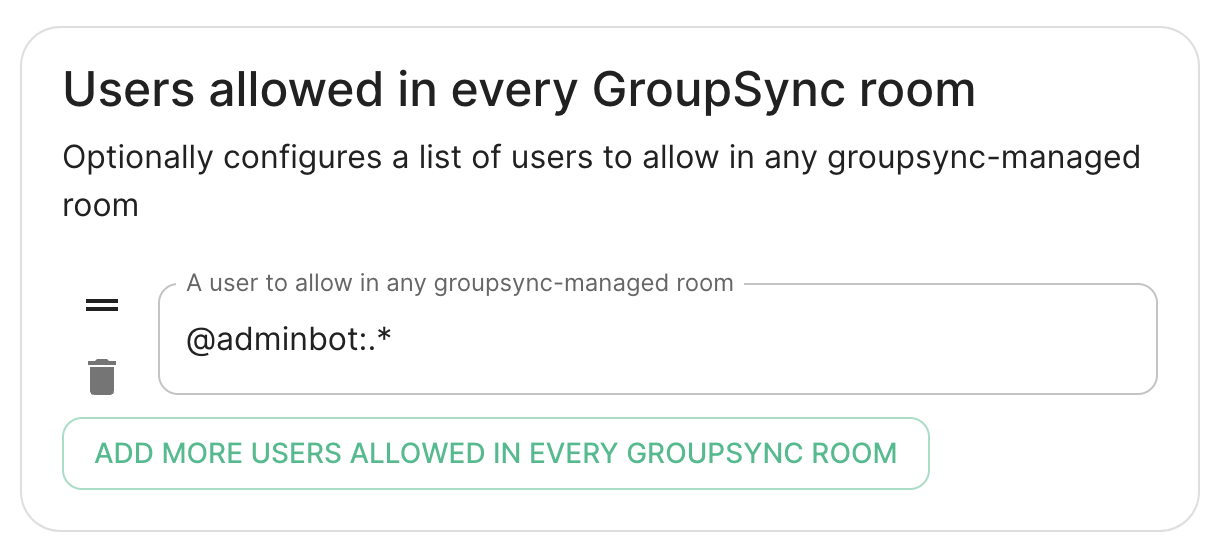](https://ems-docs.element.io/uploads/images/gallery/2023-05/screenshot-2023-05-09-at-16-05-13.png)
A list of userid patterns that will not get kicked from rooms even if they don't belong to them according to LDAP.
This is useful for things like auditbot if Audibot has been enabled.
Patterns listed here will be wrapped in ^ and $ before matching.
## Defaults Rooms
[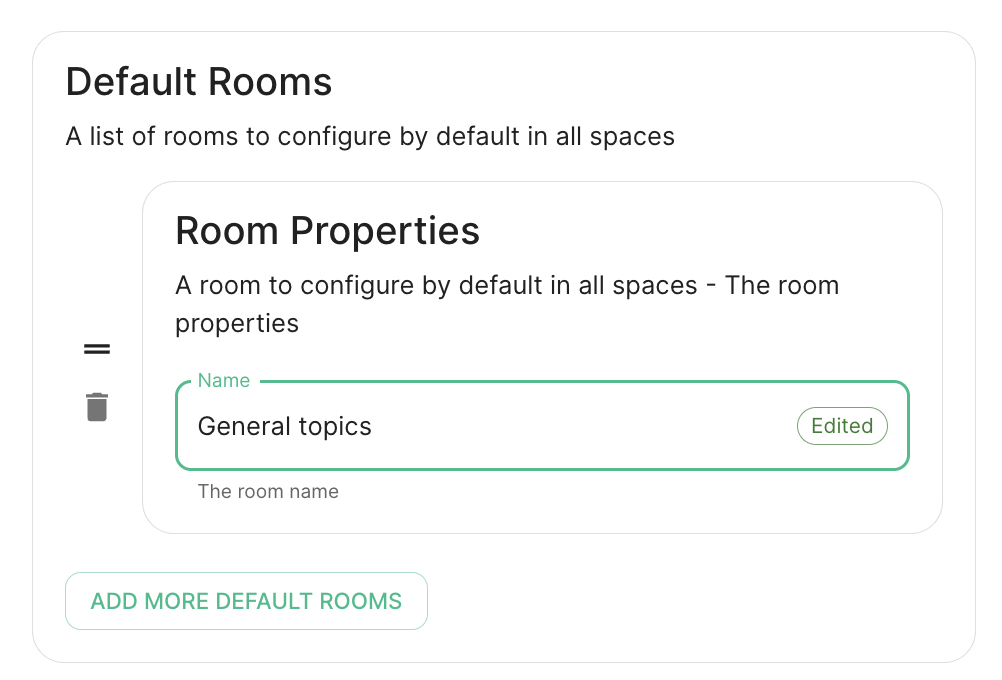](https://ems-docs.element.io/uploads/images/gallery/2023-05/screenshot-2023-05-09-at-16-30-39.png)
A list of rooms added to every space
## H
# Setting up GitLab, GitHub, JIRA and Webhooks Integrations With the Installer
In Element Server Suite, our GitLab, GitHub, and JIRA extensions
are provided by the hookshot package. This documentation explains how to
configure hookshot.
## Configuring Hookshot with the Installer
From the Installer's Integrations page, click "Install" under "Hookshot: Github, Gitlab, Jira, and Custom Webhooks."
On the first screen here, we can set the logging level and a hookshot specific verify tls setting. Most users can leave these alone.
To use hookshot, you will need to generate a hookshot password key, when can be done by running the following command on a Linux command line:
```bash
openssl genpkey -out passkey.pem -outform PEM -algorithm RSA -pkeyopt rsa_keygen_bits:4096
```
which will generate output similar to this:
```bash
..................................................................................................................................................................++++
......................................................................................++++
```
Once this has finished, you will have a file called passkey.pem that can use to upload as the "Hookshot Password key".
If you wish to change the hookshot provisioning secret, you can, but you can also leave this alone as it is randomly generated by the installer.
Next, we get to a set of settings that allow us to make changes to the Hookshot bot's appearance.
There is also a button to show widget settings, which brings up these options:
In this form, we have the ability to control how widgets are incorporated into rooms (the defaults are usually fine) and to set a list of Disallowed IP ranges wherein widgets will not load if the homeserver IP falls in the range. If your homeservers IP falls in any of these ranges, you will want to remove that range so that the widgets will load!
Next, we have the option to enable Gitlab, which shows us the following settings:
The webhook secret is randomly generated and does not need to be changed. You can also add Gitlab instances by specifying an instance name and pasting the URL.
Next, we have the option to enable Jira, which shows us the following settings:
In here, we can specify the OAuth Client ID and the OAuth client secret to connect to Jira. To obtain this information, please follow these steps:
The JIRA service currently only supports atlassian.com (JIRA SaaS) when
handling user authentication. Support for on-prem deployments is hoping to
land soon.
- You'll first need to head to
https://developer.atlassian.com/console/myapps/create-3lo-app/ to create a
"OAuth 2.0 (3LO)" integration.
- Once named and created, you will need to:
- Enable the User REST, JIRA Platform REST and User Identity APIs under
Permissions.
- Use rotating tokens under Authorisation.
- Set a callback url. This will be the public URL to hookshot with a path
of /jira/oauth.
- Copy the client ID and Secret from Settings
Once you've set these, you'll notice that a webhook secret has been randomly generated for you. You can leave this alone or edit it if you desire.
Next, let's look at configuring Webhooks:
You can set whether or not webhooks are enabled and whether they allow JS Transformation functions. It is good to leave these enabled per the defaults. You can also specify the user id prefix for the creation of custom webhooks. If you set this to `webhook_` then each new webhook will appear in a room with a username starting with `webhook_`.
Next, let's look at configuring Github:
This bridge requires a GitHub App. You will need to create one. Once you have created this, you'll be able to fill in the Auth ID and OAuth Client ID. You will also need to generate a "Github application key file" to upload this. Further, you will need to specify a "Github OAuth client secret" and a "Github webhook secret", both of which will appear on your newly created Github app page.
On this screen, we have the option to change how we call the bot and other minor settings. We also have the ability to select which hooks we provide notifications for, what labels we wish to exclude, and then which hooks we will ignore completely.
Now we have the ability to add a list of labels that we want to match. This has the impact of the integration only notifying you of issues with a specifc set of labels.
We then have the ability to add a list of labels that all newly created issues through the bot should be labeled with.
Then we have the ability to enable showing diffs in the room when a PR is created.
Moving along, we can configure how workflow run results are configured in the bot, including matching specific workflows and including or excluding specific workflows.
## Finishing Configuration
You furrther have the ability to click "Advanced" and set any kubernetes specific settings for how this pod is run. Once you have set everything up on this page, you can click "Continue" to go back to the Integrations page.
When you have finished running the installer and the hookshot pod is up and running, there are some configurations to handle in the Element client itself in the rooms that you wish the integration to be present.
As an admin, you will need to enable hookshot in the rooms using the "Add widgets, bridges, & bots" functionality to add the "Hookshot" widget to the room and finish the setup.
# Setting up Adminbot and Auditbot
## Overview
Adminbot allows for an Element Administrator to become admin in any existing room or space on a managed homeserver. This enables you to delete rooms for which the room administrator has left your company and other useful administration actions.
Auditbot allows you to have the ability to export any communications in any room that the auditbot is a member of, even if encryption is in use. This is important in enabling you to handle compliance requirements that require chat histories be obtainable.
## On using Admin Bot and Audit Bot
Currently, we deploy a special version of Element Web to allow you to log in as the adminbot and auditbot. Given this, please do not make changes to widgets in rooms while logged in as the adminbot or the auditbot. The special Element Web does not have any custom settings that you have applied to the main Element Web that your users use and as such, you can cause problems for yourself by working with widgets as the adminbot and auditbot. In the future, we are working to provide custom interfaces for these bots.
### Configuring Admin Bot
From the Installer's Integrations page, click "Install" under "Admin Bot"
You will then see the following:
Your first choice is to configure adminbot or enable this server as part of a federated adminbot cluster. For most cases, you'll want to select "Configure Adminbot".
Below this, we have a checkbox to either allow the adminbot to participate in DM rooms (rooms with 1-2 people) or not.
We also have a checkbox to join local rooms only. You probably want to leave this on. If you turn it off, the adminbot will try to join any federated rooms that your server is joined to.
Moving on, we also have the ability to change the logging level and set the username of the bot.
After this, we have the ability to set the "Backup Passphrase" which is used to gain access to the key backup store.
Two settings that need to be set in the "Advanced" section are the fqdn for the adminbot element web access point and its certifactes. These settings can be found by clicking "Advanced" and scrolling to:
Your first choice is to configure auditbot or enable this server as part of a federated auditbot cluster. For most cases, you'll want to select "Configure Auditbot".
Below this, we have a checkbox to either allow the adminbot to participate in DM rooms (rooms with 1-2 people) or not.
We also have a checkbox to join local rooms only. You probably want to leave this on. If you turn it off, the adminbot will try to join any federated rooms that your server is joined to.
Moving on, we also have the ability to change the logging level and set the username of the bot.
After this, we have the ability to set the "Backup Passphrase" which is used to gain access to the key backup store.
You can also configure an S3 bucket to log to and you can configure how many logfiles should be kept and how large a log file should be allowed to grow to. By default, the auditbot will log to the storage that has been attached by the cluster (check the storage settings under the "Advanced" tab).
Two settings that need to be set in the "Advanced" section are the fqdn for the auditbot element web access point and its certifactes. These settings can be found by clicking "Advanced" and scrolling to:
## Adminbot Federation
### On the central admin bot server
You will pick "Configure Admin Bot" and will fill in everything from the above Adminbot configuration instructions, but you will also add Remote Federated Homeservers in this interface:
You will need to fill out this form for each remote server that will join the federation. You will need to set the domain name and the matrix server for each to get started.
You will also need to grab the Admin user authentication token for each server and specify that here. You may get this with the following command run against a specific server: `kubectl get synapseusers/adminuser-donotdelete -n element-onprem -o yaml`. You are looking for the value of the field `status.accessToken`.
Then in the app service, you can leave Automatically compute the appservice tokens set. You will need to also get the generic shared secret from that server and specify it here as well. You can get this value from running: `kubectl get -n element-onprem secrets first-element-deployment-synapse-secrets -o yaml | grep registration` and looking at the value for the registrationSharedSecret.
### On the remote admin bot server
Instead of selecting "Configure Adminbot", you will pick "Enable Central Adminbot Access" and will then be presented with this UI:
You will then specify the FQDN of the central adminbot server.
## Auditbot Federation
### On the central auditbot server
You will pick "Configure Audit Bot" and will fill in everything from the above Auditbot configuration instructions, but you will also add Remote Federated Homeservers in this interface:
You will need to fill out this form for each remote server that will join the federation. You will need to set the domain name and the matrix server for each to get started.
You will also need to grab the Admin user authentication token for each server and specify that here. You may get this with the following command run against a specific server: `kubectl get synapseusers/adminuser-donotdelete -n element-onprem -o yaml`. You are looking for the value of the field `status.accessToken`.
Then in the app service, you can leave Automatically compute the appservice tokens set. You will need to also get the generic shared secret from that server and specify it here as well. You can get this value from running: `kubectl get -n element-onprem secrets first-element-deployment-synapse-secrets -o yaml | grep registration` and looking at the value for the registrationSharedSecret.
### On the remote audit bot server
Instead of selecting "Configure Auditbot", you will pick "Enable Central Auditbot Access" and will then be presented with this UI:
You will then specify the FQDN of the central auditbot server.
# Setting Up Hydrogen
## Configuring Hydrogen
From the Installer's Integrations page, click "Install" under "Hydrogen".
For the hydrogen.yml presented by the installer, edit the file and ensure the following values are set:
- `hydrogen_fqdn` is the FQDN that will be used for accessing hydrogen. It must have a PEM formatted SSL certificate as mentioned in the introduction. The crt/key pair must be in the `CONFIG_DIRECTORY/certs` directory.
- `extra_config` is extra json config that should be injected into the hydrogen client configuration.
You will need to re-run the installer after making these changes for them to take effect.
# Setting up On-Premise Metrics
## Setting up VictoriaMetrics and Grafana
From the Installer's Integrations page, click "Install" under "Monitoring"
For the provided prom.yml, see the following descriptions of the parameters:
- If you want to write prometheus data to a remote prometheus instance, please define these 4 variables :
- `remote_write_url`: The URL of the endpoint to which to push remote writes
- `remote_write_external_labels`: The labels to add to your data, to identify the writes from this cluster
- `remote_write_username`: The username to use to push the writes
- `remote_write_password`: The password to use to push the writes
- You can configure which prometheus components you want to deploy :
- `deploy_vmsingle`, `deploy_vmagent` and `deploy_vmoperator`: `true` to deploy VictoriaMetrics
- `deploy_node_exporter`: requires prometheus deployment. Set to `true` to gather data about the k8s nodes.
- `deploy_kube_control_plane_monitoring`: requires prometheus deployment. Set to `true` to gather data about the kube controle plane.
- `deploy_kube_state_metrics`: requires prometheus deployment. Set to `true` to gather data about kube metrics.
- `deploy_element_service_monitors`: Set to `true` to create `ServiceMonitor` resources into the K8S cluster. Set it to `true` if you want to monitor your element services stack using prometheus.
- You can choose to deploy grafana on the cluster :
- `deploy_grafana`: `true`
- `grafana_fqdn`: The FQDN of the grafana application
- `grafana_data_path`: `/mnt/data/grafana`
- `grafana_data_size`: 1G
For the specified `grafana_fqdn`, you will need to provide a crt/key PEM encoded key pair in `~/.element-enterprise-server/config/legacy/certs` prior to running the installer. If our hostname were `metrics.airgap.local`, the installer will expect to find `metrics.airgap.local.crt` and `metrics.airgap.local.key` in the ~/.element-enterprise-server/config/legacy/certs` directory. If you are using Let's Encrypt, you do not need to add these files.
After running the installer, open the FQDN of Grafana. The initial login user is `admin` and password is the value of `admin_password`. You'll be required to set a new password, please define one secured and keep it in a safe place.
~
## Logs
On single-node setups configured using our installer, if you chose to enable log aggregation via Loki, you can find your logs in Grafana by going to Explore, selecting `loki` as the data source, then use `Label filters` by for example `app`.
# Setting Up the Telegram Bridge
# Configuring Telegram bridge
## On Telegram platform
- Login to [my.telegram.org](https://my.telegram.org) to get a telegram app ID and hash (get from ). You should use a phone number associated to your company.
## Basic config
From the Installer's Integrations page, click "Install" under "Telegram Bridge".
For the provided telegram.yml file, please see the following options:
- `postgres_create_in_cluster`: `true` to create the postgres db into the k8s cluster. On a standalone deployment, it is necessary to define the `postgres_data_path`.
- `postgres_fqdn`: The fqdn of the postgres server. If using `postgres_create_in_cluster`, you can choose the name of the workload.
- `postgres_data_path`: "/mnt/data/telegram-postgres"
- `postgres_port`: 5432
- `postgres_user`: The user to connect to the db.
- `postgres_db`: The name of the db.
- `postgres_password`: A password to connect to the db.
- `telegram_fqdn`: The FQDN of the bridge for communicating with Telegram and using public login user interface.
- `max_users`: Max number of users enabled on the bridge.
- `bot_username`: The username of the bot for users to manage their bridge connectivity.
- `bot_display_name`: The display name of the bot.
- `bot_avatar`: An mx content URL to the bot avatar.
- `admins`: The list of admins of the bridge.
- `enable_encryption`: true to allow e2e encryption in bridge.
- `enable_encryption_by_default`: true to enable by default e2e encryption on every chat created by the bridge.
- `enable_public_portal`: true to give the possibility to users to login using the bridge portal UI.
- `telegram_api_id`: The telegram API ID you got from telegram platform.
- `telegram_api_hash`: The telegram api hash you got from telegram platform.
For the specified `telegram_fqdn`, you will need to provide a crt/key PEM encoded key pair in `~/.element-enterprise-server/config/legacy/certs` prior to running the installer. If our hostname were `telegram.airgap.local`, the installer will expect to find `telegram.airgap.local.crt` and `telegram.airgap.local.key` in the ~/.element-enterprise-server/config/legacy/certs` directory. If you are using Let's Encrypt, you do not need to add these files.
You will need to re-run the installer after making changes for these to take effect.
## Usage
- Talk to the telegram bot to login to the bridge. See [Telegram Bridge](https://ems-docs.element.io/books/element-cloud-documentation/page/telegram-bridge) starting at "Bridge Telegram to your Element account". Instead of addressing the bot as that document explains, use "@bot_username:domain" as per your setup.
# Setting Up the Teams Bridge
# Configuring Teams Bridge
### Register with Microsoft Azure
You will first need to generate an "Application" to serve connect your Teams bridge with Microsoft.
- Connect to Azure on to go to the Active Directory.
- Go to "Register an application screen" and register an application.
- Supported account types can be what fits your needs, but do not select "Personal Microsoft accounts"
- **Redirect URI** must be `https:///authenticate`. You must use the type `Desktop and Mobile apps`. You don't need to check any of suggested redirection URIs.
- You should be taken to a general configuration page. Click Certificates & secrets
- Generate a **Client Secret** and copy the resulting value. The value will be your `teams_client_secret`.
### Permissions
You will need to set some API permissions.
For each of the list below click Add permission > Microsoft Graph > and then set the **Delegated permissions**.
- ChannelMessage.Read.All - Delegated
- ChannelMessage.Send - Delegated
- ChatMessage.Read - Delegated
- ChatMessage.Send - Delegated
- ChatMember.Read - Delegated
- ChatMember.ReadWrite - Delegated
- Group.ReadWrite.All - Delegated
- offline_access - Delegated
- profile - Delegated
- Team.ReadBasic.All - Delegated
- User.Read - Delegated
- User.Read.All - Delegated
For each of the list below click Add permission > Microsoft Graph > and then set the **Application permissions**:
- ChannelMember.Read.All - Application
- ChannelMessage.Read.All - Application
- Chat.Create - Application
- Chat.Read.All - Application
- Chat.ReadBasic.All - Application
- Chat.ReadWrite.All - Application
- ChatMember.Read.All - Application
- ChatMember.ReadWrite.All - Application
- ChatMessage.Read.All - Application
- Group.Create - Application
- Group.Read.All - Application
- Group.ReadWrite.All - Application
- GroupMember.Read.All - Application
- GroupMember.ReadWrite.All - Application
- User.Read.All - Application
Once you are done, click **Grant admin consent**
- Go to Overview
- Copy the "Application (client) ID" as your `teams_client_id` in the config
- Copy the "Directory (tenant) ID" as the `teams_tenant_id` in the config.
### Setting up the bot user
The bridge requires a Teams user to be registered as a "bot" to send messages on behalf of Matrix users. You just need to allocate one user from the Teams interface to do this.
- First, you must go to the Azure Active Directory page.
- Click users.
- Click New user.
- Ensure **Create user** is selected.
- Enter a User name ex. "matrixbridge".
- Enter a Name ex. "Matrix Bridge".
- Enter an Initial password.
- Create the user.
- Optionally, set more profile details like an avatar.
- You will now need to log in as this new bot user to set a permanent password (Teams requires you to reset the password on login).
- After logging in you should be prompted to set a new password.
- Enter the bot username and password into config under `teams_bot_username` and `teams_bot_password`
### Getting the groupId
The groupId can be found by opening Teams, clicking ... on a team, and clicking "Get link to team". The groupId is included in the URL `12345678-abcd-efgh-ijkl-lmnopqrstuvw` in this example.
```
https://teams.microsoft.com/l/team/19%3XXX%40thread.tacv2/conversations?groupId=12345678-abcd-efgh-ijkl-lmnopqrstuvw&tenantId=87654321-dcba-hgfe-lkji-zyxwvutsrqpo
```
## On the hosting machine
### Generate teams registration keys
```sh
openssl genrsa -out teams.key 1024
openssl req -new -x509 -key teams.key -out teams.crt -days 365
```
These keys need to be placed in `~/.element-enterprise-server/config/legacy/certs/teams` on the machine that you are running the installer on.
### Configure Teams Bridge
From the Installer's Integrations page, click "Install" under "Microsoft Teams Bridge"
For the provided teams.yml, please the following documentation of the parameters:
```
teams_client_id: # teams app client id
teams_client_secret: # teams app secret
teams_tenant_id: # teams app tenant id
teams_bot_username: # teams bot username
teams_bot_password: # teams bot password
teams_cert_file: teams.crt
teams_cert_private: teams.key
teams_fqdn:
teams_bridged_groups:
- group_id: 218b0bfe-05d3-4a63-8323-846d189f1dc1 #change me
properties:
autoCreateRooms:
public: true
powerLevelContent:
users:
"@alice:example.com": 100 # This will add account as admin
"@teams-bot:example.com": 100 # the Teams bot mxid :
autoCreateSpace: true
limits:
maxChannels: 25
maxTeamsUsers: 25
# repeat "- group_id:" section above for each Team you want to bridge
bot_display_name: Teams Bridge Bot
bot_sender_localpart: teams-bot
enable_welcome_room: true
welcome_room_text: |
Welcome, your Element host is configured to bridge to a Teams instance.
This means that Microsoft Teams messages will appear on your Element
account and you can send messages in Element rooms to have them appear
on teams.
To allow Element to access your Teams account, please say `login` and
follow the steps to get connected. Once you are connected, you can open
the 🧭 Explore Rooms dialog to find your Teams rooms.
# namespaces_prefix_user: OPTIONAL: default to _teams_
# namespaces_prefix_aliases: OPTIONAL: default to teams_
```
- For each Bridged Group, you will need to set a group_id and some properties found in the config sample.
You will need to re-run the installer for changes to take effect.
# Setting Up the IRC Bridge
## Matrix IRC Bridge
The Matrix IRC Bridge is an IRC bridge for Matrix that will pass all IRC messages through to Matrix, and all Matrix messages through to IRC. Please also refer to the bridges' specific documentation for additional guidance.
For usage of the IRC Bridge via it's bot user see [Using the Matrix IRC Bridge](https://ems-docs.element.io/books/element-support/page/using-the-matrix-irc-bridge) documentation.
## Installation and Configuration
From the Installer's Integrations page find the `IRC Bridge` entry, and click `Install`.This will setup the IRC Bridges' config directory, by default this will be located:
```
~/.element-enterprise-server/config/legacy/ircbridge
```
You will initially be taken to the bridges configuration page, for any subsequent edits, the `Install` button will be replaced with `Configure`, indicating the bridge is installed.
[](https://ems-docs.element.io/uploads/images/gallery/2023-08/image-1692608418173.png)
There are two sections of the Matrix IRC Bridge configuration page, the `Bridge.yml` section, and a section to Upload a Private Key. We'll start with the latter as it's the simplest of the two, and is referenced in the first.
### Upload a Private Key
As the bridge needs to send plaintext passwords to the IRC server, it cannot send a password hash, so those passwords are stored encrypted in the bridge database. When a user specifies a password to use, using the admin room command `!storepass server.name passw0rd`, the password is encrypted using a RSA PEM-formatted private key. When a connection is made to IRC on behalf of the Matrix user, this password will be sent as the server password (PASS command).
Therefore you will need a Private Key file, by default called `passkey.pem`:
- If you have a Private Key file already, simply upload the file using this sections `Upload File` button, supplying a RSA PEM-formatted private key.
[](https://ems-docs.element.io/uploads/images/gallery/2023-08/image-1692620742637.png)
- If you don't already have one, per the instructions provided in the section itself, you should generate this file by running the following command from within the IRC Bridges' config directory:
```bash
openssl genpkey -out passkey.pem -outform PEM -algorithm RSA -pkeyopt rsa_keygen_bits:2048
```
### The `Bridge.yml` Section
The `Bridge.yml` is the complete configuration of the Matrix IRC Bridge. It points to a private key file (Private Key Settings), and both configures the bridges' own settings and functionality (Bridge Settings), and the specific IRC services you want it to connect with (IRC Settings).
#### Private Key Settings
```yml
key_file: passkey.pem
```
By default this is the first line in the `Bridge.yml` config, it refers to the file either moved into the IRC Bridges' config directory, or generated in there using `openssl`. If moved into the directory ensure the file was correctly renamed to `passkey.pem`.
#### Bridge Settings
The rest of the configuration sits under the `bridged_irc_servers:` section:
```yml
bridged_irc_servers:
```
You'll notice all entries within are initially indented (` `) so all code blocks will include this indentation. Focusing on settings relating to the bridge itself (and not any specific IRC connection) covers everything except the `address:` and associated `parameters:` sections, by default found at the end of the `Bridge.yml`.
##### Postgres
If you are using `postgres-create-in-cluster` you can leave this section as-is, the default `ircbridge-postgres` / `ircbridge` / `postgres_password` values will ensure your setup works correctly.
```yml
- postgres_fqdn: ircbridge-postgres
postgres_user: ircbridge
postgres_db: ircbridge
postgres_password: postgres_password
```
Otherwise you should edit as needed to connect to your existing Postgres setup:
- `postgres_fqdn:` Provide the URL to your Postgres setup
- `postgres_user:` Provide the user that will be used to connect to the database
- `postgres_db:` Provide the database you will connect to
- `postgres_password:` Provide the password of the user specified above
You can uncomment the following to use as needed, note if unspecified some of these will default to the advised values, you do not need to uncomment if you are happy with the defaults.
- `postgres_data_path:` This can be used to specify the path to the postgres db on the host machine
- `postgres_port:` This can be used to specify a non-standard port, this defaults to `5432`.
- `postgres_sslmode:` This can be used to specify the sslmode for the Postgres connection, this defaults to `'disable'`, however `'no-verify'` and `'verify-full` are available options
For example, your Postgres section might instead look like the below:
```yml
- postgres_fqdn: https://db.example.com
postgres_user: example-user
postgres_db: matrixircbridge
postgres_password: example-password
# postgres_data_path: "/mnt/data/-postgres"
postgres_port: 2345
postgres_sslmode: 'verify-full'
```
##### IRC Bridge Admins
Within the `admins:` section you will need to list all the Matrix User ID's of your users who should be Admins of the IRC Bridge. You should list one Matrix User ID per line using the full Matrix User ID formatted like `@USERNAME:HOMESERVER`
```yml
admins:
- "@user-one:example.com"
- "@user-two:example.com"
```
##### Provisioning
Provisioning allows you to set specified rules about existing room when bridging those rooms to IRC Channels.
- `enable_provisioning:` Set this to `true` to enable the use of `provisioning_rules:`
- `provisioning_rules:` -> `userIds:` Use Regex to specify which User IDs to check for in existing rooms that are trying to be bridged
- `exempt:` List any User IDs you do not want to prevent the bridging of a room, that would otherwise meet the match in `conflict:`
- `conflict:` Specify individual User IDs, or use Regex
- `provisioning_room_limit:` Specify the number of channels allowed to be bridged
So the example `bridge.yml` config below will block the bridging of a room if it has any User IDs within it from the `badguys.com` homeserver **except** `@doubleagent:badguys.com`, and limit the number of bridged rooms to 50.
```yml
enable_provisioning: true
provisioning_rules:
userIds:
exempt:
- "@doubleagent:badguys.com"
conflict:
- "@.*:badguys.com"
provisioning_room_limit: 50
```
##### IRC Ident
If you are using the Ident protocol you can enable it usage with the following config:
- `enable_ident:` Set this to `true` to enable the use of IRC Ident
- `ident_port_type:` Specify either `'HostPort'` or `'NodePort'` depending on your setup
- `ident_port_number:` Specify the port number that should be used
```yml
enable_ident: false
ident_port_type: 'HostPort'
ident_port_number: 10230
```
##### Miscellaneous
Finally there are a few additional options to configure:
- `logging_level:` This specifies how detailed the logs should be for the bridge, by default this is `info`, but `error`, `warn` and `debug` are available.
- You can see the bridge logs using `kubectl logs IRC_POD_NAME -n element-onprem`
- `enable_presence:` Set to `true` if presence is required.
- This should be kept as `false` if presence is disabled on the homeserver to avoid excess traffic.
- `drop_matrix_messages_after_seconds:` Specify after how many seconds the bridge should drop Matrix messages, by default this is `0` meaning no messages will be dropped.
- If the bridge is down for a while, the homeserver will attempt to send all missed events on reconnection. These events may be hours old, which can be confusing to IRC users if they are then bridged. This option allows these old messages to be dropped.
- **CAUTION:** This is a very coarse heuristic. Federated homeservers may have different clock times which may be old enough to cause *all* events from the homeserver to be dropped.
- `bot_username:` Specify the Matrix User ID of the the bridge bot that will facilitate the creation of rooms and can be messaged by admins to perform commands.
- `rmau_limit:` Set this to the maximum number of remote monthly active users that you would like to allow in a bridged IRC room.
- `users_prefix:` Specify the prefix to be used on the Matrix User IDs created for users who are communicating via IRC.
- `alias_prefix:` Specify the prefix to be used on room aliases when created via the `!join` command.
The defaults are usually best left as-is unless a specific need requires changing these, however for troubleshooting purposes, switching `logging_level` to `debug` can help identify issues with the bridge.
```yml
logging_level: debug
enable_presence: false
drop_matrix_messages_after_seconds: 0
bot_username: "ircbridgebot"
rmau_limit: 100
users_prefix: "irc_"
alias_prefix: "irc_"
```
##### Advanced Additional Configuration
You can find more advanced configuration options by checking the config.yaml sample provided on the Matrix IRC Bridge repository.
You can ignore the `servers:` block as config in that section should be added under the `parameters:` section associated with `address:` that will be setup per the below section. If you copy any config, ensure the indentation is correct, as above, all entries within are initially indented (` `), so they are under the `bridged_irc_servers:` section.
#### IRC Settings
The final section of `Bridge.yml`, here you specify the IRC network(s) you want the bridge to connect with, this is done using `address:` and `parameter:` formatted like so:
- `address:` Specify your desired IRC Network
```yml
address: irc.example.com
parameters:
```
Aside from the address of the IRC Network, everything is configured within the `parameters:` section, and so is initially indented ` `, all code blocks will include this indentation.
##### Basic IRC Network Configuration
At a minimum, you will need to specify the `name:` of your IRC Network, as well as some details for the bots configuration on the IRC side of the connection, you can use the below to get up and running.
- `name:` The server name to show on the bridge.
- `botConfig:`
- `enabled:` Keep this set as `true`
- `nick:` Specify the nickname of the bot user within IRC
- `username:` Specify the username of the bot user within IRC
- `password:` Optionally specify the password of the bot to give to NickServ or IRC Server for this nick. You can generate this by using the `pwgen 32 1` command
```yml
name: "Example IRC"
botConfig:
enabled: true
nick: "MatrixBot"
username: "matrixbot"
password: "some_password"
```
##### Advanced IRC Network Configuration (Load Balancing, SSL, etc.)
For more fine-grained control of the IRC connection, there are some additional configuration lines you may wish to make use of. As these are not required, if unspecified some of these will default to the advised values, you do not need to include any of these if you are happy with the defaults. You can use the below config options, in addition to those in the section above, to get more complex setups up and running.
- `additionalAddresses:` Specify any additional addresses to connect to that can be used for load balancing between IRCDs
- Specify each additional address within the `[]` as comma-separated values, for example:
- `[ "irc2.example.com", "irc3.example.com" ]`
- `onlyAdditionalAddresses:` Set to `true` to exclusively use additional addresses to connect to servers while reserving the main address for identification purposes, this defaults to `false`
- `port:` Specify the exact port to use for the IRC connection
- `ssl:` Set to `true` to require the use SSL, this defaults to `false`
- `sslselfsign:` Set to `true` if the IRC network is using a self-signed certificate, this defaults to `false`
- `sasl:` Set to `true` should the connection attempt to identify via SASL, this defaults to `false`
- `allowExpiredCerts:` Set to `true` to allow expired certificates when connecting to the IRC server, this defaults to `false`
- `botConfig:`
- `joinChannelsIfNoUsers:` Set to `false` to prevent the bot from joining channels even if there are no Matrix users on the other side of the bridge, this defaults to `true` so doesn't need to be specified unless `false` is required.
If you end up needing any of these additional configuration options, your `parameters:` section may look like the below example:
```yml
name: "Example IRC"
additionalAddresses: [ "irc2.example.com" ]
onlyAdditionalAddresses: false
port: 6697
ssl: true
sslselfsign: false
sasl: false
allowExpiredCerts: false
botConfig:
enabled: true
nick: "MatrixBot"
username: "matrixbot"
password: "some_password"
joinChannelsIfNoUsers: true
```
##### Mapping IRC user modes to Matrix power levels
You can use the configuration below to map the conversion of IRC user modes to Matrix power levels. This enables bridging of IRC ops to Matrix power levels only, it does not enable the reverse. If a user has been given multiple modes, the one that maps to the highest power level will be used.
- `modePowerMap:` Populate with a list of IRC user modes and there respective Matrix Power Level in the formate of `IRC_USER_MODE: MATRIX_POWER_LEVEL`
```yml
modePowerMap:
o: 50
v: 1
```
##### Configuring DMs between users
By default private messaging is enabled via the bridge and Matrix Direct Message rooms can be federated. You can customise this behaviour using the `privateMessages:` config section.
- `enabled:` Set to `false` to prevent private messages to be sent to/from IRC/Matrix, defaults to `true`
- `federate:` Set to `false` so only users on the homeserver attached to the bridge to be able to use private message rooms, defaults to `true`
```yml
privateMessages:
enabled: true
federate: true
```
##### Mapping IRC Channels to Matrix Rooms
Whilst a user can use the `!join` command (if Dynamic Channels are enabled) to manually connect to IRC Channels, you can specify mappings of IRC Channels to Matrix Rooms, 1 Channel can be mapped to multiple Matrix Rooms, up-front. The Matrix Room must already exist, and you will need to include it's Room ID within the configuration - you can get this ID by using the `3-dot menu` next to the room, and opening `Settings`.
[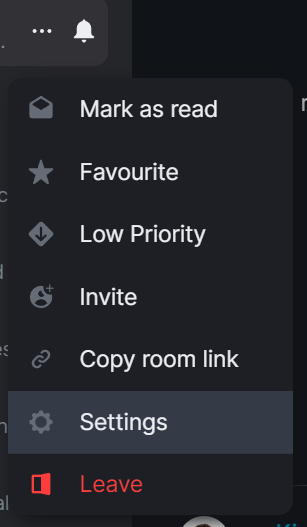](https://ems-docs.element.io/uploads/images/gallery/2023-08/image-1692627296903.png) [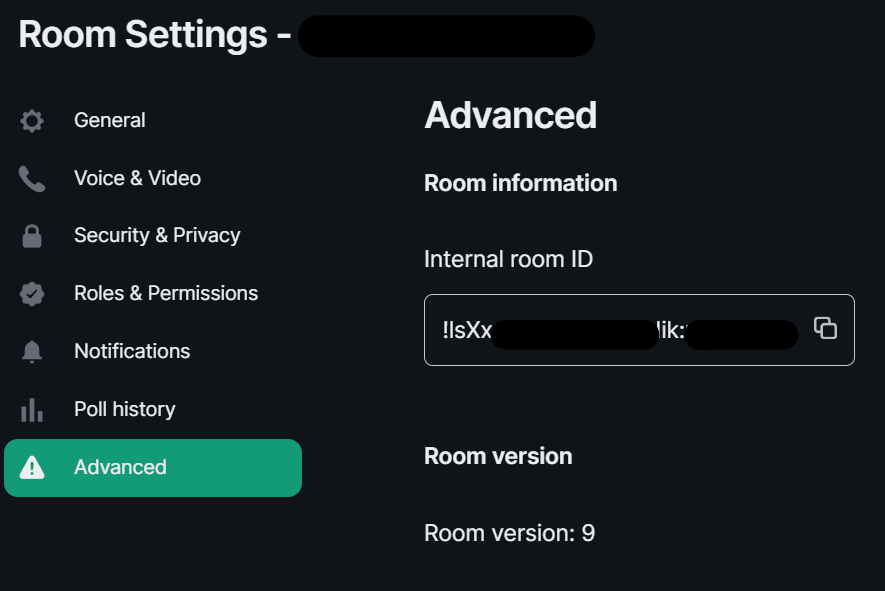](https://ems-docs.element.io/uploads/images/gallery/2023-08/image-1692627399561.png)
- `mappings:` Under here you will need to specify an IRC Channel, then within that you will need to list out the required `roomIds:` in `[]` as a comma-separated list and provide a `key:` if there is a Channel key / password to us. If provided Matrix users do not need to know the channel key in order to join it.
```yml
mappings:
"#IRC_CHANNEL_NAME":
roomIds: ["!ROOM_ID_THREE:HOMESERVER", "!ROOM_ID_TWO:HOMESERVER"]
key: "secret"
```
See the below example configuration for mapping the #welcome IRC Channel:
```yml
mappings:
"#welcome":
roomIds: ["!exampleroomidhere:example.com"]
```
##### Allowing `!join` with Dynamic Channels
If you would like for users to be able to use the `!join` command to join any allowed IRC Channel you will need to configure `dynamicChannels:`.
You may remember you set an alias prefix in the Miscellaneous section above. If you wish to fully customise the format of aliases of bridged rooms you should remove that `alias_prefix:` line. However the only benefit to this would be to add a suffix to the Matrix Room alias so is not recommended.
- `enabled:` Set to `true` to allow users to use the `!join` command to join any allowed IRC Channel, defaults to `false`
- `createAlias:` Set to `false` if you do not want an alias to be created for any new Matrix rooms created using `!join`, defaults to `true`
- `published:` Set to `false` to prevent the created Matrix room via `!join` from being published to the public room list, defaults to `true`
- `useHomeserverDirectory:` Set to `true` to publish room to your Homeservers' directory instead of one created for the IRC Bridge, defaults to `false`
- `joinRule:` Set to `"invite"` so only users with an invite can join the created room, otherwise this defaults to `"public"`, so anyone can join the room
- `whitelist:` Only used if `joinRule:` is set to `invite`, populate with a list of Matrix User IDs that the IRC bot will send invites to in response to a `!join`
- `federate:` Set to `false` so only users on the homeserver attached to the bridge to be able to use these rooms, defaults to `true`
- `aliasTemplate:` Only used if `createAlias:` is set to `true`. Set to specify the alias for newly created rooms from the `!join` command, defaults to `"#irc_$CHANNEL"`
- You should not include this line if you do not need to add a suffix to your Matrix Room alias. Using `alias_prefix:`, this will default to `#PREFIX_CHANNEL_NAME:HOMESERVER`
- If you are specifying this line, you can use the following variables within the alias:
- `$SERVER` => The IRC server address (e.g. `"irc.example.com"`)
- `$CHANNEL` => The IRC channel (e.g. `"#python"`), this must be used within the alias
- `exclude:` Provide a comma-separated list of IRC Channels within `[]` that should be prevented from being mapped under any circumstances
In addition you could also specify the below, though it is unlikely you should need to specify the exact Matrix Room Version to use.
- `roomVersion:` Set to specify the desired Matrix Room Version, if unspecified, no specific room version is requested.
- If the homeserver doesn't support the room version then the request will fail.
```yml
dynamicChannels:
enabled: true
createAlias: true
published: true
useHomeserverDirectory: true
joinRule: invite
federate: true
aliasTemplate: "#irc_$CHANNEL"
whitelist:
- "@foo:example.com"
- "@bar:example.com"
exclude: ["#foo", "#bar"]
```
##### Exclude users from using the bridge
Using the `excludedUsers:` configuration you can specify Regex to identify users to be kicked from any IRC Bridged rooms.
- `regex:` Set this to any Regex that should match on users' Matrix User IDs
- `kickReason:` Set to specify the reason provided to users when kicked from IRC Bridged rooms
```yml
excludedUsers:
- regex: "@.*:evilcorp.com"
kickReason: "We don't like Evilcorp"
```
##### Syncing Matrix and IRC Membership lists
To manage and control how Matrix and IRC membership lists are synced you will need to include `membershipLists:` within your config.
- `enabled:` Set to `true` to enable the syncing of membership lists between IRC and Matrix, defaults to `false`
- This can have a significant effect on performance on startup as the lists are synced
- `floodDelayMs:` Syncing membership lists at startup can result in hundreds of members to process all at once. This timer drip feeds membership entries at the specified rate, defaults to `10000` (10 Seconds)
Within `membershipLists:` are the following sections, `global:`, `rooms:`, `channels:` and `ignoreIdleUsersOnStartup:`. For `global:`, `rooms:`, `channels:` you can specify `initial:`, `incremental:` and `requireMatrixJoined:` which all default to `false`. You can configure settings globally, using `global:`, or specific to Matrix Rooms with `rooms:` or IRC Channels via `channels:`.
- What does setting `initial:` to `true` do?
- For `ircToMatrix:` this gets a snapshot of all real IRC users on a channel (via NAMES) and joins their virtual matrix clients to the room
- For `matrixToIrc:` this gets a snapshot of all real Matrix users in the room and joins all of them to the mapped IRC channel on startup
- What does setting `incremental:` to `true` do?
- For `ircToMatrix:` this makes virtual matrix clients join and leave rooms as their real IRC counterparts join/part channels
- For `matrixToIrc:` this makes virtual IRC clients join and leave channels as their real Matrix counterparts join/leave rooms
- What does setting `requireMatrixJoined:` to `true` do?
- This controls if the bridge should check if all Matrix users are connected to IRC and joined to the channel before relaying messages into the room. This is considered a safety net to avoid any leakages by the bridge to unconnected users but given it ignores all IRC messages while users are still connecting it's likely not required.
The last section is `ignoreIdleUsersOnStartup:` which determines if the bridge should ignore users which are not considered active on the bridge during startup.
- `enabled:` Set to `true` to allow ignoring of idle users during startup
- `idleForHours:` Set to configure how many hours a user has to be idle for before they can be ignored
- `exclude:` Provide Regex matching on Matrix User IDs that should be excluded from being marked as ignorable
```yml
membershipLists:
enabled: false
floodDelayMs: 10000
global:
ircToMatrix:
initial: false
incremental: false
requireMatrixJoined: false
matrixToIrc:
initial: false
incremental: false
rooms:
- room: "!fuasirouddJoxtwfge:localhost"
matrixToIrc:
initial: false
incremental: false
channels:
- channel: "#foo"
ircToMatrix:
initial: false
incremental: false
requireMatrixJoined: false
ignoreIdleUsersOnStartup:
enabled: true
idleForHours: 720
exclude: "foobar"
```
##### Configuring how IRC users appear in Matrix
As part of the bridge IRC users and their messages will appear in Matrix as Matrix users, you will be able to click on their profiles perform actions just like any other user. You can configure how they are display using `matrixClients:`.
You may remember you set a user name prefix in the Miscellaneous section above. If you wish to fully customise the format of your IRC users' Matrix User IDs you should remove that `users_prefix:` line. However the only benefit to this would be to add a suffix to the Matrix User ID so is not recommended.
- `userTemplate:` Specify the template Matrix User ID that IRC users will appear as, it must start with an `@` and feature `$NICK` within, `$SERVER` is usable
- You should not include this line if you do not need to add a suffix to your IRC users' Matrix IDs. Using `users_prefix:`, this will default to `@PREFIX_NICKNAME:HOMESERVER`
- `displayName:` Specify the Display Name of IRC Users that appear within Matrix, it must contain `$NICK within`, `$SERVER` is usable
- `joinAttempts:` Specify the number of tries a client can attempt to join a room before the request is discarded. Set to `-1` to never retry or `0` to never give up, defaults to `-1`
```yml
matrixClients:
userTemplate: "@irc_$NICK"
displayName: "$NICK"
joinAttempts: -1
```
##### Configuring how Matrix users appear in IRC
As part of the bridge Matrix users and their messages will appear in IRC as IRC users, you will be able to perform IRC actions on them like any other user. You can configure how this functions using `ircClients:`.
- `nickTemplate:` Set this to the template how Matrix users' IRC client nick name is set, defaults to `"$DISPLAY[m]"`
- You can use the following variables within the template, you must use at least one of these.
- $LOCALPART => The user ID localpart (e.g. `"alice"` in `@alice:localhost`)
- $USERID => The user ID (e.g. `@alice:localhost`)
- $DISPLAY => The display name of this user, with excluded characters (e.g. space) removed.
- If the user has no display name, this falls back to $LOCALPART.
- `allowNickChanges:` Set to `true` to allow users to use the `!nick` command to change their nick on the server
- `maxClients:` Set the max number of IRC clients that will connect
- If the limit is reached, the client that spoke the longest time ago will be disconnected and replaced, defaults to `30`
- `idleTimeout:` Set the maximum amount of time in seconds that a client can exist without sending another message before being disconnected.
- Use `0` to not apply an idle timeout, defaults to `172800` (48 hours)
- This value is ignored if this IRC server is mirroring matrix membership lists to IRC.
- `reconnectIntervalMs:` Set the number of millseconds to wait between consecutive reconnections if a client gets disconnected.
- Set to `0` to disable scheduling i.e. it will be scheduled immediately, defaults to `5000` (5 seconds)
- `concurrentReconnectLimit:` Set the number of concurrent reconnects if a user has been disconnected unexpectedly
- Set this to a reasonably high number so that bridges are not waiting an eternity to reconnect all its clients if we see a massive number of disconnect.
- Set to 0 to immediately try to reconnect all users, defaults to `50`
- `lineLimit:` Set the number of lines of text to allow being sent as from matrix to IRC, defaults to `3`
- If the number of lines that would be sent is > lineLimit, the text will instead be uploaded to Matrix and the resulting URI is treated as a file. A link will be sent to the IRC instead to avoid spamming IRC.
- `realnameFormat:` Set to either `"mxid"` or `"reverse-mxid"` to define the format used for the IRC realname.
- `kickOn:`
- `channelJoinFailure:` Set to `true` to kick a Matrix user from a bridged room if they fail to join the IRC channel
- `ircConnectionFailure:` Set to `true` to kick a Matrix user from ALL rooms if they are unable to get connected to IRC
- `userQuit:` Set to `true` to kick a Matrix user from ALL rooms if they choose to QUIT the IRC network
You can also optionally configure the following, they do not need to be included in your config if you are not changing their default values.
- `ipv6:`
- `only:` Set to `true` to force IPv6 for outgoing connections, defaults to `false`
- `userModes:` Specify the required IRC User Mode to set when connecting, e.g. `"RiG"` to set `+R`, `+i` and `+G`, defaults to `""` (No User Modes)
- `pingTimeoutMs:` Set the minimum time to wait between connection attempts if the bridge is disconnected due to throttling.
- `pingRateMs:` Set the rate at which to send pings to the IRCd if the client is being quiet for a while.
- Whilst IRCd *should* sending pings to the bridge to keep the connection alive, sometimes it doesn't and ends up ping timing out the bridge.
```yml
ircClients:
nickTemplate: "$DISPLAY[m]"
allowNickChanges: true
maxClients: 30
# ipv6:
# only: false
idleTimeout: 10800
reconnectIntervalMs: 5000
concurrentReconnectLimit: 50
lineLimit: 3
realnameFormat: "mxid"
# pingTimeoutMs: 600000
# pingRateMs: 60000
kickOn:
channelJoinFailure: true
ircConnectionFailure: true
userQuit: true
```
### Deploying the IRC Bridge
Once you have make the required changes to your `Bridge.yml` configuration, make sure you find and click the `Save` button at the bottom of the IRC Bridge configuration page to ensure your changes are updated.
[](https://ems-docs.element.io/uploads/images/gallery/2023-08/image-1692624783061.png)
You will then need to re-Deploy for any changes to take effect, as above ensure all changes made are saved then click `Deploy`.
[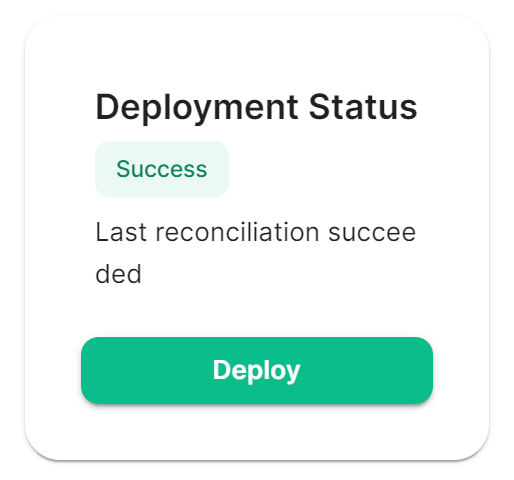](https://ems-docs.element.io/uploads/images/gallery/2023-08/image-1692624827468.png)
## Using the Bridge
For usage of the IRC Bridge via it's bot user see [Using the Matrix IRC Bridge](https://ems-docs.element.io/books/element-support/page/using-the-matrix-irc-bridge) documentation, or for end user focused documentation see [Using the Matrix IRC Bridge as an End User](https://ems-docs.element.io/books/element-support/page/using-the-matrix-irc-bridge-as-an-end-user).
If you have setup mapping of rooms in your `Bridge.yml`, some rooms will already be connected IRC, users need only join the bridged room and start messaging. IRC users should see Matrix users in the Channel and be able to communicate with them like any other IRC user.
# Setting Up the SIP Bridge
# Configuring SIP bridge
## Basic config
From the Installer's Integrations page, click "Install" under "SIP Bridge"
For the provided sipbridge.yml, please see the following documentation:
- `postgres_create_in_cluster`: `true` to create the postgres db into the k8s cluster. On a standalone deployment, it is necessary to define the `postgres_data_path`.
- `postgres_fqdn`: The fqdn of the postgres server. If using `postgres_create_in_cluster`, you can choose the name of the workload.
- `postgres_data_path`: "/mnt/data/sipbridge-postgres"
- `postgres_port`: 5432
- `postgres_user`: The user to connect to the db.
- `postgres_db`: The name of the db.
- `postgres_password`: A password to connect to the db.
- `port_type`: `HostPort` or `NodePort` depending on which kind of deployment you want to use. On standalone deployment, we advise you to use `HostPort` mode.
- `port`: The port on which to configure the SIP protocol. On `NodePort` mode, it should be in kubernetes range:
- `enable_tcp`: `true` to enable TCP SIP.
- `pstn_gateway`: The hostname of the PSTN Gateway.
- `external_address`: The external address of the SIP Bridge
- `proxy` : The address of the SIP Proxy
- `user_agent`: A user agent for the sip bridge.
- `user_avatar`: An MXC url to the sip bridge avatar. Don't define it if you have not uploaded any avatar.
- `encryption_key`: A 32 character long secret used for encryption. Generate this with `pwgen 32 1`
# Setting Up the XMPP Bridge
## Configuring the XMPP Bridge
The XMPP bridge relies on the xmpp "component" feature. It is an equivalent
of matrix application services. You need to configure an XMPP Component on an XMPP Server that the bridge will use to bridge matrix and xmpp user.
### On the hosting machine
From the Installer's Integrations page, click "Install" under "XMPP Bridge".
### Examples
In all the examples below the following are set:
- The `domain_name` is your homeserver domain ( the part after : in your MXID ) : `example.com`
- XMPP Server FQDN: xmpp.example.com
- XMPP External Component/`xmpp_domain`: `matrix.xmpp.example.com`
#### Prosody Example
If you are configuring prosody, you need the following component configuration (for the sample xmpp server, `matrix.xmpp.example.com`):
```
Component "matrix.xmpp.example.com"
ssl = {
certificate = "/etc/prosody/certs/tls.crt";
key = "/etc/prosody/certs/tls.key";
}
component_secret = "eeb8choosaim3oothaeGh0aequiop4ji"
```
And then with that configured, you would pass the following into `xmpp.yml`:
```
xmpp_service: xmpp://xmpp.example.com:5347
xmpp_domain: "matrix.xmpp.example.com" # external component subdomain
xmpp_component_password: eeb8choosaim3oothaeGh0aequiop4ji # xmpp component password
```
Note: We've used `pwgen 32 1` to generate the `component_secret`.
#### Joining an XMPP Room
Once you have the XMPP bridge up, you need to map an XMPP room to a Matrix ID. For example, if the room on XMPP is named: `#welcome@conference.xmpp.example.com`, where `conference` is the FQDN of the component hosting rooms for your XMPP instance, then on Matrix, you would join:
```
#_xmpp_welcome_conference.xmpp.example.com:example.com
```
So you can simply send the following command in your Element client to jump into the XMPP room via Matrix
```
/join #_xmpp_welcome_conference.xmpp.example.com:example.com
```
#### Joining a Matrix room from XMPP
If the Element/Matrix room is public you should be able to query the room list at the external component server address (Ex: `matrix.xmpp.example.com`)
The Matrix room at alias `#roomname:example.com` maps to `#roomname#example.com@matrix.xmpp.example.com` on the XMPP server `xmpp.example.com` if your `xmpp_domain: matrix.xmpp.example.com`
**Note:** If the Matrix room has users with the same name as yor XMPP account, you will need to edit you XMPP nickname to be unique in the room
| Element | | XMPP |
|------| ---- | ------ |
|#**roomname**:element.local (native Matrix room)| → | #**roomname**#element.local@element.xmpp.example.com (bridged into XMPP)|
|#_xmpp\_**roomname**_conference.xmpp.example.com:element.local (bridged into Matrix/Element) | ← | #**roomname**@conference.xmpp.example.com (native XMPP room) |
## Using the bridge as an end user
For end user documentation you can visit the [Using the Matrix XMPP Bridge as an End User](https://ems-docs.element.io/books/element-support/page/using-the-matrix-xmpp-bridge-as-an-end-user) documentation.
# Setting up Location Sharing
## Overview
The ability to send a location share, whether static or live, is available without any additional configuration.
However, when *receiving* a location share, in order to display it on a map, the client must have access to a tile server. If it does not, the location will be displayed as text with coordinates.
By default, location sharing uses a MapTiler instance and API key that is sourced and paid for by Element. This is provided free, primarily for personal EMS users and those on Matrix.org.
If no alternate tileserver is configured either on the HomeServer or client then the mobile and desktop applications will fall back to Element's MapTiler instance. Self-hosted instances of Element Web will not fall back, and will show an error message.
## Using Element's MapTiler instance
Customers should be advised that our MapTiler instance is not intended for commercial use, it does not come with any uptime or support SLA, we are not under any contractual obligation to provide it or continue to provide it, and for the most robust privacy customers should either source their own cloud-based tileserver or self-host one on-premises.
However, if they wish to use our instance with Element Web for testing, demonstration or POC purposes, they can configure the map_style_url by adding extra configurations in the advanced section of the Element Web page in the installer:
```plaintext
{
"map_style_url": "https://api.maptiler.com/maps/streets/style.json?key=fU3vlMsMn4Jb6dnEIFsx"
}
```
## Using a different tileserver
If the customer sources an alternate tileserver, whether from MapTiler or elsewhere, you should enter the tileserver URL in the `extra_client` section of the Well-Known Delegation Integration accessed from the Integrations page in the Installer:
```plaintext
{
... other info ...
"m.tile_server": {
"map_style_url": "http://mytileserver.example.com/style.json"
}
```
## Self-hosting a tileserver
Customers can also host their own tileserver if they wish to dedicate the resources to doing so. Detailed information on how to do so is available [here](https://matrix.org/docs/guides/map-tile-server).
## Changing permissions for live location sharing
By default live location sharing is restricted to moderators of rooms. In direct messages, both participants are admins by default so this isn't a problem. However this does impact public and private rooms. To change the default permissions for new rooms the following Synapse additional configuration should be set
```yaml
default_power_level_content_override:
private_chat:
events:
"m.beacon_info": 0
"org.matrix.msc3672.beacon_info": 0
"m.room.name": 50
"m.room.power_levels": 100
"m.room.history_visibility": 100
"m.room.canonical_alias": 50
"m.room.avatar": 50
"m.room.tombstone": 100
"m.room.server_acl": 100
"m.room.encryption": 100
# Not strictly necessary as this is used for direct messages, however if additional users are later invited into the room they won't be administrators
trusted_private_chat:
events:
"m.beacon_info": 0
"org.matrix.msc3672.beacon_info": 0
"m.room.name": 50
"m.room.power_levels": 100
"m.room.history_visibility": 100
"m.room.canonical_alias": 50
"m.room.avatar": 50
"m.room.tombstone": 100
"m.room.server_acl": 100
"m.room.encryption": 100
public_chat:
events:
"m.beacon_info": 0
"org.matrix.msc3672.beacon_info": 0
"m.room.name": 50
"m.room.power_levels": 100
"m.room.history_visibility": 100
"m.room.canonical_alias": 50
"m.room.avatar": 50
"m.room.tombstone": 100
"m.room.server_acl": 100
"m.room.encryption": 100
```
# Removing Legacy Integrations
Today, if you remove a Yaml integration's config, its components will not be removed from the cluster automatically. You will also need to manually remove the custom resources from the Kubernetes cluster.
## Removing Monitoring stack
You need to delete first the VMSingle and the VMAgent from the namespace :
```
kubectl delete vmsingle/monitoring -n
kubectl delete vmagent/monitoring -n
```
Once done, you can delete the namespace : `kubectl delete ns/`
# Setting up Sliding Sync
### Introduction to Sliding Sync
Sliding Sync is a backend component required by the Element X client beta. It provides a mechanism for the fast synchronisation of Matrix rooms. It is not recommended for production use and is only provide to enable the usage of the Element X client. The current version does not support SSO (OIDC/SAML/CAS). If you wish to try out the Element X client, then you need to be using password-based auth to allow Sliding Sync to work. SSO support (OIDC/SAML/CAS) will be added with a later version of the Sliding Sync tooling.
### Installing Sliding Sync
From the integrations page, simply click the install button next to Sliding Sync:
You should be able to ignore both the sync secret and the logging, but if you ever wanted to change them, you can do that here.
If you are using an external PostgreSQL database, then you will need to create a new database for sliding sync and configure that here:
# Setting up Element Call
# Introduction
Element Call is Element's next generation of video calling, set to replace Jitsi in the future. Element Call is currently an experimental feature so please use it accordingly; it is not expected to replace Jitsi yet.
# How to set up Element Call
## Required domains
In addition to the core set of domains for any ESS deployment, an Element Call installation on ESS uses the following domains:
- Required:
- **Element Call Domain**: the domain of the Element Call web client.
- **Element Call SFU Domain**: the domain of the SFU (Selective Forwarding Unit) for forwarding media streams between call participants.
- Optional:
- **Coturn Domain**: the domain of a Coturn instance hosted by your ESS installation. Required for airgapped environments.
Ensure you have acquired DNS records for these domains before installing Element Call on your ESS instance.
## Required ports
Ensure that any firewalls in front of your ESS instance allow external traffic on the following ports:
- Required:
- `443/tcp` for accessing the Element Call web client.
- `30881/tcp` and `30882/udp`, for exposing the self-hosted Livekit SFU.
- Optional:
- `80/http` for acquiring LetsEncrypt certificates for Element Call domains.
- UDP (and possibly TCP) ports you choose for STUN TURN and/or the UDP relay of a self-hosted Coturn.
## Basic installation
In the Admin Console, visit the Configure page, select Integrations on the left sidebar, and select `Element Call (Experimental)`.
[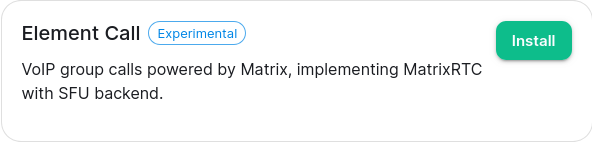](https://ems-docs.element.io/uploads/images/gallery/2024-04/image-1713354302892.png)
On the next page, the `SFU > Networking` section must be configured. Read the descriptions of the available networking modes to decide which is appropriate for your ESS instance.
Next, click the `Advanced` button at the bottom of the page, then to show the `Kubernetes` section, then click the **Show** button in that section.
[](https://ems-docs.element.io/uploads/images/gallery/2024-04/image-1713355354449.png)
In the section that appears, configure the `Ingress` and `Ingresses > SFU` sections with the `Element Call Domain` and `Element Call SFU Domain` (respectively) that you acquired earlier, as well as their `TLS` sections to associate those domain names with an SSL certificate for secure connections.
Other settings on the page may be left at their defaults, or set to your preference.
## How to set up Element Call for airgapped environments
Your ESS instance must host Coturn in order for Element Call to function in airgapped environments. To do this, click `Install` next to `Coturn` from the integrations page.
[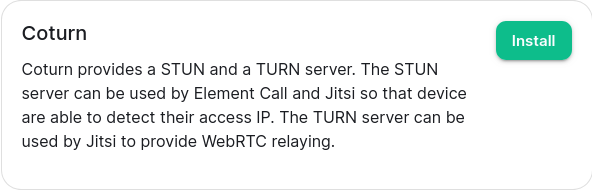](https://ems-docs.element.io/uploads/images/gallery/2024-04/image-1713356040322.png)
On the Coturn integration page, set the `External IP` of your ESS instance that clients should be able to reach it at, the `Coturn Domain`, and at least `STUN TURN`.
[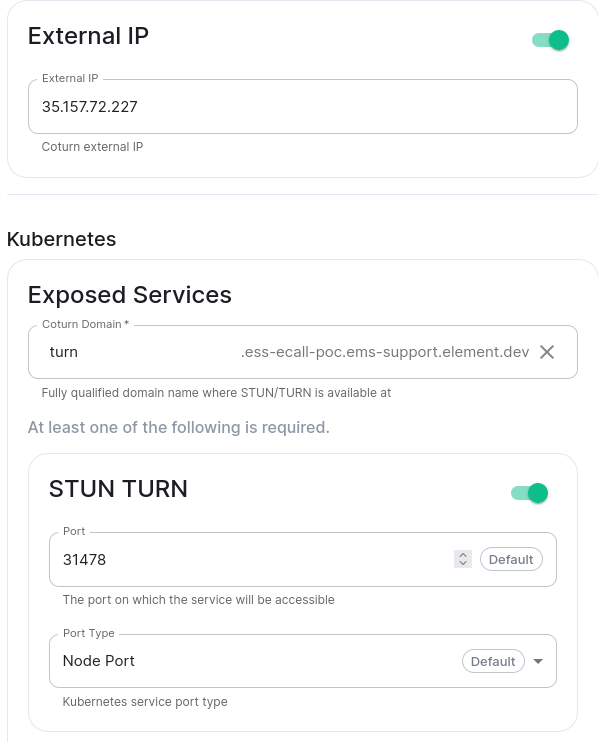](https://ems-docs.element.io/uploads/images/gallery/2024-04/image-1713369060899.png)
Then, within the Element Call integration page, ensure SFU Networking has no STUN Servers defined. This will cause the deployed Coturn to be used by connecting users as the STUN server to discover their public IP address.
# Element Call with guest access
By default, Element Call shares the same user access restrictions as the Synapse homeserver. This means that unless Synapse has been configured to allow guest users, calls on Element Call are accessible only to Matrix users registered on the Synapse homeserver. However, enabling guest users in Synapse to allow unregistered access to Element Call opens up the entire homeserver to guest account creation, which may be undesirable.
To solve the needs of allowing guest access to Element Call while blocking guest account creation on the homeserver, it is possible to **grant guess access via federation with an additional dedicated homeserver**, managed by an additional ESS instance. This involves a total of two ESS instances:
- **The main instance:** an existing fully-featured ESS instance where registered accounts are homed & all integrations, including Element Call, are installed. Has Synapse configured with closed or restricted registration.
- **The guest instance:** an additional ESS instance used only to host guest accounts, and to provide its own deployment of Element Call for unregistered/guest access. Has Synapse configured with open registration.
Guest access to Element Call is achieved via a closed federation between the two instances: the main instance federates with the guest instance and any other homeservers it wishes to federate with, and the guest homeserver federates **only** with the main instance. This allows unregistered users to join Element Call on the main instance by creating an account on the guest instance with open registration, while preventing these guest accounts from being used to reach any other homeservers.
## How to set up Element Call with guest access
- Install Element Call on your existing ESS instance by following the prior instructions on this page. This will be your **main instance**.
- Prepare another ESS instance, then follow the prior instructions to install Element Call on it. This will be your **guest instance**.
- [Set custom images](https://ems-docs.element.io/books/element-server-suite-classic-documentation-lts-2310/page/customize-containers-ran-by-ess) for Element Web and Element Call:
- Log into **each instance** via SSH and follow these steps:
- Save a file with the following content:
- on the **main instance**:
```
apiVersion: v1
kind: ConfigMap
metadata:
name: element-call-main-overrides
namespace: element-onprem
data:
images_digests: |
element_web:
element_web:
image_repository_server: docker.io
image_repository_path: vectorim/element-web
image_tag: develop
image_digest: sha256:0c5a025a4097a14f95077befad417f4a5af501cc2bc1dbda5ce0b055af0514eb
```
- on the **guest instance**:
```
apiVersion: v1
kind: ConfigMap
metadata:
name: element-call-guest-overrides
namespace: element-onprem
data:
images_digests: |
element_call:
element_call:
image_repository_server: ghcr.io
image_repository_path: element-hq/element-call
image_tag: latest-ci
image_digest: sha256:a9fbf8049567c2c11b4ddf8afbf98586a528e799d7f95266c7ae2ed16f250a56
```
- Run `kubectl -n element-onprem apply -f `
- In the admin console of **each instance**:
- Set `Cluster > Advanced > Config > Image Digests Config Map` to:
- `element-call-main-overrides` on the main instance
- `element-call-guest-overrides` on the guest instance
- In `Synapse > Advanced > Additional`, add this YAML content:
```
experimental_features:
msc3266_enabled: true
```
- In the admin console of the **main instance**:
- In `Element Web > Advanced > Additional configuration`, add this JSON content:
```
{
"features": {
"feature_new_room_decoration_ui": true,
"feature_ask_to_join": true
},
"element_call": {
"guest_spa_url": "https://"
}
}
```
- To limit federation to only the guest instance, apply these settings in the `Synapse` section:
- Set `Profile > Federation Type` to `Limited`
- Set `Config > Registration` to `Closed`
- Set `Advanced > Allow List` to include the the guest instance's Synapse Domain
- In the admin console of the **guest instance**:
- In `Synapse > Advanced > Additional`, add this YAML content:
```
experimental_features:
msc3266_enabled: true
```
- To limit federation to only the main instance, apply these settings in the `Synapse` section:
- Set `Profile > Federation Type` to `Limited`
- Set `Config > Registration` to `Closed`
- Set `Advanced > Allow List` to include the main instance's Synapse Domain
- In `Integrations > Element Call > Additional configuration`, add this JSON content:
```
{
"livekit": {
"livekit_service_url": "https://"
}
}
```
# Setting Up the Skype for Business Bridge
# Configuring the Skype for Business Bridge
## Domains and certificates
The first step in preparing a Skype for Business (S4B) Bridge is to assign it a hostname that other S4B Server deployments can connect to it via SIP federation. This requires configuring DNS records and obtaining a TLS certificate for that hostname, which can be any name of your choosing.
The hostname assigned to a S4B Bridge is also known as its "SIP domain", as it serves as the domain name of the virtual SIP server managed by the bridge for federating with S4B Servers. The rest of this guide refers to a bridge's SIP domain as ``.
Once you've chosen a hostname to assign to your bridge, other S4B Servers must be able to resolve that hostname to the bridge's public IP address via DNS. The most straightforward way to achieve this is to obtain public DNS records for ``. If obtaining public records is not an option, an S4B Server administrator may configure it with internal records instead (which is outside the scope of this guide).
The DNS records to obtain are as follows:
- `A/AAAA `
- `SRV _sipfederationtls._tcp. 5061 ` (optional, but recommended)
You must also obtain a TLS certificate for ``. It may be obtained from either a public CSA like Let's Encrypt, or by any PKI scheme shared between the bridge & any S4B Servers it must connect with.
## Basic config
From the Installer's Integrations page, click "Install" under "Skype for Business Bridge".
The most important configuration options are under Advanced > Exposed Services, which is where to set the SIP domain & TLS certificates of the bridge:
- **Skype for Business Bridge Domain:** set this to ``
- **SIP:**
- If your ESS deployment allows for the usage of Host Ports, set "Port" to `5060` and "Port Type" to "Host Port".
- Otherwise, you must configure a reverse proxy to redirect inbound traffic for port `5060` to the port you choose to assign this setting to.
- **SIPS:** Same as above, but with a port of `5061`.
- **TLS:** Choose "Certificate File" and upload the certificate & private key obtained for ``.
# Configuring Skype for Business Server
In order for a S4B Server deployment to connect to your bridge, the deployment must first be configured with an Edge Server to support SIP federation & to explicitly allow federation with the SIP domain of the bridge.
This section describes how to modify an existing S4B Server deployment to federate with the bridge. It assumes that a functional S4B Server deployment has already been prepared; details on how to install a S4B Server deployment from scratch are out-of-scope of this guide.
## Overview
To support SIP federation, a S4B Server deployment uses a pool of one or more **Edge Servers** to relay traffic from external SIP domains to the pool of internal servers that provide the core functionalty of the deployment, known as **Front End Servers**. This design is necessary because Front End Servers are meant to be run within the private network of a deployment, without access to external networks.
Edge Servers are also used as a proxy for allowing native S4B users to log in from outside the deployment's private network. Users who connect in this manner are known as "remote users".
Once equipped with an Edge Server, a S4B Server deployment must then be configured with which external SIP domains it may federate with. By default, traffic from all external SIP domains is blocked.
The S4B Bridge acts as a SIP endpoint with its own SIP domain. Thus, for it to connect to a S4B Server deployment, the deployment must not only be equipped with an Edge Server, but it must set the bridge's SIP domain as an "allowed" domain.
Below is a simple diagram of the network topology of a S4B Server deployment federated with a S4B Bridge:
```bash
external S4B clients <───> Edge Pool <───> S4B Bridge <~~~> Matrix homeserver <═══> Matrix clients
A A
│ ╏
V V
internal S4B clients <─> Front End Pool Matrix homeserver <═══> Matrix clients
<───>: SIP
<~~~>: Matrix Application Service API
<═══>: Matrix Client-Server API
<╍╍╍>: Matrix Federation API
```
**This guide covers only the usecase of a single Front End Server and Edge Server.** It is expected that similar instructions apply for multi-server pools, but that has not been tested.
## Prerequisites
A S4B Server deployment must be prepared with least the following components in order for it to be capable of adding an Edge Server:
- A Windows Server host running a Skype for Business 2019 Standard Edition Front End Server
- A Windows Server host acting as a Domain Controller for all hosts in the deployment, and also acting as an internal Certificate Signing Authority (CSA) & DNS server for all hosts
- If a Domain Controller is not available to act as a CSA, you may use any alternative/custom PKI scheme of your choosing, as long as the root CA certificate is mutually trusted by all hosts.
- If a Domain Controller is not available to act as a DNS server, custom hostname mappings may instead be applied in the "hosts" file of all hosts, located at `C:\Windows\System32\drivers\etc\hosts`.
Such a deployment will have set some hostnames, which are referred to elsewhere in this guide as follows:
- ``: The domain name / Primary DNS Suffix of the S4B Server deployment
- `.`: The internal FQDN of the Front End Server, where `` is its host name
- ``: The default SIP domain of the deployment (visible in the Topology Builder on the Front End Server)
## Deploying the Edge Server
An Edge Server must be deployed on a standalone host within the private network of the S4B Server deployment. **It cannot be collocated on the same host as the Front End Server** ([source](https://learn.microsoft.com/en-us/SkypeForBusiness/plan-your-deployment/topology-basics/topology-basics?toc=%2FSkypeForBusiness%2Fsfbs2019toc%2Ftoc.json&bc=%2FSkypeForBusiness%2Fbreadcrumb%2Ftoc.json#collocation-of-server-roles)).
The OS to install on the Edge Server's host must be either Windows Server 2019 or 2016. **Other versions of Windows Server, even newer versions, will not work** ([source](https://learn.microsoft.com/en-us/SkypeForBusiness/plan/system-requirements#operating-systems-for-skype-for-business-server-2019)). It should also be the same version of Windows Server that is installed on the host running the Front End Server. The host must also be outside of the Active Directory domain of the deployment.
Assign the host with a name of your choosing, which will be referred to elsewhere in this guide as ``. The internal FQDN of the host is therefore `.`.
After installing the OS, ensure Internet connectivity and perform Windows Update. Then, use the Server Manager desktop app (which can be found in Windows Search) to install the prerequisites listed by [the official S4B documentation](https://learn.microsoft.com/en-us/SkypeForBusiness/plan/system-requirements#software-that-should-be-installed-before-a-skype-for-business-server-2019-deployment). **Do not install any components needed for a Front End Server**, as they may interfere with Edge Server components. It is also recommended to **not install IIS on the Edge Server**, despite the official documention, as it interferes with VoIP functionality.
Next, install the Skype for Business Administrative Tools. You may use the same installation media that was used for installing the Front End Server. Otherwise, it may be obtained from this [download link](https://www.microsoft.com/en-us/evalcenter/evaluate-skype-business-server-2019).
Running the installation media will install two programs, known as the Core Components: the Deployment Wizard and the Management Shell. When using the Deployment Wizard on the Edge Server's host, **do not run any tasks related to Active Directory**, which should have already been run on the Front End Server, and must be run only once for the entire deployment. **It is also unnecessary to install the rest of the Administrative Tools**, such as the Topology Builder, on the Edge Server host.
## Network topology
The network interfaces of hosts within the deployment must be configured such that inbound external SIP traffic is handled solely by one interface of the Edge Server, and that traffic between the Edge and Front End Servers remains within the private network of the deployment.
**The Edge Server needs at least two network interfaces:**
- an external-facing interface for accepting inbound SIP traffic
- Its default gateway must at least have a route to the IP address of your S4B Bridge instance.
- If the Edge Server host is behind NAT, inbound traffic must be routed to this interface.
- an internal-facing interface for reaching hosts within the private subnet of the deployment
- Its DHCP Server must be set to the internal IP address of the deployment's Domain Controller.
- This interface must not be routable to the public Internet.
Also, the firewall of the Edge Server must at least leave port 5061 open, and have it accessible to either the public Internet, or to the public IP address of your S4B Bridge host.
**The Front End server needs at least one network interface**, and for it to be an internal-facing interface with the same properties of the Edge Server's internal-facing interface. If Internet connectivity is desired (like for facilitating Phone Access & Meeting URLs), add a separate external-facing interface for handling external traffic, instead of making the internal-facing interface publicly routable.
The IP addresses of these interfaces are referred to elsewhere in this guide as follows:
- ``: the address of the Edge Server's external-facing interface
- ``: the address of the Edge Server's internal-facing interface
- ``: the address of the Front End Server's internal-facing interface
## DNS records
### Internal records
The deployment needs an internal DNS record for the Edge Server's internal-facing interface in order to identify it by name. To add this record, open the DNS Manager on the Domain Controller host, and add an A/AAAA record for `.`, the FQDN of the Edge Server host, with the target address set to ``.
### External records
In order for your S4B Bridge to reach your Edge Server, acquire these public DNS records for advertising the SIP domain of your S4B Server deployment:
- `A/AAAA .`
- `CNAME sip..`
- `SRV _sipfederationtls._tcp. 5061 .`
## Topology configuration
The topology of your S4B Server deployment may now be updated to include the Edge Server.
On the Front End Server, open the Topology Builder. Choose the option to download the current topology to a file, as this will ensure that you will edit an up-to-date version of the topology in the following steps.
Once the topology is loaded, navigate through the tree list on the left of the window to find the "Edge pools" entry (under "Skype for Business" > "site" > "Skype for Business Server 2019" > "Edge Pools"), right click it, select "New Edge Pool...", and apply the following settings in the wizard that appears:
- Pool FQDN: set to `.`
- Enable "This pool has one server"
- Enable federation (port 5061)
- Use a single FQDN and IP address
- Apply IPv4/6 settings so that you will be able to use the Edge Server's internal & external interface addresses later.
- External FQDN: set to `.`
- Leave service ports at their default of 5061, 444, and 443 for Access, Web Conferencing, and A/V Edge Services respectively
- Internal & external IPv4/6 addresses: set these to addresses of the internal & external interfaces you set up earlier. **The internal interface is never 127.0.0.1.**
- Next hop pool & media association: set this to the Front End Server (which should be the only choice)
Next, in the settings for your site (available by right-clicking the tree entry immediately below the top-level "Skype for Business Server" item and choosing "Edit Properties"), enable:
- Apply federation route assignments to all sites
- Enable SIP federation, and choose your Edge Server
All required topology changes have now been set. To apply these changes onto the Front End Server:
- Using the menu bar at the top of the Topology Viewer window, click "Action" > "Topology" > "Publish..." (The progress window may display errors, but these can typically be ignored.)
- Open the Deployment Wizard, click "Install or Update Skype for Business Server System", and execute the "Install Local Configuration Store" step. Choose the option to "retrieve directly from the Central Management Store".
- While still in the Deployment Wizard, execute the "Setup or Remove Skype for Business Server Components" step.
The toplogy must next be published onto the Edge Server. To do so:
- On the Front End Server, open the S4B Management Shell, and export the topology to a file with this command:
- `Export-CsConfiguration -FileName `
- Copy that file onto the Edge Server. Ideally export the file to a shared drive so that a manual copy is unnecessary.
- On the Edge Server, open the Deployment Wizard, click "Install or Update Skype for Business Server System", and execute the "Install Local Configuration Store" step. Choose the option to "import from a file (recommended for Edge Servers)", and select the file for the exported topology configuration.
- While still in the Deployment Wizard, execute the "Setup or Remove Skype for Business Server Components" step.
## Certificates
S4B sends/receives all SIP traffic over TLS; thus, the Edge Server needs its own set of certificates, both internal & external to the S4B Server deployment.
To obtain all required certificates, open the Deployment Wizard on the Edge Server, click "Install or Update Skype for Business Server System", and execute the "Request, Install or Assign Certificates" task. This will display the Certificate Wizard, which shows a list of all required certificates, and which services they must contain the domain names of. Only two certificates should be listed: "Edge internal" and "External Edge certificate (public Internet)".
The "Edge internal" certificate should be obtained by sending a certificate signing request to the Domain Controller in your deployment, which acts as an internal Certificate Signing Authority. To do so, click the "Edge internal" entry in the list, then click the Request button on the right edge of the window. This will display a dialog that guides you through the steps of sending the request. Once the request is sent, enter the Domain Controller, accept the request, and then go back to the Edge Server to assign the approved certificate.
In contrast, the "External Edge certificate" must be provided by a Certificate Authority that is trusted by the host running the S4B Bridge. This may be a public CA such as Let's Encrypt, or any custom PKI scheme of your choosing. If using the latter, ensure that the root CA's certificate is installed on both the Edge Server host and the S4B Bridge host.
The "External Edge certificate" must contain these names:
- Subject Name: `.`
- Subject Alternative Names:
- DNS Name: `.`
- DNS Name: `sip.`
Once the certificate is obtained, use the Certificate Wizard on the Edge Server to assign it.
## Restart to apply changes
Changes to server topology requires restarting system services on both the Front End Server and Edge Server. To do so, open the Management Server on each server, and run these commands:
1. Run `Stop-CsWindowsService` on the Edge Server, and wait for it to complete.
2. Run `Stop-CsWindowsService` on the Front End Server, and wait for it to complete.
3. Run `Start-CsWindowsService` on the Front End Server, and wait for it to complete.
4. Run `Start-CsWindowsService` on the Edge Server, and wait for it to complete.
## Federation settings
With the topology in place, the S4B Server deployment may now be configured to allow federation with your S4B Bridge. Federation settings may be applied on the Front End Server either in the web admin panel at `https://./macp`, or via Powershell commands in the Management Shell. This section lists each setting that must be applied in the web admin panel, followed by its equivalent Powershell in the Management Shell.
Log into the admin panel using the credentials of your Windows account on the Front End Server, and expand the "Federation and External Access" section on the left sidebar. Then, navigate to the following sections and apply these settings:
- External Access Policy:
- In either the Global policy or a site-level policy for your S4B site:
- "Enable communications with federated users"
- Powershell:
- To edit the Global policy: [`Set-CsExternalAccessPolicy -Identity Global -EnableFederationAccess $True`](https://learn.microsoft.com/en-us/powershell/module/skype/set-csexternalaccesspolicy)
- To create & configure a site-level policy: [`New-CsExternalAccessPolicy -Identity Site: -EnableFederationAccess $True`](https://learn.microsoft.com/en-us/powershell/module/skype/new-csexternalaccesspolicy)
- Access Edge Configuration
- In Global policy (the only option available):
- "Enable federation and public IM connectivity"
- _Optional:_ "Enable partner domain discovery": Enable this if you would rather have federation be managed dynamically instead of having to explicitly add the SIP domain of your bridge to your S4B Server's allowlist of federated domains. For this to work, you must register a DNS SRV record for your bridge's SIP domain (see the section on [bridge domains and certificates](#bkmrk-domains-and-certific)). However, adding the bridge's domain to your S4B Server's allowlist is still necessary to prevent the bridge's traffic from being rate-limited.
- Powershell: [`Set-CsAccessEdgeConfiguration -AllowFederatedUsers $True [-EnablePartnerDiscovery $True -DiscoveredPartnerVerificationLevel "AlwaysVerifiable"]`](https://learn.microsoft.com/en-us/powershell/module/skype/set-csaccessedgeconfiguration)
- SIP Federated Domains
- add your S4B Bridge's SIP domain as an Allowed Domain:
- Domain name (or FQDN): ``
- Access Edge service (FQDN):
- If you registered a DNS SRV record of `_sipfederationtls._tcp.`, leave this blank.
- Otherwise, set this to ``.
- Powershell: [`New-CsAllowedDomain -Identity "" -Comment ""`](https://learn.microsoft.com/en-us/powershell/module/skype/set-csalloweddomain)
To verify any of these settings in Powershell, replace `New-` or `Set-` in any of the issued commands with `Get-`. To unapply a setting, use `Remove-`.
These changes may take some time before they get applied. When in doubt, restart all services by running `Stop-CsWindowsService` then `Start-CsWindowsService` in the S4B Server Management Shell on both the Front End Server and the Edge Server.
# Contact mapping
## Matrix users in S4B
Once a S4B Server is connected to an instance of the bridge, a Matrix user may be added to a S4B user's contact list as a "Contact Not in My Organization". The S4B desktop client provides this action via the "Add a contact" button, which is on the right edge of the main window just below the contact search bar.
Proceeding will display a prompt to set the IM Address of the contact to be added. Technically, an IM Address is a SIP address without the leading `sip:` scheme.
The IM Address of a Matrix user managed by the bridge is derived from the user's MXID, and has the following mapping:
`@`**`username`**`:`**`matrixdomain`** → **`username`**`+`**`homeserver`**`@`**`bridge-sipdomain`**
- **`username`**: the "localpart" of the MXID.
- **`matrixdomain`**: the domain name of the Matrix user's homeserver.
- **`bridge-sipdomain`**: the SIP domain of the bridge (which may differ from the homeserver domain).
## S4B users in Matrix
S4B users are represented in Matrix by virtual "ghost" users managed by the bridge. The MXID of a virtual S4B user is derived from the "Bridge > User Prefix" setting (from the bridge's Integrations configuration page in the Installer) and the IM Address (i.e. the SIP Address) of the virtual user's corresponding S4B user, and has the following mapping:
**`username`**`@`**`s4b-sipdomain`** → `@`**``**`sip=3a`**`username`**`=40`**`s4b-sipdomain`**`:`**`matrixdomain`**
- **``**: the value of "Bridge > User Prefix" from the bridge's configuration. The default value is `_s4b_`.
- `sip=3a`: the URL encoding of the `sip:` scheme of an IM Address (with an escape character of `=` instead of the typical `%`), encoded so as to not conflict with the `:` belonging to the MXID.
- Note that despite S4B using TLS for all SIP traffic, the IM Addresses of S4B contacts never use the `sips:` scheme.
- **`username`**: the "localpart" of the IM Address.
- `=40`: the URL encoding of the `@` character of the IM address, encoded so as to not conflict with the `@` belonging to the MXID.
- **`s4b-sipdomain`**: the SIP domain of the S4B Server.
- **`matrixdomain`**: the domain name of the homeserver that the bridge is registered with.
Thus, with a **``** of `_s4b_`, the IM Address to MXID mapping is:
**`username`**`@`**`s4b-sipdomain`** → `@_s4b_sip=3a`**`username`**`=40`**`s4b-sipdomain`**`:`**`matrixdomain`**
# Advanced Configuration
Need help doing something more advanced? See guides for Helm Chart installs, Synapse Workers and more!
# Synapse Section: Additional Config
The `Additional Config` section, which allows including config not currently configurable via the UI from the [Configuration Manual](https://element-hq.github.io/synapse/latest/usage/configuration/config_documentation.html), is available under the 'Advanced' section of the `Synapse` page.
We strongly advise against including any config not configurable via the UI as it will most likely interfere with settings automatically computed by the updater. Additional configuration options are not supported so we encourage you to first raise your requirements to Support where we can best advise on them.
[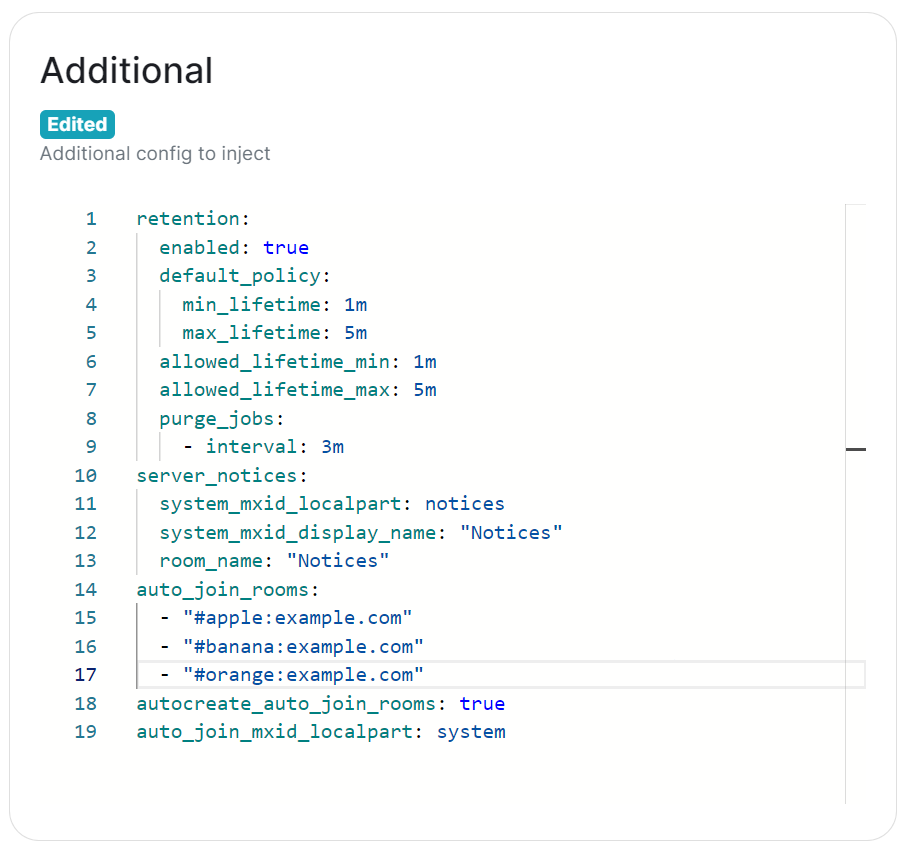](https://ems-docs.element.io/uploads/images/gallery/2024-02/image-1707403377252.png)
Configuration should follow the same format as supplied by the [Configuration Manual](https://element-hq.github.io/synapse/latest/usage/configuration/config_documentation.html), if you include options that have otherwise been configured via the UI they will be overridden with the exception of MAU, Federation and Data Retention (see [Nonoverridable Config](#bkmrk-max_mau_value%2C-limit)). Though as noted above, any additional config carries the risk that it will most likely interfere with settings automatically computed by the updater.
### What version of Synapse am I running?
Remember to set the configuration manual page to the version of Synapse deployed by the installer, otherwise you may see configuration options / guidance not applicable to the version of Synapse you have deployed.
You can determine the version of Synapse you have deployed by using `kubectl describe pod first-element-deployment-synapse-main-0 -n element-onprem | grep version`, changing the pod name as needed. This will output something like `app.kubernetes.io/version=v1.93.0-lts.1-base`, as such when you visit any link to the Configuration Manual, you should update the page to see the correct information for your version.
[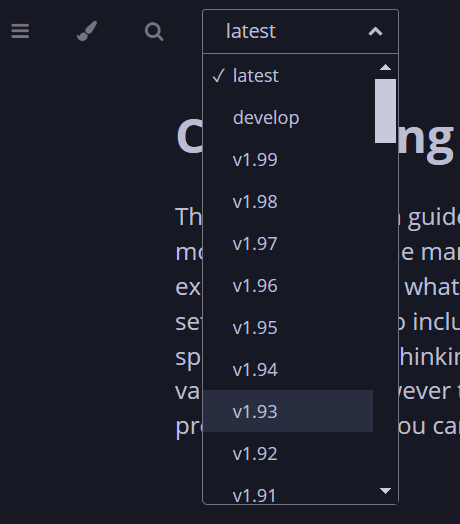](https://ems-docs.element.io/uploads/images/gallery/2024-02/image-1707910732938.png)
[](https://ems-docs.element.io/uploads/images/gallery/2024-02/image-1707910771900.png)
### Known Issues
#### [`max_mau_value`](https://element-hq.github.io/synapse/latest/usage/configuration/config_documentation.html#max_mau_value), [`limit_usage_by_mau`](https://element-hq.github.io/synapse/latest/usage/configuration/config_documentation.html#limit_usage_by_mau), [`federation`](https://element-hq.github.io/synapse/latest/usage/configuration/config_documentation.html#federation-1) and [`retention`](https://element-hq.github.io/synapse/latest/usage/configuration/config_documentation.html#retention)
Configuration of these via `Additional Config`, that are in conflict with those set via the UI, will not override the UI set values. As such, we do not advise including them or any related settings within the `Additional Config` as they are of increased risk to causing issues with your deployment.
#### [`auto_join_rooms`](https://element-hq.github.io/synapse/latest/usage/configuration/config_documentation.html#auto_join_rooms)
Due to how the installer sets up Synapse, the `auto_join_rooms` option will only work when configured as required on the first deployment. Should you configure this on an existing deployment, or change the rooms on a subsequent deployment, it will not function and you'll receive various errors within the Synapse pod logs. To resolve you will need to manually create the rooms and specify `auto_join_mxid_localpart` in your config. If you're using AdminBot / AuditBot, either would be a perfect candidate for the specified MXID as you can be sure they will be in any room you specify.
Therefore in order to get this setup, you'll need to follow these steps:
- For a brand new "fresh" install, simply specify with config per the manual, on the first user registration, they will create and join the specified rooms and all subsequent users will also auto-join.
```yml
auto_join_rooms:
- "#exampleroom:example.com"
- "#anotherexampleroom:example.com"
```
- For existing installs, or when you wish to adjust the auto-join room list, you will need to:
1. Manually create the rooms and assign the desired alias. (Room Settings -> Local Addresses)
2. Add the following config, making sure to set the localpart to a user present within the rooms specified. This could be the room creator, someone invited who has joined, or something like Admin/Audit Bot.
```yml
auto_join_mxid_localpart: adminbot
```
3. Redeploy, wait for the synapse pod to restart
4. Newly registered users will now auto-join the specified rooms
As usual, with `auto_join_rooms`, the caveat is that changing the rooms will not automatically join previously registered users to the updated rooms. To automate this you will likely need to make use of the Admin API, see [Using Python with the Admin + Client-Server APIs](https://ems-docs.element.io/books/element-support/page/using-python-with-the-admin-client-server-apis), specifically [Example #1: Join Users to Rooms](https://ems-docs.element.io/link/458#bkmrk-example-%231%3A-join-use) would be a good starting point.
### Exceptions
While use of Additional Config is not recommended, there are certain circumstances built-in to the UI that will allow you to defer to configuration options you will need to specify within the Additional Config block. These exceptions will be covered here, however please be advised, using them still carries risk of instability so we'd recommend sticking with options fully supported by the UI itself.
#### `Custom` Registration
Within the Synapse section of the installer, as part of the registration configuration, you can select `Custom`. When doing so, configuration of [Registration](https://element-hq.github.io/synapse/latest/usage/configuration/config_documentation.html#registration) should be done via Additional Config, allowing you more control. Options that can be configured can be found at the linked [Registration](https://element-hq.github.io/synapse/latest/usage/configuration/config_documentation.html#registration) section of the Synapse Configuration Manual, but include:
- [`enable_registration`](https://element-hq.github.io/synapse/latest/usage/configuration/config_documentation.html#enable_registration)
- [`enable_registration_without_verification`](https://element-hq.github.io/synapse/latest/usage/configuration/config_documentation.html#enable_registration_without_verification)
- [`registrations_require_3pid`](https://element-hq.github.io/synapse/latest/usage/configuration/config_documentation.html#registrations_require_3pid)
- [`registration_requires_token`](https://element-hq.github.io/synapse/latest/usage/configuration/config_documentation.html#registration_requires_token)
- [`registration_shared_secret`](https://element-hq.github.io/synapse/latest/usage/configuration/config_documentation.html#registration_shared_secret)
#### Allowing Private Federation via [`ip_range_whitelist`](https://element-hq.github.io/synapse/latest/usage/configuration/config_documentation.html#ip_range_whitelist)
By default private IP ranges are blacklisted, per [`ip_range_blacklist`](https://element-hq.github.io/synapse/latest/usage/configuration/config_documentation.html#ip_range_blacklist). So when looking to privately federate between two homeservers, where they'd communicate over one of these private ranges, without specifying said range using `ip_range_whitelist` it will fail showing errors like the below:
```
synapse.http.federation.well_known_resolver - 259 - INFO - GET-369 - Fetching https://server2.example.com/.well-known/matrix/server
synapse.http.client - 199 - INFO - sentinel - Blocked 172.20.8.127 from DNS resolution to server2.example.com
```
To resolve this, you will need to add the following to the Additional config:
```yml
ip_range_whitelist:
- '172.16.0.0/12'
```
### Config Example
When setting additional config via the UI, the following would be added to the your `deployment.yml`:
[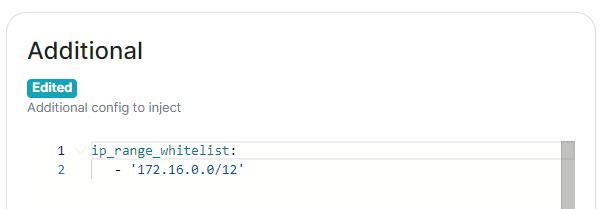](https://ems-docs.element.io/uploads/images/gallery/2024-05/image-1716546562058.png)
```yml
spec:
components:
synapse:
config:
additional: |-
ip_range_whitelist:
- '172.16.0.0/12'
```
# Synapse Section: Workers
The `Workers` section, which allows you to configure [Synape Workers](https://element-hq.github.io/synapse/latest/workers.html), is available under the 'Advanced' section of the `Synapse` page.
### What are Synapse Workers
Synapse is built on Python, an inherent limitation of which is only being able to execute one thread at a time (due to the GIL). To allow for horizontal scaling Synapse is built to split out functionality into multiple separate python processes. While for small instances it is recommended to run Synapse in the default monolith mode, for larger instances where performance is a concern it can be helpful to split out functionality into these separate processes, called Workers.
Without Workers
With Workers
For a detailed high-level overview of workers, see the [How we fixed Synapse's Scalability](https://matrix.org/blog/2020/11/03/how-we-fixed-synapse-s-scalability/) blogpost.
#### Benefits of Using Workers
1. **Scalability****.** By distributing tasks across multiple processes, Synapse can handle more concurrent operations and better utilize system resources.
2. **Fault Isolation****.** If a specific worker crashes, it only affects the functionality it handles, rather than bringing down the entire server.
3. **Performance Optimisation****.** By dedicating workers to specific high-demand tasks, you can improve the overall performance by removing bottlenecks.
#### Worker ↔ Synapse Communication
The separat Worker processes communicate with each other via a Synapse-specific protocol called 'replication' (analogous to MySQL- or Postgres-style database replication) which feeds streams of newly written data between processes so they can be kept in sync with the database state.
Synapse uses a Redis pub/sub channel to send the replication stream between all configured Synapse processes. Additionally, processes may make HTTP requests to each other, primarily for operations which need to wait for a reply ─ such as sending an event.
All the workers and the main process connect to Redis, which relays replication commands between processes with Synapse using it as a shared cache and as a pub/sub mechanism.
### How to configure
[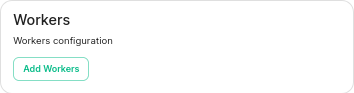](https://ems-docs.element.io/uploads/images/gallery/2023-06/image-1687357253633.png)
Click on Add Workers
You have to select a Worker Type. Here are the workers which can be useful to you :
- **Pushers****.** If you experience slowness with notifications sending to clients
- **Client-Reader****.** If you experience slowness when clients login and sync their chat rooms
- **Synchrotron****.** If you experience slowness when rooms are active
- **Federation-x****.** If you are working in a federated setup, you might want to dedicate federation to workers.
If you are experiencing resources congestion, you can try to reduce the resources requested by each worker. Be aware that
- If the node gets full of memory, it will try to kill containers which are consuming more than what they requested
- If a container consumes more than its memory limit, it will be automatically killed by the node, even if there is free memory left.
You will need to re-run the installer after making these changes for them to take effect.
#### Worker Types
The ESS Installer has a number of Worker Types, see below for a breakdown of what they are and how they work.
##### Appservice
- **Purpose****.** Handles interactions with Application Services (appservices) which are third-party applications integrated with the Matrix ecosystem.
- **Functions****.** Manages the sending and receiving of events to/from appservices, such as bots or bridges to other messaging systems.
##### Background
- **Purpose****.** Executes background tasks that are not time-sensitive and can be processed asynchronously.
- **Functions****.** Includes tasks like database cleanups, generating statistics, and running periodic maintenance jobs.
##### Client Reader
- **Purpose****.** Serves read requests from clients, which typically includes retrieving room history and state.
- **Functions****.** Offloads read-heavy operations from the main process to improve performance and scalability.
##### Encryption
- **Purpose****.** Manages encryption-related tasks, ensuring secure communication between clients.
- **Functions****.** Handles encryption and decryption of messages, key exchanges, and other cryptographic operations.
##### Event Creator
- **Purpose****.** Responsible for creating new events, such as messages or state changes within rooms.
- **Functions****.** Handles the generation and initial processing of events before they are persisted in the database.
##### Event Persister
- **Purpose****.** Handles the storage of events in the database.
- **Functions****.** Ensures that events are correctly and efficiently written to the storage backend.
##### Federation Inbound
- **Purpose****.** Manages incoming federation traffic from other Matrix homeservers.
- **Functions****.** Handles events and transactions received from federated servers, ensuring they are processed and integrated into the local server’s state.
##### Federation Reader
- **Purpose****.** Serves read requests related to federation.
- **Functions****.** Manages queries and data retrieval requests that are part of the federation protocol, improving performance for federated operations.
##### Federation Sender
- **Purpose****.** Handles outgoing federation traffic to other Matrix homeservers.
- **Functions****.** Manages sending events and transactions to federated servers, ensuring timely and reliable delivery.
##### Initial Synchrotron
- **Purpose****.** Provides the initial sync for clients when they first connect to the server or after a long period of inactivity.
- **Functions****.** Gathers the necessary state and history to bring the client up to date with the current room state.
##### Media Repository
- **Purpose****.** Manages the storage and retrieval of media files (images, videos, etc.) uploaded by users.
- **Functions****.** Handles media uploads, downloads, and caching to improve performance and scalability.
##### Presence Writer
- **Purpose****.** Manages user presence updates (e.g., online, offline, idle).
- **Functions****.** Ensures that presence information is updated and propagated to other users and servers efficiently.
##### Pusher
- **Purpose****.** Manages push notifications for users.
- **Functions****.** Sends notifications to users about new events, such as messages or mentions, to their devices.
##### Receipts Account
- **Purpose****.** Handles read receipts from users indicating they have read certain messages.
- **Functions****.** Processes and stores read receipts to keep track of which messages users have acknowledged.
##### Sso Login
- **Purpose****.** Manages Single Sign-On (SSO) authentication for users.
- **Functions****.** Handles authentication flows for users logging in via SSO providers.
##### Synchrotron
- **Purpose****.** Handles synchronization (sync) requests from clients.
- **Functions****.** Manages the process of keeping clients updated with the latest state and events in real-time or near real-time.
##### Typing Persister
- **Purpose****.** Manages typing notifications from users.
- **Functions****.** Ensures typing indicators are processed and stored, and updates are sent to relevant clients.
##### User Dir
- **Purpose****.** Manages the user directory, which allows users to search for other users on the server.
- **Functions****.** Maintains and queries the user directory, improving search performance and accuracy.
##### Frontend Proxy
- **Purpose****.** Acts as a reverse proxy for incoming HTTP traffic, distributing it to the appropriate worker processes.
- **Functions****.** Balances load and manages connections to improve scalability and fault tolerance.
# Kubernetes Override Sections
[](https://ems-docs.element.io/uploads/images/gallery/2024-02/image-1706791299674.png)
Found in under `Advanced` in any section where you configure a component of the installer, under the `Kubernetes` heading. Here you can override Kubernetes configuration for each component.
### Common
[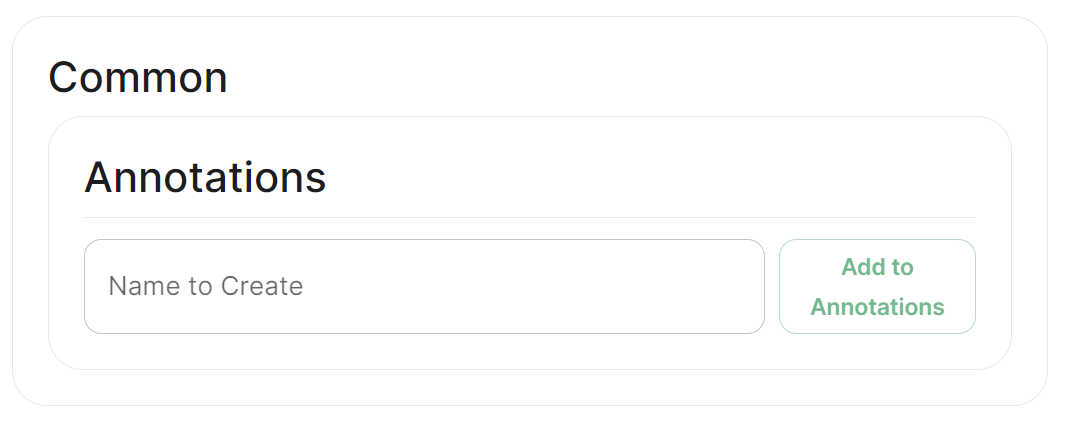](https://ems-docs.element.io/uploads/images/gallery/2024-02/image-1706791551167.png)
#### Annotations
In Kubernetes, annotations are key-value pairs associated with Kubernetes objects like pods, services, and nodes. Annotations are meant to be used for non-identifying metadata and are typically used to provide additional information about the objects. Unlike labels, which are used for identification and organization, annotations are more free-form and can contain arbitrary data.
Annotations are often used for various purposes, such as:
- **Documentation****.** Providing additional information about a resource that might be useful for administrators or developers.
- **Tooling Integration****.** Integrating with external tools or automation systems that rely on specific metadata.
- **Customisation****.** Storing configuration information that affects the behaviour of controllers, operators, or custom tooling.
- **Audit Trailing****.** Capturing additional information for audit or tracking purposes.
### Ingress
#### Annotations
See explanation of [annotations](#bkmrk-annotations) above
#### Services
Depending on the component you are viewing, you may see `Limits` and `Requests` broken out for each sub-component applicable to that component. When configuring Element Web you will only see the `Limits` and `Requests` config, for Integrator however, you will see `Limits` and `Requests` for each sub-component; `Appstore`; `Integrator`; `Modular Widgets`; and `Scalar Web`.
### Workloads
[](https://ems-docs.element.io/uploads/images/gallery/2024-02/image-1706791788806.png)
#### Annotations
See explanation of [annotations](#bkmrk-annotations) above
#### Resources
Depending on the component you are viewing, you may see `Limits` and `Requests` broken out for each sub-component applicable to that component. When configuring Element Web you will only see the `Limits` and `Requests` config, for Integrator however, you will see `Limits` and `Requests` for each sub-component; `Appstore`; `Integrator`; `Modular Widgets`; and `Scalar Web`.
##### Limits
##### Requests
#### Security Context
[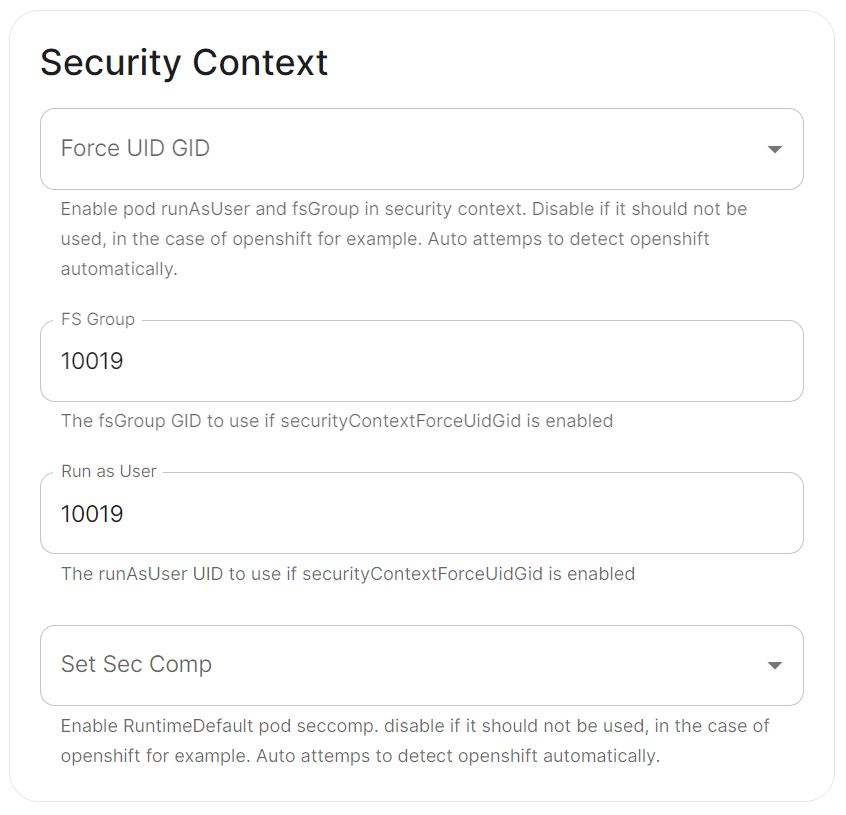](https://ems-docs.element.io/uploads/images/gallery/2024-02/image-1707245447309.png)
#### Docker Secrets
[](https://ems-docs.element.io/uploads/images/gallery/2024-02/image-1707245474966.png)
#### Host Aliases
[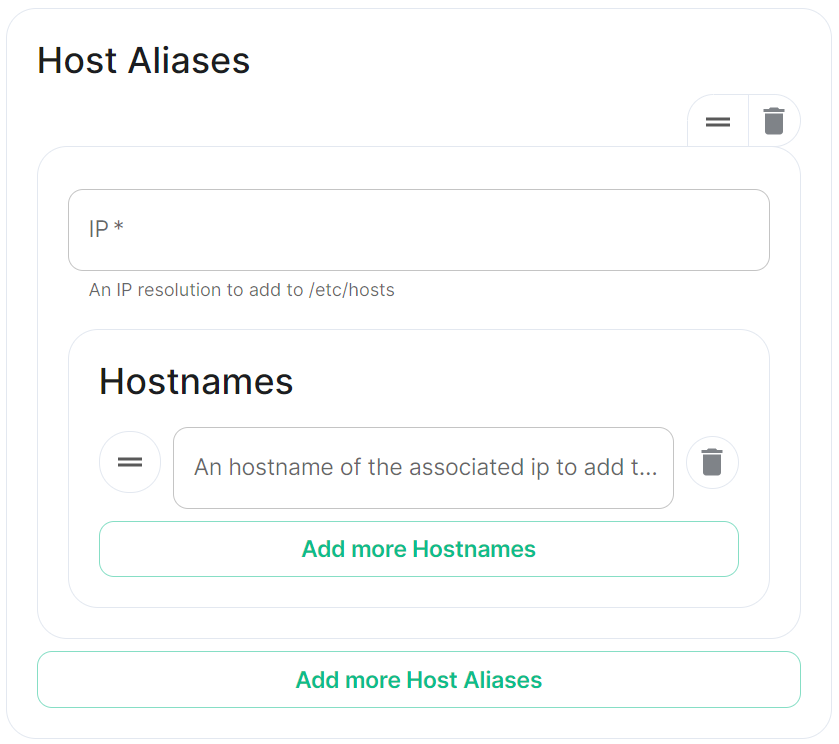](https://ems-docs.element.io/uploads/images/gallery/2024-02/image-1707245501958.png)
# Customise Containers used by ESS
How to change an image used by a container deployed by ESS.
In specific use cases you might want to change the image used for a specific pod, for example, to add additional contents, change web clients features, etc. In general the steps to do this involve:
- Creating a new ConfigMap definition with the overrides you need to configure, then injecting it into the cluster.
- Configuring the installer to use the new Images Digests Config Map.
- Generating a secret for the registry (if it requires authentication) and adding it to ESS.
We strongly advise against customising any pods. Customised containers are not supported and may break your setup so we encourage you to first raise your requirements to Support where we can best advise on them.
### Non-Airgapped Environments
#### Creating the new Images Digests Config Map
In order to override images used by ESS during the install, you will need to inject a new ConfigMap which specifies the image to use for each component. To do that, you will need to inject a ConfigMap. It's structure maps the components of the ESS, all of them can be overridden :
Config Example
```yaml
data:
images_digests: |# Copyright 2023 New Vector Ltd
adminbot:
access_element_web:
haproxy:
pipe:
auditbot:
access_element_web:
haproxy:
pipe:
element_call:
element_call:
sfu:
jwt:
redis:
element_web:
element_web:
groupsync:
groupsync:
hookshot:
hookshot:
hydrogen:
hydrogen:
integrator:
integrator:
modular_widgets:
appstore:
irc_bridges:
irc_bridges:
jitsi:
jicofo:
jvb:
prosody:
web:
sysctl:
prometheus_exporter:
haproxy:
user_verification_service:
matrix_authentication_service:
init:
matrix_authentication_service:
secure_border_gateway:
secure_border_gateway:
sip_bridge:
sip_bridge:
skype_for_business_bridge:
skype_for_business_bridge:
sliding_sync:
api:
poller:
sydent:
sydent:
sygnal:
sygnal:
synapse:
haproxy:
redis:
synapse:
synapse_admin:
synapse_admin:
telegram_bridge:
telegram_bridge:
well_known_delegation:
well_known_delegation:
xmpp_bridge:
xmpp_bridge:
```
Each container on this tree needs at least the following properties to override the source of download :
```
image_repository_path: elementdeployment/vectorim/element-web
image_repository_server: localregistry.local
```
You can also override the image tag and the image digest if you want to enforce using digests in your deployment :
```
image_digest: sha256:ee01604ac0ec8ed4b56d96589976bd84b6eaca52e7a506de0444b15a363a6967
image_tag: v0.2.2
```
For example, the required ConfigMap manifest (e.g. `images_digest_configmap.yml`) format would be, to override the `element_web/element_web` container source path :
Config Example
```yaml
apiVersion: v1
kind: ConfigMap
metadata:
name: config_map_name
namespace: namespace_of_your_deployment
data:
images_digests: |
element_web:
element_web:
image_repository_path: mycompany/custom-element-web
image_repository_server: docker.io
image_tag: v2.1.1-patched
```
Notes:
- the `image_digest:` may need to be regenerated, or it can be removed.
- The `image_repository_path` needs to reflect the path in your local repository.
- The `image_repository_server` should be replaced with your local repository URL
The new ConfigMap can then be injected into the cluster with:
`kubectl apply -f images_digest_configmap.yml -n `
#### Configuring the installer
You will also need to configure the ESS Installer to use the new Images Digests Config Map by adding the `` into the Cluster advanced section.
[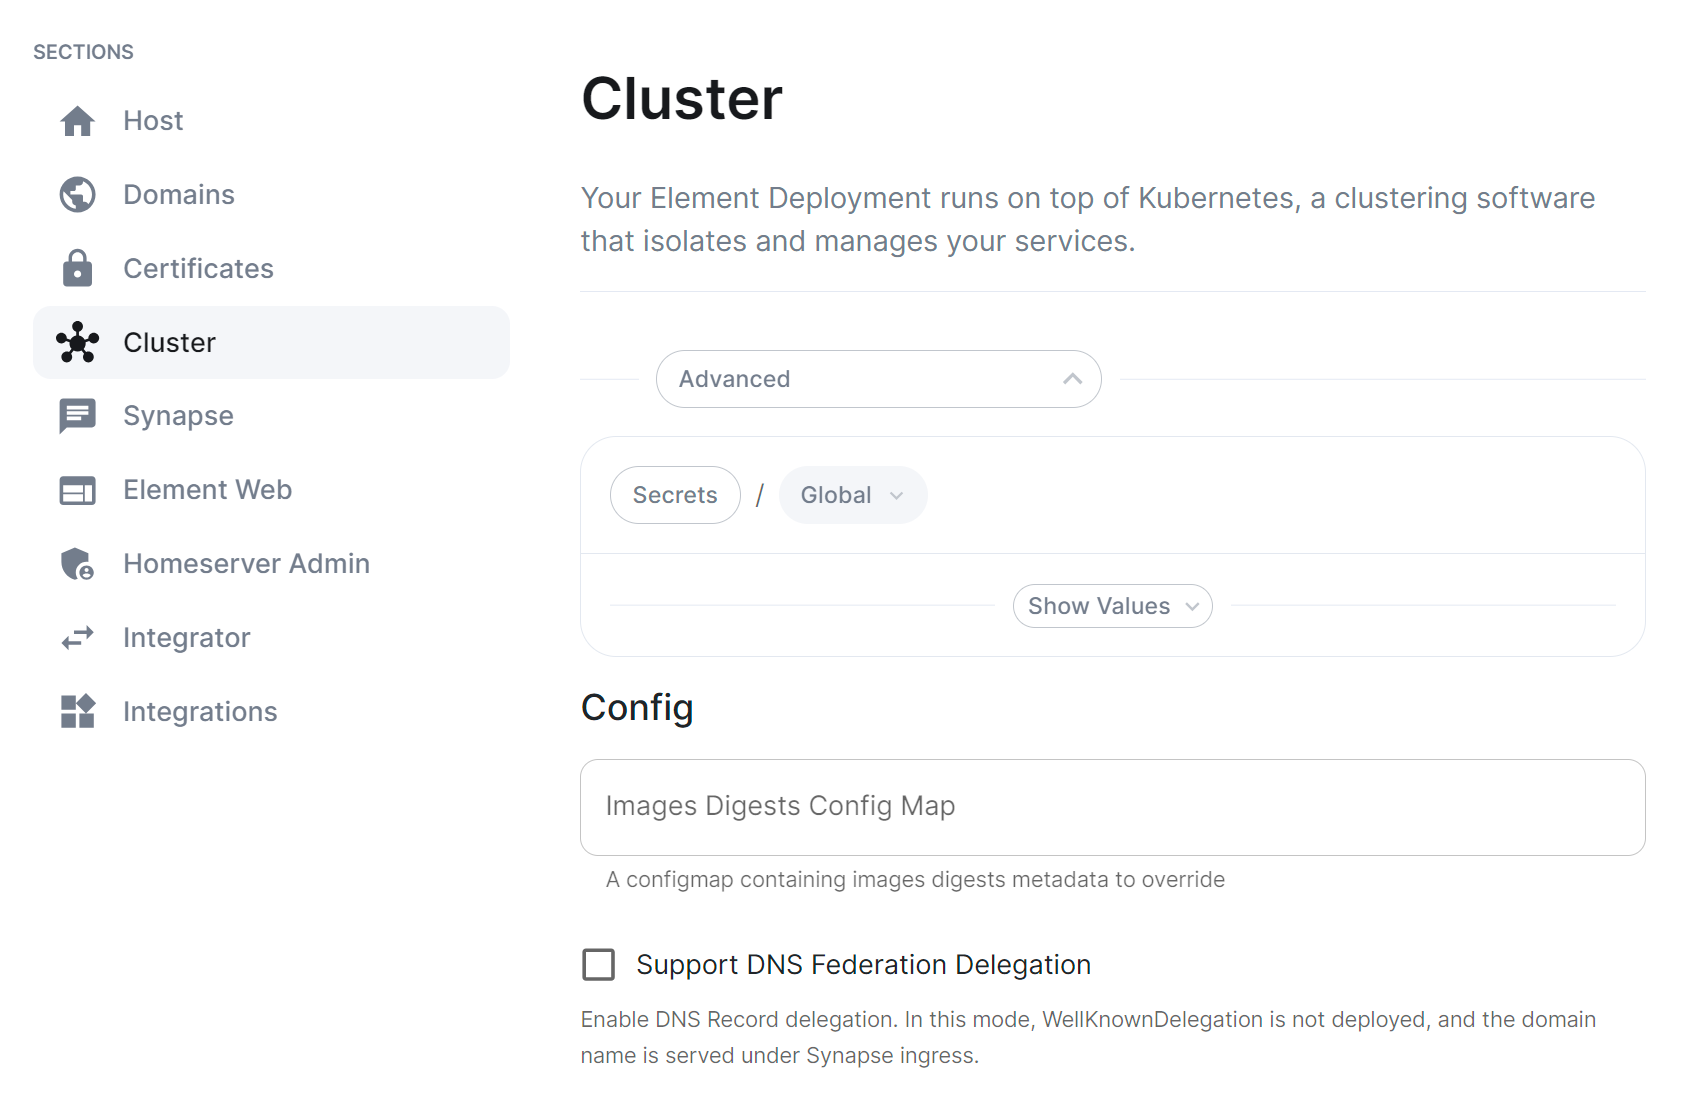](https://ems-docs.element.io/uploads/images/gallery/2023-10/image-1698326646967.png)
#### Supplying registry credentials
If your registry requires authentication, you will need to create a new secret. So for example, if your registry is called `myregistry` and the URL of the registry is `myregistry.tld`, the command would be:
```
kubectl create secret docker-registry myregistry --docker-username= --docker-password= --docker-server=myregistry.tld -n
```
The new secret can then be added into the ESS Installer GUI advanced cluster Docker Secrets:
[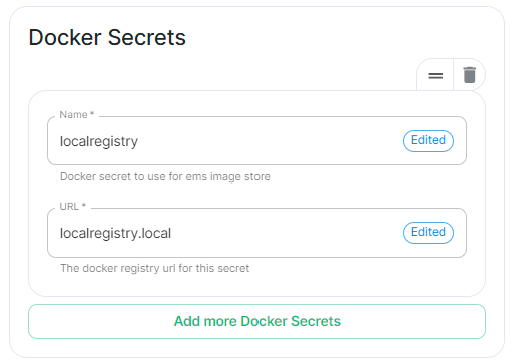](https://ems-docs.element.io/uploads/images/gallery/2023-10/image-1698325423589.png)
### Airgapped Environments
To perform these actions, you will need the airgapped archive extracted onto a host **with** an internet connection:
1. Open a terminal, you will be using the `crane` binary found within the airgapped directory extracted. Firstly make sure to authenticate with any of the registries you will be downloading from using:
```
airgapped/utils/crane auth login REGISTRY.DOMAIN -u EMS_USERNAME -p EMS_TOKEN
```
You will need to do this for both `gchr.io` and `gitlab-registry`:
```
airgapped/utils/crane auth login gitlab-registry.matrix.org -u EMS_USERNAME -p EMS_TOKEN
airgapped/utils/crane auth login ghcr.io -u EMS_USERNAME -p EMS_TOKEN
```
2. Use the following to download the required image:
```
airgapped/utils/crane pull --format tarball image.tar
```
Note: `` should be formatted like so `registry/organisation/repo:version`, for example, to download the Element Call Version 0.5.12 image, the `` would be `ghcr.io/vector-im/element-call:v0.5.12`
```
airgapped/utils/crane pull --format tarball ghcr.io/vector-im/element-call:v0.5.12 image.tar
```
- For `registry.element.io` you will need to use `skopeo` instead i.e.:
```
skopeo copy docker://registry.element.io/group-sync:v0.13.7-dbg docker-archive://$(pwd)/gsync-dbg.tar
```
3. The generate the image digest (used in the next step). Continuing the Element Call Version 0.5.12 example, use the below command to return the image digest string:
```
airgapped/utils/crane --platform amd64 digest --tarball image.tar
```
Returns:
```
sha256:f16c6ef5954135fb4e4e0af6b3cb174e641cd2cbee901b1262b2fdf05ddcedfc
```
4. Copy `image.tar` into the `airgapped/images` folder, renaming it to the digest string generated in step 3, `.tar` excluding the `sha256:` prefix. For our Element Call Version 0.5.12 example, the filename would be:
```
f16c6ef5954135fb4e4e0af6b3cb174e641cd2cbee901b1262b2fdf05ddcedfc.tar
```
5. Edit the `images_digests.yml` file also found in the `airgapped/images` folder, like so:
```yml
:
:
image_digest: sha256:
image_repository_path: /
image_repository_server:
image_tag:
```
For our Element Call Version 0.5.12 example, you would update like so:
```yml
element_call:
element_call:
image_digest: sha256:f16c6ef5954135fb4e4e0af6b3cb174e641cd2cbee901b1262b2fdf05ddcedfc
image_repository_path: vector-im/element-call
image_repository_server: ghcr.io
image_tag: v0.5.12
```
### Handling new releases of ESS
If you are overriding image, you will need to make sure that your images are compatible with the new releases of ESS. You can use a staging environment to tests the upgrades for example.
# Secrets
Find out more about the Secrets block found under each Sections' Advanced configuration options
Under 'Advanced' in each section, you may find a block listing all the associated secrets configured as part of this section. This directly correlates to your `secrets.yml` and will allow you to remove secrets no longer required. For example, on the Cluster Section you may have uploaded a Certificate Authority CA.pem, you can use this block to remove it should it no longer be required.
It is not however advised to modify the contents of secrets from this view, you should always do so via the associated UI that configures it in the first place, see the below example from the Cluster section.
[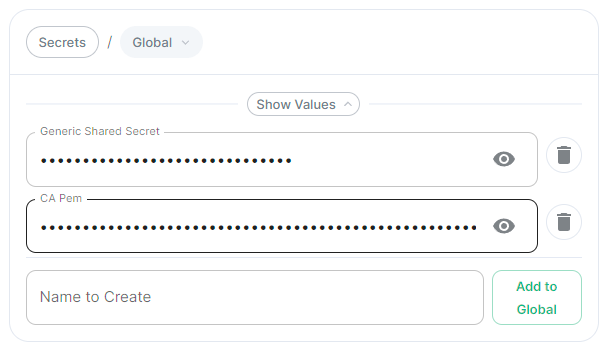](https://ems-docs.element.io/uploads/images/gallery/2024-05/image-1716368370442.png)
##### CA Pem
Config Example
- `secrets.yml`
```yml
apiVersion: v1
kind: Secret
metadata:
name: global
namespace: element-onprem
data: # Added to the `global`, `element-onprem` secret as `ca.pem` under the `data` section. Other values may also be present here.
ca.pem: >-
base64encodedCAinPEMformatString
```
If you have uploaded a Certificate Authority certificate, you will find it listed in this section, if a certificate was uploaded in error, you can use the 'Delete' button next to the entry to remove it.
##### Generic Shared Secret
Config Example
- `secrets.yml`
```yml
apiVersion: v1
kind: Secret
metadata:
name: global
namespace: element-onprem
data: # Added to the `global`, `element-onprem` secret as `genericSharedSecret` under the `data` section. Other values may also be present here.
genericSharedSecret: QmdrWkVzRE5aVFJSOTNKWVJGNXROTG10UTFMVWF2
```
Like with the CA certificate option above, this will be present due to the Generic Shared Secret, this is auto-generated and will be replaced if you change it there (and click 'Save' / 'Continue'). It is not advised to edit this property here.
# How to run a Webserver on Standalone Deployments
This guide is does not come with support by Element. It is not part of the Element Server Suite (ESS) product. Use at your own risk. Remember you are responsible of maintaining this software stack yourself.
Some config options require a web content to be served. For example:
- Changing Element Web appearance with custom background pictures.
- Providing a HomePage for display in Element Web.
- Providing a Guide PDF from your server in an airgapped environment.
One way to provide this content is to run a web server in the same `microk8s` Kubernetes Cluster as the Element Enterprise Suite.
You should first consider using an existing webserver before installing and maintaining an additional webserver for these requirements.
The following guide describes the steps to setup the Bitnami Apache helm chart in the Standalone `microk8s` cluster setup by Element Server Suite.
**Requirements:**
- a DNS entry pages.BASEDOMAIN.
- a Certificate (private key + certificate) for pages.BASEDOMAIN
- an installed standalone Element Server Suite setup
- access to the server on the command line
**Results:**
- a web server that runs in the `mircok8s` cluster
- a directory `/var/www/apache-content` to place and modify web content like homepage, backgrounds and guides.
This guide is applicable to the Single Node deployment of Element Server Suite but can be used for guidance on how to host a webserver in other Kubernetes Clusters as well.
You can use any webserver that you like, in this example we will user the Bitnami Apache chart.
We need helm version 3. You can follow [this Guide](https://helm.sh/docs/intro/install/) or ask `microk8s` to install `helm3`.
### Installing Prerequisites
#### Enabling Helm3 with microk8s
```bash
$ microk8s enable helm3
Infer repository core for addon helm3
Enabling Helm 3
Fetching helm version v3.8.0.
% Total % Received % Xferd Average Speed Time Time Time Current
Dload Upload Total Spent Left Speed
100 12.9M 100 12.9M 0 0 17.4M 0 --:--:-- --:--:-- --:--:-- 17.4M
Helm 3 is enabled
```
Let's check if it is working
```bash
$ microk8s.helm3 version
version.BuildInfo{Version:"v3.8.0", GitCommit:"d14138609b01886f544b2025f5000351c9eb092e", GitTreeState:"clean", GoVersion:"go1.17.5"}
```
Create and Alias for helm
```bash
echo alias helm=microk8s.helm3 >> ~/.bashrc
source ~/.bashrc
```
#### Enable the Bitnami Helm Chart repository
Add the bitnami repository
```bash
helm repo add bitnami https://charts.bitnami.com/bitnami
```
Update the repo information
```bash
helm repo update
```
### Preparation and Configuration
#### Prepare the Web-Server Content
Create a directory to supply content:
```
sudo mkdir /var/www/apache-content
```
Create a homepage `home.html`, i.e.:
```html
Create a Key Backup & Passphrase now!
(see Getting Started Guite p. 5)
```
Put your content into the apache-content directory:
```
cp /tmp/background.jpg /apache-content/
cp /tmp/home.html ~element/apache-content/
```
There are multiple ways to provide this content to the apache pod. The bitnami helm chart user ConfigMaps, Physical Volumes or a Git Repository.
**ConfigMaps** are a good choice for smaller amounts of data. There is a hard limit of 1MiB on ConfigMaps. So if all your data is not more that 1MiB, the config map is a good choice for you.
**Physical Volumes** are a good choice for larger amounts of data. There are several choices for backing storage available. In the context of the standalone deployments of ESS a Physical Hostpath is the most practical. HostPath is not a good solution for mutli node k8s clusters, unless you pin a pod to a certain node. Pinning the pod to a single node would put the workload at risk, should that node go down.
**Git Repository** is a favourite as it versions the content and you track and revert to earlier states easily. The bitnami apache helm chart is built in a way that updates in regular intervals to your latest changes.
We are selecting the Physical Volume option to serve content in this case. Our instance of Microk8s comes with the Hostpath storage addon enabled.
Define the physical volume:
```bash
cat <pv-volume.yaml
apiVersion: v1
kind: PersistentVolume
metadata:
name: apache-content-pv
labels:
type: local
spec:
storageClassName: microk8s-hostpath
persistentVolumeReclaimPolicy: Retain
capacity:
storage: 100Mi
accessModes:
- ReadWriteOnce
hostPath:
path: "/var/www/apache-content"
EOF
```
Apply to the cluster
```
kubectl apply -f pv-volume.yaml
```
Next we need a Physical Volume Claim:
```bash
cat <pv-claim.yaml
apiVersion: v1
kind: PersistentVolumeClaim
metadata:
name: apache-content-pvc
spec:
volumeName: apache-content-pv
storageClassName: microk8s-hostpath
accessModes: [ReadWriteOnce]
resources: { requests: { storage: 100Mi } }
EOF
```
Apply to the cluster to create the pvc
```
kubectl apply -f pv-claim.yaml
```
#### Configure the Helm Chart
We need to add configurations to adjust the apache deployment to our needs. The K8s service should be switched to ClusterIP. The Single Node deployment includes an Ingress configuration through nginx that we can use to route traffic to this webserver. The name of the ingressClass is "public". We will need to provide a hostname. This name needs to be resolvable through DNS. This could be done through the wildcard entry for \*.$BASEDOMAIN that you might already have. You will need a certificate and certificate private key to secure this connection through TLS.
The full list of configuration options of this chart is explained in [the bitnami repository here](https://github.com/bitnami/charts/blob/main/bitnami/apache/README.md#deploying-a-custom-web-application.)
Create a file called apache-values.yml in the home directory of your element user directory.
Remember to replace **BASEDOMAIN** with the correct value for your deployment.
```yaml
cat <apache-values.yaml
service:
type: ClusterIP
ingress:
enabled: true
ingressClassName: "public"
hostname: pages.BASEDOMAIN
htdocsPVC: apache-content-pvc
EOF
```
### Deployment
#### Deploy the Apache Helm Chart
Now we are ready to deploy the apache helm chart
```
helm install myhomepage -f apache-values.yaml oci://registry-1.docker.io/bitnamicharts/apache
```
#### Manage the deployment
List the deployed helm charts:
```
$ helm list
NAME NAMESPACE REVISION UPDATED STATUS CHART APP VERSION
myhomepage default 1 2023-09-06 14:46:33.352124975 +0000 UTC deployed apache-10.1.0 2.4.57
```
Get more details:
```
$ helm status myhomepage
NAME: myhomepage
LAST DEPLOYED: Wed Sep 6 14:46:33 2023
NAMESPACE: default
STATUS: deployed
REVISION: 1
TEST SUITE: None
NOTES:
CHART NAME: apache
CHART VERSION: 10.1.0
APP VERSION: 2.4.57
** Please be patient while the chart is being deployed **
1. Get the Apache URL by running:
You should be able to access your new Apache installation through:
- http://pages.lutz-gui.sales-demos.element.io
```
If you need to update the deployment, modify the required apache-values.yaml and run :
```bash
helm upgrade myhomepage -f apache-values.yaml oci://registry-1.docker.io/bitnamicharts/apache
```
If you don't want the deployment any more, you can remove it.
```bash
helm uninstall myhomepage
```
#### Secure the deployment with certificates
If you are in a connected environment, you can rely on cert-manager to create certificates and secrets for you.
##### Cert-manager with letsencrypt
If you have cert-manager enabled. You will just need to add the right **annotations to the ingress** of your deployment. Modify you apache-values.yaml and add these lines to the ingress block :
```yaml
tls: true
annotations:
cert-manager.io/cluster-issuer: letsencrypt
kubernetes.io/ingress.class: public
```
You will need to upgrade your deployment to reflect these changes:
```bash
helm upgrade myhomepage -f apache-values.yaml oci://registry-1.docker.io/bitnamicharts/apache
```
##### Custom Certificates
There are situations in which you want custom certificates instead. These can be used by modifying your apache-values.yaml. Add the following lines to the ingress block in the apache-values.yaml. Take care to get the indentation right. Replace the **...** with your data.
```
tls: true
extraTls:
- hosts:
- pages.lutz-gui.sales-demos.element.io
secretName: "pages.lutz-gui.sales-demos.element.io-tls"
secrets:
- name: pages.lutz-gui.sales-demos.element.io-tls
key: |-
-----BEGIN RSA PRIVATE KEY-----
...
-----END RSA PRIVATE KEY-----
certificate: |-
-----BEGIN CERTIFICATE-----
...
-----END CERTIFICATE-----
```
You will need to upgrade your deployment to reflect these changes:
```bash
helm upgrade myhomepage -f apache-values.yaml oci://registry-1.docker.io/bitnamicharts/apache
```
### Tips and Tricks
You can make your life easier by using bash completing and an alias for kubectl.
You will need to have the bash-completion package installed as a prerequisite.
For all users on the system:
```
kubectl completion bash | sudo tee /etc/bash_completion.d/kubectl > /dev/null
```
Set an aias for kubectl for your user:
```
echo 'alias k=kubectl' >>~/.bashrc
```
Enable auto-completion for your alias
```
echo 'complete -o default -F __start_kubectl k' >>~/.bashrc
```
After reloading your Shell, you can now enjoy auto completion for your k ( kubectl ) commands.
# ESS CRDs support in ArgoCD
ArgoCD can support getting the ESS CRDs Status as resource health using [Custom Health Checks](https://argo-cd.readthedocs.io/en/stable/operator-manual/health/#way-2-contribute-a-custom-health-check)
You need to configure the following under the configmap `argocd-cm` of argocd :
```yml
data:
resource.customizations: |
matrix.element.io/*:
health.lua: |
hs = {}
if obj.status ~= nil then
if obj.status.conditions ~= nil then
for i, condition in ipairs(obj.status.conditions) do
if condition.type == "Failure" and condition.status == "True" then
hs.status = "Degraded"
hs.message = condition.message
return hs
end
if condition.type == "Running" and condition.status == "True" and condition.reason ~= "Successful" then
hs.status = "Progressing"
hs.message = condition.message
return hs
end
if condition.type == "Available" and condition.status == "True" then
hs.status = "Healthy"
hs.message = condition.message
return hs
end
if condition.type == "Available" and condition.status == "False" then
hs.status = "Degraded"
hs.message = condition.message
return hs
end
if condition.type == "Successful" and condition.status == "True" then
hs.status = "Healthy"
hs.message = condition.message
return hs
end
end
end
end
hs.status = "Progressing"
hs.message = "Waiting for the CR to start to converge..."
return hs
EOT
```
# Verifying ESS releases against Cosign
### Cosign ESS Verification Key
ESS does not use Cosign transaction log to be able to support airgapped deployment. We are instead relying on a public key that you can ask if you need to run image verification in your cluster.
The ESS Cosign public key is the following one :
```
-----BEGIN PUBLIC KEY-----
MFkwEwYHKoZIzj0CAQYIKoZIzj0DAQcDQgAE1Lc+7BqkqD+0XYft05CeXto/Ga1Y
DKNk3o48PIJ2JMrq3mzw13/m5rzlGjdgJCs6yctf4+UdACZx5WSiIWTFbQ==
-----END PUBLIC KEY-----
```
#### Verifying manually
To verify a container against ESS Keys, you will have to run the following command :
- Operator: `cosign verify registry.element.io/ess-operator: --key cosign.pub`
- Updater: `cosign verify registry.element.io/ess-updater: --key cosign.pub`
If you are running in an airgapped environment, then you will need to append ` --insecure-ignore-tlog=true` to the above commands
#### Verifying automatically
You will have to setup and configure your [SIGStore Admission Policy](https://docs.sigstore.dev/policy-controller/overview/) to use ESS Public Key.
# Notifications, MDM & Push Gateway
The stock Android and iOS Apps will use an Element owned Push Gateway to send Notification via the Apple or Google Notifiction Services.
The URL of our push gateway is **https://matrix.org/_matrix/push/v1/notify**
The apps will on startup register with the Google or Apple Notification Services (APNs) and request a push_notification_client_identifier.
If notifications need sending, the homeserver will use the configured Push Gateway to sent notification through the APNs.
### What is a Notification?
A notification will not contain sensitive content. This is what notificatons actually look like :
```
▿ 5 elements
▿ 0 : 2 elements
▿ key : AnyHashable("unread_count")
- value : "unread_count"
- value : 1
▿ 1 : 2 elements
▿ key : AnyHashable("pusher_notification_client_identifier")
- value : "pusher_notification_client_identifier"
- value : ad0bd22bb90fabde45429b3b79cdbba12bd86f3dafb80ea22d2b1343995d8418
▿ 2 : 2 elements
▿ key : AnyHashable("aps")
- value : "aps"
▿ value : 2 elements
▿ 0 : 2 elements
- key : alert
▿ value : 2 elements
▿ 0 : 2 elements
- key : loc-key
- value : Notification
▿ 1 : 2 elements
- key : loc-args
- value : 0 elements
▿ 1 : 2 elements
- key : mutable-content
- value : 1
▿ 3 : 2 elements
▿ key : AnyHashable("room_id")
- value : "room_id"
- value : !vkibNVqwhZVOaNskRU:matrix.org
▿ 4 : 2 elements
▿ key : AnyHashable("event_id")
- value : "event_id"
- value : $0cTr40iZmOd3Aj0c65e_7F6NNVF_BwzEFpyXuMEp29g
```
We recommend that you use the stock Element Apps from PlayStore or Applestore together with the Push Gateway that we as Element host.
### Mobile Device Management (MDM)
You can use Mobile Device Management to configure and roll out Mobil Applications. To be able to configure mobile apps this way, the app needs to implement certain interfaces in a standard way. This is called AppConfig.
The Android Element App does not support AppConfig currently. You will need to rebuild the apk to include changes like a different homeserver or a diffrent pusherURL.
The iOS Element App got enabled for AppConfig in version 1.11.2. this allows the change of the following parameters and keys without the need to recompile the app.
* im.vector.app.serverConfigDefaultHomeserverUrlString
* im.vector.app.clientPermalinkBaseUrl
* im.vector.app.serverConfigSygnalAPIUrlString
If you employ a Mobile Device Management solution like e.g. VmWare Workspace One, you will need to configure your iOS Element app with these keys as documented [here](https://kb.vmware.com/s/article/2960753) in section **Publish and update Managed AppConfig for your app in Workspace ONE**.
Depending on the brand of MDM you are using, you can create the required keys manually, or enable these setting with an XML file.
The XML file might look like this :
```
1im.vector.apphttps://matrix.BASEDOMAINhttps://messenger.BASEDOMAIN
```
### Using your own Push Gateway ( Sygnal )
Some organization still feel uncomfortable with using our Push Gateway. You are able to use
your own push gateway (e.g. Sygnal) if you want.
You can install Sygnal as an integration with the Element Server Suite.
During the App Upload process a private key is created. We as Element Company retain and use that key
on our Push infrastructure. This is why you can not use the stock Element Apps, but will need
to upload your own version of the Element App. This will give you access to your own private notification key that is bound to the
app you uploaded.
You will need to configure your Sygnal with the private key of your Element App.
You will need to set the "im.vector.app.serverConfigSygnalAPIUrlString" for the iOS App or the equilivant in the Android App Source code.
# Helm Chart Installation
## Introduction
This document will walk you through how to get started with our Element Server Suite Helm Charts. These charts are provided to be used in environments which typically deploy applications by helm charts. If you are unfamiliar with helm charts, we'd highly recommend that you start with our Enterprise Installer.
## General concepts
ESS deployment rely on the following components to deploy the workloads on a kubernetes cluster :
1. Updater : It reads an ElementDeployment CRD manifest, and generates the associated individual Element CRDs manifests linked together
2. Operator : It reads the individual Element CRDs manifests to generates the associated kubernetes workloads
3. ElementDeployment : This CRD is a simple structure following the pattern :
```yml
spec:
global:
k8s:
# Global settings that will be applied by default to all workloads if not forced locally. This is where you will be able to configure a default ingress certificate, default number of replicas on the deployments, etc.
config:
# Global configuration that can be used by every element component
secretName: # The global secret name. Required secrets keys can be found in the description of this field using `kubectl explain`. Every config named `SecretKey` will point to a secret key containing the secret targetted by this secret name.
components:
:
k8s:
# Local kubernetes configuration of this component. You can override here the global values to force a certain behaviour for each components.
config:
# This component configuration
secretName: # The component secret name containing secret values. Required secrets keys can be found in the description of this field using `kubectl explain`. Every config named `SecretKey` will point to a secret key containing the secret targetted by this secret name.
:
...
```
Any change to the ElementDeployment manifest deployed in the namespace will trigger a reconciliation loop. This loop will update the Element manifests read by the Operator. It will again trigger a reconciliation loop in the Operator process, which will update kubernetes workloads accordingly.
If you manually change a workload, it will trigger a reconciliation loop and the Operator will override your change on the workload.
The deployment must be managed only through the ElementDeployment CRD.
## Installing the Operator and the Updater helm charts
We advise you to deploy the helm charts in one of the deployments model :
1. Cluster-Wide deployment : In this mode, the CRDs Conversion Webhook and the controller managers are deployed in their own namespace, separated from ESS deployments. They are able to manage ESS deployments in any namespace of the cluster The install and the upgrade of the helm chart requires cluster admin permissions.
2. Namespace-scoped deployment : In this mode, only the CRDs conversion webhooks require cluster admin permissions. The Controller managers are deployed directly in the namespace of the element deployment. The install and the upgrade of ESS does not require cluster admin permissions if the CRDs do not change.
### All-in-one deployment (Requires cert-manager)
When cert-manager is present in the cluster, it is possible to use the all-in-one `ess-system` helm chart to deploy the operator and the updater.
First, let's add the ess-system repository to helm, replace `ems_image_store_username` and `ems_image_store_token` with the values provided to you by Element.
```
helm repo add ess-system https://registry.element.io/helm/ess-system --username
--password '' --version ~2.17.0
```
#### Cluster-wide deployment
When deploying ESS-System as a cluster-wide deployment, updating ESS requires ClusterAdmin permissions.
Create the following values file :
```
emsImageStore:
username:
password:
element-operator:
clusterDeployment: true
deployCrds: true # Deploys the CRDs and the Conversion Webhooks
deployCrdRoles: true # Deploys roles to give permissions to users to manage specific ESS CRs
deployManager: true # Deploys the controller managers
element-updater:
clusterDeployment: true
deployCrds: true # Deploys the CRDs and the Conversion Webhooks
deployCrdRoles: true # Deploys roles to give permissions to users to manage specific ESS CRs
deployManager: true # Deploys the controller managers
```
#### Namespace-scoped deployment
When deploying ESS-System as a namespace-scoped deployment, you have to deploy `ess-system` in two parts :
1. One for the CRDs and the conversion webhooks. This part will be managed with ClusterAdmin permissions. These update less often.
2. One for the controller managers. This part will be managed with namespace-scoped permissions.
In this mode, the `ElementDeployment` CR is deployed in the same namespace as the controller-managers.
Create the following values file to deploy the CRDs and the conversion webhooks :
```
emsImageStore:
username:
password:
element-operator:
clusterDeployment: true
deployCrds: true # Deploys the CRDs and the Conversion Webhooks
deployCrdRoles: false # Deploys roles to give permissions to users to manage specific ESS CRs
deployManager: false # Deploys the controller managers
element-updater:
clusterDeployment: true
deployCrds: true # Deploys the CRDs and the Conversion Webhooks
deployCrdRoles: false # Deploys roles to give permissions to users to manage specific ESS CRs
deployManager: false # Deploys the controller managers
```
Create the following values file to deploy the controller managers in their namespace :
```
emsImageStore:
username:
password:
element-operator:
clusterDeployment: false
deployCrds: false # Deploys the CRDs and the Conversion Webhooks
deployCrdRoles: false # Deploys roles to give permissions to users to manage specific ESS CRs
deployManager: true # Deploys the controller managers
element-updater:
clusterDeployment: false
deployCrds: false # Deploys the CRDs and the Conversion Webhooks
deployCrdRoles: false # Deploys roles to give permissions to users to manage specific ESS CRs
deployManager: true # Deploys the controller managers
```
### Without cert-manager present on the cluster
First, let's add the element-updater and element-operator repositories to helm, replace `ems_image_store_username` and `ems_image_store_token` with the values provided to you by Element.
```
helm repo add element-updater https://registry.element.io/helm/element-updater --username
--password ''
helm repo add element-operator https://registry.element.io/helm/element-operator --username --password ''
```
Now that we have the repositories configured, we can verify this by:
```
helm repo list
```
and should see the following in that output:
```
NAME URL
element-operator https://registry.element.io/helm/element-operator
element-updater https://registry.element.io/helm/element-updater
```
*N.B. This guide assumes that you are using the `element-updater` and `element-operator` namespaces. You can call it whatever you want and if it doesn't exist yet, you can create it with: `kubectl create ns `.*
#### Generating an image pull secret with EMS credentials
To generate an `ems-credentials ` to be used by your helm chart deployment, you will need to generate an authentication token and palce it in a secret.
```
kubectl create secret -n element-updater docker-registry ems-credentials --docker-server=registry.element.io --docker-username= --docker-password=`
kubectl create secret -n element-operator docker-registry ems-credentials --docker-server=registry.element.io --docker-username= --docker-password=`
```
#### Generating a TLS secret for the webhook
The conversion webhooks need their own self-signed CA and TLS certificate to be integrated into kubernetes.
For example using `easy-rsa` :
```
easyrsa init-pki
easyrsa --batch "--req-cn=ESS-CA`date +%s`" build-ca nopass
easyrsa --subject-alt-name="DNS:element-operator-conversion-webhook.element-operator"\
--days=10000 \
build-server-full element-operator-conversion-webhook nopass
easyrsa --subject-alt-name="DNS:element-updater-conversion-webhook.element-updater"\
--days=10000 \
build-server-full element-updater-conversion-webhook nopass
```
Create a secret for each of these two certificates :
```
kubectl create secret tls element-operator-conversion-webhook --cert=pki/issued/element-operator-conversion-webhook.crt --key=pki/private/element-operator-conversion-webhook.key --namespace element-operator
kubectl create secret tls element-updater-conversion-webhook --cert=pki/issued/element-updater-conversion-webhook.crt --key=pki/private/element-updater-conversion-webhook.key --namespace element-updater
```
#### Installing the helm chart for the `element-updater` and the `element-operator`
Create the following values file to deploy the controller managers in their namespace :
`values.element-operator.yml` :
```
clusterDeployment: true
deployCrds: true # Deploys the CRDs and the Conversion Webhooks
deployCrdRoles: true # Deploys roles to give permissions to users to manage specific ESS CRs
deployManager: true # Deploys the controller managers
crds:
conversionWebhook:
caBundle: # Paste here the content of `base64 pki/ca.crt -w 0`
tlsSecretName: element-operator-conversion-webhook
imagePullSecret: ems-credentials
operator:
imagePullSecret: ems-credentials
```
`values.element-updater.yml` :
```
clusterDeployment: true
deployCrds: true # Deploys the CRDs and the Conversion Webhooks
deployCrdRoles: true # Deploys roles to give permissions to users to manage specific ESS CRs
deployManager: true # Deploys the controller managers
crds:
conversionWebhook:
caBundle: # Paste here the content of `base64 pki/ca.crt -w 0`
tlsSecretName: element-updater-conversion-webhook
imagePullSecret: ems-credentials
updater:
imagePullSecret: ems-credentials
```
Run the helm install command :
```
helm install element-operator element-operator/element-operator --namespace element-operator -f values.yaml --version ~2.17.0
helm install element-updater element-updater/element-updater --namespace element-updater -f values.yaml --version ~2.17.0
```
Now at this point, you should have the following 4 containers up and running:
```
[user@helm ~]$ kubectl get pods -n element-operator
NAMESPACE NAME READY STATUS RESTARTS AGE
element-operator element-operator-controller-manager-c8fc5c47-nzt2t 2/2 Running 0 6m5s
element-operator element-operator-conversion-webhook-7477d98c9b-xc89s 1/1 Running 0 6m5s
[user@helm ~]$ kubectl get pods -n element-updater
NAMESPACE NAME READY STATUS RESTARTS AGE
element-updater element-updater-controller-manager-6f8476f6cb-74nx5 2/2 Running 0 106s
element-updater element-updater-conversion-webhook-65ddcbb569-qzbfs 1/1 Running 0 81s
```
## Generating the ElementDeployment CR to Deploy Element Server Suite
The `ess-stack` helm chart is available in the `ess-system` repository :
```
helm repo add ess-system https://registry.element.io/helm/ess-system --username
--password ''
```
You can install it using the following command against your values file. See below for the value file configuration.
```
helm install ess-system/ess-stack --namespace element-onprem -f values.yaml --version ~2.17.0
```
It will deploy an ElementDeployment CR and its associated secrets from the chart values file.
The values file will contain the following structure :
- Available Components & Global settings can be found under [https://ess-schemas-docs.element.io](https://ess-schemas-docs.element.io)
- For each `SecretKey` variable, the value will point to a secret key under `secrets`. For example, `components.synapse.config.macaroonSecretKey` is `macaroon`, so a `macaroon` secret must exists under `secrets.synapse.content`.
```yaml
emsImageStore:
username:
password:
secrets:
global:
content:
genericSharedSecret: # generic shared secret
synapse:
content:
macaroon: # macaroon
adminPassword: # synapse admin password
postgresPassword: # postgres password
telemetryPassword: # your ems image store password
registrationSharedSecret: # registration shared secret
# python3 -c "import signedjson.key; signing_key = signedjson.key.generate_signing_key(0); print(f\"{signing_key.alg} {signing_key.version} {signedjson.key.encode_signing_key_base64(signing_key)}\")"
signingKey: # REPLACE WITH OUTPUT FROM PYTHON COMMAND ABOVE
# globalOptions contains the global properties of the ELementDeployment CRD
globalOptions:
config:
domainName: # your base domain
k8s:
ingresses:
tls:
mode: certmanager
certmanager:
issuer: letsencrypt
workloads:
replicas: 1
components:
elementWeb:
k8s:
ingress:
fqdn: # element web fqdn
synapse:
config:
media:
volume:
size: 5Gi
postgresql:
database: # postgres database
host: # postgres host
port: 5432
user: # postgres user
telemetry:
username:
instanceId:
k8s:
ingress:
fqdn: # synapse fqdn
wellKnownDelegation:
config: {}
k8s: {}
```
### Checking deployment progress
To check on the progress of the deployment, you will first watch the logs of the updater:
```
kubectl logs -f -n element-updater element-updater-controller-manager-
```
You will have to tab complete to get the correct hash for the element-updater-controller-manager pod name.
Once the updater is no longer pushing out new logs, you can track progress with the operator or by watching pods come up in the `element-onprem` namespace.
Operator status:
```
kubectl logs -f -n element-operator element-operator element-operator-controller-manager-
```
Watching reconciliation move forward in the `element-onprem` namespace:
```
kubectl get elementdeployment -o yaml | grep dependentCRs -A20 -n element-onprem -w
```
Watching dependent CRs errors :
```
kubectl get / -o yaml
```
Watching pods come up in the `element-onprem` namespace:
```
kubectl get pods -n element-onprem -w
```
# Administration
Migrating? Automate your deployment? Configuring Backups? Guides for Administrators here!
# Automating ESS Deployment
Understand your ESS configuration files and how you can automate ESS deployment(s).
### The `.element-enterprise-server` Directory
Config examples included on this page may not up-to-date and are solely provided for demonstration purposes. It is highly recommended to run the version of the installer you wish to install to generate and configure config files that work with that version.
Once these config files have been created by the installer, you should refer to the up-to-date config examples available in the installation documentation to understand how each config option can be modified.
When you first run the installer binary, it will create a directory in your home folder, `~/.element-enterprise-server`. This is where you'll find everything the installer uses / generates as part of the installation including your configuration, the installer itself and logs.
As you run through the GUI, it will output config files within `~/.element-enterprise-server/config` that will be used when you deploy. This is the best way to get started, before any automation effort, you should run through the installer and get a working config that suits your requirements.
This will generate the config files, which can then be modified as needed, for your automation efforts, then in order to understand how deployments could be automated, you should understand what config is stored where.
#### The `cluster.yml` Config File
The Cluster YAML configuration file is populated with information used by all aspects of the installer. To start you'll find `apiVersion:`, `kind:` and `metadata` which are used by the installer itself to identify the version of your configuration file. In cases where you switch to a new version of the installer, it will then upgrade this config in-line with the latest versions requirements.
Config Example
```yml
apiVersion: ess.element.io/v1alpha1
kind: InstallerSettings
metadata:
annotations:
k8s.element.io/version: 2023-07.09-gui
name: first-element-cluster
```
The configuration information is then stored in the `spec:` section, for instance you'll see; your Postgres in cluster information; DNS Resolvers; EMS Token; etc. See the example below:
```yml
spec:
connectivity:
dockerhub: {}
install:
certManager:
adminEmail: admin@example.com
emsImageStore:
password: examplesubscriptionpassword
username: examplesubscriptionusername
microk8s:
dnsResolvers:
- 8.8.8.8
- 8.8.4.4
postgresInCluster:
hostPath: /data/postgres
passwordsSeed: examplepasswordsseed
```
#### The `deployment.yml` Config File
The Deployment YAML configuration file is populated with the bulk of the configuration for you're deployment. As above, you'll find `apiVersion:`, `kind:` and `metadata` which are used by the installer itself to identify the version of your configuration file. In cases where you switch to a new version of the installer, it will then upgrade this config in-line with the latest versions requirements.
Config Example
```yml
apiVersion: matrix.element.io/v1alpha1
kind: ElementDeployment
metadata:
name: first-element-deployment
namespace: element-onprem
```
The configuration is again found within the `spec:` section of this file, which itself has two main sections:
- `components:` which contains the set configuration for each individual component i.e. Element Web or Synapse
- `global:` which contains configuration required by all components i.e. the root FQDN and Certificate Authority information
##### `components:`
First each component has a named section, such as `elementWeb`, `integrator`, `synapseAdmin`, or in this example `synapse`:
```yml
synapse:
```
Within each component, there are two sections to organise the configuration:
- `config:` which is configuration of the component itself i.e. whether Synapse registration is Open / Closed
Config Example
```yml
config:
acceptInvites: manual
adminPasswordSecretKey: adminPassword
externalAppservices:
configMaps: []
files: {}
federation:
certificateAutoritiesSecretKeys: []
clientMinimumTlsVersion: '1.2'
trustedKeyServers: []
log:
rootLevel: Info
macaroonSecretKey: macaroon
maxMauUsers: 250
media:
maxUploadSize: 100M
volume:
size: 50Gi
postgresql:
passwordSecretKey: postgresPassword
port: 5432
sslMode: require
registration: closed
registrationSharedSecretSecretKey: registrationSharedSecret
security:
defaultRoomEncryption: not_set
signingKeySecretKey: signingKey
telemetry:
enabled: true
passwordSecretKey: telemetryPassword
room: '#element-telemetry'
urlPreview:
config:
acceptLanguage:
- en
workers: []
```
- `k8s:` which is configuration of the pod itself in k8s i.e. CPU and Memory resource limits or FQDN
Config Example
```yml
k8s:
common:
annotations: {}
haproxy:
workloads:
annotations: {}
resources:
limits:
memory: 200Mi
requests:
cpu: 1
memory: 100Mi
securityContext:
fsGroup: 10001
runAsUser: 10001
ingress:
annotations: {}
fqdn: synapse.example.com
services: {}
tls:
certmanager:
issuer: letsencrypt
mode: certmanager
redis:
workloads:
annotations: {}
resources:
limits:
memory: 50Mi
requests:
cpu: 200m
memory: 50Mi
securityContext:
fsGroup: 10002
runAsUser: 10002
synapse:
common:
annotations: {}
monitoring:
serviceMonitor:
deploy: auto
storage: {}
workloads:
annotations: {}
resources:
limits:
memory: 4Gi
requests:
cpu: 1
memory: 2Gi
securityContext:
fsGroup: 10991
runAsUser: 10991
secretName: synapse
```
##### `global:`
The `global:` section works just like `component:` above, split into two sections `config:` and `k8s:`. It will set the default settings for all new components, you can see an example below:
Config Example
```yml
global:
config:
adminAllowIps:
- 0.0.0.0/0
- ::/0
certificateAuthoritySecretKey: ca.pem
domainName: example.com
genericSharedSecretSecretKey: genericSharedSecret
supportDnsFederationDelegation: false
verifyTls: true
k8s:
common:
annotations: {}
ingresses:
annotations: {}
services:
type: ClusterIP
tls:
certmanager:
issuer: letsencrypt
mode: certmanager
monitoring:
serviceMonitor:
deploy: auto
workloads:
annotations: {}
hostAliases: []
replicas: 2
securityContext:
forceUidGid: auto
setSecComp: auto
secretName: global
```
#### The `secrets.yml` Config File
The Secrets YAML configuration file is populated, as expected, the secrets used for your configuration. It consists of multiple entries, separated by lines of `---` each following the below format:
Config Example
```yml
apiVersion: v1
data:
genericSharedSecret: Q1BoVmNIaEIzWUR6VVZjZXpkMXhuQnNubHhLVVlM
kind: Secret
metadata:
name: global
namespace: element-onprem
```
The main section of interest for automation purposes, is the `data:` section, here you will find a dictionary of secrets, in the above you can see a `genericSharedSecret` and it's value opposite.
#### The `legacy` Directory
The `legacy` directory stores configuration for specific components not yet updated to the new format within the `component:` section of the `deployment.yml`. Work is steadily progressing on updating these legacy components to the new format, however in the meantime, you will find a folder for each legacy component here.
As integrations are upgraded to the new format this example (IRC) may become outdated, however the process remains identical for any integrations still using the legacy format. Make sure to check via the installer if the integration you are looking for is configured in this way.
Within each components folder, you will see a `.yml` file, which is where the configuration of that component is stored. For instance, if you setup the IRC Bridge, it will create `~/.element-enterprise-server/config/legacy/ircbridge` with `bridge.yml` inside. You can use the [Integrations and Add-Ons](https://ems-docs.element.io/books/element-server-suite-classic-documentation-lts-2310/chapter/integrations-and-add-ons) chapter of our documentation for guidance on how these files are configured. Using the IRC Bridge example, you would have a `bridge.yml` like so:
Config Example
```yml
key_file: passkey.pem
bridged_irc_servers:
- postgres_fqdn: ircbridge-postgres
postgres_user: ircbridge
postgres_db: ircbridge
postgres_password: postgres_password
admins:
- "@user:example.com"
logging_level: debug
enable_presence: true
drop_matrix_messages_after_seconds: 0
bot_username: "ircbridgebot"
provisioning_room_limit: 50
rmau_limit: 100
users_prefix: "irc_"
alias_prefix: "irc_"
address: irc.example.com
parameters:
name: "Example IRC"
port: 6697
ssl: true
botConfig:
enabled: true
nick: "MatrixBot"
username: "matrixbot"
password: "some_password"
dynamicChannels:
enabled: true
mappings:
"#welcome":
roomIds: ["!MLdeIFVsWCgrPkcYkL:example.com"]
ircClients:
allowNickChanges: true
```
There is also another important folder in `legacy`. The `certs` directory, here you will need to add any CA.pem file and certificates for the FQDN of any legacy components. As part of any automation, you will need to ensure these files are correct per setup and named correctly, the certificates in this directory should be named using the fully qualified domain name (.key and .crt).
### Automating your deployment
Once you have a set of working configuration, you should make a backup of your `~/.element-enterprise-server/config` directory. Through whatever form of automation you choose, automate the modification of your `cluster.yml`, `deployment.yml`, `secrets.yml` and any legacy `*.ymls` to adjust set values as needed.
For instance, perhaps you need 6 identical homeservers each with their own domain name, you would need to edit the `fqdn` of each component and the `domainName` in `deployment.yml`. You'd then have 6 config directories, each differing in domain, ready to be used by an installer binary.
On each of the 6 hosts, create the `~/.element-enterprise-server` directory and copy that hosts specific config to `~/.element-enterprise-server/config`. Copy the installer binary to the host, ensuring it's executable.
#### Running the installer unattended
Once host system is setup, you can add ` unattended` when running the binary to run the installer unattended. It will pickup the configuration and start the deployment installation without needing to use the GUI to get it started.
```bash
./element-enterprise-graphical-installer-YYYY-MM.VERSION-gui.bin unattended
````
# Backup and Restore
An ESS Administrators focused guide on backing up and restoring Element Server Suite.
Welcome, ESS Administrators. This guide is crafted for your role, focusing on the pragmatic aspects of securing crucial data within the Element Server Suite (ESS). ESS integrates with external PostgreSQL databases and persistent volumes and is deployable in standalone or Kubernetes mode. To ensure data integrity, we recommend including valuable, though not strictly consistent, data in backups. The guide also addresses data restoration and a straightforward disaster recovery plan.
### Software Overview
ESS provides Synapse and Integrations which require an external PostgreSQL and persistent volumes. It offers standalone or Kubernetes deployment.
- **Standalone Deployments****.** The free version of our Element Server Suite. Allowing you to easily install a Synapse homeserver and hosted Element Web client.
- **Kubernetes Deployments****.** We strongly recommend to leverage your own cluster backup solutions for effective data protection.
You'll find below a description of the content of each component data and db backup.
#### Synapse
- Synapse deployments creates a PVC named `-synapse-media`. It contains all users medias (avatar, photos, videos, etc). It does not need strict consistency with database content, but the more in sync they are, the more medias can be correctly synced with rooms state in case of restore.
- Synapse requires an external postgressql database which contains all the server state.
#### Adminbot
- Adminbot integration creates a PVC named `-adminbot`. It contains the bot decryption keys, and a cache of the adminbot logins.
#### Auditbot
- Auditbot integration creates a PVC named `-auditbot`. It contains the bot decryption keys, and a cache of the adminbot logins.
- Auditbot store the room logs of your organization either in an S3 Bucket or the aforementioned PVC. Depending on the critical nature of being able to provide room logs for audit, you need to properly backup your S3 Bucket or the PVC.
#### Matrix Authentication Service
- Matrix Authentication Service requires an external postgresql database. It contains the homeserver users, their access tokens and their Sessions/Devices.
#### Sliding Sync
- Sliding Sync requires an external postgresql database. It contains Sliding Sync running state, and data cache. The database backup needs to be properly secured. This database needs to be backed-up to be able to avoid UTDs and initial-syncs on a disaster recovery.
#### Sydent
- Sydent integration creates a PVC named `-sydent`. It contains the integration SQLite database.
#### Integrator
- Integrator requires an external postgresql database. It contains information about which integration was added to each room.
#### Bridges (XMPP, IRC, Whatsapp, SIP, Telegram)
- The bridges require each an external postgresql database. It contains mapping data between Matrix Rooms and Channels on the other bridge side.
### Backup Policy & Backup Procedure
There is no particular prerequisite to do before executing an ESS backup. Only Synapse and MAS Databases should be backed up in sync and stay consistent. All other individual components can be backed up on it's own lifecycle.
Backups frequency and retention periods must be defined according to your own SLAs and SLIs.
### Data restoration
The following ESS components should be restored first in case of complete restoration. Other components can be restore on their distinctively, on their own time:
- Synapse Postgresql database
- Synapse media
- Matrix Authentication Service database (if installed)
- Restart Synapse & MAS (if installed)
- Restore and restart each individual component
### Disaster Recovery Plan
In case of disaster recovery, the following components are critical for your system recovery:
- **Synapse Postgresql Database** is critical for Synapse to send consistent data to other servers, integrations and clients.
- **Synapse Keys** configured in ESS configuration (Signing Key, etc) are critical for Synapse to start and identify itself as the same server as before.
- **Matrix Authentication Service Postgresql Database** is critical for your system to recover your user accounts, their devices and sessions.
The following systems will recover features subsets, and might involve reset & data loss if not recovered :
- **Synapse Media Storage****.** Users will loose their Avatars, and all photos, videos, files uploaded to the rooms wont be available anymore
- **AdminBot and AuditBot Data****.** The bots will need to be renamed for them to start joining all rooms and logging events again
- **Sliding Sync****.** Users will have to do an initial-sync again, and their encrypted messages will display as "Unable to decrypt" if its database cannot be recovered
- **Integrator****.** Integrations will have to be added back to the rooms where they were configured. Their configuration will be desynced from integrator, and they might need to be reconfigured from scratch to have them synced with integrator.
### Security Considerations
Some backups will contain sensitive data, Here is a description of the type of data and the risks associated to it. When available, make sure to enable encryption for your stored backups. You should use appropriate access controls and authentication for your backup processes.
#### Synapse
Synapse media and db backups should be considered sensitive.
Synapse media backups will contain all user media (avatar, photos, video, files). If your organization is enforcing encrypted rooms, the media will be stored encrypted with each user e2ee keys. If you are not enforcing encryption, you might have media stored in cleartext here, and appropriate measures should be taken to ensure that the backups are safely secured.
Synapse postgresql backups will contain all user key backup storage, where their keys are stored safely encrypted with each user passphrase. Synapse DB will also store room states and events. If your organization is enforcing encrypted rooms, these will be stored encrypted with each user e2ee keys.
#### Adminbot
Adminbot PV backup should be considered sensitive.
Any user accessing it could read the content of your organization rooms. Would such an event occur, revoking the bot tokens would prevent logging in as the AdminBot and stop any pulling of the room messages content.
#### Auditbot
Auditbot PV backup should be considered sensitive.
Any user accessing it could read the content of your organization rooms. Would such an event occur, revoking the bot tokens would prevent logging in as the AuditBot and stop any pulling of the room messages content.
Logs stored by the AuditBot for audit capabilities are not encrypted, so any user able to access it will be able to read any logged room content.
#### Sliding Sync
Sliding-Sync DB Backups should be considered sensitive.
Sliding-Sync database backups will contain Users Access tokens, which are encrypted with Sliding Sync Secret Key. The tokens are only refreshed regularly if you are using Matrix Authentication Services. These tokens give access to user messages-sending capabilities, but cannot read encrypted messages without user keys.
#### Sydent
Sydent DB Backups should be considered sensitive.
Sydent DB Backups contain association between user matrix accounts and their external identifiers (mails, phone numbers, external social networks, etc).
#### Matrix Authentication Service
Matrix Authentication Service DB Backups should be considered sensitive.
Matrix Authentication Service database backups will contain user access tokens, so they give access to user accounts. It will also contain the OIDC providers and confidential OAuth 2.0 Clients configuration, with secrets stored encrypted using MAS encryption key.
#### IRC Bridge
IRC Bridge DB Backups should be considered sensitive.
IRC Bridge DB Backups contain user IRC passwords. These passwords give access to users IRC account, and should be reinitialized in case of incident.
### Standalone Deployment Guidelines
#### General storage recommentations for single-node instances
- `/data` is where the standalone deployment installs PostgreSQL data and Element Deployment data. It should be a distinct mount point.
- Ideally this would have an independent lifecycle from the server itself
- Ideally this would be easily snapshot-able, either at a filesystem level or with the backing storage
#### Adminbot storage:
- Files stored with `uid=10006` / `gid=10006`, default config uses `/data/element-deployment/adminbot` for single-node instances
- Storage space required is proportional to the number of user devices on the server. 1GB is sufficient for most servers
#### Auditbot storage:
- Files stored with `uid=10006` / `gid=10006`, default config uses `/data/element-deployment/auditbot` for single-node instances
- Storage space required is proportional to the number of events tracked.
#### Synapse storage:
- Media:
- File stored with `uid=10991` / `gid=10991`, default config uses `/data/element-deployment/synapse` for single-node instances
- Storage space required grows with the number and size of uploaded media. For more information, see the [Synapse Media](https://ems-docs.element.io/link/475#bkmrk-synapse-media) section from the Requirements and Recommendations doc.
#### Postgres (in-cluster) storage:
- Files stored with `uid=999` / `gid=999`, default config uses `/data/postgres` for single-node instances
#### Backup Guidance:
- **AdminBot****.** Backups should be made by taking a snapshot of the PV (ideally) or rsyncing the backing directory to backup storage
- **AuditBot****.** Backups should be made by taking a snapshot of the PV (ideally) or rsyncing the backing directory to backup storage
- **Synapse Media****.** Backups should be made by taking a snapshot of the PV (ideally) or rsyncing the backing directory to backup storage
- **Postgres****.**
- **In Cluster:** Backups should be made by
```bash
kubectl -n element-onprem exec -it postgres-synapse-0 -- sh -c 'pg_dump -U $POSTGRES_USER $POSTGRES_DB' \
> synapse_postgres_backup_$(date +%Y%m%d-%H%M%S).sql
```
- **External:** Backup procedures as per your DBA
- **Configuration****.** Please ensure that your entire configuration directory (that contains at least `parameters.yml` & `secrets.yml` but may also include other sub-directories & configuration files) is regularly backed up. The suggested configuration path in Element's documentation is `~/.element-onpremise-config` but could be anything. It is whatever directory you used with the installer.
# Configuring Element Desktop
[Element Desktop](https://github.com/element-hq/element-desktop) is a Matrix client for desktop platforms with Element Web at its core.
You can download Element Desktop for Mac, Linux or Windows from the [Element](https://element.io/download) downloads page.
See for the Element Web and Desktop documentation.
### Aligning Element Desktop with your ESS deployed Element Web
By default, Element Desktop will be configured to point to the [Matrix.org](https://matrix.org/) homeserver, however this is configurable by supplying a [User Specified `config.json`](https://web-docs.element.dev/Element%20Desktop/index.html#user-specified-configjson).
As Element Desktop is mainly Element Web, but packaged as a Desktop application, this `config.json` is identical to the `config.json` ESS will configure and deploy for you at `https:///config.json`, so it is recommended to setup Element Desktop using that file directly.
How you do this will depend on your specific environment, but you will need to ensure the `config.json` is placed in the correct location to be used by Element Desktop.
- `%APPDATA%\$NAME\config.json` on Windows
- `$XDG_CONFIG_HOME/$NAME/config.json` or `~/.config/$NAME/config.json` on Linux
- `~/Library/Application Support/$NAME/config.json` on macOS
In the paths above, `$NAME` is typically Element, unless you use `--profile $PROFILE` in which case it becomes `Element-$PROFILE`.
As Microsoft Windows File Explorer by default hides file extensions, please double check to ensure the `config.json` does indeed have the `.json` file extension, not `.txt`.
### Customising your desktop configuration
You may wish to further customise Element Desktop, if the changes you wish to make should not also apply to your ESS deployed Element Web, you will need to add them in addition to your existing `config.json`.
You can find [Desktop specific](hhttps://web-docs.element.dev/Element%20Web/config.html#desktop_builds-and-mobile_builds) configuration options, or just customise using any options from the [Element Web Config](https://web-docs.element.dev/Element%20Web/config.html) docs.
### The Element Desktop MSI
#### Where to download
Customers who have a subscription to the Enterprise edition of the Element Server Suite (ESS) can download a MSI version of Element Desktop. This version of Element Desktop is by default installed into Program Files (instead of per user) and can be used to deploy into enterprise environments. To download, login to your EMS Accoutn and access from the same download page you'd find the enterprise installer, .
#### Using the Element Desktop MSI
The Element Desktop MSI can be used to install Element Desktop to all desired machines in your environment, unlike the usual installer, you can customise it's install directory (which now defaults to `Program Files`).
You can customise the installation directory by installing the MSI using, or just generally configuring the `APPLICATIONFOLDER`:
```
msiexec /i "Element 1.11.66.msi" APPLICATIONFOLDER="C:\Element"
```
##### MSI and `config.json`
Once users run Element for the first time, an Element folder will be created in their `AppData` profile specific to that user. By using Group Policy, Logon Scripts, SCCM or whatever other method you like, ensure the desired `config.json` is present within `%APPDATA%\Element`. (The `config.json` can be present prior to the directories creation.)
# Migrating from Self-Hosted to ESS
This document is currently work-in-progress and might not be accurate. Please speak with your Element contact if you have any questions.
## Preparation
This section outlines what you should do ahead of the migration in order to ensure the migration goes as quickly as possible and without issues.
- At the latest 48 hours before your migration is scheduled, set the TTL on any DNS records that need to be updated to the lowest allowed value.
- Check the size of your database:
- PostgreSQL: Connect to your database and issue the command `\l+`
- Check the size of your media
- Synapse Media Store: `du -hs /path/to/synapse/media_store/`
- Matrix Media Repo:
- If you are using SQLite instead of PostgreSQL, you should port your database to PostgreSQL by following [this](https://element-hq.github.io/synapse/latest/postgres.html) guide before dumping your database
Note that the database and media may be duplicated/stored twice on your ESS host during the import process depending on how you do things.
If you are migrating from EMS, see also for import documentation tailored to the EMS export.
## Setup your new ESS server
Follow the ESS docs for first-time installation, configuring to match your existing homeserver before proceeding with the below.
The `Domain Name` on the Domains page during the ESS initial setup wizard must be the same as you have on your current setup. The other domains can be changed if you wish.
To make the import later easier, we recommend you select the following Synapse Profile. You can change this as required after the import.
- Monthly Active Users: 500
- Federation Type: closed
After the ESS installation, you can check your ESS Synapse version on the `Admin` -> `Server Info` page:
[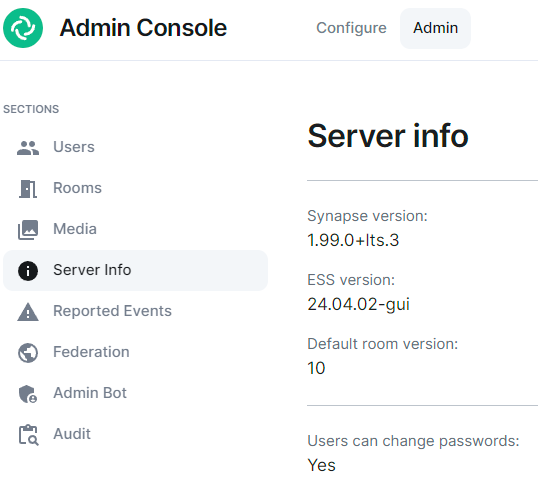](https://ems-docs.element.io/uploads/images/gallery/2024-05/image-1715171819276.png)
## Export your old Matrix server
### SSH to your old Matrix server
You might want to run everything in a `tmux` or a `screen` session to avoid disruption in case of a lost SSH connection.
### Upgrade your old Synapse to the same version EES is running
Follow
Please be aware that ESS, especially our LTS releases may not run the latest available Synapse release. Please speak with your Element contact for advice on how to resolve this issue. Note that Synapse does support downgrading, but occationally a new Synapse version includes database schema changes and this limits downgrading. See for additional details and compatible versions.
Start Synapse, make sure it's happy.
Stop Synapse
### Create a folder to store everything
```bash
mkdir -p /tmp/synapse_export
cd /tmp/synapse_export
```
The guide from here on assumes your current working directory is `/tmp/synapse_export`.
### Set restrictive permissions on the folder
If you are working as root: (otherwise set restrictive permissions as needed):
```bash
chmod 700 /tmp/synapse_export
```
### Copy Synapse config
Get the following files :
- Your Synapse configuration file (usually `homeserver.yaml`)
- Your message signing key.
- This is stored in a separate file. See the Synapse config file [`homeserver.yaml`] for the path. The variable is `signing_key_path`
- grab `macaroon_secret_key` from `homeserver.yaml` and place it in the "Secrets \ Synapse \ Macaroon" on your ESS server
- If you use native Synapse user authentication, `password.pepper` must remain unchanged. If not you need to reset all passwords. Note that setting the pepper is not supported in ESS as time of writing, please check with your Element contact.
### Stop Synapse
Once Synapse is stopped, do not start it again after this
Doing so can cause issues with federation and inconsistent data for your users.
While you wait for the database to export or files to transfer, you should edit or create the well-known files and DNS records to point to your new EES host. This can take a while to update so should be done as soon as possible in order to ensure your server will function properly when the migration is complete.
### Database export
Dump your database:
```bash
pg_dump -Fc -O -h -U -d -W -f synapse.dump
```
- `` (ip or fqdn for your database server)
- `` (username for your synapse database)
- `` (the name of the database for synapse)
## Import to your ESS server
### Database import
Enter a bash shell on the Synapse postgres container:
Stop Synapse
```bash
kubectl .... replicas=0
```
Note that this might differ depending on how you have your Postgres managed. Please consult the documentation for your deployment system.
```bash
kubectl exec -it -n element-onprem synapse-postgres-0 --container postgres -- /bin/bash
```
Then on postgres container shell run:
```bash
psql -U synapse_user synapse
```
The following command will erase the existing Synapse Database without warning or confirmation. Please ensure that is is the correct database and there is no production data on it.
```sql
DO $$ DECLARE
r RECORD;
BEGIN
FOR r IN (SELECT tablename FROM pg_tables WHERE schemaname = current_schema()) LOOP
EXECUTE 'DROP TABLE ' || quote_ident(r.tablename) || ' CASCADE';
END LOOP;
END $$;
DROP sequence cache_invalidation_stream_seq;
DROP sequence state_group_id_seq;
DROP sequence user_id_seq;
DROP sequence account_data_sequence;
DROP sequence application_services_txn_id_seq;
DROP sequence device_inbox_sequence;
DROP sequence event_auth_chain_id;
DROP sequence events_backfill_stream_seq;
DROP sequence events_stream_seq;
DROP sequence presence_stream_sequence;
DROP sequence receipts_sequence;
DROP sequence un_partial_stated_event_stream_sequence;
DROP sequence un_partial_stated_room_stream_sequence;
```
Use `\q` to quit, then back on the host run:
```bash
gzip -d synapse_export.sql.gz
sudo cp synapse_export.sql /data/postgres/synapse/
# or
kibectl --namespace element-onprem cp synapse_export.sql element-onprem synapse-postgres-0:/tmp
```
Finally on the pod:
```bash
cd /var/lib/postgresql/data
# or
cd /tmo
pg_restore --no-owner --role= -d dump.sql
```
# Using the Admin Console
AKA the Installer GUI, a quick overview of the Configure and Admin tabs and the sections within.
### Opening the Admin Console
First, let’s get started by logging into the admin console. To do this, make sure that the installer is still running or bring it up by running the installer binary like this (Please specify the correct version and don’t just copy this line!):
```
./element-enterprise-graphical-installer-2023-06.01-gui.bin
```
You will then see output similar to:
```
To start configuration open:
https://admin.element.demo:8443/a/XWDPB7NQ
````
### The Configure Tab
On clicking the link, you will be automatically logged in as an administrator and see the console.
You’ll notice that the first page is the “Configure” tab on the top and the sections in the left hand menu mirror those in the installer:
- **Host****.** is for setting details specific to the deployment host itself.
- **Domains****.** is for setting the specific domain names and subdomains that are used by the installation.
- **Certificates****.** is for making specific certificate choices and uploading certificates if using custom certificates.
- **Cluster****.** is for setting any kubernetes specific parameters required for your installation.
- **Synapse****.** is for setting any homeserver settings or variables. You may also set any custom configuration that can be done through [homeserver.yaml](https://element-hq.github.io/synapse/latest/usage/configuration/config_documentation.html).
- **Element Web****.** is for making any specific changes to the Element Web deployment and also for setting any custom configuration that would be specified in a [config.json](https://github.com/vector-im/element-web/blob/develop/docs/config.md).
- **Homeserver Admin****.** is for making changes related to this admin console.
- **Integrator****.** is for making any changes related to the integration manager.
- **Integrations****.** is for installing, configuring, or removing any of the add-ons that we ship as part of Element Server Suite.
Note that all settings under the “Configure” tab presently require you to re-deploy your installation by using the conveniently located “Deploy” button. Please make all changes across any of these pages that you wish to deploy prior to hitting the “Deploy” button.
### The Admin Tab
If you click on the “Admin” tab, you will see the following screen:
[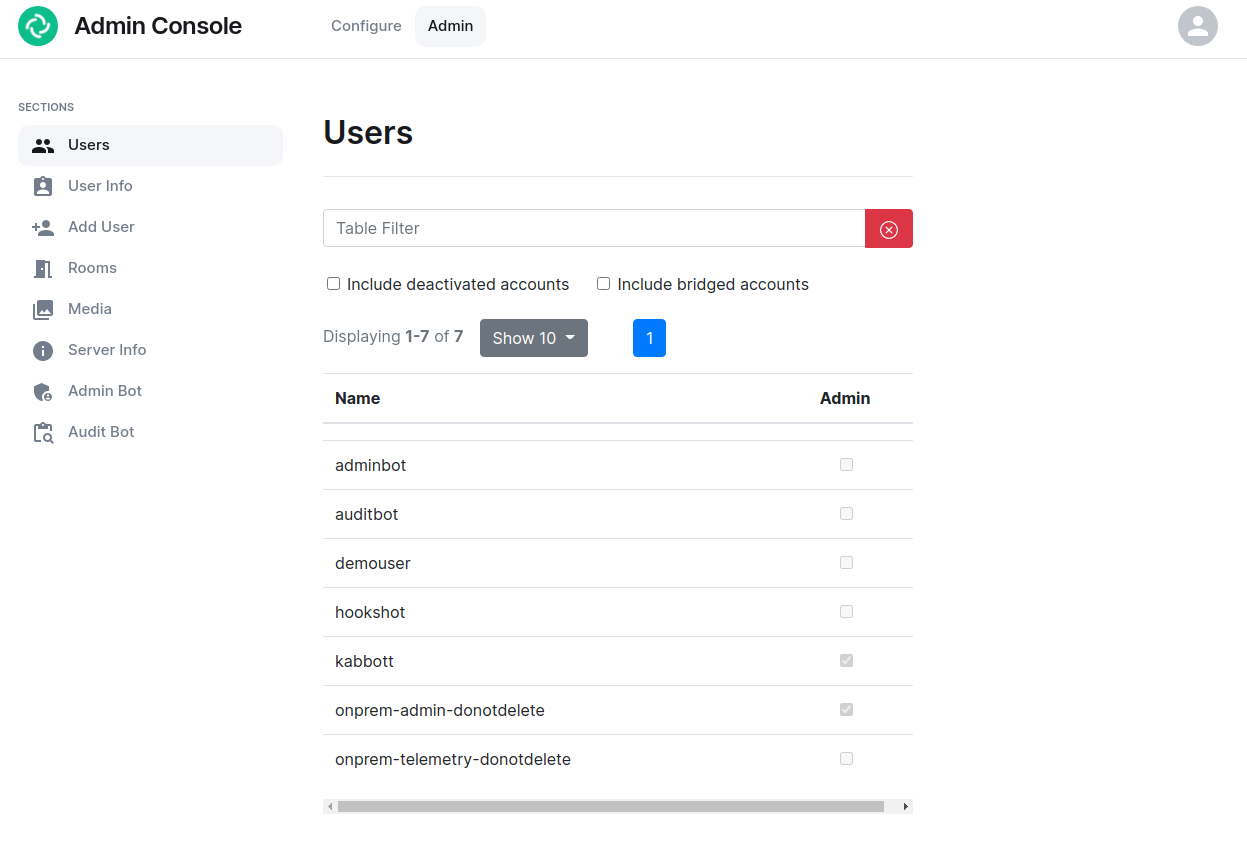](https://ems-docs.element.io/uploads/images/gallery/2023-06/adminconsole-docs2.png)
See the section by section guide on [Using the Admin Tab](https://ems-docs.element.io/books/element-server-suite-classic-documentation-lts-2404/page/using-the-admin-tab) for a more detailed look at using it, otherwise see the below overview:
In the left hand menu, we have the following options:
- **Users****.** tab. On this tab, we can display a list of users, see who has admin rights, and click on a username to get more information on a local user.
- **User Info****.** tab. On this tab, we can specify a username and get more information about a user.
- **Add User****.** tab. We can use this tab to add a local user to the database. This will not work if you are using delegated authentication.
- **Rooms****.** tab. On this tab, we can view a list of rooms on the homeserver. This will have information on the room id, the room name, the number of users in a room, and the version of the room. From here, we can also delete rooms from the server.
- **Server Info****.** tab. On this tab, we can see some basic server information such as the version of synapse installed and the version of python available to the homeserver.
- **Admin Bot****.** tab. This tab includes a button to log in as the admin bot user along with the key backup credentials to decrypt the messages once you are logged in as the admin bot.
- **Audit Bot****.** tab. This tab includes a button to log in as the audit bot user along with the key backup credentials to decrypt the messages once you are logged in as the audit bot.
# Using the Admin Tab
### Users Section
[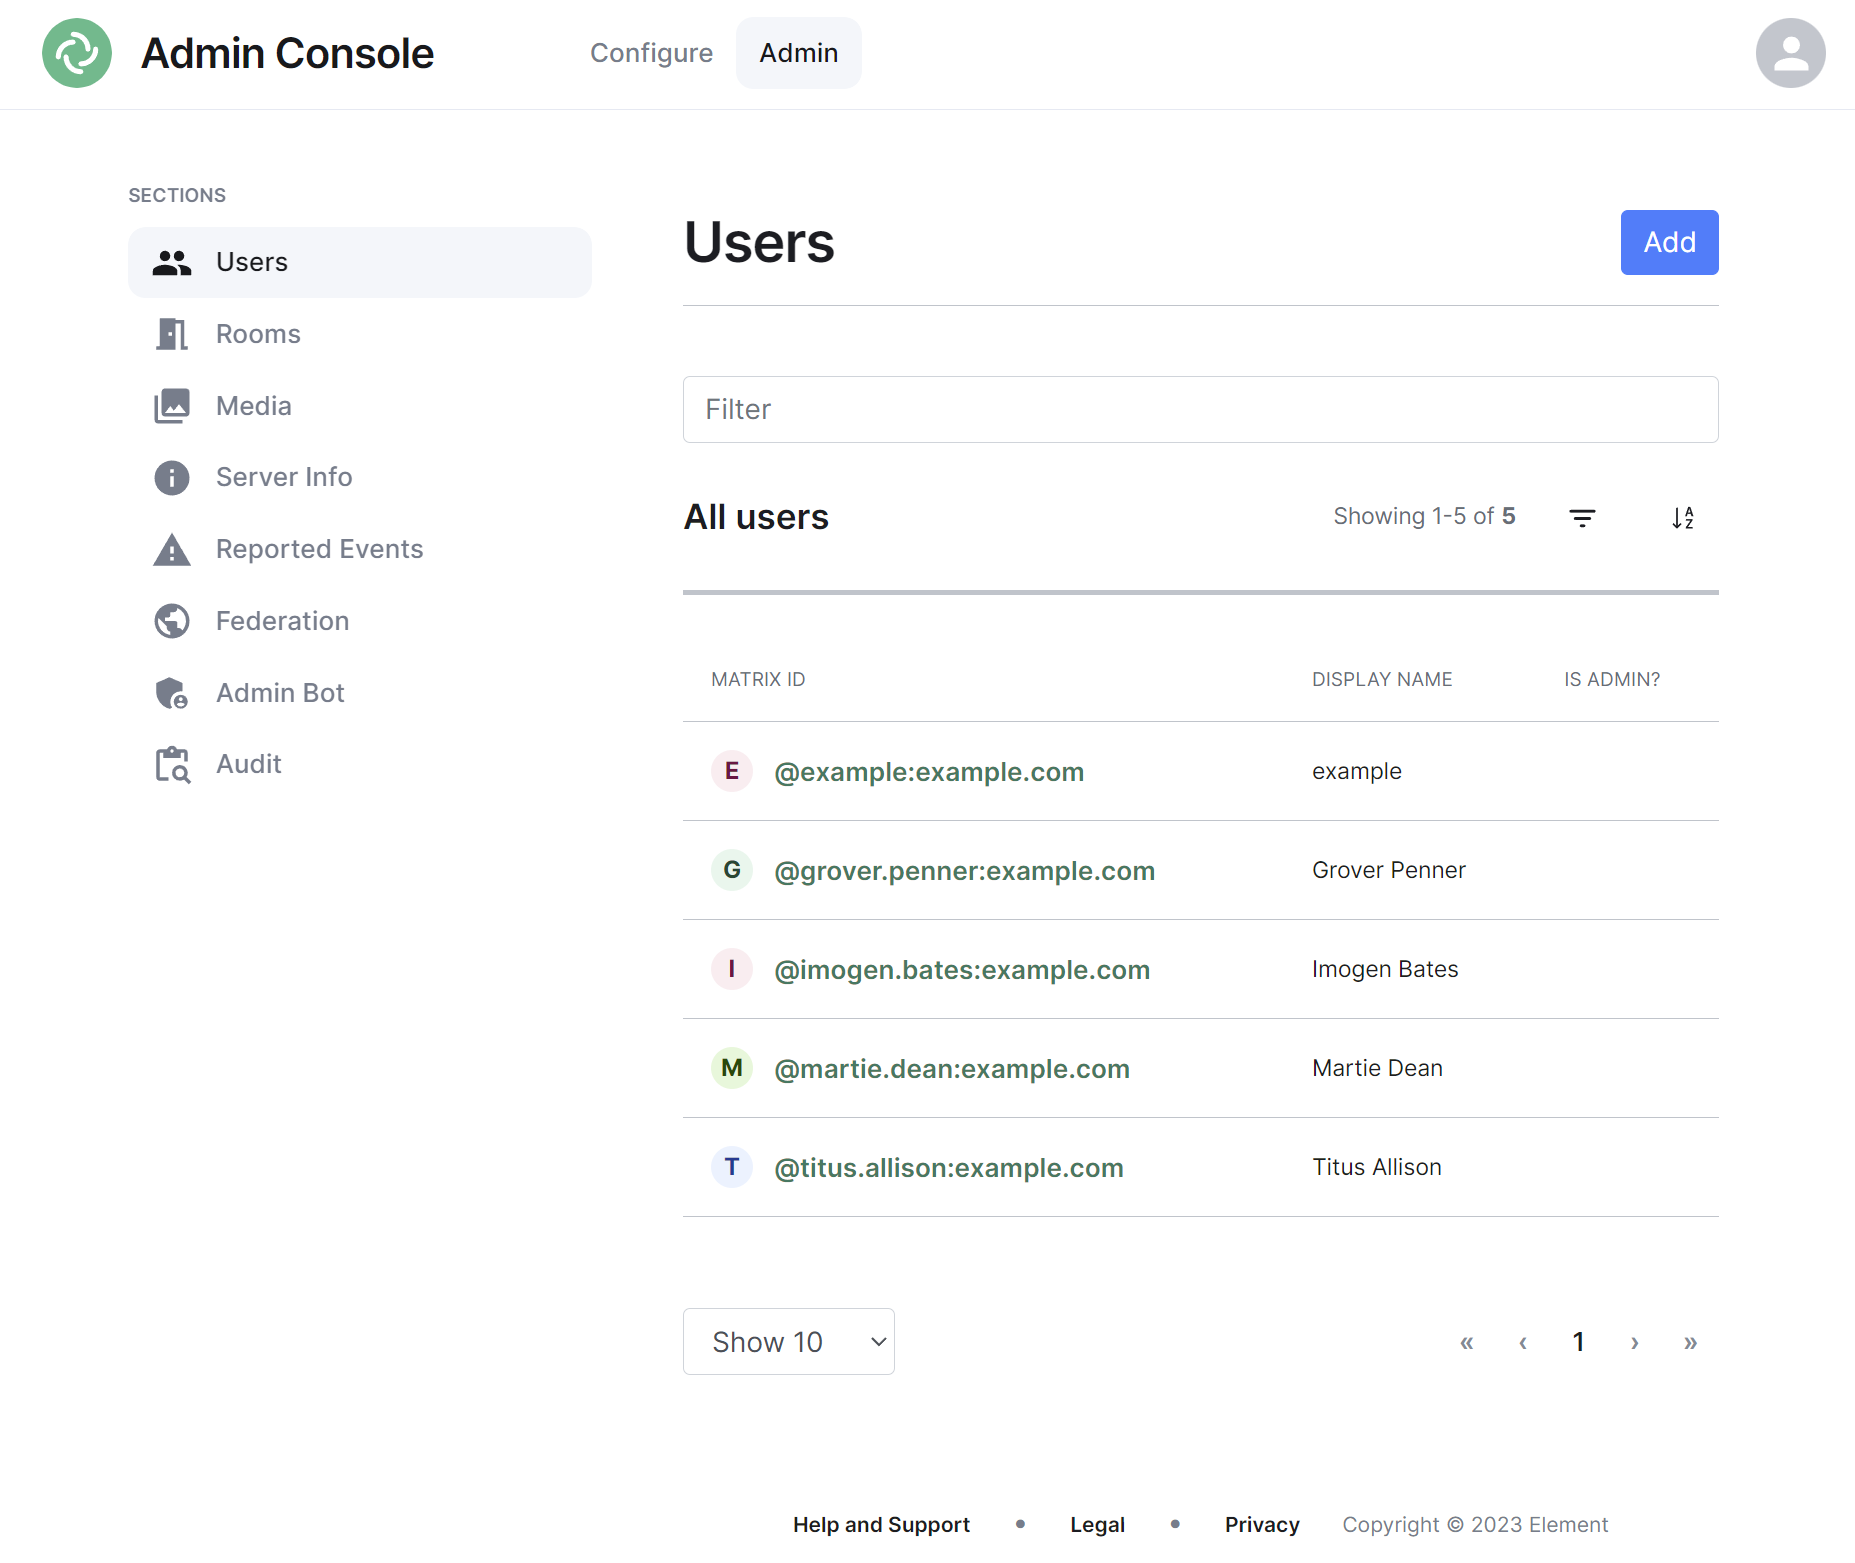](https://ems-docs.element.io/uploads/images/gallery/2023-11/image-1699362510651.png)
By default the users section will display all active user accounts present on your homeserver, listing their Matrix ID followed by their Display Name and whether the user is a Synapse Admin.
#### Navigating
Users will be displayed in a list, defaulting to a maximum of 10 users per page, you can show more users per page using the drop found at the bottom left of the list.
To navigate between pages, you can use the page navigation options found at the bottom right of the list.
[](https://ems-docs.element.io/uploads/images/gallery/2023-11/image-1699362680045.png)
#### Sorting and Filtering
The default view of users can be adjusted using the available sorting and filtering options.
To sort, select the sort button and select how users should be organised, options include by Matrix ID (A-Z or Z-A), by Display Name (A-Z or Z-A) and displaying Admins first.
[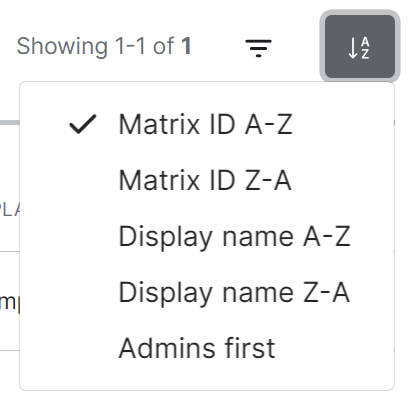](https://ems-docs.element.io/uploads/images/gallery/2023-11/image-1699362631750.png)
To search for users specifically, you can use the filter search box found above the list of users. Simply enter your search term and the list will be filtered for matches.
[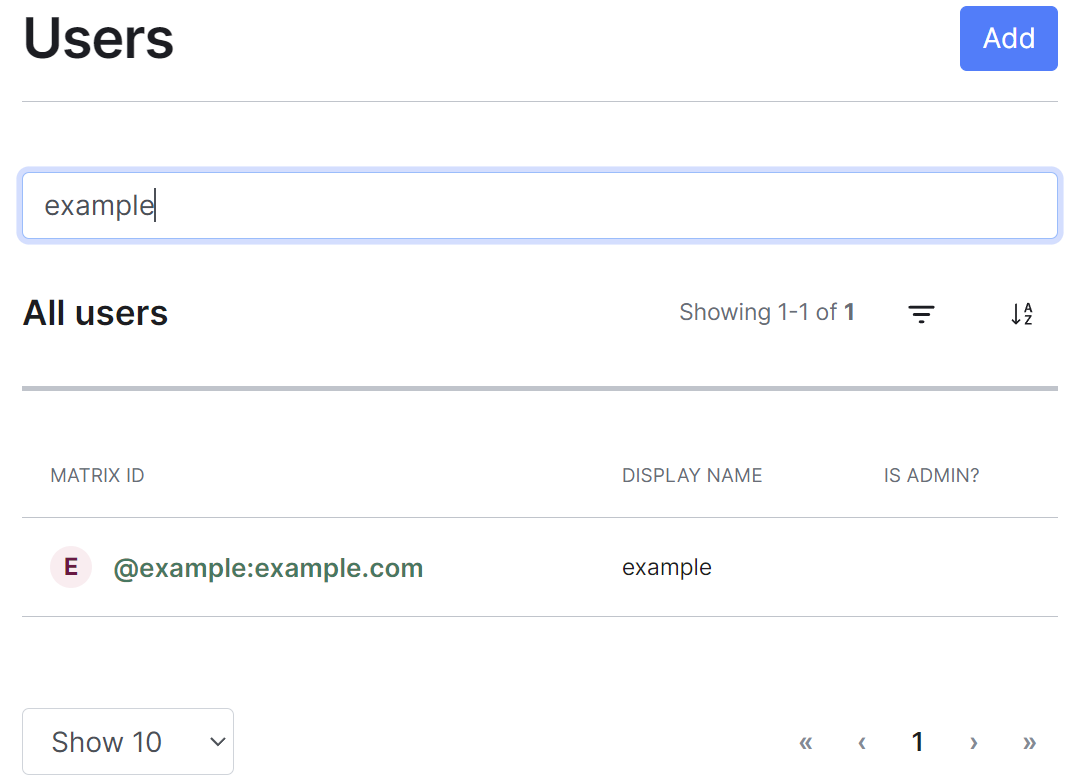](https://ems-docs.element.io/uploads/images/gallery/2023-11/image-1699362618567.png)
By default a number of account types are excluded from the list of users, these are deactivated accounts, guest accounts, support accounts and bot accounts. You can include these accounts by selecting the filter button then choosing the appropriate option.
[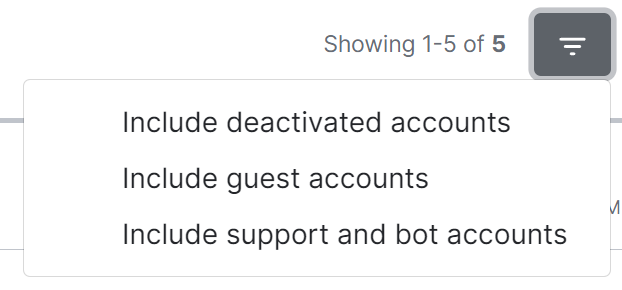](https://ems-docs.element.io/uploads/images/gallery/2023-11/image-1699362539098.png)
To remove these includes, you can click the 'x' icon next to the filter added just above the list view.
[](https://ems-docs.element.io/uploads/images/gallery/2023-11/image-1699362598581.png)
#### Adding Users
You can add user accounts manually by clicking the Add button found at the top right of the admin interface. This will take you to a page where you can register a new Synapse user.
[](https://ems-docs.element.io/uploads/images/gallery/2023-11/image-1699362707931.png)
**Note**, if your homeserver has a Terms of Service, users added in this way will need to accept those terms after logging in. This differs from the usual flow of users who create their account themselves, accepting the terms during the sign up process.
Once any additional user/s have been added, simply click the 'Back to people list' button to return to the user list.
[](https://ems-docs.element.io/uploads/images/gallery/2023-11/image-1699362832094.png)
##### Adding a single user
Provide the required username of the new user, if the user should be made a Synapse admin you should check the 'Make new user server admin' checkbox, then press the Add button. A new user will be added and their password will appear on screen.
[](https://ems-docs.element.io/uploads/images/gallery/2023-11/image-1699362765678.png)
##### Adding multiple users at once
You are also able to import bulk users at once, either click the ` username,email,phone,displayname,password` button, or manually create a csv file with those headings. Only the username is required and if the password is left blank, a random one will be generated. The CSV should be limited to no more than 30MB, you can see an example below:
```csv
username,email,phone,displayname,password
grover.penner,,,Grover Penner,grover
titus.allison,,,Titus Allison,titus
martie.dean,,,Martie Dean,martie
rachyl.dpears,,,Rachyl Spears,rachyl
imogen.bates,,,Imogen Bates,imogen
```
Either drag the CSV file into the window, or using the 'Choose file' button and press 'Import' to create the users. You will receive confirmation the users have been created.
[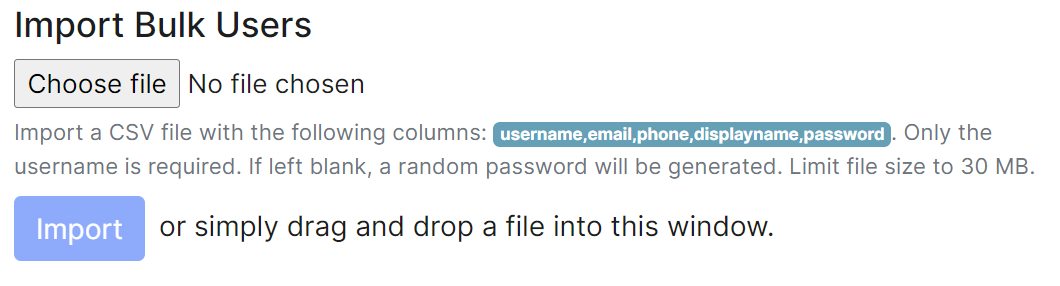](https://ems-docs.element.io/uploads/images/gallery/2023-11/image-1699362784985.png)
#### Managing Users
You can manage an existing user by clicking on their account from the user list. You will then be presented with a view where you can manage the account.
**Note**, you can quickly copy the accounts Matrix ID by clicking on it, you will see a tooltip confirm the ID has been copied.
[](https://ems-docs.element.io/uploads/images/gallery/2023-11/image-1699362946377.png)
You can make a user a Synapse admin by checking the 'Admin' checkbox found to the right of the Matrix ID. Clicking this checkbox will cause a confirmation prompt to appear to confirm the action.
**Note**, this does not currently give any additional permissions in Element clients. It grants permission to use the Synapse Admin API
You can edit the users' existing Display Name by clicking the 'edit' button found following their existing Display Name, and you can reset the users' password by clicking the 'Reset' button.
From this view you can also see when a user was last logged in and a list of their currently active devices (i.e. sessions).
[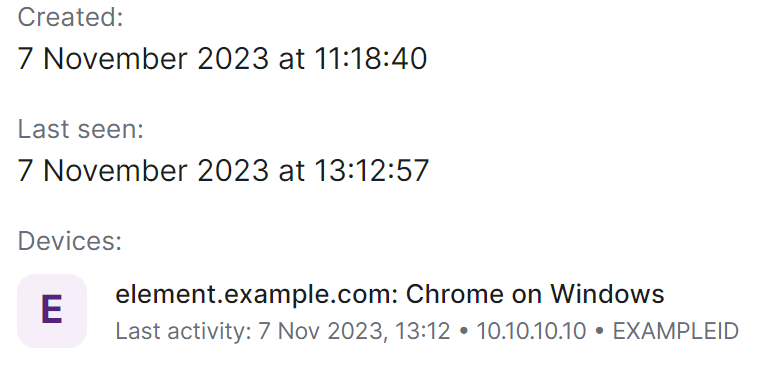](https://ems-docs.element.io/uploads/images/gallery/2023-11/image-1699363094103.png)
Finally you are also able to manually deactivate the account by clicking the 'Deactivate account' button, this will cause a confirmation prompt to appear to confirm the action.
**Note**, this action will remove active access tokens, reset the password, and delete third-party IDs (to prevent the user requesting a password reset). It will also mark the user as GDPR-erased (stopping their data from being distributed further, and deleting it entirely if there are no other references to it).
### Rooms Section
[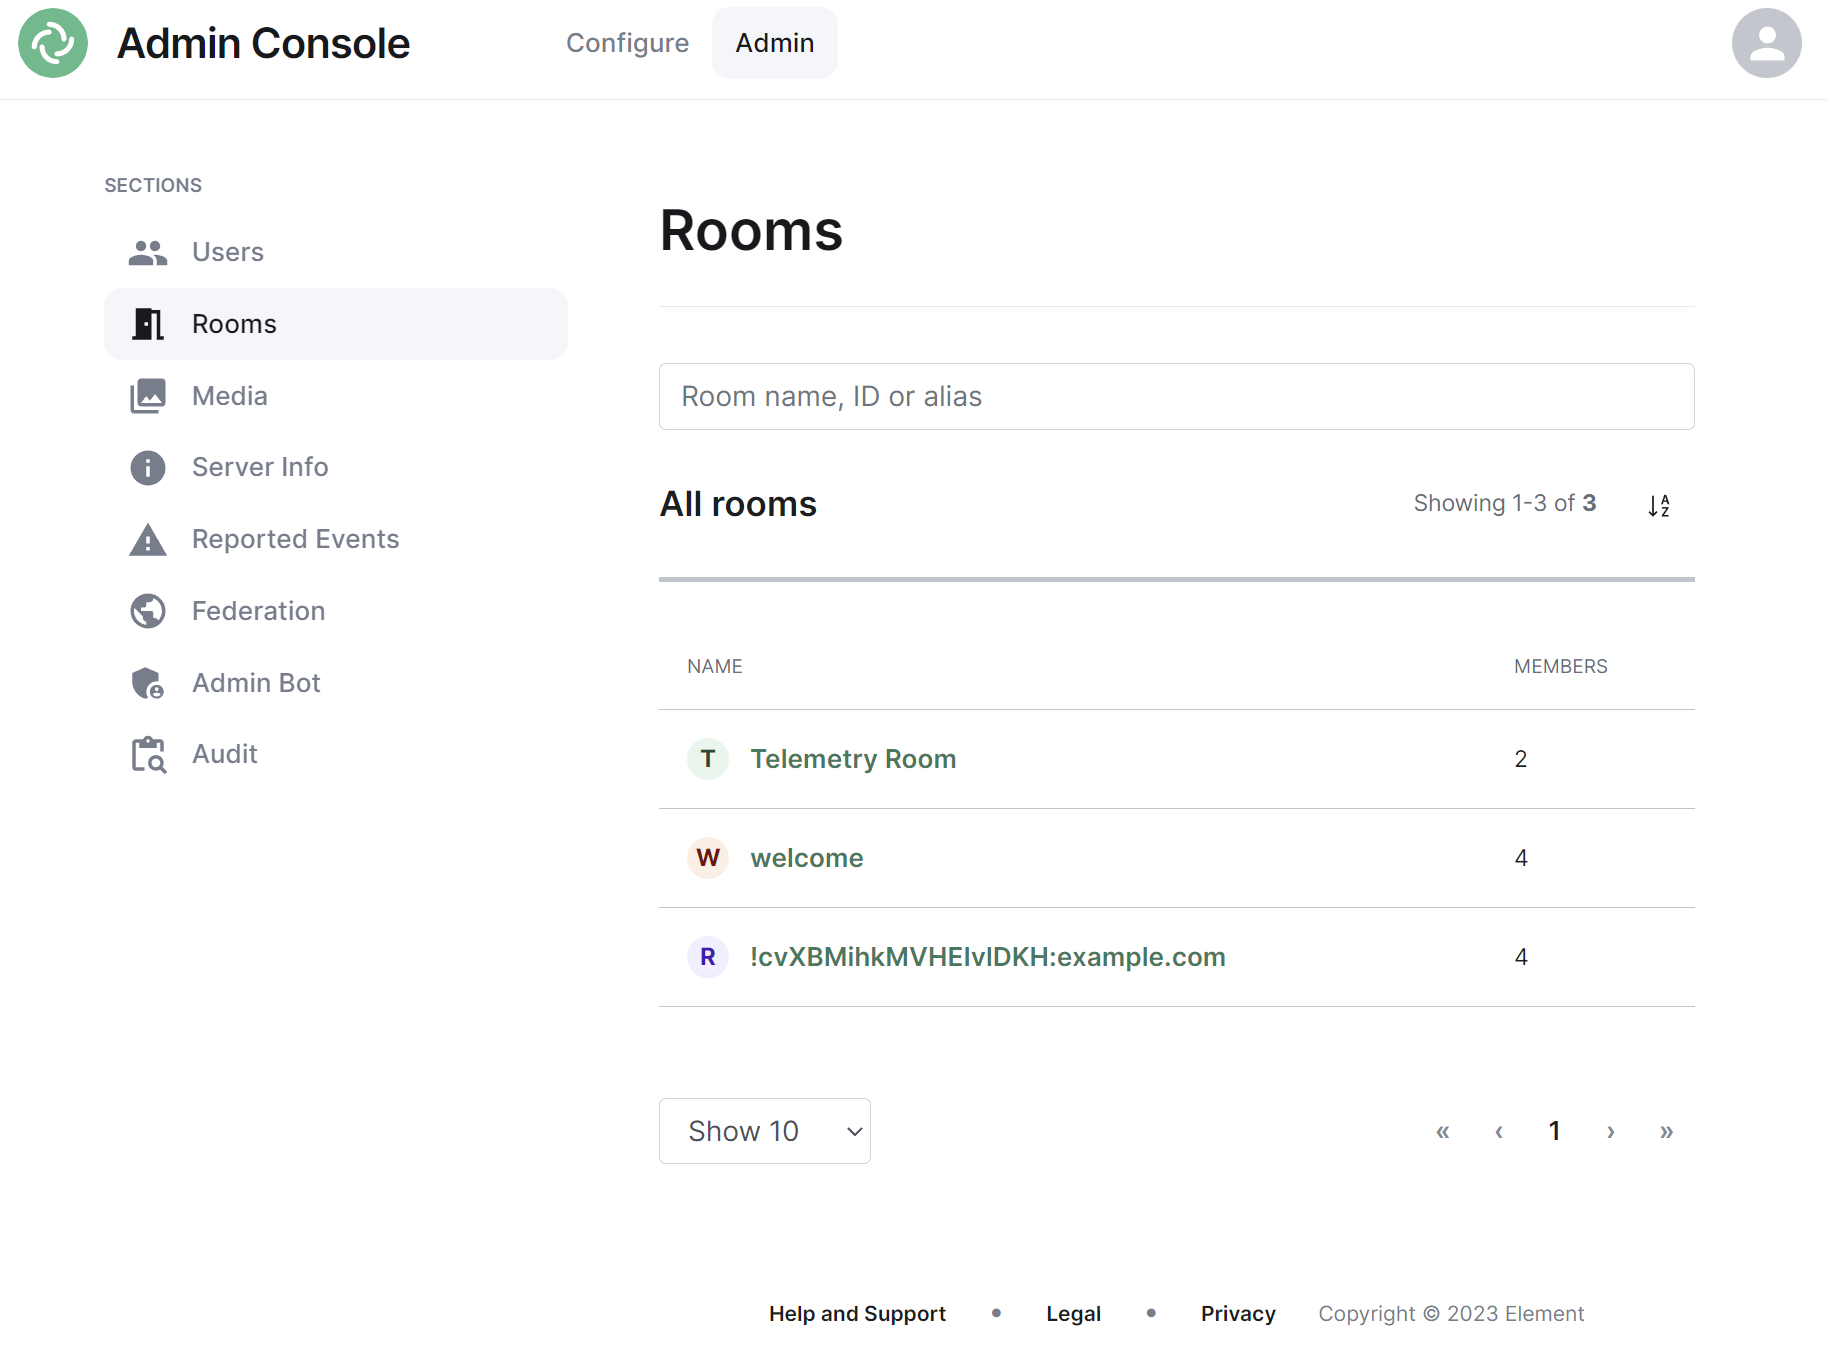](https://ems-docs.element.io/uploads/images/gallery/2023-11/image-1699363182592.png)
By default the rooms section will display all rooms present on your homeserver, listing their room name, or ID if not applicable, followed by the member count.
#### Navigating
Rooms will be displayed in a list, defaulting to a maximum of 10 rooms per page, you can show more rooms per page using the drop found at the bottom left of the list.
To navigate between pages, you can use the page navigation options found at the bottom right of the list.
[](https://ems-docs.element.io/uploads/images/gallery/2023-11/image-1699362680045.png)
#### Sorting and Filtering
The default view of rooms can be adjusted using the available sorting and filtering options.
To sort, select the sort button and select how rooms should be organised, options include by Name (A-Z or Z-A) and Room Members (highest first, least first).
[](https://ems-docs.element.io/uploads/images/gallery/2023-11/image-1699363253207.png)
To search for rooms specifically, you can use the filter search box found above the list of rooms. Simply enter your search term and the list will be filtered for matches.
[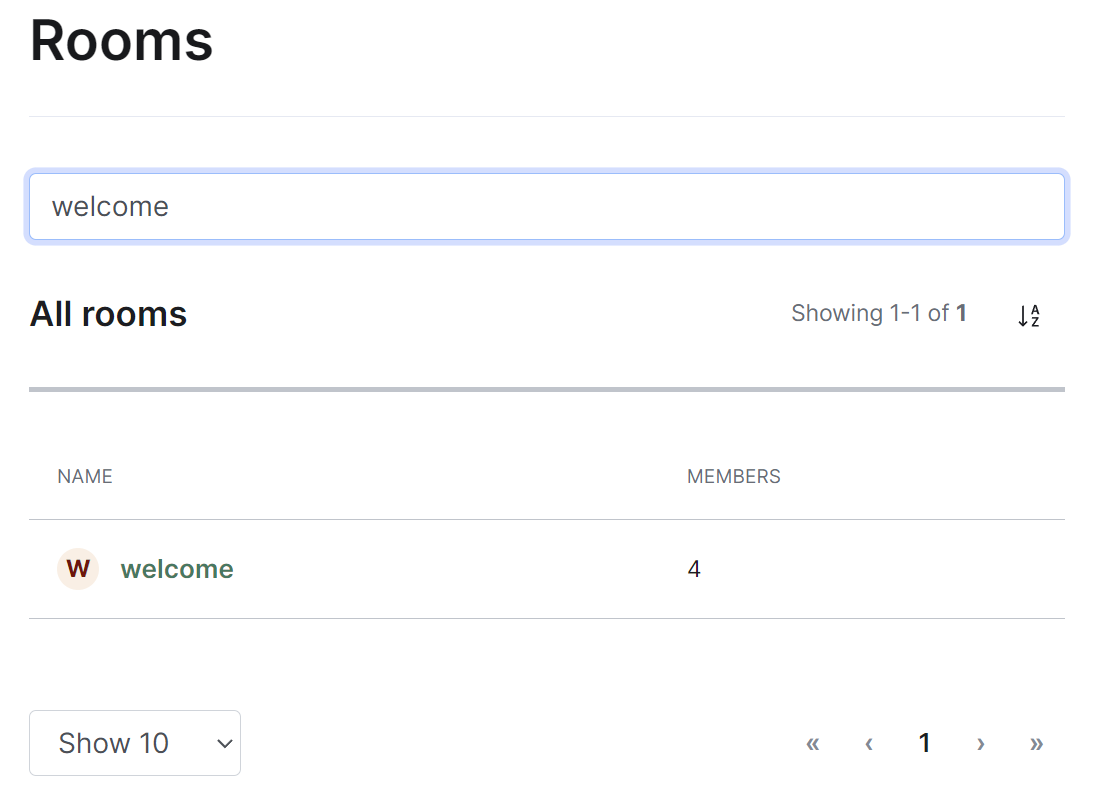](https://ems-docs.element.io/uploads/images/gallery/2023-11/image-1699363278387.png)
#### Managing Rooms
You can manage an existing room by clicking on its name from the room list. You will then be presented with a view where you can manage the room.
From this view you can view information about the room, including the room name and topic, room ID, members and alias etc. To view the members of the room, you can click the 'View list' link next to the member count to be taken to a view of all accounts within the room.
[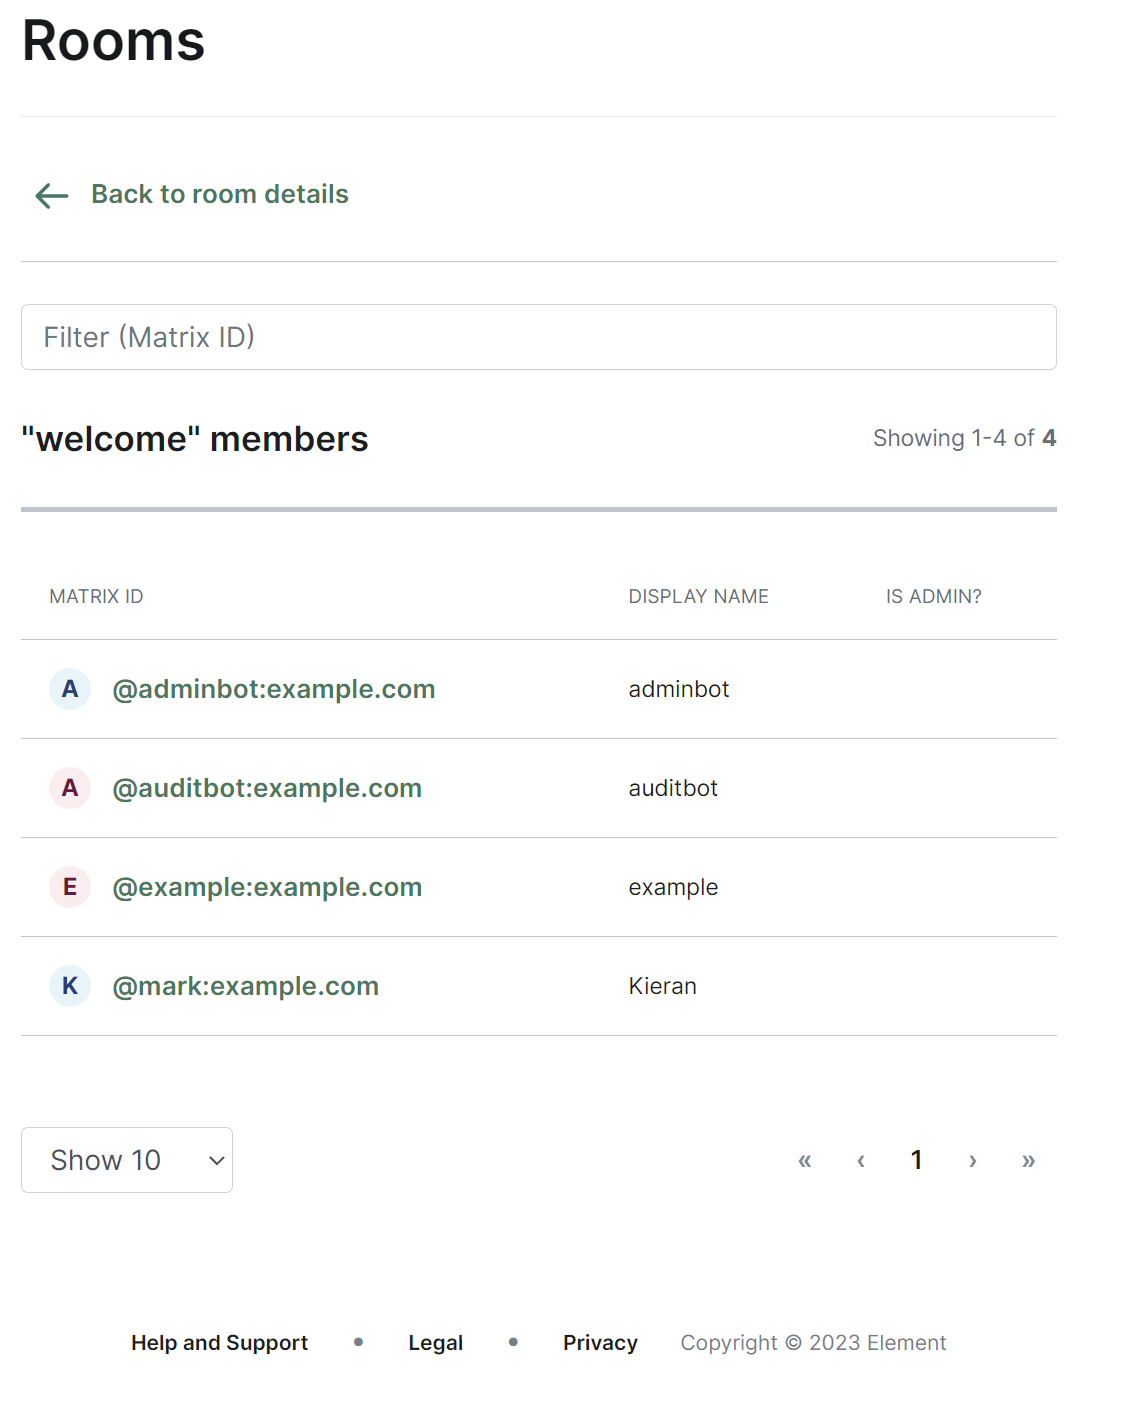](https://ems-docs.element.io/uploads/images/gallery/2023-11/image-1699363425309.png)
You can control whether the room is visible in the public directory by toggling the 'Show room in directory' checkbox.
[](https://ems-docs.element.io/uploads/images/gallery/2023-11/image-1699363315669.png)
You are also able to delete the room by clicking the 'Delete room' button at the bottom of the page, doing so will cause a confirmation prompt to appear to confirm the action.
**Note**, this operation is irreversible.
### Media Section
[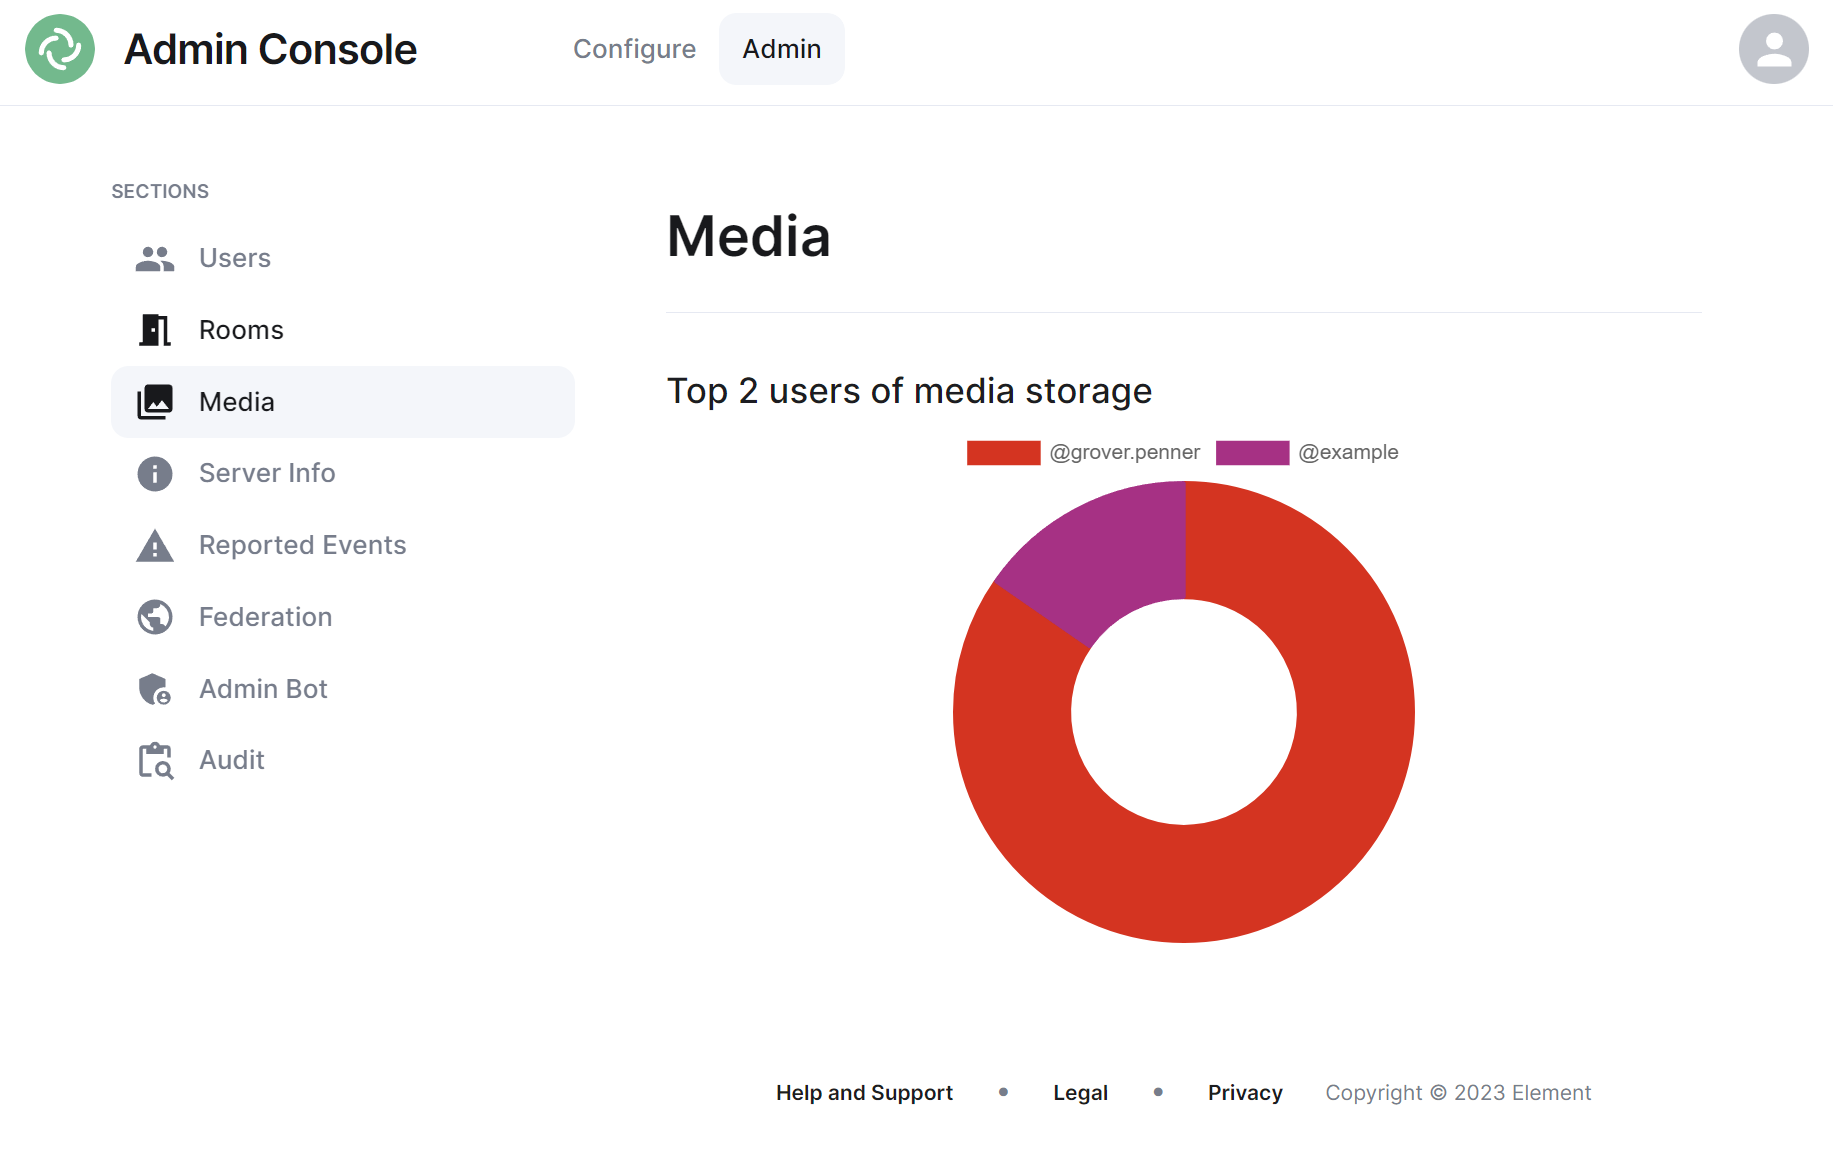](https://ems-docs.element.io/uploads/images/gallery/2023-11/image-1699363563584.png)
The Media section shows your a pie chart visualisation of the top users of media storage on your homeserver, you can click the individual Matrix IDs from the key to include / exclude those users from the visualisation. You can also hover over the pie chart segments to see a tooltip highlighting the size of storage used by the specific user as well as the quantity of items.
### Server Info Section
[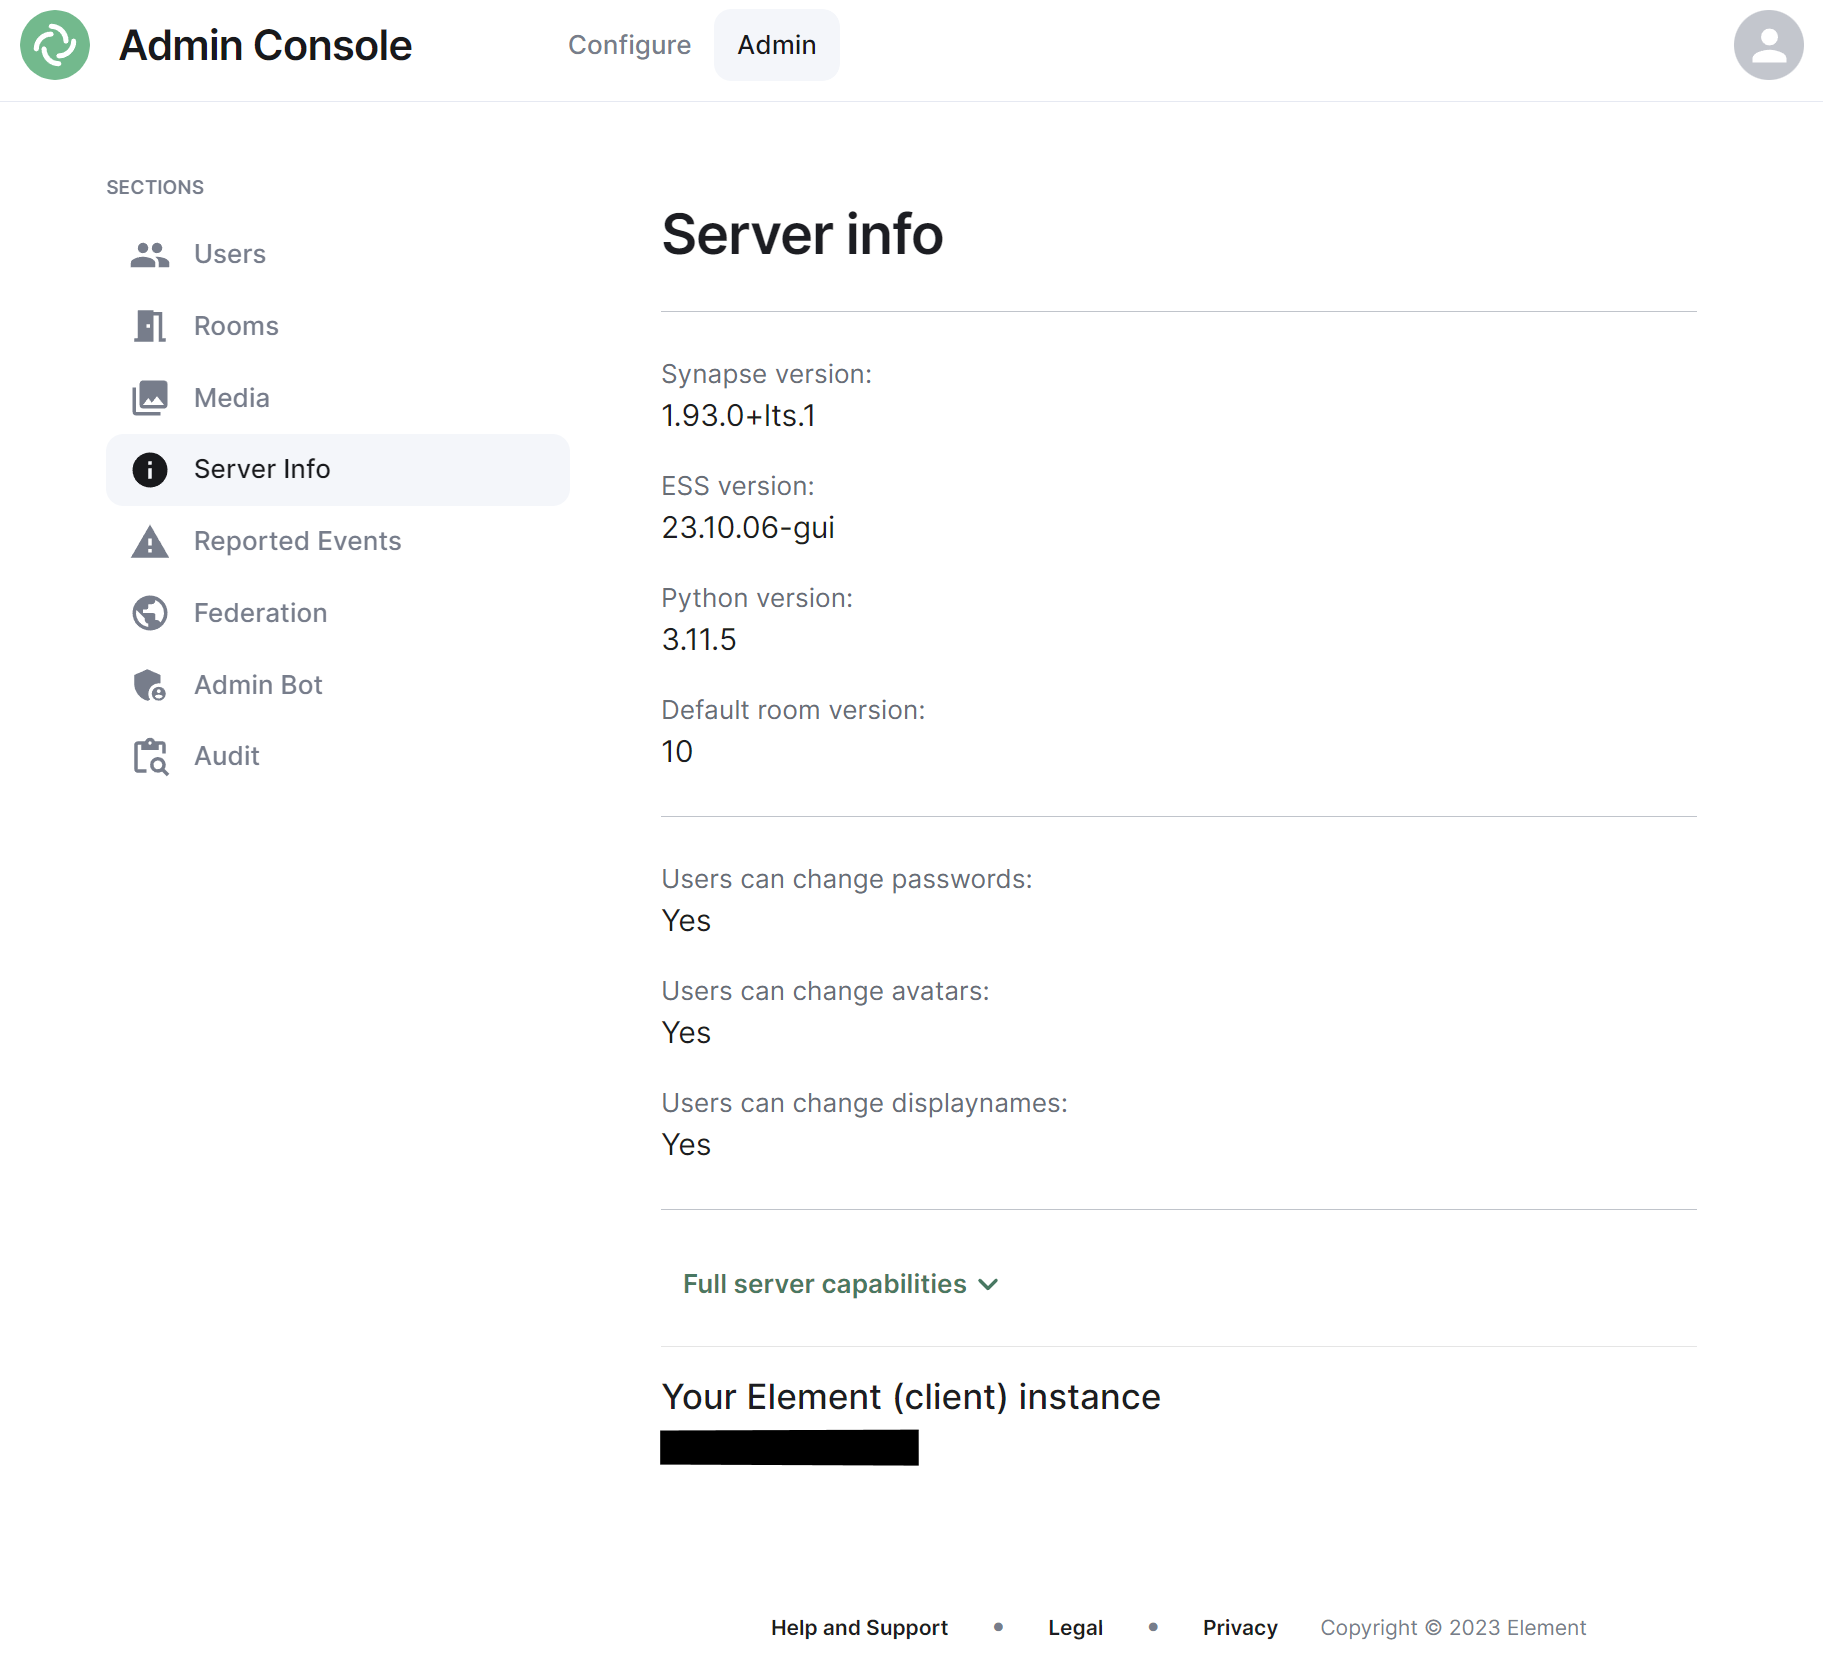](https://ems-docs.element.io/uploads/images/gallery/2023-11/image-1699363677183.png)
This section allows you to see version specific information about your homeserver, including Synapse version, ESS version, Python version and the default room version.
The view also highlight user access rights to change passwords, avatars and display names as well as a JSON output of the full server capabilities.
Finally it will identify the version of your hosted element client instance.
### Reported Events Section
### Federation Section
[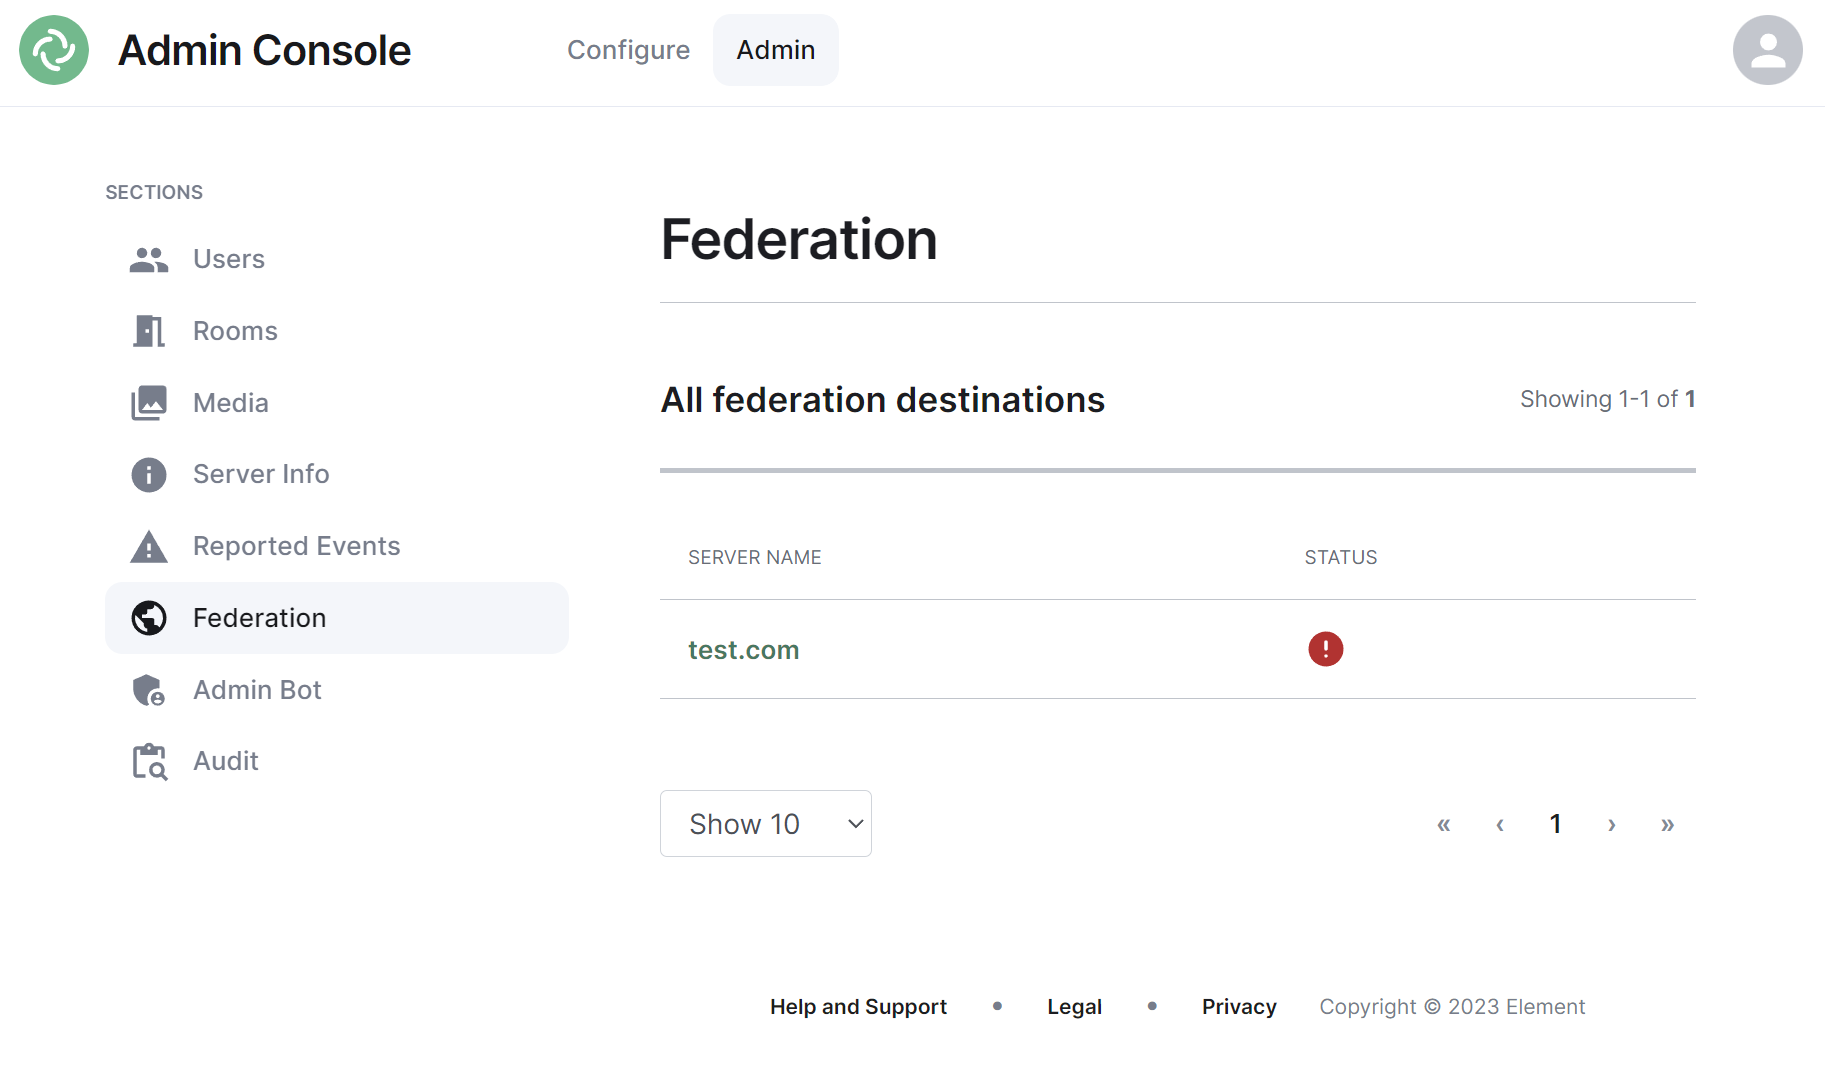](https://ems-docs.element.io/uploads/images/gallery/2023-11/image-1699363741350.png)
The Federation section shows all homeservers your homeserver is federating with, i.e. which homeservers users from your homeserver share a room with followed by it's current status.
#### Navigating
Homeservers will be displayed in a list, defaulting to a maximum of 10 homeservers per page, you can show more homeservers per page using the drop found at the bottom left of the list.
To navigate between pages, you can use the page navigation options found at the bottom right of the list.
[](https://ems-docs.element.io/uploads/images/gallery/2023-11/image-1699362680045.png)
#### Managing Individual Homeserver Federation
You can manage an existing federation destination (homeserver) by clicking on its name from the room list. You will then be presented with a view where you can view the latest status of the federation as well as a list of the federated rooms.
[](https://ems-docs.element.io/uploads/images/gallery/2023-11/image-1699363789207.png)
Clicking on any of the rooms from the list, will allow you to manage the specific room via the Rooms section.
### Admin Bot Section
[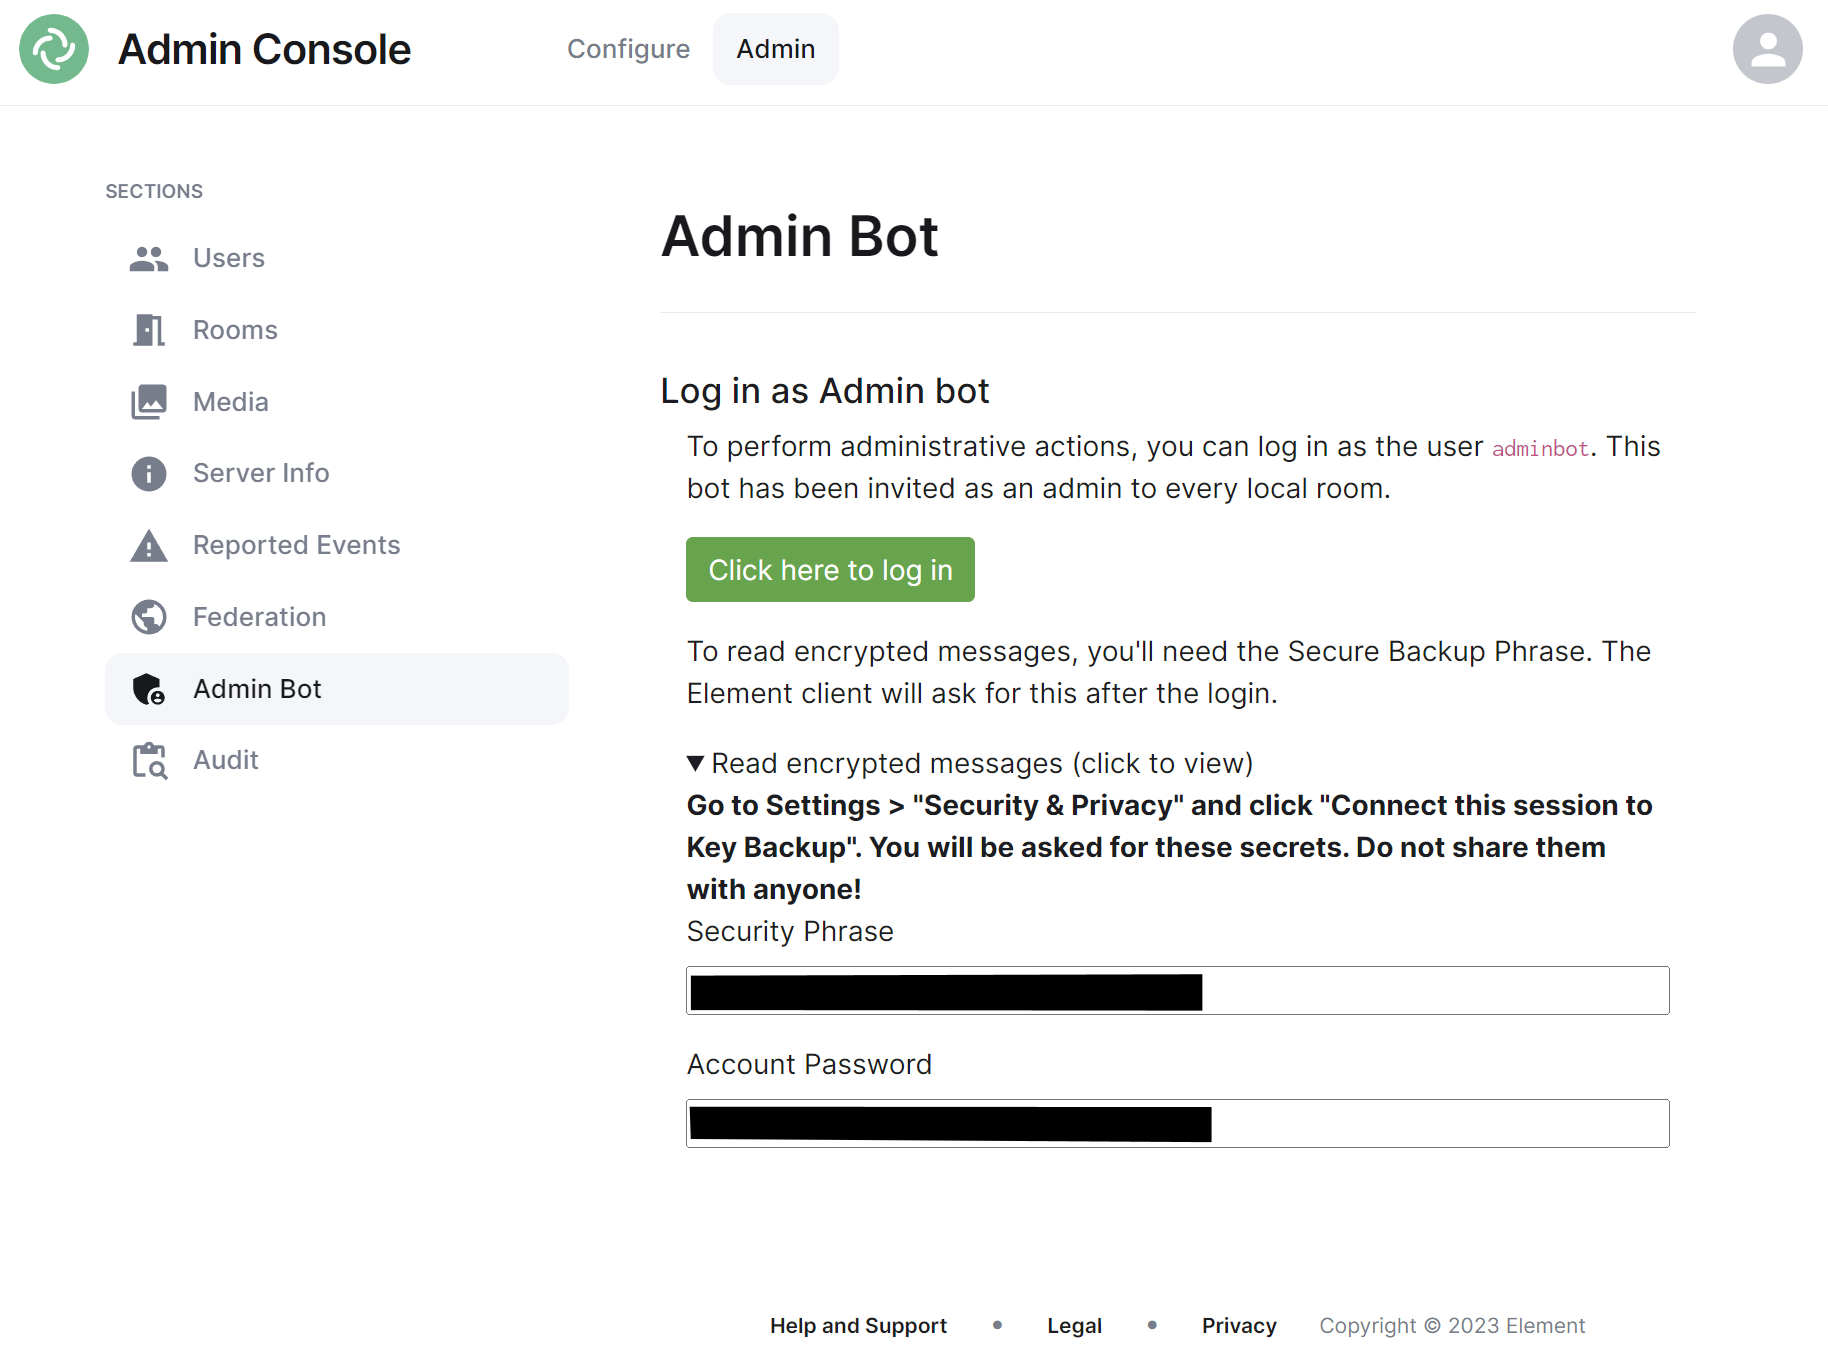](https://ems-docs.element.io/uploads/images/gallery/2023-11/image-1699363837799.png)
If you make use of Admin Bot you will be able to use this section to log in as the configured Admin Bot user. Click the 'Click here to log in' button to log in and following the instructions provided to read encrypted messages (if required).
Do not make changes to widgets in rooms while logged in as the Adminbot. The dedicated Element Web for Adminbot does not have the custom configuration your main Element Web client has, as such you can cause problems when working with widgets.
### Audit Section
If you make use of Audit Bot you will be able to use this section to perform audit tasks on your homeserver.
# Guidance on High Availability
ESS makes use of Kubernetes for deployment so most guidiance on high-availability is tied directly with general Kubernetes guidance on high availability.
### Kubernetes
#### Essential Links
- [Options for Highly Available Topology](https://kubernetes.io/docs/setup/production-environment/tools/kubeadm/ha-topology/)
- [Creating Highly Available Clusters with kubeadm](https://kubernetes.io/docs/setup/production-environment/tools/kubeadm/high-availability/)
- [Set up a High Availability etcd Cluster with kubeadm](https://kubernetes.io/docs/setup/production-environment/tools/kubeadm/setup-ha-etcd-with-kubeadm/)
- [Production environment](https://kubernetes.io/docs/setup/production-environment/)
#### High-Level Overview
It is strongly advised to make use of the Kubernetes documentation to ensure your environment is setup for high availability, see links above. At a high-level, Kubernetes achieves high availability through:
- **Cluster Architecture****.**
- **Multiple Masters:** In a highly available Kubernetes cluster, multiple master nodes (control plane nodes) are deployed. These nodes run the critical components such as `etcd`, the API server, scheduler, and controller-manager. By using multiple master nodes, the cluster can continue to operate even if one or more master nodes fail.
- **Etcd Clustering:** `etcd` is the key-value store used by Kubernetes to store all cluster data. It can be configured as a cluster with multiple nodes to provide data redundancy and consistency. This ensures that if one etcd instance fails, the data remains available from other instances.
- **Pod and Node Management****.**
- **Replication Controllers and ReplicaSets:** Kubernetes uses replication controllers and ReplicaSets to ensure that a specified number of pod replicas are running at any given time. If a pod fails, the ReplicaSet automatically replaces it, ensuring continuous availability of the application.
- **Deployments:** Deployments provide declarative updates to applications, allowing rolling updates and rollbacks. This ensures that application updates do not cause downtime and can be rolled back if issues occur.
- **DaemonSets:** DaemonSets ensure that a copy of a pod runs on all (or a subset of) nodes. This is useful for deploying critical system services across the entire cluster.
- **Service Discovery and Load Balancing****.**
- **Services:** Kubernetes Services provide a stable IP and DNS name for accessing a set of pods. Services use built-in load balancing to distribute traffic among the pods, ensuring that traffic is not sent to failed pods.
- **Ingress Controllers:** Ingress controllers manage external access to the services in a cluster, typically HTTP. They provide load balancing, SSL termination, and name-based virtual hosting, enhancing the availability and reliability of web applications.
- **Node Health Management****.**
- **Node Monitoring and Self-Healing:** Kubernetes continuously monitors the health of nodes and pods. If a node fails, Kubernetes can automatically reschedule the pods from the failed node onto healthy nodes. This self-healing capability ensures minimal disruption to the running applications.
- **Pod Disruption Budgets (PDBs):** PDBs allow administrators to define the minimum number of pods that must be available during disruptions (such as during maintenance or upgrades), ensuring application availability even during planned outages.
- **Persistent Storage****.**
- **Persistent Volumes and Claims:** Kubernetes provides abstractions for managing persistent storage. Persistent Volumes (PVs) and Persistent Volume Claims (PVCs) decouple storage from the pod lifecycle, ensuring that data is preserved even if pods are rescheduled or nodes fail.
- **Storage Classes and Dynamic Provisioning:** Storage classes allow administrators to define different storage types (e.g., SSDs, network-attached storage) and enable dynamic provisioning of storage resources, ensuring that applications always have access to the required storage.
- **Geographical Distribution****.**
- **Multi-Zone and Multi-Region Deployments:** Kubernetes supports deploying clusters across multiple availability zones and regions. This geographical distribution helps in maintaining high availability even in the event of data center or regional failures.
- **Network Policies and Security****.**
- **Network Policies:** These policies allow administrators to control the communication between pods, enhancing security and ensuring that only authorized traffic reaches critical applications.
- **RBAC (Role-Based Access Control):** RBAC restricts access to cluster resources based on roles and permissions, reducing the risk of accidental or malicious disruptions to the cluster's operations.
- **Automated Upgrades and Rollbacks****.**
- **Cluster Upgrade Tools:** Tools like `kubeadm` and managed Kubernetes services (e.g., Google Kubernetes Engine, Amazon EKS, Azure AKS) provide automated upgrade capabilities, ensuring that clusters can be kept up-to-date with minimal downtime.
- **Automated Rollbacks:** In the event of a failed update, Kubernetes can automatically roll back to a previous stable state, ensuring that applications remain available.
#### How does this tie into ESS
As ESS is deployed into a Kubernetes cluster, if you are looking for high availability you should ensure your environment is configured with that in mind. One important factor is to ensure you deploy using the Kubernetes deployment option, whilst Standalone mode will deploy to a Kubernetes cluster, by definition it exists solely on a single node so options for high availability will be limited.
### PostgreSQL
#### Essential links
- [PostgreSQL - High Availability, Load Balancing, and Replication](https://www.postgresql.org/docs/current/high-availability.html)
- [PostgreSQL - Different replication solutions](https://www.postgresql.org/docs/current/different-replication-solutions.html)
#### High-Level Overview
To ensure a smooth failover process for ESS, it is crucial to prepare a robust database topology. The following list outline the necessary element to take into consideration:
- **Database replicas**
- **Location**: Deploy the database replicas in a separate data center from the primary database to provide geographical redundancy.
- **Replication**: Configure continuous replication from the primary database to the s econdary database. This ensures that the secondary database has an up-to-date copy of all data.
- **Synchronization and Monitoring**
- **Synchronization**: Ensure that the secondary database is consistently synchronized with the primary database. Use reliable replication technologies and monitor for any lag or synchronization issues.
- **Monitoring Tools**: Implement monitoring tools to keep track of the replication status and performance metrics of both databases. Set up alerts for any discrepancies or failures in the replication process.
- **Data Integrity and Consistency**
- **Consistency Checks**: Periodically perform consistency checks between the primary and secondary databases to ensure data integrity.
-**Backups**: Maintain regular backups of both the primary and secondary databases. Store backups in a secure, redundant location to prevent data loss.
- **Testing and Validation**
- **Failover Testing**: Conduct regular failover drills to test the transition from the primary to the secondary database. Validate that the secondary database can handle the load and that the failover process works seamlessly.
- **Performance Testing**: Evaluate the performance of the secondary database under expected load conditions to ensure it can maintain the required service levels.
By carefully preparing the database topology as described, you can ensure that the failover process for ESS is efficient and reliable, minimizing downtime and maintaining data integrity.
#### How does this tie into ESS
As ESS relies on PostgreSQL for its database if you are looking for high availability you should ensure your environment is configured with that in mind. The database replicas can be achieved the same way in both Kubernetes and Standalone deployment, as the database is **not** managed by ESS.
### ESS failover plan
This document outlines a high-level, semi-automatic, failover plan for ESS. The plan ensures continuity of service by switching to a secondary data center (DC) in the event of a failure in the primary data center.
#### Prerequisites
- **Database Replica**: A replica of the main database, located in a secondary data center, continuously reading from the primary database.
- **Secondary ESS Deployment**: An instance of the ESS deployment, configured in a secondary data center.
- **Signing Keys Synchronization**: The signing keys stored in ESS secrets need to be kept synchronized between the primary and secondary data centers.
- **Media Repository**: Media files are stored on a redundant S3 bucket accessible from both data centers.
#### ESS Architecture for failover capabilities based on 3 datacenters
##### DC1 (Primary)
- **ElementDeployment Manifest****.**
- Manifest points to addresses in DC1.
- TLS Secrets managed by ACME.
- **TLS Secrets****.**
- Replicated to DC2 and DC3.
- **Operator****.**
- 1 replica.
- **Updater****.**
- 1 replica.
- **PostgreSQL****.**
- Primary database.
#### DC2
- **ElementDeployment Manifest****.**
- Manifest points to addresses in DC2.
- TLS Secrets pointing to existing secrets, replicated locally from DC1.
- **Operator****.**
- 0 replica, it prevents the deployment of the kubernetes workloads
- **Updater****.**
- 1 replica, the base element manifest are ready for the operator to deploy the workloads
- **PostgreSQL****.**
- Hot-Standby, replicating from DC1.
##### DC3
- **ElementDeployment Manifest****.**
- Manifest points to addresses in DC3.
- TLS Secrets pointing to existing secrets, replicated locally from DC1.
- **Operator****.**
- 0 replica, it prevents the deployment of the kubernetes workloads
- **Updater****.**
- 1 replica, the base element manifest are ready for the operator to deploy the workloads
- **PostgreSQL****.**
- Hot-Standby, replicating from DC1.
#### Failover Process
When DC1 experiences downtime and needs to be failed over to DC2, follow these steps:
- **Disable DC1****.**
- Firewall outbound traffic to prevent federation/outbound requests such as push notifications.
- Scale down the Operator to 0 replicas and remove workloads from DC1.
- **Activate DC2****.**
- Promote the PostgreSQL instance in DC2 to the primary role.
- Set Operator Replicas:
- Increase the Operator replicas to 1.
- This starts the Synapse workloads in DC2.
- Update the DNS to point the ingress to DC2.
- Open the firewall if it was closed to ensure proper network access.
- **Synchronize DC3****.**
- Ensure PostgreSQL Replication:
- Make sure that the PostgreSQL in DC3 is properly replicating from the new primary in DC2.
- Adjust the PostgreSQL topology if necessary to ensure proper synchronization.
You should decline your own failover procedure based on this high-level failover overview. By doing so, you can ensure that ESS continues to operate smoothly and with minimal downtime, maintaining service availability even when the primary data center goes down.
# Starting and Stopping ESS Services
# Stopping a component
To stop a component, such as `Synapse`, it is necessary to stop the operator :
```
kubectl scale deploy/element-operator-controller-manager -n operator-onprem --replicas 0
```
Once the operator is stopped, you can delete the Synapse resource to remove all Synapse workloads :
```
kubectl delete synapse/first-element-deployment -n element-onprem
```
To get a list of resources that you can remove, you can look at the following command :
```
kubectl get elementdeployment/first-element-deployment -n element-onprem --template='{{range $key, $value := .status.dependentCRs}}{{$key}}{{"\n"}}{{end}}'
```
Example :
```
ElementWeb/first-element-deployment
Hookshot/first-element-deployment
Integrator/first-element-deployment
MatrixAuthenticationService/first-element-deployment
Synapse/first-element-deployment
SynapseAdminUI/first-element-deployment
SynapseUser/first-element-deployment-adminuser-donotdelete
SynapseUser/first-element-deployment-telemetry-donotdelete
WellKnownDelegation/first-element-deployment
```
# Starting a component
To stop a component, such as `Synapse`, it is necessary to start the operator :
```
kubectl scale deploy/element-operator-controller-manager -n operator-onprem --replicas 1
```
Because the `Synapse` resource will automatically have been recreated by the `updater`, the operator on startup will automatically detect it and recreate all synapse workloads.
# Support and Troubleshooting
Need some help? Start here for Troubleshooting guides and how to get in touch for Support
# Support
What's supported and how to get in touch!
### Getting in touch
Need some help? Simply log in to your [EMS Control Panel](https://ems.element.io/user/hosting#/hosts) with the EMS Account associated with your Element Server Suite Enterprise subscription.
Then click the `Your Account` button, found at the top right of the page, then `Help & Support`.
[](https://ems-docs.element.io/uploads/images/gallery/2024-08/image-1724335816124.png)
You'll be presented with a contact form:
[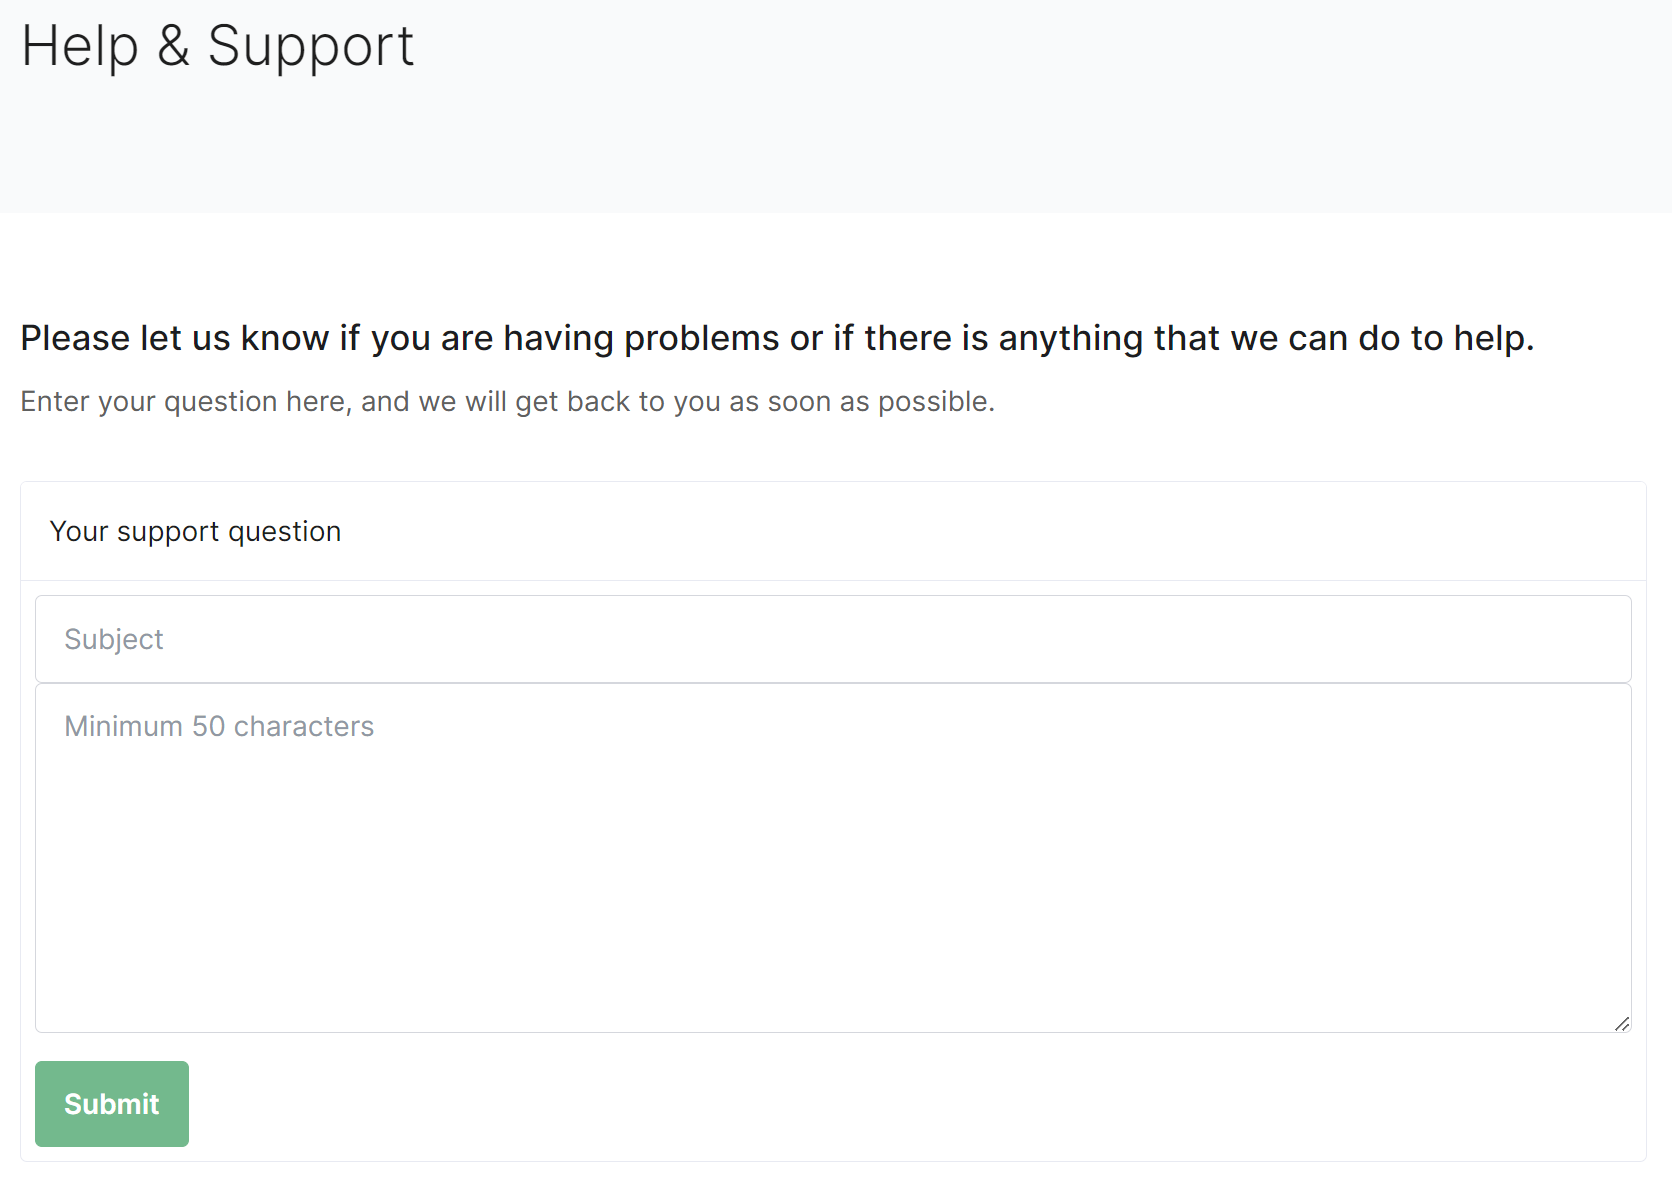](https://ems-docs.element.io/uploads/images/gallery/2024-08/image-1724335840505.png)
Please provide as many details as you can, once submitted, you should receive a confirmation email which you can reply to with any additional information.
### Scope of Coverage
- Installation and Operation (Configuring the Installer, Debugging Issues)
- Synapse Usage/Configuration/Prioritised Bug Fixes
- Element Web Usage/Configuration/Prioritised Bug Fixes
- Integrations
- Delegated Auth (e.g. OIDC/SAML/LDAP) (Add-on)
- Group Sync (LDAP, AD Graph API, SCIM supported) (Add-on)
- Our Monitoring Stack (Prometheus, Grafana)
- Github / Gitlab
- JIRA
- Webhooks
- Jitsi
- Sliding Sync Proxy
- AdminBot (Add-on)
- AuditBot (Add-on)
- XMPP, IRC and Telegram Bridges
The following items are ***not*** included in support coverage:
- General Infrastructure Assistance
- K8s Assistance
- Operating System Support
- Postgresql Database Support
#### Singlenode Deployments
- Element does not support deployment to a microk8s that was not installed by our installer.
- Element does not provide a backup solution.
- Element does not provide support for any underlying storage.
#### Kubernetes Deployments
- Element does not support deploying the installer created postgresql in a kubernetes environment.
- Element requires that you deploy postgresql separately in a kubernetes environment, external to your Element deployment
# Troubleshooting
# Introduction to Troubleshooting
Troubleshooting the Element Installer comes down to knowing a little bit about kubernetes and how to check the status of the various resources. This guide will walk you through some of the initial steps that you'll want to take when things are going wrong.
## Known issues
### Installer fails and asks you to start firewalld
The current installer will check if you have firewalld installed on your system. It does expect to find firewalld started as a systemd service if it is installed. If it is not started, the installer will terminate with a failure that asks you to start it. We noticed some Linux distributions like SLES15P4, RHEL8 and AlmaLinux8 that have firewalld installed as a default package but not enabled, or started.
If you hit this issue, you don't need to enable and start firewalld. The workaround is to uninstall firewalld, if you are not planning on using it.
On SLES
```bash
zypper remove firewalld -y
```
On RHEL8
```bash
dnf remove firewalld -y
```
### Airgapped installation does not start
If you are using element-enterprise-graphical-installer-2023-03.02-gui.bin and element-enterprise-installer-airgapped-2023-03.02-gui.tar.gz. You might run into an error looking like this:
```plaintext
Looking in links: ./airgapped/pip
WARNING: Url './airgapped/pip' is ignored. It is either a non-existing path or lacks a specific scheme.
ERROR: Could not find a version that satisfies the requirement wheel (from versions: none)
ERROR: No matching distribution found for wheel
```
The workaround for it is to copy the pip folder from the airgapped directory to ~/.element-enterprise-server/installer/airgapped/pip
### Failure downloading https://..., An unknown error occurred: ''CustomHTTPSConnection'' object has no attribute ''cert_file''
Make sure you are using a supported operating system version. See for more details.
## install.sh problems
Sometimes there will be problems when running the ansible-playbook portion of the installer. When this happens, you can increase the verbosity of ansible logging by editing `.ansible.rc` in the installer directory and setting:
```bash
export ANSIBLE_DEBUG=true
export ANSIBLE_VERBOSITY=4
```
and re-running the installer. This will generate quite verbose output, but that typically will help pinpoint what the actual problem with the installer is.
## Problems post-installation
### Checking Pod Status and Getting Logs
- In general, a well-functioning Element stack has at it's minimum the following containers (or pods in kubernetes language) running:
```bash
[user@element2 ~]$ kubectl get pods -n element-onprem
kubectl get pods -n element-onprem
NAME READY STATUS RESTARTS AGE
first-element-deployment-element-web-6cc66f48c5-lvd7w 1/1 Running 0 4d20h
first-element-deployment-element-call-c9975d55b-dzjw2 1/1 Running 0 4d20h
integrator-postgres-0 3/3 Running 0 4d20h
synapse-postgres-0 3/3 Running 0 4d20h
first-element-deployment-integrator-59bcfc67c5-jkbm6 3/3 Running 0 4d20h
adminbot-admin-app-element-web-c9d456769-rpk9l 1/1 Running 0 4d20h
auditbot-admin-app-element-web-5859f54b4f-8lbng 1/1 Running 0 4d20h
first-element-deployment-synapse-redis-68f7bfbdc-wht9m 1/1 Running 0 4d20h
first-element-deployment-synapse-haproxy-7f66f5fdf5-8sfkf 1/1 Running 0 4d20h
adminbot-pipe-0 1/1 Running 0 4d20h
auditbot-pipe-0 1/1 Running 0 4d20h
first-element-deployment-synapse-admin-ui-564bb5bb9f-87zb4 1/1 Running 0 4d20h
first-element-deployment-groupsync-0 1/1 Running 0 20h
first-element-deployment-well-known-64d4cfd45f-l9kkr 1/1 Running 0 20h
first-element-deployment-synapse-main-0 1/1 Running 0 20h
first-element-deployment-synapse-appservice-0 1/1 Running 0 20h
```
The above `kubectl get pods -n element-onprem` is the first place to start. You'll notice in the above, all of the pods are in the `Running` status and this indicates that all should be well. If the state is anything other than "Running" or "Creating", then you'll want to grab logs for those pods. To grab the logs for a pod, run:
```bash
kubectl logs -n element-onprem
```
replacing `` with the actual pod name. If we wanted to get the logs from synapse, the specific syntax would be:
```bash
kubectl logs -n element-onprem first-element-deployment-synapse-main-0
```
and this would generate logs similar to:
```bash
2022-05-03 17:46:33,333 - synapse.util.caches.lrucache - 154 - INFO - LruCache._expire_old_entries-2887 - Dropped 0 items from caches
2022-05-03 17:46:33,375 - synapse.storage.databases.main.metrics - 471 - INFO - generate_user_daily_visits-289 - Calling _generate_user_daily_visits
2022-05-03 17:46:58,424 - synapse.metrics._gc - 118 - INFO - sentinel - Collecting gc 1
2022-05-03 17:47:03,334 - synapse.util.caches.lrucache - 154 - INFO - LruCache._expire_old_entries-2888 - Dropped 0 items from caches
2022-05-03 17:47:33,333 - synapse.util.caches.lrucache - 154 - INFO - LruCache._expire_old_entries-2889 - Dropped 0 items from caches
2022-05-03 17:48:03,333 - synapse.util.caches.lrucache - 154 - INFO - LruCache._expire_old_entries-2890 - Dropped 0 items from caches
```
- Again, for every pod not in the `Running` or `Creating` status, you'll want to use the above procedure to get the logs for Element to look at.
- If you don't have any pods in the `element-onprem` namespace as indicated by running the above command, then you should run:
```bash
[user@element2 ~]$ kubectl get pods -A
NAMESPACE NAME READY STATUS RESTARTS AGE
kube-system calico-node-2lznr 1/1 Running 0 8d
kube-system calico-kube-controllers-c548999db-s5cjm 1/1 Running 0 8d
kube-system coredns-5dbccd956f-glc8f 1/1 Running 0 8d
kube-system dashboard-metrics-scraper-6b6f796c8d-8x6p4 1/1 Running 0 8d
ingress nginx-ingress-microk8s-controller-w8lcn 1/1 Running 0 8d
cert-manager cert-manager-cainjector-6586bddc69-9xwkj 1/1 Running 0 8d
kube-system hostpath-provisioner-78cb89d65b-djfq5 1/1 Running 0 8d
kube-system kubernetes-dashboard-765646474b-5lhxp 1/1 Running 0 8d
cert-manager cert-manager-5bb9dd7d5d-cg9h8 1/1 Running 0 8d
container-registry registry-f69889b8c-zkhm5 1/1 Running 0 8d
cert-manager cert-manager-webhook-6fc8f4666b-9tmjb 1/1 Running 0 8d
kube-system metrics-server-5f8f64cb86-f876p 1/1 Running 0 8d
jitsi sysctl-jvb-vs9mn 1/1 Running 0 8d
jitsi shard-0-jicofo-7c5cd9fff5-qrzmk 1/1 Running 0 8d
jitsi shard-0-web-fdd565cd6-v49ps 1/1 Running 0 8d
jitsi shard-0-web-fdd565cd6-wmzpb 1/1 Running 0 8d
jitsi shard-0-prosody-6d466f5bcb-5qsbb 1/1 Running 0 8d
jitsi shard-0-jvb-0 1/2 Running 0 8d
operator-onprem element-operator-controller-manager-... 2/2 Running 0 4d
updater-onprem element-updater-controller-manager-... 2/2 Running 0 4d
element-onprem first-element-deployment-element-web-... 1/1 Running 0 4d
element-onprem first-element-deployment-element-call-... 1/1 Running 0 4d
element-onprem integrator-postgres-0 3/3 Running 0 4d
element-onprem synapse-postgres-0 3/3 Running 0 4d
element-onprem first-element-deployment-integrator-... 3/3 Running 0 4d
element-onprem adminbot-admin-app-element-web-... 1/1 Running 0 4d
element-onprem auditbot-admin-app-element-web-... 1/1 Running 0 4d
element-onprem first-element-deployment-synapse-redis-... 1/1 Running 0 4d
element-onprem first-element-deployment-synapse-haproxy-.. 1/1 Running 0 4d
element-onprem adminbot-pipe-0 1/1 Running 0 4d
element-onprem auditbot-pipe-0 1/1 Running 0 4d
element-onprem first-element-deployment-synapse-admin-ui-. 1/1 Running 0 4d
element-onprem first-element-deployment-groupsync-0 1/1 Running 0 20h
element-onprem first-element-deployment-well-known-... 1/1 Running 0 20h
element-onprem first-element-deployment-synapse-main-0 1/1 Running 0 20h
element-onprem first-element-deployment-synapse-appservice-0 1/1 Running 0 20h
```
- This is the output from a healthy system, but if you have any of these pods not in the `Running` or `Creating` state, then please gather logs using the following syntax:
```bash
kubectl logs -n
```
- So to gather logs for the kubernetes ingress, you would run:
```bash
kubectl logs -n ingress nginx-ingress-microk8s-controller-w8lcn
```
and you would see logs similar to:
```bash
I0502 14:15:08.467258 6 leaderelection.go:248] attempting to acquire leader lease ingress/ingress-controller-leader...
I0502 14:15:08.467587 6 controller.go:155] "Configuration changes detected, backend reload required"
I0502 14:15:08.481539 6 leaderelection.go:258] successfully acquired lease ingress/ingress-controller-leader
I0502 14:15:08.481656 6 status.go:84] "New leader elected" identity="nginx-ingress-microk8s-controller-n6wmk"
I0502 14:15:08.515623 6 controller.go:172] "Backend successfully reloaded"
I0502 14:15:08.515681 6 controller.go:183] "Initial sync, sleeping for 1 second"
I0502 14:15:08.515705 6 event.go:282] Event(v1.ObjectReference{Kind:"Pod", Namespace:"ingress", Name:"nginx-ingress-microk8s-controller-n6wmk", UID:"548d9478-094e-4a19-ba61-284b60152b85", APIVersion:"v1", ResourceVersion:"524688", FieldPath:""}): type: 'Normal' reason: 'RELOAD' NGINX reload triggered due to a change in configuration
```
Again, for all pods not in the `Running` or `Creating` state, please use the above method to get log data to send to Element.
### Default administrator
The installer creates a default administrator `onprem-admin-donotdelete`
The Synapse admin user password is defined under the synapse section in the installer
### Error: UPGRADE FAILED: another operation (install/upgrade/rollback) is in progress
Delete the updater namespace and Deploy again.
```bash
kubectl delete namespaces updater-onprem
```
### microk8s takes a logn time to become ready after system boot
See
### Node-based pods failing name resolution
```log
05:03:45:601 ERROR [Pipeline] Unable to verify identity configuration for bot-auditbot: Unknown errcode Unknown error
05:03:45:601 ERROR [Pipeline] Unable to verify identity. Stopping
matrix-pipe encountered an error and has stopped Error: getaddrinfo EAI_AGAIN synapse.prod.ourdomain
at GetAddrInfoReqWrap.onlookup [as oncomplete] (node:dns:84:26) {
errno: -3001,
code: 'EAI_AGAIN',
syscall: 'getaddrinfo',
hostname: 'synapse.prod.ourdomain'
}
```
To see what Hosts are set, try:
```bash
kubectl exec -it -n element-onprem getent hosts
```
So to do this on the adminbot-pipe-0 pod, it would look like:
```bash
kubectl exec -it -n element-onprem adminbot-pipe-0 getent hosts
```
and return output similar to:
```bash
127.0.0.1 localhost
127.0.0.1 localhost ip6-localhost ip6-loopback
10.1.241.27 adminbot-pipe-0
192.168.122.5 ems.onprem element.ems.onprem hs.ems.onprem adminbot.ems.onprem auditbot.ems.onprem integrator.ems.onprem hookshot.ems.onprem admin.ems.onprem eleweb.ems.onprem
```
### Node-based pods failing SSL
```bash
2023-02-06 15:42:04 ERROR: IrcBridge Failed to fetch roomlist from joined rooms: Error: unable to verify the first certificate. Retrying
MatrixHttpClient (REQ-13) Error: unable to verify the first certificate
at TLSSocket.onConnectSecure (_tls_wrap.js:1515:34)
at TLSSocket.emit (events.js:400:28)
at TLSSocket.emit (domain.js:475:12)
at TLSSocket. finishInit (_tls_wrap.js:937:8),
at TLSWrap.ssl.onhandshakedone (_tls_wrap.js:709:12) {
code: 'UNABLE TO VERIFY LEAF SIGNATURE
```
Drop into a shell on the pod
```bash
kubectl exec -it -n element-onprem adminbot-pipe-0 -- /bin/sh
```
Check it's ability to send a request to the Synapse server
```plaintext
node
require=("http")
request(https://synapse.server/)
```
### Reconciliation failing / Enable enhanced updater logging
If your reconciliation is failing, a good place to start is with the updater logs
```bash
kubectl --namespace updater-onprem logs \
"$(kubectl --namespace updater-onprem get pods --no-headers \
--output=custom-columns="NAME:.metadata.name" | grep controller)" \
--since 10m
```
If that doesn't have the answers you seek, for example
```plaintext
TASK [Build all components manifests] ********************************
fatal: [localhost]: FAILED! => {"censored": "the output has been hidden due to
the fact that 'no_log: true' was specified for this result"}
```
You can enable debug logging by editing the updater deployment
```bash
kubectl --namespace updater-onprem edit \
deploy/element-updater-controller-manager
```
In this file, search for `env` and add the this variable to all occurrences
```yaml
- name: DEBUG_MANIFESTS
value: "1"
```
Wait a bit for the updater to re-run and then fetch the updater logs again. Look for `fatal` or to get the stdout from Ansible, look for `Ansible Task StdOut`. See also [Unhealthy deployment](#bkmrk-unhealthy-deployment) below.
Click for a specific example
I had this "unknown playbook failure"
[](https://ems-docs.element.io/uploads/images/gallery/2024-07/image-1720802779508.png)
After enabling debug logging for the updater, I found this error telling me that my Telegram bridge is misconfigured
```plaintext
--------------------------- Ansible Task StdOut -------------------------------
TASK [Build all components manifests] ********************************
fatal: [localhost]: FAILED! => {"msg": "The task includes an option with an
undefined variable. The error was: 'dict object' has no attribute
'telegramApiId'. 'dict object' has no attribute 'telegramApiId'. 'dict object'
has no attribute 'telegramApiId'. 'dict object' has no attribute
'telegramApiId'. 'dict object' has no attribute 'telegramApiId'. 'dict object'
has no attribute 'telegramApiId'. 'dict object' has no attribute
'telegramApiId'. 'dict object' has no attribute 'telegramApiId'\n\nThe error
appears to be in '/element.io/roles/elementdeployment/tasks/prepare.yml': line
21, column 3, but may\nbe elsewhere in the file depending on the exact syntax
problem.\n\nThe offending line appears to be:\n\n\n- name: \"Build all
components manifests\"\n ^ here\n"}
```
### Unhealthy deployment
```bash
kubectl get elementdeployment --all-namespaces --output yaml
```
In the status you will see which component is having an issue. You can then do
```bash
kubectl --namespace element-onprem get ``/`` --output yaml
```
And you would see the issue in the status.
### Other Commands of Interest
Some other commands that may yield some interesting data while troubleshooting are:
#### Check list of active kubernetes events
```bash
kubectl get events -A
```
You will see a list of events or the message `No resources found`.
- Show the state of services in the `element-onprem` namespace:
```bash
kubectl get services -n element-onprem
```
This should return output similar to:
```bash
NAME TYPE CLUSTER-IP EXTERNAL-IP PORT(S) AGE
postgres ClusterIP 10.152.183.47 5432/TCP 6d23h
app-element-web ClusterIP 10.152.183.60 80/TCP 6d23h
server-well-known ClusterIP 10.152.183.185 80/TCP 6d23h
instance-synapse-main-headless ClusterIP None 80/TCP 6d23h
instance-synapse-main-0 ClusterIP 10.152.183.105 80/TCP,9093/TCP,9001/TCP 6d23h
instance-synapse-haproxy ClusterIP 10.152.183.78 80/TCP 6d23h
```
#### Connect to the Synapse Database
```bash
kubectl --namespace element-onprem exec --stdin --tty synapse-postgres-0 -- bash
psql "dbname=$POSTGRES_DB user=$POSTGRES_USER password=$POSTGRES_PASSWORD"
```
#### Excessive Synapse Database Space Usage
Connect to the Synapse database.
**SQL queries provided for reference only. Ensure you fully understand what they do before runnign and use at your own risk.**
##### List tables ordered by size
```sql
SELECT
schemaname AS table_schema,
relname AS table_name,
pg_size_pretty(pg_relation_size(relid)) AS data_size
FROM pg_catalog.pg_statio_user_tables
ORDER BY pg_relation_size(relid) DESC;
```
Example output
```plaintext
table_schema | table_name | data_size
--------------+---------------------------------------+-----------
public | event_json | 2090 MB
public | event_auth | 961 MB
public | events | 399 MB
public | current_state_delta_stream | 341 MB
public | state_groups_state | 294 MB
public | room_memberships | 270 MB
public | cache_invalidation_stream_by_instance | 265 MB
public | stream_ordering_to_exterm | 252 MB
public | state_events | 249 MB
public | event_edges | 208 MB
(10 rows)
```
##### Count unique values in a table ordered by count
This example counts events per room from the `event_json` table (where all your messages etc. are stored). This may take a while to run and may use a lot of system resources.
```sql
SELECT
room_id,
COUNT(*) AS count
FROM event_json
GROUP BY room_id
ORDER BY count DESC
LIMIT 10;
```
Example output
```plaintext
room_id | count
---------------------------------+---------
!GahmaiShiezefienae:example.com | 1382242
!gutheetheixuFohmae:example.com | 1933
!OhnuokaiCoocieghoh:example.com | 357
!efaeMegazeeriteibo:example.com | 175
!ohcahTueyaesiopohc:example.com | 93
!ithaeTaiRaewieThoo:example.com | 43
!PhohkuShuShahhieWa:example.com | 39
!eghaiPhetahHohweku:example.com | 37
!faiLeiZeefirierahn:example.com | 29
!Eehahhaepahzooshah:example.com | 27
(10 rows)
```
In this instance something unusual might be going on in `!GahmaiShiezefienae:example.com` that warrants further investigation.
#### Export logs from all Synapse pods to a file
This will export logs from the last 5 minutes.
```bash
for pod in $(kubectl --namespace element-onprem get pods --no-headers \
--output=custom-columns="NAME:.metadata.name" | grep '\-synapse')
do
echo "$pod" >> synapse.log
kubectl --namespace element-onprem logs "$pod" --since 5m >> synapse.log
done
```
#### Grep all configmaps
```bash
for configmap in $(kubectl --namespace element-onprem get configmaps --no-headers --output=custom-columns="NAME:.metadata.name"); do
kubectl --namespace element-onprem describe configmaps "$configmap" \
| grep --extended-regex '(host|password)'
done
```
#### List Synapse pods, sorted by pod age/creation time
```bash
kubectl --namespace element-onprem get pods --sort-by 'metadata.creationTimestamp' | grep --extended-regex '(NAME|-synapse)'
```
#### Matrix Authentication Service admin
If your server use [Matrix Authentication Service](https://element-hq.github.io/matrix-authentication-service/) (MAS), you might accoationally need to interact with this directly. This can be done either using the [MAS Admin API](https://element-hq.github.io/matrix-authentication-service/topics/admin-api.html) or using [`mas-cli`](https://element-hq.github.io/matrix-authentication-service/reference/cli/index.html).
Here is an one-liner for connectign to `mas-cli`:
```bash
kubectl --namespace element-onprem exec --stdin --tty \
"$(kubectl --namespace element-onprem get pods \
--output=custom-columns='NAME:.metadata.name' \
| grep first-element-deployment-matrix-authentication-service)" \
-- mas-cli help
```
Alternately, to make it easier, you can create an alias:
```bash
alias mas-cli='kubectl --namespace element-onprem exec --stdin --tty \
"$(kubectl --namespace element-onprem get pods \
--output=custom-columns="NAME:.metadata.name" \
| grep first-element-deployment-matrix-authentication-service)" \
-- mas-cli '
```
#### Redeploy the micro8ks setup
It is possible to redeploy microk8s by running the following command as root:
```bash
snap remove microk8s
```
This command does remove all microk8s pods and related microk8s storage volumes. **Once this command has been run, you need to reboot your server** - otherwise you may have networking issues. Add `--purge` flag to remove the data if disk usage is a concern.
After the reboot, you can re-run the installer and have it re-deploy microk8s and Element Enterprise On-Premise for you.
#### Show all persistent volumes and persistent volume claims for the `element-onprem` namespace
```bash
kubectl get pv -n element-onprem
```
This will give you output similar to:
```bash
NAME CAPACITY ACCESS MODES RECLAIM POLICY STATUS CLAIM STORAGECLASS REASON AGE
pvc-fc3459f0-eb62-4afa-94ce-7b8f8105c6d1 20Gi RWX Delete Bound container-registry/registry-claim microk8s-hostpath 8d
integrator-postgres 5Gi RWO Recycle Bound element-onprem/integrator-postgres microk8s-hostpath 8d
synapse-postgres 5Gi RWO Recycle Bound element-onprem/synapse-postgres microk8s-hostpath 8d
hostpath-synapse-media 50Gi RWO Recycle Bound element-onprem/first-element-deployment-synapse-media microk8s-hostpath 8d
adminbot-bot-data 10M RWO Recycle Bound element-onprem/adminbot-bot-data microk8s-hostpath 8d
auditbot-bot-data 10M RWO Recycle Bound element-onprem/auditbot-bot-data microk8s-hostpath 8d
```
#### Show deployments in the `element-onprem` namespace
```bash
kubectl get deploy -n element-onprem
```
This will return output similar to:
```bash
NAME READY UP-TO-DATE AVAILABLE AGE
app-element-web 1/1 1 1 6d23h
server-well-known 1/1 1 1 6d23h
instance-synapse-haproxy 1/1 1 1 6d23h
```
#### Show hostname to IP mappings from within a pod
Run:
```bash
kubectl exec -n element-onprem -- getent hosts
```
and you will see output similar to:
```bash
127.0.0.1 localhost
127.0.0.1 localhost ip6-localhost ip6-loopback
10.1.241.30 instance-hookshot-0.instance-hookshot.element-onprem.svc.cluster.local instance-hookshot-0
192.168.122.5 ems.onprem element.ems.onprem hs.ems.onprem adminbot.ems.onprem auditbot.ems.onprem integrator.ems.onprem hookshot.ems.onprem admin.ems.onprem eleweb.ems.onprem
```
This will help you troubleshoot host resolution.
#### Show the Element Web configuration
```bash
kubectl describe cm -n element-onprem app-element-web
```
and this will return output similar to:
```bash
config.json:
----
{
"default_server_config": {
"m.homeserver": {
"base_url": "https://synapse2.local",
"server_name": "local"
}
},
"dummy_end": "placeholder",
"integrations_jitsi_widget_url": "https://dimension.element2.local/widgets/jitsi",
"integrations_rest_url": "https://dimension.element2.local/api/v1/scalar",
"integrations_ui_url": "https://dimension.element2.local/element",
"integrations_widgets_urls": [
"https://dimension.element2.local/widgets"
]
}
```
#### Show the nginx configuration for Element Web: (If using nginx as your ingress controller in production or using thPoC installer.)
```bash
kubectl describe cm -n element-onprem app-element-web-nginx
```
and this will return output similar to:
```plaintext
server {
listen 8080;
add_header X-Frame-Options SAMEORIGIN;
add_header X-Content-Type-Options nosniff;
add_header X-XSS-Protection "1; mode=block";
add_header Content-Security-Policy "frame-ancestors 'self'";
add_header X-Robots-Tag "noindex, nofollow, noarchive, noimageindex";
location / {
root /usr/share/nginx/html;
index index.html index.htm;
charset utf-8;
}
}
```
#### Show the status of all namespaces
```bash
kubectl get namespaces
```
which will return output similar to:
```bash
NAME STATUS AGE
kube-system Active 20d
kube-public Active 20d
kube-node-lease Active 20d
default Active 20d
ingress Active 6d23h
container-registry Active 6d23h
operator-onprem Active 6d23h
element-onprem Active 6d23h
```
#### Show the status of the stateful sets in the `element-onprem` namespace
```bash
kubectl get sts -n element-onprem
```
This should return output similar to:
```bash
NAME READY AGE
postgres 1/1 6d23h
instance-synapse-main 1/1 6d23h
```
#### Show the Synapse configuration
Click to see commands for installers prior to version 2023-05.05
For installers prior to 2022-05.06, use:
```bash
kubectl describe cm -n element-onprem first-element-deployment-synapse-shared
```
For the 2022-05.06 installer and later, use:
```bash
kubectl -n element-onprem get secret synapse-secrets -o yaml 2>&1 | grep shared.yaml | awk -F 'shared.yaml: ' '{print $2}' - | base64 -d
```
For the 2023-05.05 installer and later, use:
```bash
kubectl --namespace element-onprem get \
secrets first-element-deployment-synapse-main --output yaml | \
grep instance_template.yaml | awk '{print $2}' | base64 --decode
```
#### Verify DNS names and IPs in certificates
In the `certs` directory under the configuration directory, run:
```bash
for i in $(ls *crt); do echo $i && openssl x509 -in $i -noout -text | grep DNS; done
```
This will give you output similar to:
```bash
local.crt
DNS:local, IP Address:192.168.122.118, IP Address:127.0.0.1
synapse2.local.crt
DNS:synapse2.local, IP Address:192.168.122.118, IP Address:127.0.0.1
```
and this will allow you to verify that you have the right host names and IP addresses in your certificates.
#### View the MAU Settings in Synapse
```bash
kubectl get -n element-onprem secrets/synapse-secrets -o yaml | grep -i shared.yaml -m 1| awk -F ': ' '{print $2}' - | base64 -d
```
which will return output similar to:
```plaintext
# Local custom settings
mau_stats_only: true
limit_usage_by_mau: False
max_mau_value: 1000
mau_trial_days: 2
mau_appservice_trial_days:
chatterbox: 0
enable_registration_token_3pid_bypass: true
```
## Integration issues
### GitHub not sending events
You can trace webhook calls from your GitHub application under `Settings`/`developer settings`/`GitHub Apps`
Select your GitHub App
Click on `Advanced` and you should see queries issues by your app under `Recent Deliveries`
[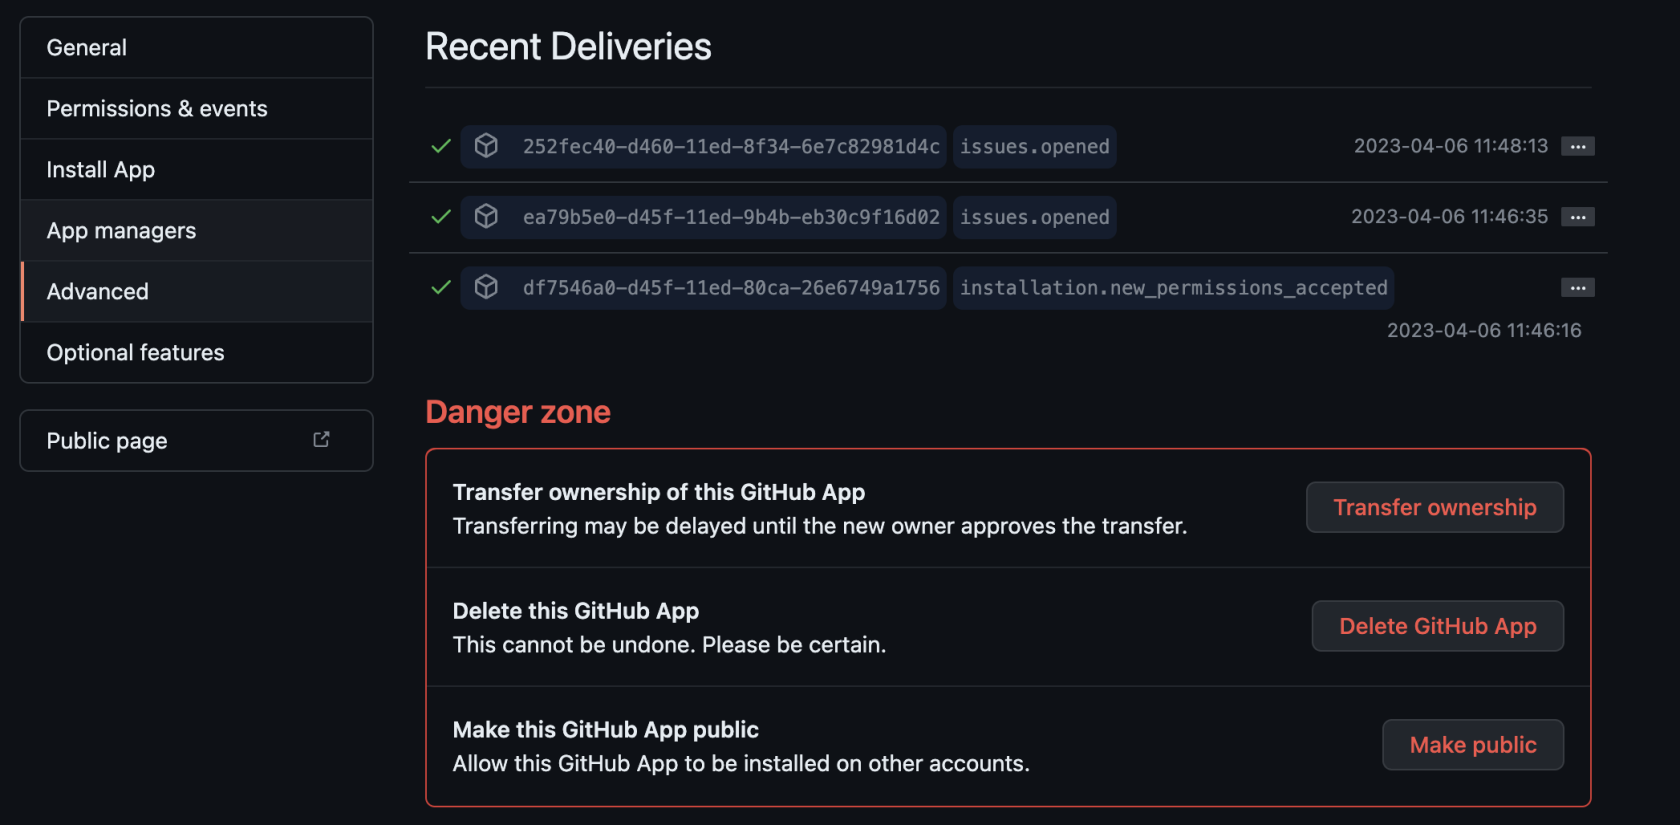](https://ems-docs.element.io/uploads/images/gallery/2023-04/SNLscreenshot-2023-04-06-at-12-12-42.png)
## Updater and Operator in `ImagePullBackOff` state
Check EMS Image Store Username and Token
Check to see if you can pull the Docker image:
`kubectl get pods -l app.kubernetes.io/instance=element-operator-controller-manager -n operator-onprem -o yaml | grep 'image:'`
grab the entry like `image: gitlab-registry.matrix.org/ems-image-store/standard/kubernetes-operator@sha256:305c7ae51e3b3bfbeff8abf2454b47f86d676fa573ec13b45f8fa567dc02fcd1`
Should look like
`microk8s.ctr image pull gitlab-registry.matrix.org/ems-image-store/standard/kubernetes-operator@sha256:305c7ae51e3b3bfbeff8abf2454b47f86d676fa573ec13b45f8fa567dc02fcd1 -u :`
# ESS LTS 24.04 Change Logs and Upgrade Notes
LTS 24.04 Changelogs and important Update Notes, always check here before upgrading!
### Upgrade Notes for the 24.04 LTS
If you are planning on upgrading to the LTS we always recommend upgrading to the latest LTS patch version, however you should be aware of all significant upgrade notes from each prior patch version. They have been collated for convenience below, you can find the full changelogs of each release there after.
24.04.20-gui
The required Python versions are now 3.9, 3.10, 3.11. These are available on all supported OS distributions. The installer will attempt to install the required packages in some scenarios. Airgapped customers should ensure that Python 3.9 packages are available in their package mirrors. Alternatively, Python 3.9, 3.10, or 3.11 can be preinstalled on the server in all situations.
24.04.05-gui
Major Change: The standalone installer now upgrades microk8s gracefully automatically. The microk8s upgrade procedure does not anymore involve an uninstall/reinstall of microk8s. It now will automatically upgrade microk8s to the expected version, and the flag --upgrade-cluster has been removed.
Any customization to CNI Configuration in /var/snap/microk8s/current/args/cni-network/cni.yaml will have to be reconfigured. During the upgrade, microk8s will restart, and add-ons will be disabled to force an upgrade. It can induce a small downtime of a couple of minutes.
24.04.01-gui
This release contains an important Synapse security fix with a backwards incompatible change. Please note that simply reverting this ESS release is not possible.
Please ensure to have a working backups before upgrading as downgrading is not a possibility from this release.
### 24.04.23-gui
#### Security Issues
Enterprise
Upgrade Element Web to v1.11.85, fixes CVE-2024-50336, CVE-2024-51749, and CVE-2024-51750.
#### Bug Fixes
Enterprise / Starter
Improve the reliability of reverting to the upstream microk8s stop script.
### 24.04.22-gui
#### New Features
Enterprise / Starter
Fix an issue where load would not be properly balanced across Synchrotron workers.
#### Bug Fixes
Enterprise / Starter
Fix an issue where setting up Persistent Volumes on microk8s could error and be silently ignored.
Enterprise / Starter
microk8s stop script is now using the native shell script again.
Enterprise / Starter
Fix issue where install hung if no usable Python was already installed.
Enterprise
In Airgapped deployment, mark the microk8s images as pinned to prevent their garbage collection.
Enterprise / Starter
Fix Snap failing to update microk8s.
### 24.04.21-gui
#### Upgrade Notes
Enterprise / Starter
Upgrade ElementWeb to v1.11.81.
#### Bug Fixes
Enterprise / Starter
Fix potential permissions issues during microk8s upgrades.
Enterprise
Correctly import airgapped registry settings when upgrading from before 24.04.
Enterprise / Starter
Improve reliability of some microk8s interactions.
### 24.04.20-gui
#### Release Summary
The required Python versions are now 3.9, 3.10, 3.11. These are available on all supported OS distributions. The installer will attempt to install the required packages in some scenarios. Airgapped customers should ensure that Python 3.9 packages are available in their package mirrors. Alternatively, Python 3.9, 3.10, or 3.11 can be preinstalled on the server in all situations.
#### New Features
Enterprise / Starter
Check for supported Python versions when starting a deployment run. Recreate the virtual environment if it is using the wrong Python version.
Enterprise / Starter
Speed improvements in the operator/updater reconciliation process.
Enterprise / Starter
The installer now ensures that the microk8s version on the host is supported before starting the upgrade process.
Enterprise / Starter
Allow configuration of the operator and updater with debug logs.
#### Upgrade Notes
Enterprise
Global upgrade of the monitoring stack. Victoria Metrics is now on version 1.101.
Enterprise / Starter
Services got renamed, -headless suffixes are all removed. If you are using Network Policies, those will need to be upgraded to the new names.
Enterprise / Starter
Upgrade microk8s to 1.30. The standalone installer now upgrades microk8s automatically. Any customization to CNI Configuration in /var/snap/microk8s/current/args/cni-network/cni.yaml will have to be reconfigured. This upgrade will induce a small downtime of a couple of minutes.
Enterprise / Starter
Upgrade to cert-manager 1.12.13.
#### Security Issues
Enterprise / Starter
Upgrade to Ansible 8 for security fixes.
#### Bug Fixes
Enterprise
Fix empty dashboards (NGinx, Kubernetes Workloads, etc) in Grafana.
Enterprise / Starter
Remove unneeded reconciliations due to bad orphan detection.
Enterprise / Starter
Fix updater metrics scraping.
Enterprise / Starter
Fix microk8s stop command not stopping running containers.
Enterprise / Starter
Improve reliability of some microk8s interactions.
Enterprise
Fix missing VMAlert component, which is required to gather record metrics.
Enterprise / Starter
Validate that the node IP is excluded from a HTTP Proxy if one is configured.
Enterprise / Starter
Improve reliability of changing the Postgres password in the cluster if the password seed changes.
Enterprise / Starter
Improve reliability of setting up CoreDNS.
Enterprise
Construct storage for Matrix Content Scanner if deploying on ESS managed microk8s.
### 24.04.19-gui
#### New Features
Enterprise
Backport authenticated media APIs (MSC3916) to Synapse LTS.
Enterprise / Starter
Scrape Synapse HAProxy metrics.
Enterprise
Scrape Adminbot and Auditbot HAProxy metrics.
Enterprise
Set default volume sizes for Matrix Content Scanner volumes.
Enterprise
Set default volume sizes for Adminbot, Auditbot & Sydent volumes.
#### Bug Fixes
Enterprise
Ensure operator and updater metrics are correctly scraped.
Enterprise
Ensure Telemetry room permissions are consistent.
Enterprise
Ensure component settings for storageClassName override the global setting.
### 24.04.18-gui
#### Upgrade Notes
Enterprise
Upgrade Auditbot to 6.1.2 to improve overall request handling efficiency, especially at high-loads.
### 24.04.17-gui
#### Bug Fixes
Enterprise / Starter
Fix pulling operator & updater images from behind a proxy.
### 24.04.16-gui
#### Upgrade Notes
Enterprise / Starter
Upgrade ElementWeb to v1.11.75.
Enterprise
Upgrade Hydrogen to v0.4.1-fix
#### Bug Fixes
Enterprise / Starter
Enable MSC 3967 on Synapse to avoid some device verification issues.
Enterprise
Setup the onprem-admin user as a MAS admin
### 24.04.15-gui
#### Bug Fixes
Enterprise / Starter
Fix proxy variables configuration check preventing the installer from going through.
Enterprise / Starter
Fix an issue preventing setup when a proxy is configured on the host. On proxy configuration errors, the installer will now continue the setup process after displaying the verification error message.
Reduce false positives from Matrix Content Scanner
Enterprise / Starter
Fix microk8s services subnet parsing.
### 24.04.12-gui
#### New Features
Enterprise / Starter
Speed up initial Synapse deploy
Enterprise
Add the possibility to configure user deprovisioning and rooms cleanup in GroupSync
#### Bug Fixes
Enterprise / Starter
Make sure nf_conntrack module is loaded in the kernel when deploying in standalone mode.
### 24.04.11-gui
#### New Features
Enterprise
Add the possibility to configure a matrix stats endpoint
Enterprise
Setup the onprem-admin user as a MAS admin
Enterprise
Allow configuration of empty (no) disallowed IP ranges in Hookshot
Enterprise
Validate Synapse Telemetry is consistently set
Enterprise / Starter
Synapse improve worker configuration
Enterprise / Starter
Allow blocking of non-scanned media
#### Upgrade Notes
Enterprise / Starter
On RHEL and derived platforms, it now requires python 3.11 installed.
#### Bug Fixes
Enterprise / Starter
On RHEL and derived platforms, the installer should not rely on platform-python for other tasks than Firewalld and SELinux tasks for microk8s setup.
Enterprise / Starter
Fix some CVEs in the operator/updater/conversion webhook
Enterprise / Starter
Fix Matrix Content Scanner not working as expected
Enterprise
Configure max upload size in Secure Border Gateway request body size limit
### 24.04.10-gui
#### Security Issues
Enterprise
Better image signatures, enterprise is now published to sigstore
#### Bug Fixes
Enterprise / Starter
Refactor synapse config files to own the priority of each setting managed by ESS
Enterprise
Sygnal upgrade to 0.15.0 for further Firebase API fixes
Enterprise
Adminbot and Auditbot are currently incompatible with MAS
Enterprise
Synapse - override botocore CA bundle to allow pushing against non-AWS S3 providers
Enterprise
Add support for Element Call configuration in Element Well Known file
Enterprise
Matrix Authentication Service - fix UI configuration of certificates for ingresses
Enterprise
Minor speed up to initial setup of Synapse
Enterprise
Prevent users from editing auditbot and adminbot passphrase in the UI.
Enterprise
Enforce pattern checks against inputs under options.
### 24.04.09-gui
#### Security Issues
Enterprise
Previous update might have enabled unexpectedly outbound webhooks in Hookshot. If you don't need this feature, make sure that it is disabled in Hookshot integration, under Generic Webhooks settings.
#### Bug Fixes
Enterprise
Reduce secrets leaks from operator & updater logs. If you need, for debugging purposes, to enable secrets logging, you must edit the operator & updater deployments and set the environment variable DEBUG_MANIFESTS=1
### 24.04.08-gui
#### New Features
Enterprise
Add support for Outbound webhooks in Hookshot.
Enterprise
Synapse OIDC support attribute requirements
#### Upgrade Notes
Enterprise
Upgrade Adminbot & Auditbot to using matrix-pipe 5.1.0, based on Rust Crypto SDK.
Enterprise
Upgrade Sygnal to 0.14.3 to support latest Firebase API.
#### Bug Fixes
Enterprise
Fixes an issue where auditbot UI would fail to open because tokens were unable to refresh.
Enterprise
Fix a critical issue which would prevent users from accessing Adminbot and Auditbot UI.
Enterprise
Revert change of 24.04.07 which prevented adminbot and auditbot from doing an initial sync.
Enterprise
Create new devices for adminbot and auditbot to work with the new rust sdk cryptographic libraries.
### 24.04.07-gui
#### New Features
Enterprise
Add support for Outbound webhooks in Hookshot.
Enterprise
Synapse OIDC support attribute requirements
#### Upgrade Notes
Enterprise
Upgrade Adminbot & Auditbot to using matrix-pipe 5.1.0, based on Rust Crypto SDK.
Enterprise
Upgrade Sygnal to 0.14.3 to support latest Firebase API.
#### Bug Fixes
Enterprise / Starter
Fix an issue preventing setup when a proxy is configured on the host.
Enterprise
Attempt to detect OpenShift and configure operator & updater installation values appropriately
### 24.04.06-gui
#### New Features
Enterprise
Allow configuration of Synapse database connection pool sizes
Enterprise
Expose Operator & Updater metrics
Enterprise
Add a ServiceMonitor to scrape metrics of microk8s ingress.
#### Upgrade Notes
Enterprise
Upgrade Adminbot for more reliable decryption support
Enterprise / Starter
Upgrade to cert-manager 1.12.11
#### Bug Fixes
Enterprise
Don't include cert-manager in the airgapped tarball. ESS doesn't install or manage cert-manager in airgapped deploys
Enterprise / Starter
Allow well-known delegation to omit configuration of the ingress entirely without triggering unknown variable errors
Enterprise / Starter
Allow configuration of Matrix Content Scanner without a storage class name
Enterprise / Starter
Mark Postgres configuration as required for all components that use a Postgres database
Enterprise
Mark the source for GroupSync as required
Enterprise
Remove workloads and dependent CRs from statuses when they're no longer deployed
Enterprise
Fix provisioning of users that are not rate-limited
Enterprise
Better identification for the Telegram and WhatsApp bridges in their respective apps
Enterprise
Avoid leaking Postgres connections when there are issues provisioning Synapse users
Enterprise
SIPBridge - Disable Virtual rooms
Enterprise / Starter
Fix an issue where the cert manager issuer would try to be created but the cert-manager webhook would not be ready.
Enterprise
Fix monitoring of kube etcd and kube scheduler on microk8s.
### 24.04.05-gui
#### New Features
Enterprise / Starter
Major Change: The standalone installer now upgrades microk8s gracefully automatically. The microk8s upgrade procedure does not anymore involve a uninstall/reinstall of microk8s. It now will automatically upgrade microk8s to the expected version, and the flag --upgrade-cluster has been removed.
Any customization to CNI Configuration in /var/snap/microk8s/current/args/cni-network/cni.yaml will have to be reconfigured. During the upgrade, microk8s will restart, and addons will be disabled to force an upgrade. It can induce a small downtime of a couple of minutes.
Enterprise
Status watchers are now golang containers. Resources used by the operator and updater are now reduced.
#### Upgrade Notes
Enterprise
Upgrade Telegram bridge to 0.15.1-mod-1
Enterprise
Upgrade WhatsApp bridge to 0.10.7-mod-1
#### Bug Fixes
Enterprise / Starter
Fix haproxy failing on ipv4-only nodes.
Enterprise
Fix inconsistent behaviour when switching between S3/Persistent volume option under media tab.
Enterprise / Starter
Fix watchers to avoid triggering unneeded reconciliation loops
Enterprise
GroupSync - Fix issue when LDAP identities contain commas in their names.
Enterprise / Starter
Fix cert-manager upgrade failing to remove old resources.
Enterprise
Fix media screen on standalone setup.
Enterprise / Starter
Remove --upgrade-cluster parameter as microk8s is now upgraded gracefully.
Enterprise / Starter
Fix operator and updater having permissions issues under Openshift
Enterprise / Starter
Fix Jitsi JVB fails to get ready when STUN servers list is empty and Coturn is not deployed.
Enterprise / Starter
The installer does not flake anymore between bootstrap and installer view when the kubernetes cluster is not reachable intermittently.
Enterprise
Configuring monitoring stack persistent volumes properly in microk8s requires to recreate their statefulsets.
Enterprise
Fix an ansible error when installing the telemetry script on the local host when user GID != UID.
Enterprise
Fix missing storage class on some Monitoring PVCs.
### 24.04.04-gui
#### Bug Fixes
Enterprise / Starter
Improve robustness of adding custom well-known delegation configuration
Enterprise / Starter
Fix missing media tab in the Admin Console when using microk8s.
Enterprise
Fix Enable DM Admin not being respected for Adminbot
Improve GroupSync performance with large member lists
Enterprise
Add Azure Blob Storage support to Auditbot
Enterprise
Config GroupSync memory usage based on resource limits/requests
#### Upgrade Notes
Enterprise / Starter
Upgrade Element Web to 1.11.66
#### Bug Fixes
Enterprise
Improve reliability of Synapse user provisioning
Enterprise
Improve Jitsi timezone validation
Enterprise / Starter
Improve Postgres shutdown behaviour when using the ESS Postgreses in cluster
### 24.04.02-gui
#### Upgrade Notes
Enterprise
Upgrade airgapped microk8s to 1.27.13
#### Bug Fixes
Enterprise
Fix issue upgrading from 23.10 LTS in an Airgapped environment where images weren't uploaded to the registry anymore
Enterprise
Synapse HTTP proxy settings can now be edited in the installer.
Enterprise / Starter
Media volume name and size can now be configured for standalone cluster deployments.
### 24.04.01-gui
#### Release Summary
**23.10.29 LTS to 24.04.01 LTS highlights**
This release has focused on making deployments on Kubernetes more reliable. A lot of bugs were fixed, and helm charts have been enhanced to allow to deploy webhooks and CRDs together without the operator and updater.
#### LTS New Features
Enterprise / Starter
The admin app now allows viewing of uploaded media
Enterprise
Add WhatsApp Bridge support
Enterprise
Check the health of the deployment or a component using kubectl describe against any Element CRs, in the status. Our documentation describes how to configure ArgoCD to get these informations into your Application health.
Enterprise
Add the possiblity to configure S3 for Synapse media storage.
Enterprise
Improve support for non-OIDC compliant upstream identity providers with Matrix Authentication Service,
Enterprise / Starter
Allow configuration of seLinuxOptions on all workloads.
Enterprise
Enable simple configuration of whether Element Web generates sharing links with its own URL or matrix.to
Enterprise
When using Airgapped deployment, it is now possible to login to the target upload registry in the installer UI.
Enterprise / Starter
A couple of speedups have been implemented both in the operator and the installer.
Enterprise / Starter
Change deploy order of components to have the core components deployed first by the updater.
Enterprise / Starter
The operator and the updater are now built based on distroless container, to reduce the image size and contents.
Enterprise
Auditbot UI does not need any ingress anymore.
Enterprise / Starter
The installer now contains crictl to allow for local ctr daemon maintenance on microk8s.
Enterprise
Reduce required resources for Standalone to 2 vCPU and 3Gb of memory.
Enterprise / Starter
Reduce postgres in cluster requests to 100Mi.
Enterprise
Add participant limit field in ElementCall configuration.
Enterprise / Starter
Add support for tolerations and nodeSelectors on workload.
Enterprise
Coturn is now managed by the UI view, by the updater, alongside ElementCall and Jitsi. It is now possible to deploy Coturn on a Kubernetes cluster.
Enterprise / Starter
We now configure automatically a CPU Limit of each Operator & Updater to be 25% of the machine vCPUs on standalone. The node still needs at least 2 vCPUs to work properly. On Kubernetes deployment, there's no CPU limit. The number of workers will be adapted relatively to the memory available to the operator/updater.
#### LTS Upgrade Notes
This new LTS can be upgraded from 23.10 if you want to get the new latest features of ESS.
#### LTS Version Updates
Enterprise / Starter
Update operator-sdk to v1.34.1
Enterprise
Update Hookshot to 5.2.1
Enterprise / Starter
Update ElementWeb to v1.11.64
Enterprise / Starter
Update SlidingSync to v0.99.15
Enterprise
Update Synapse to v1.99.0 with CVE-2024-31208 fix
Enterprise
Update Element Call to 0.5.16 and LiveKit to 1.5.1
Enterprise
Update Sydent to 2.6.1
#### LTS Synapse security release
This release contains a fix for GHSA-3h7q-rfh9-xm4v / CVE-2024-31208, a high severity Synapse security issue. Upgrading is advised at the soonest possible moment.
#### Important notes regarding rollback of this release
This release contains an important Synapse security fix with a backwards incompatible change. Please note that simply reverting this ESS release is not possible.
**Please ensure to have a working backups before upgrading as downgrading is not a possibility from this release**.
#### New Features
Enterprise
Check the health of the deployment or a component using kubectl describe against any Element CRs, in the status. Our documentation describes how to configure ArgoCD to get these information into your Application health.
Enterprise
Add the possibility to configure S3 for Synapse media storage.
Enterprise
Add options under Delegated Auth to configure users profiles editing permissions.
Enterprise
Improve support for non-OIDC compliant upstream identity providers with Matrix Authentication Service
Enterprise / Starter
Allow configuration of seLinuxOptions on all workloads
Enterprise
Enable simple configuration of whether Element Web generates sharing links with its own URL or matrix.to
Enterprise
Support GCM/FCM API v1 in Sygnal
Enterprise / Starter
Configure ansible poll interval to 0.01 to reduce CPU load
Enterprise / Starter
A couple of speedups have been implemented both in the operator and the installer.
Enterprise / Starter
We now configure automatically a CPU Limit of each Operator & Updater to be 25% of the machine vCPUs on standalone. The node still needs at least 2 vCPUs to work properly. On Kubernetes deployment, there's no CPU limit. The number of workers will be adapted relatively to the memory available to the operator/updater.
#### Upgrade Notes
Enterprise / Starter
Update operator-sdk to v1.34.1
Enterprise
Update Hookshot to 5.2.1
Enterprise / Starter
Update SlidingSync to v0.99.15
Enterprise
Update Synapse to v1.99.0 with CVE-2024-31208 fix
Enterprise / Starter
Upgrade Element Web to v1.11.64.
Enterprise
Upgrade Matrix Authentication Service to v0.9.0.
Enterprise
Update Secure Border Gateway to v1.1.1.
Enterprise
Upgrade Group Sync to v0.13.6.
Enterprise
Element Call 0.5.16 and LiveKit 1.5.1
Enterprise
Sydent 2.6.1
Enterprise
Make Jitsi and Element Call STUN configuration consistent with each other to ease the upgrade from 23.10.
Enterprise
Upgrade Sygnal to v0.14.1.
#### Security Issues
Enterprise
Upgrade IRC Bridge to 2.0.0 to fix CVE-2024-32000.
#### Bug Fixes
Enterprise / Starter
Correctly install apt package python3-venv on recent ubuntu version.
Enterprise
Fixes to how Admin/Auditbot configs are maintained in the installer.
Enterprise / Starter
Improve installer one-time login codes security.
Enterprise / Starter
Mitigate installer log injections via HTTP headers.
Enterprise
Fix admin console discovery of OIDC to use MSC2956.
Enterprise
Update Auditbot S3 object name to one that will not clash with other files.
Enterprise
Fix issues passing in Coturn external-ip and enabling host mode.
Enterprise / Starter
Fix an issue where Auditbot S3 storage would prune files too early.
Enterprise / Starter
Fix an issue with Jitsi where it would not be possible to configure the Sync Power Level in the Restrict Widgets to Synapse configuration.
Enterprise
AdminBot and Matrix Authentication Service can now be deployed together
Enterprise
Upgrade Synapse Admin to better support homeservers using SRV delegation
Enterprise
Fix support for APNS notifications in Sygnal going via a HTTP Forward Proxy
Enterprise
Fix configuration of multiple TURN servers in Synapse when manually configuring
Enterprise
Fix Sydent Terms & Conditions having a version that's just a number
Enterprise / Starter
Fix ServiceMonitors being left behind when components are removed
Enterprise
Fix SIP Bridge Services clashing
Enterprise
Fix a bug which could make airgapped impossible to deploy due to microk8s snap refresh being in error state.
Enterprise
Fix Synapse bootstrap phase getting stuck due to incompatible registration options.
Enterprise / Starter
Stop displaying NGINX version on error pages.
Enterprise
Clarify and improve validation of TURN server configuration section.
Enterprise
Ignore Adminbot/Auditbot users in IRC admin rooms.
Enterprise
Fix an issue where configuring Coturn would lead to infinite reconciliation.
#### Other
Enterprise
Clean up unused Matrix Authentication Service spa HTTP resource.
Enterprise
Auditbot no longer requires the configuration of a dedicated UI ingress. This is handled by Synapse Admin UI now
Enterprise
Clarify description of Synapse default room encryption section.
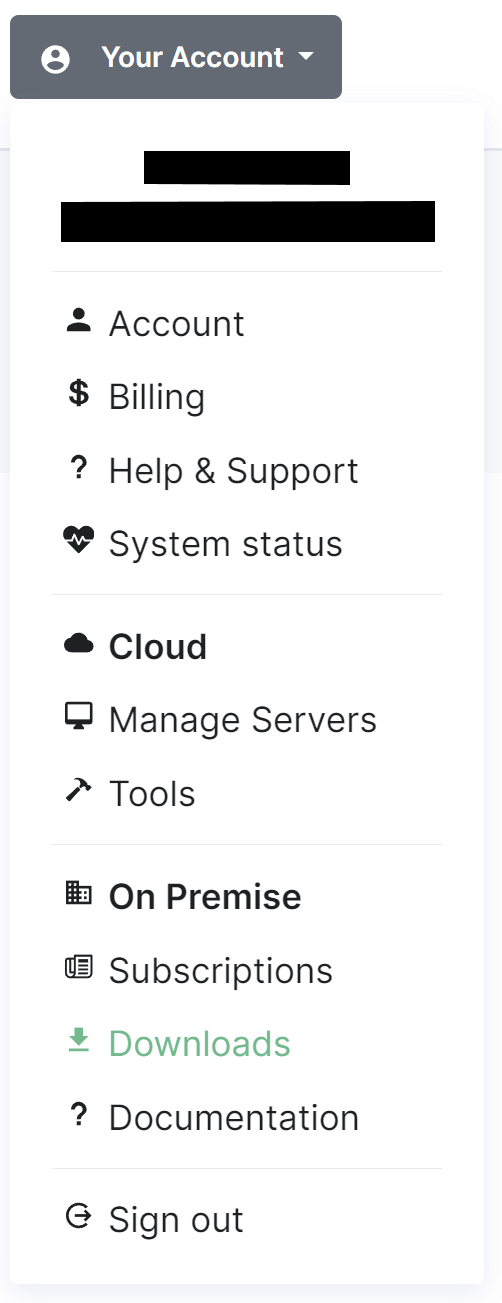
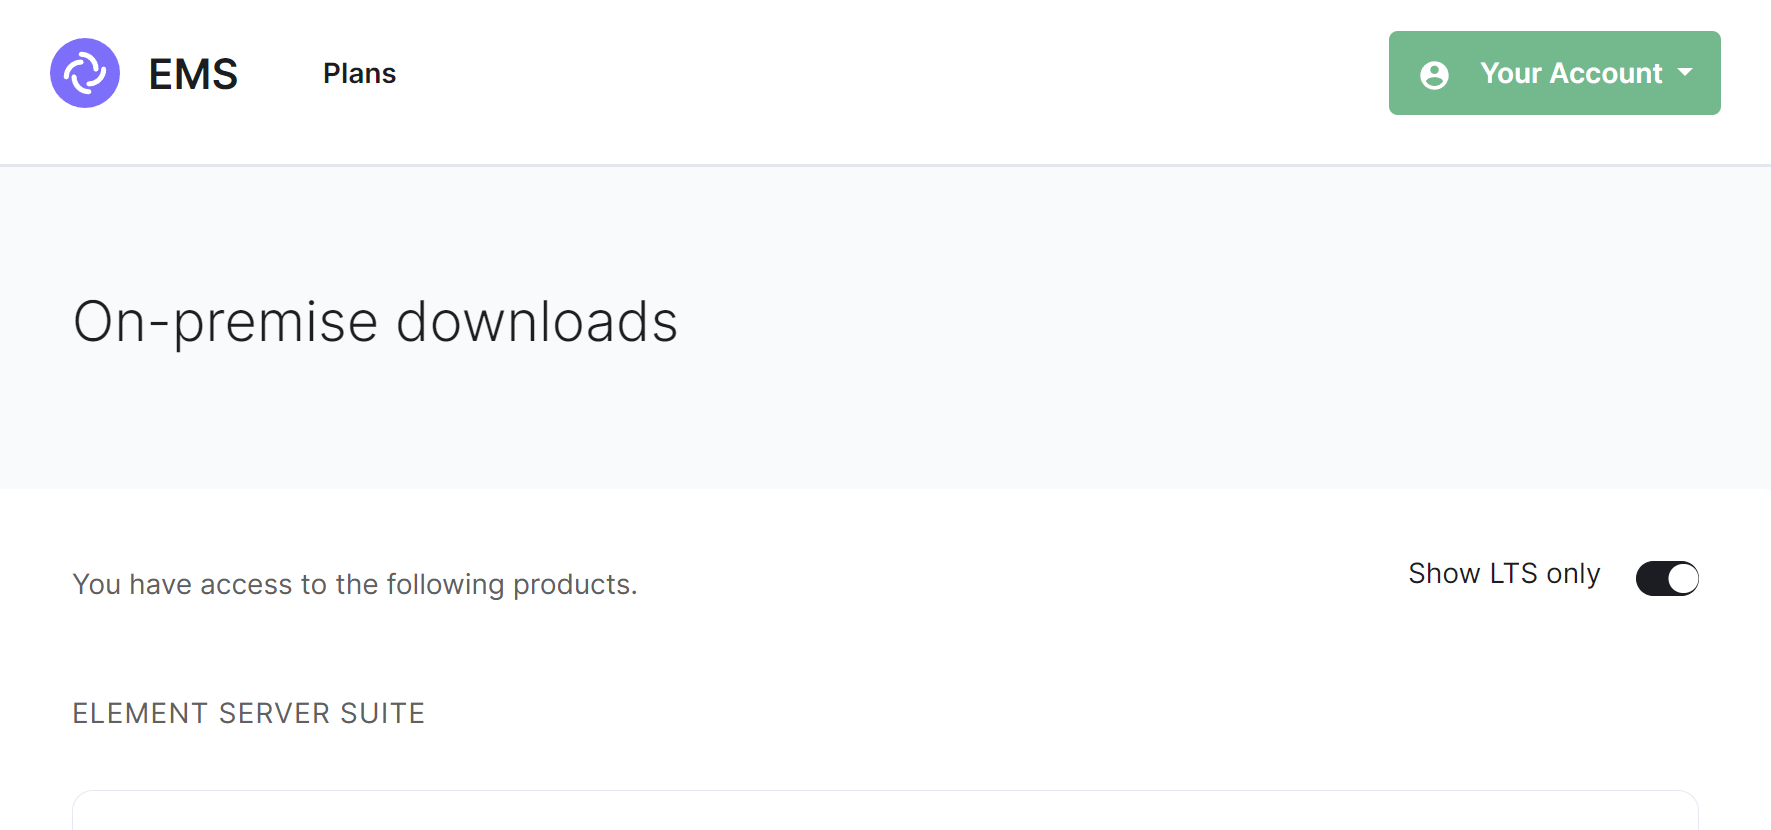
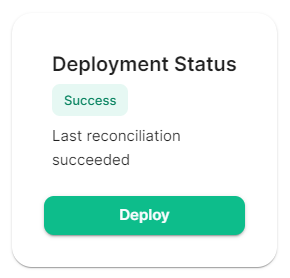
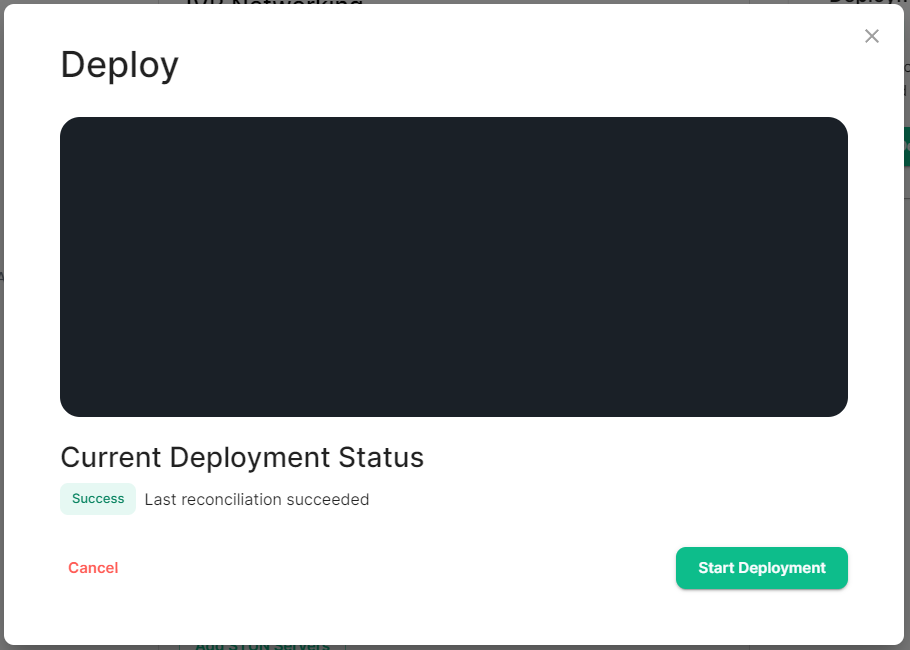
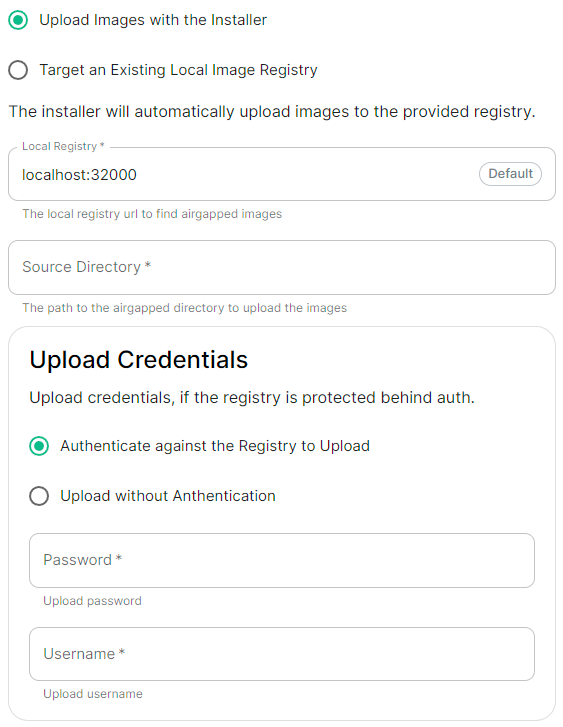
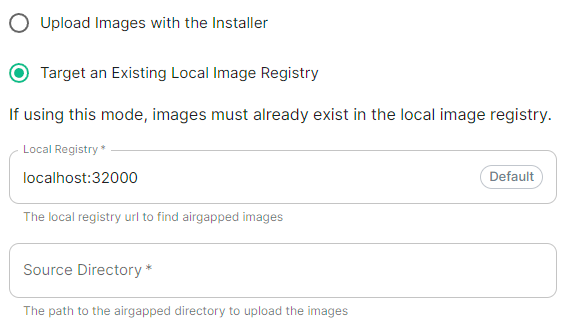
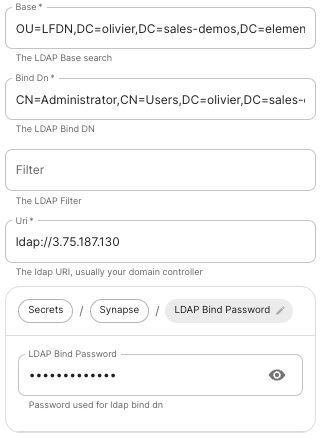

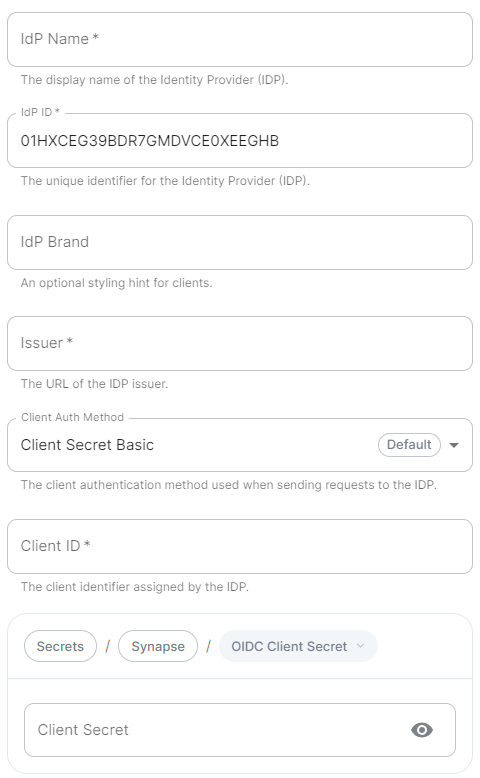
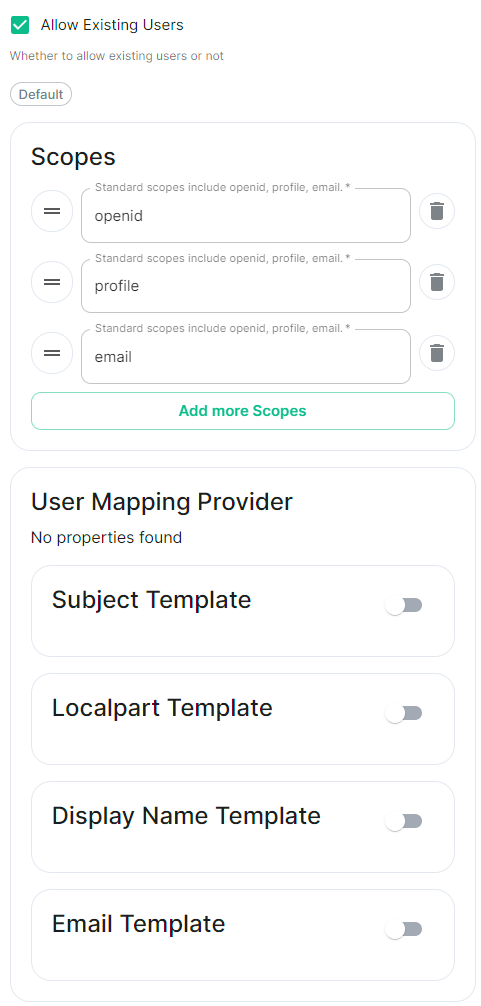
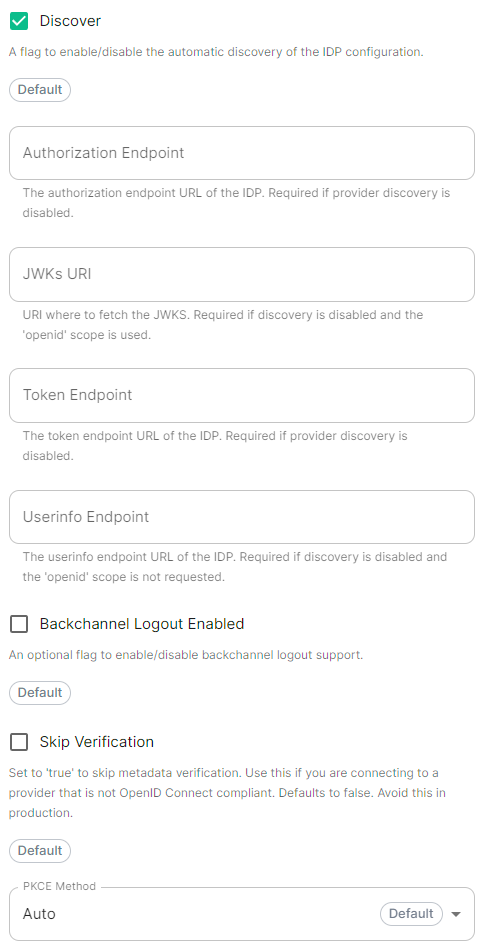
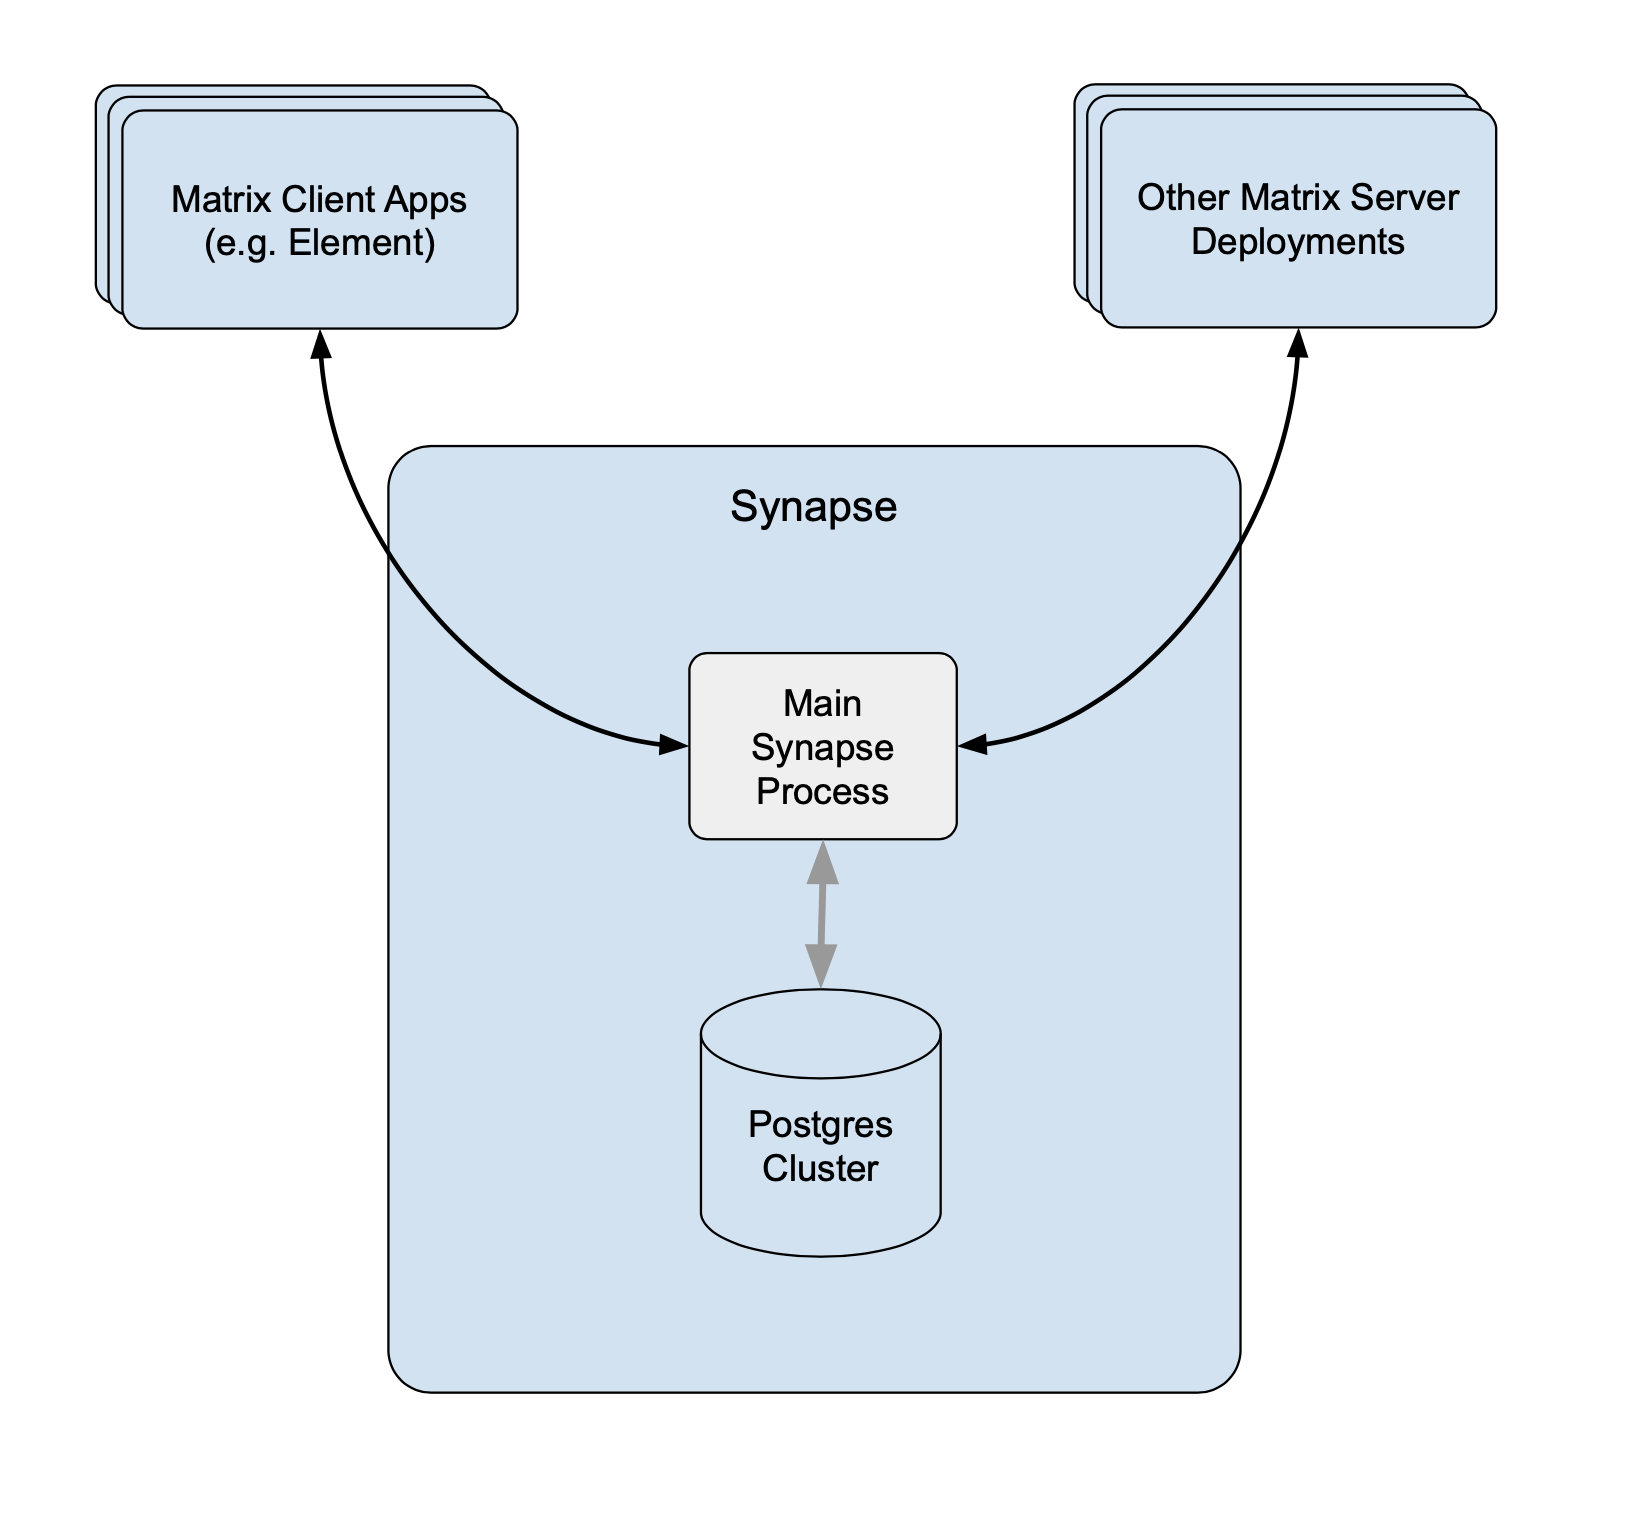 Without Workers
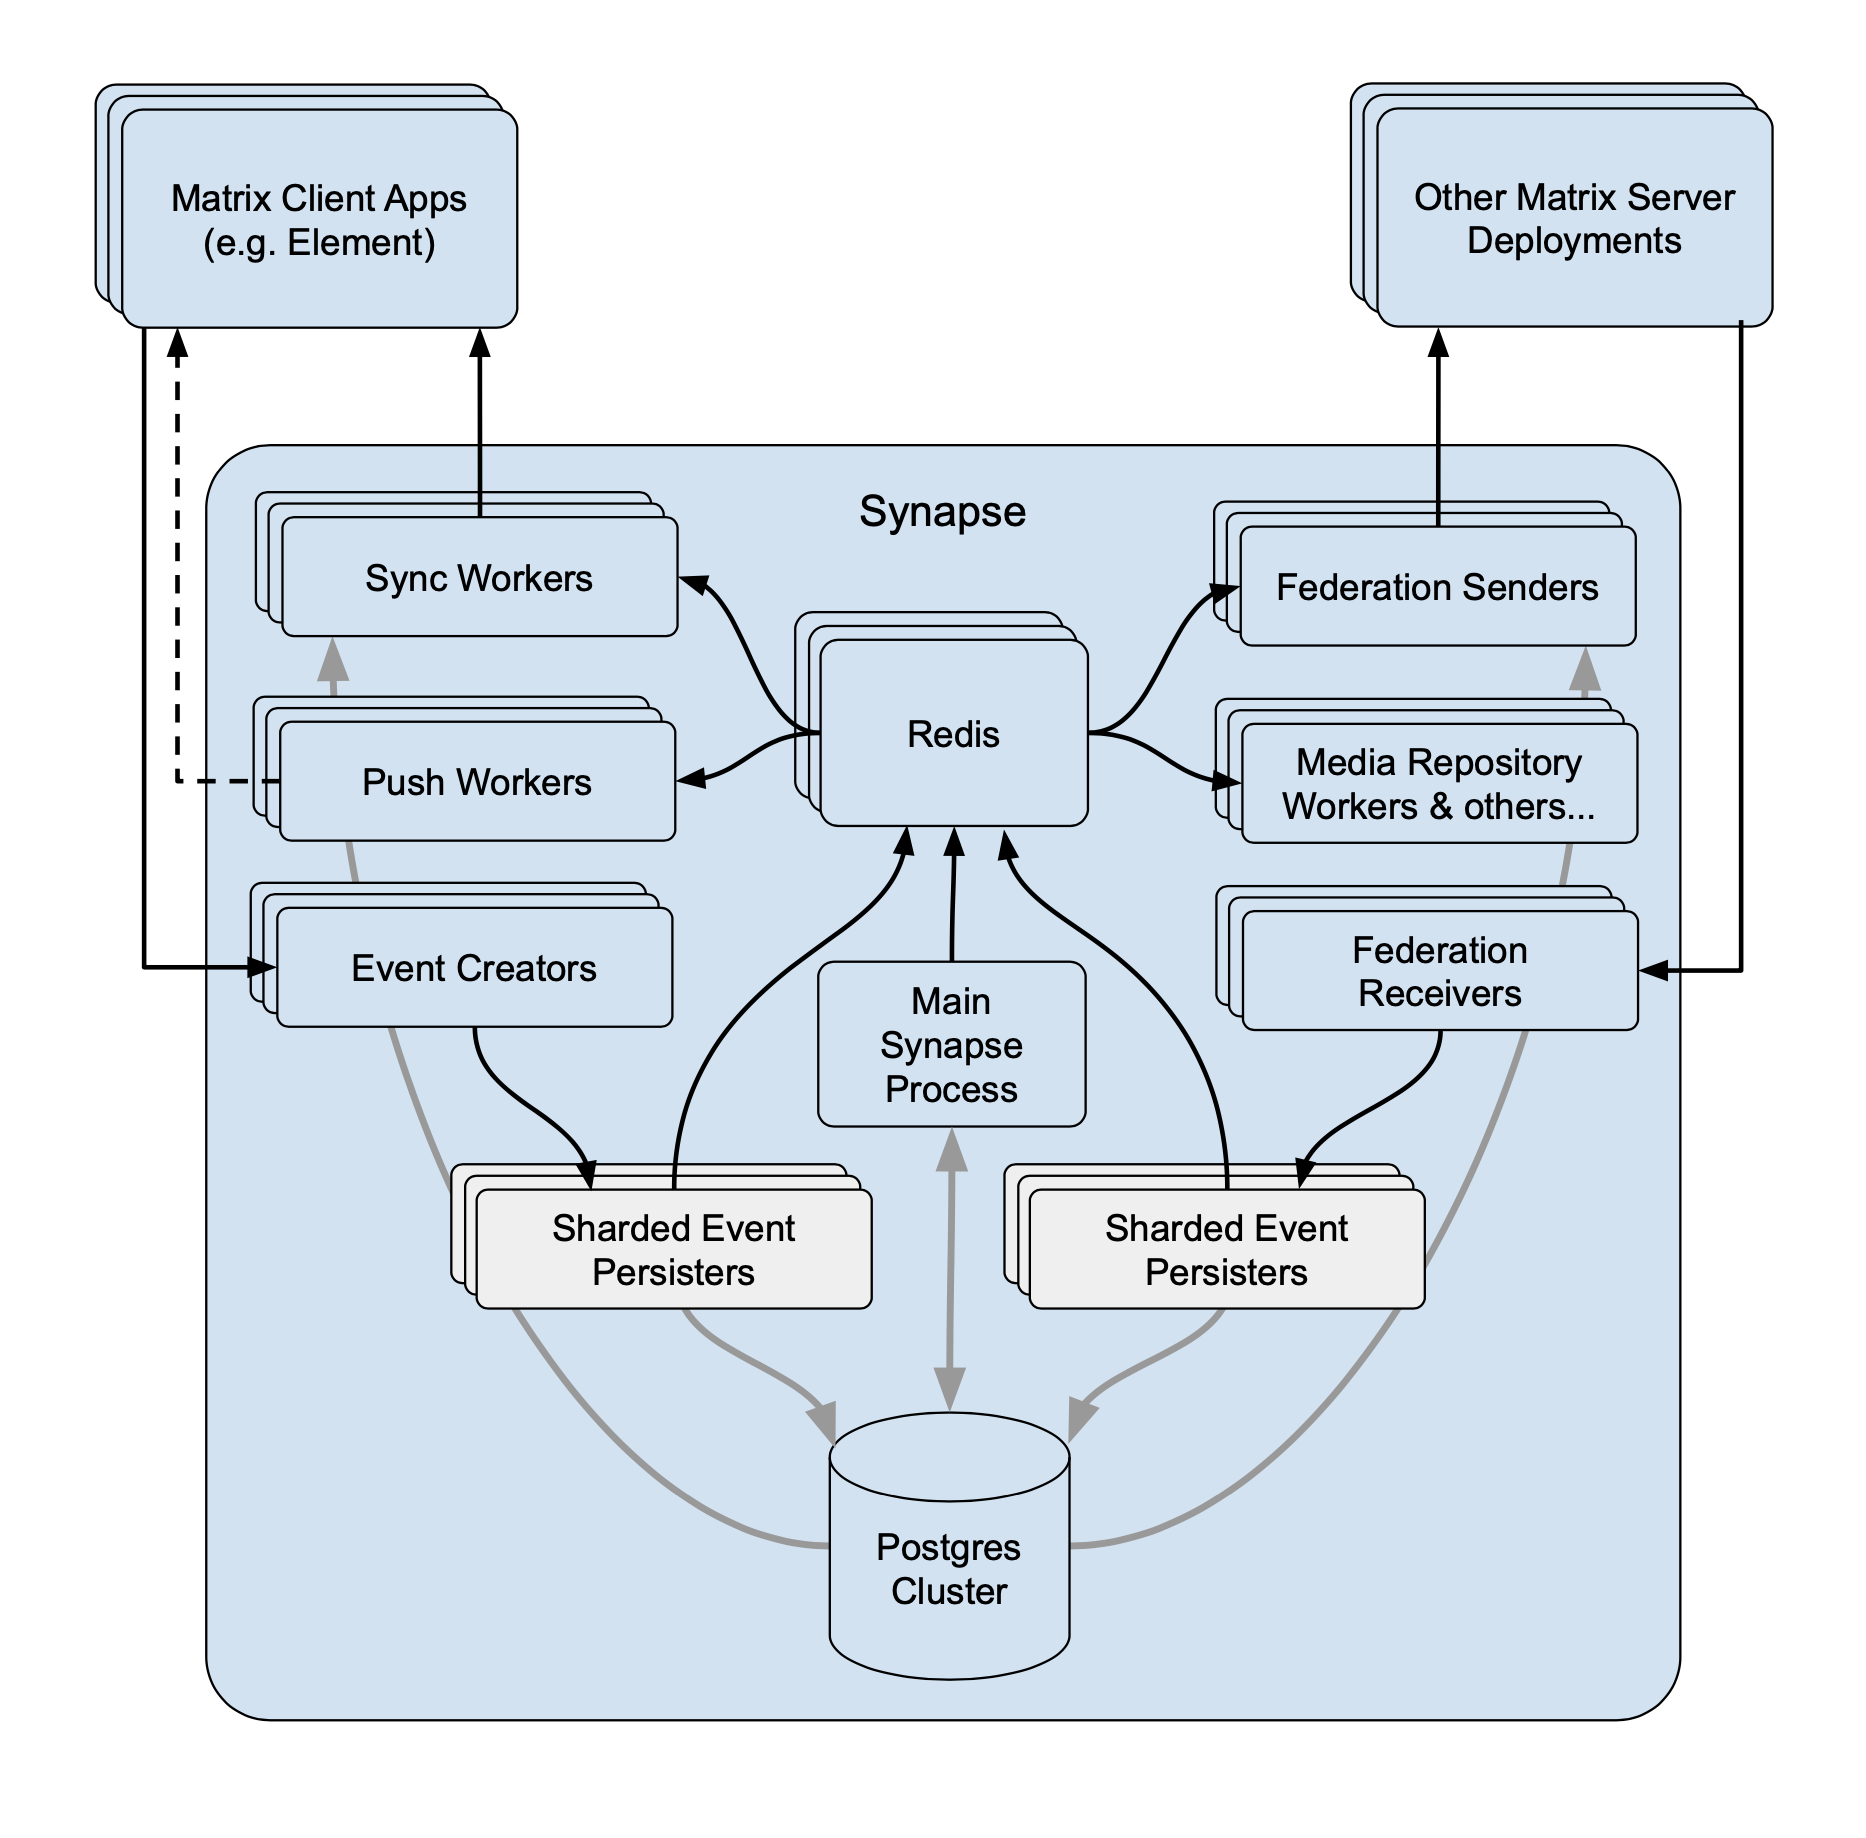 With Workers
[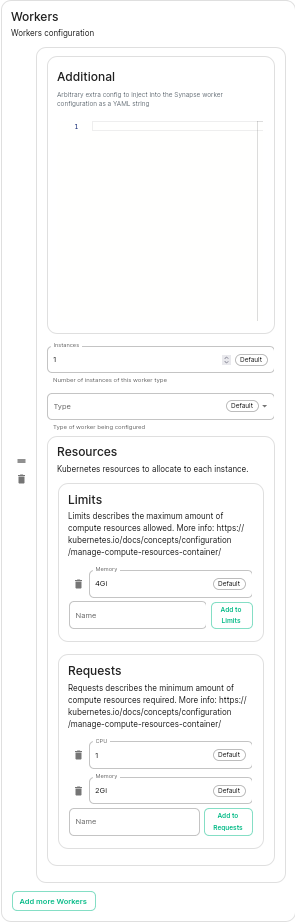](https://ems-docs.element.io/uploads/images/gallery/2023-06/image-1687357284426.png)
You have to select a Worker Type. Here are the workers which can be useful to you :
- **Pushers****.**
With Workers
[](https://ems-docs.element.io/uploads/images/gallery/2023-06/image-1687357284426.png)
You have to select a Worker Type. Here are the workers which can be useful to you :
- **Pushers****.**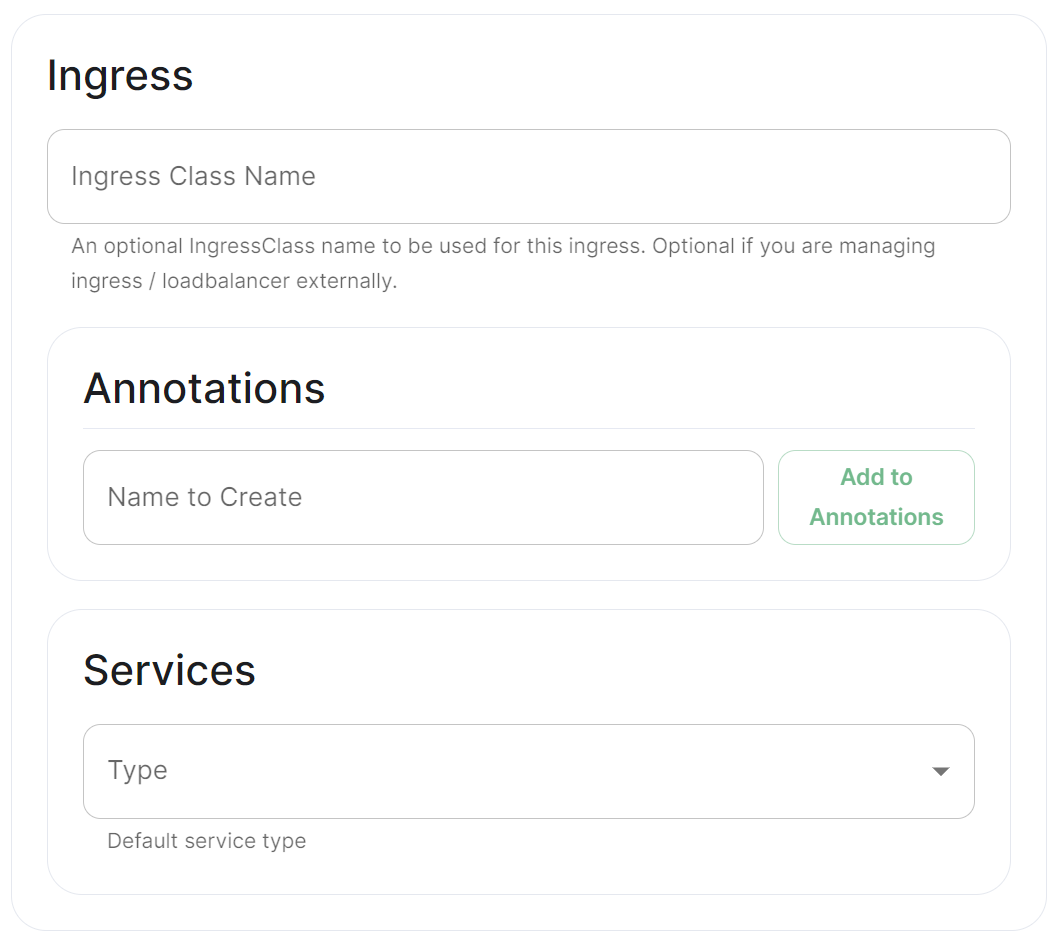
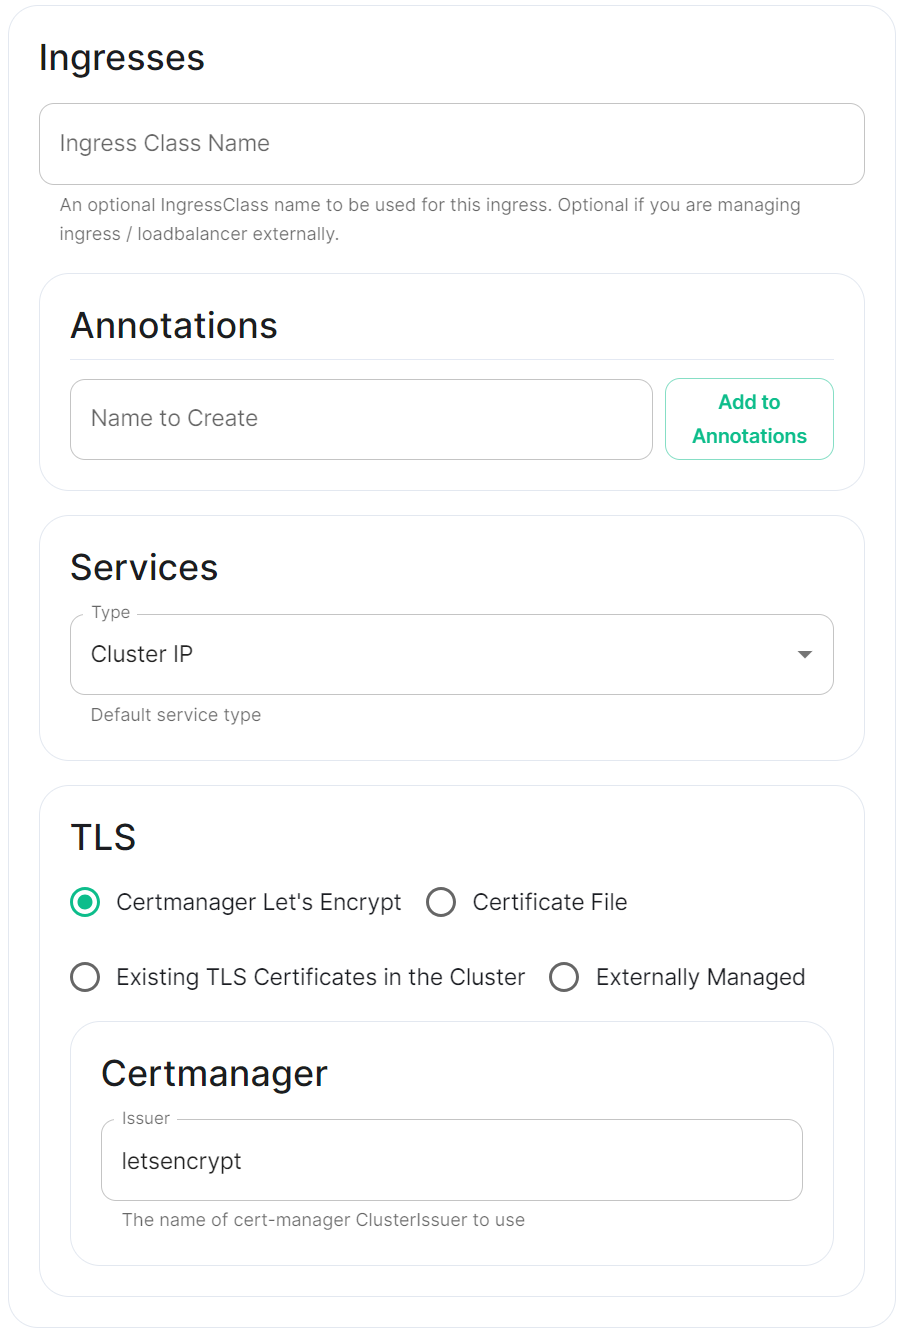
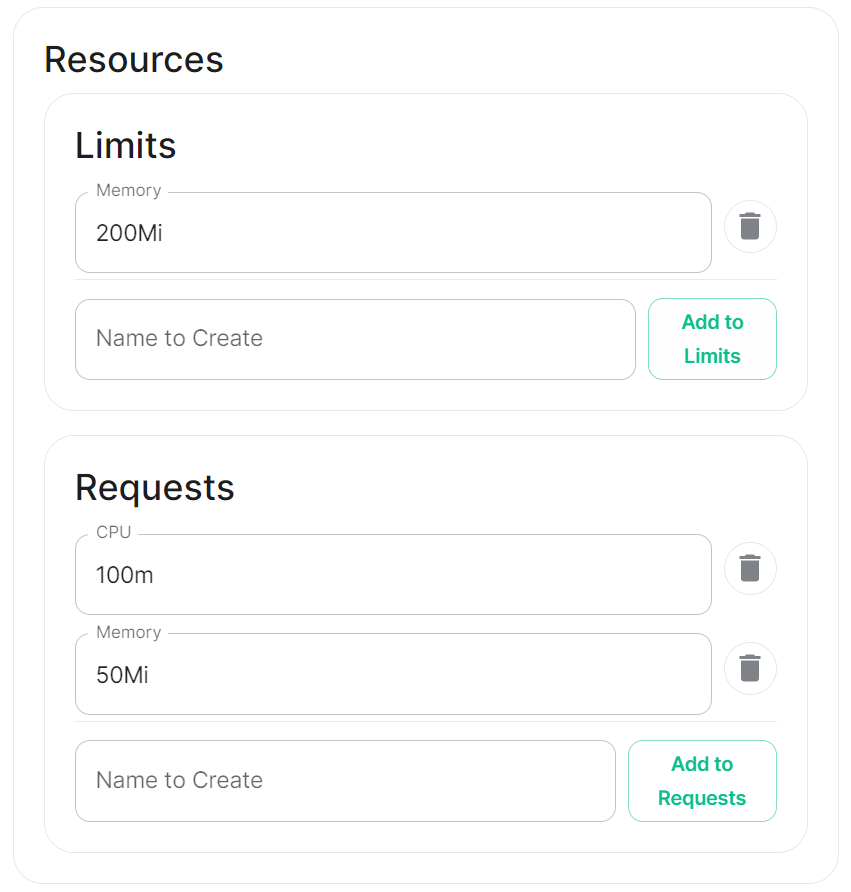
 Each container on this tree needs at least the following properties to override the source of download :
```
image_repository_path: elementdeployment/vectorim/element-web
image_repository_server: localregistry.local
```
You can also override the image tag and the image digest if you want to enforce using digests in your deployment :
```
image_digest: sha256:ee01604ac0ec8ed4b56d96589976bd84b6eaca52e7a506de0444b15a363a6967
image_tag: v0.2.2
```
For example, the required ConfigMap manifest (e.g. `images_digest_configmap.yml`) format would be, to override the `element_web/element_web` container source path :
Each container on this tree needs at least the following properties to override the source of download :
```
image_repository_path: elementdeployment/vectorim/element-web
image_repository_server: localregistry.local
```
You can also override the image tag and the image digest if you want to enforce using digests in your deployment :
```
image_digest: sha256:ee01604ac0ec8ed4b56d96589976bd84b6eaca52e7a506de0444b15a363a6967
image_tag: v0.2.2
```
For example, the required ConfigMap manifest (e.g. `images_digest_configmap.yml`) format would be, to override the `element_web/element_web` container source path :
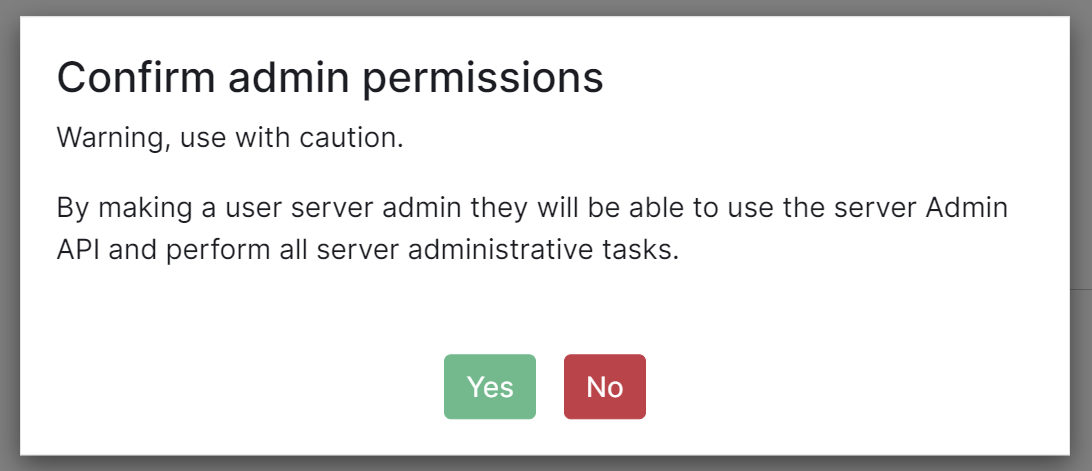
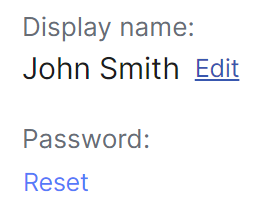


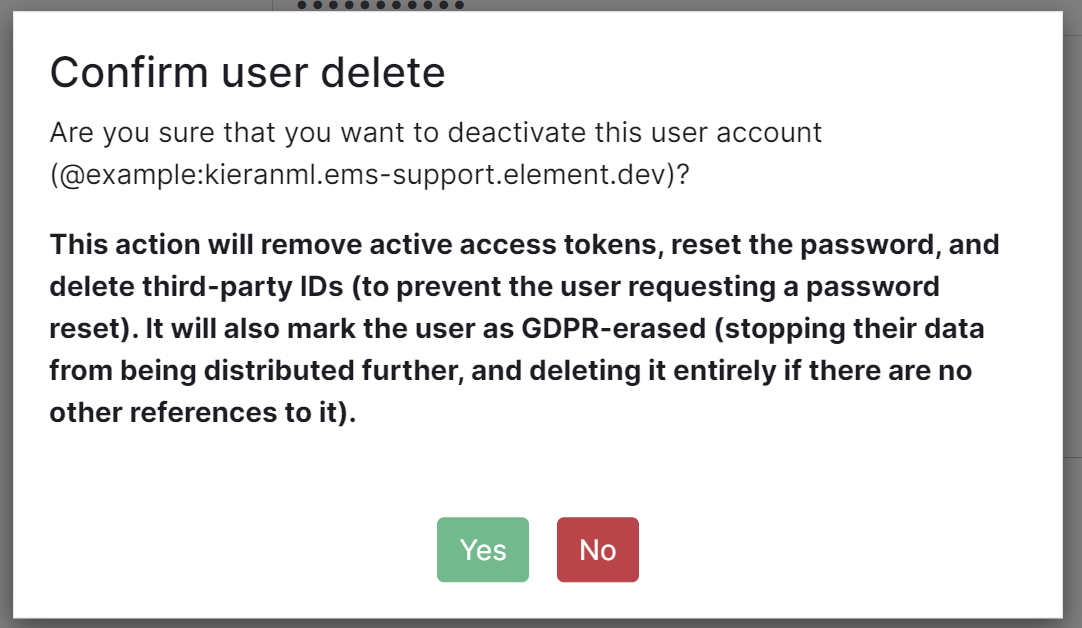
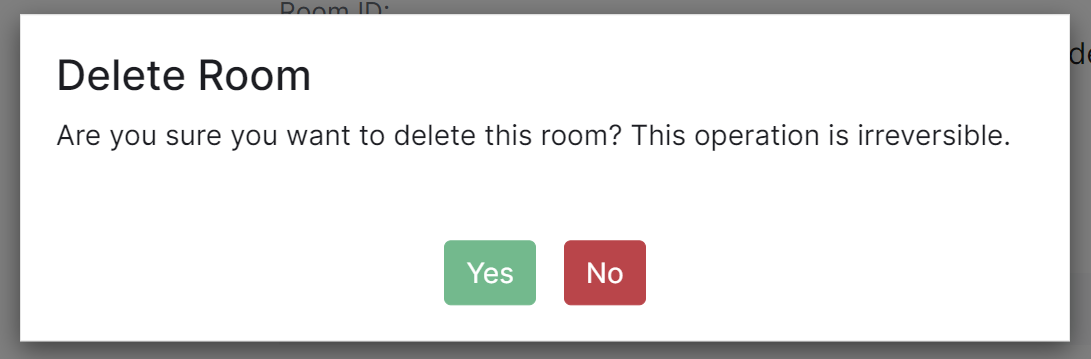
 ### Unhealthy deployment
```bash
kubectl get elementdeployment --all-namespaces --output yaml
```
In the status you will see which component is having an issue. You can then do
```bash
kubectl --namespace element-onprem get `
### Unhealthy deployment
```bash
kubectl get elementdeployment --all-namespaces --output yaml
```
In the status you will see which component is having an issue. You can then do
```bash
kubectl --namespace element-onprem get `