Advanced Configuration
Need help doing something more advanced? See guides for Helm Chart installs, Synapse Workers and more!
- Synapse Section: Additional Config
- Synapse Section: Workers
- Kubernetes Override Sections
- Customise Containers used by ESS
- Secrets
- How to run a Webserver on Standalone Deployments
- ESS CRDs support in ArgoCD
- Verifying ESS releases against Cosign
- Notifications, MDM & Push Gateway
- Helm Chart Installation
Synapse Section: Additional Config
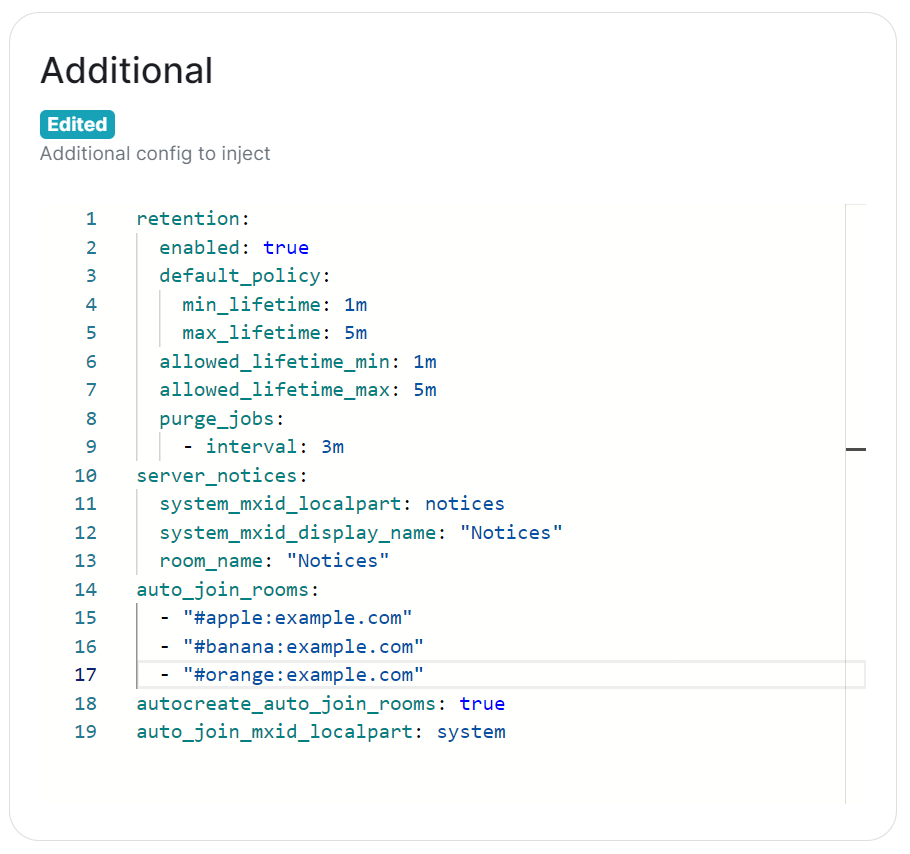
The Additional Config section, which allows including config not currently configurable via the UI from the Configuration Manual, is available under the 'Advanced' section of the Synapse page.
We strongly advise against including any config not configurable via the UI as it will most likely interfere with settings automatically computed by the updater. Additional configuration options are not supported so we encourage you to first raise your requirements to Support where we can best advise on them.
Configuration should follow the same format as supplied by the Configuration Manual, if you include options that have otherwise been configured via the UI they will be overridden with the exception of MAU, Federation and Data Retention (see Nonoverridable Config). Though as noted above, any additional config carries the risk that it will most likely interfere with settings automatically computed by the updater.
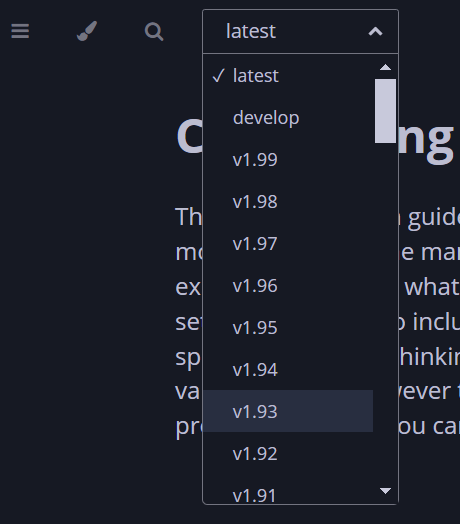
What version of Synapse am I running?
Remember to set the configuration manual page to the version of Synapse deployed by the installer, otherwise you may see configuration options / guidance not applicable to the version of Synapse you have deployed.
You can determine the version of Synapse you have deployed by using kubectl describe pod first-element-deployment-synapse-main-0 -n element-onprem | grep version, changing the pod name as needed. This will output something like app.kubernetes.io/version=v1.93.0-lts.1-base, as such when you visit any link to the Configuration Manual, you should update the page to see the correct information for your version.

Known Issues
max_mau_value, limit_usage_by_mau, federation and retention
Configuration of these via Additional Config, that are in conflict with those set via the UI, will not override the UI set values. As such, we do not advise including them or any related settings within the Additional Config as they are of increased risk to causing issues with your deployment.
auto_join_rooms
Due to how the installer sets up Synapse, the auto_join_rooms option will only work when configured as required on the first deployment. Should you configure this on an existing deployment, or change the rooms on a subsequent deployment, it will not function and you'll receive various errors within the Synapse pod logs. To resolve you will need to manually create the rooms and specify auto_join_mxid_localpart in your config. If you're using AdminBot / AuditBot, either would be a perfect candidate for the specified MXID as you can be sure they will be in any room you specify.
Therefore in order to get this setup, you'll need to follow these steps:
-
For a brand new "fresh" install, simply specify with config per the manual, on the first user registration, they will create and join the specified rooms and all subsequent users will also auto-join.
auto_join_rooms: - "#exampleroom:example.com" - "#anotherexampleroom:example.com" -
For existing installs, or when you wish to adjust the auto-join room list, you will need to:
- Manually create the rooms and assign the desired alias. (Room Settings -> Local Addresses)
- Add the following config, making sure to set the localpart to a user present within the rooms specified. This could be the room creator, someone invited who has joined, or something like Admin/Audit Bot.
auto_join_mxid_localpart: adminbot - Redeploy, wait for the synapse pod to restart
- Newly registered users will now auto-join the specified rooms
As usual, with auto_join_rooms, the caveat is that changing the rooms will not automatically join previously registered users to the updated rooms. To automate this you will likely need to make use of the Admin API, see Using Python with the Admin + Client-Server APIs, specifically Example #1: Join Users to Rooms would be a good starting point.
Exceptions
While use of Additional Config is not recommended, there are certain circumstances built-in to the UI that will allow you to defer to configuration options you will need to specify within the Additional Config block. These exceptions will be covered here, however please be advised, using them still carries risk of instability so we'd recommend sticking with options fully supported by the UI itself.
Custom Registration
Within the Synapse section of the installer, as part of the registration configuration, you can select Custom. When doing so, configuration of Registration should be done via Additional Config, allowing you more control. Options that can be configured can be found at the linked Registration section of the Synapse Configuration Manual, but include:
-
enable_registration -
enable_registration_without_verification -
registrations_require_3pid -
registration_requires_token -
registration_shared_secret
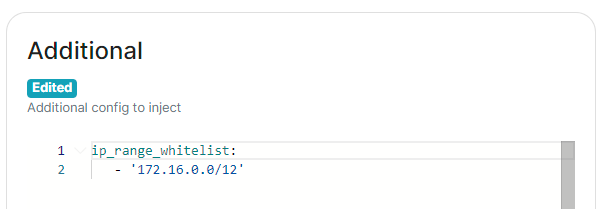
Allowing Private Federation via ip_range_whitelist
By default private IP ranges are blacklisted, per ip_range_blacklist. So when looking to privately federate between two homeservers, where they'd communicate over one of these private ranges, without specifying said range using ip_range_whitelist it will fail showing errors like the below:
synapse.http.federation.well_known_resolver - 259 - INFO - GET-369 - Fetching https://server2.example.com/.well-known/matrix/server
synapse.http.client - 199 - INFO - sentinel - Blocked 172.20.8.127 from DNS resolution to server2.example.com
To resolve this, you will need to add the following to the Additional config:
ip_range_whitelist:
   - '172.16.0.0/12'
Config Example
When setting additional config via the UI, the following would be added to the your deployment.yml:
spec:
  components:
    synapse:
      config:
        additional: |-
          ip_range_whitelist:
             - '172.16.0.0/12'
Synapse Section: Workers
The Workers section, which allows you to configure Synape Workers, is available under the 'Advanced' section of the Synapse page.
What are Synapse Workers
Synapse is built on Python, an inherent limitation of which is only being able to execute one thread at a time (due to the GIL). To allow for horizontal scaling Synapse is built to split out functionality into multiple separate python processes. While for small instances it is recommended to run Synapse in the default monolith mode, for larger instances where performance is a concern it can be helpful to split out functionality into these separate processes, called Workers.
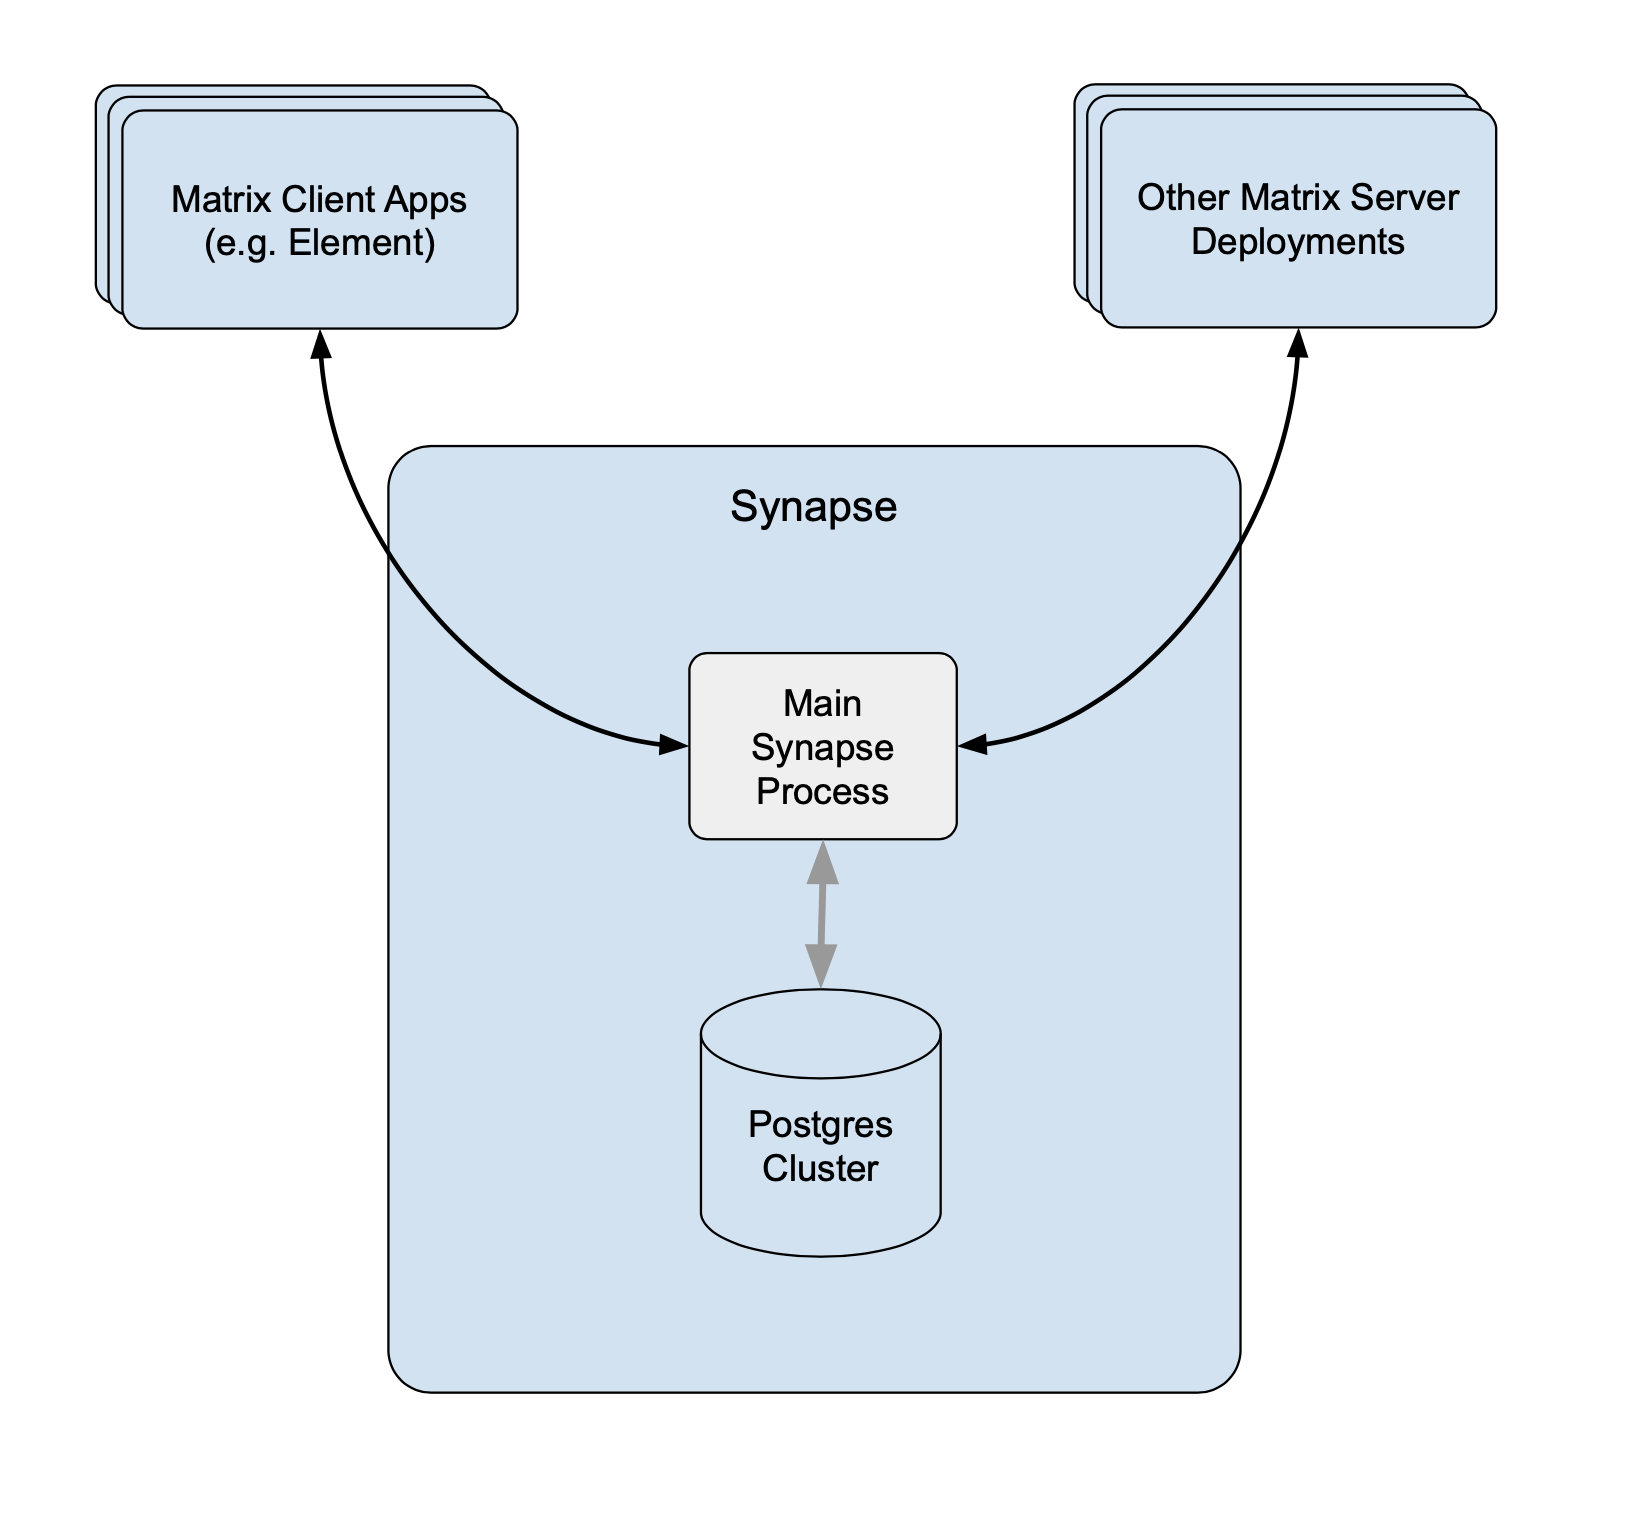 Without Workers Without Workers |
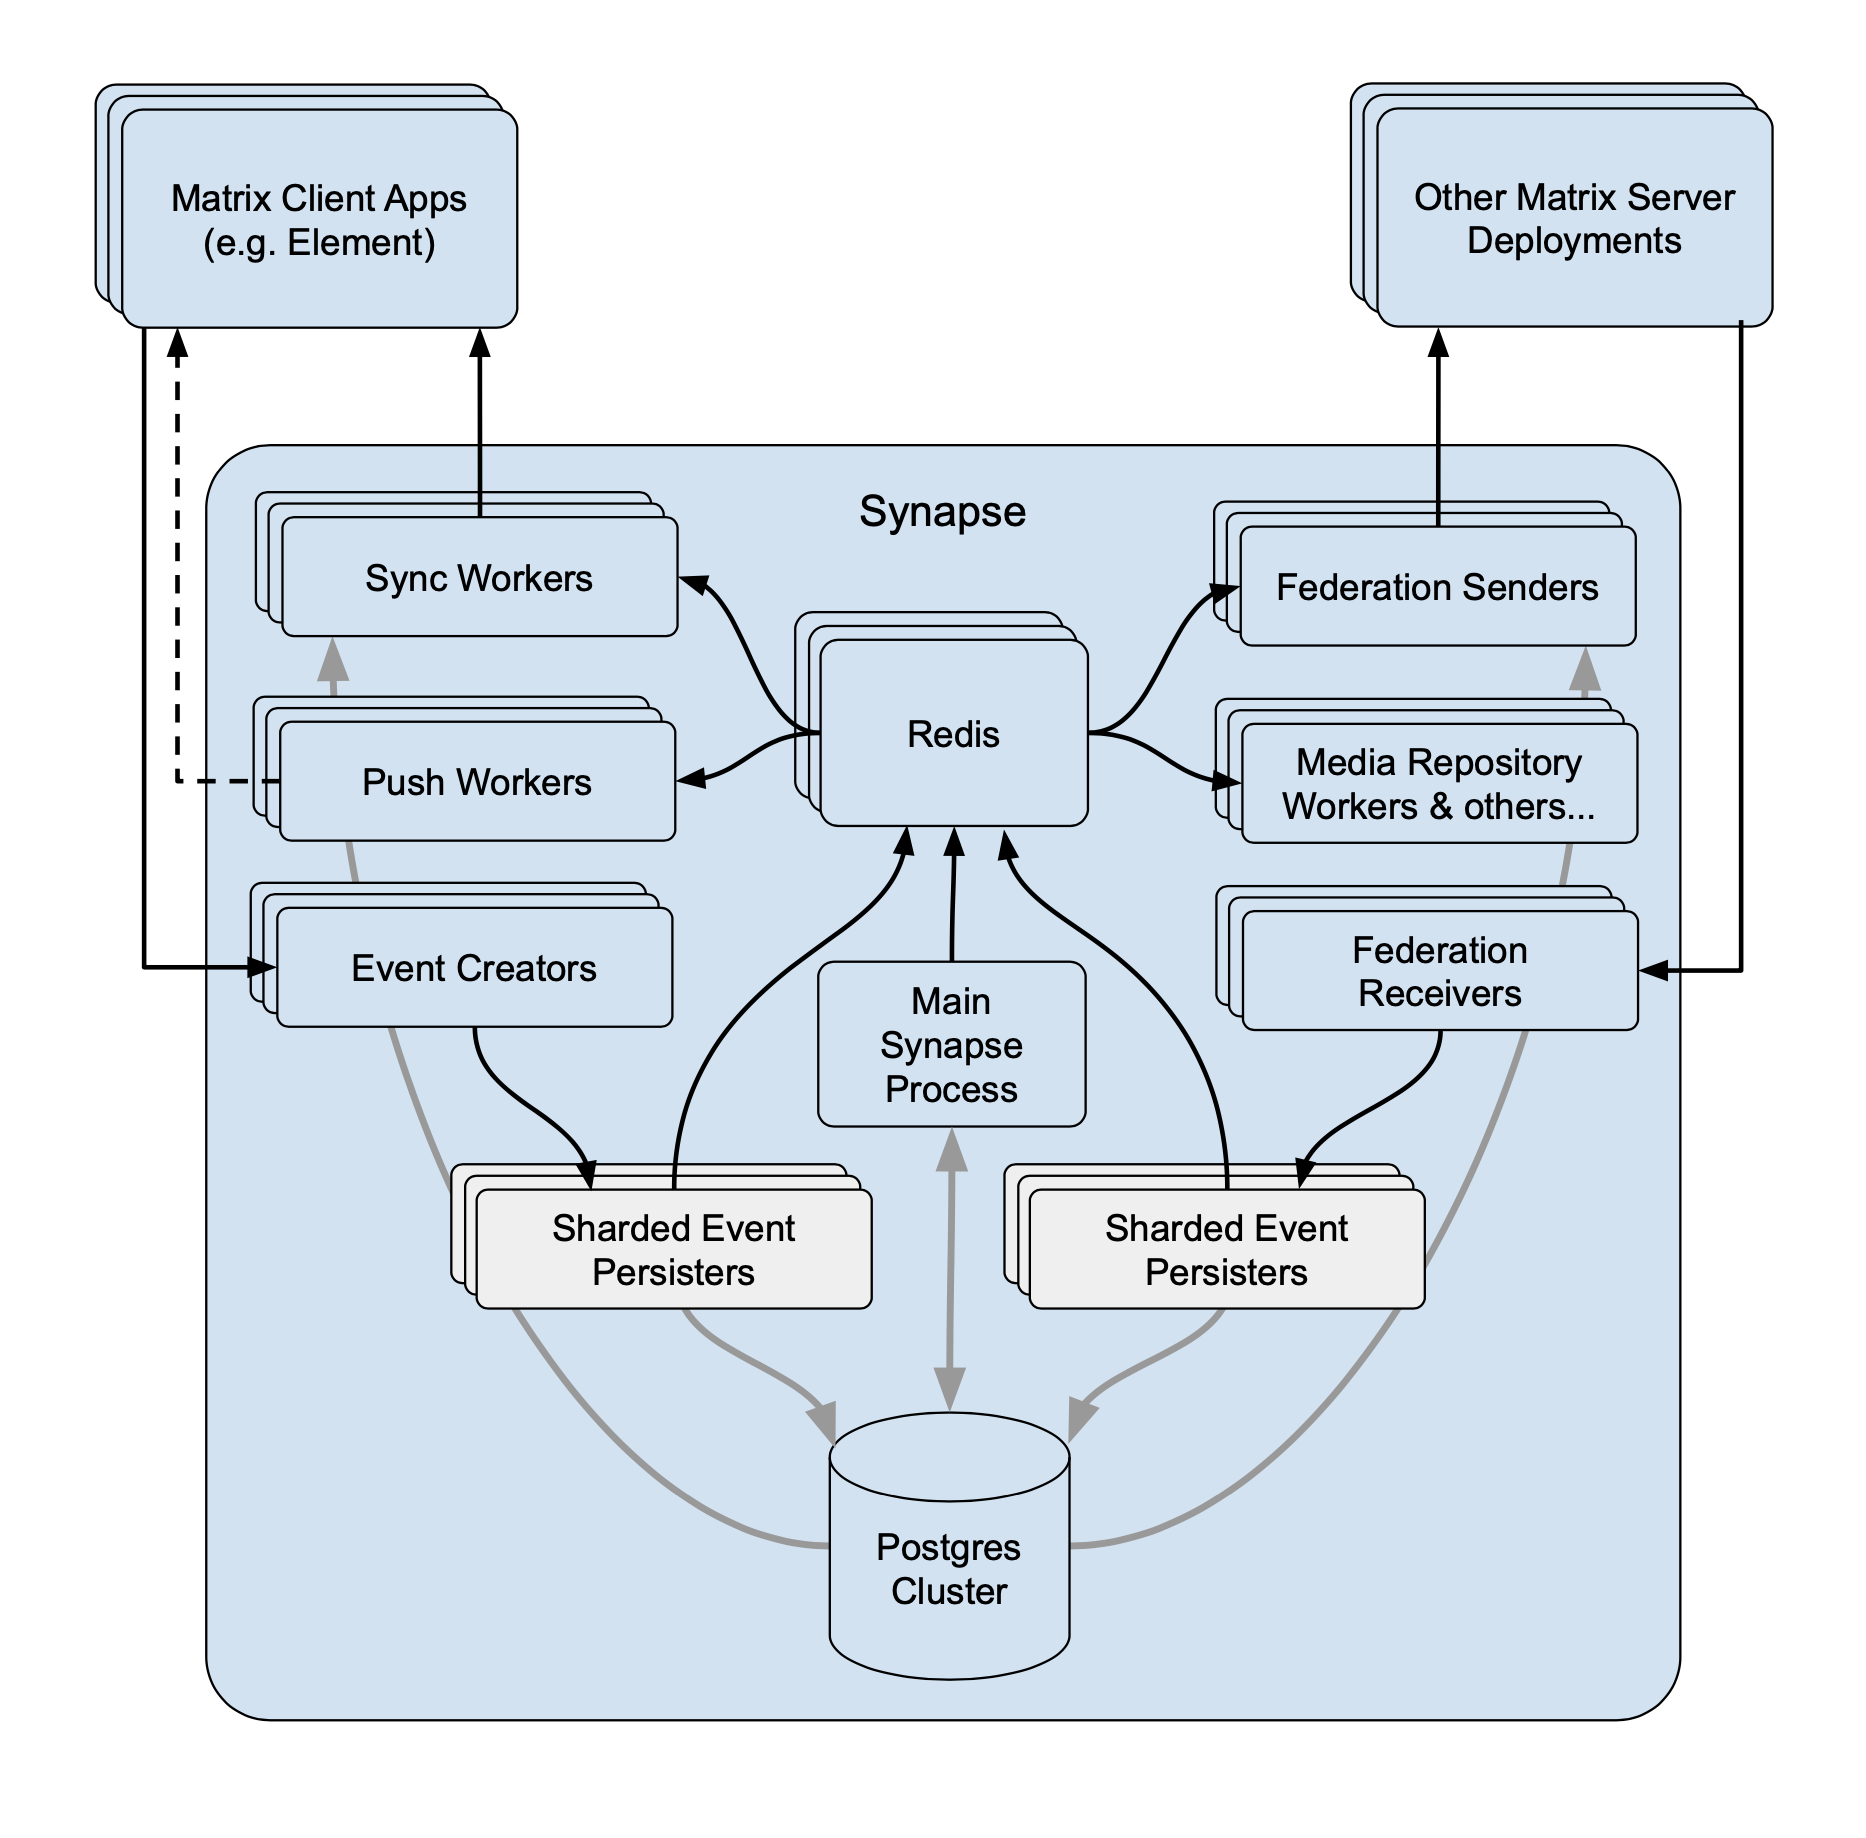 With Workers With Workers |
For a detailed high-level overview of workers, see the How we fixed Synapse's Scalability blogpost.
Benefits of Using Workers
- Scalability. By distributing tasks across multiple processes, Synapse can handle more concurrent operations and better utilize system resources.
- Fault Isolation. If a specific worker crashes, it only affects the functionality it handles, rather than bringing down the entire server.
- Performance Optimisation. By dedicating workers to specific high-demand tasks, you can improve the overall performance by removing bottlenecks.
Worker ↔ Synapse Communication
The separat Worker processes communicate with each other via a Synapse-specific protocol called 'replication' (analogous to MySQL- or Postgres-style database replication) which feeds streams of newly written data between processes so they can be kept in sync with the database state.
Synapse uses a Redis pub/sub channel to send the replication stream between all configured Synapse processes. Additionally, processes may make HTTP requests to each other, primarily for operations which need to wait for a reply ─ such as sending an event.
All the workers and the main process connect to Redis, which relays replication commands between processes with Synapse using it as a shared cache and as a pub/sub mechanism.
How to configure
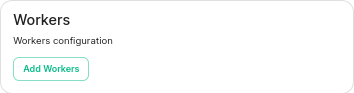
Click on Add Workers
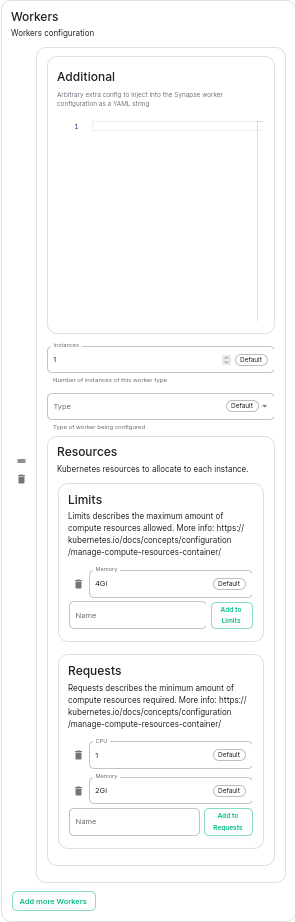
You have to select a Worker Type. Here are the workers which can be useful to you :
-
Pushers.
If you experience slowness with notifications sending to clients -
Client-Reader.
If you experience slowness when clients login and sync their chat rooms -
Synchrotron.
If you experience slowness when rooms are active -
Federation-x.
If you are working in a federated setup, you might want to dedicate federation to workers.
If you are experiencing resources congestion, you can try to reduce the resources requested by each worker. Be aware that
- If the node gets full of memory, it will try to kill containers which are consuming more than what they requested
- If a container consumes more than its memory limit, it will be automatically killed by the node, even if there is free memory left.
You will need to re-run the installer after making these changes for them to take effect.
Worker Types
The ESS Installer has a number of Worker Types, see below for a breakdown of what they are and how they work.
Appservice
- Purpose. Handles interactions with Application Services (appservices) which are third-party applications integrated with the Matrix ecosystem.
- Functions. Manages the sending and receiving of events to/from appservices, such as bots or bridges to other messaging systems.
Background
- Purpose. Executes background tasks that are not time-sensitive and can be processed asynchronously.
- Functions. Includes tasks like database cleanups, generating statistics, and running periodic maintenance jobs.
Client Reader
- Purpose. Serves read requests from clients, which typically includes retrieving room history and state.
- Functions. Offloads read-heavy operations from the main process to improve performance and scalability.
Encryption
- Purpose. Manages encryption-related tasks, ensuring secure communication between clients.
- Functions. Handles encryption and decryption of messages, key exchanges, and other cryptographic operations.
Event Creator
- Purpose. Responsible for creating new events, such as messages or state changes within rooms.
- Functions. Handles the generation and initial processing of events before they are persisted in the database.
Event Persister
- Purpose. Handles the storage of events in the database.
- Functions. Ensures that events are correctly and efficiently written to the storage backend.
Federation Inbound
- Purpose. Manages incoming federation traffic from other Matrix homeservers.
- Functions. Handles events and transactions received from federated servers, ensuring they are processed and integrated into the local server’s state.
Federation Reader
- Purpose. Serves read requests related to federation.
- Functions. Manages queries and data retrieval requests that are part of the federation protocol, improving performance for federated operations.
Federation Sender
- Purpose. Handles outgoing federation traffic to other Matrix homeservers.
- Functions. Manages sending events and transactions to federated servers, ensuring timely and reliable delivery.
Initial Synchrotron
- Purpose. Provides the initial sync for clients when they first connect to the server or after a long period of inactivity.
- Functions. Gathers the necessary state and history to bring the client up to date with the current room state.
Media Repository
- Purpose. Manages the storage and retrieval of media files (images, videos, etc.) uploaded by users.
- Functions. Handles media uploads, downloads, and caching to improve performance and scalability.
Presence Writer
- Purpose. Manages user presence updates (e.g., online, offline, idle).
- Functions. Ensures that presence information is updated and propagated to other users and servers efficiently.
Pusher
- Purpose. Manages push notifications for users.
- Functions. Sends notifications to users about new events, such as messages or mentions, to their devices.
Receipts Account
- Purpose. Handles read receipts from users indicating they have read certain messages.
- Functions. Processes and stores read receipts to keep track of which messages users have acknowledged.
Sso Login
- Purpose. Manages Single Sign-On (SSO) authentication for users.
- Functions. Handles authentication flows for users logging in via SSO providers.
Synchrotron
- Purpose. Handles synchronization (sync) requests from clients.
- Functions. Manages the process of keeping clients updated with the latest state and events in real-time or near real-time.
Typing Persister
- Purpose. Manages typing notifications from users.
- Functions. Ensures typing indicators are processed and stored, and updates are sent to relevant clients.
User Dir
- Purpose. Manages the user directory, which allows users to search for other users on the server.
- Functions. Maintains and queries the user directory, improving search performance and accuracy.
Frontend Proxy
- Purpose. Acts as a reverse proxy for incoming HTTP traffic, distributing it to the appropriate worker processes.
- Functions. Balances load and manages connections to improve scalability and fault tolerance.
Kubernetes Override Sections

Found in under Advanced in any section where you configure a component of the installer, under the Kubernetes heading. Here you can override Kubernetes configuration for each component.
Common
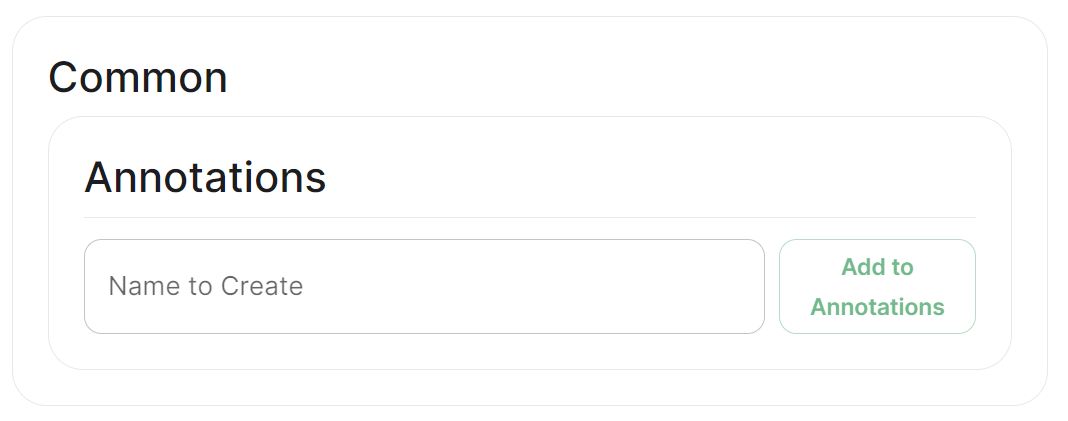
Annotations
In Kubernetes, annotations are key-value pairs associated with Kubernetes objects like pods, services, and nodes. Annotations are meant to be used for non-identifying metadata and are typically used to provide additional information about the objects. Unlike labels, which are used for identification and organization, annotations are more free-form and can contain arbitrary data.
Annotations are often used for various purposes, such as:
-
Documentation.
Providing additional information about a resource that might be useful for administrators or developers. -
Tooling Integration.
Integrating with external tools or automation systems that rely on specific metadata. -
Customisation.
Storing configuration information that affects the behaviour of controllers, operators, or custom tooling. -
Audit Trailing.
Capturing additional information for audit or tracking purposes.
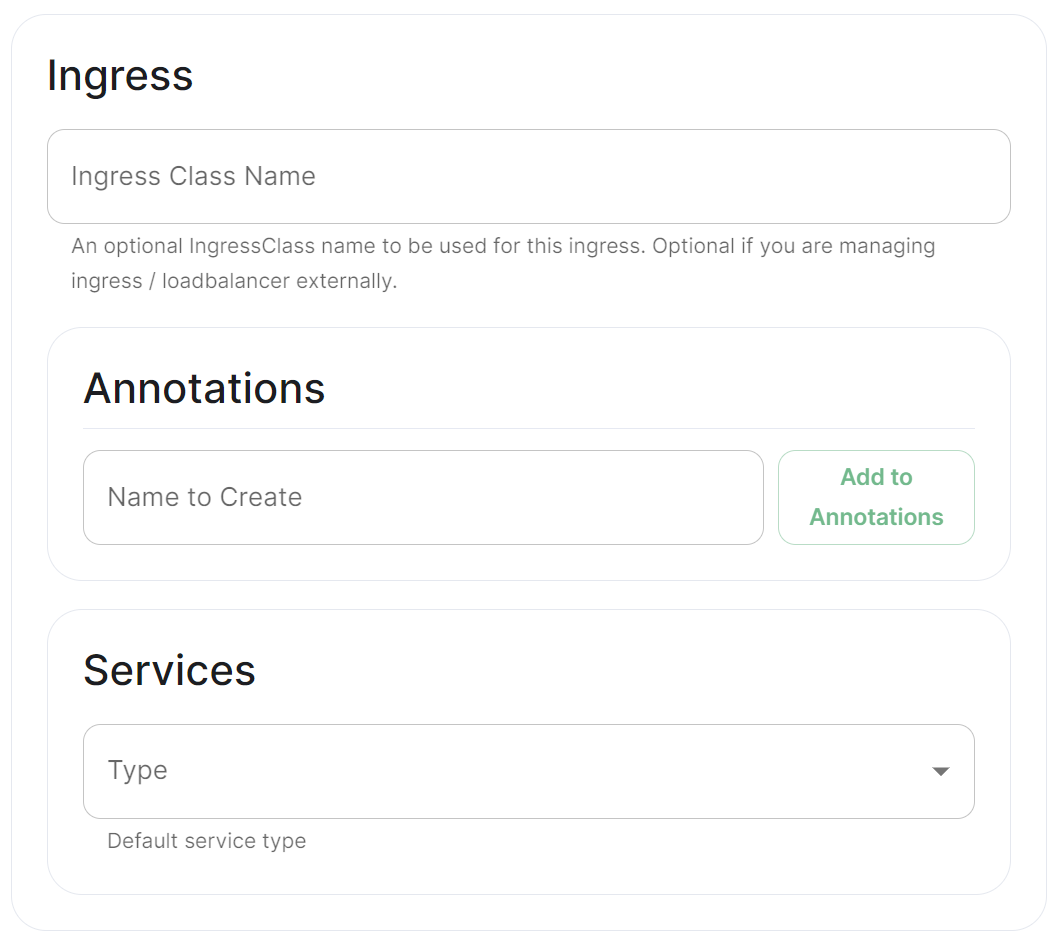
Ingress
 |
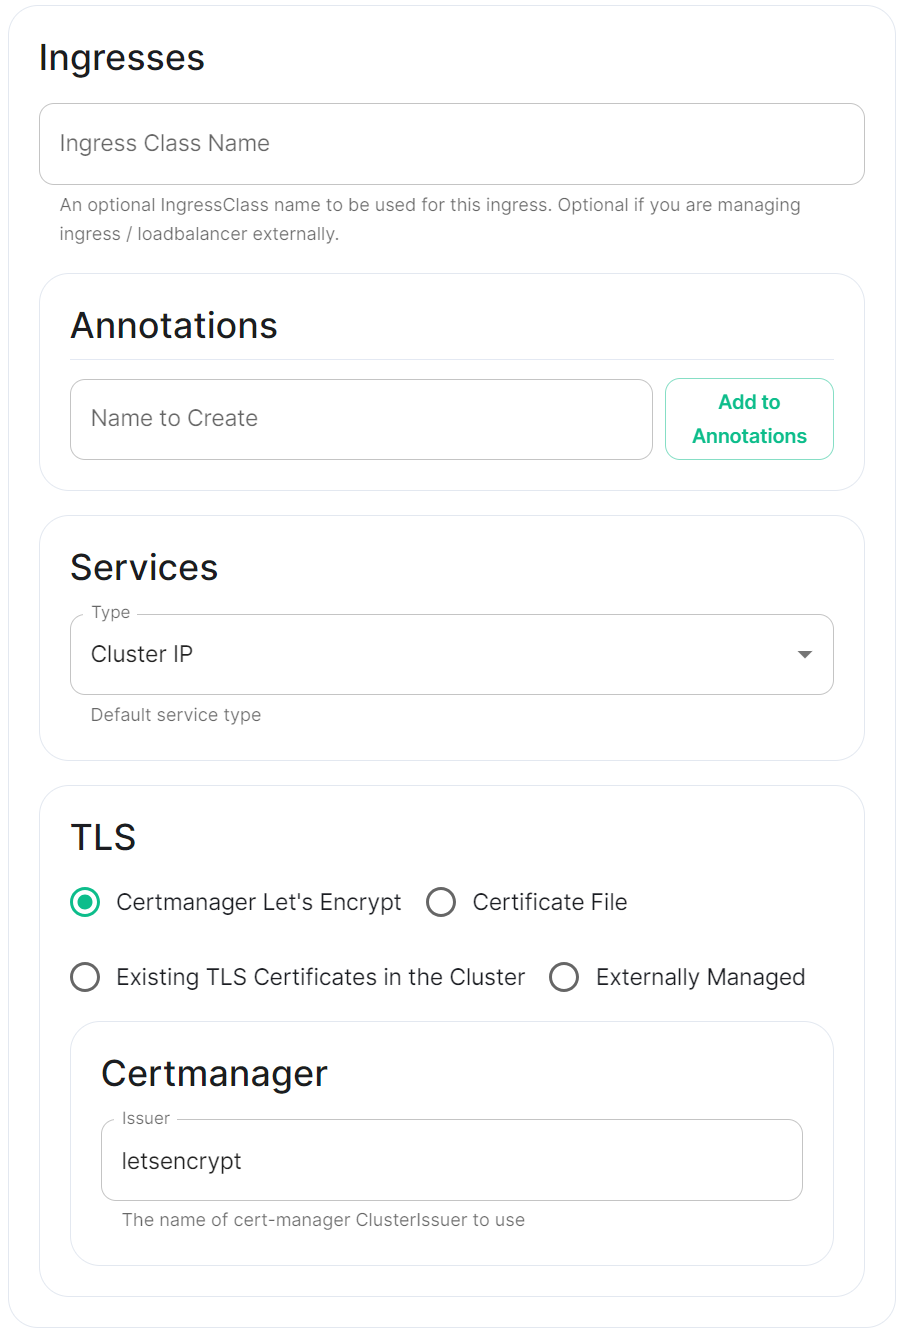 |
Annotations
See explanation of annotations above
Services
Depending on the component you are viewing, you may see Limits and Requests broken out for each sub-component applicable to that component. When configuring Element Web you will only see the Limits and Requests config, for Integrator however, you will see Limits and Requests for each sub-component; Appstore; Integrator; Modular Widgets; and Scalar Web.
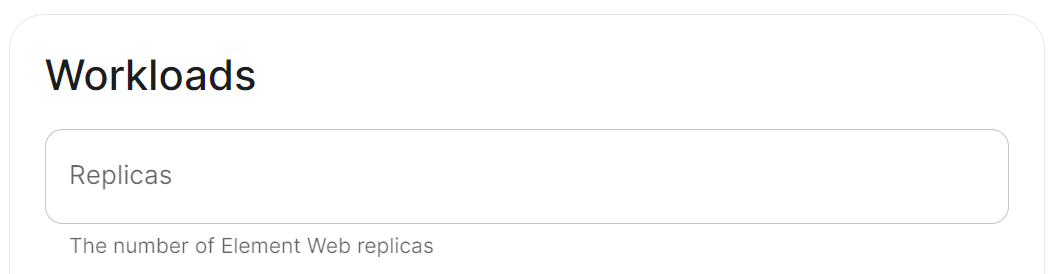
Workloads
Annotations
See explanation of annotations above
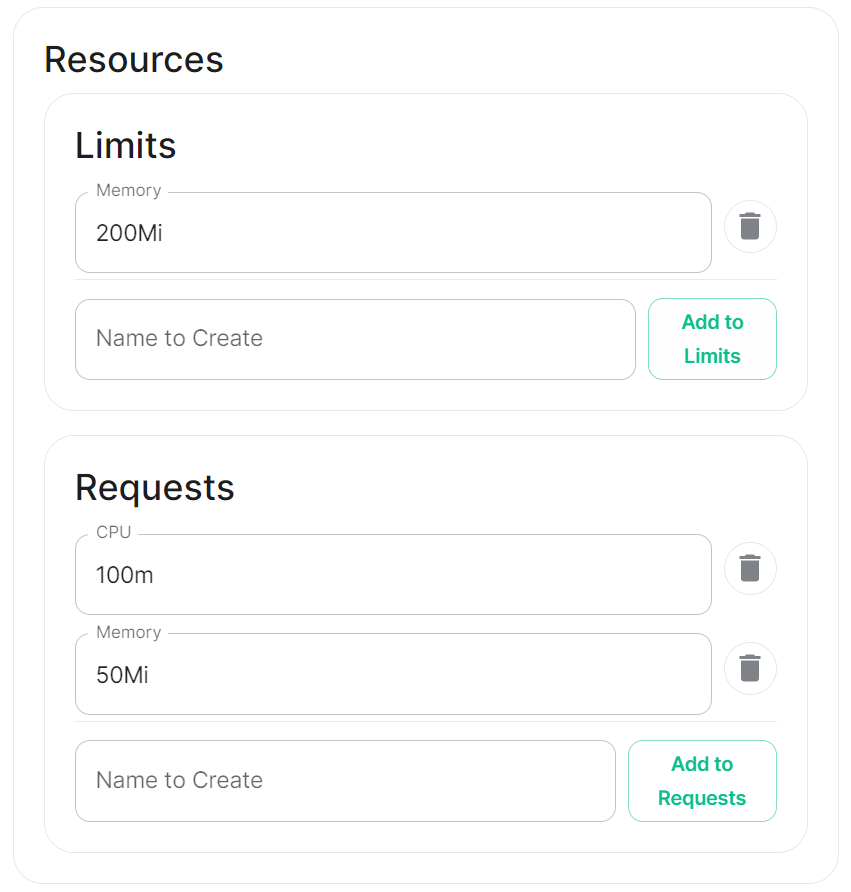
Resources
 |
 |
Depending on the component you are viewing, you may see Limits and Requests broken out for each sub-component applicable to that component. When configuring Element Web you will only see the Limits and Requests config, for Integrator however, you will see Limits and Requests for each sub-component; Appstore; Integrator; Modular Widgets; and Scalar Web.
Limits
Requests
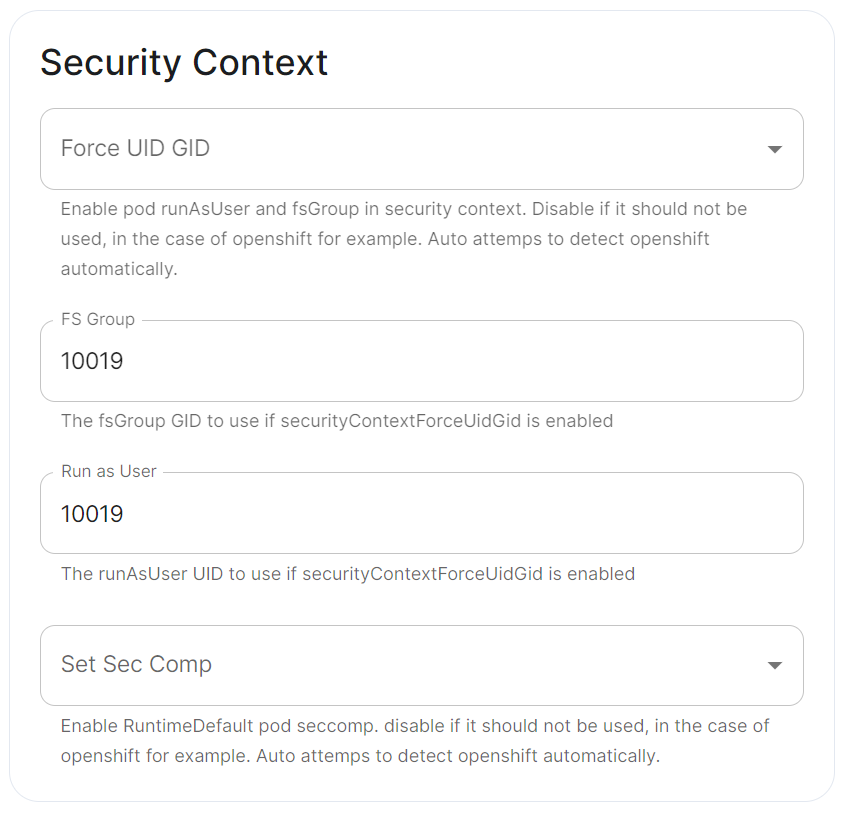
Security Context
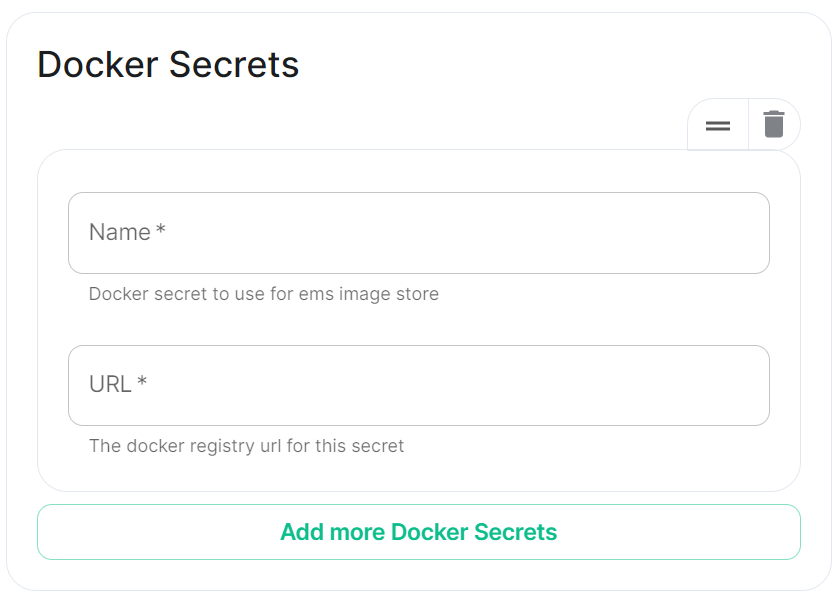
Docker Secrets
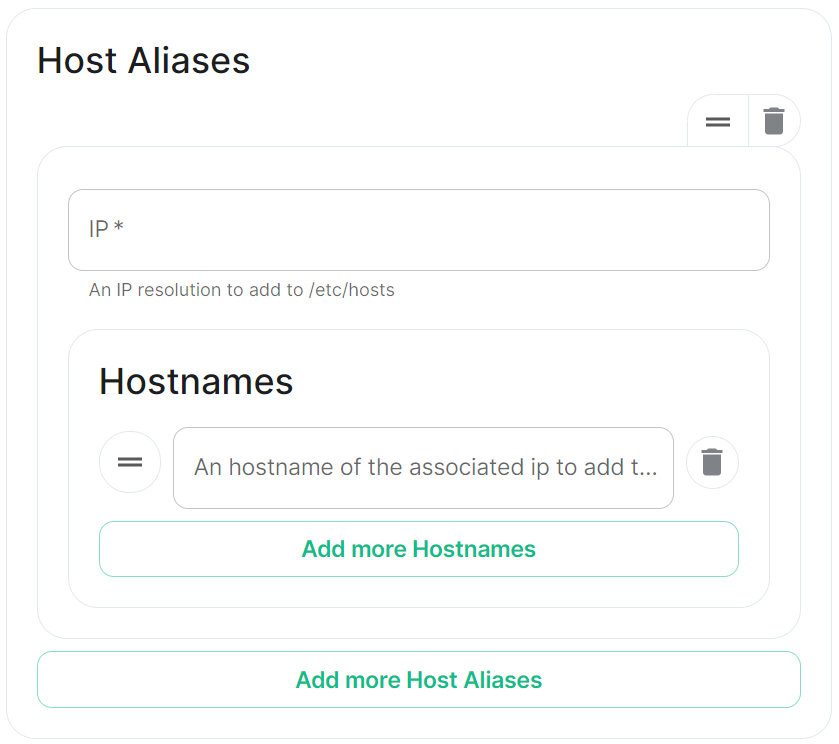
Host Aliases
Customise Containers used by ESS
How to change an image used by a container deployed by ESS.
In specific use cases you might want to change the image used for a specific pod, for example, to add additional contents, change web clients features, etc. In general the steps to do this involve:
- Creating a new ConfigMap definition with the overrides you need to configure, then injecting it into the cluster.
- Configuring the installer to use the new Images Digests Config Map.
- Generating a secret for the registry (if it requires authentication) and adding it to ESS.
We strongly advise against customising any pods. Customised containers are not supported and may break your setup so we encourage you to first raise your requirements to Support where we can best advise on them.
Non-Airgapped Environments
Creating the new Images Digests Config Map
In order to override images used by ESS during the install, you will need to inject a new ConfigMap which specifies the image to use for each component. To do that, you will need to inject a ConfigMap. It's structure maps the components of the ESS, all of them can be overridden :
Config Example
data:
  images_digests: |# Copyright 2023 New Vector Ltd
    adminbot:
      access_element_web:
      haproxy:
      pipe:
    auditbot:
      access_element_web:
      haproxy:
      pipe:
    element_call:
      element_call:
      sfu:
      jwt:
      redis:
    element_web:
      element_web:
    groupsync:
      groupsync:
    hookshot:
      hookshot:
    hydrogen:
      hydrogen:
    integrator:
      integrator:
      modular_widgets:
      appstore:
    irc_bridges:
      irc_bridges:
    jitsi:
      jicofo:
      jvb:
      prosody:
      web:
      sysctl:
      prometheus_exporter:
      haproxy:
      user_verification_service:
    matrix_authentication_service:
      init:
      matrix_authentication_service:
    secure_border_gateway:
      secure_border_gateway:
    sip_bridge:
      sip_bridge:
    skype_for_business_bridge:
      skype_for_business_bridge:
    sliding_sync:
      api:
      poller:
    sydent:
      sydent:
    sygnal:
      sygnal:
    synapse:
      haproxy:
      redis:
      synapse:
    synapse_admin:
      synapse_admin:
    telegram_bridge:
      telegram_bridge:
    well_known_delegation:
      well_known_delegation:
    xmpp_bridge:
      xmpp_bridge:
Each container on this tree needs at least the following properties to override the source of download :
image_repository_path: elementdeployment/vectorim/element-web
image_repository_server: localregistry.local
You can also override the image tag and the image digest if you want to enforce using digests in your deployment :
image_digest: sha256:ee01604ac0ec8ed4b56d96589976bd84b6eaca52e7a506de0444b15a363a6967
image_tag: v0.2.2
For example, the required ConfigMap manifest (e.g. images_digest_configmap.yml) format would be, to override the element_web/element_web container source path :
Config Example
apiVersion: v1
kind: ConfigMap
metadata:
  name: config_map_name
  namespace: namespace_of_your_deployment
data:
  images_digests: |
    element_web:
      element_web:
        image_repository_path: mycompany/custom-element-web
        image_repository_server: docker.io
        image_tag: v2.1.1-patched
Notes:
- the
image_digest:may need to be regenerated, or it can be removed. - The
image_repository_pathneeds to reflect the path in your local repository. - The
image_repository_servershould be replaced with your local repository URL
The new ConfigMap can then be injected into the cluster with:
kubectl apply -f images_digest_configmap.yml -n <namespace of your deployment>
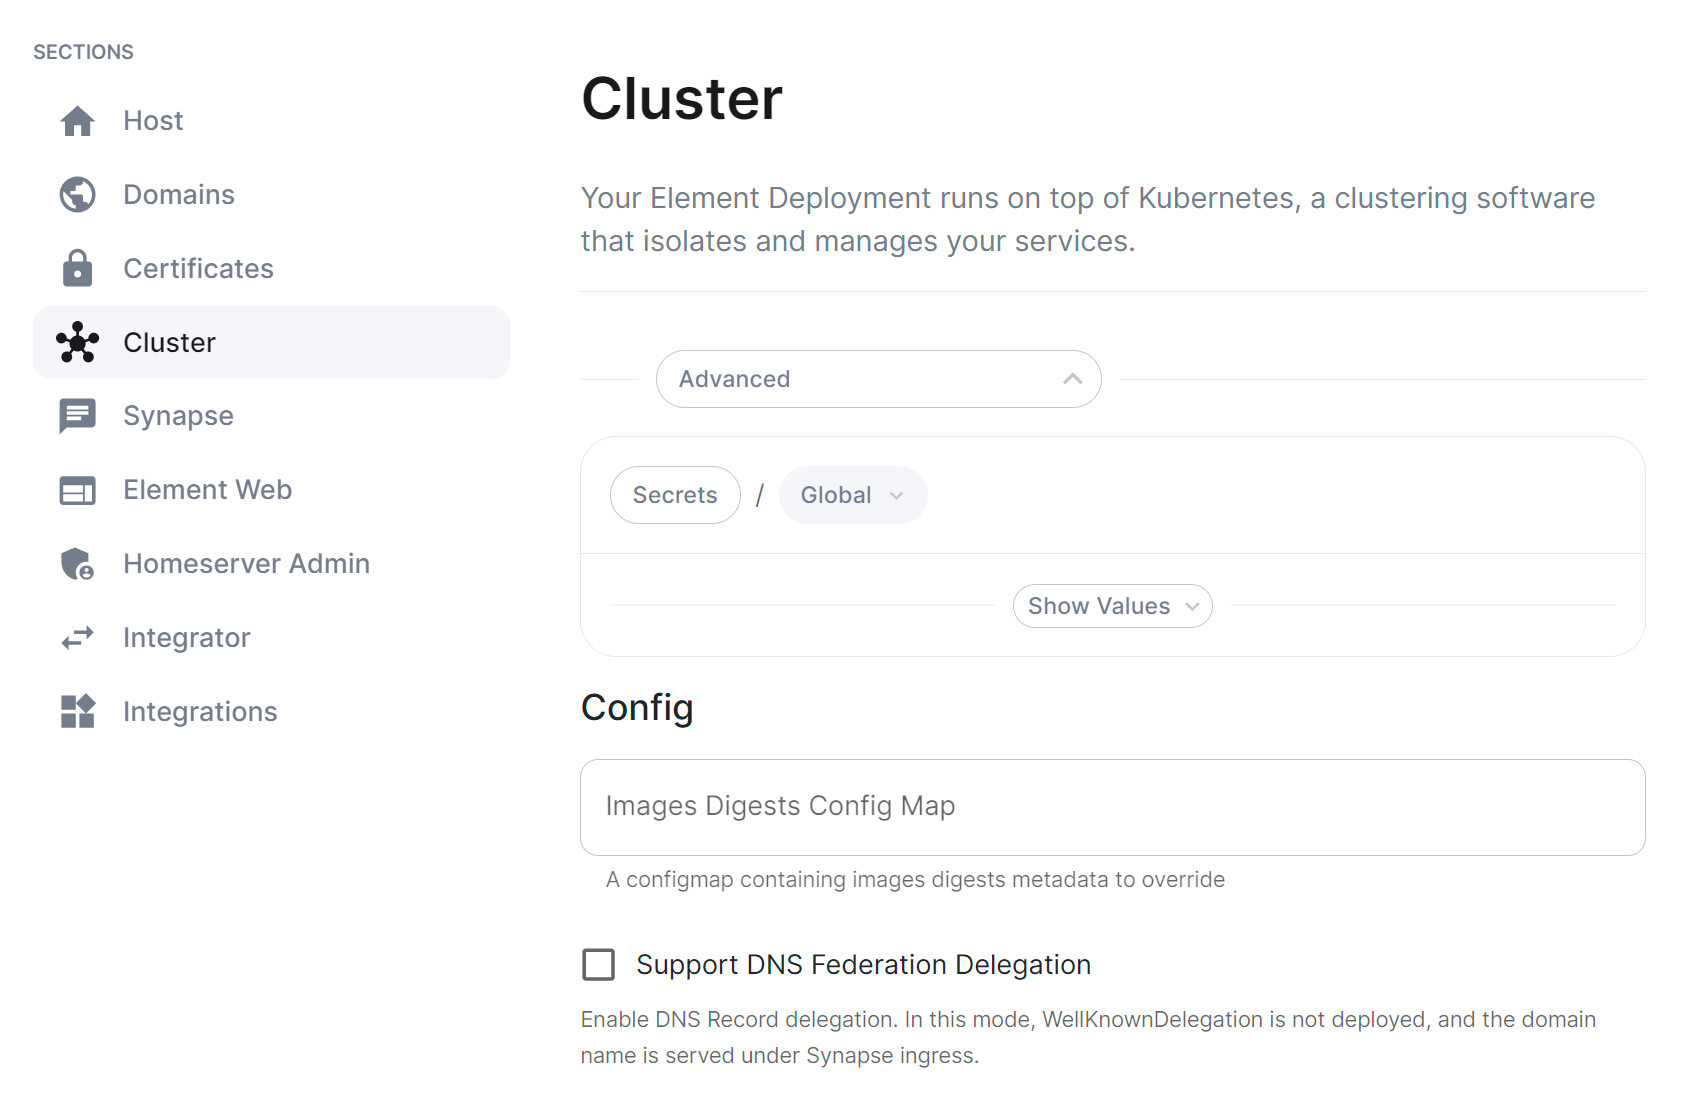
Configuring the installer
You will also need to configure the ESS Installer to use the new Images Digests Config Map by adding the <config map name> into the Cluster advanced section.
Supplying registry credentials
If your registry requires authentication, you will need to create a new secret. So for example, if your registry is called myregistry and the URL of the registry is myregistry.tld, the command would be:
kubectl create secret docker-registry myregistry --docker-username=<registry user> --docker-password=<registry password> --docker-server=myregistry.tld -n <your namespace>
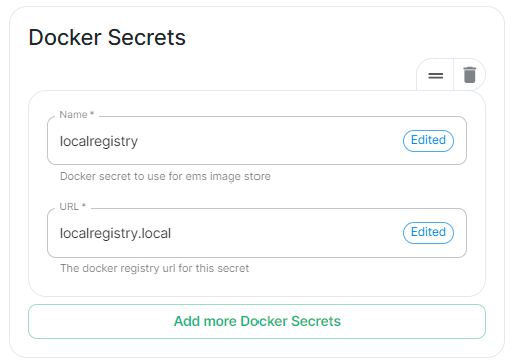
The new secret can then be added into the ESS Installer GUI advanced cluster Docker Secrets:
Airgapped Environments
To perform these actions, you will need the airgapped archive extracted onto a host with an internet connection:
-
Open a terminal, you will be using the
cranebinary found within the airgapped directory extracted. Firstly make sure to authenticate with any of the registries you will be downloading from using:airgapped/utils/crane auth login REGISTRY.DOMAIN -u EMS_USERNAME -p EMS_TOKENYou will need to do this for both
gchr.ioandgitlab-registry:airgapped/utils/crane auth login gitlab-registry.matrix.org -u EMS_USERNAME -p EMS_TOKEN airgapped/utils/crane auth login ghcr.io -u EMS_USERNAME -p EMS_TOKEN -
Use the following to download the required image:
airgapped/utils/crane pull --format tarball <imagenanme> image.tarNote:
<imagename>should be formatted like soregistry/organisation/repo:version, for example, to download the Element Call Version 0.5.12 image, the<imagename>would beghcr.io/vector-im/element-call:v0.5.12airgapped/utils/crane pull --format tarball ghcr.io/vector-im/element-call:v0.5.12 image.tar- For
registry.element.ioyou will need to useskopeoinstead i.e.:skopeo copy docker://registry.element.io/group-sync:v0.13.7-dbg docker-archive://$(pwd)/gsync-dbg.tar
- For
-
The generate the image digest (used in the next step). Continuing the Element Call Version 0.5.12 example, use the below command to return the image digest string:
airgapped/utils/crane --platform amd64 digest --tarball image.tarReturns:
sha256:f16c6ef5954135fb4e4e0af6b3cb174e641cd2cbee901b1262b2fdf05ddcedfc -
Copy
image.tarinto theairgapped/imagesfolder, renaming it to the digest string generated in step 3,<digest>.tarexcluding thesha256:prefix. For our Element Call Version 0.5.12 example, the filename would be:f16c6ef5954135fb4e4e0af6b3cb174e641cd2cbee901b1262b2fdf05ddcedfc.tar -
Edit the
images_digests.ymlfile also found in theairgapped/imagesfolder, like so:<component_name>: <component_image>: image_digest: sha256:<digest> image_repository_path: <organisation>/<repo> image_repository_server: <registry> image_tag: <new version>For our Element Call Version 0.5.12 example, you would update like so:
  element_call:
    element_call:
      image_digest: sha256:f16c6ef5954135fb4e4e0af6b3cb174e641cd2cbee901b1262b2fdf05ddcedfc
      image_repository_path: vector-im/element-call
      image_repository_server: ghcr.io
      image_tag: v0.5.12
Handling new releases of ESS
If you are overriding image, you will need to make sure that your images are compatible with the new releases of ESS. You can use a staging environment to tests the upgrades for example.
Secrets
Find out more about the Secrets block found under each Sections' Advanced configuration options
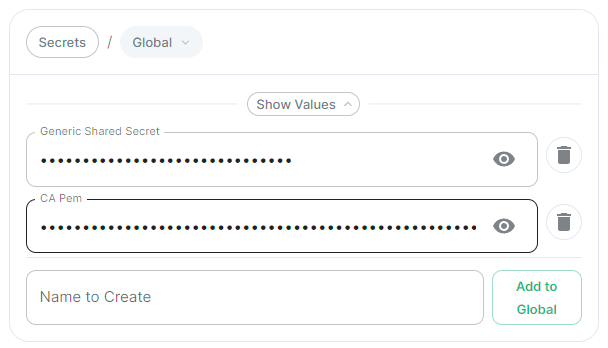
Under 'Advanced' in each section, you may find a block listing all the associated secrets configured as part of this section. This directly correlates to your secrets.yml and will allow you to remove secrets no longer required. For example, on the Cluster Section you may have uploaded a Certificate Authority CA.pem, you can use this block to remove it should it no longer be required.
It is not however advised to modify the contents of secrets from this view, you should always do so via the associated UI that configures it in the first place, see the below example from the Cluster section.
CA Pem
Config Example
-
secrets.ymlapiVersion: v1 kind: Secret metadata: name: global namespace: element-onprem data: # Added to the `global`, `element-onprem` secret as `ca.pem` under the `data` section. Other values may also be present here. ca.pem: >- base64encodedCAinPEMformatString
If you have uploaded a Certificate Authority certificate, you will find it listed in this section, if a certificate was uploaded in error, you can use the 'Delete' button next to the entry to remove it.
Generic Shared Secret
Config Example
-
secrets.ymlapiVersion: v1 kind: Secret metadata: name: global namespace: element-onprem data: # Added to the `global`, `element-onprem` secret as `genericSharedSecret` under the `data` section. Other values may also be present here. genericSharedSecret: QmdrWkVzRE5aVFJSOTNKWVJGNXROTG10UTFMVWF2
Like with the CA certificate option above, this will be present due to the Generic Shared Secret, this is auto-generated and will be replaced if you change it there (and click 'Save' / 'Continue'). It is not advised to edit this property here.
How to run a Webserver on Standalone Deployments
This guide is does not come with support by Element. It is not part of the Element Server Suite (ESS) product. Use at your own risk. Remember you are responsible of maintaining this software stack yourself.
Some config options require a web content to be served. For example:
- Changing Element Web appearance with custom background pictures.
- Providing a HomePage for display in Element Web.
- Providing a Guide PDF from your server in an airgapped environment.
One way to provide this content is to run a web server in the same microk8s Kubernetes Cluster as the Element Enterprise Suite.
You should first consider using an existing webserver before installing and maintaining an additional webserver for these requirements.
The following guide describes the steps to setup the Bitnami Apache helm chart in the Standalone microk8s cluster setup by Element Server Suite.
Requirements:
- a DNS entry pages.BASEDOMAIN.
- a Certificate (private key + certificate) for pages.BASEDOMAIN
- an installed standalone Element Server Suite setup
- access to the server on the command line
Results:
- a web server that runs in the
mircok8scluster - a directory
/var/www/apache-contentto place and modify web content like homepage, backgrounds and guides.
This guide is applicable to the Single Node deployment of Element Server Suite but can be used for guidance on how to host a webserver in other Kubernetes Clusters as well.
You can use any webserver that you like, in this example we will user the Bitnami Apache chart.
We need helm version 3. You can follow this Guide or ask microk8s to install helm3.
Installing Prerequisites
Enabling Helm3 with microk8s
$ microk8s enable helm3
Infer repository core for addon helm3
Enabling Helm 3
Fetching helm version v3.8.0.
  % Total    % Received % Xferd  Average Speed   Time    Time     Time  Current
                                 Dload  Upload   Total   Spent    Left  Speed
100 12.9M  100 12.9M    0     0  17.4M      0 --:--:-- --:--:-- --:--:-- 17.4M
Helm 3 is enabled
Let's check if it is working
$ microk8s.helm3 version
version.BuildInfo{Version:"v3.8.0", GitCommit:"d14138609b01886f544b2025f5000351c9eb092e", GitTreeState:"clean", GoVersion:"go1.17.5"}
Create and Alias for helm
echo alias helm=microk8s.helm3 >> ~/.bashrc
source ~/.bashrc
Enable the Bitnami Helm Chart repository
Add the bitnami repository
helm repo add bitnami https://charts.bitnami.com/bitnami
Update the repo information
helm repo update
Preparation and Configuration
Prepare the Web-Server Content
Create a directory to supply content:
sudo mkdir /var/www/apache-content
Create a homepage home.html, i.e.:
<h2 style="text-align:center"><br />
Welcome to the Element Chat Server.</h2>
<p style="text-align:center">You can find a <a href="https://static.element.io/pdfs/element-user-guide.pdf">Getting Started Guide here</a></p>
<p style="text-align:center">Powered by <a href="https://matrix.org/">Matrix</a>, provided by <a href="http://element.io">Element</a>.</p>
<p style="text-align:center"><a href="https://element.BASEDOMAIN/#/directory">Explore rooms</a></p>
<p style="text-align:center"><strong><span style="font-size:20px"><span style="color:#c0392b">Create a Key Backup & Passphrase now!<br />
(see Getting Started Guite p. 5)</span></span></strong></p>
Put your content into the apache-content directory:
cp /tmp/background.jpg /apache-content/
cp /tmp/home.html ~element/apache-content/
There are multiple ways to provide this content to the apache pod. The bitnami helm chart user ConfigMaps, Physical Volumes or a Git Repository.
ConfigMaps are a good choice for smaller amounts of data. There is a hard limit of 1MiB on ConfigMaps. So if all your data is not more that 1MiB, the config map is a good choice for you.
Physical Volumes are a good choice for larger amounts of data. There are several choices for backing storage available. In the context of the standalone deployments of ESS a Physical Hostpath is the most practical. HostPath is not a good solution for mutli node k8s clusters, unless you pin a pod to a certain node. Pinning the pod to a single node would put the workload at risk, should that node go down.
Git Repository is a favourite as it versions the content and you track and revert to earlier states easily. The bitnami apache helm chart is built in a way that updates in regular intervals to your latest changes.
We are selecting the Physical Volume option to serve content in this case. Our instance of Microk8s comes with the Hostpath storage addon enabled.
Define the physical volume:
cat <<EOF>pv-volume.yaml
apiVersion: v1
kind: PersistentVolume
metadata:
  name: apache-content-pv
  labels:
    type: local
spec:
  storageClassName: microk8s-hostpath
  persistentVolumeReclaimPolicy: Retain
  capacity:
    storage: 100Mi
  accessModes:
    - ReadWriteOnce
  hostPath:
    path: "/var/www/apache-content"
EOF
Apply to the cluster
kubectl apply -f pv-volume.yaml
Next we need a Physical Volume Claim:
cat <<EOF>pv-claim.yaml
apiVersion: v1
kind: PersistentVolumeClaim
metadata:
  name: apache-content-pvc
spec:
  volumeName: apache-content-pv
  storageClassName: microk8s-hostpath
  accessModes: [ReadWriteOnce]
  resources: { requests: { storage: 100Mi } }
EOF
Apply to the cluster to create the pvc
kubectl apply -f pv-claim.yaml
Configure the Helm Chart
We need to add configurations to adjust the apache deployment to our needs. The K8s service should be switched to ClusterIP. The Single Node deployment includes an Ingress configuration through nginx that we can use to route traffic to this webserver. The name of the ingressClass is "public". We will need to provide a hostname. This name needs to be resolvable through DNS. This could be done through the wildcard entry for *.$BASEDOMAIN that you might already have. You will need a certificate and certificate private key to secure this connection through TLS.
The full list of configuration options of this chart is explained in the bitnami repository here
Create a file called apache-values.yml in the home directory of your element user directory.
Remember to replace BASEDOMAIN with the correct value for your deployment.
cat <<EOF>apache-values.yaml
service:
  type: ClusterIP
ingress:
  enabled: true
  ingressClassName: "public"
  hostname: pages.BASEDOMAIN
htdocsPVC: apache-content-pvc
EOF
Deployment
Deploy the Apache Helm Chart
Now we are ready to deploy the apache helm chart
helm install myhomepage -f apache-values.yaml oci://registry-1.docker.io/bitnamicharts/apache
Manage the deployment
List the deployed helm charts:
$ helm list
NAME      	NAMESPACE	REVISION	UPDATED                                	STATUS  	CHART        	APP VERSION
myhomepage	default  	1       	2023-09-06 14:46:33.352124975 +0000 UTC	deployed	apache-10.1.0	2.4.57
Get more details:
$ helm status myhomepage
NAME: myhomepage
LAST DEPLOYED: Wed Sep  6 14:46:33 2023
NAMESPACE: default
STATUS: deployed
REVISION: 1
TEST SUITE: None
NOTES:
CHART NAME: apache
CHART VERSION: 10.1.0
APP VERSION: 2.4.57

** Please be patient while the chart is being deployed **

1. Get the Apache URL by running:

  You should be able to access your new Apache installation through:
      - http://pages.lutz-gui.sales-demos.element.io
If you need to update the deployment, modify the required apache-values.yaml and run :
helm upgrade myhomepage -f apache-values.yaml oci://registry-1.docker.io/bitnamicharts/apache
If you don't want the deployment any more, you can remove it.
helm uninstall myhomepage
Secure the deployment with certificates
If you are in a connected environment, you can rely on cert-manager to create certificates and secrets for you.
Cert-manager with letsencrypt
If you have cert-manager enabled. You will just need to add the right annotations to the ingress of your deployment. Modify you apache-values.yaml and add these lines to the ingress block :
  tls: true
  annotations:
    cert-manager.io/cluster-issuer: letsencrypt
    kubernetes.io/ingress.class: public
You will need to upgrade your deployment to reflect these changes:
helm upgrade myhomepage -f apache-values.yaml oci://registry-1.docker.io/bitnamicharts/apache
Custom Certificates
There are situations in which you want custom certificates instead. These can be used by modifying your apache-values.yaml. Add the following lines to the ingress block in the apache-values.yaml. Take care to get the indentation right. Replace the ... with your data.
  tls: true
  extraTls:
  - hosts:
    - pages.lutz-gui.sales-demos.element.io
    secretName: "pages.lutz-gui.sales-demos.element.io-tls"
  secrets:
    - name: pages.lutz-gui.sales-demos.element.io-tls
      key: |-
        -----BEGIN RSA PRIVATE KEY-----
        ...
        -----END RSA PRIVATE KEY-----
      certificate: |-
        -----BEGIN CERTIFICATE-----
        ...
        -----END CERTIFICATE-----
You will need to upgrade your deployment to reflect these changes:
helm upgrade myhomepage -f apache-values.yaml oci://registry-1.docker.io/bitnamicharts/apache
Tips and Tricks
You can make your life easier by using bash completing and an alias for kubectl. You will need to have the bash-completion package installed as a prerequisite.
For all users on the system:
kubectl completion bash | sudo tee /etc/bash_completion.d/kubectl > /dev/null
Set an aias for kubectl for your user:
echo 'alias k=kubectl' >>~/.bashrc
Enable auto-completion for your alias
echo 'complete -o default -F __start_kubectl k' >>~/.bashrc
After reloading your Shell, you can now enjoy auto completion for your k ( kubectl ) commands.
ESS CRDs support in ArgoCD
ArgoCD can support getting the ESS CRDs Status as resource health using Custom Health Checks
You need to configure the following under the configmap argocd-cm of argocd :
data:
  resource.customizations: |
    matrix.element.io/*:
      health.lua: |
        hs = {}
        if obj.status ~= nil then
          if obj.status.conditions ~= nil then
            for i, condition in ipairs(obj.status.conditions) do
              if condition.type == "Failure" and condition.status == "True" then
                hs.status = "Degraded"
                hs.message = condition.message
                return hs
              end
              if condition.type == "Running" and condition.status == "True" and condition.reason ~= "Successful" then
                hs.status = "Progressing"
                hs.message = condition.message
                return hs
              end
              if condition.type == "Available" and condition.status == "True" then
                hs.status = "Healthy"
                hs.message = condition.message
                return hs
              end
              if condition.type == "Available" and condition.status == "False" then
                hs.status = "Degraded"
                hs.message = condition.message
                return hs
              end
              if condition.type == "Successful" and condition.status == "True" then
                hs.status = "Healthy"
                hs.message = condition.message
                return hs
              end
            end
          end
        end

        hs.status = "Progressing"
        hs.message = "Waiting for the CR to start to converge..."
        return hs
    EOT
Verifying ESS releases against Cosign
Cosign ESS Verification Key
ESS does not use Cosign transaction log to be able to support airgapped deployment. We are instead relying on a public key that you can ask if you need to run image verification in your cluster.
The ESS Cosign public key is the following one :
-----BEGIN PUBLIC KEY-----
MFkwEwYHKoZIzj0CAQYIKoZIzj0DAQcDQgAE1Lc+7BqkqD+0XYft05CeXto/Ga1Y
DKNk3o48PIJ2JMrq3mzw13/m5rzlGjdgJCs6yctf4+UdACZx5WSiIWTFbQ==
-----END PUBLIC KEY-----
Verifying manually
To verify a container against ESS Keys, you will have to run the following command :
- Operator:
cosign verify registry.element.io/ess-operator:<version> --key cosign.pub - Updater:
cosign verify registry.element.io/ess-updater:<version> --key cosign.pub
If you are running in an airgapped environment, then you will need to append --insecure-ignore-tlog=true to the above commands
Verifying automatically
You will have to setup and configure your SIGStore Admission Policy to use ESS Public Key.
Notifications, MDM & Push Gateway
The stock Android and iOS Apps will use an Element owned Push Gateway to send Notification via the Apple or Google Notifiction Services.
The URL of our push gateway is https://matrix.org/_matrix/push/v1/notify
The apps will on startup register with the Google or Apple Notification Services (APNs) and request a push_notification_client_identifier. If notifications need sending, the homeserver will use the configured Push Gateway to sent notification through the APNs.
What is a Notification?
A notification will not contain sensitive content. This is what notificatons actually look like :
▿ 5 elements
  ▿ 0 : 2 elements
    ▿ key : AnyHashable("unread_count")
      - value : "unread_count"
    - value : 1
  ▿ 1 : 2 elements
    ▿ key : AnyHashable("pusher_notification_client_identifier")
      - value : "pusher_notification_client_identifier"
    - value : ad0bd22bb90fabde45429b3b79cdbba12bd86f3dafb80ea22d2b1343995d8418
  ▿ 2 : 2 elements
    ▿ key : AnyHashable("aps")
      - value : "aps"
    ▿ value : 2 elements
      ▿ 0 : 2 elements
        - key : alert
        ▿ value : 2 elements
          ▿ 0 : 2 elements
            - key : loc-key
            - value : Notification
          ▿ 1 : 2 elements
            - key : loc-args
            - value : 0 elements
      ▿ 1 : 2 elements
        - key : mutable-content
        - value : 1
  ▿ 3 : 2 elements
    ▿ key : AnyHashable("room_id")
      - value : "room_id"
    - value : !vkibNVqwhZVOaNskRU:matrix.org
  ▿ 4 : 2 elements
    ▿ key : AnyHashable("event_id")
      - value : "event_id"
    - value : $0cTr40iZmOd3Aj0c65e_7F6NNVF_BwzEFpyXuMEp29g
We recommend that you use the stock Element Apps from PlayStore or Applestore together with the Push Gateway that we as Element host.
Mobile Device Management (MDM)
You can use Mobile Device Management to configure and roll out Mobil Applications. To be able to configure mobile apps this way, the app needs to implement certain interfaces in a standard way. This is called AppConfig.
The Android Element App does not support AppConfig currently. You will need to rebuild the apk to include changes like a different homeserver or a diffrent pusherURL.
The iOS Element App got enabled for AppConfig in version 1.11.2. this allows the change of the following parameters and keys without the need to recompile the app.
- im.vector.app.serverConfigDefaultHomeserverUrlString
- im.vector.app.clientPermalinkBaseUrl
- im.vector.app.serverConfigSygnalAPIUrlString
If you employ a Mobile Device Management solution like e.g. VmWare Workspace One, you will need to configure your iOS Element app with these keys as documented here in section Publish and update Managed AppConfig for your app in Workspace ONE.
Depending on the brand of MDM you are using, you can create the required keys manually, or enable these setting with an XML file. The XML file might look like this :
<managedAppConfiguration>
     <version>1</version>
     <bundleId>im.vector.app</bundleId>
     <dict>
          <string keyName="im.vector.app.serverConfigDefaultHomeserverUrlString">
               <defaultValue>
                    <value>https://matrix.BASEDOMAIN</value>
               </defaultValue>
          </string>
          <string keyName="im.vector.app.clientPermalinkBaseUrl">
               <defaultValue>
                    <value>https://messenger.BASEDOMAIN</value>
               </defaultValue>
          </string>
     </dict>
</managedAppConfiguration>
Using your own Push Gateway ( Sygnal )
Some organization still feel uncomfortable with using our Push Gateway. You are able to use your own push gateway (e.g. Sygnal) if you want.
You can install Sygnal as an integration with the Element Server Suite.
During the App Upload process a private key is created. We as Element Company retain and use that key on our Push infrastructure. This is why you can not use the stock Element Apps, but will need to upload your own version of the Element App. This will give you access to your own private notification key that is bound to the app you uploaded.
You will need to configure your Sygnal with the private key of your Element App.
You will need to set the "im.vector.app.serverConfigSygnalAPIUrlString" for the iOS App or the equilivant in the Android App Source code.
Helm Chart Installation
Introduction
This document will walk you through how to get started with our Element Server Suite Helm Charts. These charts are provided to be used in environments which typically deploy applications by helm charts. If you are unfamiliar with helm charts, we'd highly recommend that you start with our Enterprise Installer.
General concepts
ESS deployment rely on the following components to deploy the workloads on a kubernetes cluster :
- Updater : It reads an ElementDeployment CRD manifest, and generates the associated individual Element CRDs manifests linked together
- Operator : It reads the individual Element CRDs manifests to generates the associated kubernetes workloads
- ElementDeployment : This CRD is a simple structure following the pattern :
spec:
  global:
    k8s:
      # Global settings that will be applied by default to all workloads if not forced locally. This is where you will be able to configure a default ingress certificate, default number of replicas on the deployments, etc.
    config:
      # Global configuration that can be used by every element component
    secretName: # The global secret name. Required secrets keys can be found in the description of this field using `kubectl explain`. Every config named `<foo>SecretKey` will point to a secret key containing the secret targetted by this secret name.
  components:
    <component name>:
      k8s:
        # Local kubernetes configuration of this component. You can override here the global values to force a certain behaviour for each components.
      config:
        # This component configuration
      secretName: # The component secret name containing secret values. Required secrets keys can be found in the description of this field using `kubectl explain`.  Every config named `<foo>SecretKey` will point to a secret key containing the secret targetted by this secret name.
   <another component>:
     ...
Any change to the ElementDeployment manifest deployed in the namespace will trigger a reconciliation loop. This loop will update the Element manifests read by the Operator. It will again trigger a reconciliation loop in the Operator process, which will update kubernetes workloads accordingly.
If you manually change a workload, it will trigger a reconciliation loop and the Operator will override your change on the workload.
The deployment must be managed only through the ElementDeployment CRD.
Installing the Operator and the Updater helm charts
We advise you to deploy the helm charts in one of the deployments model :
- Cluster-Wide deployment : In this mode, the CRDs Conversion Webhook and the controller managers are deployed in their own namespace, separated from ESS deployments. They are able to manage ESS deployments in any namespace of the cluster The install and the upgrade of the helm chart requires cluster admin permissions.
- Namespace-scoped deployment : In this mode, only the CRDs conversion webhooks require cluster admin permissions. The Controller managers are deployed directly in the namespace of the element deployment. The install and the upgrade of ESS does not require cluster admin permissions if the CRDs do not change.
All-in-one deployment (Requires cert-manager)
When cert-manager is present in the cluster, it is possible to use the all-in-one ess-system helm chart to deploy the operator and the updater.
First, let's add the ess-system repository to helm, replace ems_image_store_username and ems_image_store_token with the values provided to you by Element.
helm repo add ess-system https://registry.element.io/helm/ess-system --username
<ems_image_store_username> --password '<ems_image_store_token>'
Cluster-wide deployment
When deploying ESS-System as a cluster-wide deployment, updating ESS requires ClusterAdmin permissions.
Create the following values file :
emsImageStore:
  username: <username>
  password: <password>

element-operator:
  clusterDeployment: true
  deployCrds: true  # Deploys the CRDs and the Conversion Webhooks
  deployCrdRoles: true  # Deploys roles to give permissions to users to manage specific ESS CRs
  deployManager: true  # Deploys the controller managers

element-updater:
  clusterDeployment: true
  deployCrds: true  # Deploys the CRDs and the Conversion Webhooks
  deployCrdRoles: true  # Deploys roles to give permissions to users to manage specific ESS CRs
  deployManager: true  # Deploys the controller managers
Namespace-scoped deployment
When deploying ESS-System as a namespace-scoped deployment, you have to deploy ess-system in two parts :
- One for the CRDs and the conversion webhooks. This part will be managed with ClusterAdmin permissions. These update less often.
- One for the controller managers. This part will be managed with namespace-scoped permissions.
In this mode, the ElementDeployment CR is deployed in the same namespace as the controller-managers.
Create the following values file to deploy the CRDs and the conversion webhooks :
emsImageStore:
  username: <username>
  password: <password>

element-operator:
  clusterDeployment: true
  deployCrds: true  # Deploys the CRDs and the Conversion Webhooks
  deployCrdRoles: false  # Deploys roles to give permissions to users to manage specific ESS CRs
  deployManager: false  # Deploys the controller managers

element-updater:
  clusterDeployment: true
  deployCrds: true  # Deploys the CRDs and the Conversion Webhooks
  deployCrdRoles: false  # Deploys roles to give permissions to users to manage specific ESS CRs
  deployManager: false  # Deploys the controller managers
Create the following values file to deploy the controller managers in their namespace :
emsImageStore:
  username: <username>
  password: <password>

element-operator:
  clusterDeployment: false
  deployCrds: false  # Deploys the CRDs and the Conversion Webhooks
  deployCrdRoles: false  # Deploys roles to give permissions to users to manage specific ESS CRs
  deployManager: true  # Deploys the controller managers

element-updater:
  clusterDeployment: false
  deployCrds: false  # Deploys the CRDs and the Conversion Webhooks
  deployCrdRoles: false  # Deploys roles to give permissions to users to manage specific ESS CRs
  deployManager: true  # Deploys the controller managers
Without cert-manager present on the cluster
First, let's add the element-updater and element-operator repositories to helm, replace ems_image_store_username and ems_image_store_token with the values provided to you by Element.
helm repo add element-updater https://registry.element.io/helm/element-updater --username
<ems_image_store_username> --password '<ems_image_store_token>'
helm repo add element-operator https://registry.element.io/helm/element-operator --username <ems_image_store_username> --password '<ems_image_store_token>'
Now that we have the repositories configured, we can verify this by:
helm repo list
and should see the following in that output:
NAME                    URL
element-operator        https://registry.element.io/helm/element-operator
element-updater         https://registry.element.io/helm/element-updater
N.B. This guide assumes that you are using the element-updater and element-operator namespaces. You can call it whatever you want and if it doesn't exist yet, you can create it with: kubectl create ns <name>.
Generating an image pull secret with EMS credentials
To generate an ems-credentials to be used by your helm chart deployment, you will need to generate an authentication token and palce it in a secret.
kubectl create secret -n element-updater docker-registry ems-credentials --docker-server=registry.element.io --docker-username=<EMSusername> --docker-password=<EMStoken>`
kubectl create secret -n element-operator docker-registry ems-credentials --docker-server=registry.element.io --docker-username=<EMSusername> --docker-password=<EMStoken>`
Generating a TLS secret for the webhook
The conversion webhooks need their own self-signed CA and TLS certificate to be integrated into kubernetes.
For example using easy-rsa :
easyrsa init-pki
easyrsa --batch "--req-cn=ESS-CA`date +%s`" build-ca nopass
easyrsa --subject-alt-name="DNS:element-operator-conversion-webhook.element-operator"\
  --days=10000 \
  build-server-full element-operator-conversion-webhook nopass
easyrsa --subject-alt-name="DNS:element-updater-conversion-webhook.element-updater"\
  --days=10000 \
  build-server-full element-updater-conversion-webhook nopass
Create a secret for each of these two certificates :
kubectl create secret tls element-operator-conversion-webhook --cert=pki/issued/element-operator-conversion-webhook.crt --key=pki/private/element-operator-conversion-webhook.key  --namespace element-operator
kubectl create secret tls element-updater-conversion-webhook --cert=pki/issued/element-updater-conversion-webhook.crt --key=pki/private/element-updater-conversion-webhook.key  --namespace element-updater
Installing the helm chart for the element-updater and the element-operator
Create the following values file to deploy the controller managers in their namespace :
values.element-operator.yml :
clusterDeployment: true
deployCrds: true  # Deploys the CRDs and the Conversion Webhooks
deployCrdRoles: true  # Deploys roles to give permissions to users to manage specific ESS CRs
deployManager: true  # Deploys the controller managers
crds:
  conversionWebhook:
    caBundle: # Paste here the content of `base64 pki/ca.crt -w 0`
    tlsSecretName: element-operator-conversion-webhook
    imagePullSecret: ems-credentials
operator:
  imagePullSecret: ems-credentials
values.element-updater.yml :
clusterDeployment: true
deployCrds: true  # Deploys the CRDs and the Conversion Webhooks
deployCrdRoles: true  # Deploys roles to give permissions to users to manage specific ESS CRs
deployManager: true  # Deploys the controller managers
crds:
  conversionWebhook:
    caBundle: # Paste here the content of `base64 pki/ca.crt -w 0`
    tlsSecretName: element-updater-conversion-webhook
updater:
  imagePullSecret: ems-credentials
Run the helm install command :
helm install element-operator element-operator/element-operator --namespace element-operator -f values.yaml
helm install element-updater element-updater/element-updater --namespace element-updater -f values.yaml
Now at this point, you should have the following 4 containers up and running:
[user@helm ~]$ kubectl get pods -n element-operator
NAMESPACE            NAME                                                   READY   STATUS    RESTARTS        AGE
element-operator     element-operator-controller-manager-c8fc5c47-nzt2t     2/2     Running   0               6m5s
element-operator     element-operator-conversion-webhook-7477d98c9b-xc89s   1/1     Running   0               6m5s
[user@helm ~]$ kubectl get pods -n element-updater
NAMESPACE            NAME                                                   READY   STATUS    RESTARTS        AGE
element-updater      element-updater-controller-manager-6f8476f6cb-74nx5    2/2     Running   0               106s
element-updater      element-updater-conversion-webhook-65ddcbb569-qzbfs    1/1     Running   0               81s
Generating the ElementDeployment CR to Deploy Element Server Suite
Using the ess-stack helm-chart
The ess-stack helm chart is available in the ess-system repository :
helm repo add ess-system https://registry.element.io/helm/ess-system --username
<ems_image_store_username> --password '<ems_image_store_token>'
It will deploy an ElementDeployment CR and its associated secrets from the chart values file.
The values file will contain the following structure :
- Available Components & Global settings can be found under https://ess-schemas-docs.element.io
- For each
SecretKeyvariable, the value will point to a secret key undersecrets. For example,components.synapse.config.macaroonSecretKeyismacaroon, so amacaroonsecret must exists undersecrets.synapse.content. - You can see a demo at the starter-edition open source repository
emsImageStore:
  username: <username>
  password: <password>

secrets:
  global:
    content:
      genericSharedSecret: # generic shared secret
  synapse:
    content:
        macaroon: # macaroon
        postgresPassword: # postgres password
        registrationSharedSecret: # registration shared secret
        # python3 -c "import signedjson.key; signing_key = signedjson.key.generate_signing_key(0); print(f\"{signing_key.alg} {signing_key.version} {signedjson.key.encode_signing_key_base64(signing_key)}\")"
        signingKey: # REPLACE WITH OUTPUT FROM PYTHON COMMAND ABOVE

 # globalOptions contains the global properties of the ELementDeployment CRD
globalOptions:
  config:
    domainName: # your base domain
  k8s:
    ingresses:
      tls:
        mode: certmanager
        certmanager:
          issuer: letsencrypt
    workloads:
      replicas: 1

components:
  elementWeb:
    k8s:
      ingress:
        fqdn:  # element web fqdn
  synapse:
    config:
      media:
        volume:
          size: 5Gi
      postgresql:
        database: # postgres database
        host:  # postgres host
        port: 5432
        user: # postgres user
    k8s:
      ingress:
        fqdn: # synapse fqdn
  wellKnownDelegation:
    config: {}
    k8s: {}
Writing your own ElementDeployment CR
Here is a small sample to deploy the basic components using your own certificate files. This is provided as an example, as ElementDeployment supports a whole range of configuration option that you can explore in :
- The documentation website at https://ess-schemas-docs.element.io
- the GUI
- through
kubectl explaincommand :kubectl explain elementdeployment.matrix.element.io.spec.components
apiVersion: matrix.element.io/v1alpha1
kind: ElementDeployment
metadata:
  name: <element_deployment_name>
  namespace: <target namespace>
spec:
  global:
    k8s:
      ingresses:
        ingressClassName: "public"
      workloads:
        dockerSecrets:
        - name: dockerhub
          url: docker.io
        - name: element-registry
          url: registry.element.io
      storage:
        storageClassName: "standard"
    secretName: global
    config:
      genericSharedSecretSecretKey: genericSharedSecret
      domainName: "deployment.tld"
  components:
    elementWeb:
      secretName: external-elementweb-secrets
      k8s:
        ingress:
          tls:
            mode: certfile
            certificate:
              certFileSecretKey: eleweb.tls
              privateKeySecretKey: eleweb.crt
          fqdn: element-web.tld
    synapse:
      secretName: external-synapse-secrets
      config:
        maxMauUsers: 100
        media:
          volume:
            size: 1
        postgresql:
          host: "<postgresql server>"
          user: "<user>"
          database: "<db>"
          passwordSecretKey: pgpassword
          sslMode: disable
      k8s:
        ingress:
          fqdn: synapse.tld
      tls:
        mode: certfile
        certificate:
          certFileSecretKey: synapse.tls
          privateKeySecretKey: synapse.crt
    wellKnownDelegation:
      secretName: external-wellknowndelegation-secrets
      k8s:
        ingress:
          tls:
            mode: certfile
            certificate:
              certFileSecretKey: wellknown.tls
              privateKeySecretKey: wellknown.crt
To inject secret values in the CR, you will have to create the following secrets :
-
name: globalwith data keygenericSharedSecretcontaining any random value. It will be used as a seed for all secrets generated by the updater. -
name: external-elementweb-secretswith data keyseleweb.tlscontaining element web private key andeleweb.crtcontaining element web certificate. -
name: external-synapse-secretswith data keyssynapse.tlscontaining synapse private key andsynapse.crtcontaining synapse certificate. You will also needpgpasswordwith the postgres password. All attributes pointing to Secret Keys have a default value, and in this example we are relying on the default values ofconfig.macaroonSecretKey:macaroon,config.registrationSharedSecretSecretKey:registrationSharedSecret,config.signingKeySecretKey:signingKeyand theconfig.adminPasswordSecretKeypointing toadminPasswordin the secret key. -
name: external-wellknowndelegation-secretswith data keyswellknown.tlscontaining well known delegation private key andwellknown.crtcontaining well known delegation certificate.
Once the CRD and the Secrets deployed to the namespace, the Updater will be able to create all the resources handled by the Operator, which will then deploy the workloads on your kubernetes cluster.
Loading docker secrets into kubernetes in preparation of deployment
N.B. This guide assumes that you are using the element-onprem namespace for deploying Element. You can call it whatever you want and if it doesn't exist yet, you can create it with: kubectl create ns element-onprem.
Now we need to load secrets into kubernetes so that the deployment can access them. If you built your own CRD from scratch, you will need to follow our Element Deployment CRD documentation.
kubectl create secret -n element-onprem docker-registry ems-image-store --docker-server=registry.element.io --docker-username=<EMSusername> --docker-password=<EMStoken>
Checking deployment progress
To check on the progress of the deployment, you will first watch the logs of the updater:
kubectl logs -f -n element-updater element-updater-controller-manager-<rest of pod name>
You will have to tab complete to get the correct hash for the element-updater-controller-manager pod name.
Once the updater is no longer pushing out new logs, you can track progress with the operator or by watching pods come up in the element-onprem namespace.
Operator status:
kubectl logs -f -n element-operator element-operator element-operator-controller-manager-<rest of pod name>
Watching reconciliation move forward in the element-onprem namespace:
kubectl get elementdeployment -o yaml | grep dependentCRs -A20 -n element-onprem -w
Watching pods come up in the element-onprem namespace:
kubectl get pods -n element-onprem -w