Element Cloud Documentation
Documentation for Element and EMS by the EMS team
- Element X status on EMS Cloud
- Frequently Asked Questions
- Element Matrix Services
- Add Additional Users
- Add Users
- Apply coupon/discount
- Client Look & Feel
- EMS Server With Custom Domain
- How to Get an EMS Server
- Migrate From EMS to Self-Hosted
- Migrate From Self-Hosted to EMS
- Reset User Password
- Token based registration
- Adding a Trust & Safety Contact
- Authentication
- Integrations
- Admin Bot
- Audit Bot
- Create a Conference Call in a Room
- Discord Bridge
- Hookshot
- Migrate to the new GitHub and Feeds bots
- Public IRC Bridges
- Public Slack Bridge
- Signal Bridge
- Slack Bridge
- Teams Bridge
- Telegram Bridge
- WhatsApp Bridge
- EMS Account Management
- Creating an EMS Account
- Securing an EMS Account
- Changing an EMS Account Password
- Deleting an EMS Account
- Non-English
Element X status on EMS Cloud
This page outlines the current plan for making sliding sync (required for Element X) available for EMS cloud customers. The page will be updated if anything changes.
See the Element blog post “Element X: Ignition” for more information on Element X.
Hosts using traditional password authentication
All EMS hosts using traditional password authentication now have the sliding sync proxy and you can start using Element X.
Hosts using delegated authentication/SSO including Element One users
A pre-requisite of support for Element X is adding support for the Matrix Authentication Service (MAS) to Element Matrix Services (EMS).
Whilst significant progress has been made in developing MAS work to add support for it to EMS is not due until 2025 - we'd advise checking the Element Blog for the latest updates where we'll announce its support in the future.
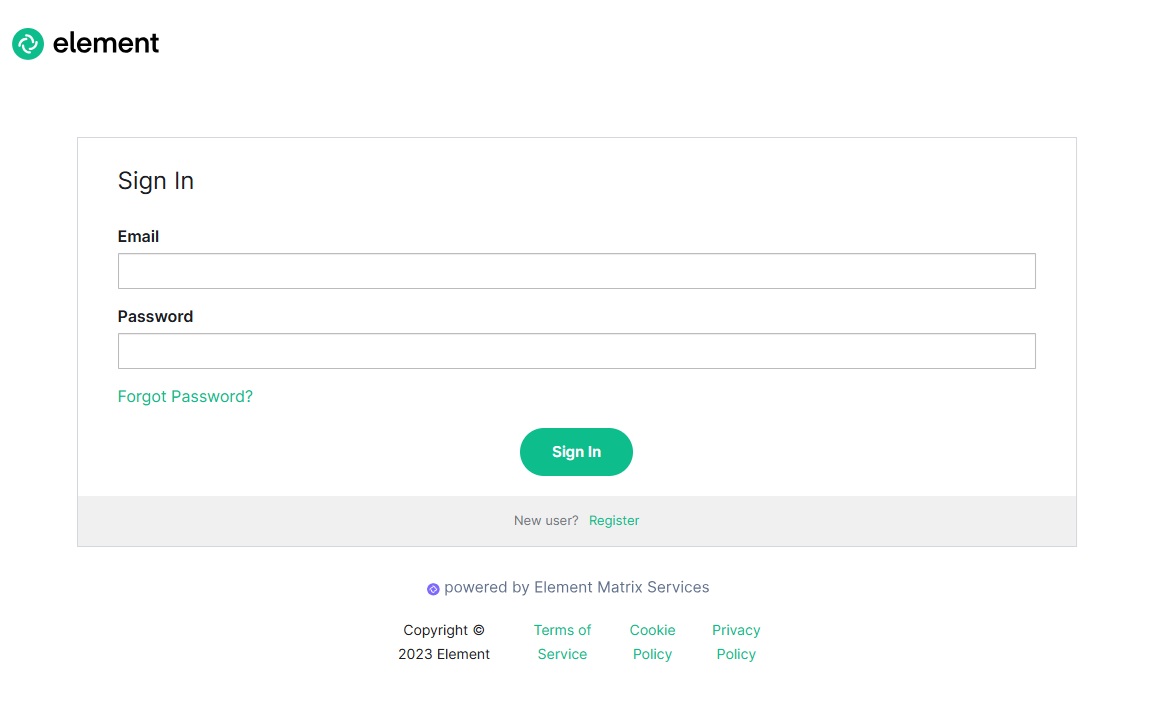
Frequently Asked Questions
Account Management
Can I migrate from Element One to Element Home/Cloud?
Unfortunately, Element One and Home are different products and do not currently have an upgrade path. You can set up an Element Home/Cloud host, then manually invite your new Element Home account to all rooms from your Element One account. Bridged rooms have to be manually re-bridged from your Home host.
The same applies to migration from Element Home/Cloud to Element One.
How do I enable 2FA on my EMS account?
- Sign in to your EMS account on https://ems.element.io/
- Click
Your Accountin the top-right - Click
Account - Click
Authentication Settings - Click
Signing inin theAccount securitycard - Click
Set up Authenticator Application - Follow the instructions on the page to complete the 2FA setup
Please note:
- Only one 2FA device is supported. If you add multiple 2FA devices, you will be unable to sign in.
- This only applies to your account in the EMS control panel and your Element One account. Not to Matrix accounts on dedicated EMS servers.
Please discontinue my account
It is best if EMS customers delete their host or account themselves. Here's how:
Delete the host from the host management page at https://ems.element.io/user/hosting by clicking the Delete host button (and confirming deletion in the resulting dialog). This will delete the host and cancel all associated subscriptions.
You can manage or cancel your Element One subscription on https://ems.element.io/user/hosting#/elementone.
Or delete the EMS account entirely. This is done from the user account page https://ems.element.io/user/account by clicking on the Delete account button and confirming. This will delete all hosts and subscriptions before removing the user's account.
Integrations
Bots? What's the reason for using them?
Bots allow you to get information and perform actions in line with your chat. There are a bunch that can be found at https://matrix.org/docs/projects/bots/.
Can I host my own Telegram bridge?
Unfortunately, you are not currently able to host your own bridges to work with your EMS-hosted homeserver. As of December 2020, we have added a Telegram bridge to EMS. See our blog post: EMS brings more interoperability to messaging.
If you have federation enabled for your homeserver, you can also bridge into publicly accessible rooms, such as https://t2bot.io/, or integrations available on public homeservers such as matrix.org.
Do DMs count towards the 20-channel limit for the paid Slack bridge?
Yes, but we're currently reviewing the bridging pricing models, and soon we'll likely be offering Slack (as well as all of our other bridges) on a usage basis rather than on a room/workspace capped basis.
When this launches, existing customers will be able to stay on their existing plan or choose to move to the new model.
How do I add a GitHub integration?
To create a GitHub integration in a room, click on the i icon at the top right, accept the privacy policy, click Add widgets, bridges & bots, click Add integrations and select GitHub from the Bots list. When prompted, log in to GitHub and select the repositories and functions you want.
Note that your server needs to have federation enabled for integrations to work.
How do I add RSS integration to my Matrix server?
To create RSS integration in a room, click on the i icon at the top right, accept the privacy policy, click Add widgets, bridges & bots, click Add integrations and select RSS Bot from the Bots list. Then, enter the RSS URL and click Subscribe.
Note that your server needs to have federation enabled for integrations to work.
How do I bridge to Libera Chat IRC rooms with more than 100 users?
Please talk to your account manager, or open a support ticket by emailing support@matrix.org. The bridge team will consider requests on a case-by-case basis.
What is the difference between the free and paid Slack bridge?
They're mostly the same. The big difference is that the free one doesn't bridge DMs / puppet your account. See also Do DMs count towards the 20 channel limit for the paid Slack bridge?
With Jitsi video conferencing, how is the data being transferred?
Jitsi conferencing data goes directly from the browser to the Jitsi server, and it does not use the Matrix protocol. If you add a Jitsi widget to a room, that widget will be stored in the room state as Matrix events, but the Jitsi communication itself is from the client to the Jitsi server used.
Miscellaneous
Are all my messages stored on my homeserver?
Messages are stored on your server. However, if you are communicating with users registered on other servers, then relevant messages/events will also exist on their server.
How do I send "System Alerts" or post from the @server user?
The web console has a form to do this. "System status messages" - You can use this form to send messages to all users of your server. For example, this could be used to send "messages of the day", or important policy updates, etc.
How do I update External IDs for my users?
When managing SSO integrations, you might need to edit the external IDs for your Matrix users. This can be done using the Synapse Admin API. You can follow this knowledge base page for further details, How do I migrate to SSO while keeping my original accounts?.
Is there a maximum file size per upload?
The file upload limit for EMS hosts is currently set at 100MB.
What are the benefits of paying for an EMS homeserver?
EMS aims to take the hassle out of hosting and managing your own Matrix stack. There is a significant technical overhead (in terms of technical knowledge required) as well as ongoing time and resources to ensure that your server continues running and is kept up to date with all of the latest security updates etc. With EMS, you don't have to worry about that, as it is all taken care of for you at the touch of a button.
We also provide a (growing) suite of proprietary host administration tools in the form of the EMS Synapse admin dashboard to help give you better insight and control of your server.
What are the limitations in terms of storage?
We’ve shied away from hard limits for storage and instead adopted a fair use policy. If you use the server for business conversations and share a few images as part of your discussions, you will never have problems. However, if you share thousands of images daily per user, you will hit a limit.
Pricing & Payment
Do you offer other payment options like PayPal, Crypto, or IBAN/SEPA?
Currently, we only accept Credit or Debit/bank account cards as payment. "Debit cards" should work with any regular bank account.
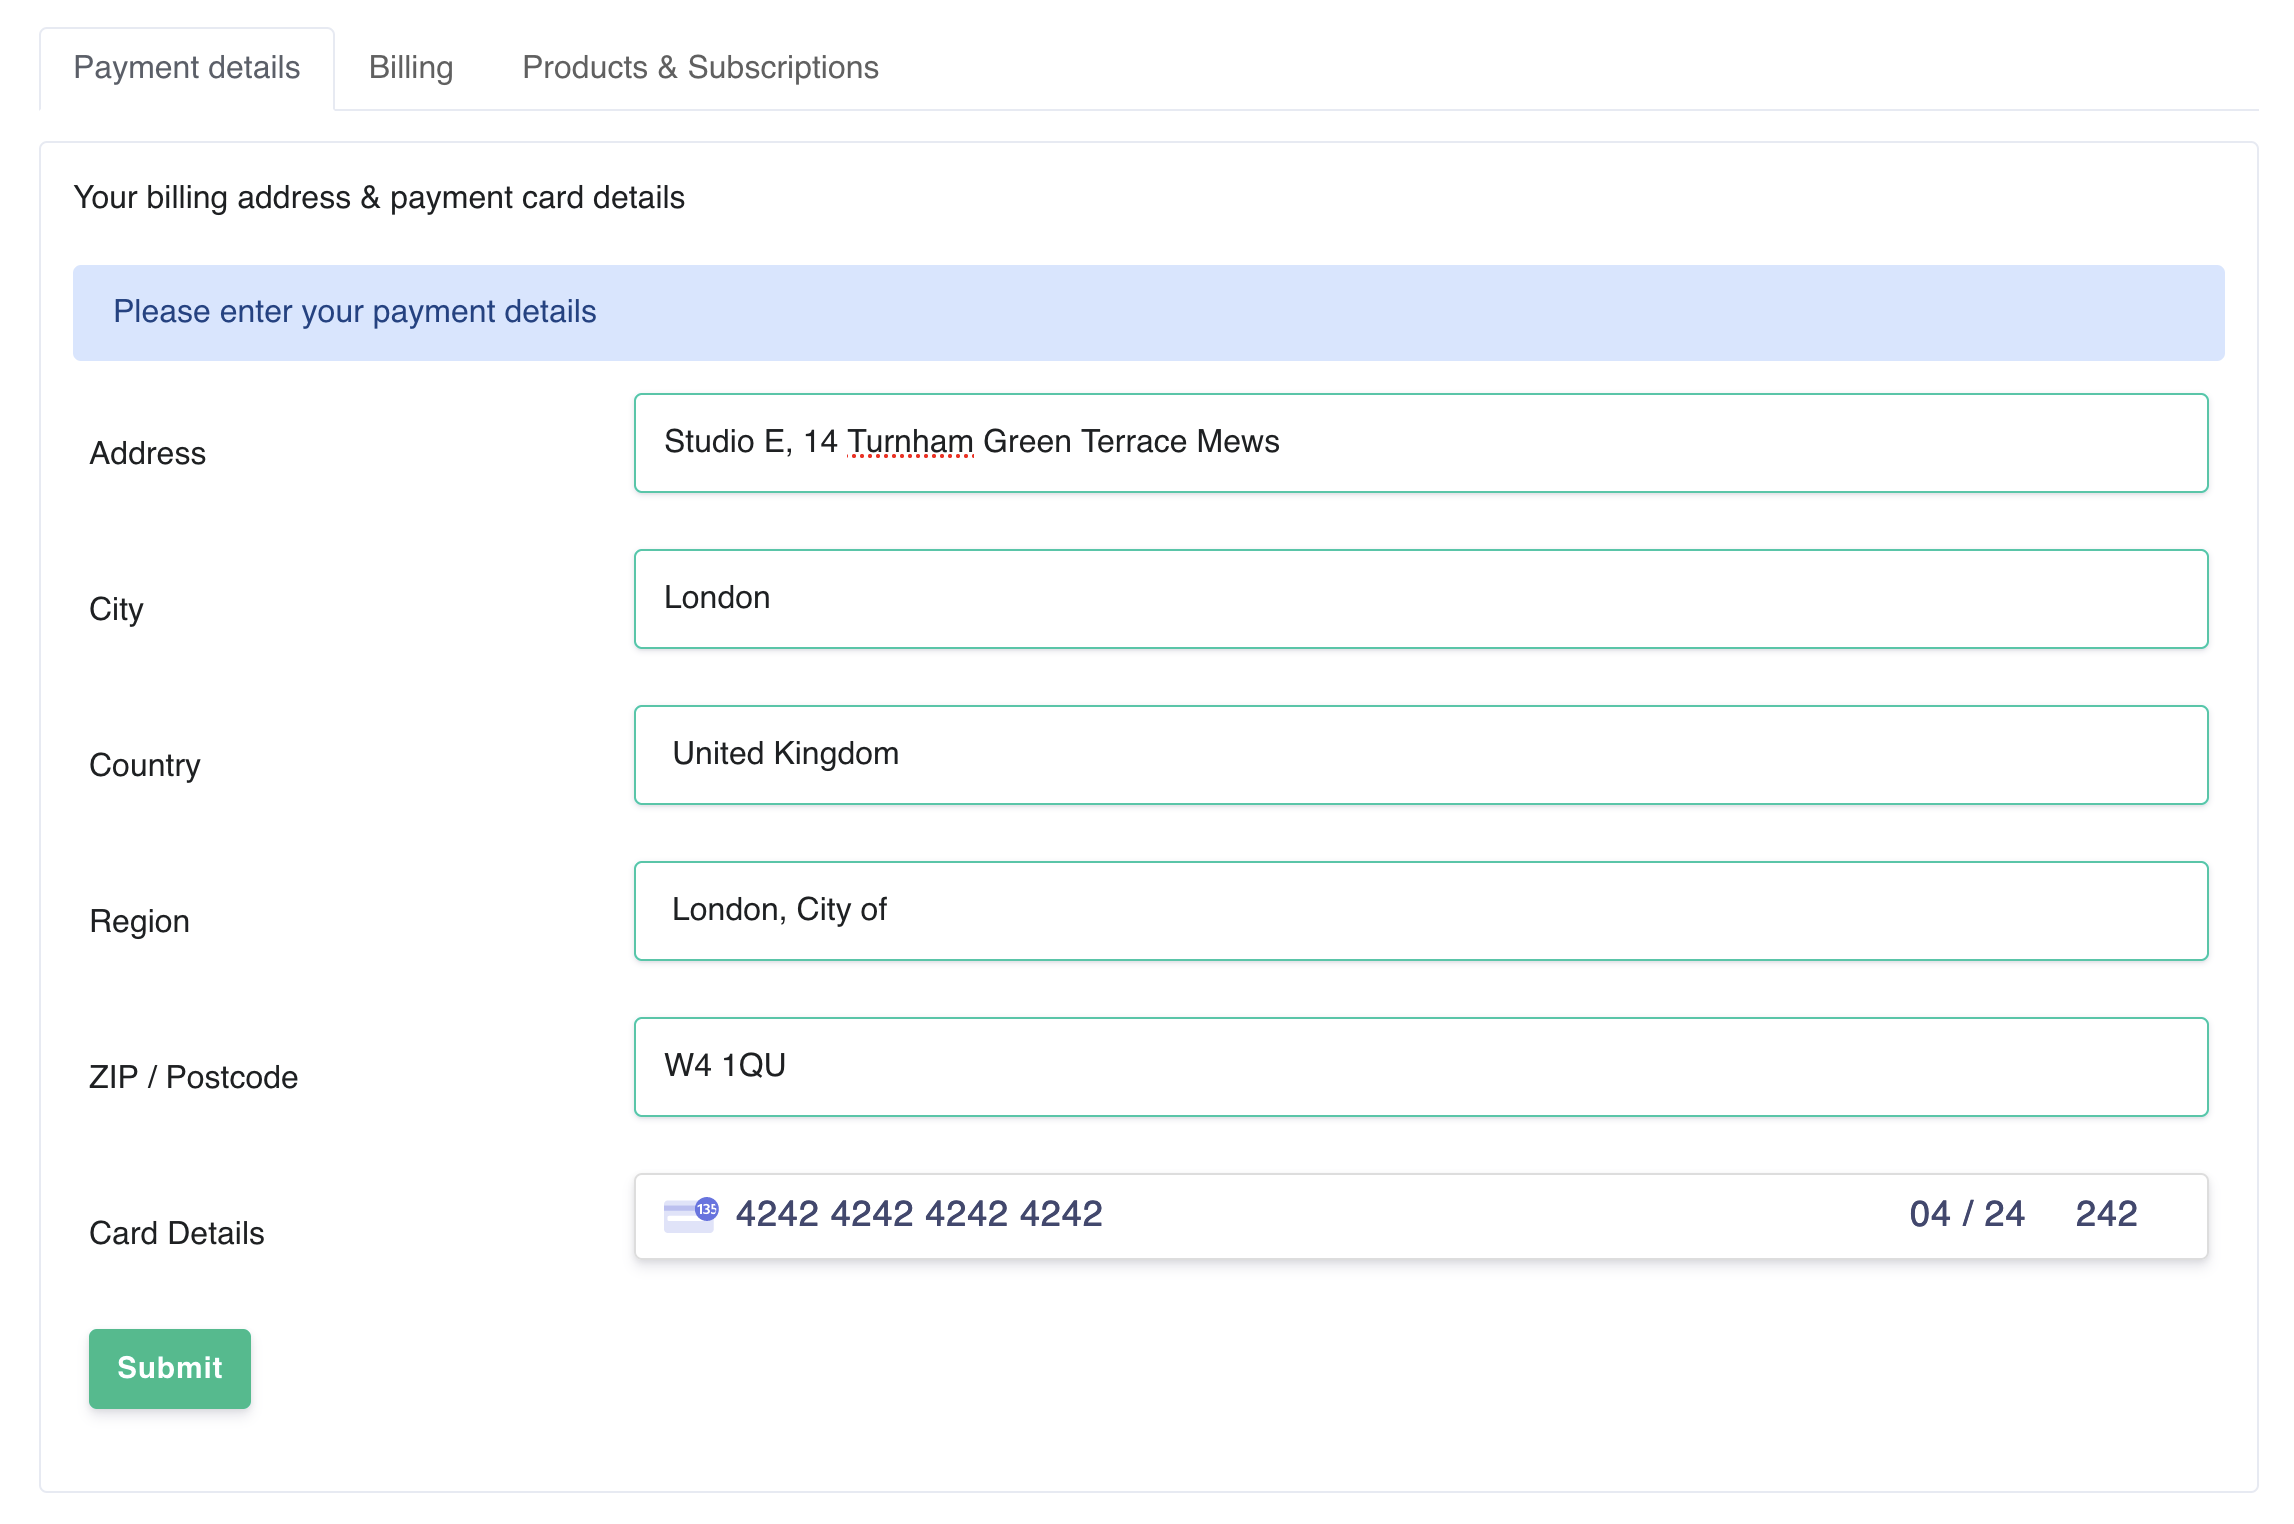
How do I update my payment info?
To update your payment info, go to https://ems.element.io/user/billing. From here, you can update your payment details.
If I join a room with a lot of external users from my homeserver, will I be charged for those?
No, you are only ever charged for users that are registered on your server and who have been active for more than two days in a month. These users make up your Monthly Active User (MAU) total. Users that are registered on other servers (that you communicate with over federation), guest users, and users who are only briefly active on your server are not counted.
Server Configuration & Management
Are custom appservices supported?
Uploading custom (YAML) registration files for appservices is not currently supported for EMS hosts.
We are actively working on improving bridging support for EMS hosts and hope that this will be something that you see substantial improvement in over the coming months.
Are you able to use a custom domain like "matrix.example.com"?
Yes, absolutely! However, you need to set this at host creation time as the homeserver name is "baked in" to all of the events that the homeserver creates.
You can set both the homeserver name, e.g., example.com (so your Matrix user IDs would be of the form @foo:example.com), and your (Element) client address, which might be something like webchat.example.com. However, to prove that you own the domain in question, you will need to place some JSON / text into two well-known files on the webserver for your domain. In the setup wizard, you will be guided through this process when setting up the custom domain for your server.
Can I add all my users to a Space by default?
Yes, this is available for Gold and Enterprise customers. Please talk to your Account Manager or open a support ticket.
Can I change the default room notification level for my users?
This is currently not possible, unfortunately.
Can I customize the Element web login page?
Yes, you can modify the look and feel of your client to suit you.
Please see our blog article on custom branding for your Element instance here https://element.io/blog/custom-branding/ and Client Look & Feel for more details.
You will be able to enter the customization preferences from the managed host page of your EMS account - https://ems.element.io/user/hosting.
Can I use a subdomain instead of the root domain with my EMS server?
Yes. However, this is not recommended. For the same reason your email address probably is not someone@email.example.com, you probably don't want your Matrix IDs to be @someone:matrix.example.com.
Please see https://element-hq.github.io/synapse/latest/setup/installation.html#choosing-your-server-name for additional details on your server name.
Can I use EMS-hosted well-knowns with the root of my domain?
Yes, you can, but there are some limitations:
- You will not be able to serve a website on the domain.
- Using a CNAME DNS record on the root of a domain is not compliant with the DNS Specification (per Domain Name System RFC 1034, paragraph 3.6.2 specifically). But you may still be able to do this successfully if:
- Your DNS provider allows setting a CNAME record on the root of your domain. Be aware that certain other DNS records for your domain will not be returned properly, including SOA, NS, and TXT records. (Such as SPF, DMARC, and DKIM, which are used for securing email), OR
- Your DNS provider offers a DNS Spec compliant workaround for using CNAME on root. This includes ALIAS records and CloudFlare CNAME Flattening (note that proxy must be turned off).
- When using this, please note that the EMS Control Panel will not recognize your DNS record as correct, but your EMS server will function correctly and without limitations (beyond the yellow warning in the EMS Control Panel)
- If your DNS provider does not allow CNAME records on root or a DNS Spec compliant solution like ALIAS records, you can use an A record instead. To do this, finish setting up your EMS server without adding the DNS record when asked. After setup is complete, check the IP address of your EMS server, for example, with
$ dig example.ems.hostin the Mac/Linux terminal orResolve-DnsName -Name example.ems.hostin Windows PowerShell, then add an A record on the root of your domain pointing to this IP address.- Please note that EMS does not officially support this, and we reserve the right to change the IP address of your EMS server without notice.
- You will see the same error in the EMS Control Panel as above, but your EMS server will work with this configuration.
- Using a subdomain for your EMS server. By doing this, you will not see any of the limitations and do not need any of the workarounds listed above. However, please consider Can I use a subdomain instead of the root domain with my EMS server?
CNAME and .well-known?
- You need to create a CNAME record with your DNS provider. This needs to be: chat.example.com. CNAME yourEMShost.element.io. (please note that proxy must be turned off if you are using CloudFlare)
- You need to set up a website on your domain, e.g.,
example.com. - This website needs HTTPS enabled.
- You need to create two files on the webserver. These need to be located at exactly:
-
https://example.com/.well-known/matrix/client -
https://example.com/.well-known/matrix/server
-
- You need to enable the CORS header
Access-Control-Allow-Origin: *on the webserver for the client file. See https://enable-cors.org/ for instructions on how to do this.
The client file needs to contain:
{
"m.homeserver": {
"base_url": "https://yourEMShost.ems.host"
},
"m.identity_server": {
"base_url": "https://vector.im"
}
}
The server file needs to contain:
{
"m.server": "yourEMShost.ems.host:443"
}
CNAME doesn't work with Cloudflare?
You can use the CNAME with CloudFlare, but you have to change the Proxy status to DNS only.
Could you expand on "over federation"?
If you have federation turned on in your server configuration, you are able to communicate with users registered on other servers (e.g., matrix.org).
You are only ever charged for users that are registered on your server and who have been active for more than two days in a month. These users make up your Monthly Active User (MAU) total. Users that are registered on other servers (that you communicate with over federation), guest users, and users who are only briefly active on your server are not counted.
DNS is not resolving
This problem is most likely caused by a delay in DNS replication downstream of your DNS servers.
How can I manage my #general room?
You can gain admin permissions in this room by calling this Synapse Admin API or by contacting EMS Support at https://ems.element.io/support.
Gold and Enterprise customers can also request changes to the list of default rooms their users are automatically added to.
How do I change the name/brand of the Element Web client?
You can rename the Element client from Element to for example Company Chat with the Client name field on https://ems.element.io/user/hosting#/hosts. See Client Look & Feel for additional details.
How do I change the server's custom domain?
You can only set a custom domain name for a server at setup time. This is because the server's domain name is "baked-in" to all of the events generated by the server.
So, you would need to deprovision an existing server and create a new one, selecting your custom DNS preferences from the advanced settings section of host setup configuration if you wish to change the current host DNS.
How do I delete a room or a space?
Go to https://ems.element.io/user/hosting#/admin, click Rooms, and find the room or space you want to delete. Then click the <svg stroke="currentColor" fill="#de4437" stroke-width="0" viewBox="0 0 512 512" height="1em" width="1em" xmlns="http://www.w3.org/2000/svg"> button to delete it.
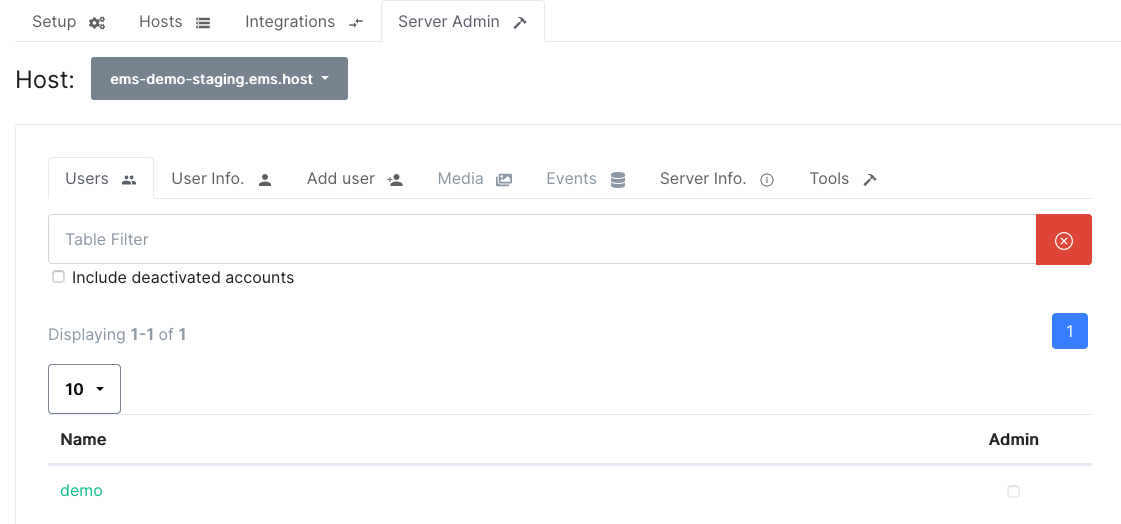
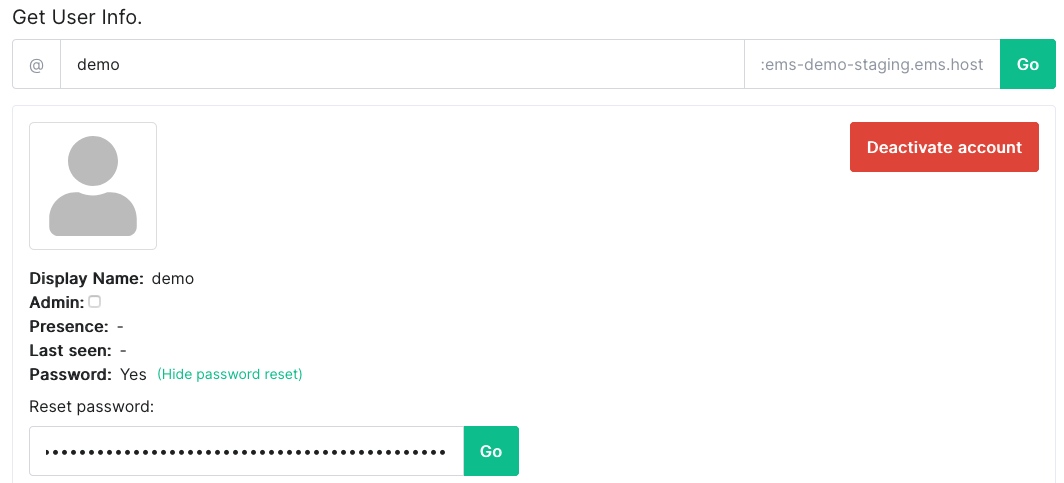
How do I delete users when administering the server?
You can deactivate users from the admin dashboard for your host at https://ems.element.io/user/hosting.
Select the Server Admin tab and then the User Info sub-tab. From here, you can search for the relevant user and hit the Deactivate account button.
How do I enable the public room directory?
The public room directory is enabled on your EMS server if both Federation and Guest users are enabled.
How do I reactivate a user?
- Go to the Server Admin tab of the EMS Control Panel
- Click the <svg width="20" height="20" viewBox="0 0 20 20" fill="none" xmlns="http://www.w3.org/2000/svg"> button
- Select
Include deactivated accounts - Click the user you wish to reactivate from the list
- Click
Reactivate account
How do I migrate from EMS to self-hosted if I choose to do so in the future?
Currently, the process of migrating away is manual. However, we hope to have an automated, self-serve system in the not too distant future. For the time being, if you wish to migrate away, please email ems-support@element.io (while your EMS server is still up and running) and ask for a snapshot of your Synapse database. We will then generate a snapshot for you and create a link to download the data. You can then use this to restore the database / Synapse instance on your own infrastructure.
Note that migrating from EMS to self-hosted is only possible if you use your own domain (Custom DNS) with your EMS server.
I deleted my host, now my server name is taken, and I cannot rebuild
This is part of a security measure. We generally prevent hosts from returning to the pool after they were initially claimed to prevent people from attempting to imitate old servers/users. Contact support from https://ems.element.io/support while signed in to get the hostname released.
Online users are displayed as offline?
Unfortunately, we are not able to offer user presence as a feature at the moment. This is due to potential performance impact and excess resource usage on hosts when this feature is enabled. The Synapse team is aware of this, and it is on their roadmap to address. However, we do not currently have a timeline for when it will be available again.
What does "Include bridged accounts" on the user management page mean?
When you bridge to external services, external users get an "appservice user" on your EMS server. If you have any bridges and check this checkbox, users from across your bridges will also be shown.
Element Matrix Services
Add Additional Users
- Click
Your AccountandManage Serversor click this link https://ems.element.io/user/hosting. - Click the Hosts tab.
- Change
Total Monthly Active User Seatsto the number of users you want and clickSaveat the bottom.

- Note that you cannot decrease your user count later.

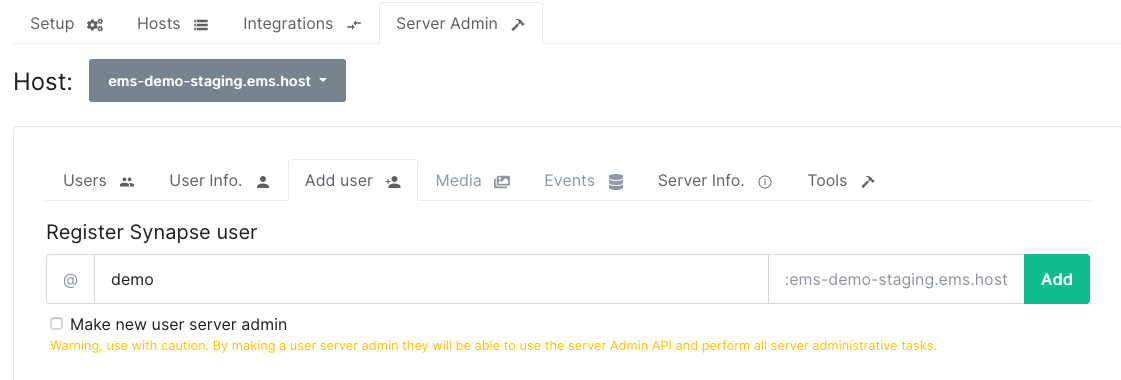
Add Users
-
Click
Your AccountandManage Serversor click this link: https://ems.element.io/user/hosting -
Click
Server Admin -
Select your host
-
Click
Add userEnter the username and clickAdd

-
Select
Make new user server adminif you want this user to be able to use the Synapse Admin API to perform administrative tasks on your server. Be careful with this as this option has a lot of power on your server. -
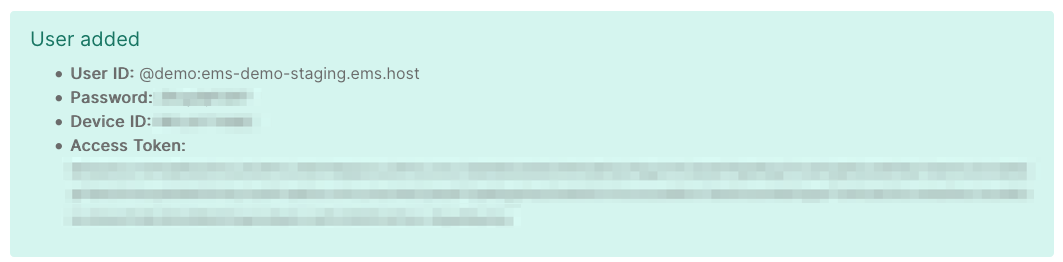
The username and password for the new user is displayed. You will only be able to see this information once so send the password to the user in a secure manner and then delete it

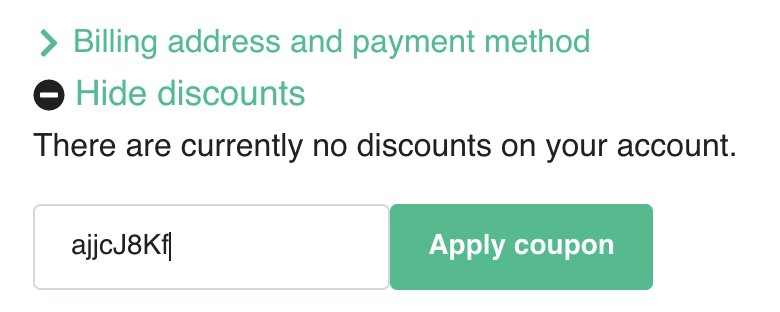
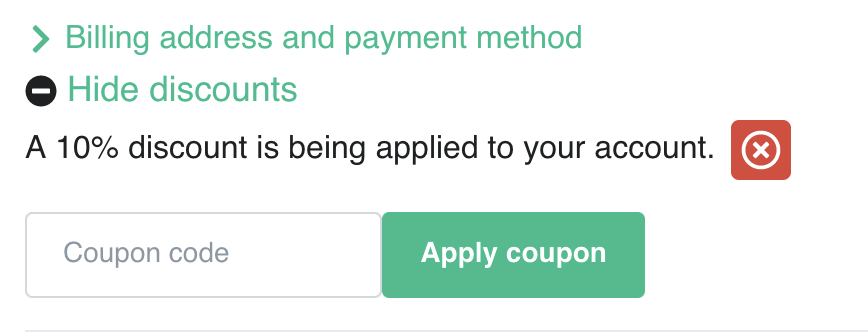
Apply coupon/discount
Coupons can only be applied by new customers before purchasing any products. However, if you are an existing customer and want to add a coupon, please contact support at https://ems.element.io/support.
Terms and Conditions apply. See the page for your coupon or ask your Element contact or support.
- Create your EMS account normally
- If you have agreed to pay by invoice/bank transfer, stop here and let your Element contact know you have created your account so they can enable invoice payment for you
- Add your billing address and payment card on https://ems.element.io/user/billing, or click
Your Account, thenBilling

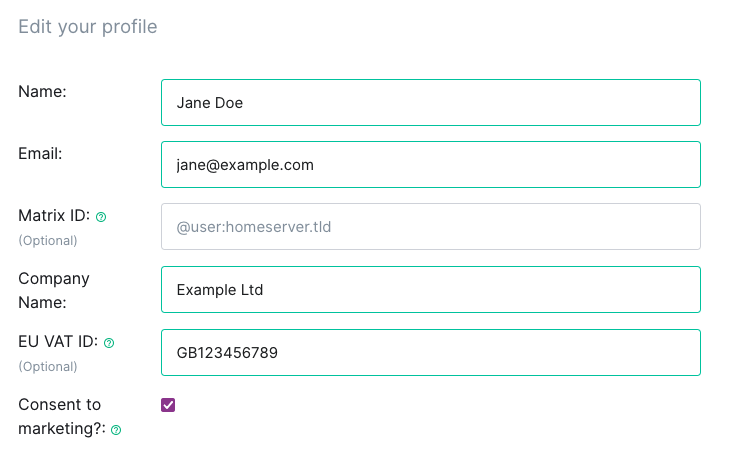
- Go to https://ems.element.io/user/account, or click
Your Account, thenAccount - If you are a business, you must enter your company name and if applicable, VAT ID here

- Click
Show Discounts - Enter your coupon code and click
Apply coupon


-
Continue host setup normally. The discount will automatically be applied to all applicable products


Client Look & Feel
This feature allows you to customize the home and welcome page on your EMS-provided Element Web client.
Blog posts
See also our blog posts on the subject:
- Build your own custom branded chat platform at the touch of a button!
- A white label messaging app to create your own brand messenger
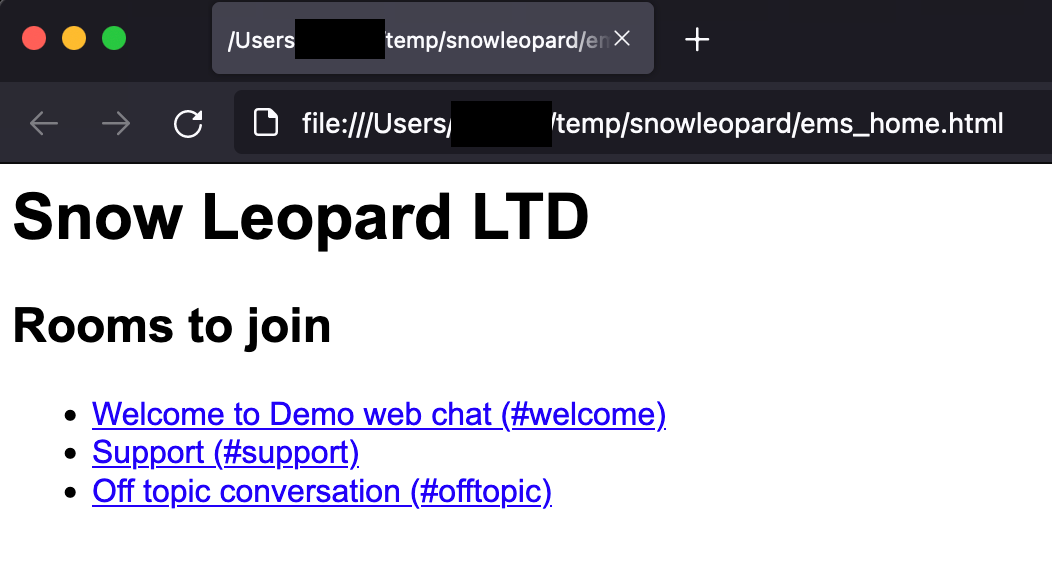
Create home and login template
-
Create the files you want to use.
-
Edit
ems_home.html. This can be as simple as a couple of lines of HTML, for example:<h1>Snow Leopard LTD</h1> <h2>Rooms to join</h2> <ul> <li><a href='/#/room/#welcome:snowleopard-staging.ems.host'>Welcome to Demo web chat (#welcome)</a></li> <li><a href='/#/room/#support:snowleopard-staging.ems.host'>Support (#support)</a></li> <li><a href='/#/room/#offtopic:snowleopard-staging.ems.host'>Off topic conversation (#offtopic)</a></li> </ul>You can also add a more complex HTML and styling.
-
It looks like this in your web browser:

-
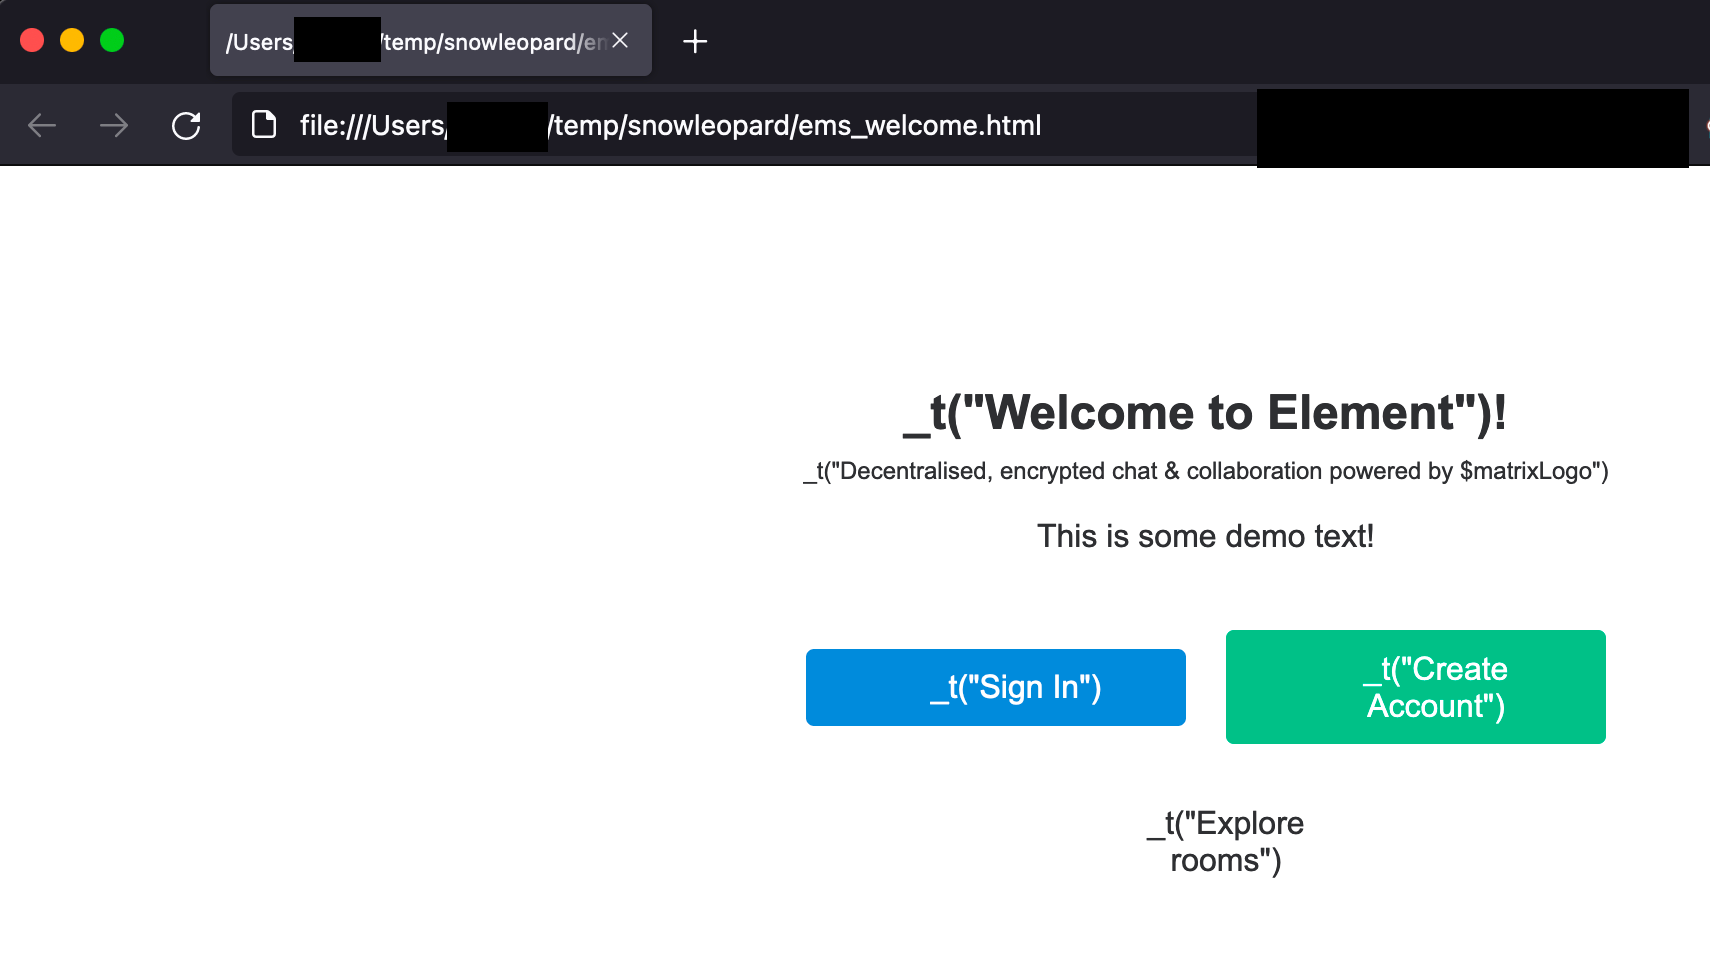
Edit
ems_welcome.html. This is a bit more complex, but it can be almost anything you want as long as it has links toLog in(/#/login) andCreate account(/#/register). The default design is based on this template. You can get creative with the CSS and the!importanttag.Click to see ems_welcome contents
The only change I made from the template is adding
<p>This is some demo text!</p>on line 177.<style type="text/css"> /* we deliberately inline style here to avoid flash-of-CSS problems, and to avoid * voodoo where we have to set display: none by default */ h1::after { content: "!"; } .mx_Parent { display: -webkit-box; display: -webkit-flex; display: -ms-flexbox; display: flex; -webkit-box-orient: vertical; -webkit-box-direction: normal; -webkit-flex-direction: column; -ms-flex-direction: column; flex-direction: column; -webkit-box-pack: center; -webkit-justify-content: center; -ms-flex-pack: center; justify-content: center; -webkit-box-align: center; -webkit-align-items: center; -ms-flex-align: center; align-items: center; text-align: center; padding: 25px 35px; color: #2e2f32; } .mx_Logo { height: 54px; margin-top: 2px; } .mx_ButtonGroup { margin-top: 10px; } .mx_ButtonRow { display: -webkit-box; display: -webkit-flex; display: -ms-flexbox; display: flex; -webkit-justify-content: space-around; -ms-flex-pack: distribute; -webkit-box-align: center; -webkit-align-items: center; -ms-flex-align: center; align-items: center; justify-content: space-between; box-sizing: border-box; margin: 12px 0 0; } .mx_ButtonRow > * { margin: 0 10px; } .mx_ButtonRow > *:first-child { margin-left: 0; } .mx_ButtonRow > *:last-child { margin-right: 0; } .mx_ButtonParent { display: -webkit-box; display: -webkit-flex; display: -ms-flexbox; display: flex; padding: 10px 20px; -webkit-box-orient: horizontal; -webkit-box-direction: normal; -webkit-flex-direction: row; -ms-flex-direction: row; flex-direction: row; -webkit-box-pack: center; -webkit-justify-content: center; -ms-flex-pack: center; justify-content: center; -webkit-box-align: center; -webkit-align-items: center; -ms-flex-align: center; align-items: center; border-radius: 4px; width: 150px; background-repeat: no-repeat; background-position: 10px center; text-decoration: none; color: #2e2f32 !important; } .mx_ButtonLabel { margin-left: 20px; } .mx_Header_title { font-size: 24px; font-weight: 600; margin: 20px 0 0; } .mx_Header_subtitle { font-size: 12px; font-weight: normal; margin: 8px 0 0; } .mx_ButtonSignIn { background-color: #368BD6; color: white !important; } .mx_ButtonCreateAccount { background-color: #0DBD8B; color: white !important; } .mx_SecondaryButton { background-color: #FFFFFF; color: #2E2F32; } .mx_Button_iconSignIn { background-image: url('welcome/images/icon-sign-in.svg'); } .mx_Button_iconCreateAccount { background-image: url('welcome/images/icon-create-account.svg'); } .mx_Button_iconHelp { background-image: url('welcome/images/icon-help.svg'); } .mx_Button_iconRoomDirectory { background-image: url('welcome/images/icon-room-directory.svg'); } /* .mx_WelcomePage_loggedIn is applied by EmbeddedPage from the Welcome component If it is set on the page, we should show the buttons. Otherwise, we have to assume we don't have an account and should hide them. No account == no guest account either. */ .mx_WelcomePage:not(.mx_WelcomePage_loggedIn) .mx_WelcomePage_guestFunctions { display: none; } .mx_ButtonRow.mx_WelcomePage_guestFunctions { margin-top: 20px; } .mx_ButtonRow.mx_WelcomePage_guestFunctions > div { margin: 0 auto; } @media only screen and (max-width: 480px) { .mx_ButtonRow { flex-direction: column; } .mx_ButtonRow > * { margin: 0 0 10px 0; } } </style> <div class="mx_Parent"> <a href="https://element.io" target="_blank" rel="noopener"> <img src="welcome/images/logo.svg" alt="" class="mx_Logo"/> </a> <h1 class="mx_Header_title">_t("Welcome to Element")</h1> <!-- XXX: Our translations system isn't smart enough to recognize variables in the HTML, so we manually do it --> <h4 class="mx_Header_subtitle">_t("Decentralised, encrypted chat & collaboration powered by $matrixLogo")</h4> <p>This is some demo text!</p> <div class="mx_ButtonGroup"> <div class="mx_ButtonRow"> <a href="#/login" class="mx_ButtonParent mx_ButtonSignIn mx_Button_iconSignIn"> <div class="mx_ButtonLabel">_t("Sign In")</div> </a> <a href="#/register" class="mx_ButtonParent mx_ButtonCreateAccount mx_Button_iconCreateAccount"> <div class="mx_ButtonLabel">_t("Create Account")</div> </a> </div> <!-- The comments below are meant to be used by Ansible as a quick way to strip out the marked content when desired. See https://github.com/element-hq/element-web/issues/8622. TODO: Strip out these comments and rely on the guest flag --> <!-- BEGIN Ansible: Remove these lines when guest access is disabled --> <div class="mx_ButtonRow mx_WelcomePage_guestFunctions"> <div> <a href="#/directory" class="mx_ButtonParent mx_SecondaryButton mx_Button_iconRoomDirectory"> <div class="mx_ButtonLabel">_t("Explore rooms")</div> </a> </div> </div> <!-- END Ansible: Remove these lines when guest access is disabled --> </div> </div> -
It looks like this in your web browser:

-
Serve the files
You must host the files somewhere where they are publickly accessible and you need to enable the CORS header Access-Control-Allow-Origin: * on the web server for these files. See https://enable-cors.org/ for instructions on how to do this.
Configure your EMS server
-
Add the URLs to the
Client look & feelsection in the EMS Control Panel. ClickSave.

Unfortunately, we have a bug in the validator affecting files hosted on Matrix. Just ignore the error.- Note if you are hosting the files on your own web server, you only need to change your EMS server configuration or reprovision if the URLs have changed. Changes to the contents of existing files are applied automatically
-
Once your host finishes reprovisioning, check your Element Web to ensure the changes are applied correctly.
-
Welcome page image and Welcome page content

-
Client logo

-
Home page content

-

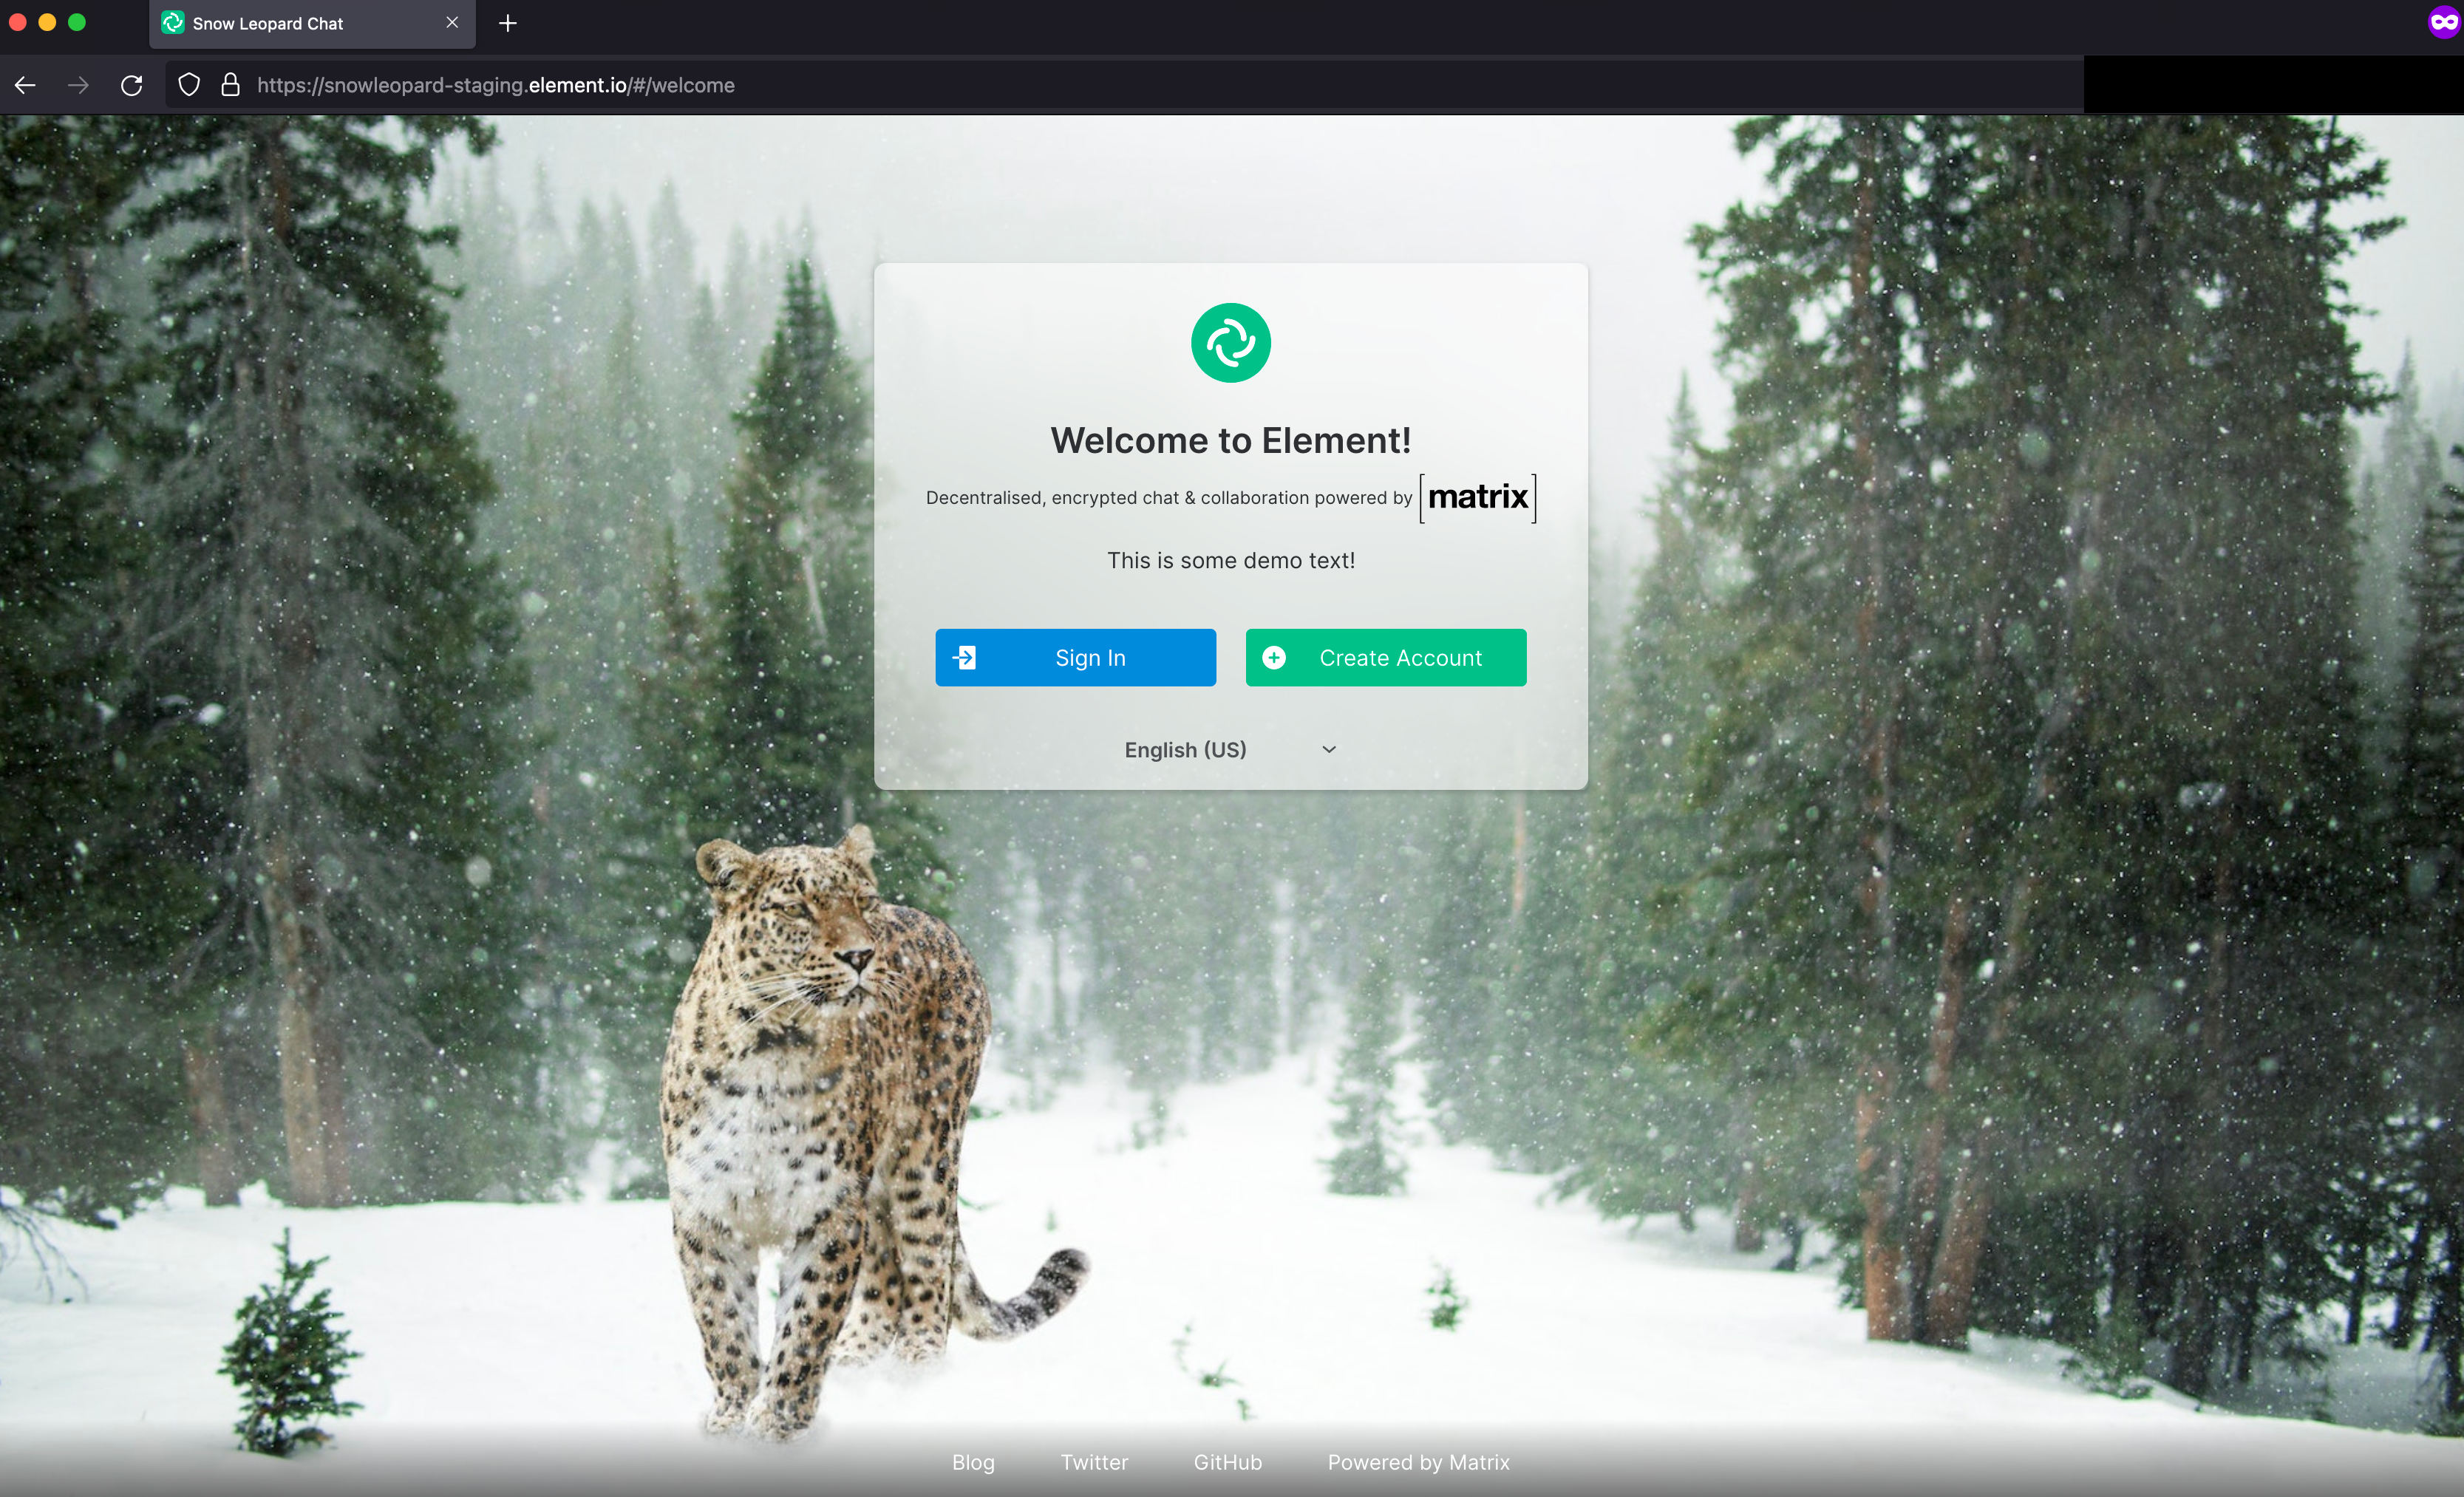
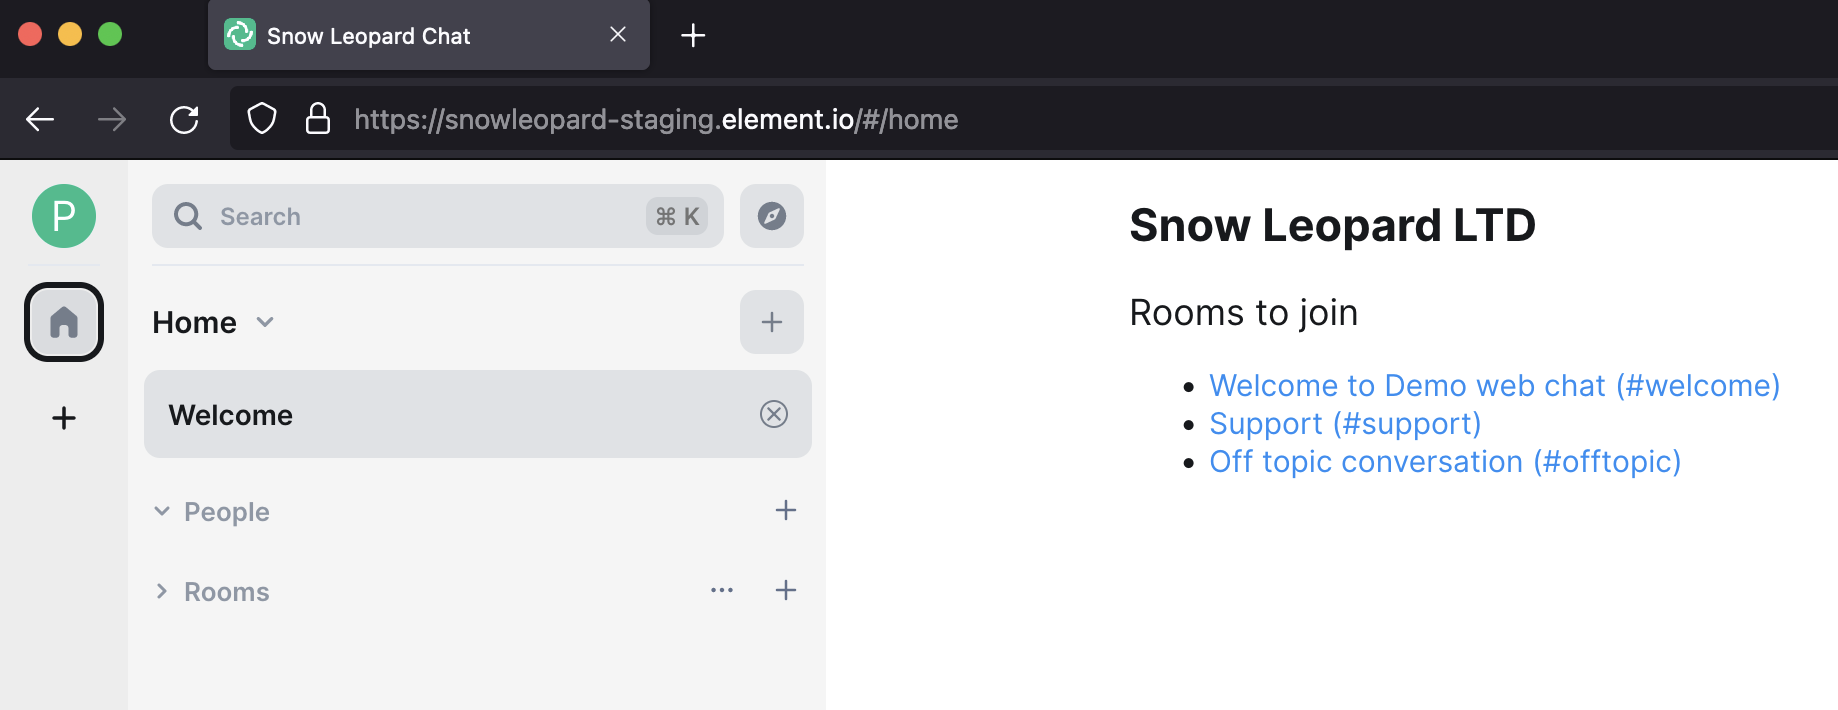
Image Credits
- Client logo image by Charles Miller used under the terms of Free to use License.
- Welcome page image by Pixabay used under the terms of Free to use (CC0) License.
EMS Server With Custom Domain
For this guide, I will be using the domain
element.io. I will set up EMS so that the
Matrix usernames becomes @someone:element.io, and the Element client will be at
https://chat.element.io/
From the guide at Get Your Own EMS Server, I will be replacing the EMS hostname
ems-demo-staging.ems.host with element.ems.host
Custom domains are only supported with Element Enterprise Cloud plans.
Prerequisites
- You own and control the domain you want to use
- If you do not have a website on the domain you want to use with your EMS server:
- You can create a CNAME DNS record for the domain. Some providers call this ALIAS or CNAME Flattening when used on
the root of the domain (domain root =
yourdomain.com, notsomething.yourdomain.com)
- You can create a CNAME DNS record for the domain. Some providers call this ALIAS or CNAME Flattening when used on
the root of the domain (domain root =
- If you have a website on the domain you want to use with your EMS server:
- Your website has HTTPS enabled using a valid certificate issued by a commonly recognized provider. For example, Comodo or LetsEncrypt.
- You can serve plain-text JSON files at these exact paths
-
https://yourdomain.com/.well-known/matrix/client -
https://yourdomain.com/.well-known/matrix/server - Note that these files do not and cannot have a file extension
-
- You can add the header
Access-Control-Allow-Origin: *to the client file on the web server
See also
- FAQ: Can I use a subdomain instead of the root domain with my EMS server?
- FAQ: Can I use EMS-hosted well-knowns with the root of my domain?
Setup
Some providers for DNS and website hosting providers need special configuration. See Provider specific instructions at the bottom for known solutions.
-
Follow steps 1 - 10 from Get Your Own EMS Server
-
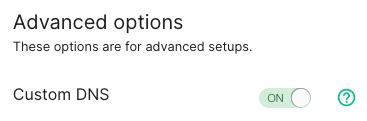
On step 10 from Get Your Own EMS Server, turn ON
Custom DNS

-
In the
Custom Homeserver domainfield, enterelement.io

-
Create two files on your website according to the instructions given.
The path cannot be changed, but up to 30 redirects are supported.
While not required, you should add the headerContent-Type application/jsonto both files.-
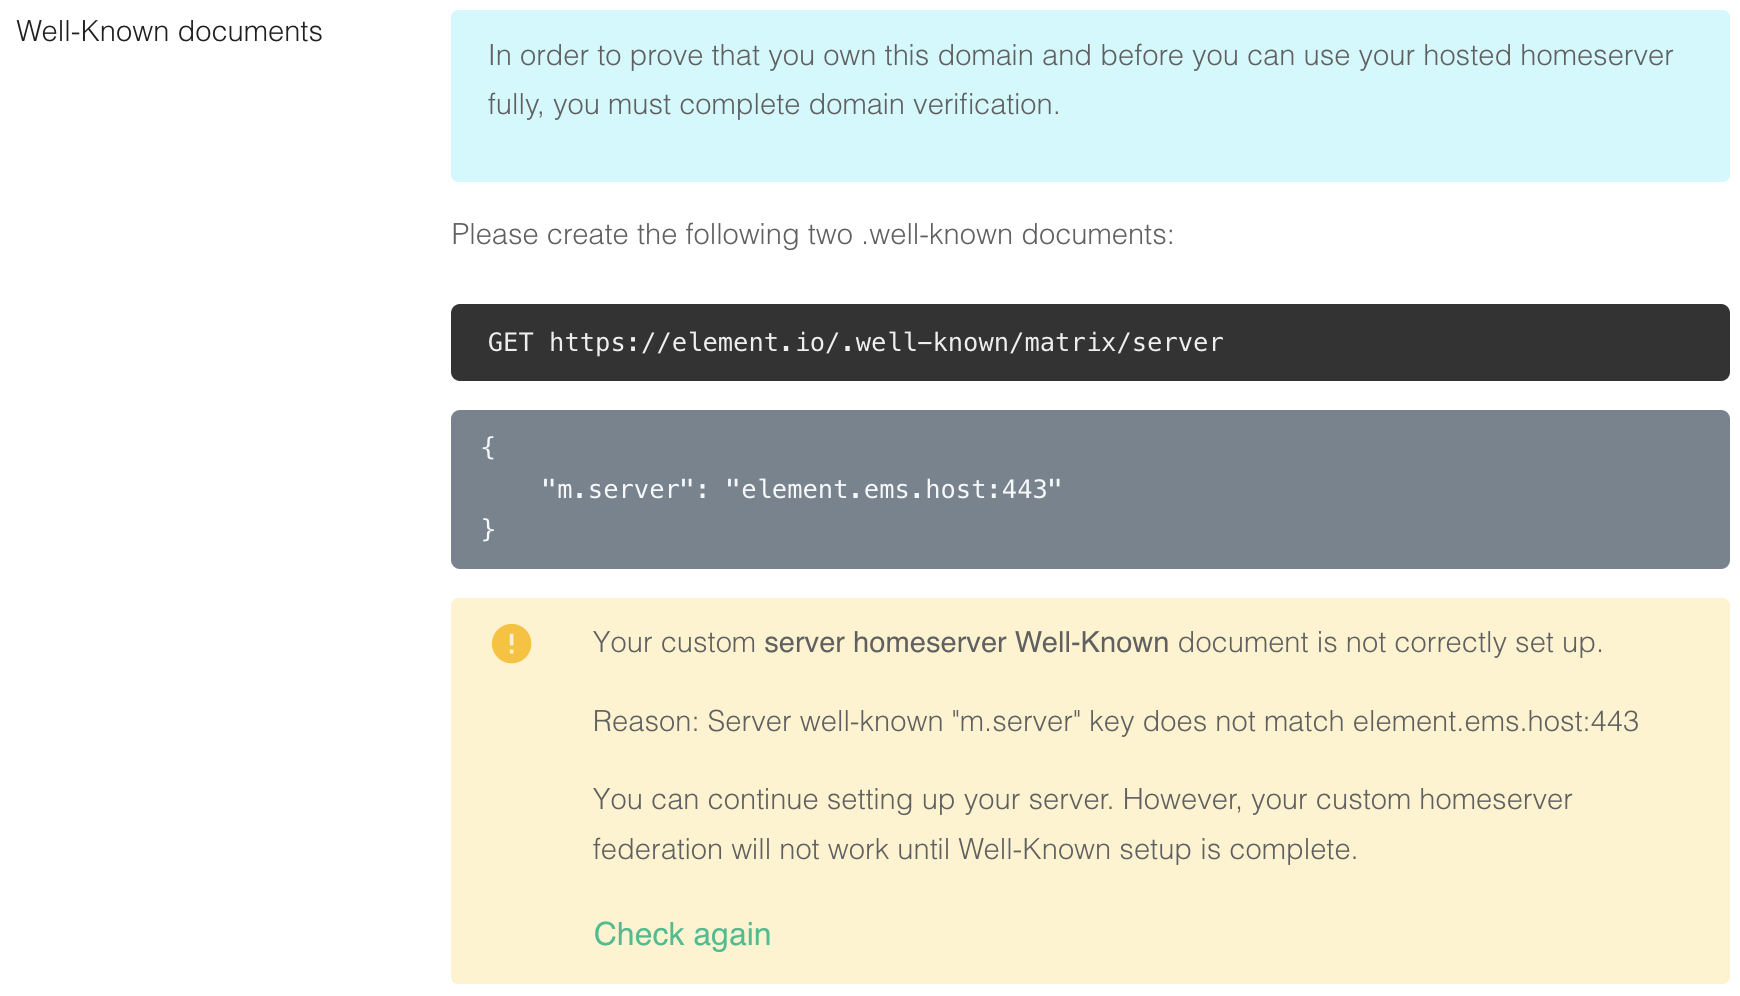
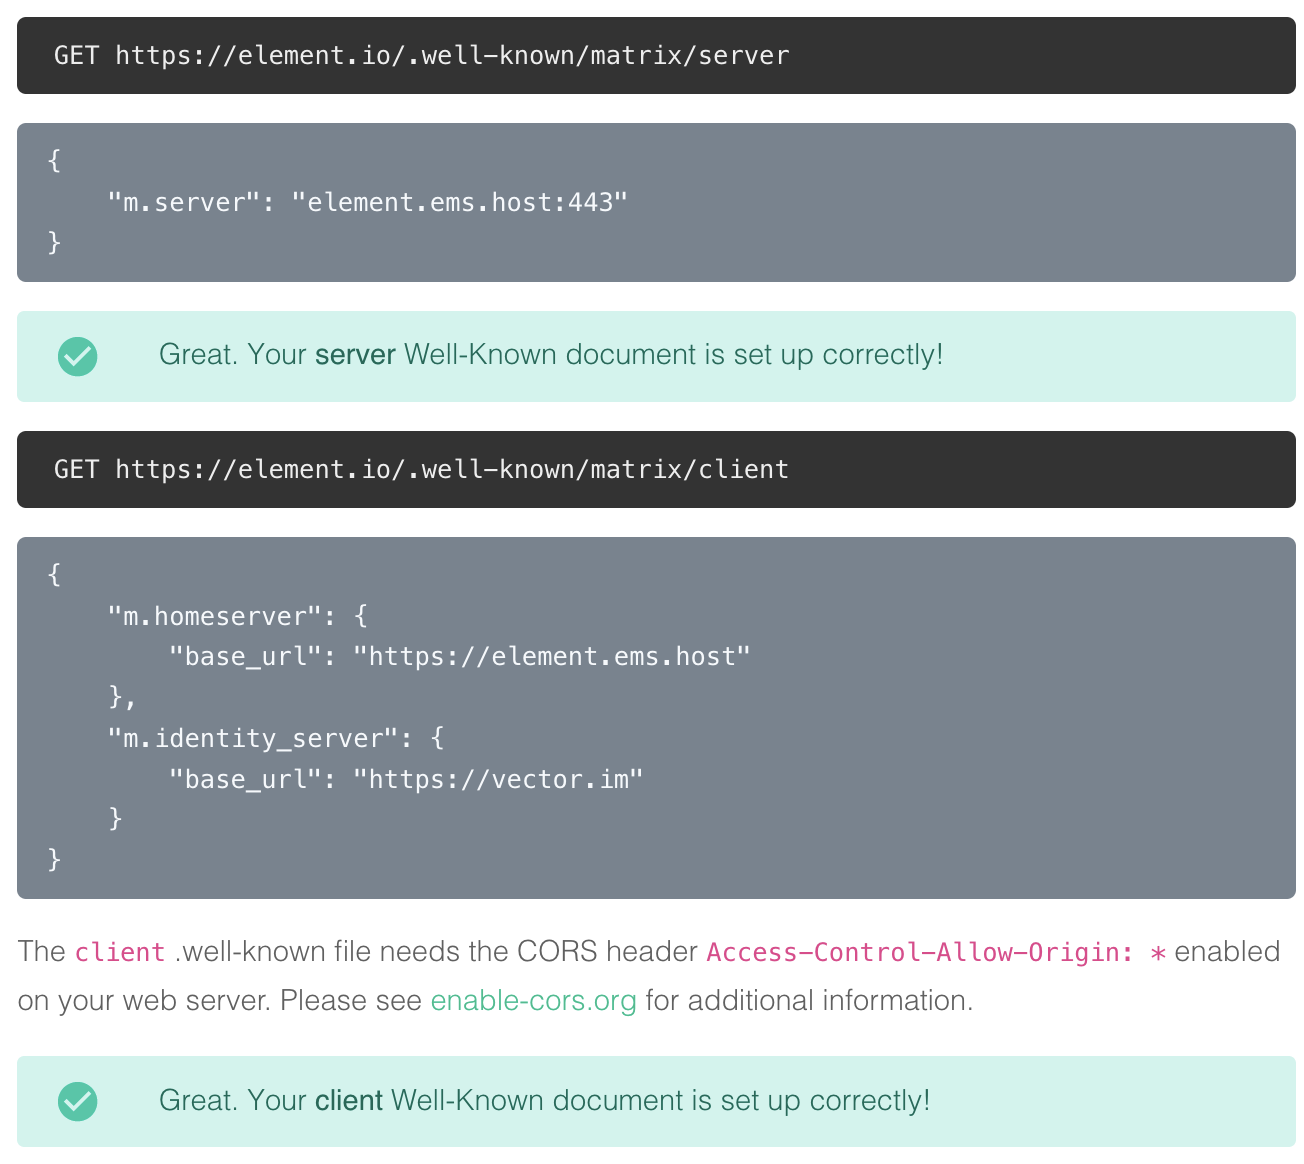
https://element.io/.well-known/matrix/server

{ "m.server": "element.ems.host:443" } -
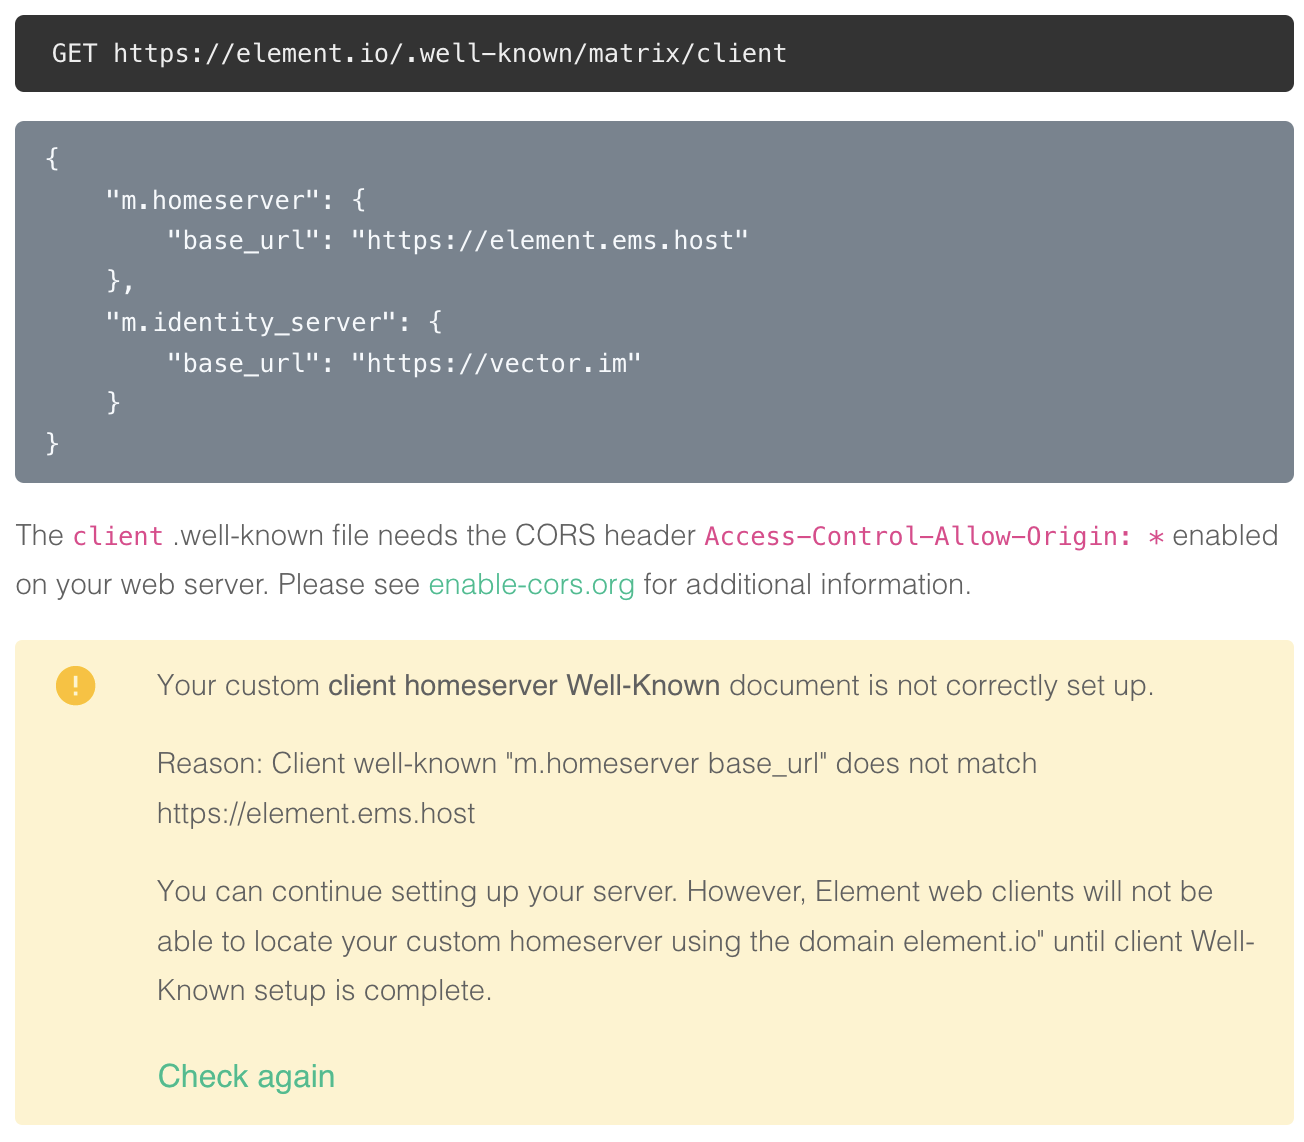
https://element.io/.well-known/matrix/client

You need to enable the CORS headerAccess-Control-Allow-Origin: *on the web server for this file. See https://enable-cors.org/ for instructions on how to do this. If you are using redicrects, the CORS headers must be set on all steps/hops.{ "m.homeserver": { "base_url": "https://element.ems.host" }, "m.identity_server": { "base_url": "https://vector.im" }, "org.matrix.msc4143.rtc_foci": [ { "type": "livekit", "livekit_service_url": "https://jwt.call.element.io" } ] }
Optional Nginx-specific configuration
If your web server is running Nginx, you can set this in the Nginx config instead of creating actual files.
server { server_name element.io ... # Matrix well-known files location /.well-known/matrix/client { return 200 '{"m.homeserver":{"base_url":"https://element.ems.host"},"m.identity_server":{"base_url":"https://vector.im"},"org.matrix.msc4143.rtc_foci":[{"type":"livekit","livekit_service_url":"https://jwt.call.element.io"}]}'; add_header Content-Type application/json; add_header 'Access-Control-Allow-Origin' '*'; } location /.well-known/matrix/server { return 200 '{"m.server": "element.ems.host:443"}'; add_header Content-Type application/json; } } -
-
Click
Check againto verify that your.well-knownfiles are configured correctly

You can also verify your `.well-known` files from the command line
Note the lines
access-control-allow-origin: *andcontent-type: application/json-
On Mac or Linux, using the
terminal$ curl -i https://element.io/.well-known/matrix/client HTTP/2 200 date: Fri, 31 Jul 2020 09:11:21 GMT content-type: application/json content-length: 129 set-cookie: __cfduid=x...; expires=Sun, 30-Aug-20 09:11:21 GMT; path=/; domain=.element.io; HttpOnly; SameSite=Lax access-control-allow-origin: * cf-cache-status: DYNAMIC cf-request-id: 0... expect-ct: max-age=604800, report-uri="https://report-uri.cloudflare.com/cdn-cgi/beacon/expect-ct" server: cloudflare cf-ray: 5... { "m.homeserver": { "base_url": "https://element.ems.host" }, "m.identity_server": { "base_url": "https://vector.im" }, "org.matrix.msc4143.rtc_foci": [ { "type": "livekit", "livekit_service_url": "https://jwt.call.element.io" } ] } $ curl -i https://element.io/.well-known/matrix/server HTTP/2 200 date: Fri, 31 Jul 2020 09:11:25 GMT content-type: application/json content-length: 52 set-cookie: __cfduid=x...; expires=Sun, 30-Aug-20 09:11:25 GMT; path=/; domain=.element.io; HttpOnly; SameSite=Lax access-control-allow-origin: * cf-cache-status: DYNAMIC cf-request-id: 0... expect-ct: max-age=604800, report-uri="https://report-uri.cloudflare.com/cdn-cgi/beacon/expect-ct" server: cloudflare cf-ray: 5... { "m.server": "element.ems.host:443" } -
On Windows, using
PowerShellPS C:\Users\twilight> Invoke-WebRequest -Uri https://element.io/.well-known/matrix/client StatusCode : 200 StatusDescription : OK Content : { "m.homeserver": { "base_url": "https://element.ems.host" }, "m.identity_server": { "base_url": "https://vector.im" }, "org.matrix.msc4143.rtc_foci": [ { "type": "livekit", "livekit_service_url": "https://jwt.call.element.io" } ] } RawContent : HTTP/1.1 200 OK Connection: keep-alive Access-Control-Allow-Origin: * CF-Cache-Status: DYNAMIC cf-request-id: 0... Expect-CT: max-age=604800, report-uri="https://repor... Forms : {} Headers : {[Connection, keep-alive], [Access-Control-Allow-Origin, *], [CF-Cache-Status, DYNAMIC], [cf-request-id, 0...]...} Images : {} InputFields : {} Links : {} ParsedHtml : System.__ComObject RawContentLength : 129 PS C:\Users\twilight> Invoke-WebRequest -Uri https://element.io/.well-known/matrix/server StatusCode : 200 StatusDescription : OK Content : { "m.server": "element.ems.host:443" } RawContent : HTTP/1.1 200 OK Connection: keep-alive Access-Control-Allow-Origin: * CF-Cache-Status: DYNAMIC cf-request-id: 0... Expect-CT: max-age=604800, report-uri="https://repor... Forms : {} Headers : {[Connection, keep-alive], [Access-Control-Allow-Origin, *], [CF-Cache-Status, DYNAMIC], [cf-request-id, 0...]...} Images : {} InputFields : {} Links : {} ParsedHtml : System.__ComObject RawContentLength : 52
-
-
You can continue without the
.well-knownfiles in place, but your server will have limited functionality until this is fixed -
In the
Custom Client domainfield, enterchat.element.io. This can be any domain, except the same asCustom Homeserver domain

-
Create a CNAME DNS record with your DNS provider according to the instructions given
chat.element.io. CNAME element.element.io.

-
This shows how this is done with Cloudflare DNS. Depending on your DNS provider, this might be different. Consult the documentation for your provider. Note that Proxy must be turned off with Cloudflare.

-
Back on EMS, click
Check again. Note that sometimes it might take a while for your new DNS record to propagate. You can continue, but functionality will be limited. Check back with the Hosts tab on https://ems.element.io/user/hosting and clickRebuild Hostonce the DNS record is in place.

You can also verify the CNAME DNS record using the command line
-
On Mac or Linux, using the
terminal$ dig chat.element.io CNAME ; <<>> DiG 9.10.6 <<>> chat.element.io CNAME ;; global options: +cmd ;; Got answer: ;; ->>HEADER<<- opcode: QUERY, status: NOERROR, id: 57888 ;; flags: qr rd ra; QUERY: 1, ANSWER: 1, AUTHORITY: 0, ADDITIONAL: 1 ;; OPT PSEUDOSECTION: ; EDNS: version: 0, flags:; udp: 512 ;; QUESTION SECTION: ;chat.element.io. IN CNAME ;; ANSWER SECTION: chat.element.io. 299 IN CNAME element.element.io. ;; Query time: 32 msec ;; SERVER: 1.1.1.1#53(1.1.1.1) ;; WHEN: Fri Jul 31 10:21:56 BST 2020 ;; MSG SIZE rcvd: 91 -
On Windows, using
PowerShellPS C:\Users\twilight> Resolve-DnsName -Name chat.element.io -Type CNAME Name Type TTL Section NameHost ---- ---- --- ------- -------- chat.element.io CNAME 299 Answer element.element.io
-
-
Continue from step 11 on Get Your Own EMS Server


Provider-specific instructions
GitHub Pages
If you are hosting your website with GitHub Pages, add this to the Jekyll config file _config.yml
include:
- .well-known
Microsoft Azure
If you are using Microsoft 365 / Azure to manage your domain or the rest of your infrastructure, please use the following instructions to host the .well-known/matrix URI (RFC 8615).
In this section, we will configure Azure to serve https://yourdomain.com/.well-known/matrix/client and https://yourdomain.com/.well-known/matrix/client.
The summary of steps is as follows:
- prepare json files
- create a Storage account then enable a Static website
- upload the json files to .well-known/matrix/ in the
$webcontainer - create a CDN and an endpoint for this container
- create a
CNAMEDNS entry for your custom domain, pointing to your CDN endpoint - associate your custom domain to your CDN endpoint
Prepare client and server .well-known files locally
On your computer, prepare two plain text files called client and server (again, notice the lack of file extension such as ".txt") which contain the following:
client
{
"m.homeserver": {
"base_url": "https://your-tenant.ems.host"
},
"m.identity_server": {
"base_url": "https://vector.im"
},
"org.matrix.msc4143.rtc_foci": [
{
"type": "livekit",
"livekit_service_url": "https://jwt.call.your-tenant.io"
}
]
}
Remember to replace your-tenant by the name of your EMS tenant.
server
{
"m.homeserver": {
"base_url": "https://your-tenant.ems.host:443"
}
}
Remember to replace your-tenant by the name of your EMS tenant.
You will be uploading these shortly.
Create a Storage account and Static website
Storage account
In the Azure Portal, create a Storage account.
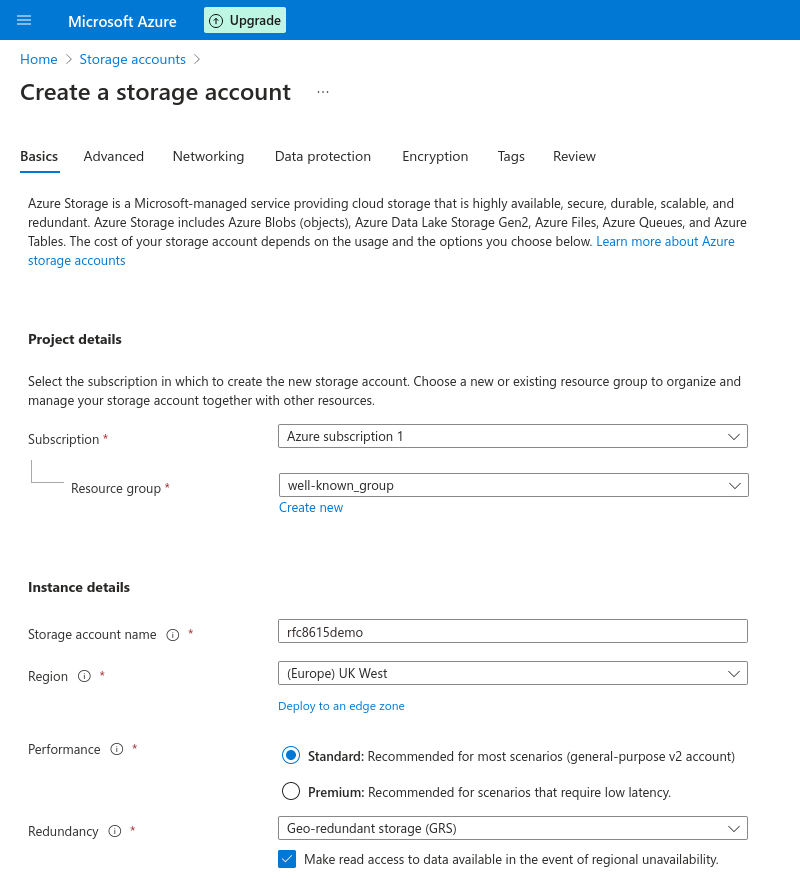
The name needs to be unique to Azure. yourdomainwellknown is an option that should work well in most scenarios.
Performarce can be left to Standard.
Redundancy should be set to Geo-redundant storage (GRS) as the .well-known URI will be a core part of your EMS deployment.
You can leave all other options to their default or change them to fit your specific deployment scenario.
Finally, click create.
Static website
Once the Storage account is created, you will need to create a Static website in this Storage account.
In the Storage account overview, choose "Static website", in the Data management section.
You do not need to provide a specific Index document name or Error document path.
Enabling the Static website in your Storage account will automatically create a $web storage container to which you can upload the json text files which will be served at the .well-known URI.
Go to "Containers", in the "Data storage" section, to upload the client and server files you prepered earlier.
Click on the $web container, then chose "Upload", which will open a panel on the right.
When uploading the client and server files, make sure to open the "advanced" part of the upload panel and choose to upload to a specific folder: .well-known/matrix/
Create a CDN, CNAME DNS entry for your custom domain and Custom domain name for the CDN endpoint
Creating a CDN is needed because Azure does not allow serving HTTPS over a custom domain using only a Storage account Static website. To do so, a CDN is necessary.
Create a CDN endpoint
Go back to your Storage account's main view and choose "Front Door and CDN" in the Security + Networking section, to create a CDN endpoint.
Service type: Azure CDN is sufficient, the more advanced features of Azure Front Door are not necessary here.
If you need to create a new profile, you may call the Profile name and Endpoint name as you wish.
For consistency, it is suggested to call them yourdomainwellknown as previously.
For Origin host name, pick your Static website.
For Query string caching behaviour, pick Ignore Query String, although this setting is not important in our context.
Once your endpoint is deployed, go to the resource, then go to your endpoint's further settings by clicking on it. Make note of its hostname (rfc8615demo.azureedge.net in our example) as you will need it shortly.
Create CNAME DNS entry for your custom domain
You will now create a DNS entry for your custom domain, a CNAME pointing to your Azure CDN endpoint's hostname. How to do so exactly will depend on who hosts your DNS servers. The specifics of this are beyond this documentation, but the following general information should be sufficient.
In your DNS provider's admin panel, add a DNS entry with the following details:
- Type:
CNAME - Domain: your custom domain, such as
yourdomain.com - Target: your Azure CDN Endpoint's hostname, such as
rfc8615demo.azureedge.netin our example
Once created, this DNS entry may take some time to propagate, but in most cases will be picked up quickly by Azure, as needed in the next step.
Associate your custom domain with your CDN Endpoint
In the endpoint's settings, choose "+ custom domain" to start adding your custom domain. A panel will open on the right.
Enter your custom domain: yourdomain.com and finally, click add.
If the CNAME entry can be seen by Azure, after a few minutes your custom domain should be associated with your CDN Endpoint.
Final result
https://yourdomain.com/.well-known/matrix/client and https://yourdomain.com/.well-known/matrix/server are now served over HTTPS by Azure.
You should now have the following resources in your Azure account:
- Storage account
- Front Door and CDN Profile
- Endpoint
Resources
- https://learn.microsoft.com/en-us/azure/cdn/cdn-create-a-storage-account-with-cdn
- https://learn.microsoft.com/en-us/azure/cdn/cdn-storage-custom-domain-https
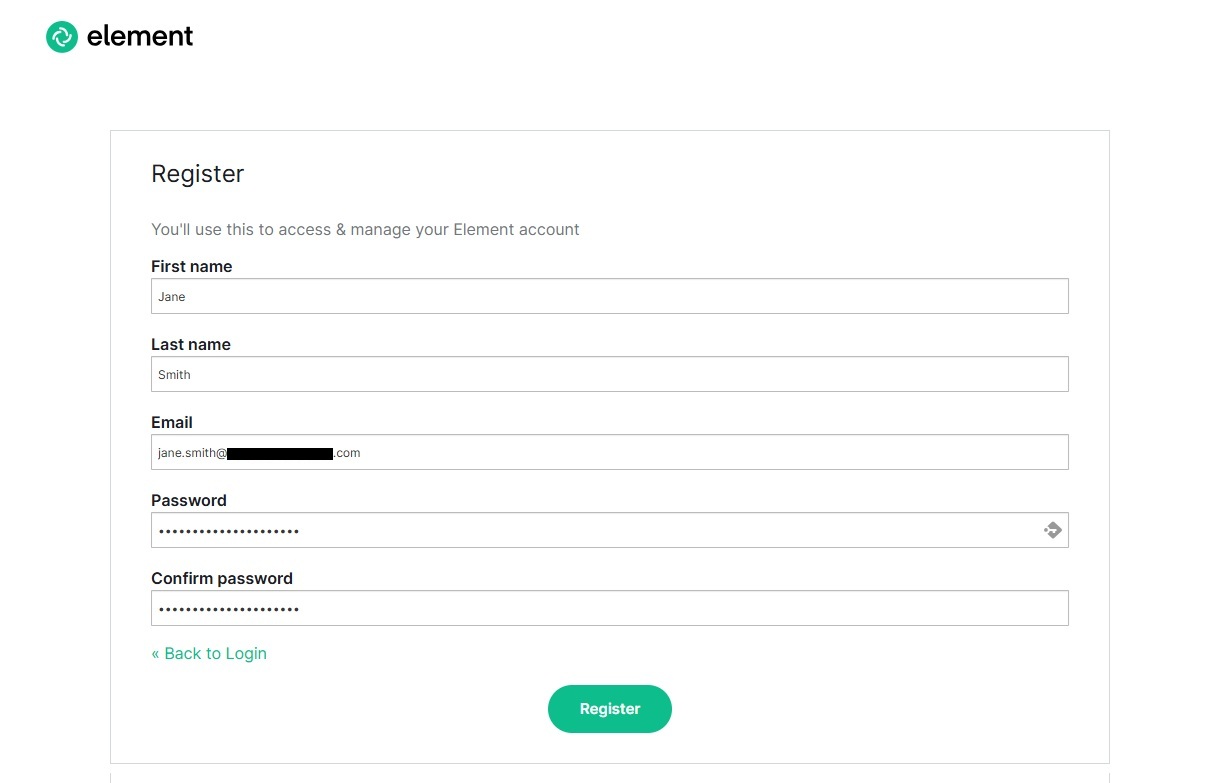
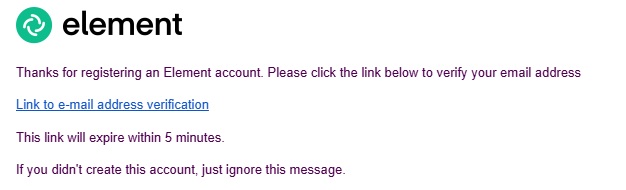
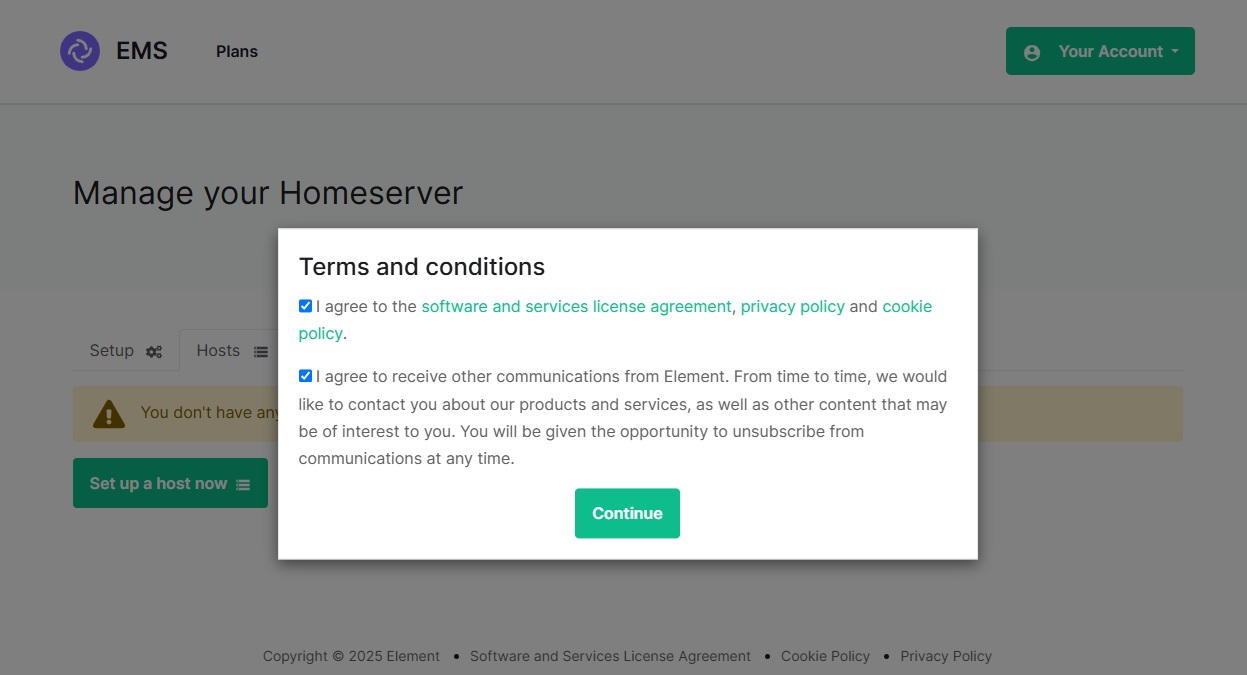
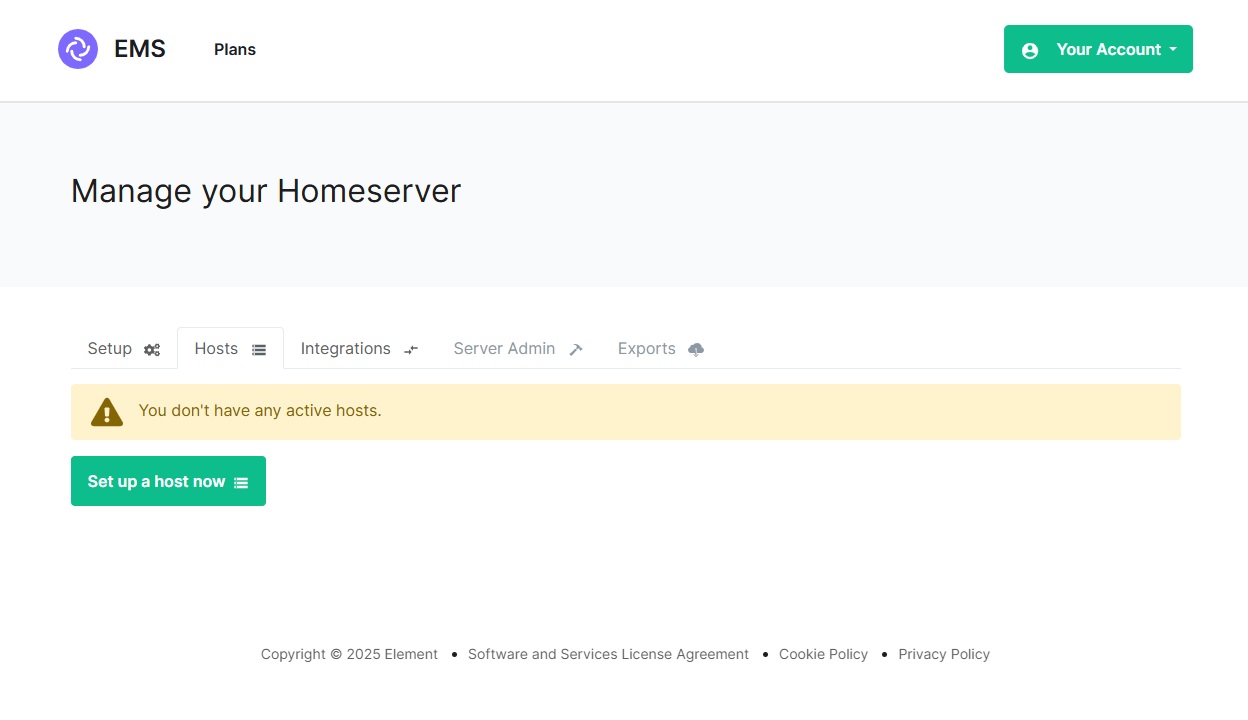
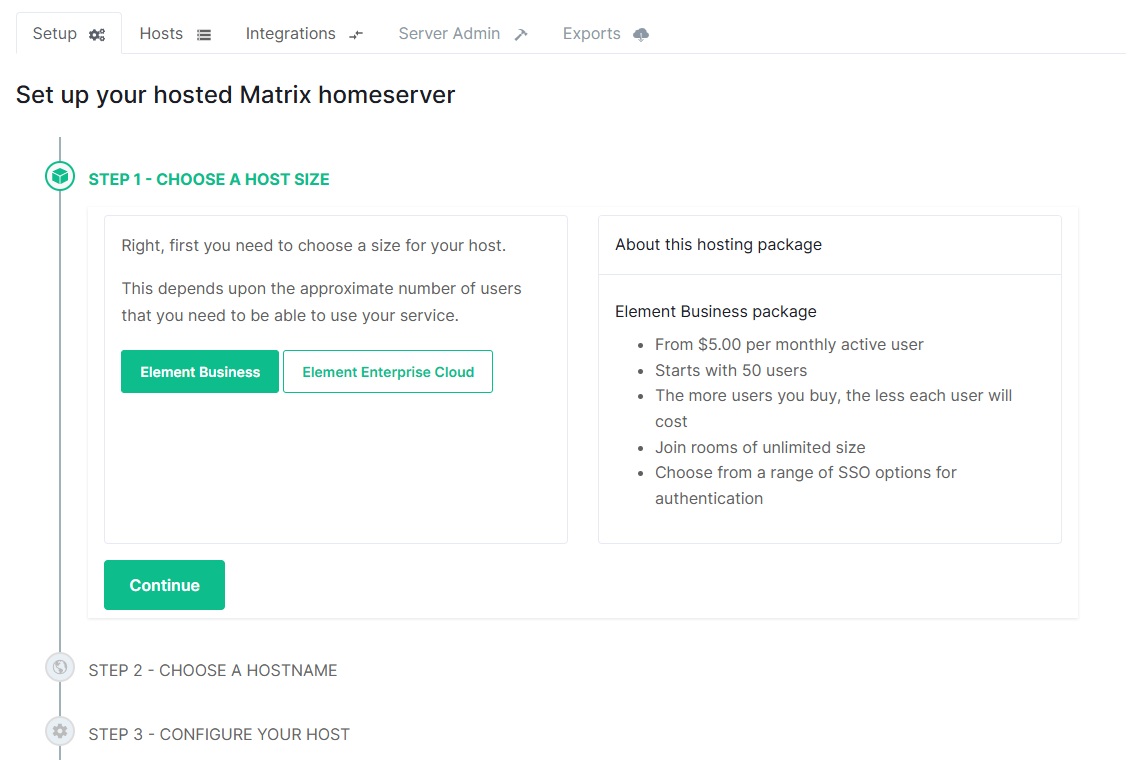
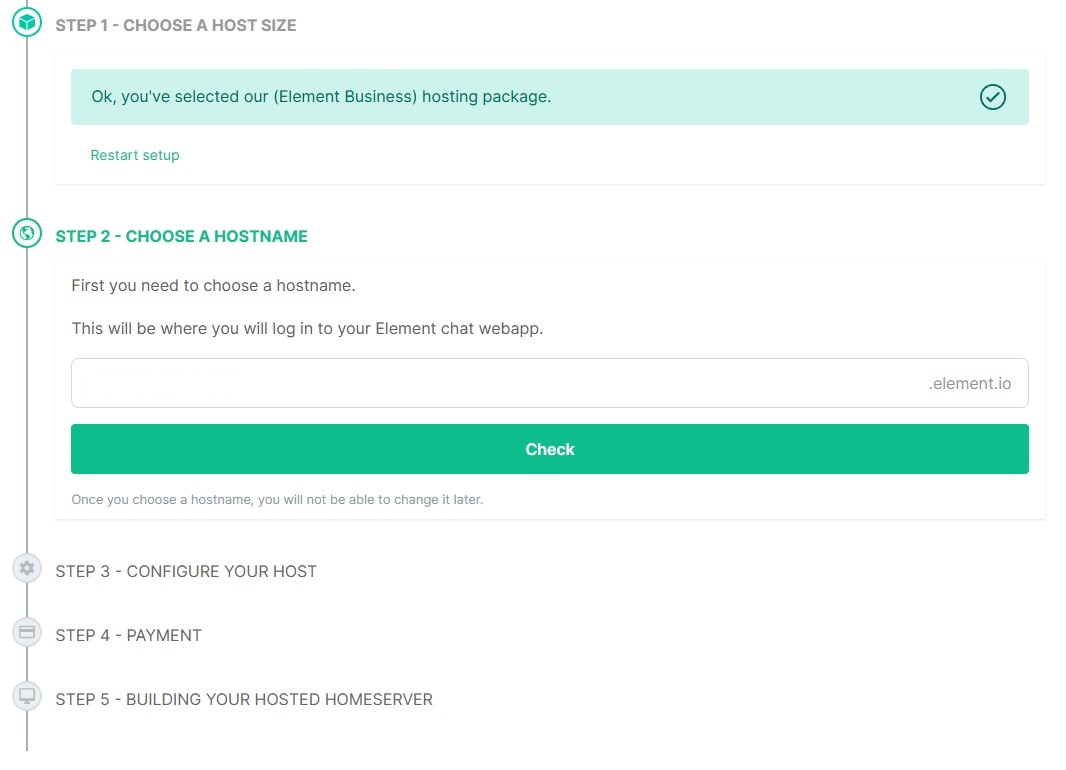
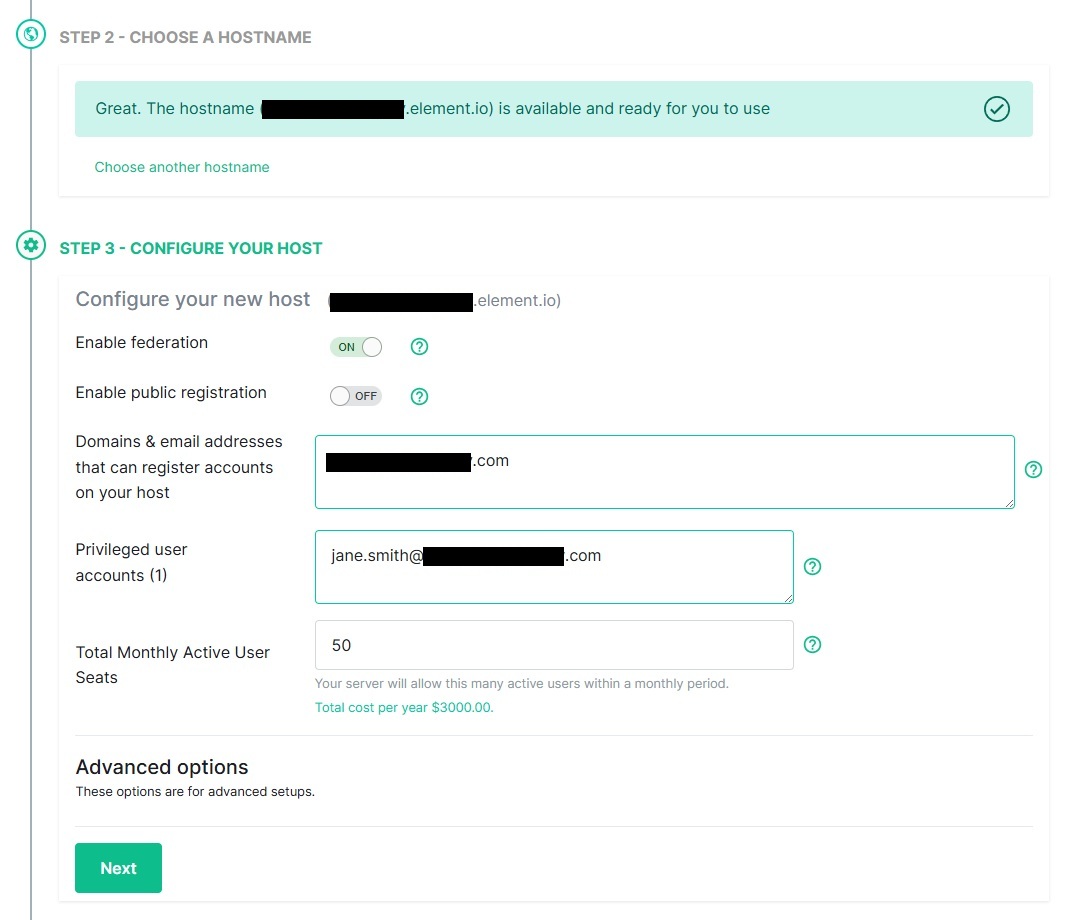
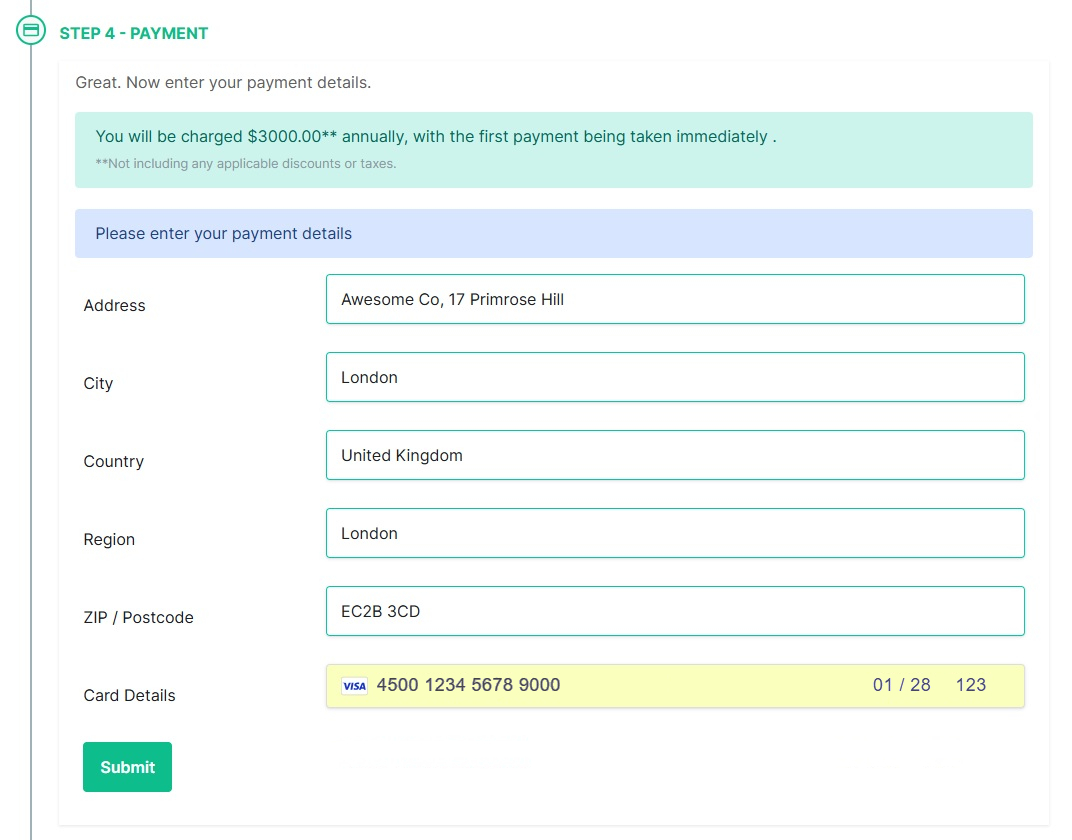
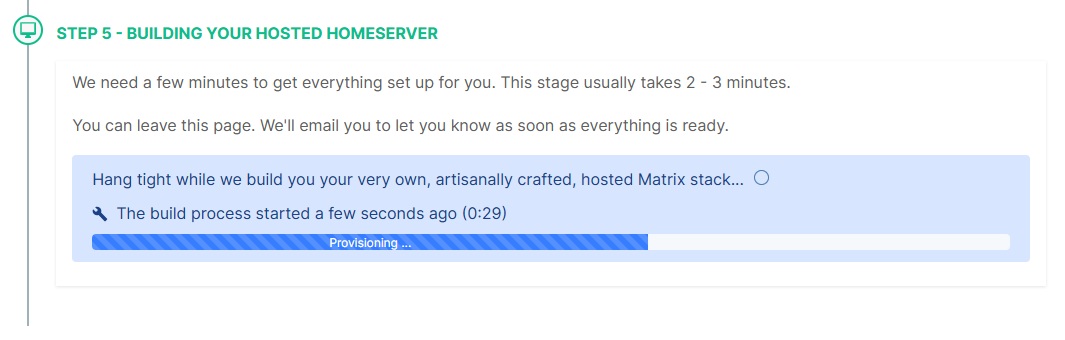
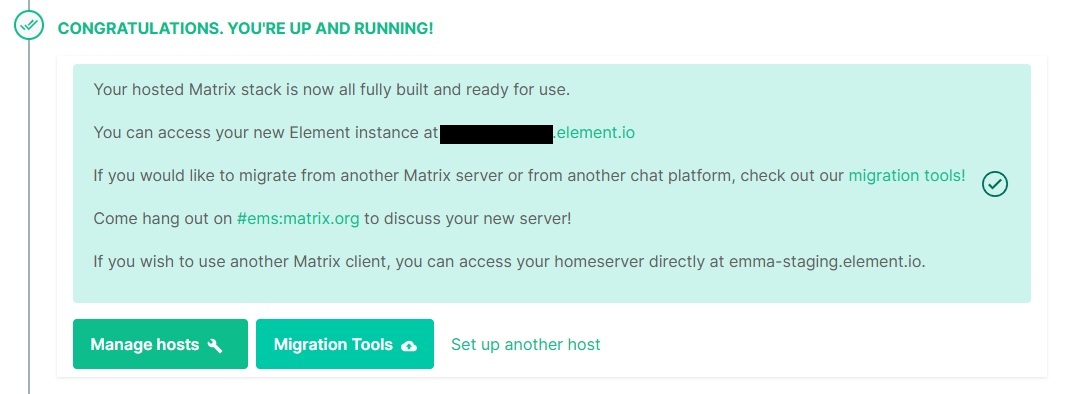
How to Get an EMS Server
-
Go to https://ems.element.io/user/hosting#/hosts and click the “Register” link below the sign-in button.

-
Fill in your details and click the Register button. Note: Your password must be at least 12 characters long.

-
Look in your inbox for your verification email. (If it doesn’t appear after a couple of minutes - check your spam!) Click the link in the email to verify your email address.

-
You will be automatically redirected to the EMS Hosting site. Before proceeding any further, agree to our terms and conditions.

-
Click “Set up a host now” to start setting up your first EMS server

-
Choose your host size and click Continue.

-
Choose a hostname and click “Check” to check availability.

-
Configure your new host.

-
Set up your payment card.

-
Check your payment information and click Purchase to build the host.

-
Sit tight for a few minutes while your server is being built

-
Once your host is ready, click Manage hosts to configure additional settings and add users.


Migrate From EMS to Self-Hosted
For support on Synapse or matrix-media-repo, ask in the Matrix rooms #synapse:matrix.org and #mediarepo:t2bot.io. For support on bridges, see the bridge documentation for each bridge's support channel.
See also this excellent blog post by Robin Riley at The Matrix.org Foundation.
Important
- It is impossible to change the domain of any Matrix server. Therefore if your EMS server is not using Custom DNS (i.e. your Matrix IDs are
@someone:hostname.ems.host), unfortunately it is not possible to import your export to your own or another environment.- You can run an export with this domain in a local environment if you set up your own DNS and self-signed certificates. But you will not be able to federate with the public Matrix federation.
- Do not cancel your EMS server until you have downloaded your export and verified its content. Canceling your server will erase your data.
- You will experience some downtime as your server will be stopped while the export is running. The EMS export tool will estimate the actual downtime when initiated.
- Ensure all your users have key backup configured and working before starting the export and migration. All clients need to log out and in again after the migration. See the Cross Signing section for more information about key backup.
- It is impossible to read encrypted messages or media from the export. Encrypted data in Matrix can only be decrypted by the user in their client when they have the required decryption keys.
Export data
- Go to https://ems.element.io/user/hosting#/exports
- Select the server you want to export from in the drop-down box, then click
Create export - Wait for the export of your config, database, and media to complete
- Once all exports have completed, download all files provided
Import process
For all components, you must install the same version as your EMS server is running. Version information is provided in the hostname-config.md file. If a newer version is available, once the import is completed and verified, follow the official upgrade documentation for each component to upgrade.
All required configuration values are provided in the hostname-config.md file.
- Following official documentation, install and configure
- PostgreSQL. Refer to the Synapse PostgreSQL documentation for database setup
- Synapse
- Optional (see media step below): matrix-media-repo
- When generating your Synapse configuration file, you MUST use the same domain as your EMS server
- Do not start Synapse yet
- In the Synapse config file (usually
homeserver.yaml), set:- pepper. If you do not do this, you have to reset all passwords
- Signing key. This is stored in a file. See this config file option for path. Alternatively, add the public key for your EMS hosted server to
old_signing_keys. If your EMS server is still running, you can find your public signing key at https://yourHostname.ems.host/_matrix/key/v2/server - macaroon_secret_key
- Import the Synapse database
- Create a new database per the Synapse PostgreSQL documentation
- Or, if your Synapse database is not empty, empty it
WARNING - THIS WILL IMMEDIATELY AND IRRECOVERABLY DELETE DATA, PLEASE TAKE CARE. WE ACCEPT NO RESPONSIBILITY IF YOU DELETE THE WRONG DATABASE OR DATA
Connect to the database withpsql, then run the following queries:
Enter the commandDO $$ DECLARE r RECORD; BEGIN FOR r IN (SELECT tablename FROM pg_tables WHERE schemaname = current_schema()) LOOP EXECUTE 'DROP TABLE ' || quote_ident(r.tablename) || ' CASCADE'; END LOOP; END $$; DROP sequence cache_invalidation_stream_seq; DROP sequence state_group_id_seq; DROP sequence user_id_seq; DROP sequence account_data_sequence; DROP sequence application_services_txn_id_seq; DROP sequence device_inbox_sequence; DROP sequence device_lists_sequence; DROP sequence e2e_cross_signing_keys_sequence; DROP sequence event_auth_chain_id; DROP sequence events_backfill_stream_seq; DROP sequence events_stream_seq; DROP sequence presence_stream_sequence; DROP sequence push_rules_stream_sequence; DROP sequence pushers_sequence; DROP sequence receipts_sequence; DROP sequence un_partial_stated_event_stream_sequence; DROP sequence un_partial_stated_room_stream_sequence;\dand make sure no tables or sequences remain.
Disconnect from the database - Extract the database dump
unzip emsHostname-synapse-database.zip - Import the database dump
pg_restore \ --username USERNAME \ --host HOSTNAME \ --dbname DATABASE_NAME \ --no-owner \ /path/to/id-emsHostname-synapse-database.dir/ - Verify that sequence was set correctly. Connect to the database and run the query
SELECT * FROM state_group_id_seq;last_valueshould be greater than 1
- Import media into matrix-media-repo according to documentation here or import media into Synapses built-in media repository using the
import_to_synapseexecutable available from the latest matrix-media-repo release - Start Synapse and ensure everything is working as expected
- Optionally, install Element Web or use another Matrix client
-
If you have any bridges, please see the documentation for each bridge
Discord | Hookshot | IRC | Signal | Slack | Telegram | Whatsapp- The process for importing the bridge databases is the same as with Synapse
- Cancel your EMS server. See this FAQ document for instructions. Note, this cannot be undone and all your data will be lost. Ensure your imported server is working as expected before doing this
Migrate From Self-Hosted to EMS
Notes
Before starting with this guide, please contact EMS support from https://ems.element.io/support or by emailing ems-support@element.io
- Except where specified, you should be able to just copy-paste each command in succession.
- Please do not change any file names anywhere.
Preparation
This section outlines what you should do ahead of the migration in order to ensure the migration goes as quickly as possible and without issues.
- At the latest 48 hours before your migration is scheduled, set the TTL on any DNS records that need to be updated to the lowest allowed value.
- Upgrade your Synapse to the same version as EMS is running. Generally this will be the latest stable release. https://element.ems.host/_matrix/federation/v1/version is a good indicator, but confirm version with your EMS contact.
- This is not required, but if your Synapse version is not the same as the EMS version, your migration will take longer.
- Check the size of your database and report to your EMS contact:
- PostgreSQL: Connect to your database and issue the command
\l+ - SQLite:
ls -lah /path/to/homeserver.db
- PostgreSQL: Connect to your database and issue the command
- Check the size of your media repository and report to your EMS contact.
- Synapse Media Store:
du -hs /path/to/synapse/media_store/ - Matrix Media Repo: https://github.com/turt2live/matrix-media-repo/blob/master/docs/admin.md#per-server-usage
- Synapse Media Store:
- If you are using SQLite instead of PostgreSQL, you should port your database to PostgreSQL by following this guide before dumping your database and sending to your EMS contact.
- This step is not required, but will speed up your migration.
SSH to your matrix server
You might want to run everything in a tmux or a screen session to avoid disruption in case of a lost SSH connection.
Generate password for gpg encryption
pwgen -s 64 1
Alternatively, you can use our GPG key. element-support-public.pgp
GPG
If gpg is being uncooperative, use the command gpgconf --kill gpg-agent.
Create a folder to store everything
mkdir -p /tmp/synapse_export
cd /tmp/synapse_export
The guide from here on assumes your current working directory is /tmp/synapse_export.
Set restrictive permissions on the folder
If you are working as root: (otherwise set restrictive permissions as needed):
chmod 000 /tmp/synapse_export
Copy Synapse config
Copy the following files and send to EMS Support:
- Your Synapse configuration file (usually
homeserver.yaml) - Your message signing key.
- This is stored in a separate file. See the Synapse config file for the path. The variable is
signing_key_pathhttps://element-hq.github.io/synapse/latest/usage/configuration/config_documentation.html#signing_key_path
- This is stored in a separate file. See the Synapse config file for the path. The variable is
Stop Synapse
DO NOT START IT AGAIN AFTER THIS
Doing so can cause issues with federation and inconsistent data for your users.
While you wait for the database to export or files to transfer, you should edit or create the well-known files and DNS records to point to your EMS host. This can take a while to update so should be done as soon as possible in order to ensure your server will function properly when the migration is complete.
Database export
PostgreSQL
Dump, compress and encrypt
Replace:
-
<dbhost>(ip or fqdn for your database server) -
<dbusername>(username for your synapse database) -
<dbname>(the name of the database for synapse)
pg_dump -O -h <dbhost> -U <dbusername> -d <dbname> | gzip > customer_db_export.sql.gz
gpg --symmetric --no-symkey-cache customer_db_export.sql.gz
rm customer_db_export.sql.gz
If required, split into smaller files
Please only do this if you have a slow connection and are worried about transferring a single large file.
split -b 100m customer_db_export.sql.gz.gpg customer_db_export.sql.gz.gpg.part-
rm customer_db_export.sql.gz.gpg
SQLIte
Compress and encrypt
tar -zcvf homeserver.db.tar.gz /path/to/homeserver.db
gpg --symmetric --no-symkey-cache homeserver.db.tar.gz
rm homeserver.db.tar.gz
If required, split into smaller files
Please only do this if you have a slow connection and are worried about transferring a single large file.
split -b 100m homeserver.db.tar.gz homeserver.db.tar.gz.part-
rm homeserver.db.tar.gz
Media export
If you are using SQLIte as database
Skip ahead to and follow Backup media export.
Download the export tool
Download the latest version of export_synapse_for_import-linux-x64 (or export_synapse_for_import-win-x64.exe) from https://github.com/turt2live/matrix-media-repo/releases
wget https://github.com/turt2live/matrix-media-repo/releases/download/vx.x.x/export_synapse_for_import-linux-x64
chmod +x export_synapse_for_import-linux-x64
Run the export
Replace:
-
<dbhost>(ip or fqdn for your database server) -
<dbname>(the name of the database for synapse) -
<dbusername>(username for your synapse database) -
/path/to/synapse/media_store(the path to where synapse stores your media) -
<yourdomain.tld>(the domain for your server. this is the part that is in your usernames)
./export_synapse_for_import-linux-x64 -h
./export_synapse_for_import-linux-x64 -dbHost <dbhost> -dbPort 5432 -dbName <dbname> -dbUsername <dbusername> -mediaDirectory /path/to/synapse/media_store -serverName <yourdomain.tld> -destination ./customer_media_export
mv logs customer_media_export
mv media-repo.yaml customer_media_export
rm export_synapse_for_import-linux-x64
Compress and encrypt
tar -zcvf customer_media_export.tar.gz customer_media_export
gpg --symmetric --no-symkey-cache customer_media_export.tar.gz
rm customer_media_export.tar.gz
rm -r customer_media_export
If required, split into smaller files
Please only do this if you have a slow connection and are worried about transferring a single large file.
split -b 100m customer_media_export.tar.gz.gpg customer_media_export.tar.gz.gpg.part-
rm customer_media_export.tar.gz.gpg
Backup media export
Compress and encrypt
Replace * /path/to/synapse/media_store (the path to where synapse stores your media)
tar -zcvf customer_backup_media_export.tar.gz /path/to/synapse/media_store
gpg --symmetric --no-symkey-cache customer_backup_media_export.tar.gz
rm customer_backup_media_export.tar.gz
If required, split into smaller files
Please only do this if you have a slow connection and are worried about transferring a single large file.
split -b 100m customer_backup_media_export.tar.gz.gpg customer_backup_media_export.tar.gz.gpg.part-
rm customer_backup_media_export.tar.gz.gpg
Transfer
Download the files, then upload to the Google Drive folder shared by EMS or a location as agreed with your EMS contact.
On your local computer:
scp -r -P 1234 -i ~/.ssh/matrix-server youruser@1.2.3.4:/tmp/synapse_export /some/local/folder
Cleanup
We strongly recommend that you leave the export and Synapse untouched until the import is finished and everything is verified working.
Note on users and Element
Element does have support for changing the delegated homeserver URL. All your users will have to sign out and sign in again to Element. You should ensure everyone has Key Backup configured and working.
Your users will not be able to decrypt messages send in their encrypted rooms while your server is offline for the migration.
Force logout of old sessions after migration
If you do not log out all sessions for your users before the migration, you can force this later. Below is a sample config file for nginx that tells all clients trying to connect to it to sign out.
Note that the headers are important, otherwise this will not work one one or more of the Element clients. Valid HTTPS is required.
This is not tested on any other Matrix clients, but it should work in theory if the client follows the Matrix Spec.
server {
listen [::]:443 ssl http2;
listen 443 ssl http2;
server_name old.delegated.url.com;
location / {
if ($request_method = 'OPTIONS') {
add_header 'Access-Control-Allow-Origin' '*';
add_header 'Access-Control-Allow-Methods' 'GET, POST, OPTIONS';
add_header 'Access-Control-Allow-Headers' 'authorization,DNT,User-Agent,X-Requested-With,If-Modified-Since,Cache-Control,Content-Type,Range';
add_header 'Access-Control-Max-Age' 1728000;
add_header 'Content-Type' 'text/plain; charset=utf-8';
add_header 'Content-Length' 0;
return 204;
}
if ($request_method = 'POST') {
add_header 'Access-Control-Allow-Origin' '*' always;
add_header 'Access-Control-Allow-Methods' 'GET, POST, OPTIONS' always;
add_header 'Access-Control-Allow-Headers' 'authorization,DNT,User-Agent,X-Requested-With,If-Modified-Since,Cache-Control,Content-Type,Range' always;
add_header 'Access-Control-Expose-Headers' 'Content-Length,Content-Range' always;
}
if ($request_method = 'GET') {
add_header 'Access-Control-Allow-Origin' '*' always;
add_header 'Access-Control-Allow-Methods' 'GET, POST, OPTIONS' always;
add_header 'Access-Control-Allow-Headers' 'authorization,DNT,User-Agent,X-Requested-With,If-Modified-Since,Cache-Control,Content-Type,Range' always;
add_header 'Access-Control-Expose-Headers' 'Content-Length,Content-Range' always;
}
default_type application/json;
return 401 '{"errcode":"M_UNKNOWN_TOKEN","error":"Server moved, please log in again."}';
}
ssl_session_timeout 1d;
ssl_session_cache shared:MozSSL:10m; # about 40000 sessions
ssl_session_tickets off;
ssl_protocols TLSv1.3;
ssl_prefer_server_ciphers on;
add_header Strict-Transport-Security "max-age=63072000" always;
ssl_stapling on;
ssl_stapling_verify on;
error_log /var/log/nginx/old.delegated.url.com.error.log;
access_log /var/log/nginx/old.delegated.url.com.access.log;
ssl_certificate /etc/letsencrypt/live/old.delegated.url.com/fullchain.pem;
ssl_certificate_key /etc/letsencrypt/live/old.delegated.url.com/privkey.pem;
}
# Redirect HTTP to HTTPS
server {
listen 80;
listen [::]:80;
server_name old.delegated.url.com;
if ($host = old.delegated.url.com) {
return 301 https://$host$request_uri;
}
return 404;
}
Reset User Password
Resetting an account password will log out all sessions. Before doing this, make sure that
- all sessions are connected to key backup,
- all sessions have backed up all their keys. See Check Status, and
- the correct key backup passphrase is available.
-
Click
Your AccountandManage Serversor click this link https://ems.element.io/user/hosting. -
Click
Server Admin, select your host, thenUsers -
Click the user you want to manage

-
Click
Reset password, enter a new password and clickGo

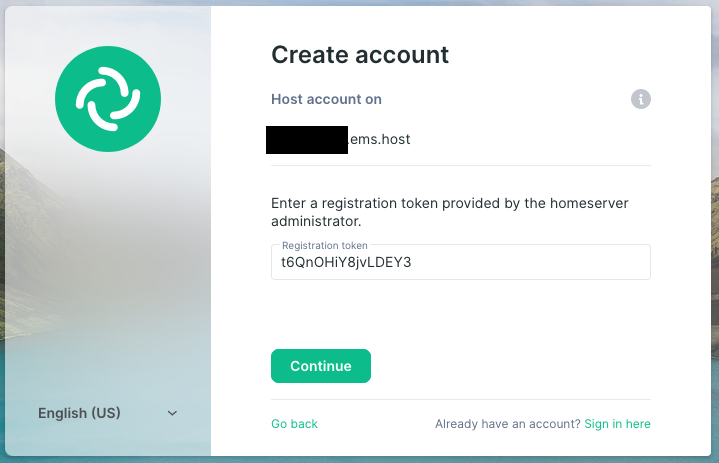
Token based registration
Create a new registration token using the Synapse Admin API. Give this to your users.
The registration flow looks like this:
-
Enter username, password and email as normal. Click
Register

-
Enter the registration token and click
Continue

-
Continue registration like normal


Adding a Trust & Safety Contact
- Click
Your AccountandManage Serversor click this link https://ems.element.io/user/hosting. - Click the Hosts tab.
- Add an email address to the
Trust and Safety contactfield and clickSaveat the bottom.
This contact should be a user with access to respond to content takedown notices and other trust & safety concerns (such as deactivating users).
Authentication
LDAP Active Directory
This guide assumes you already have a forest/domain configured and that your environment is properly secured.
This is a basic configuration. You may want to set additional options or permissions in your forest/domain.
See also Delegated Authentication for single sign-on (SSO) integration.
Setup
To enable authentication with LDAP and Active Directory, the following needs to be done:
- Configure secure LDAP in your domain.
- Create a user and optionally an UO to use for LDAP authentication.
Configure Your EMS Server
- Set up an Element Cloud Enterprise server.
- Click the Integrations tab.
- Select LDAP from the list of available Advanced Authentication methods.
- Set the following configuration parameters:
Bind URI: ldaps://ldap.example.com:636
Base: OU=matrix,DC=example,DC=com
Bind DN: CN=emsadmin,CN=Users,DC=example,DD=com
Bind Password: supersecret
UID: SamAccountName
Display Name: See below
Email: mail
- For Display Name, you have a few options based on your preference. For example:
- displayName
- GivenName
- Name
- sn
- For a full list, open PowerShell on your domain controller and enter
Import-Module ActiveDirectory
Get-ADUser test_user -Properties *
- Save your LDAP settings and wait for your EMS server to reprovision.
- Authentication in Element should now be working. If not, please look in the logs for your firewall or domain controllers or contact EMS support from our support form
OpenID Connect
Your homeserver can be configured to authenticate its users with an OpenID Connect provider. Here we list the most popular providers and how to configure them.
See also Delegated Authentication for single sign-on (SSO) integration .
Authentik
- Create a new
OAuth2/OpenID Providerprovider - Name: can be anything
- Authentication flow:
default-authentication-flow - Authorization flow:
default-provider-authentication-explicit-consent - Client type: Confidential
- Take note of the Client ID and Client Secret
- Redirect URIs/Origins (RegEx):
https://my-host.ems.host/_synapse/client/oidc/callback. Adapt the URL to match your homeserver's address. You must use your.ems.hostdomain, even if your server uses Custom DNS. - Signing Key:
authentik Self-signed Certificate - Create an application using the provider you just created. Take note of the Slug
In the Element Matrix Services configuration form
- Preset:
Custom - Issuer:
https://your-authentik-instance.com/application/o/the-slug-from-above/(you can also find this URL on the provider asOpenID Configuration Issuer) - Client ID and Secret: Values from above
- Discover endpoints: Enable
- Scopes:
openid,profile,email - Subject claim:
sub - Username attribute:
preferred_username - Display name attribute:
name
Gitea
- Create a new
OAuth2 Applicationon https://your-gitea-instance.com/user/settings/applications - Choose a name for you and your users to recognize
- Set
Redirect URIstohttps://my-host.ems.host/_synapse/client/oidc/callback. Adapt the URL to match your homeserver's address. You must use your.ems.hostdomain, even if your server uses Custom DNS. - Confidential Client: enable
In the Element Matrix Services configuration form
- Preset:
Custom - Issuer:
https://your-gitea-instance.com/ - Client ID and Secret: Values given by Gitea OAuth2 settings
- Discover endpoints: Enable
- Scopes:
openid,profile - Subject claim: leave empty
- Username attribute:
name - Display name attribute:
name'
GitHub
For detailed information, read GitHub's guide on OpenID .
- Create a new application on GitHub.com .
- Choose a name for you and your users to recognize.
- Choose a homepage URL. You can pick any URL. If your company maintains a guide on how to use Matrix, this would be most helpful.
- The Authorization callback URL needs to be
https://my-host.ems.host. Adapt the URL to match your homeserver's address. You must use your.ems.hostdomain, even if your server uses Custom DNS. - Save and note the client ID and client secret. Those are needed when adding the OpenID Connect integration in our interface.
In the Element Matrix Services configuration form
Use the preset GitHub for a simplified form or use Custom with the following values:
- Issuer must be
https://github.com/ - Use the client id and secret from above.
- Discover must be turned off.
- Authorization URI must be
https://github.com/login/oauth/authorize. - Token URI must be
https://github.com/login/oauth/authorize. - User Info URI must be
https://api.github.com/user. - JWKS URI is not required, because the scope
profilewill be requested. - The scopes should be
openid,profile,read:user. - Subject Claim must be
id. - Username attribute should be
login. - The display name can be
name(GitHub's display name) orlogin(GitHub's user handle).
GitLab
For detailed information, read GitLab's guide on OpenID .
- Create a new application on GitLab.com.
- Choose a name for you and your users to recognize.
- Choose a homepage URL. You can pick any URL. If your company maintains a guide on how to use Matrix, this would be most helpful.
- The Redirect URL needs to be
https://my-host.ems.host/_synapse/client/oidc/callback. Adapt the URL to match your homeserver's address. You must use your.ems.hostdomain, even if your server uses Custom DNS. - Check the scopes
read_user,openidandprofile. - Save and note the client ID and client secret. Those are needed when adding the OpenID Connect integration in our interface.
To connect your own GitLab instance, simply adapt the URL path.
In the Element Matrix Services configuration form
- Issuer must be
https://gitlab.com/or the URL of your GitLab instance. - Use the client id and secret from above.
- Discover must be turned on.
- The scopes should be
openid,profile,read_user. - Leave Subject Claim empty.
- Username attribute should be
nickname. - Display name attribute can be
name(GitLab's display name) ornickname(GitLab's user handle).
For detailed information, read Google's guide on OpenID .
- Create a new application on Google .
- Click
Create credentialsandOAuth client ID. - Select the application type
Web application. - Choose a name for you and your users to recognize.
- Add an authorized redirect URI with your homeserver URL, like
https://my-host.ems.host/_synapse/client/oidc/callback. You must use your.ems.hostdomain, even if your server uses Custom DNS. - Save and note the client ID and client secret. Those are needed when adding the OpenID Connect integration in our interface.
In the Element Matrix Services configuration form
Use the preset Google for a simplified form or use Custom with the following values:
- Issuer must be
https://accounts.google.com/. - Use the client id and secret from above.
- Discover must be turned on.
- The scopes should be
openid,profile,email. - Leave Subject Claim empty.
- Username attribute can be
email. This means your Matrix addresses will include the server domain of the user's e-mail address. - Display name attribute can be
name.
Okta
For detailed information, read Okta's guide onOpenID .
- Create a new App. Sign-in method
OIDC - OpenID Connectand Application typeWeb Application. - Choose a name for you and your users to recognize.
- Sign-in redirect URIs:
https://my-host.ems.host/_synapse/client/oidc/callback. Adapt the URL to match your homeserver's address. You must use your.ems.hostdomain, even if your server uses Custom DNS. - Sign-out redirect URIs:
https://my-host.ems.host/_synapse/client/oidc/backchannel_logout. Adapt the URL to match your homeserver's address. You must use your.ems.hostdomain, even if your server uses Custom DNS.
In the Element Matrix Services configuration form
- Choose Preset Custom.
- Issuer:
https://your-domain.okta.com. - Client ID: Your client ID from the Okta admin panel.
- Client secret: Your client secret from the Okta admin panel.
- Scopes:
openid,profile. - Leave Subject Claim empty.
- Username attribute: See below
- Display name attribute: for example,
given_name family_name
Username attributes
This refers to the user's localpart in their Matrix ID (@localpart:example.com). The data provided in a minimally
configured Okta user is not ideal for integration with EMS. Below are some possible configuration suggestions. All
examples below use the Matrix server domain example.com.
Available values for username and display name are email (you must include email in Scopes), phone_number (you
must include phone in Scopes), address, name, family_name, given_name, middle_name, nickname,
preferred_username, profile, picture, website, gender, birthdate, zoneinfo,locale, and updated_at.
(List updated June 8, 2023. See this document for updated
information. Available options are listed in the table under "Scopes" and after the "profile" bullet under "Scope
values").
Make sure all users that will be using your EMS server have the selected attributes set.
Option 1: Username attribute email. This will use the user's entire email address as their localpart. Including the
domain. It will also be encoded to be compatible with Matrix. For example, email jane@example.com will become
jane=40example.com:example.com. To use the email, you must also include email in Scopes.
Option 1b: We can add some logic to your OIDC config to exclude the email domain. Contact support for further details.
Option 2: Username attributes: name. This will use the user's full name from Okta. Note that spaces (and other
special characters) are not supported in Matrix localparts. For example, spaces will be encoded as =20. (I.e., Jane Doe becomes @jane=20doe:example.com.
Option 2b: We can add some logic to replace spaces with for example underscore. Contact us for details.
Option 3: By default, usernames in Okta must be an email. But, if you have changed this behavior, you can set Username
attributes to preferred_username to use the username.
Note, the attribute you choose for localparts does not have to be unique. But if you, for example, set Username
attributes to given_name, the first Jane who sign in to your EMS server will become @jane:example.com and the
second Jane becomes @jane1:example.com.
Please contact EMS Support at https://ems.element.io/support to discuss your options.
Integrations
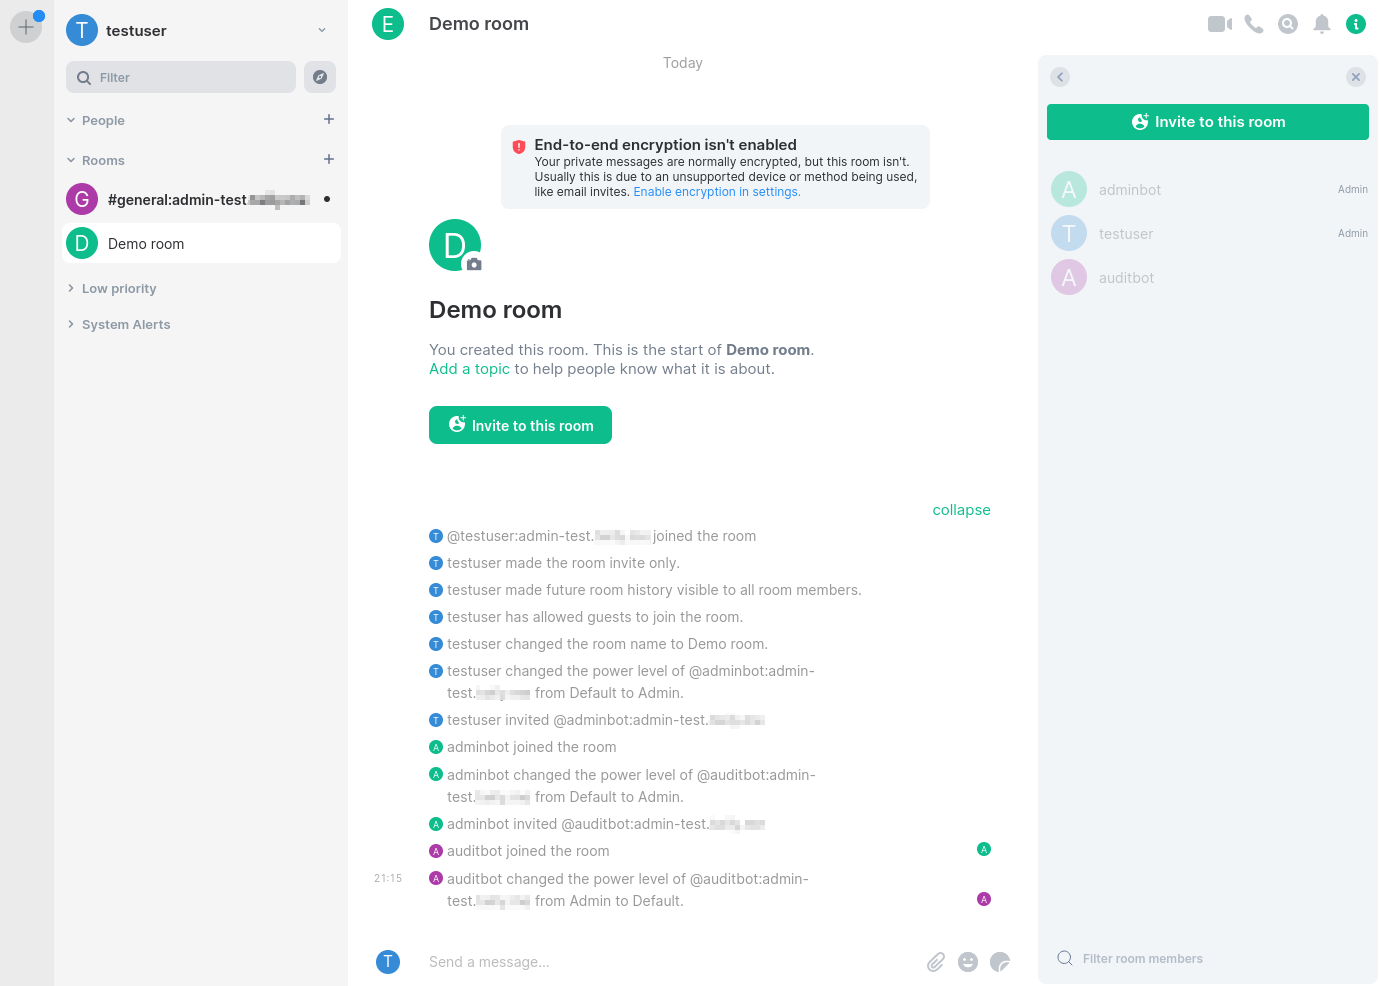
Admin Bot
Matrix brings lots of possibilities for collaboration through federation of different homeservers. This calls for moderation tools which consider the decentral power levels of Matrix rooms.
Admin Bot is only available on homeservers with the Element Enterprise Cloud plan.
Admin Bot is a service account which works in addition to the EMS Server Admin UI and Synapse Admin API.
Most administrative tasks in a Matrix room require a local account with the power level "Administrator" (100) to be a room member.
The Admin Bot extension ensures this by inviting and promoting the account adminbot in every Matrix room created on your server.
This way you can moderate content in these rooms, invite and promote room members and kick or ban unwanted members.
Use case examples
- All active administrators in a room depromoted themselves. Use Admin Bot to regain control of this room.
- Someone reported a Code of Conduct violation in a room without active moderators. Use Admin Bot to redact the messages and kick or ban the offender.
Good to know
- Admin Bot joins all rooms and spaces created by your users.
- Admin Bot also joins Direct Message rooms created by your users.
- The use of Admin Bot is visible to your users. The service account cannot be hidden. In Direct Message rooms it will not appear in the room title but is visible in the room member list.
- Admin Bot does not join rooms created by users on others servers. You can still manually invite Admin Bot and promote them to be a room admin.
- The user account
adminbotwill be used. The full Matrix ID will be something like@adminbot:element.io. - Admin Bot is able to read encrypted messages to allow you to moderate messages.
- Admin Bot does not work retroactively, rooms where all admins have left prior to setup of the bot will require manual intervention.
See also
AdminBot for global room administration.
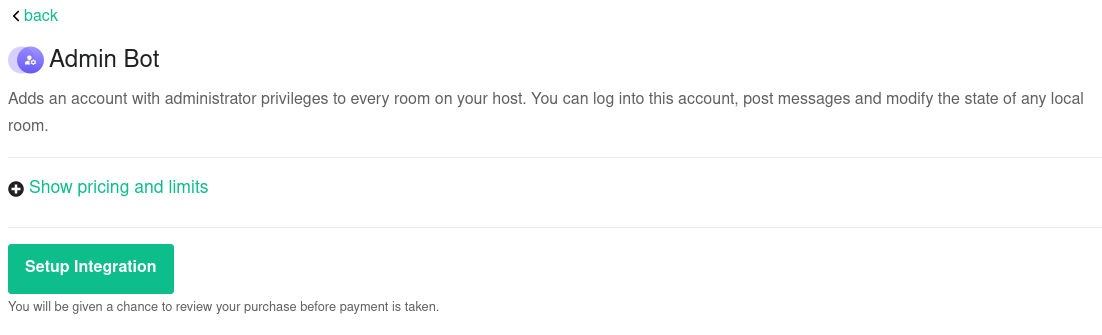
Setup
- Go to the Integrations tab on the EMS homeserver page.
- If you have more than one homesever, select the homeserver to add Admin Bot to.
- In the section Extensions, click on
Admin Bot. If this is not visible, check that the homeserver is using the Element Enterprise Cloud plan. - Click on
Set Up Integrationand confirm the pricing in a modal.
Usage
Admin Bot improves your ability to use the Server Admin tab on the EMS homeserver page and Synapse Admin API by having a local admin in every room.
Furthermore, you can use Element Web to log into the adminbot account:
-
Go to the Integrations tab on the EMS homeserver page.
-
If you have more than one homeserver, select the one you want to administrate.
-
In the section Extensions, click on
Admin Bot. If this is not visible, check that the homeserver is using the Element Enterprise Cloud plan. -
If this is the first time you log in using this browser, click
Secure Backup Phrase (click to view)and copy the phrase to your clipboard.

-
Click on
Log in as Admin bot. You will need to enter the Secure Backup Phrase on first login with a new browser in order to access Secure Storage and encrypted messages.

Removal
Removing the integration will not cause the user adminbot to leave rooms.
This is a separate step to make mistakes easier to recover from.
If the integration was accidentally deactivated and Admin Bot left rooms as the last local Administrator in that room, such rooms can no longer be moderated by anyone and need to be abandoned. Those room also couldn't be rejoined by Admin Bot.
You can deactivate the adminbot account using the EMS Admin GUI or Synapse Admin API, if you want it to leave all rooms.
Audit Bot
Audit Bot is for compliance with the law or your organization's guidelines. This service account allows you to read every conversation on your server, including encrypted conversations.
Audit Bot is only available on homeservers with the Element Enterprise Cloud plan.
Use case examples
- A law or organisational guideline requires you to store all written correspondence.
- A legal investigation requires you to verify or deny if a certain message has been sent.
Good to know
- Audit Bot joins all rooms and spaces created by your users.
- Audit Bot also joins Direct Message rooms created by your users.
- The use of Audit Bot is visible to your users. The service account cannot be hidden. In Direct Message rooms it will not appear in the room title but is visible in the room member list.
- Audit Bot does not join rooms created by users on others servers. You can still manually invite Audit Bot.
- The user account
auditbotwill be used. The full Matrix ID will be something like@auditbot:element.io. - Audit Bot is able to read encrypted messages to allow you to read or store all messages.
See also
AuditBot for regulation and compliance.
Setup
- Go to the Integrations tab on the EMS homeserver page.
- If you have more than one homesever, select the homeserver to add Audit Bot to.
- In the section Extensions, click on
Audit Bot. If this is not visible, check that the homeserver is using the Element Enterprise Cloud plan. - Click on
Set Up Integrationand confirm the pricing in a modal.
Optional export
Audit Bot can be configured to write all decrypted events in all rooms to an S3-compatible storage of your choice. This is a continous export which will start with the configuration of a bucket and stop if you clear the configuration. Messages from the past are not exported retrospectively.
Usage
You can use Element Web to log into the auditbot account:
-
Go to the Integrations tab on the EMS homeserver page.
-
If you have more than one homeserver, select the one you want to administrate.
-
In the section Extensions, click on
Audit Bot. If this is not visible, check that the homeserver is using the Element Enterprise Cloud plan. -
If this is the first time you log in using this browser, click
Secure Backup Phrase (click to view)and copy the phrase to your clipboard.
-
Click on
Log in as Audit bot. You will need to enter the Secure Backup Phrase on first login with a new browser in order to access Secure Storage and encrypted messages.

Removal
Removing the integration will not cause the user auditbot to leave rooms.
This is a separate step to make mistakes easier to recover from.
If the integration was accidentally deactivated and Audit Bot left rooms as the last local Administrator in that room, such rooms can no longer be moderated by anyone and need to be abandoned. Those room also couldn't be rejoined by Audit Bot.
You can deactivate the auditbot account using the EMS Admin GUI or Synapse Admin API, if you want it to leave all rooms.
Create a Conference Call in a Room
Setting up
-
Create a room

-
Click
Room Info, thenAdd apps, bridges & bots

-
Read and accept the Terms of Service for the Integration Manager

-
Select Jitsi from the list of available widgets

-
Save the URL if you wish, this is also easily available later. Then click
Save

-
Click the
Xto close the integration manager

-
To join the room conference, expand the Jitsi section at the top. Then click
Join Conference

-
Allow camera and microphone access. Note this might be different depending on your browser and operating system

-
You are now in the conference

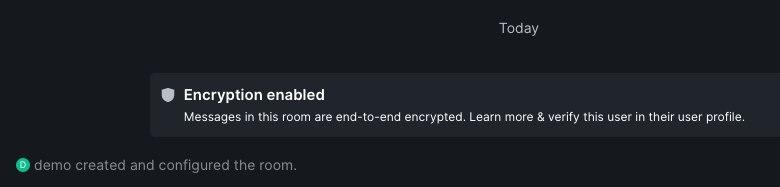
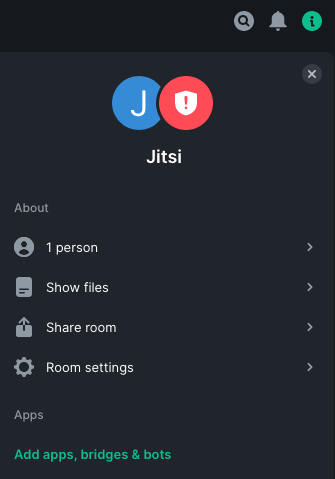

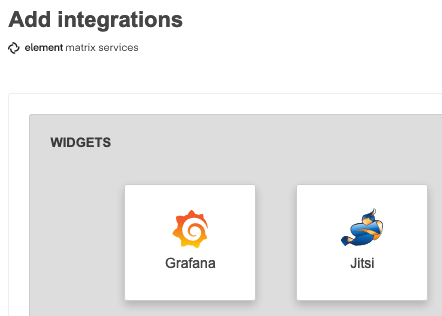
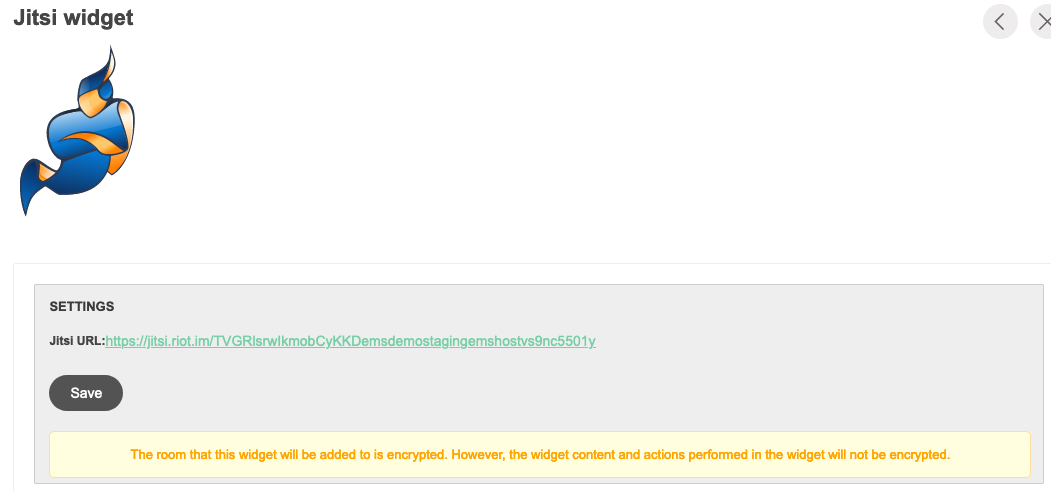
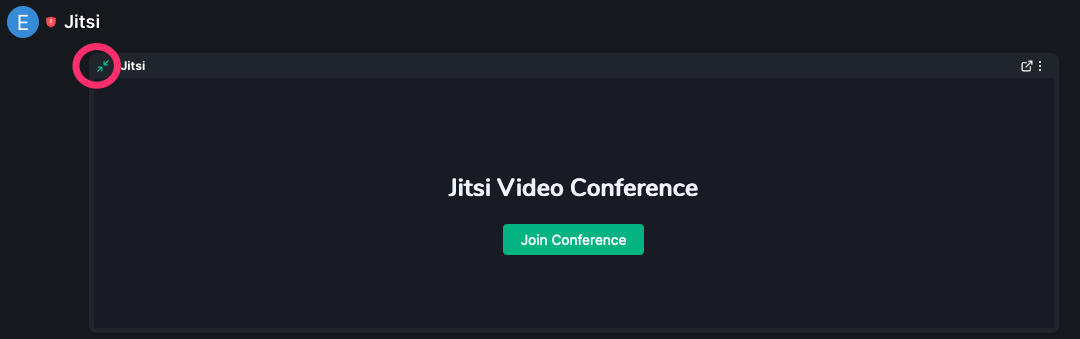
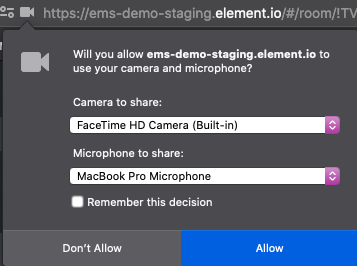
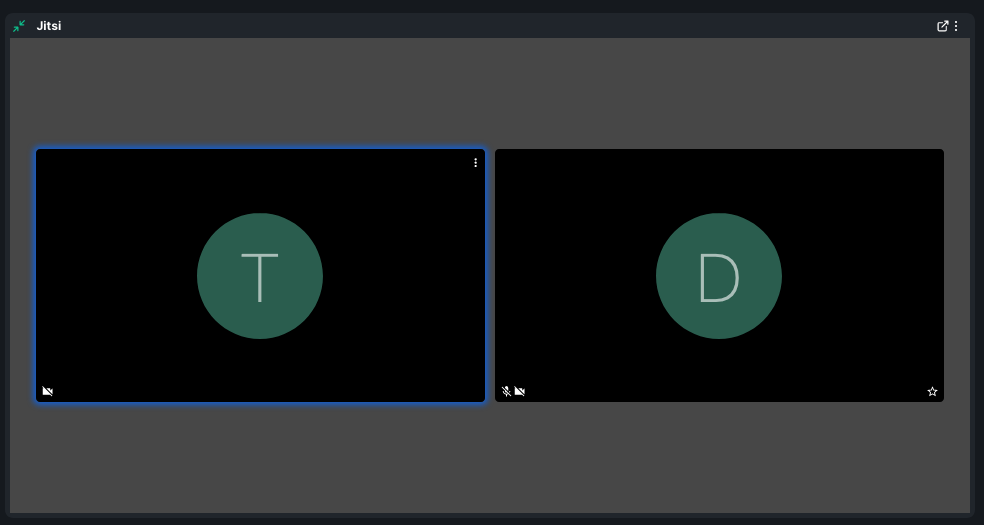
Inviting external participants
-
Click the info button in the bottom right corner

-
Click
Copy

-
Send the link to the external participant. They can just copy and paste it to their browser to join

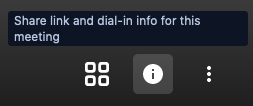
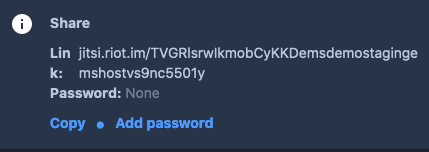
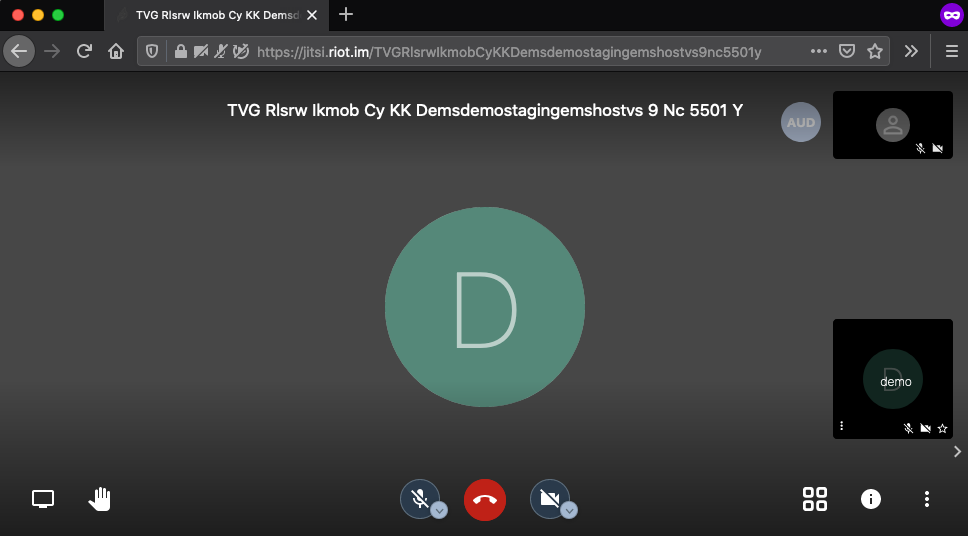
Screen sharing
-
Click the screen sharing in the bottom left corner

-
Give permissions when asked
- In macOS
you need to grant theScreen RecordingPrivacy permission, and
screen sharing does not work with the Element Desktop app
- In macOS
-
Select the application or screen you want to share, then click Allow. Note this might be different depending on your browser and operating system

-
Everyone can now see your screen
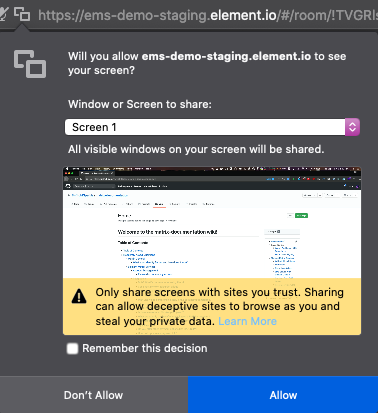
Discord Bridge
The Discord bridge is no longer available for purchase. This documentation is for existing customers of the bridge only.
Setup
First, you need to register a Discord application for your bridge. Discord applications can be registered and managed in the Discord Developer Portal.
- Click on the
New Applicationbutton in the upper right corner. - Give it a name (visible when authorizing the bridge), read Discord's Terms and click
Create. - Note the Client ID. It's required for the bridge.
- Navigate to the
Bottab. The navigation can be found on the left. - Click
Add Bot. You may also need to clickYes, do it!to confirm your action. - Note the Bot Token. It's required for the bridge.
Authorize your account
- Manage Webhooks
- Manage Server
Connect Discord server(s)
Usage
Bridge a room
- In a web browser, navigate to the Discord room you wish to bridge. The URL includes the server ID (also called guild ID) and the channel ID. The URL format is
https://discord.com/channels/GUILD_ID/CHANNEL_ID.

- In a Matrix room you want to bridge, invite
@discord:example.ems.host(replace the domain with the one of your homeserver). - Post the message
!discord bridge GUILD_ID CHANNEL_IDafter replacing the two placeholders.

- A privileged Discord user will need to approve the bridge request by responding with
!matrix approve

- Messages from Discord are now bridged to Matrix and vice versa.

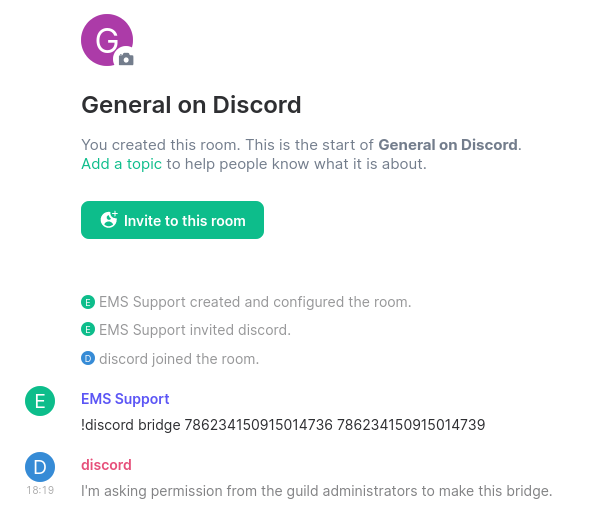
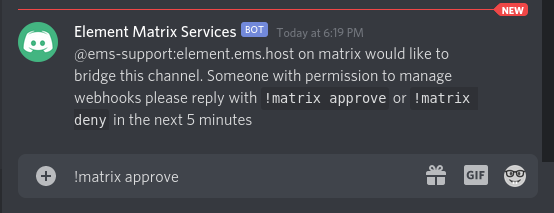
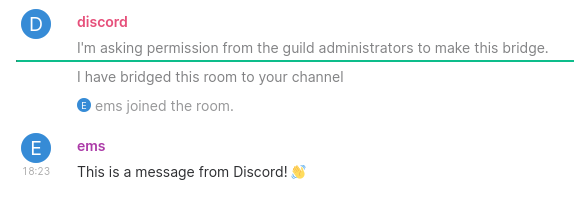
Unbridge
To unbridge a room post !discord unbridge in the Matrix room.
Private Chats
Currently, private chats are not supported by the EMS Discord bridge.
Hookshot
Dedicated Hookshot instances are available for EMS customers. To request Hookshot added to your server, please talk to Support or your Account Manager.
This guide only covers EMS-specific settings. You must review the Hookshot documentation available at https://matrix-org.github.io/matrix-hookshot/latest/hookshot.html.
This guide uses my demo server with the EMS hostname and server domain snowleopard-staging.ems.host. You must use your
.ems.host domain for all fields, even if your server uses Custom DNS. Replace snowleopard-staging with your
hostname.
GitHub
Use the following settings for your GitHub app:
- GitHub App name: This can be anything
- Homepage URL: This can be any valid URL
- Callback URL:
https://snowleopard-staging.ems.host/hookshot/oauth/ - Setup URL:
https://snowleopard-staging.ems.host/hookshot/oauth/ - Webhook URL:
https://snowleopard-staging.ems.host/hookshot/ - Webhook secret: Generate a random secure string
- SSL verification: Enabled
- Permissions: Configure per https://matrix-org.github.io/matrix-hookshot/latest/setup/github.html#permissions
- Subscribe to events: Configure per https://matrix-org.github.io/matrix-hookshot/latest/setup/github.html#permissions
- Where can this GitHub App be installed? Only on this account
- Example config screenshot. Changes are highlighted with arrows.
Click the image to open it in a new tab to zoom in

Send the following information to your Element contact:
- App ID
- Client ID
- Client Secret
- Private Key
- Webhook Secret
Migrate to the new GitHub and Feeds bots
New versions of the GitHub and RSS bots provided by Element are now available!
The previous bots are now considered deprecated and can no longer be configured. These bots have user IDs like @_neb_rssbot_...:matrix.org or @_neb_github_...:matrix.org and will be decommissioned on April 30, 2023.
Who is this for?
These instructions are for anybody who previously set up a GitHub or RSS bot using the integration manager provided by Element.
How to migrate
You may migrate your bots using Element Web or Desktop.
-
Open the Room info side panel and press Add/Edit widgets, bridges & bots.


-
Select the bot you are migrating (Feeds or GitHub).

-
Press Add to add the new bot to the room.

-
Set up the new bot. Any configurations added previously will be shown under Migrate connections.
- When migrating GitHub, it may be necesssary to log in again.

-
Kick the deprecated bot.

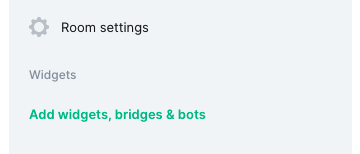

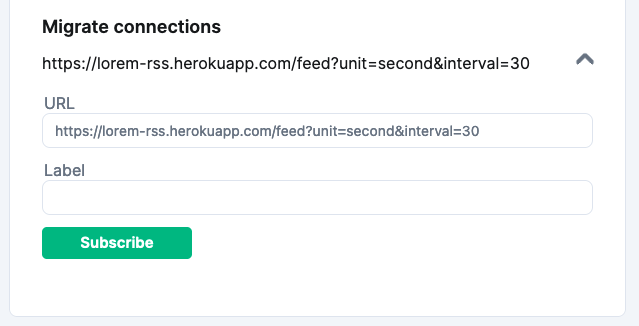
If you don't want to migrate
If you don't want to migrate your bots, you can just kick the GitHub or RSS Bot user from the room.
If you don't do anything
If you don't take any action, the deprecated bots will remain functional for the time being, but can no longer be configured. These bots will stop functioning fully after the date mentioned above.
If you have issues
Issues can be reported to element-hq/element-integration-manager.
Some bots won't be available anymore
The following bots will also be deprecated, but unfortunately do not have a new version available:
- Travis CI
- Giphy
- Google Image Search
- Wikipedia Search
- Imgur Image Search
Public IRC Bridges
Matrix.org (and others) host a number of IRC bridges for public networks.
A list of these networks can be found on the offical documentation.
Please note that matrix.org does not operate all of the networks listed, and is not responsible for content sent over the bridges.
Public Slack Bridge
Matrix.org provides a public free Slack bridge, which is free to use forever but comes with some limitations:
- You can bridge to an unlimited number of channels, but only public channels.
- You must bridge to a public room.
- Matrix users cannot puppet themselves, or Direct Message other users.
This guide explains how to use the free Slack bridge from the Matrix.org Integration Manager to integrate your Matrix room with a Slack room.
- An EMS server is not required.
- It requires your homeserver to be able to federate with Matrix.org.
Setup
-
Create a new room in Matrix, with encryption off


-
Click
Room Infoin the top right corner of the room

-
Click
Add widgets, bridges & bots

-
Choose
Slackfrom the list of available bridges and integrations

-
Click
Add Bridge
NOTE if you have purchased your Slack bridge from EMS: Ensure it saysSlack integration on <your ems domain>here.

-
Click
Add to Slack

-
Enter your Slack workspace URL, and click
Continue

-
Enter your Slack email address and password, then click
Sign in

-
Click
Allow

-
Close the Slack tab and return to Element

-
Click
List channels

-
Click the Slack channel you want to bridge to the Matrix room

-
Slack is now added to the Matrix room

-
Go to the channel you selected on Slack, click the
invite, and selectAdd apps to this channel

-
Add the Element Bridge


-
The Matrix room and Slack channel are now bridged


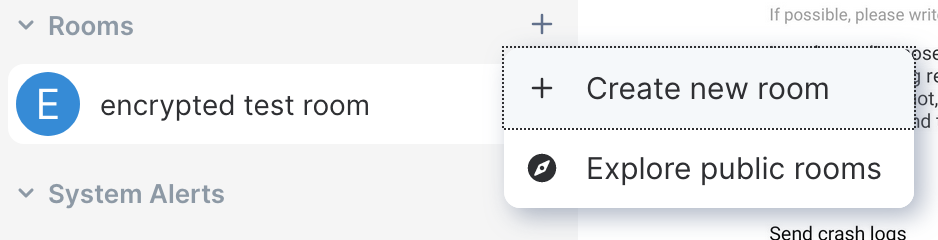
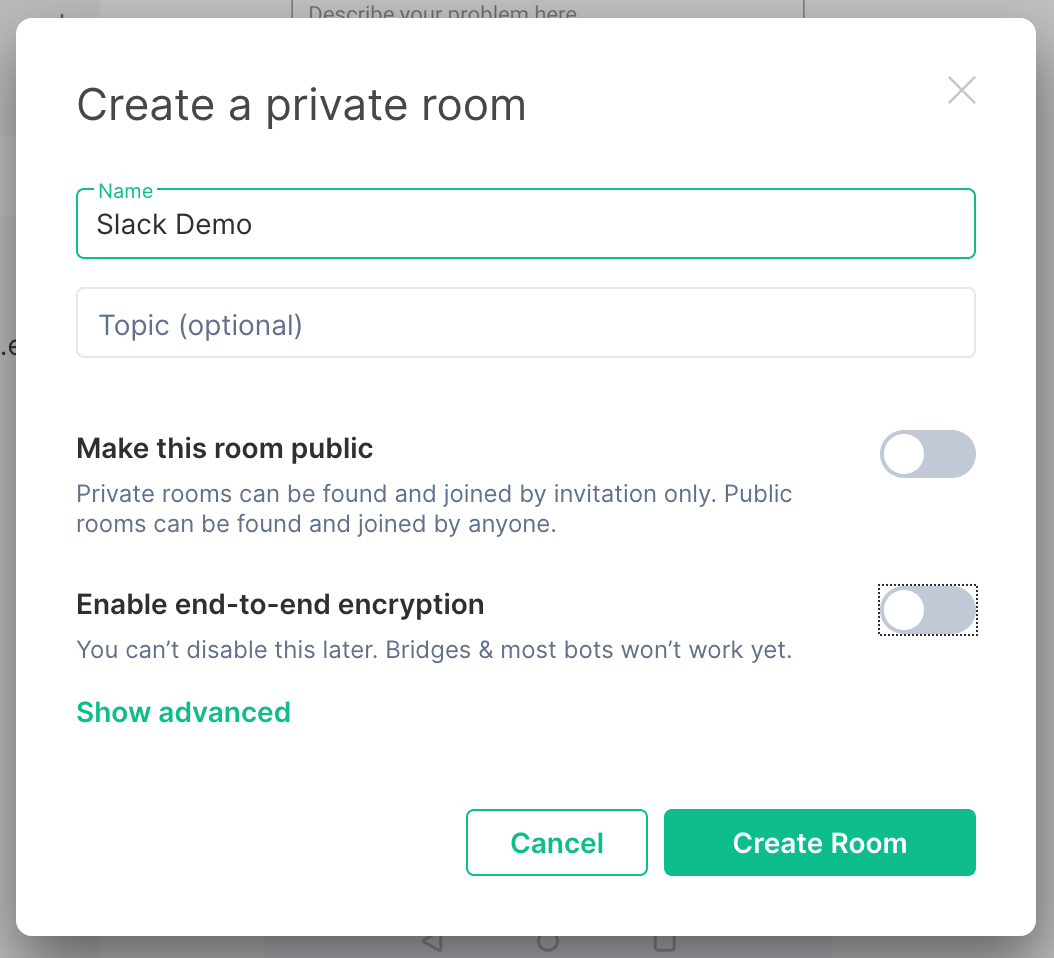
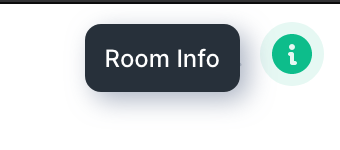
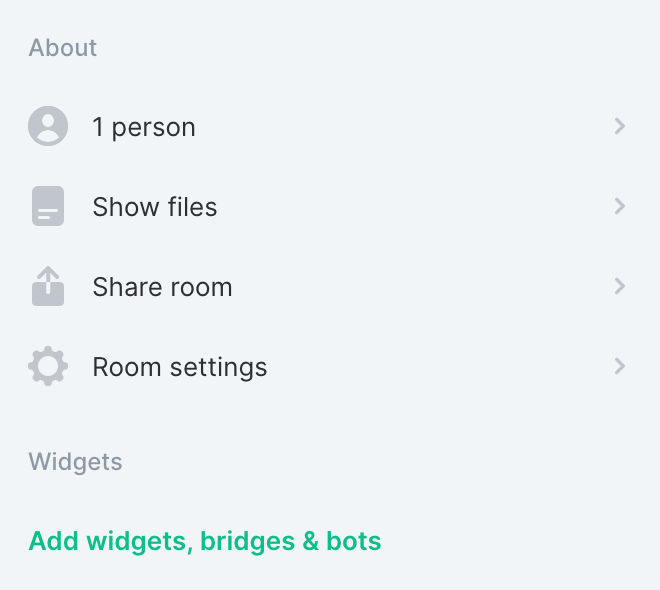
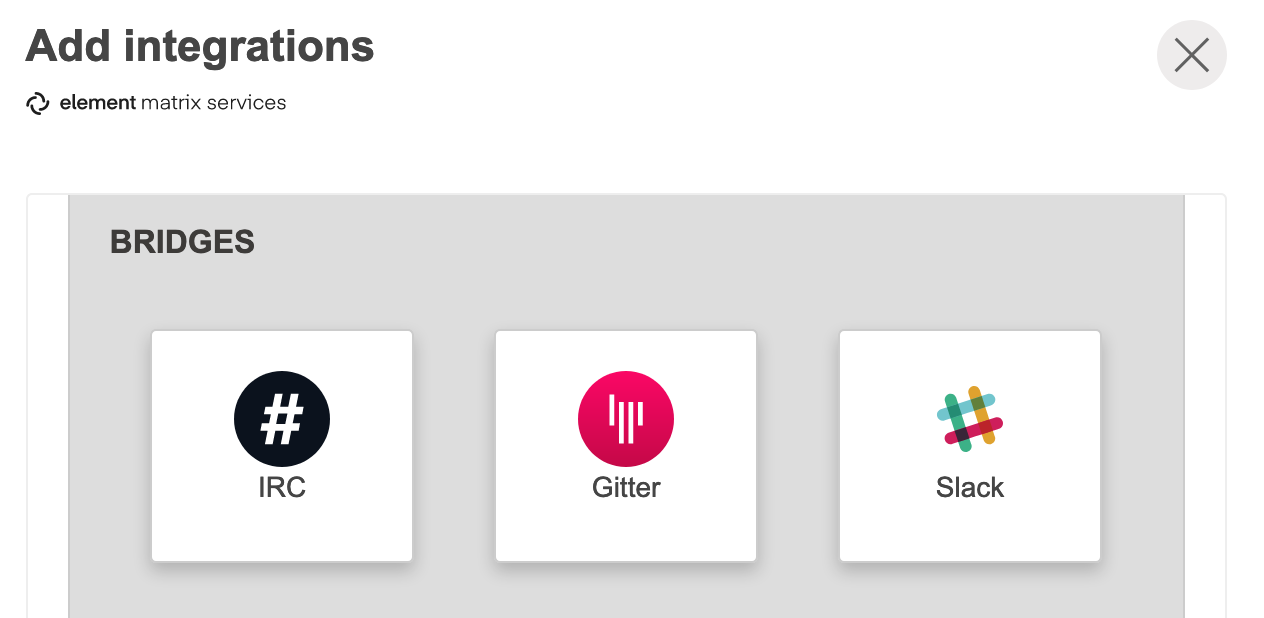
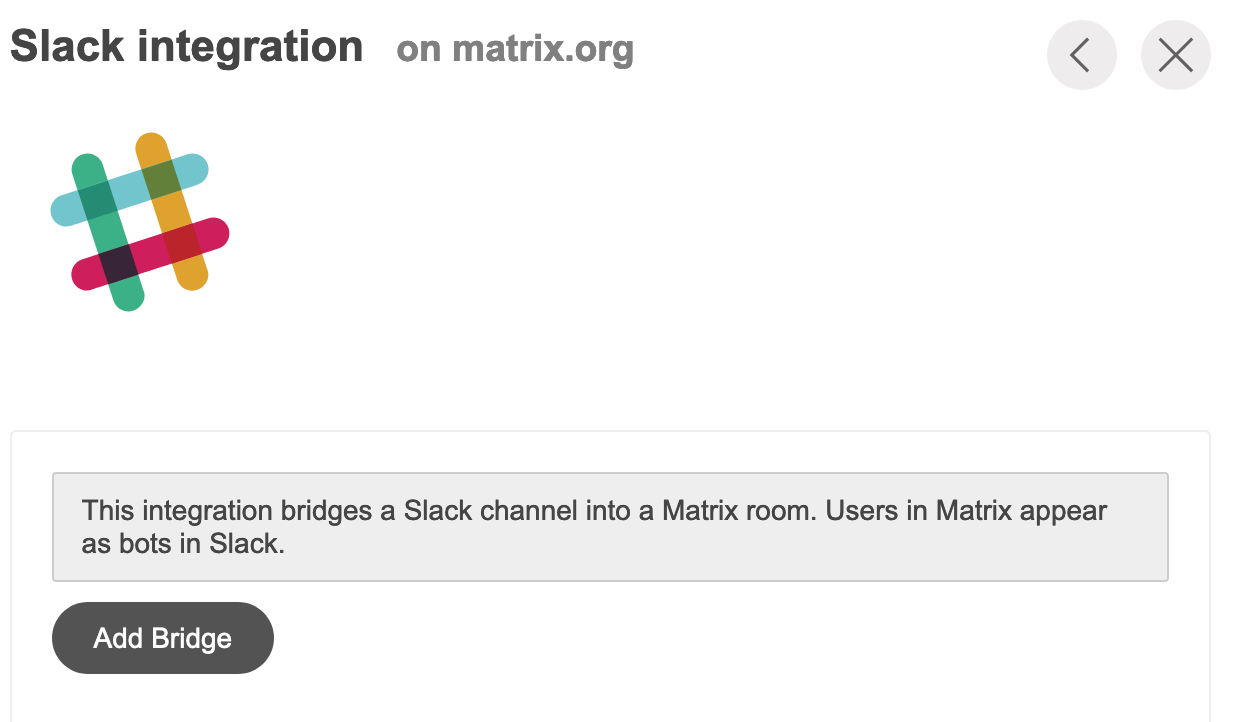
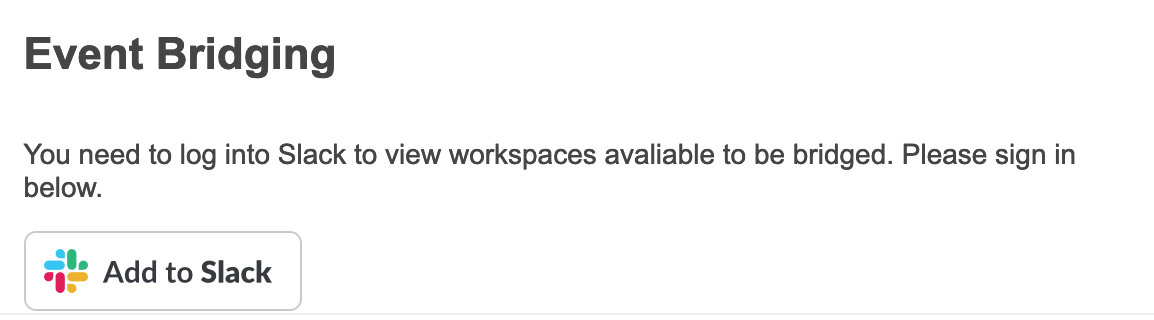
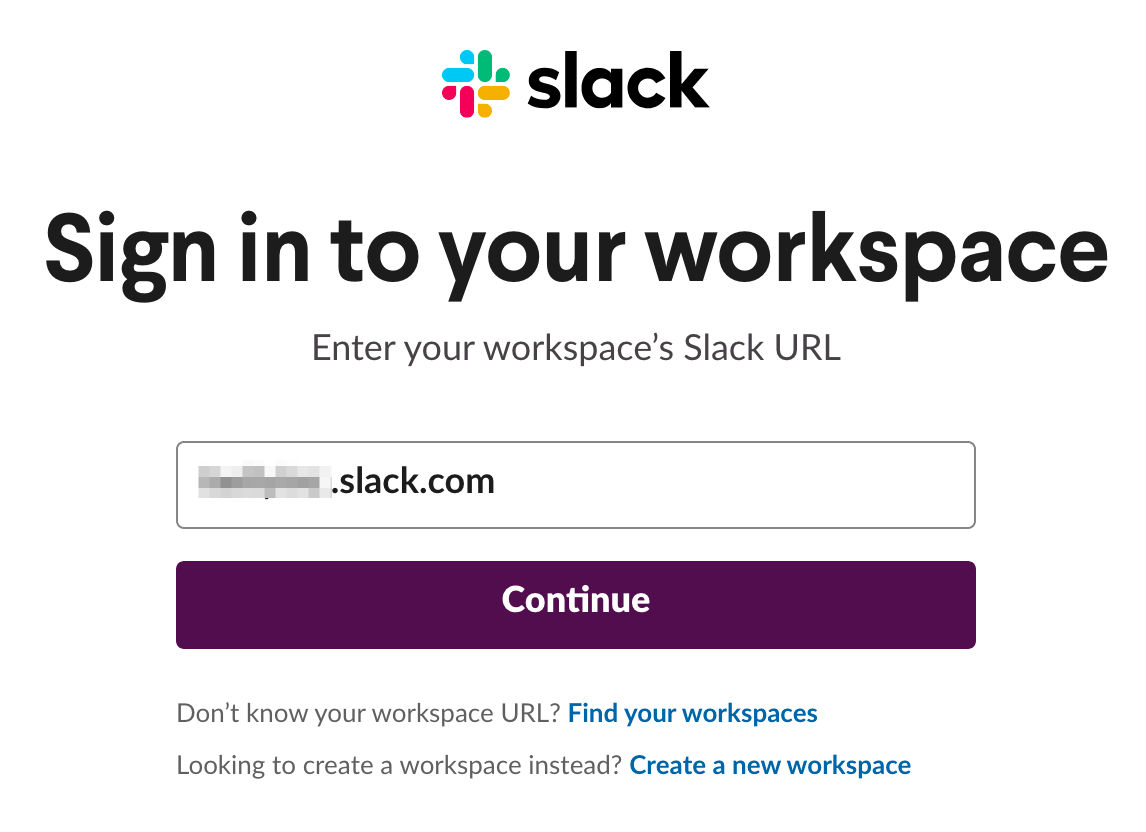
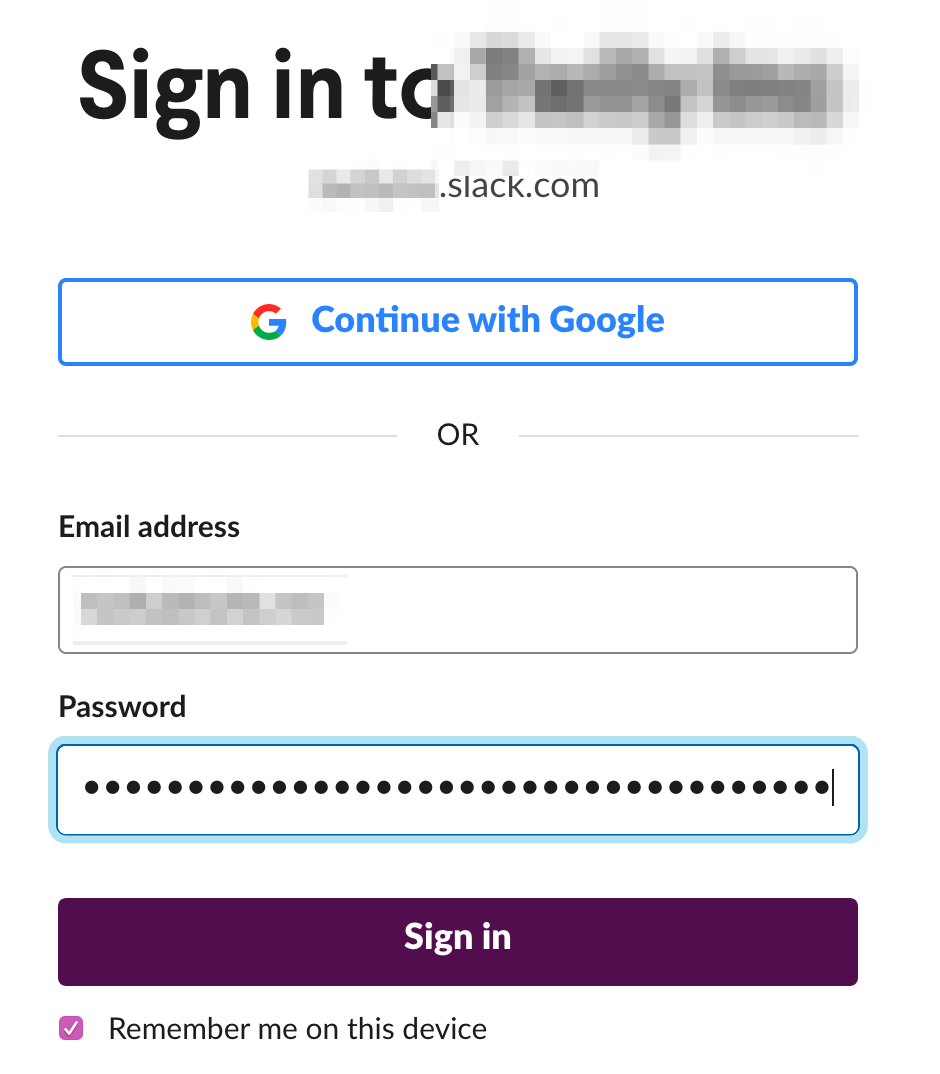
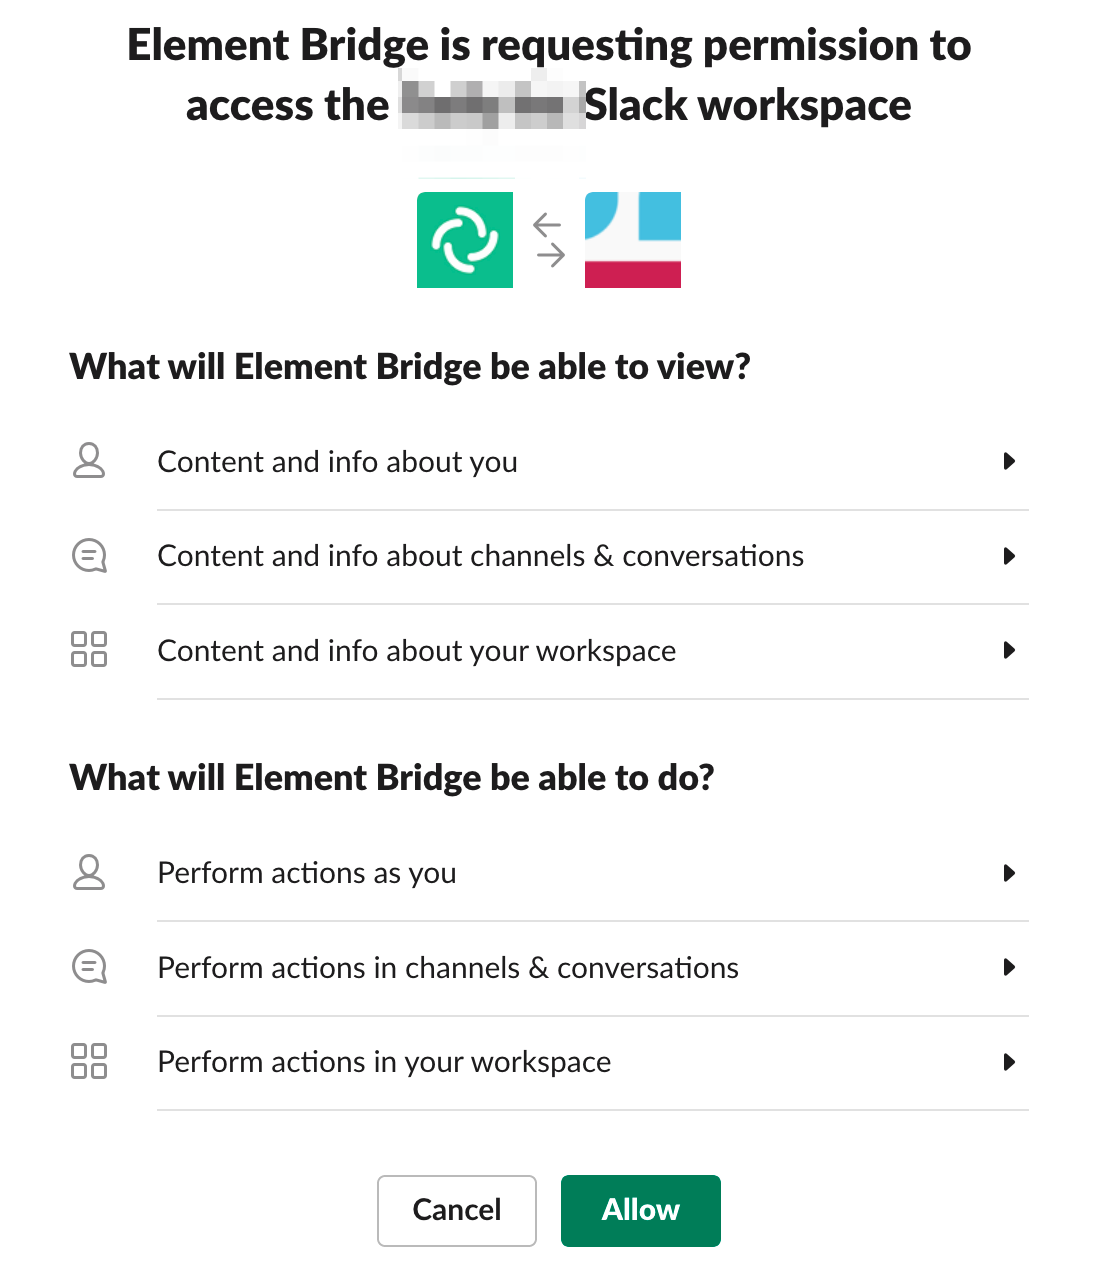
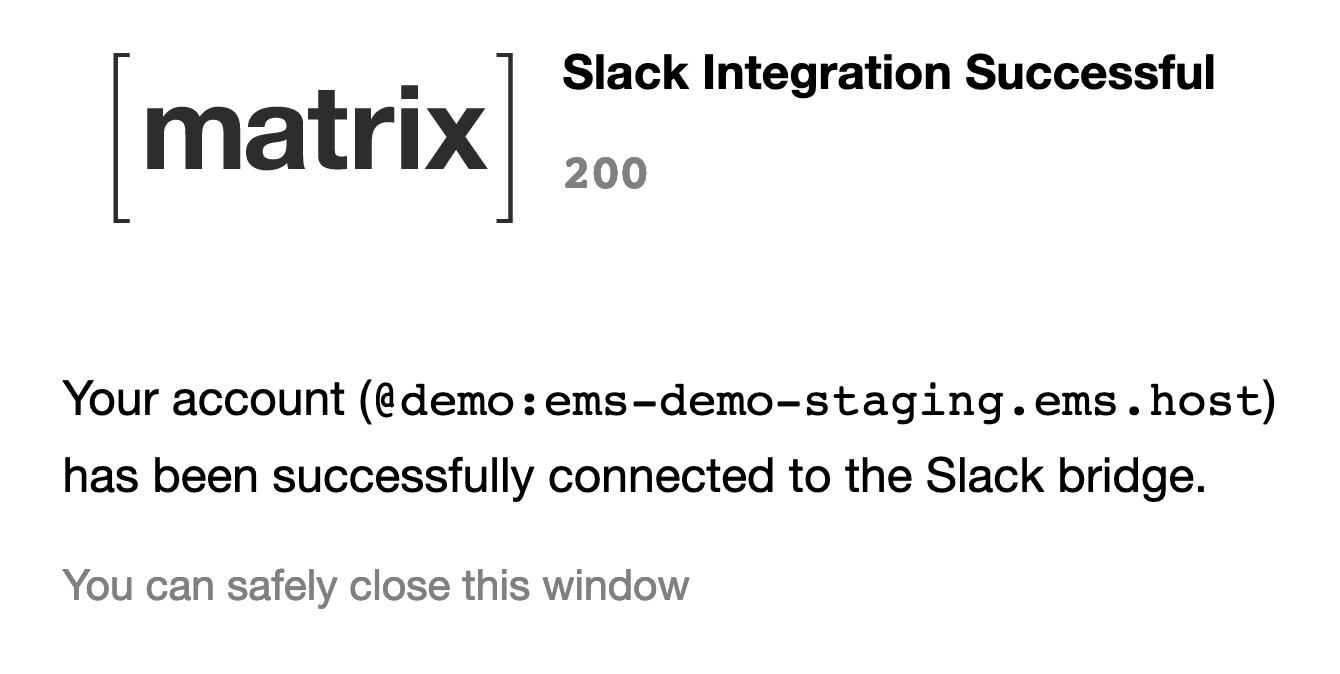
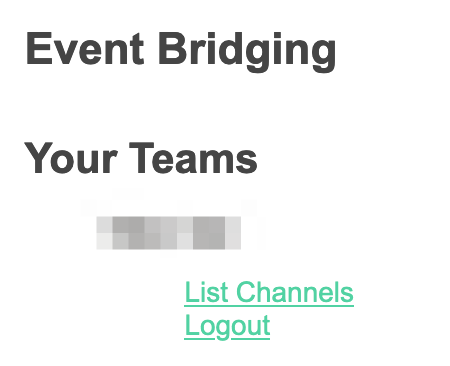
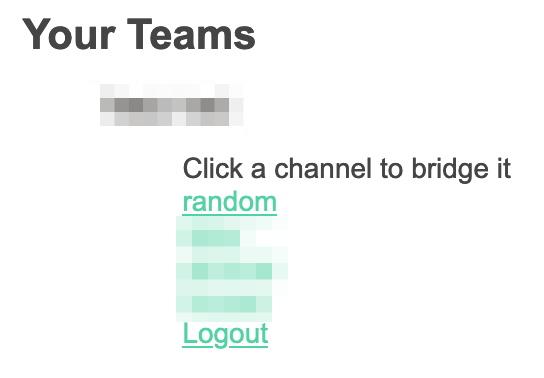
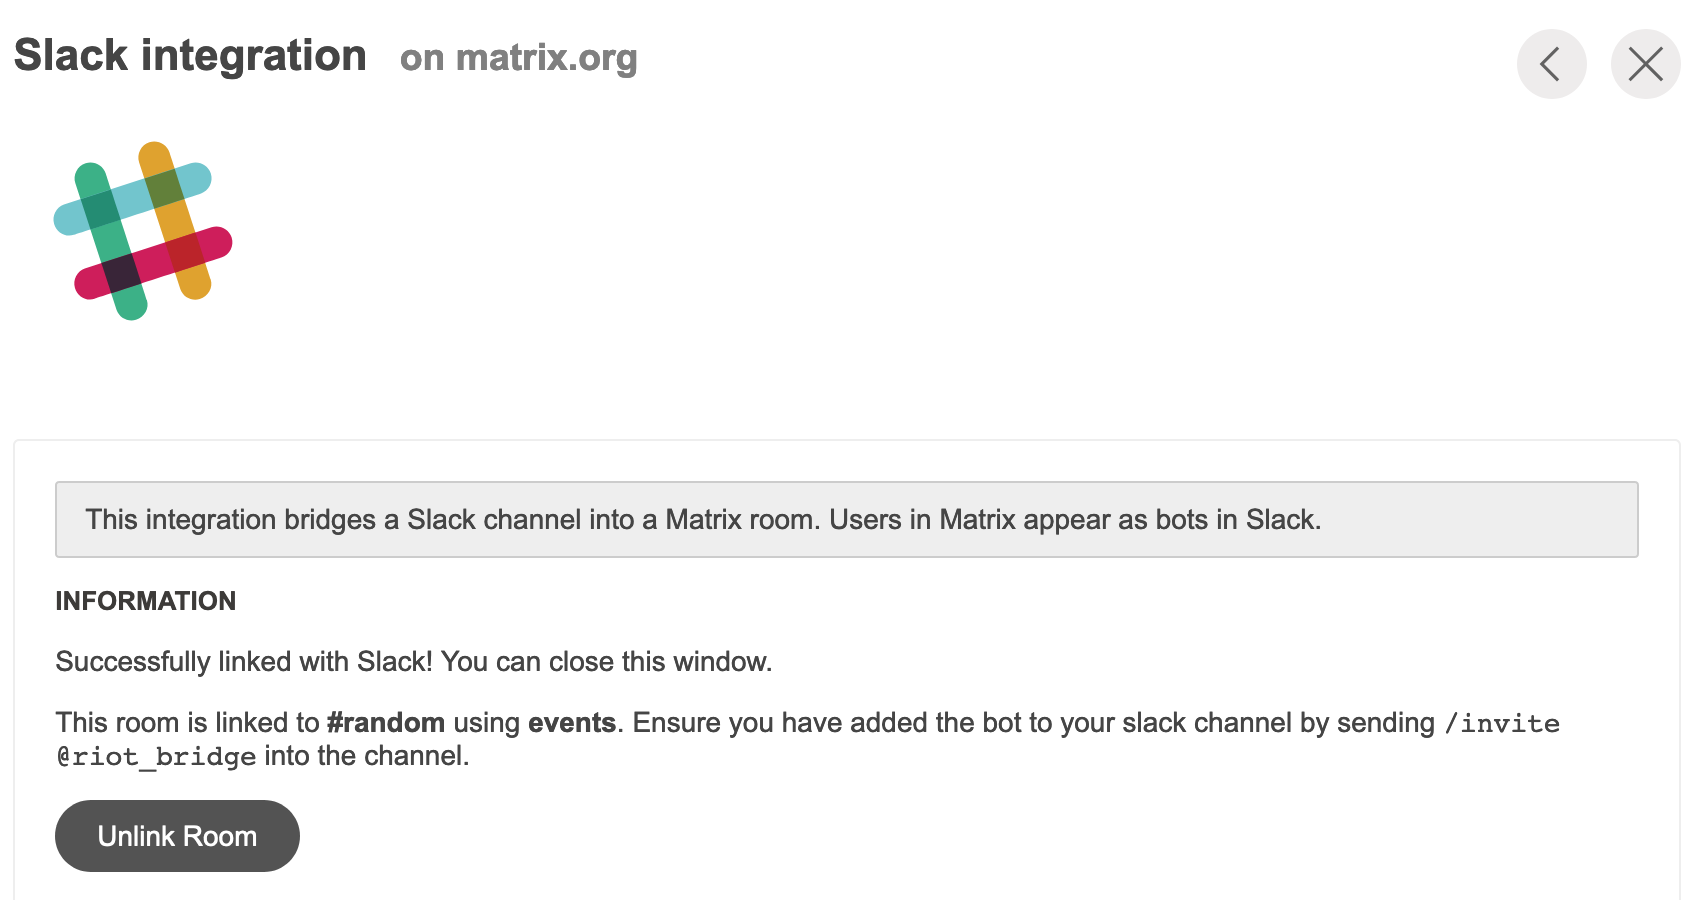


Signal Bridge
This guide explains how to use the Signal bridge from the EMS Integration Manager to integrate your Signal chats with your EMS server.
It requires your EMS server to have federation on.
The following instructions are done with the Element Desktop on the Element side and on Element iOS for the Signal side. Element Android should be almost identical to Element Web.
Purchase the Signal integration
-
Open the EMS control panel at: https://ems.element.io/user/hosting
Click theIntegrationstab and if you have more than one server, select the server you wish to add the Signal integration to.

-
Click on
Signal Bridgein the list of available Bridges.
-
Enter the maximum number of users in
Maximum Signal users.
Please note: this is the maximum number of Signal users who actually send messages over the bridge each month. You are only billed for the number of Signal users who are active. Once you exceed the maximum, then the bridge will be disabled until you increase the maximum.
If you enter less than5, you will get a warning.

If you enter5or greater inMaximum Signal users, you will not see a warning.

Once you have enteredMaximum Signal users, clickPurchase(remember you can always go back to this step and increase the maximum number of Signal users if you need more in the future). -
A dialogue will remind you of the price per user and ask if you wish to proceed. Click
Purchaseif you wish to proceed with the Signal Integration.

-
You will have to wait a few minutes while your host is reprovisioned with the Signal bridge. Once reprovisioning is finished, you are able to bridge Signal to your EMS server using your Element client.
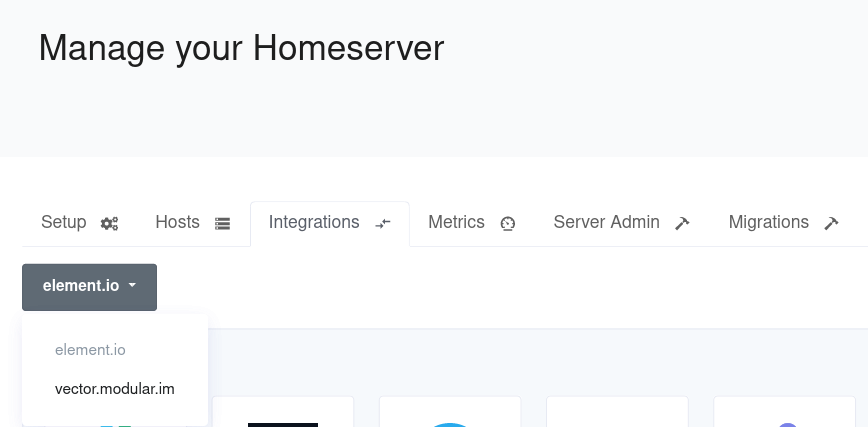
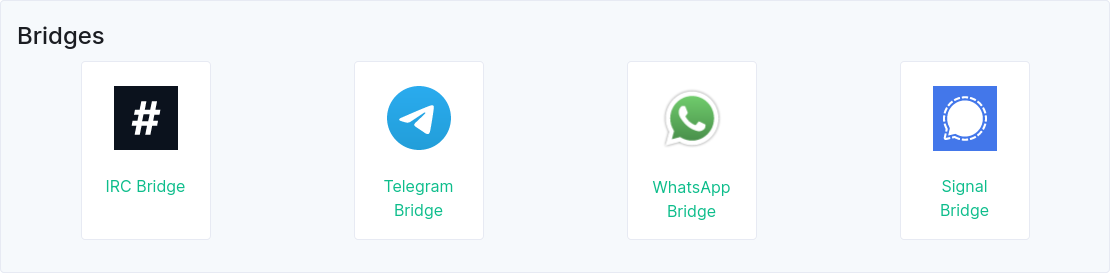
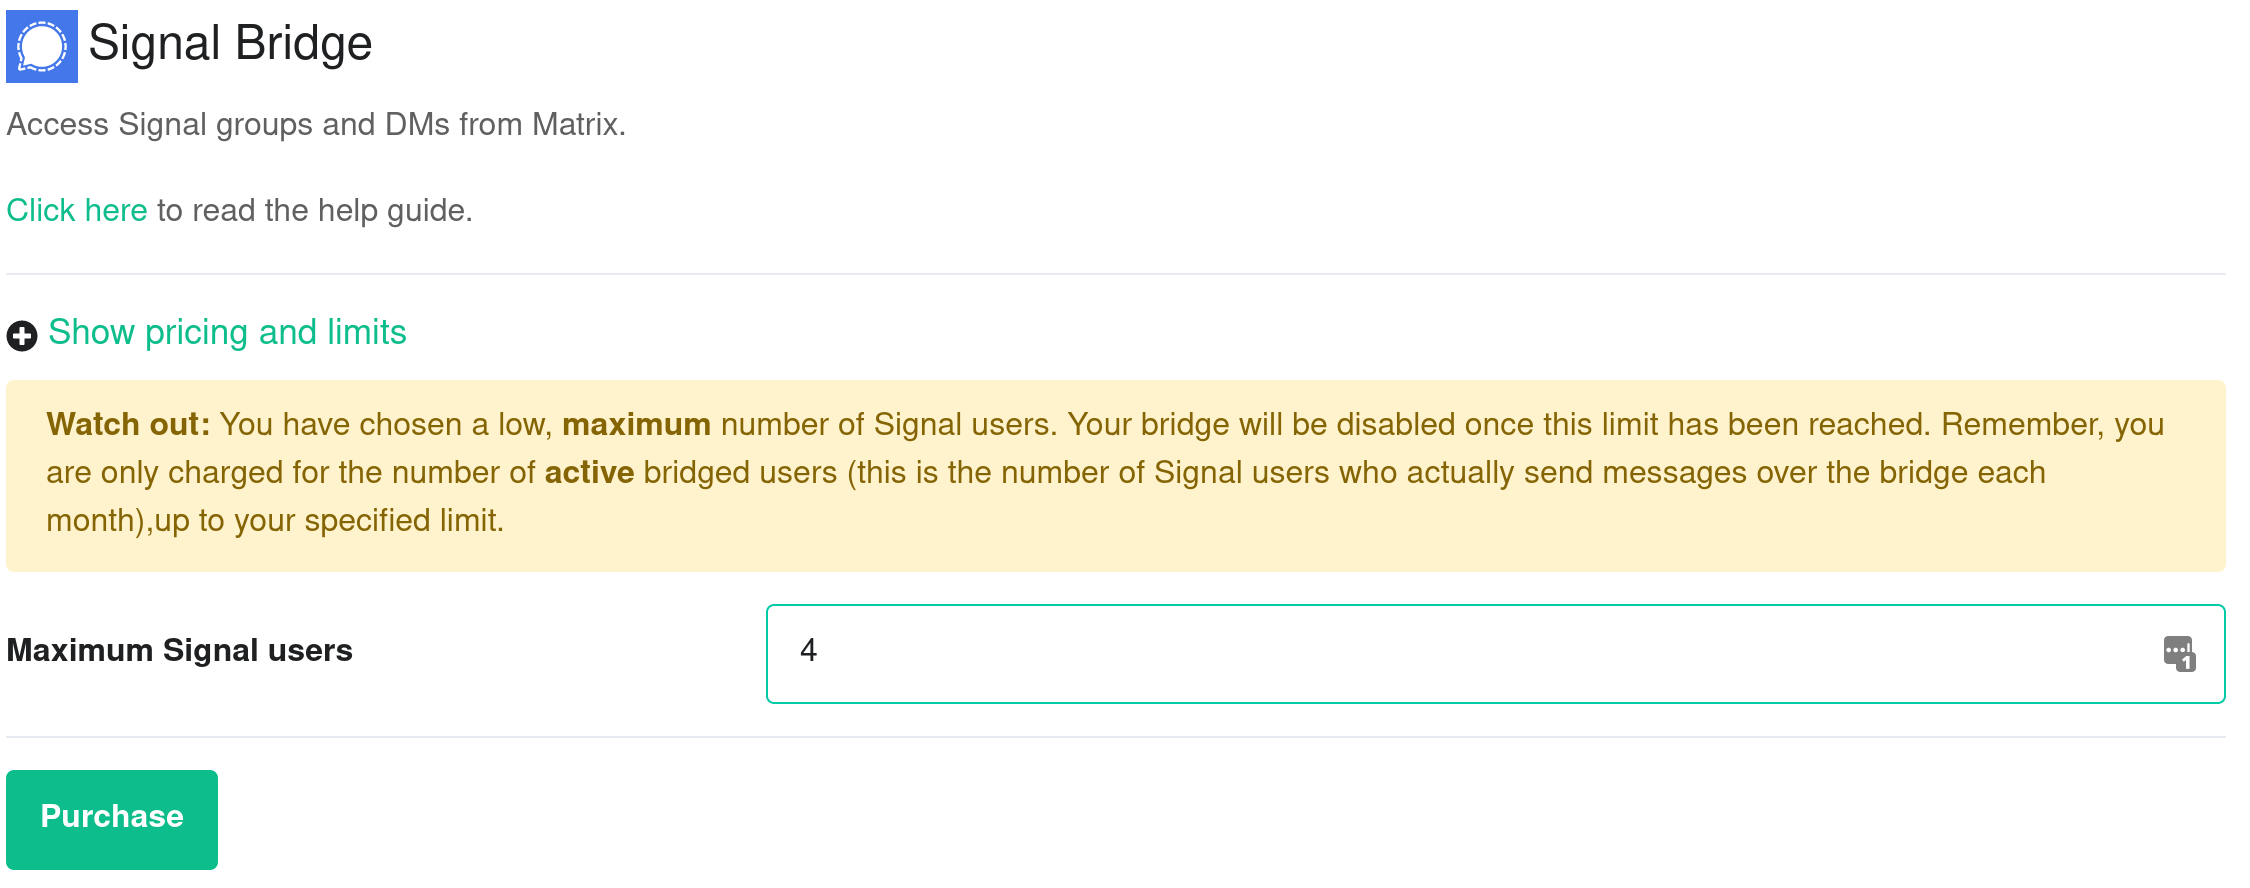
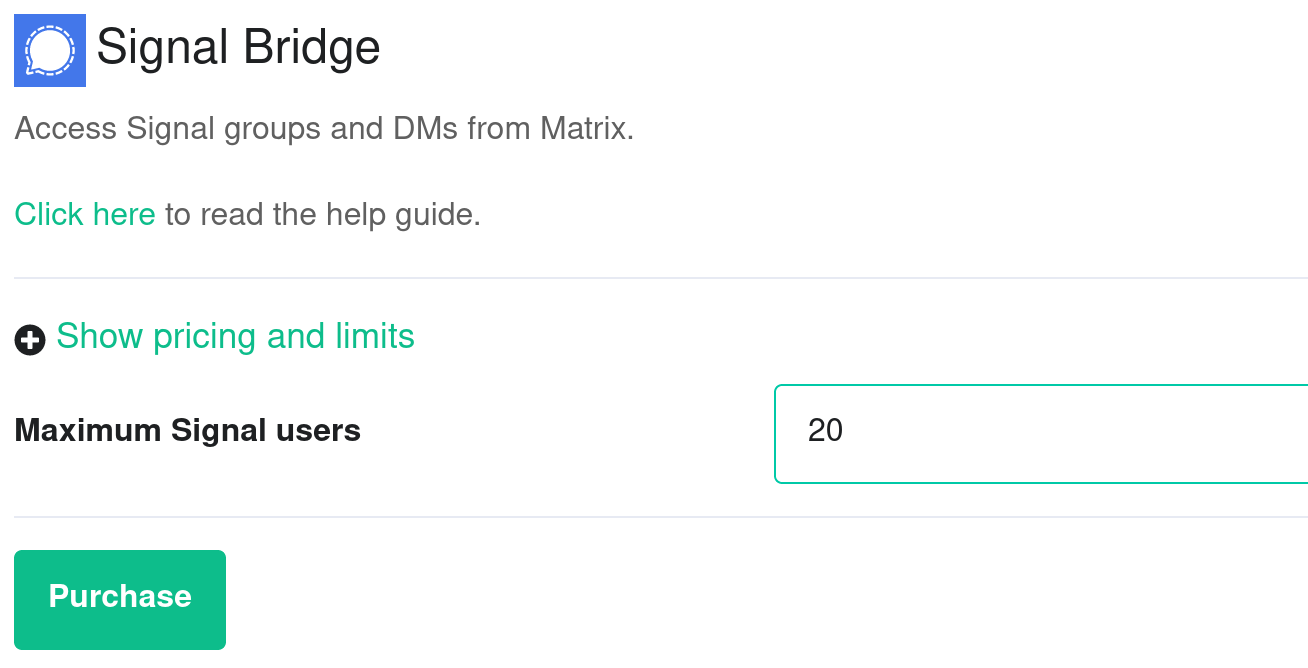
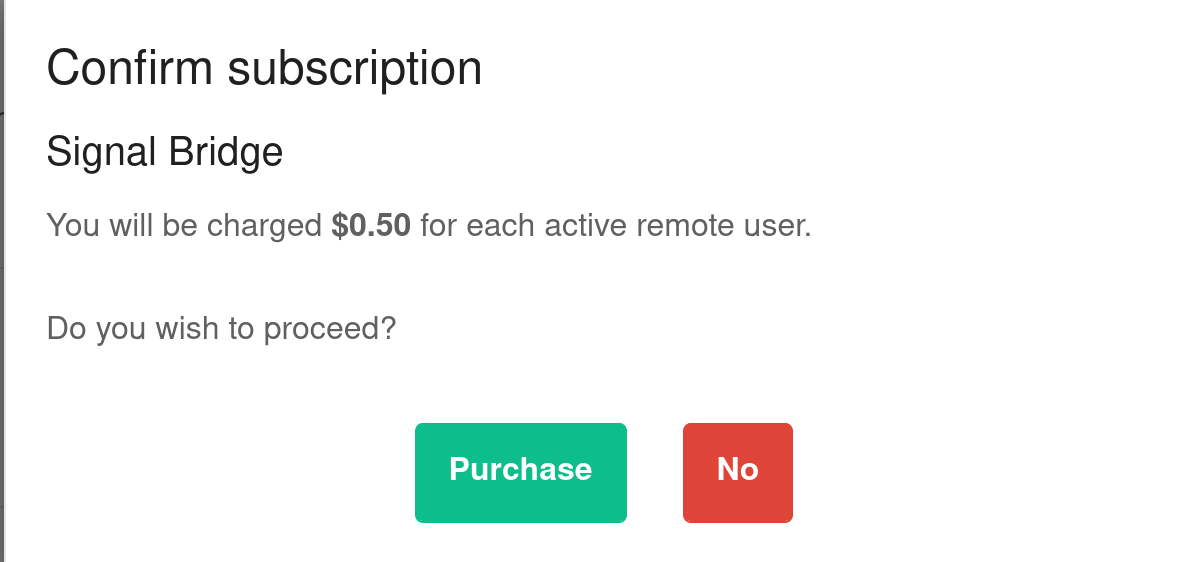
Bridge Signal to your Element account
-
Once the bridge is running, open your Element app. Click on the
+next toPeople.
-
Create a Direct Message conversation by typing
@signalbot:example.ems.host(replace the domain with the one of your homeserver). Then clickGo.

-
The bridge account will join your room and tell you how to use it.

-
Open Signal on your mobile device (iOS or Android) and tap on your avatar to go to
Settingsand thenLinked Devicesand then+to start the Signal QR code scanner. You will use this QR code scanner to scan a QR code displayed by your Element client in the next step.

-
From your Element client, send a
loginmessage to the bot to connect to your Signal account.

-
A QR code will be displayed. Quickly scan the QR code with Signal on your mobile device. You have about a minute before it times out. If it times out, just send the
loginmessage again to generate another QR code. -
On your Element client, you will see
Successfully logged in as <your_phone_number> (UUID: <your_signal_id>). Once a new message arrives in one of your Signal chats, you will see an invitation for it in your Element client. Each Signal chat is a separate Matrix room. Join one or more chats and start chatting from either your Element app on desktop, iOS or Android or your Signal on mobile.

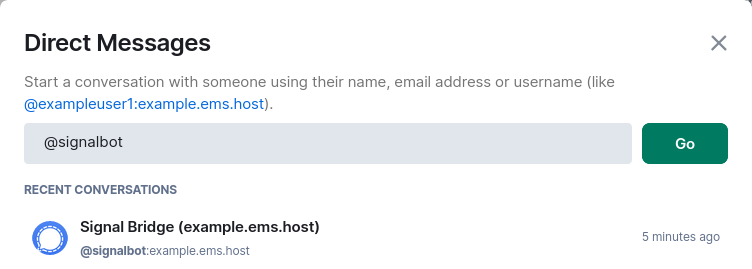
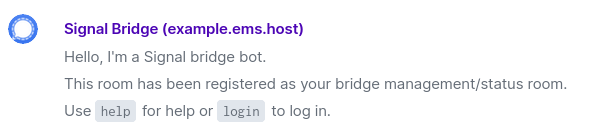

Sending a message to a Signal User
To send a message to a Signal user, you must first be connected to the bridge (see above). This currently works only for Signal users that the bridge has seen activity from.
- On your Element client, open your DM with the Signal bridge bot.
- Say
pmfollowed by the phone number for your contact. - You will be invited to a DM with that user, and can send messages to them.
Why do Signal user names show up as phone numbers?
Some signal users may appear as a phone number rather than their real name. This can because of one of the following reasons:
- The user has not spoken to you on Signal yet, and so has not sent their profile information.
- The user has not added you as a contact on their phone.
- The Signal bridge has not yet synchronized the profile information of the user from Signal (this should happen fairly soon after your first interaction).
EMS does not support the bridge as a primary device
The EMS Signal Bridge is implemented as a secondary device bridge in order to prevent Signal from ratelimiting the bridge. This means that you still need Signal installed on your iOS or Android device in order to use the bridge.
Slack Bridge
The Slack bridge is no longer available for purchase. This documentation is for existing customers of the bridge only.
The EMS Slack bridge is a paid integration for EMS homeservers. In addition to the features provided by the matrix.org bridge, it:
- Allows you to bridge to private rooms and private channels.
- Allows you to puppet your Slack identity from Matrix, appearing to send messages as if you were using Slack.
- Direct Message other Slack users
Purchase the Slack integration
-
Open the EMS control panel at: https://ems.element.io/user/hosting
-
Click the
Integrationstab and if you have more than one server, select the server you wish to add the Slack integration to
-
Click on
Slack Bridgein the list of available Bridges
-
Enter the maximum number of users in
Maximum Slack users.
Please note: this is the maximum number of Slack users who actually send messages over the bridge each month. You are only billed for the number of Slack users who are active. Once you exceed the maximum, then the bridge will be disabled until you increase the maximum.
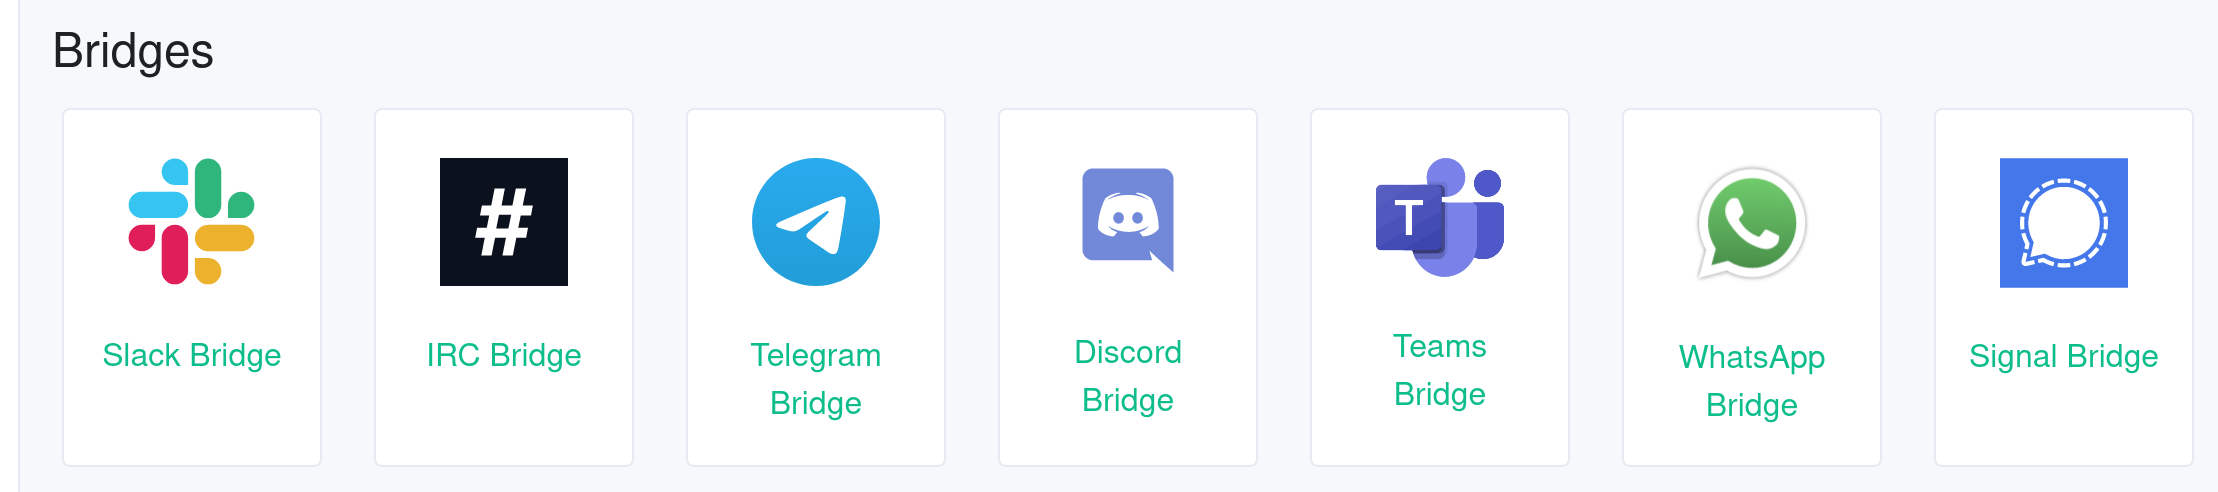
Once you have entered Maximum Slack users, click Purchase (remember you can always go back to this step and increase the maximum number of Slack users if you need more in the future).
-
A dialogue will remind you of the price per user and ask if you wish to proceed. Click
Purchaseif you wish to proceed with the Slack Integration

-
You will have to wait a few minutes while your host is reprovisioned. Once reprovisioning is finished, you are able to bridge Slack to your EMS server using your Element client.
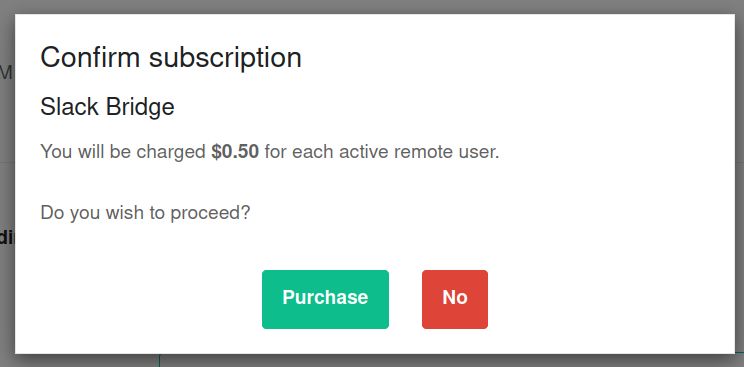
Setup
The setup process for the EMS Slack bridge is the same as the public Slack bridge hosted by matrix.org, explained here
Initiate a DM with a Slack user from Matrix
- Message the Slack bot user on Matrix.
- Say
login - An OAuth2 URL will be displayed. Follow it to get puppeted to the right Slack instance.
- Click a Slack user in Matrix and DM as normal
Teams Bridge
The Teams bridge is no longer available for purchase. This documentation is for existing customers of the bridge only.
Introduction
This guide explains how to set up a Teams bridge with your Element host. You will need to be an administrator of your Teams group to set the bridge up. Connecting to a Teams workspace that you do not control is currently not supported.
Setup
The setup process requires fetching a few details from your Teams workspace.
Teams Link
- In the Teams app, not the admin page. Click the three dots next to your Teams, then
Get link to team

- Click
Copy - Paste this link into the
Teams Linkfield on the Teams Bridge setup form on https://ems.element.io/user/hosting#/integrations - Click
Link Teams to Element - Follow the Microsoft flow and allow access
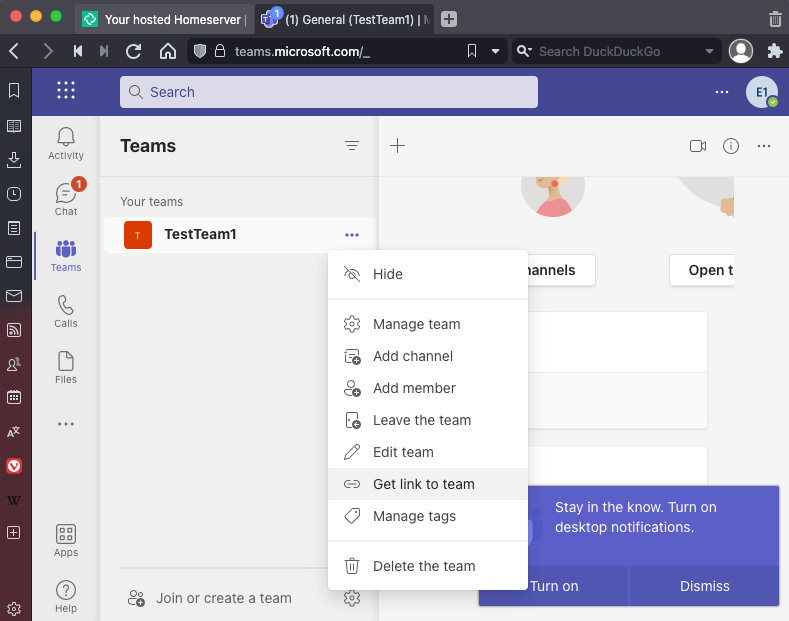
Bot Username and Password
The bridge requires a Teams user to be registered as a bot to send messages on behalf of Matrix users. You just need to allocate one user from the Teams interface to do this.
- First, you must go to the Azure Active Directory page.
- Click users.
- Click New user.
- Ensure
Create useris selected.- Enter a User name ex.
matrixbridge. - Enter a Name ex.
Matrix Bridge. - Enter an Initial password.
- Create the user.
- Optionally, set more profile details like an avatar.
- Enter a User name ex.
- You will now need to log in as this new bot user to set a permanent password (Teams requires you to reset the password on login).
- After logging in you should be prompted to set a new password.
- Enter the bot username and password into the integration form.
Welcome room
Users can be automatically prompted to link their Teams account to their Element account when they join a room bridged to a Teams channel (for instance, public rooms in the room directory). Ticking the Send a welcome message to new users of the bridge checkbox will make the bridge bot user start a DM with any new joining Element users and let them know how to get connected. If you wish to disable this behavior, leave this box unchecked.
Max Teams users
The bridge is billed based upon the number of participating Teams-side users, so you should set the maximum number of users you'd expect to see using the bridge to ensure your costs meet expectations. If the number of active Teams users exceeds this value, the bridge will be blocked, until you increase the limit. Whatever you set the limit to, you will only be charged for the number of remote users actively using the bridge.
Bot Commands
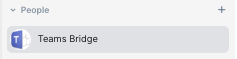
In a chat with the "Teams Bridge" bot, users can manually connect their Teams account with their EMS account by sending the login command to the bridge bot. The bot will reply with a link that users can use to login
You must authenticate with MS Teams to continue: <login.microsoftonline.com link>
After succesfully login in you should get a message like:
You are now authenticated as **Teams User**
To add a bridged Microsoft Teams team as a space in Element, this can be accomplished by sending the joinspace command.
This should add a new space to the sidebar of you Element client with the same name as the teams that you had previously setup with the Bridge, with individual channels showing up as rooms within the new space.
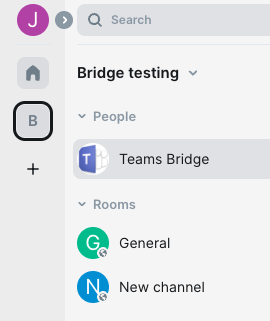
Other commands and option are availble via sending help to the bot. The current help text is show below:
-
help- This help text -
login- Authenticate with MS Teams to enable puppeting -
logout- Remove your MS Teams authentication -
startupnotice enable- Send a notification to this room when the bridge is restarted -
startupnotice disable- Disable startup notifiations -
joinspace- Join the space(s) for your team(s)
Known limitations
- Private channels are not supported
Telegram Bridge
This guide explains how to use the Telegram bridge from the EMS Integration Manager to integrate your Telegram chats with your EMS server.
It requires your EMS server to have federation on.
The following instructions are done with the Element Desktop on the Element side and on Element iOS for the Telegram side. Element Android should be almost identical to Element Web.
Purchase the Telegram integration
-
Open the EMS control panel at: https://ems.element.io/user/hosting
-
Click the
Integrationstab and if you have more than one server, select the server you wish to add the Telegram integration to.
-
Click on
Telegram Bridgein the list of available Bridges.
-
Enter the maximum number of users in
Maximum Telegram users.
Please note: this is the maximum number of Telegram users who actually send messages over the bridge each month. You are only billed for the number of Telegram users who are active. Once you exceed the maximum, then the bridge will be disabled until you increase the maximum. -
If you wish to allow Matrix users who aren't logged in to Telegram to participate in bridged Telegram chats, follow the steps in this section.
Once you have entered Maximum Telegram users, click Purchase (remember you can always go back to this step and increase the maximum number of Telegram users if you need more in the future).
-
A dialogue will remind you of the price per user and ask if you wish to proceed. Click
Purchaseif you wish to proceed with the Telegram Integration.

-
You will have to wait a few minutes while your host is reprovisioned. Once reprovisioning is finished, you are able to bridge Telegram to your EMS server using your Element client.
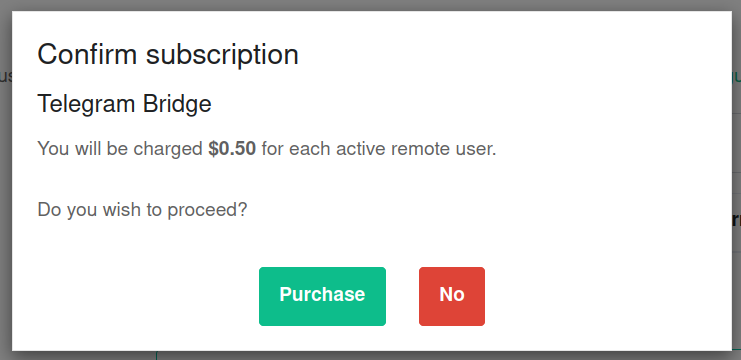
Bridge Telegram to your Element account
-
Once the bridge is running, open your Element app. Click on the
+next toPeople.
-
Create a Direct Message conversation by typing
@telegram:example.ems.host(replace the domain with the one of your homeserver). Then clickGo. -
Wait for the bridge account to join your room.
-
Open Telegram on your mobile device (iOS or Android) and tap on ≡, go to
Settings, and thenDevices, and thenLink Desktop Deviceto start the Telegram QR code scanner. You will use this QR code scanner to scan a QR code displayed by your Element client in the next step. -
From your Element client, send a
login-qrmessage to the bot to connect to your Telegram account. -
A QR code will be displayed. Quickly scan the QR code with Telegram on your mobile device.
-
On your Element client, you will see
Successfully logged in as <username>, and you will see invitations for each of your Telegram channels, groups, and DMs in your Element client. Each Telegram chat is a separate Matrix room. Join one or more chats and start chatting from either your Element app on desktop, iOS or Android or your Telegram on mobile.

Sending a message to a Telegram User
To send a message to a Telegram user, you must first be connected to the bridge (see above).
-
On your Element client, open the "Telegram bridge bot" room.
-
Say
pmfollowed by the phone number or username. The phone number must exist in your Telegram contacts. -
You will be invited to a DM with that user, and can send messages to them.
Bridging Matrix users without a Telegram account
By default, a Matrix user will have to connect their Telegram account for their messages to be bridged to Telegram. If you provide a bot token, we will use this bot to relay the messages of any Matrix users to Telegram. (Note: relaying is supported for Telegram groups, but is not yet supported for Telegram channels.)
Follow these steps to register a bot account with Telegram.
-
With your Telegram account, message
@BotFather. If talking to BotFather via the bridge using Element, note that all "slash" command messages (eg./start) sent to BotFather must begin with two slashes instead of one (eg.//start). -
Create a new bot by sending the message
/newbotto BotFather. The created bot will be the Telegram relay bot used by your bridge. Follow the subsequent prompts to give your bot a display name and a username. -
Wait for BotFather to provide you a bot token.
-
Send the message
/setprivacyto BotFather and follow the prompts to set your new bot's privacy settings to "Disabled". This allows your relay bot to bridge all messages sent in a Telegram group, not just messages that mention the bot by name. -
Open the EMS control panel for your Telegram bridge and enter the token you received from BotFather in the "Bot token" field, then wait for the page to notify you when your bridge is ready.

-
In your Element client, view your DM with the Telegram bridge bot and send the
ping-botcommand. The bot should respond with the ID of your relay bot in Matrix, which indicates that the relay bot has been set up correctly. -
In your Element client, invite the Matrix relay bot to any room that bridges a Telegram group that should relay Matrix users' messages to Telegram. A convenient way to do so is to send a message of
!tg ping-botin such a room (which will be intercepted by the bridge bot & won't appear in Telegram), wait for the bridge bot to respond with a "pill" of the relay bot's Matrix ID, click on the pill, and then click "Invite" on the sidebar that appears. -
In Telegram, confirm that your Telegram relay bot has joined the group. If it hasn't, you may manually invite your bot to the group (as long as you have permissions to do so) by viewing the group's details, selecting "Add Members", and entering the username of your relay bot that you chose in step 2.
Using the Telegram bridge
See our documentation here.
WhatsApp Bridge
This guide explains how to use the WhatsApp bridge from the EMS Integration Manager to integrate your WhatsApp chats with your EMS server.
It requires your EMS server to have federation on.
The following instructions are done with the Element Desktop on the Element side and on Element iOS for the WhatsApp side. Element Android should be almost identical to Element Web.
Purchase the WhatsApp integration
-
Open the EMS control panel at: https://ems.element.io/user/hosting
-
Click the
Integrationstab and if you have more than one server, select the server you wish to add the WhatsApp integration to
-
Click on
WhatsApp Bridgein the list of available Bridges -
Enter the maximum number of users in
Maximum WhatsApp users.
Please note: this is the maximum number of WhatsApp users who actually send messages over the bridge each month. You are only billed for the number of WhatsApp users who are active. Once you exceed the maximum, then the bridge will be disabled until you increase the maximum.- If you enter less than
5, you will get a warning

- If you enter
5or greater inMaximum WhatsApp users, you will not see a warning

- Once you have entered
Maximum WhatsApp users, clickPurchase(remember you can always go back to this step and increase the maximum number of WhatsApp users if you need more in the future).
- If you enter less than
-
A dialogue will remind you of the price per user and ask if you wish to proceed. Click
Purchaseif you wish to proceed with the WhatsApp Integration

-
You will have to wait a few minutes while your host is reprovisioned with the WhatsApp bridge. Once reprovisioning is finished, you are able to bridge WhatsApp to your EMS server using your Element client.
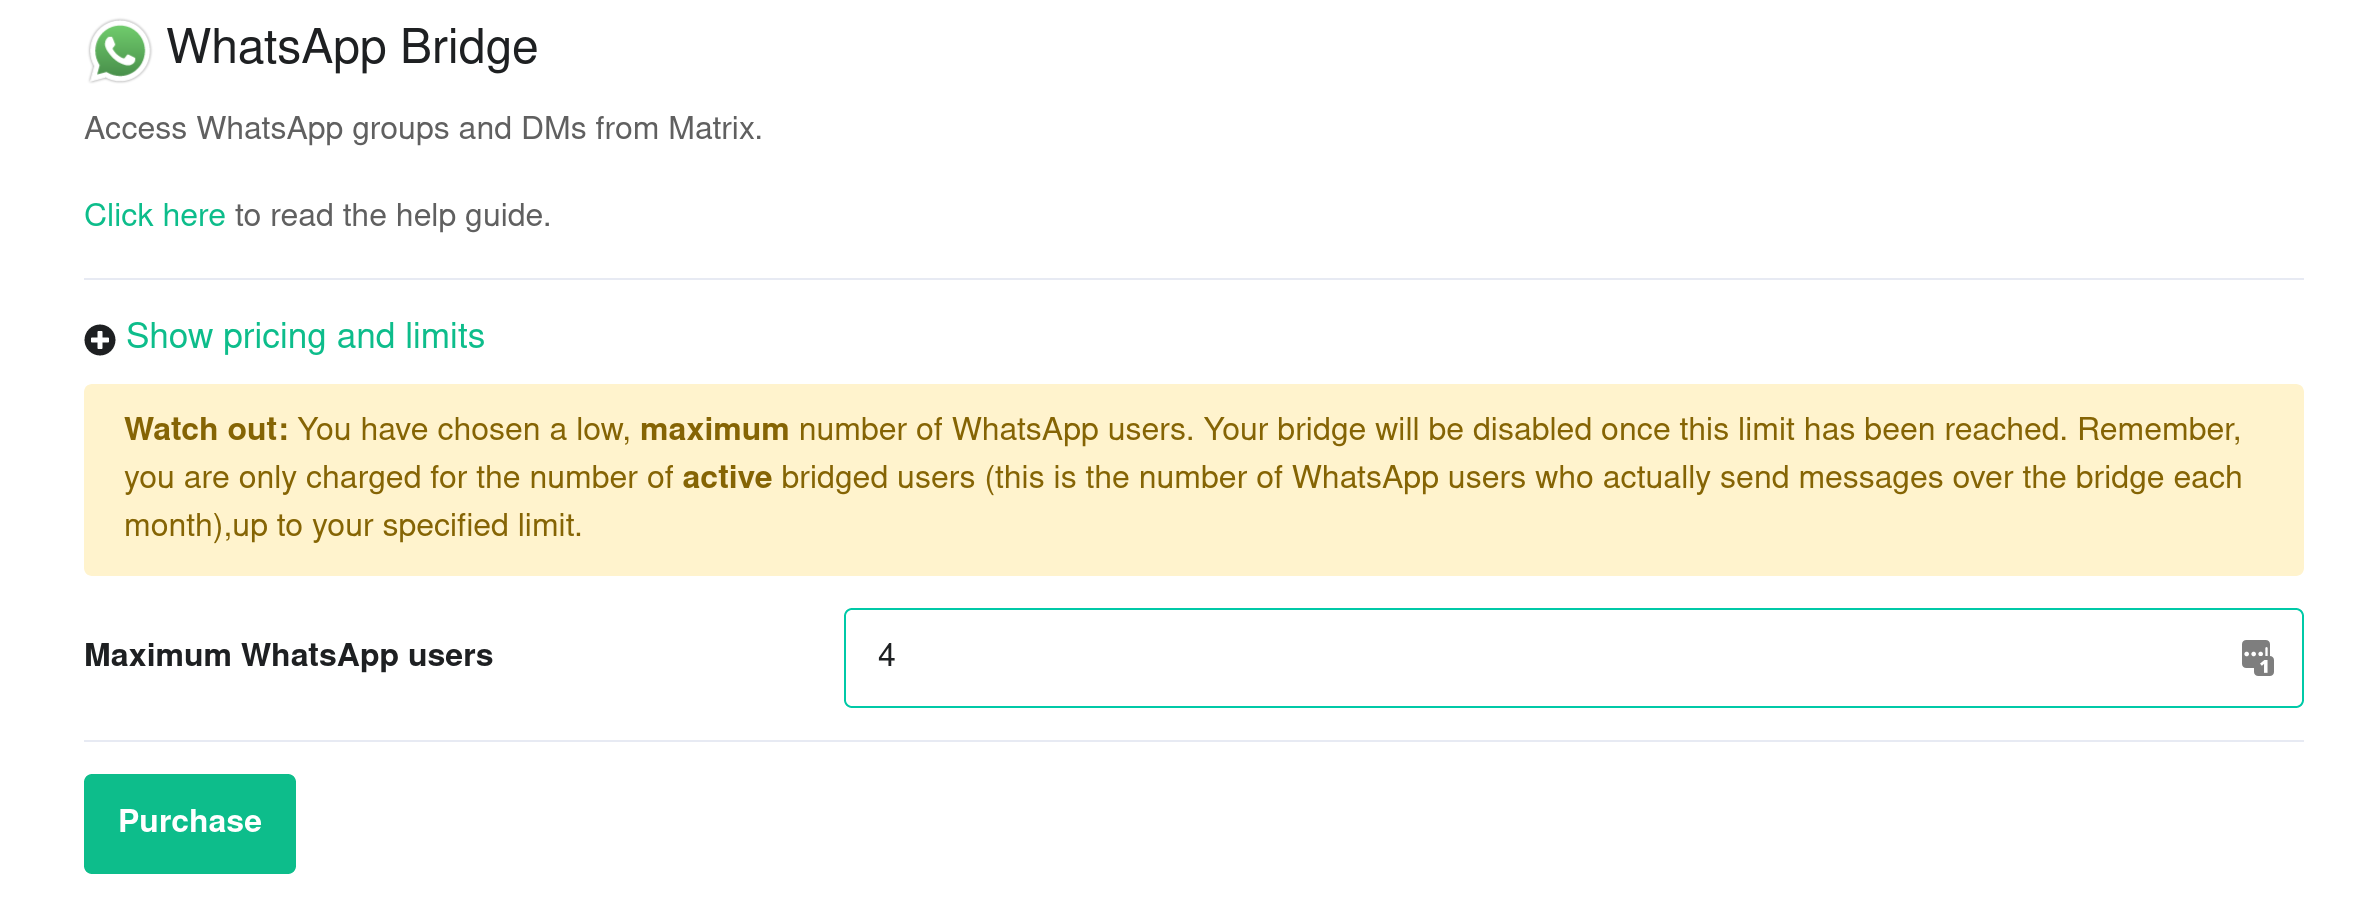
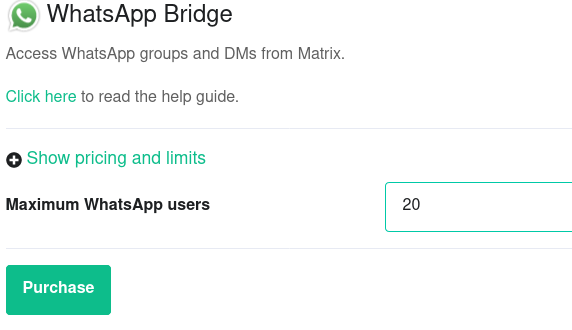

Bridge WhatsApp to your Element account
-
Once the bridge is running, open your Element app. Click on the
+next toPeople -
Create a Direct Message conversation by typing
@whatsappbot:example.ems.host(replace the domain with the one of your homeserver). Then clickGo

-
The bridge account will join your room and tell you how to use it

-
Open WhatsApp on your mobile device (iOS or Android) and go to
Settingsand thenLinked devicesand thenLink a deviceand tapOKto start the WhatsApp QR code scanner. You will use this QR code scanner to scan a QR code displayed by your Element client in the next step

-
From your Element client, send a
loginmessage to the bot to connect to your WhatsApp account

-
A QR code will be displayed. Quickly scan the QR code with WhatsApp on your mobile device. You have about a minute before it times out. If it times out, just send the login message again to generate another QR code

-
On your Element client, you will see
Successfully logged in as <phone-number> (device #<number>). -
From your Element client, send a message of
sync groups --create-portalsto the bot to bridge your existing WhatsApp chats to Matrix. You will then see invitations for each of your WhatsApp chats in your Element client. Each WhatsApp chat is a separate Matrix room. Join one or more chats and start chatting from either your Element app on desktop, iOS or Android or your WhatsApp on mobile.

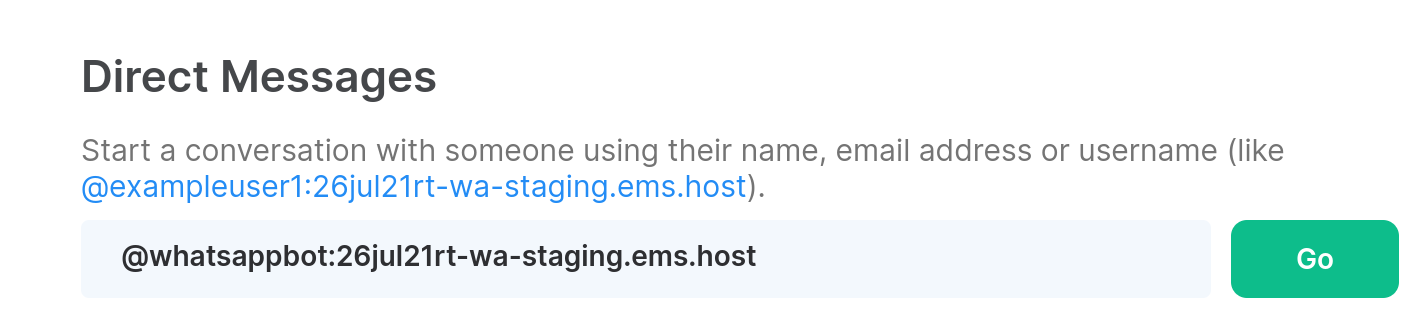


Sending a message to an WhatsApp User
To send a message to a WhatsApp user, you must first be connected to the bridge (see above).
- On your Element client, open the "WhatsApp bridge bot" room.
- Say
pmfollowed by the international formatted phone number for your contact. - You will be invited to a DM with that user, and can send messages to them.
For the EMS bridge to work, you must login to WhatsApp on iOS or Android every 14 days
From WhatsApp's documentation:
Your phone won’t need to stay online to use WhatsApp on linked devices, but if you don’t use your phone for over 14 days, your linked devices will become disconnected.
This means that you cannot uninstall the iOS or Android WhatsApp app and that you must login to that app every 14 days. If you don't, the Element WhatsApp Bridge will stop working.
My contacts show as @whatsapp_[phone number]:homeserverdomain.com
Try sending the sync contacts command in your DM with the WhatsApp bridge bot.
Relay Mode is not supported
EMS does not support the WhatsApp Bridge's Relay Mode for Element Cloud, Element Enterprise Cloud or Element One.
Using the WhatsApp bridge
Please see our documentation here.
EMS Account Management
Unsure what an EMS account is, see the 'Understanding Your Element Accounts' page above.
Creating an EMS Account
Your EMS Account is used to manage and use your subscriptions with Element, whether for your own managed homeserver in the cloud, accessing your On-Premise subscription download portal or your Element One bridges.
Depending on which subscription you want, you wil setup an EMS Account as part of that setup flow. You can however also manually create an account first, then sign-up for your desired subcription.
Manually Registering for an EMS Account
To manually register, from the Element homepage, click Sign In then Admin Dashboard to be taken to the EMS Control Panel. As you don't yet have a login, you will be presented with the login page.

Simply click Register and fill in the information requested to create and account. Note: Your password must be a minimum length of 12 characters.
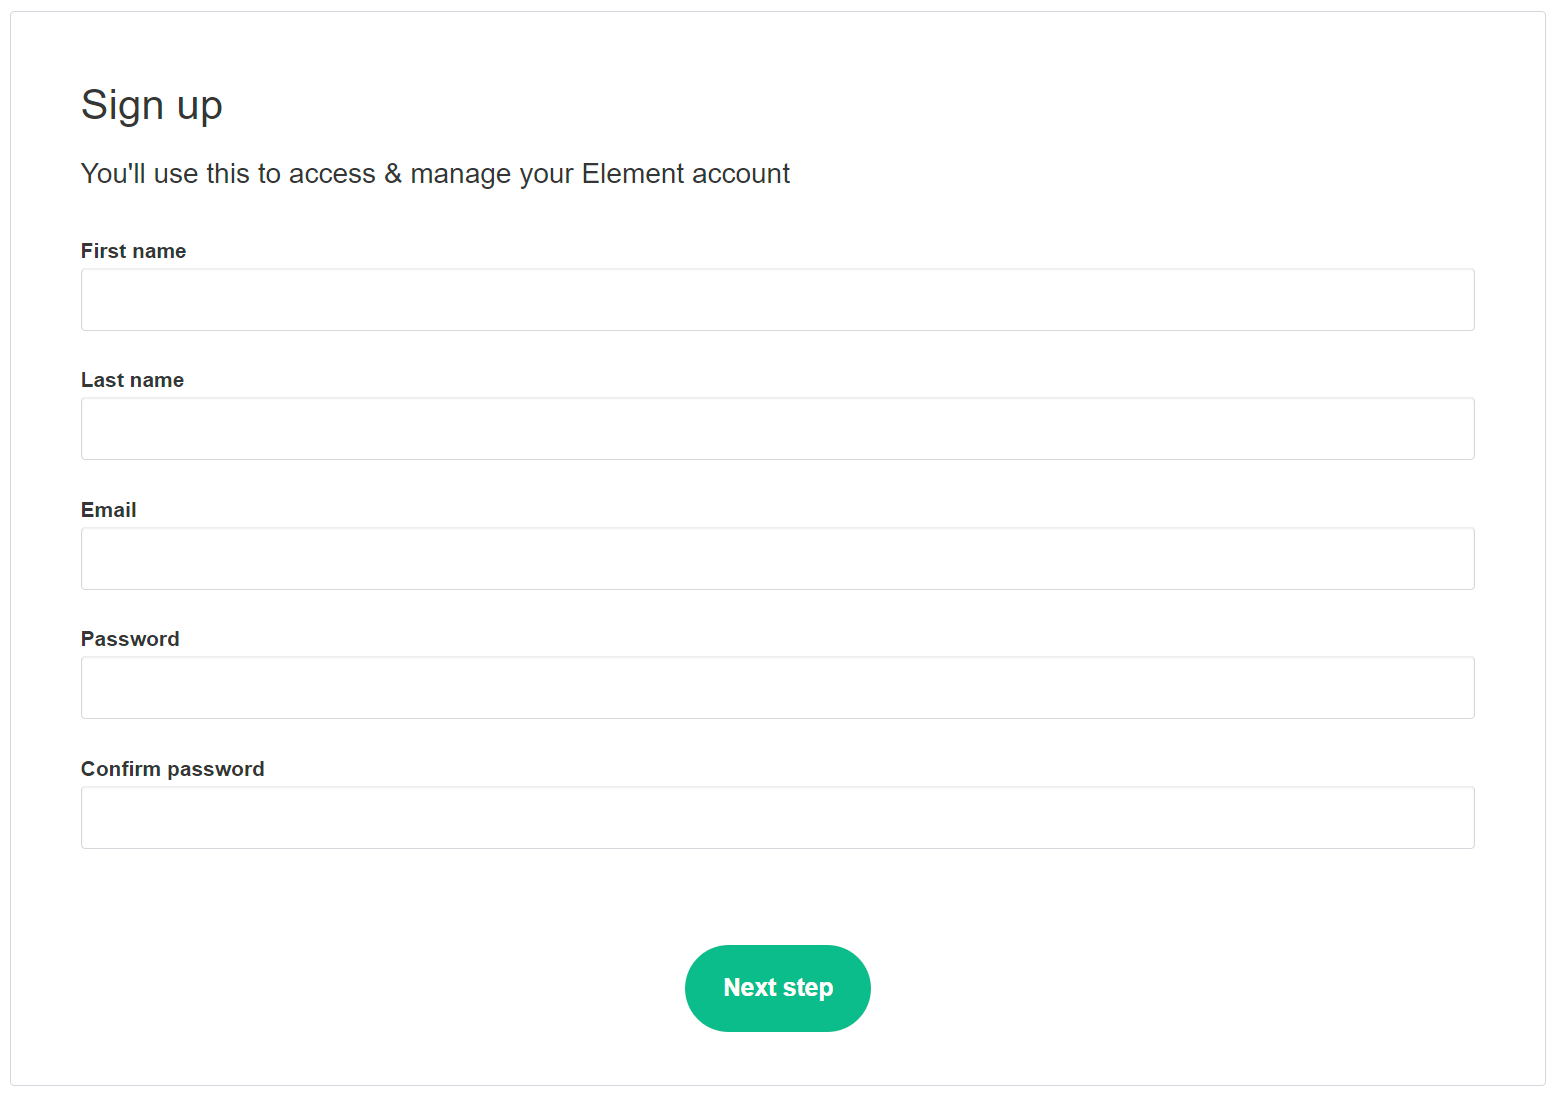
Click Next Step to move to email verification, if you don't recieve the email, you can request it be resent from this page.
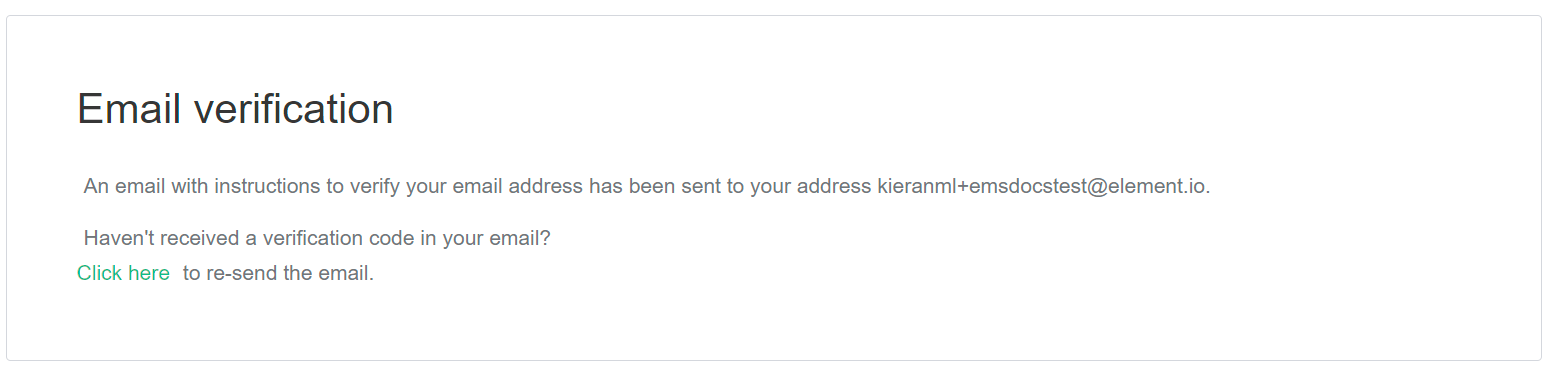
After you recieve the email, click the link to verify, then on the page Click here to proceed to confirm creation of your EMS Account.
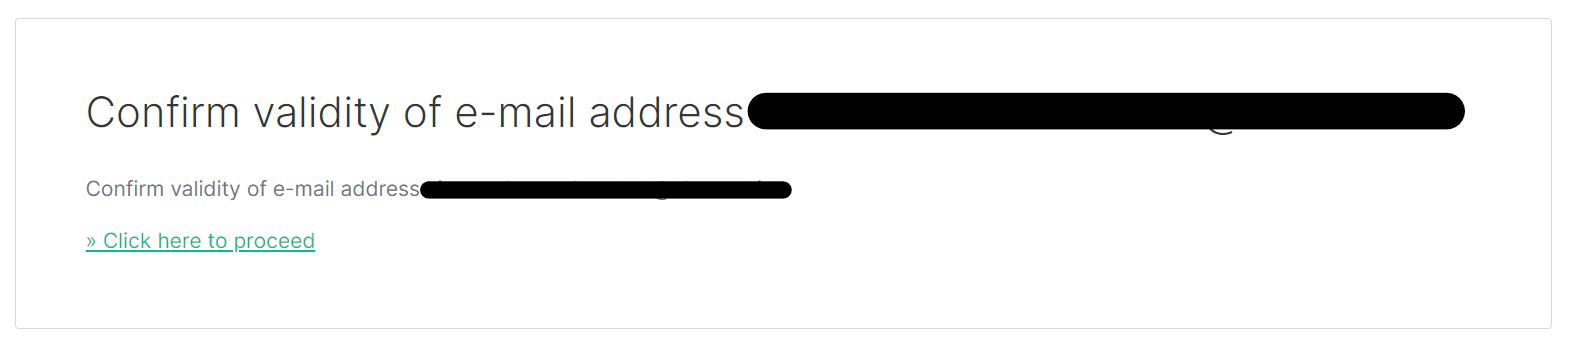

With your email verified and account created, repeat the steps to open the EMS Control Panel, or click the link. Login with your details, then accept the Terms and Conditions.
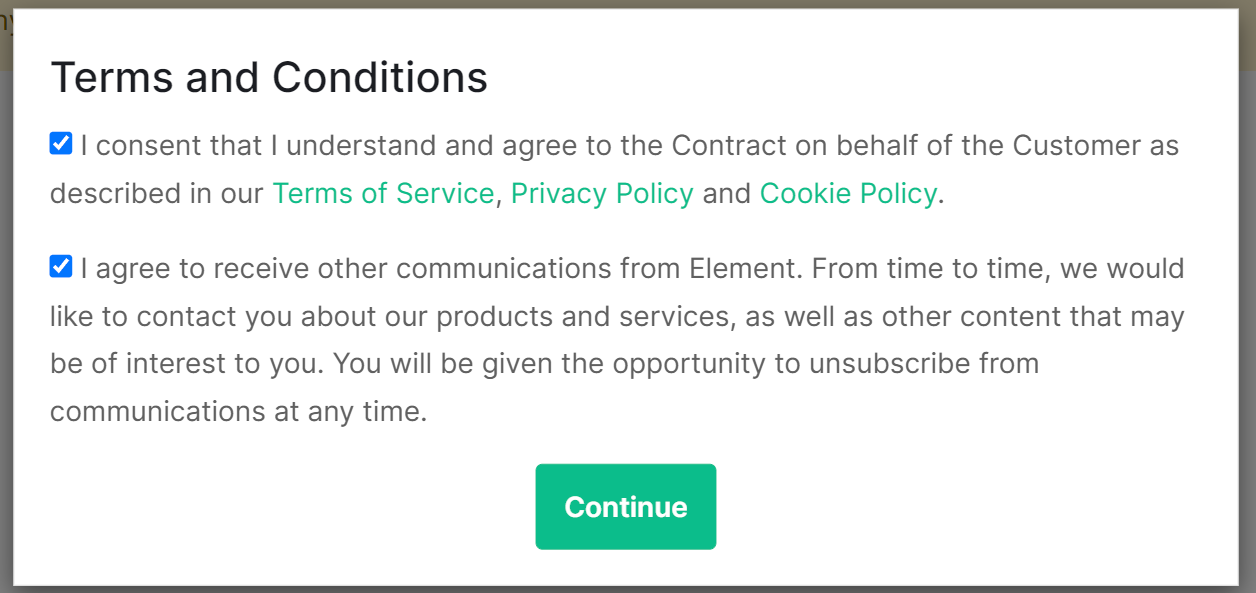
You are now in the EMS Control Panel where you can manage your account and subscriptions.
Your EMS Account when signing up through Element One
If your interested in Element One, you'll be prompted to create your EMS Account whilst running through the Element One setup flow.
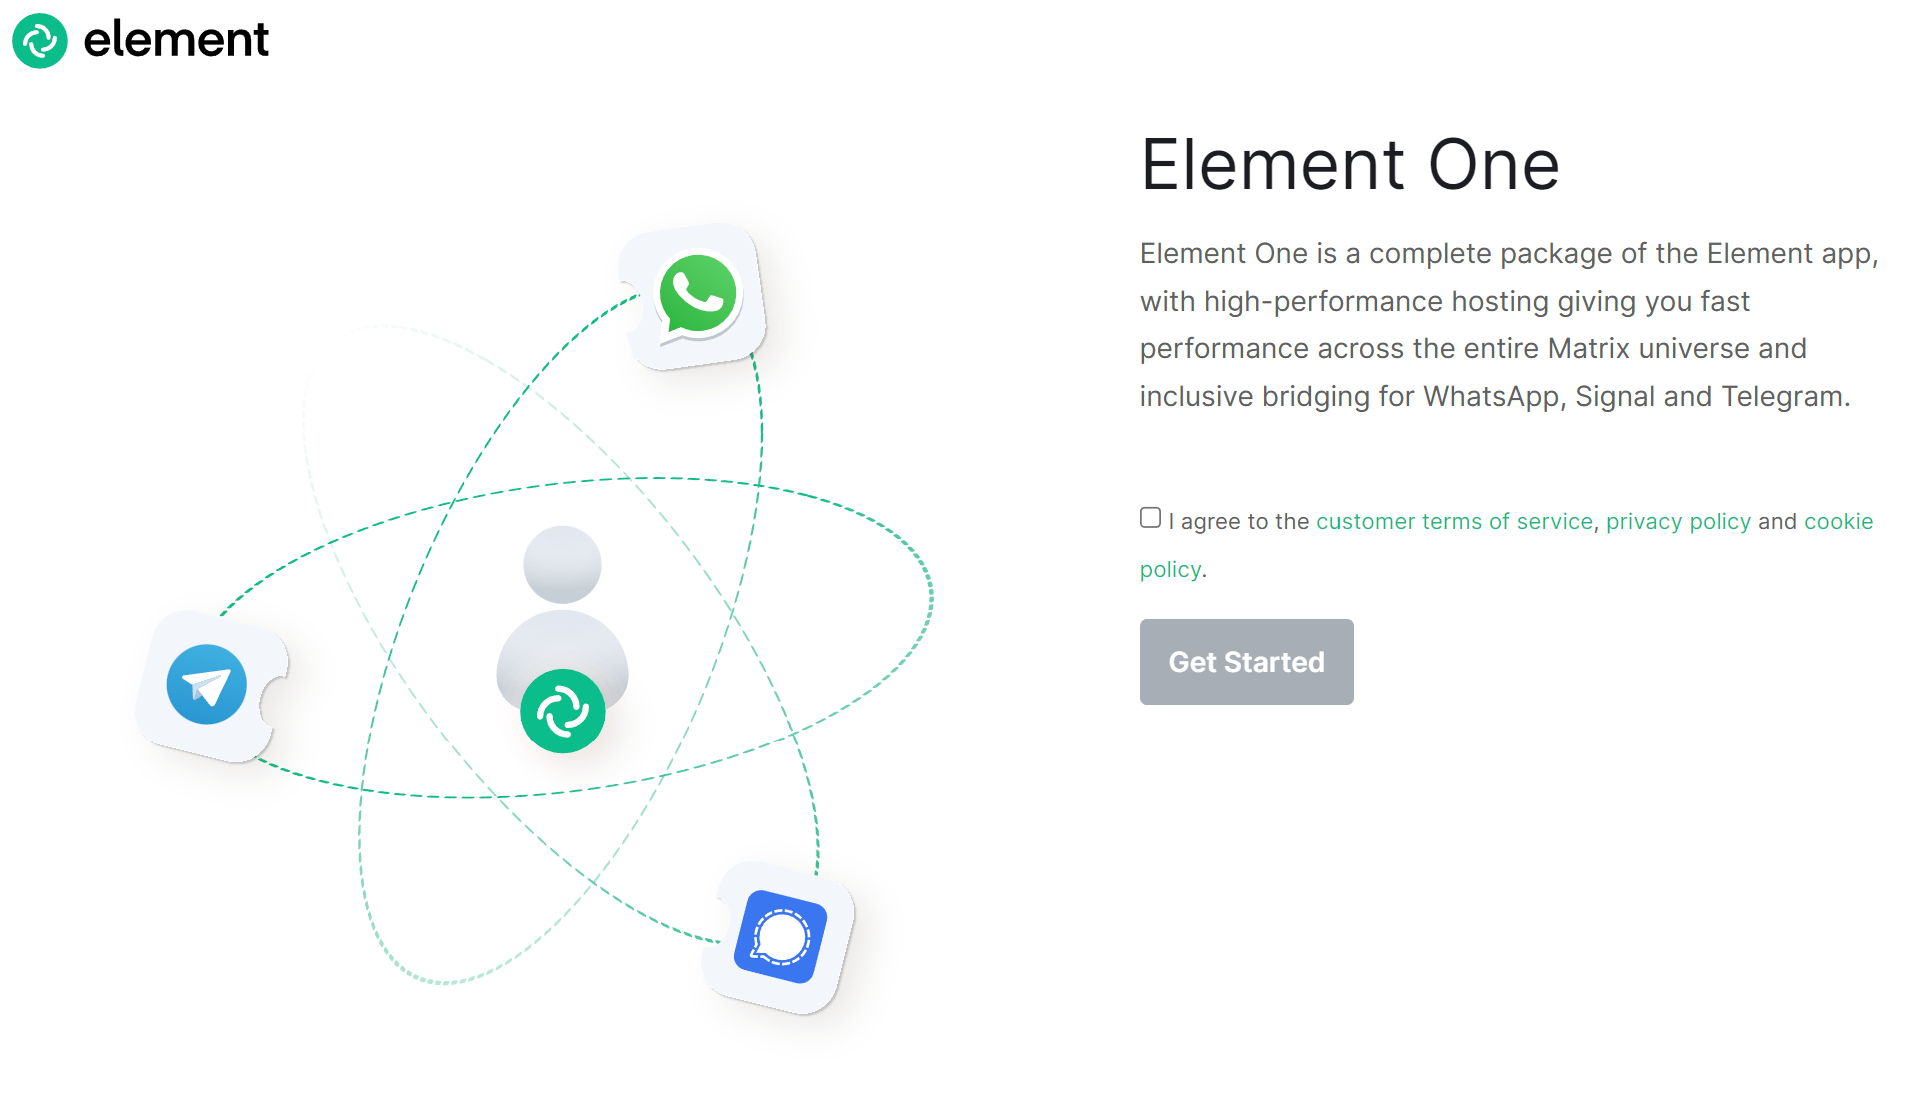
Agree to the Terms and Conditions, then you'll be taken to the account creation form. Follow the steps from the Manually Registering for an EMS Account section above for step-by-step instructions on this process.
If you already manually created an account, but still see the Sign Up screen, it's possible you are no longer signed in. Open the EMS Control Panel, log in with your details, then repeat the Element One sign-up flow.
Once signed up, or logged in, you should be taken to complete the Element One sign-up flow, seen below.
Your EMS Account when signing up for an On-Premise trial
If you're looking at trying our self hosted On-Premise offering, you will be prompted to register for an account. Click Register then accept the Terms and Conditions. Provide your email address then click Continue, you will be taken to the registration page. Follow the steps from the Manually Registering for an EMS Account section above for step-by-step instructions on this process.
If you already manually created an account, but still see the Sign Up screen, it's possible you are no longer signed in. Open the EMS Control Panel, log in with your details, then repeat the Element One sign-up flow.
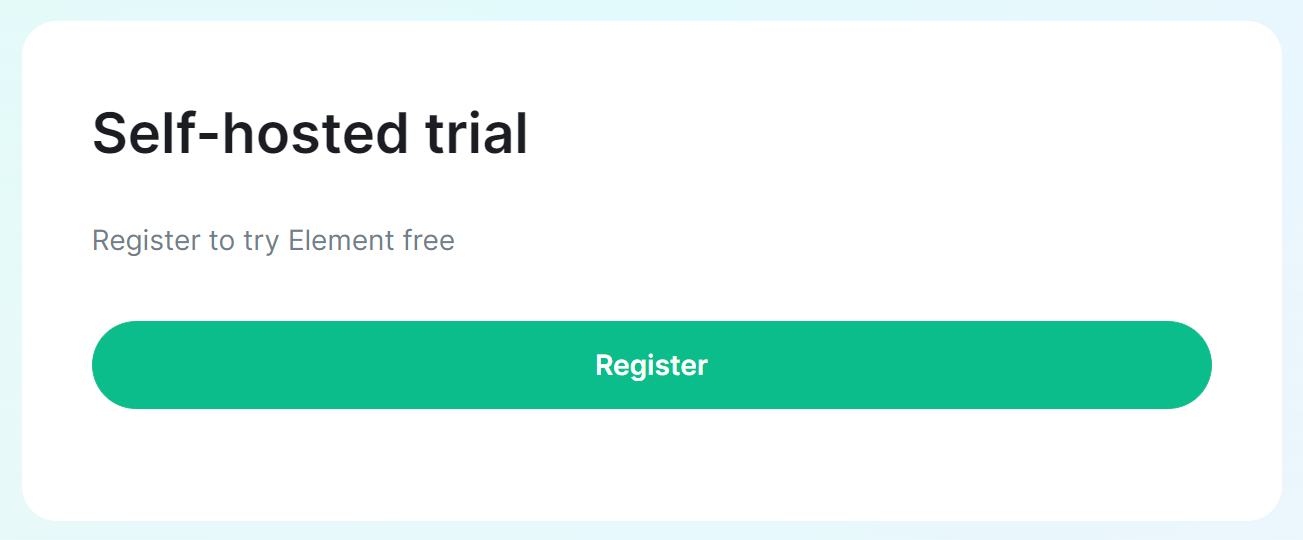
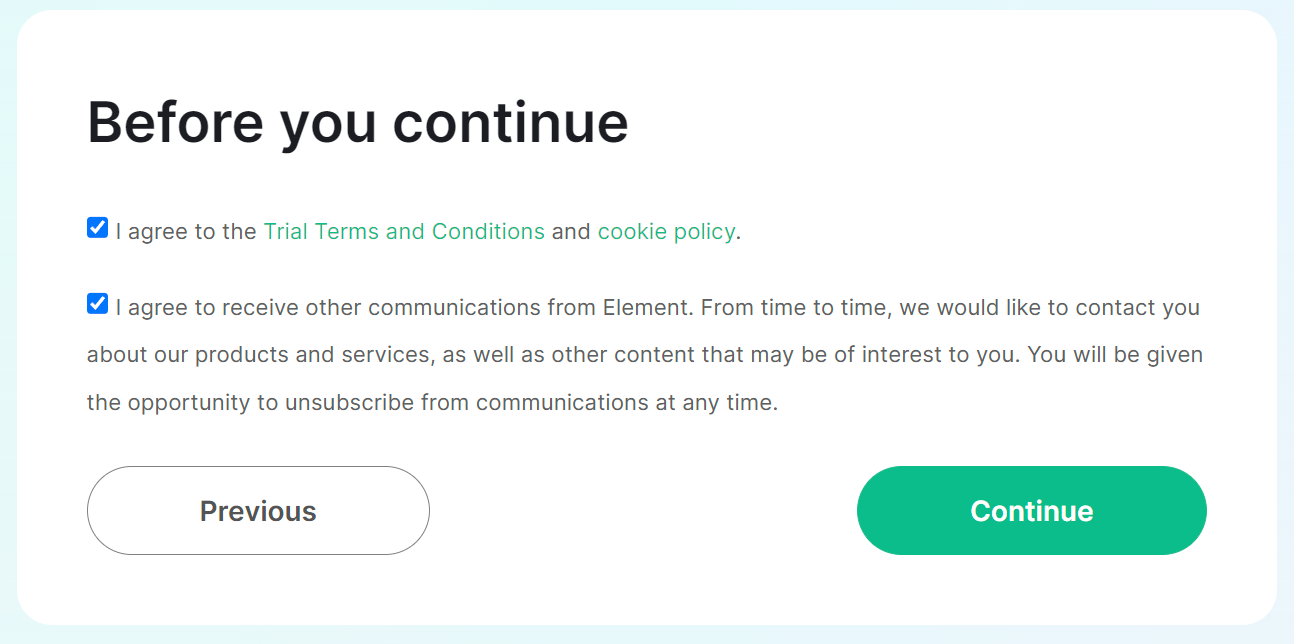
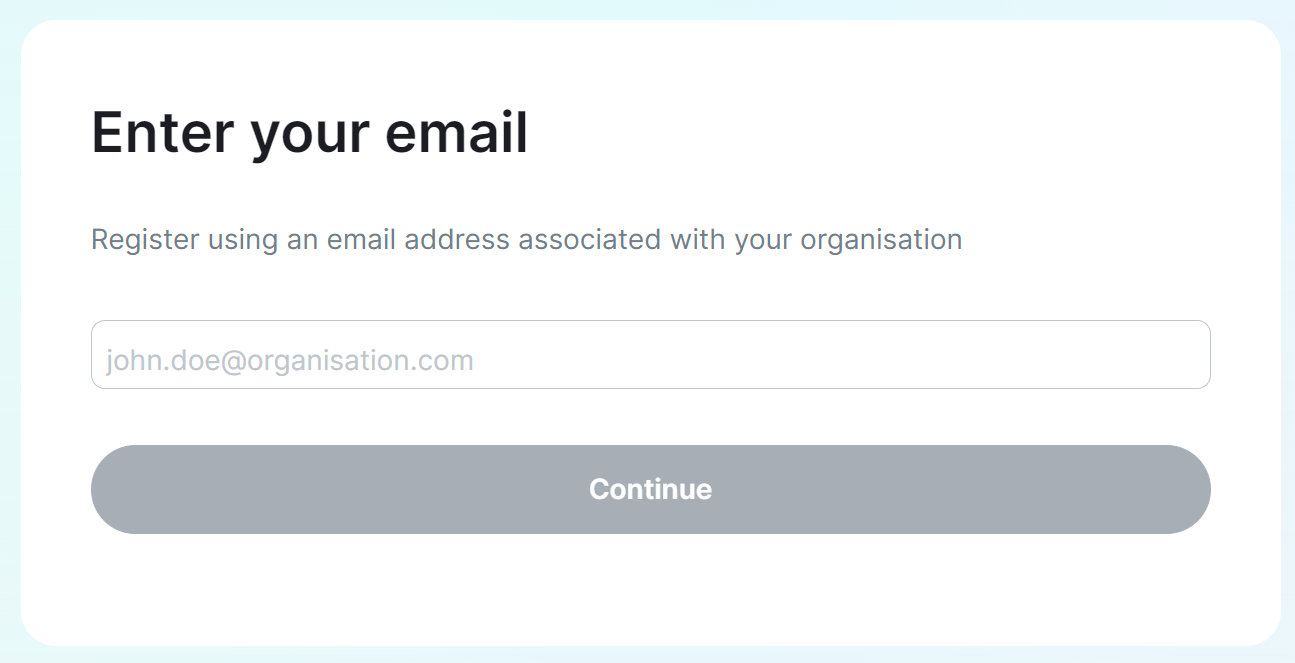
Your EMS Account when signing up for a fully managed homeserver
If you're looking to buy a fully managed homeserver you'll be presented with the creation flow, the first stage being registering for an EMS Account. Click Register, then agree to the Terms and Conditions. Follow the steps from the Manually Registering for an EMS Account section above for step-by-step instructions on this process.
If you already manually created an account, but still see the Sign Up screen, it's possible you are no longer signed in. Open the EMS Control Panel, log in with your details, then repeat the sign-up flow.
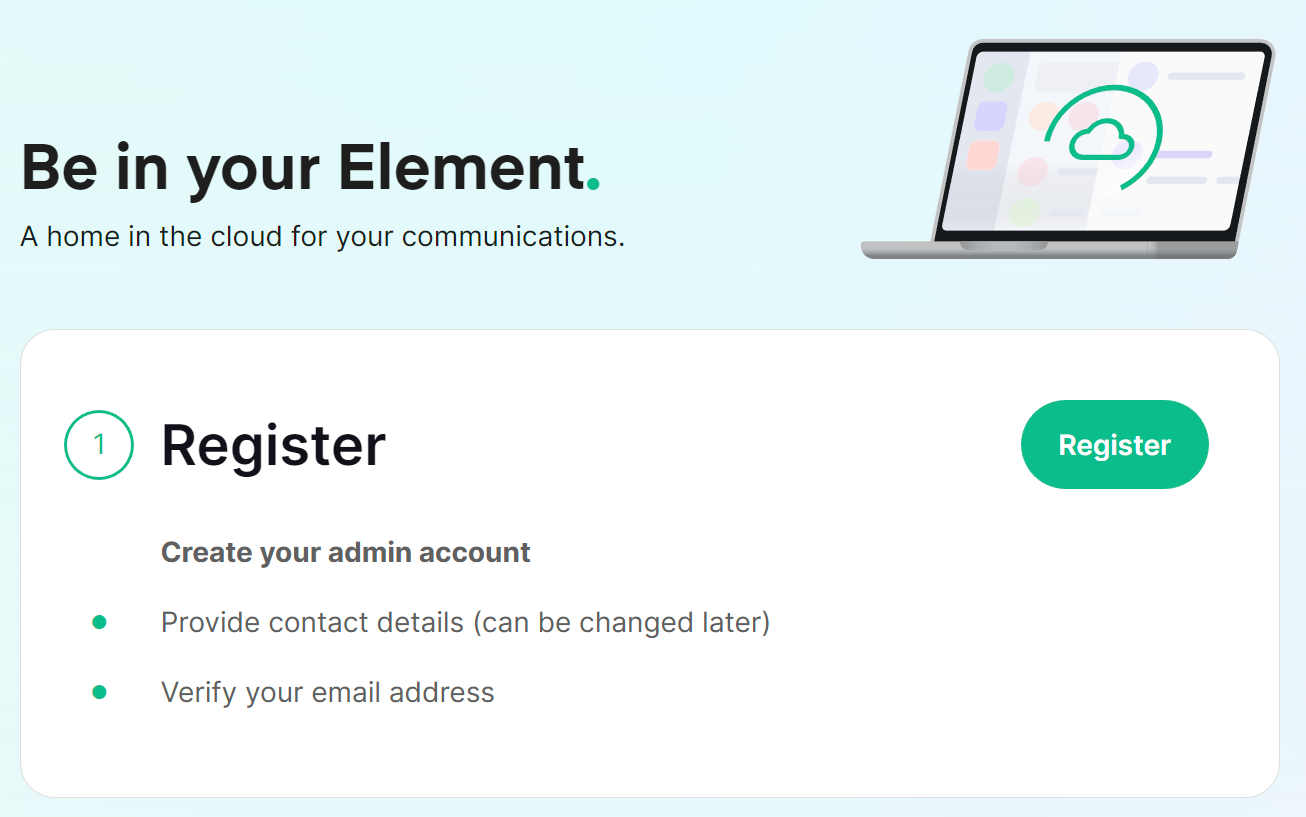
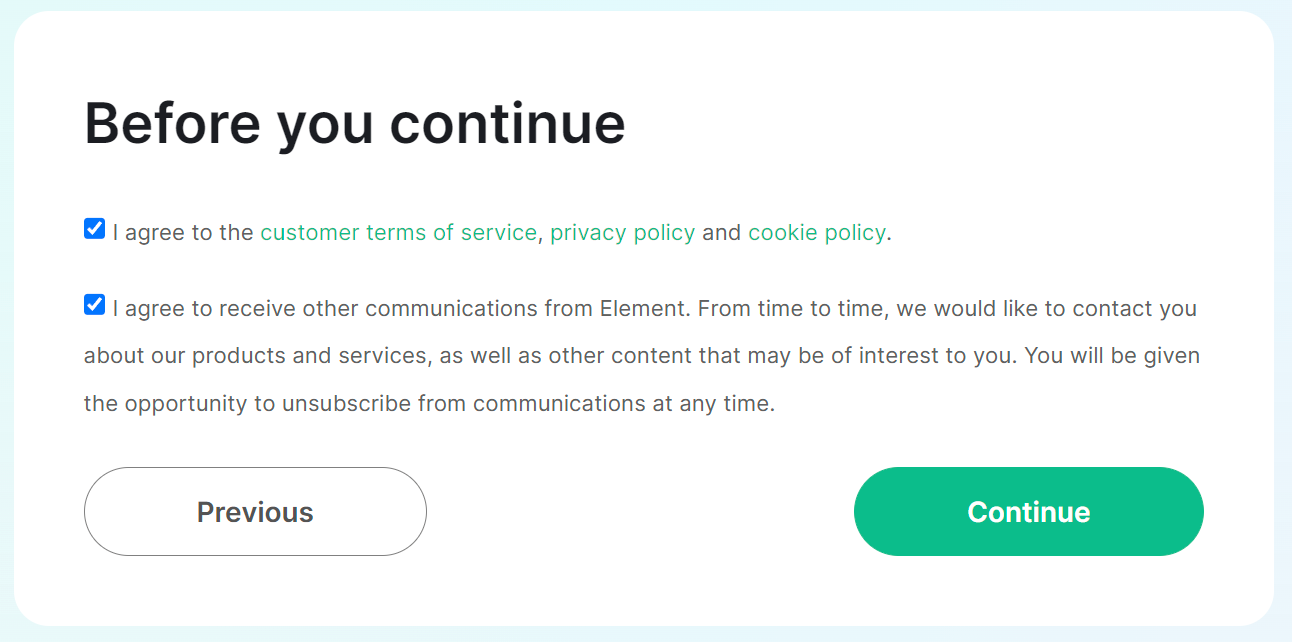
Securing an EMS Account
Two-Factor Authentication
From the Element homepage, click Sign In then Admin Dashboard to be taken to the EMS Control Panel. If you aren't logged in already, you will be presented with the login screen - sign in using your details to be taken to the EMS Control Panel.
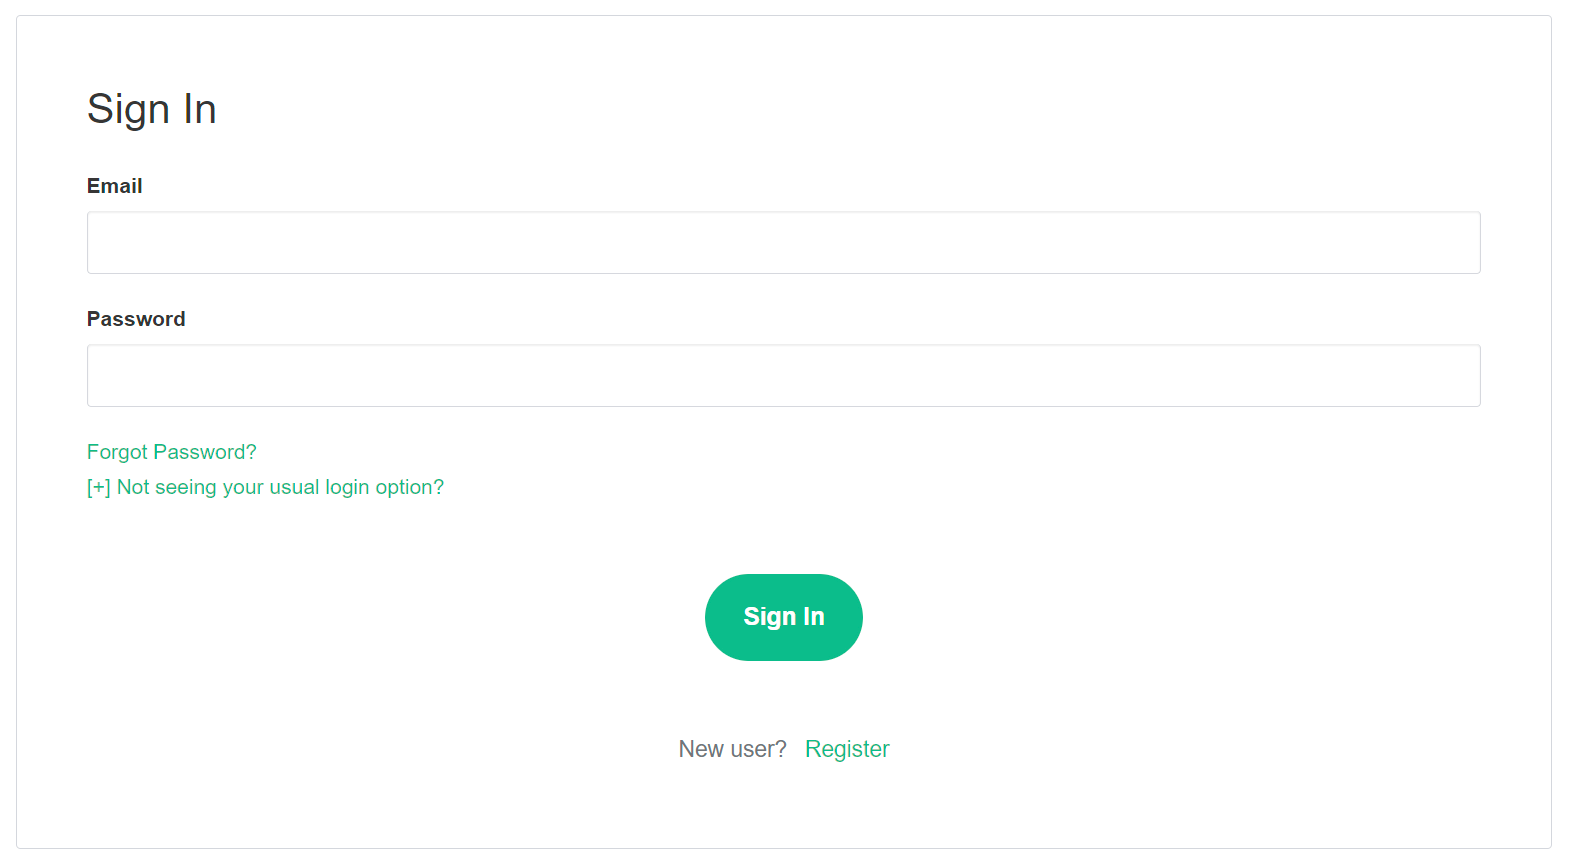
Click Your Account, found in the top right, then select Account, or goes directly there from this link, Account Page.
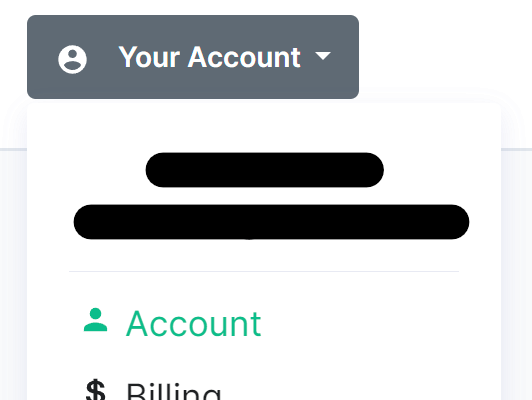
This page contains details about your account, to secure your account, you will need to click Authentication Settings found at the bottom of the Edit your profile section.
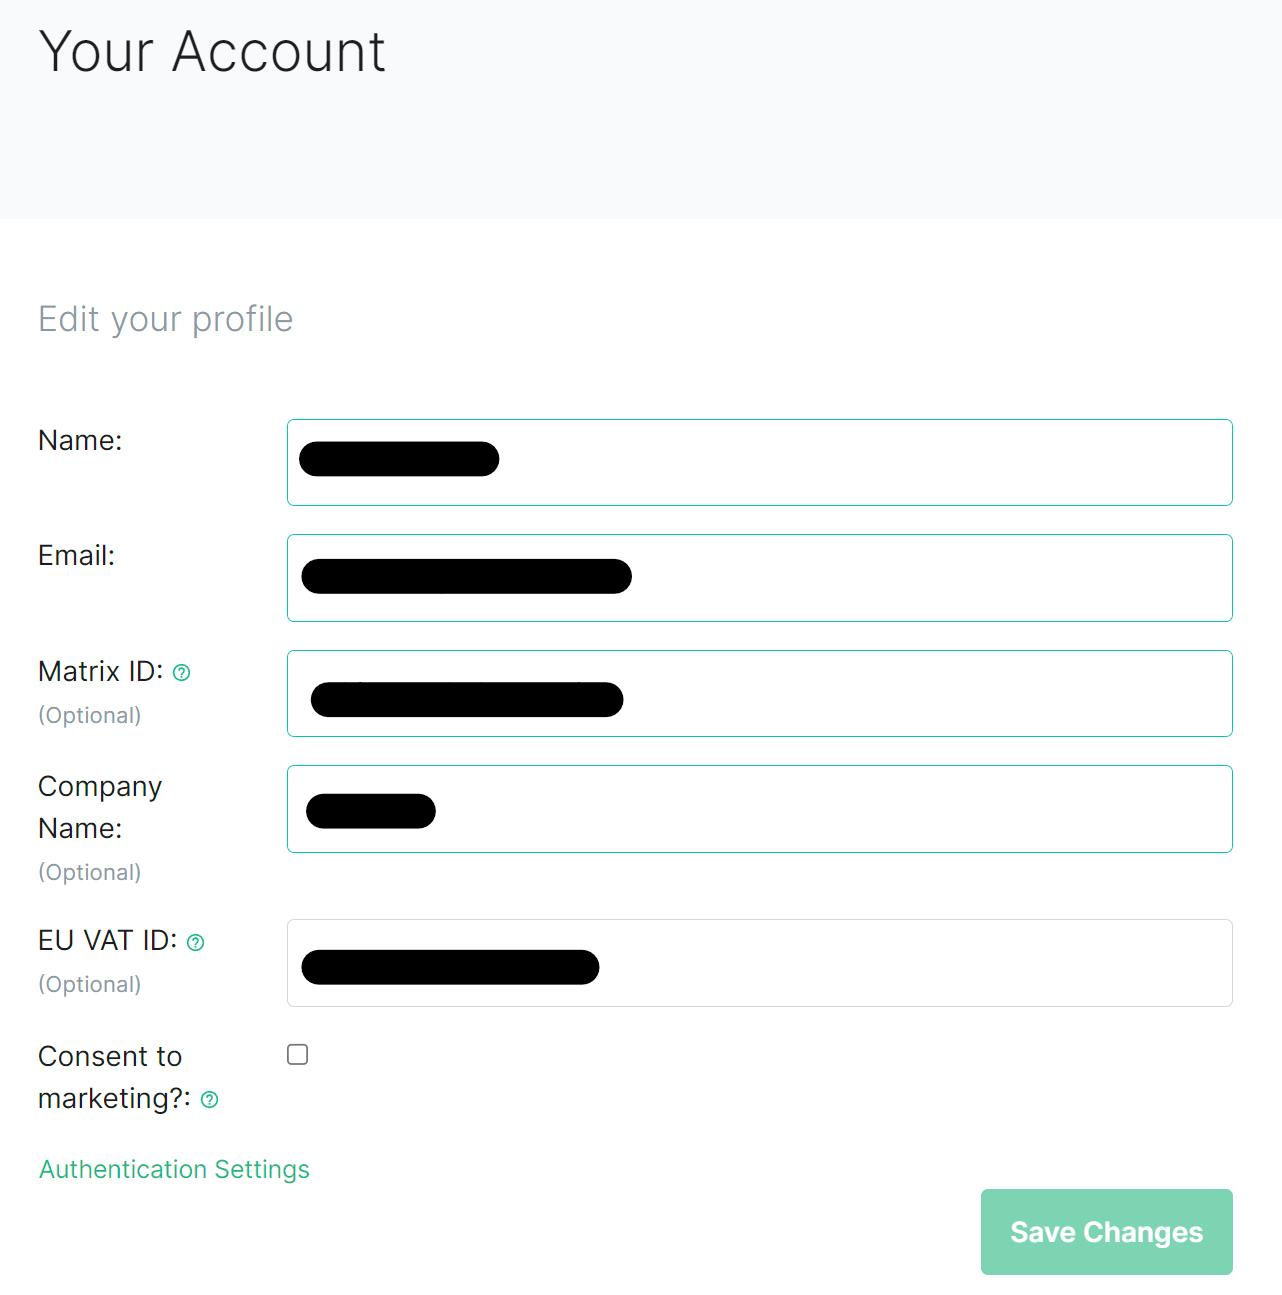
This will take you to your Account Console, where you can manage your account security settings. Click Signing In under Account Security, then from the Two-factor authentication section click Setup an authenticator application.
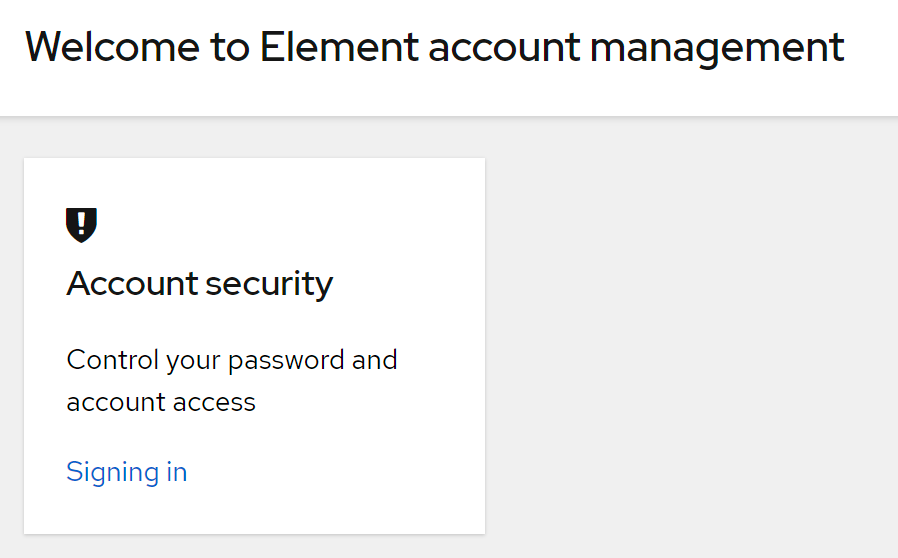

You will need to reauthenticate to confirm your identity, then follow the steps provided to setup a mobile authenticator.
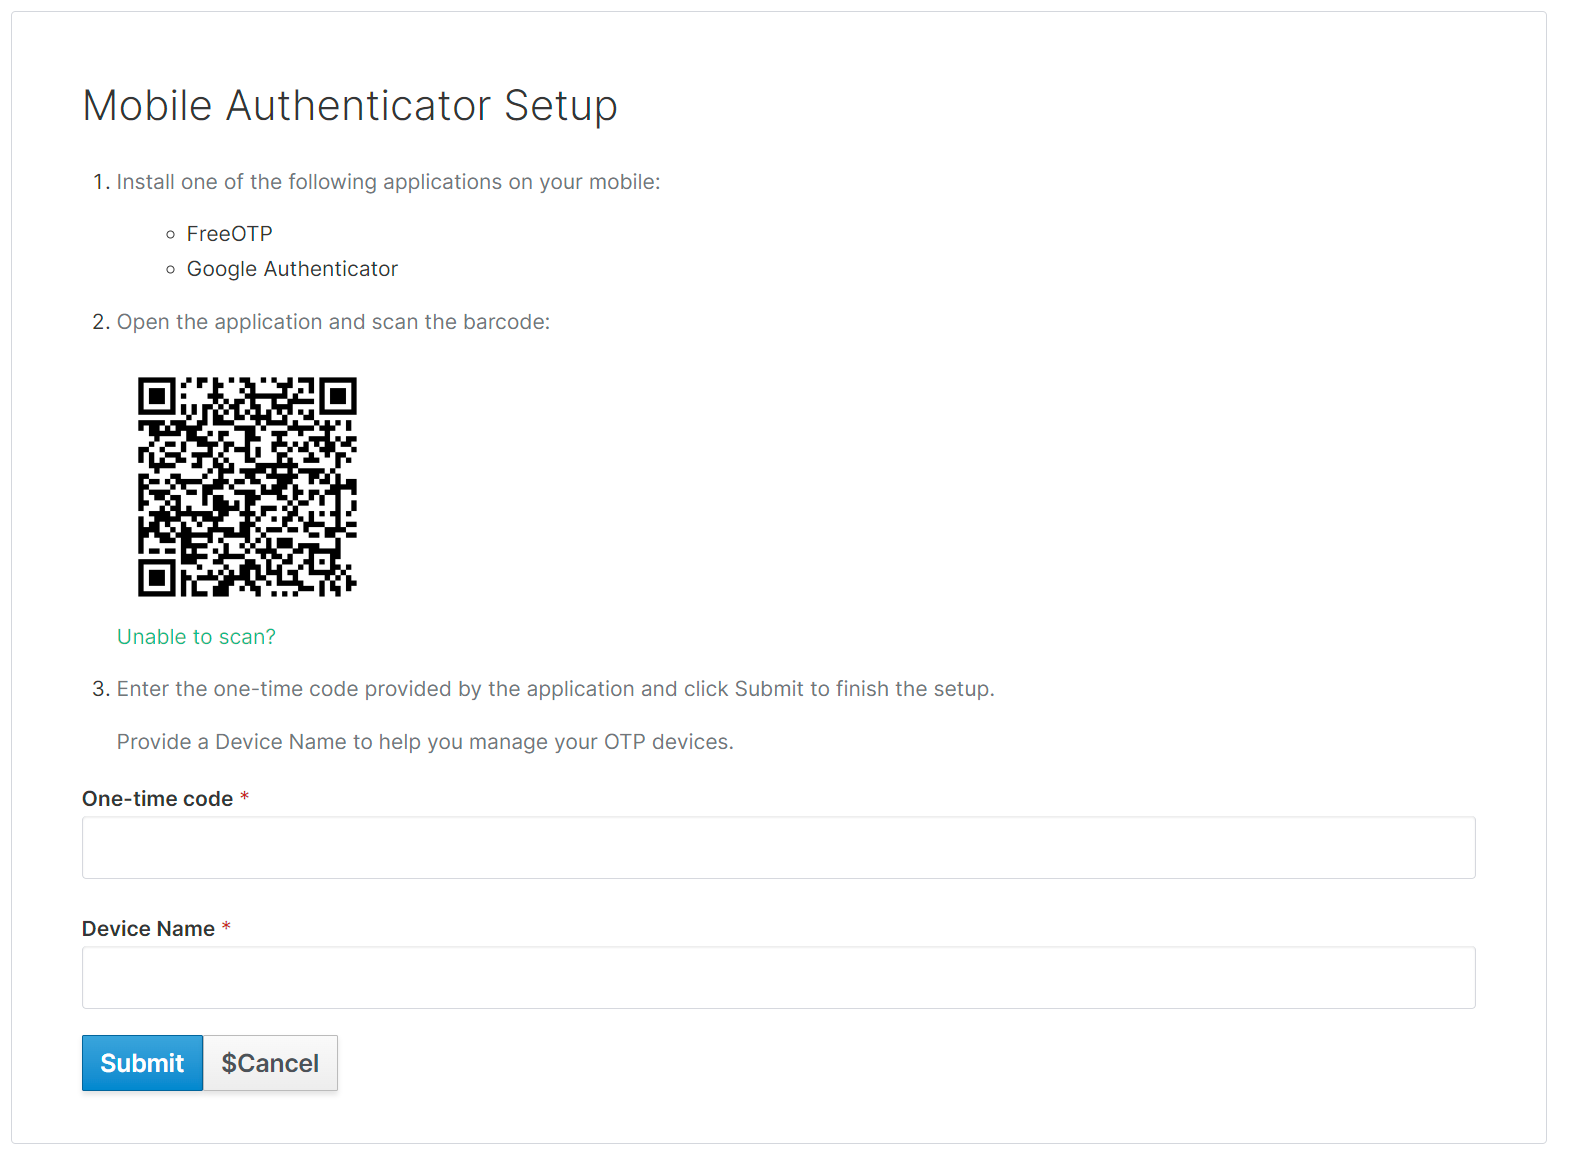
If you're planning on using a password manager, you may not be able to scan the QR code. Simply click Unable to scan, copy the code and paste it into your password manager. Configuration values are provided below the code, should your application require this information. To complete this process, provide a generated code from your device / password manager, give it a recognisable device name then click Submit.
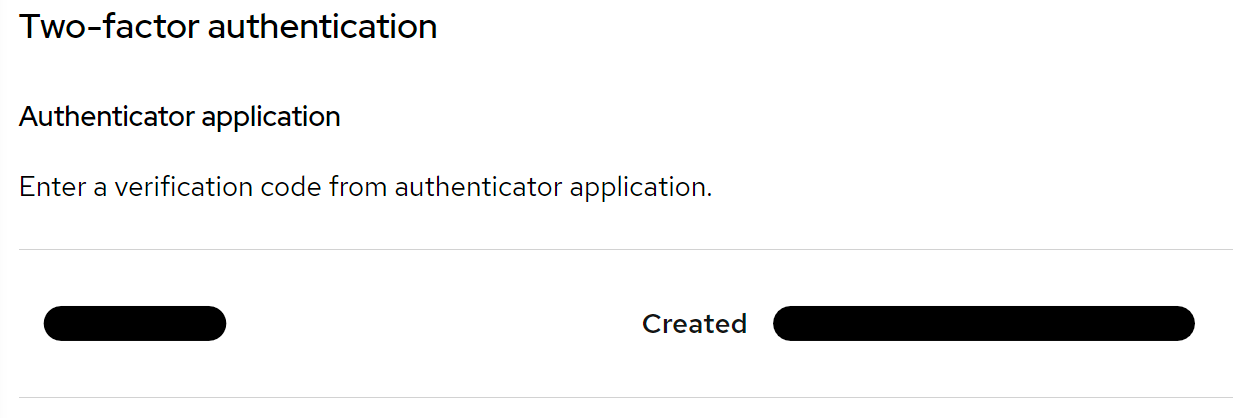
You can confirm this was successful, as you will see the device listed under the Two-factor authentication section.
Changing your EMS Account Email
From the Element homepage, click Sign In then Admin Dashboard to be taken to the EMS Control Panel. If you aren't logged in already, you will be presented with the login screen - sign in using your details to be taken to the EMS Control Panel.
Click Your Account, found in the top right, then select Account, or goes directly there from this link, Account Page.
This page contains details about your account, to change your email, simply edit the existing email present and then click Save, a banner will appear asking you to verify this new email address.

You will recieve an email, simply click the Confirm Email Address button in the email to verify this new address.
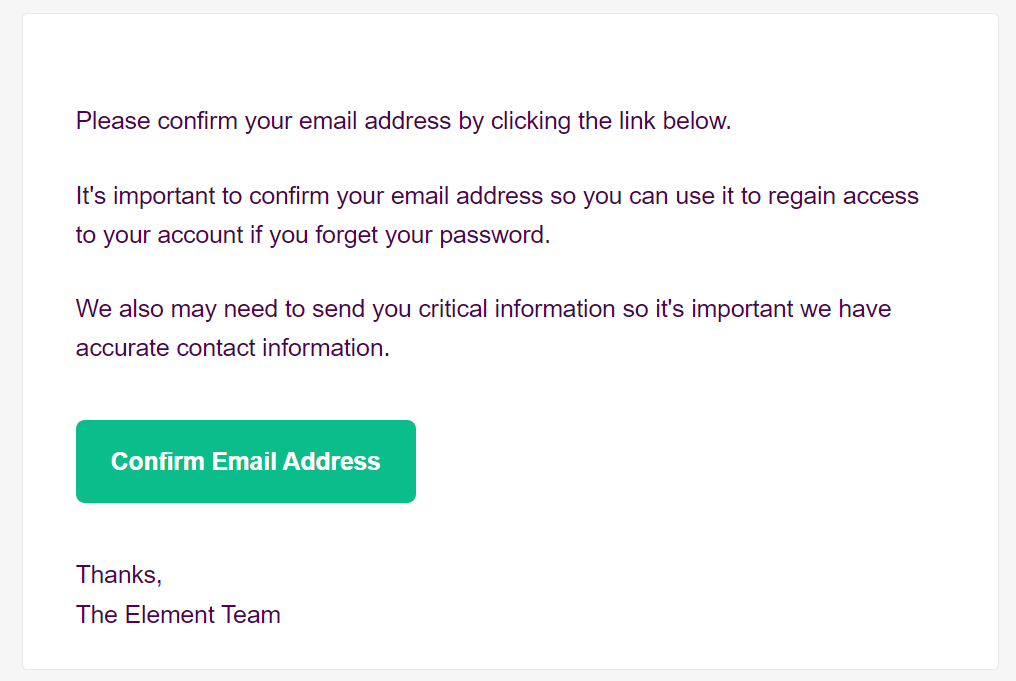
Changing an EMS Account Password
Changing your EMS Account Password
From the Element homepage, click Sign In then Admin Dashboard to be taken to the EMS Control Panel. If you aren't logged in already, you will be presented with the login screen - sign in using your details to be taken to the EMS Control Panel.
Click Your Account, found in the top right, then select Account, or goes directly there from this link, Account Page.
This page contains details about your account, to change your password, you will need to click Authentication Settings found at the bottom of the Edit your profile section.
This will take you to your Account Console, where you can manage your account security settings. Click Signing In under Account Security, then from the Basic authentication section click the Update button.

You will need to reauthenticate to confirm your identity, then follow the steps provided to setup a mobile authenticator.
Finally, you will be presented with the screen to update your password. Confirm it and then click Submit to change your account password.

Deleting an EMS Account
Deleting an EMS Account
From the Element homepage, click Sign In then Admin Dashboard to be taken to the EMS Control Panel. If you aren't logged in already, you will be presented with the login screen - sign in using your details to be taken to the EMS Control Panel.
Click Your Account, found in the top right, then select Account, or goes directly there from this link, Account Page.
This page contains details about your account, to dleete your account, you will need to click the Delete Account button found at the bottom of the page.

Confirm the account deletion in the following prompt to irreveribily delete all hosts and integrations you have and cancel any subscriptions. Your account will then be deleted.

Non-English
Deutsch: Nutzung der eigenen Domain mit EMS
Matrix ist ein Chat-Protokoll, mit dem Nutzer*innen auf verschiedenen Servern miteinander chatten können. Deshalb ist, wie bei E-Mail-Adressen, der Server fester Bestandteil einer jeden Nutzer-Adresse: @jennifer:unternehmen.de.
Nach dem @-Zeichen folgt der Benutzername und nach dem Doppelpunkt folgt die Server-Adresse.
Dies ist auch der Fall, wenn sie die Kommunikation mit anderen Matrix-Servern verbieten und ausschließlich intern chatten.
Gerne können Sie Ihre eigene Domain mit Element Matrix Services (EMS) nutzen. Damit werden die Matrix-Adressen Ihrer Anwender kürzer und auf Ihre Organisation anpasst.
Alternativ bietet Ihnen EMS ohne Aufpreis eine Subdomain. Hierbei ist keine Einrichtung Ihrerseits notwendig. Dann sehen die Adressen Ihrer Anwender*innen beispielsweise so aus: @jennifer:unternehmen.ems.host.
Hier sind die Vorteile der Optionen:
| Vorteile einer eigenen Domain | Vorteiler einer EMS-Subdomain |
|---|---|
| Nutzer- und Chat-Raum-Adressen sind kürzer und auf Ihre Organisation angepasst | Sie können sofort mit einer verfügbaren Subdomain starten |
| Benötigt die Ablage von zwei Dateien auf Ihrer Webseite oder einen DNS-Eintrag (Anleitung für Ihr IT-Team ist unten im Text) | Keine Anpassung in Ihrer IT notwendig |
| Migration zu anderen Anbietern oder in die eigene IT-Landschaft möglich | Migration zu anderen Anbietern und in die eigene IT später nicht leicht möglich[^1] |
| Ihre Domain muss erreichbar bleiben | Keine Verantwortung auf Ihrer Seite |
[^1]: Bei der Einrichtung eines Matrix Servers muss eine Domain festgelegt werden. Ein Wechsel der Domain ist momentan nicht möglich. Die Domain wird Teil der Nutzer- und Chat-Adressen. Dies betrifft auch Server, welche nicht mit anderen Servern föderieren.
Reihenfolge der Einrichtung
Sie haben sich entschieden Ihre eigene Domain zu nutzen? Sehr gut!
- Bestellen Sie den Matrix-Server bei EMS unter Angabe ihrer eigenen Domain. Sie müssen auch eine EMS-Serveradresse im Format unternehmen.ems.host wählen.
- Folgen Sie der Anleitung im Abschnitt “Einrichtung auf Ihrem Webspace”.
- Überprüfen Sie auf https://ems.element.io/user/hosting, dass Ihre Domain erfolgreich eingerichtet wurde.
Einrichtung auf Ihrem Webspace
Diese Schritte müssen Sie tätigen, um Ihre eigene Domain zu verwenden.
Sollten Sie eine englische Anleitung bevorzugen, finden Sie diese hier: https://element-hq.github.io/synapse/latest/delegate.html
Damit Anwendungen Ihren Matrix-Server bei EMS finden, müssen Sie auf Ihrer Domain einen Hinweis auf dessen Ort hinterlassen. Sie haben dafür die zwei folgenden Optionen.
Ablage von .well-known Dateien (empfohlene Option)
Erstellen Sie zwei statische JSON-Dateien auf Ihrer Webseite. Diese müssen unter den folgenden Pfaden öffentlich aus dem Internet erreichbar sein.
-
https://unternehmen.de/.well-known/matrix/client -
https://unternehmen.de/.well-known/matrix/server
Statt matrix.org, sind hier die entsprechenden Pfade auf Ihrer Domain gemeint.
Ist der Ordner .well-known auf Ihrem Webspace nicht vorhanden, erstellen Sie ihn. Manche Programme blenden Ordner aus, wenn sie mit einem Punkt starten. Er könnte also schon existieren. Erstellen Sie darin einen Ordner matrix.
Die JSON-Dateien client und server dürfen keine Dateiendung haben und müssen die folgenden Inhalte haben. Ersetzen Sie “unternehmen” mit Ihrem EMS-Hostnamen. Diesen finden Sie auf https://ems.element.io/user/hosting vor “.ems.host”, z.B. “unternehmen.ems.host”. Wurde Ihr Server vor dem Sommer 2020 angelegt, hat er vermutlich die Endung “.modular.im”.
GET /.well-known/matrix/client
{
"m.homeserver": {
"base_url": "https://unternehmen.ems.host"
},
"m.identity_server": {
"base_url": "https://vector.im"
},
"org.matrix.msc4143.rtc_foci": [
{
"type": "livekit",
"livekit_service_url": "https://jwt.call.unternehmen.io"
}
]
}
GET /.well-known/matrix/server
{
"m.server": "unternehmen.ems.host:443"
}
Ersetzen Sie in beiden Beispielen unternehmen.ems.host durch Ihre EMS-Serveradresse.
Fehlerbehebung
Um zu überprüfen, ob alles korrekt eingerichtet wurde, geben Sie Ihre Domain auf der folgenden Webseite ein.
https://federationtester.matrix.org/ (Nur in englischer Sprache)
Eine grüne Fläche mit dem Wort “SUCCESS” signalisiert eine erfolgreiche Einrichtung. Auch in EMS sollten Sie nun unter https://ems.element.io/user/hosting eine erfolgreiche Prüfung der Domain vorfinden.
Ist eine rote Nachricht “Connection Errors” zu sehen, war eine Verbindung zum Server nicht möglich. Haben Sie den Server bei EMS schon bestellt? Ist Ihre Webseite nicht über HTTPS erreichbar? Hier sollte der .well-known Ordner und die darin enthaltene Datei öffentlich aus dem Internet zugänglich sein.
Sehen Sie die Nachricht “No SRV Records”, wurde der DNS-Eintrag nicht gefunden. Dieser Eintrag ist nur notwendig, sollten Sie keine Datei auf Ihrem Webspace veröffentlichen können. Überprüfen Sie, ob Sie alles richtig eingegeben haben und das Formular Ihres Domain-Anbieters gespeichert haben. Ist alles richtig, brauchen Sie vielleicht nur etwas zu warten. Nach dem Ändern von DNS-Einträgen braucht es ein paar Minuten, bis sich die Änderung im Internet verteilt.