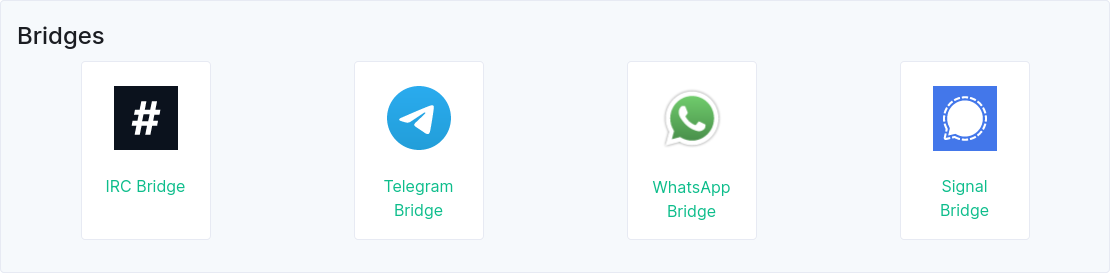
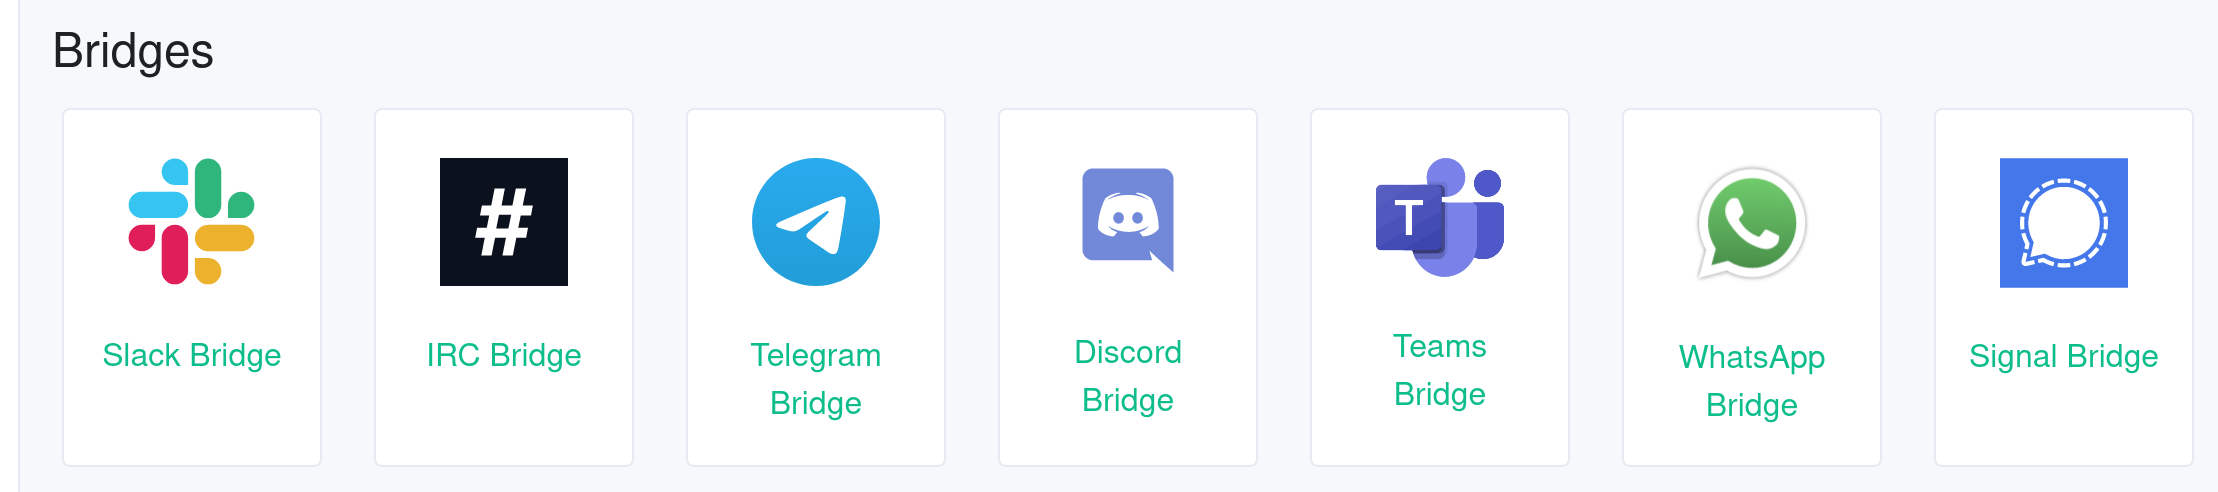
Integrations
- Admin Bot
- Audit Bot
- Create a Conference Call in a Room
- Discord Bridge
- Hookshot
- Migrate to the new GitHub and Feeds bots
- Public IRC Bridges
- Public Slack Bridge
- Signal Bridge
- Slack Bridge
- Teams Bridge
- Telegram Bridge
- WhatsApp Bridge
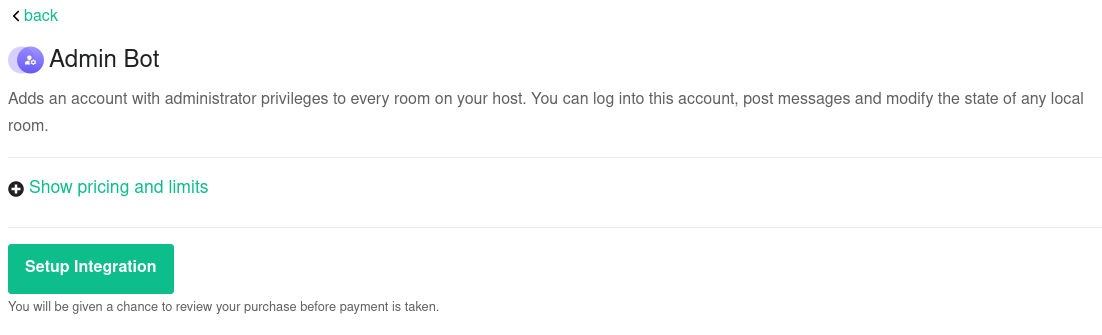
Admin Bot
Matrix brings lots of possibilities for collaboration through federation of different homeservers. This calls for moderation tools which consider the decentral power levels of Matrix rooms.
Admin Bot is only available on homeservers with the Element Enterprise Cloud plan.
Admin Bot is a service account which works in addition to the EMS Server Admin UI and Synapse Admin API.
Most administrative tasks in a Matrix room require a local account with the power level "Administrator" (100) to be a room member.
The Admin Bot extension ensures this by inviting and promoting the account adminbot in every Matrix room created on your server.
This way you can moderate content in these rooms, invite and promote room members and kick or ban unwanted members.
Use case examples
- All active administrators in a room depromoted themselves. Use Admin Bot to regain control of this room.
- Someone reported a Code of Conduct violation in a room without active moderators. Use Admin Bot to redact the messages and kick or ban the offender.
Good to know
- Admin Bot joins all rooms and spaces created by your users.
- Admin Bot also joins Direct Message rooms created by your users.
- The use of Admin Bot is visible to your users. The service account cannot be hidden. In Direct Message rooms it will not appear in the room title but is visible in the room member list.
- Admin Bot does not join rooms created by users on others servers. You can still manually invite Admin Bot and promote them to be a room admin.
- The user account
adminbotwill be used. The full Matrix ID will be something like@adminbot:element.io. - Admin Bot is able to read encrypted messages to allow you to moderate messages.
- Admin Bot does not work retroactively, rooms where all admins have left prior to setup of the bot will require manual intervention.
See also
AdminBot for global room administration.
Setup
- Go to the Integrations tab on the EMS homeserver page.
- If you have more than one homesever, select the homeserver to add Admin Bot to.
- In the section Extensions, click on
Admin Bot. If this is not visible, check that the homeserver is using the Element Enterprise Cloud plan. - Click on
Set Up Integrationand confirm the pricing in a modal.
Usage
Admin Bot improves your ability to use the Server Admin tab on the EMS homeserver page and Synapse Admin API by having a local admin in every room.
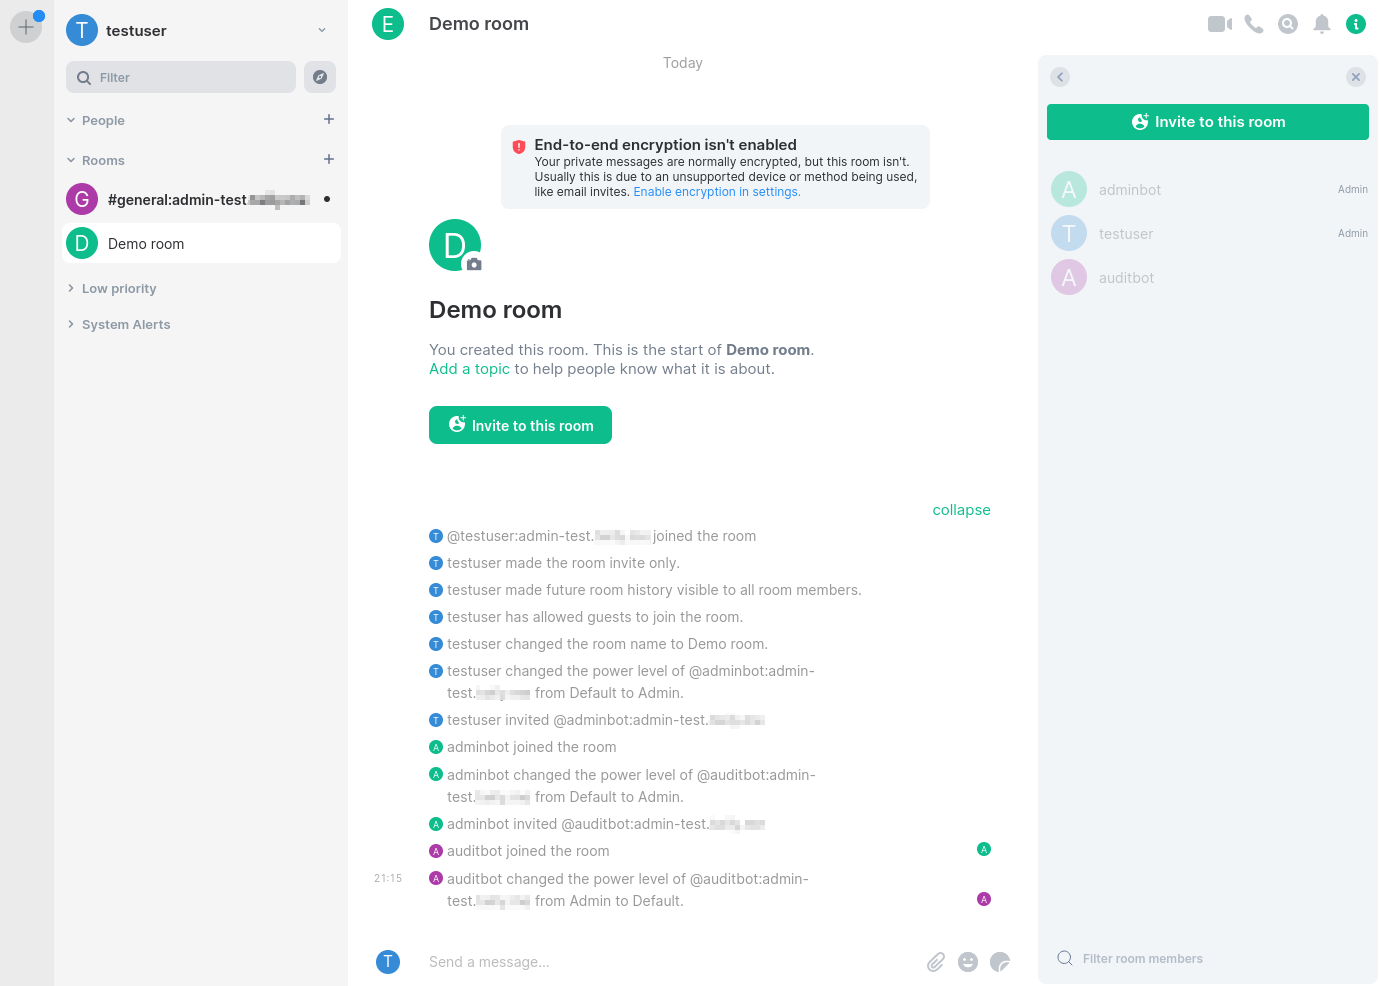
Furthermore, you can use Element Web to log into the adminbot account:
-
Go to the Integrations tab on the EMS homeserver page.
-
If you have more than one homeserver, select the one you want to administrate.
-
In the section Extensions, click on
Admin Bot. If this is not visible, check that the homeserver is using the Element Enterprise Cloud plan. -
If this is the first time you log in using this browser, click
Secure Backup Phrase (click to view)and copy the phrase to your clipboard.

-
Click on
Log in as Admin bot. You will need to enter the Secure Backup Phrase on first login with a new browser in order to access Secure Storage and encrypted messages.

Removal
Removing the integration will not cause the user adminbot to leave rooms.
This is a separate step to make mistakes easier to recover from.
If the integration was accidentally deactivated and Admin Bot left rooms as the last local Administrator in that room, such rooms can no longer be moderated by anyone and need to be abandoned. Those room also couldn't be rejoined by Admin Bot.
You can deactivate the adminbot account using the EMS Admin GUI or Synapse Admin API, if you want it to leave all rooms.
Audit Bot
Audit Bot is for compliance with the law or your organization's guidelines. This service account allows you to read every conversation on your server, including encrypted conversations.
Audit Bot is only available on homeservers with the Element Enterprise Cloud plan.
Use case examples
- A law or organisational guideline requires you to store all written correspondence.
- A legal investigation requires you to verify or deny if a certain message has been sent.
Good to know
- Audit Bot joins all rooms and spaces created by your users.
- Audit Bot also joins Direct Message rooms created by your users.
- The use of Audit Bot is visible to your users. The service account cannot be hidden. In Direct Message rooms it will not appear in the room title but is visible in the room member list.
- Audit Bot does not join rooms created by users on others servers. You can still manually invite Audit Bot.
- The user account
auditbotwill be used. The full Matrix ID will be something like@auditbot:element.io. - Audit Bot is able to read encrypted messages to allow you to read or store all messages.
See also
AuditBot for regulation and compliance.
Setup
- Go to the Integrations tab on the EMS homeserver page.
- If you have more than one homesever, select the homeserver to add Audit Bot to.
- In the section Extensions, click on
Audit Bot. If this is not visible, check that the homeserver is using the Element Enterprise Cloud plan. - Click on
Set Up Integrationand confirm the pricing in a modal.
Optional export
Audit Bot can be configured to write all decrypted events in all rooms to an S3-compatible storage of your choice. This is a continous export which will start with the configuration of a bucket and stop if you clear the configuration. Messages from the past are not exported retrospectively.
Usage
You can use Element Web to log into the auditbot account:
-
Go to the Integrations tab on the EMS homeserver page.
-
If you have more than one homeserver, select the one you want to administrate.
-
In the section Extensions, click on
Audit Bot. If this is not visible, check that the homeserver is using the Element Enterprise Cloud plan. -
If this is the first time you log in using this browser, click
Secure Backup Phrase (click to view)and copy the phrase to your clipboard.
-
Click on
Log in as Audit bot. You will need to enter the Secure Backup Phrase on first login with a new browser in order to access Secure Storage and encrypted messages.

Removal
Removing the integration will not cause the user auditbot to leave rooms.
This is a separate step to make mistakes easier to recover from.
If the integration was accidentally deactivated and Audit Bot left rooms as the last local Administrator in that room, such rooms can no longer be moderated by anyone and need to be abandoned. Those room also couldn't be rejoined by Audit Bot.
You can deactivate the auditbot account using the EMS Admin GUI or Synapse Admin API, if you want it to leave all rooms.
Create a Conference Call in a Room
Setting up
-
Create a room

-
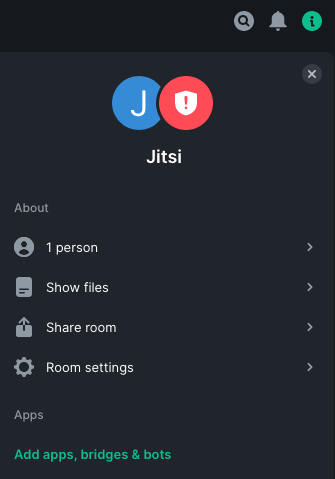
Click
Room Info, thenAdd apps, bridges & bots

-
Read and accept the Terms of Service for the Integration Manager

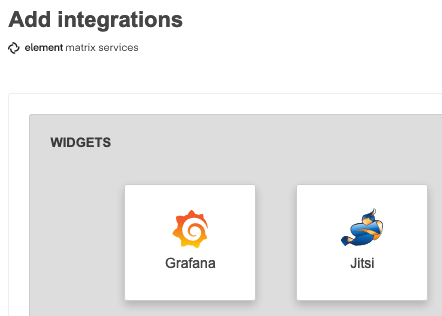
-
Select Jitsi from the list of available widgets

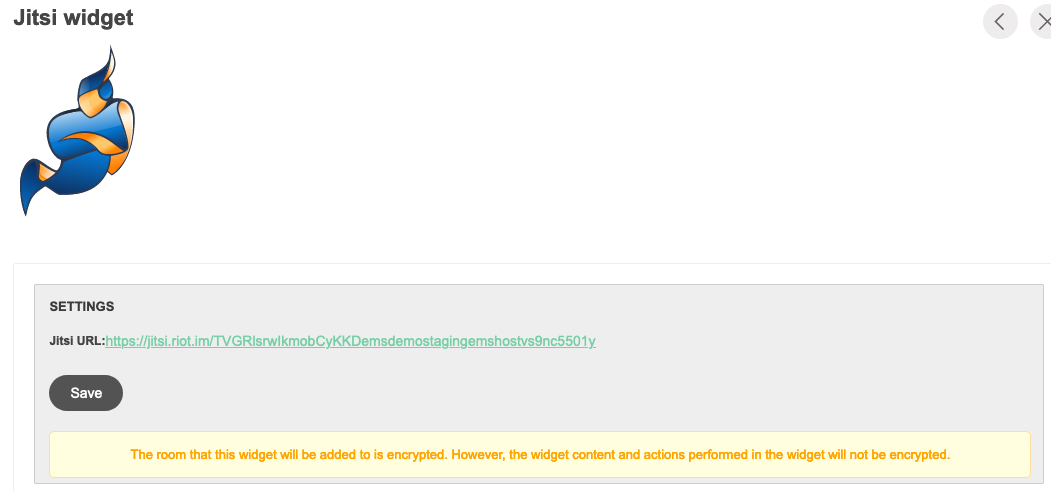
-
Save the URL if you wish, this is also easily available later. Then click
Save

-
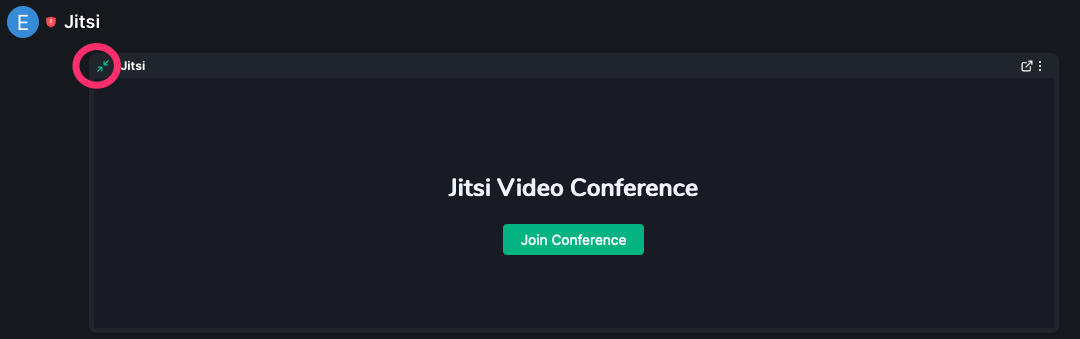
Click the
Xto close the integration manager

-
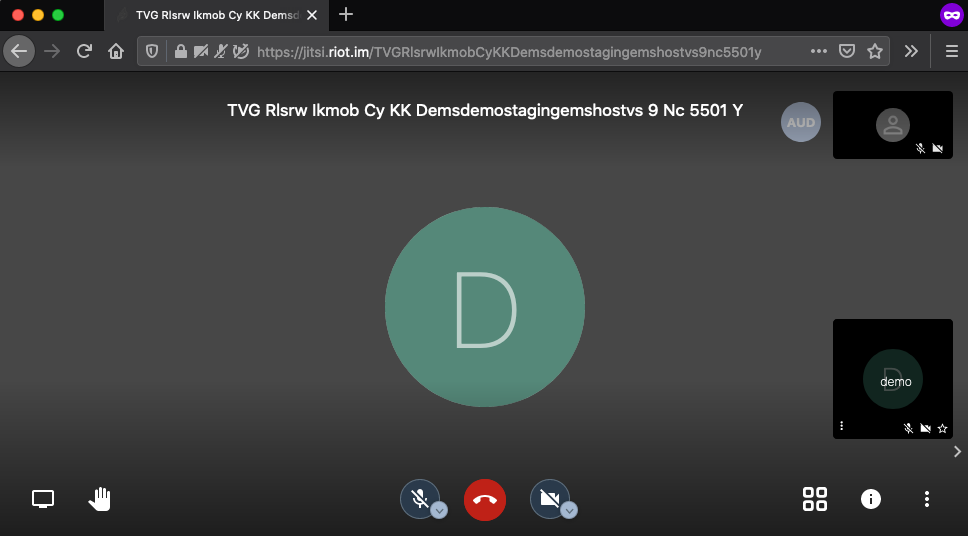
To join the room conference, expand the Jitsi section at the top. Then click
Join Conference

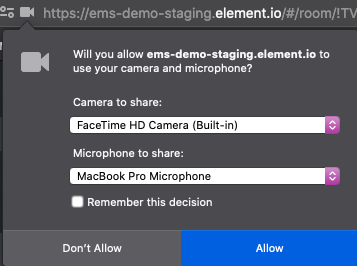
-
Allow camera and microphone access. Note this might be different depending on your browser and operating system

-
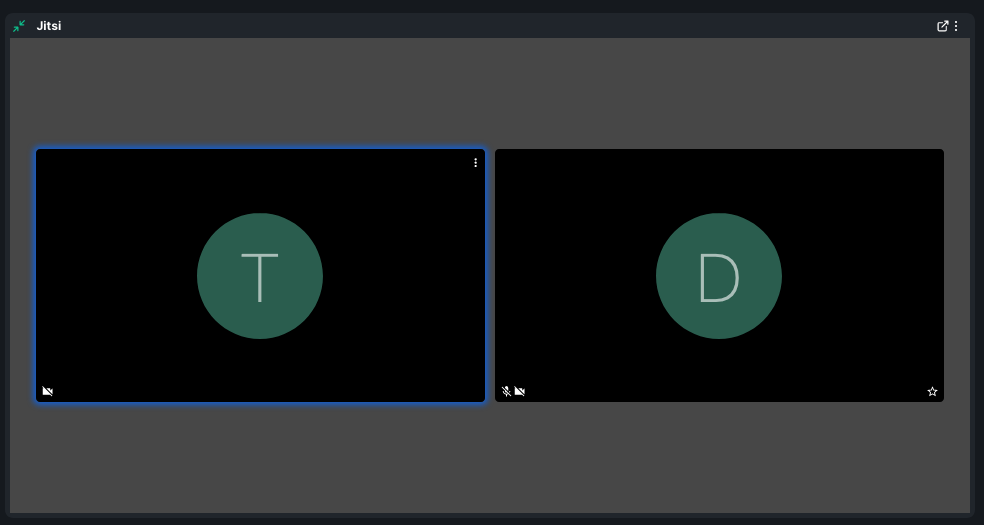
You are now in the conference


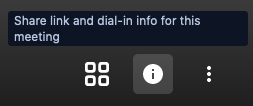
Inviting external participants
-
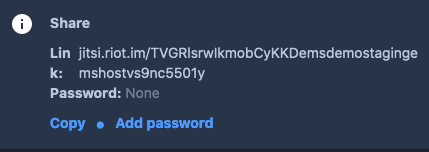
Click the info button in the bottom right corner

-
Click
Copy

-
Send the link to the external participant. They can just copy and paste it to their browser to join

Screen sharing
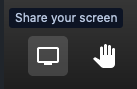
-
Click the screen sharing in the bottom left corner

-
Give permissions when asked
- In macOS
you need to grant theScreen RecordingPrivacy permission, and
screen sharing does not work with the Element Desktop app
- In macOS
-
Select the application or screen you want to share, then click Allow. Note this might be different depending on your browser and operating system

-
Everyone can now see your screen
Discord Bridge
The Discord bridge is no longer available for purchase. This documentation is for existing customers of the bridge only.
Setup
First, you need to register a Discord application for your bridge. Discord applications can be registered and managed in the Discord Developer Portal.
- Click on the
New Applicationbutton in the upper right corner. - Give it a name (visible when authorizing the bridge), read Discord's Terms and click
Create. - Note the Client ID. It's required for the bridge.
- Navigate to the
Bottab. The navigation can be found on the left. - Click
Add Bot. You may also need to clickYes, do it!to confirm your action. - Note the Bot Token. It's required for the bridge.
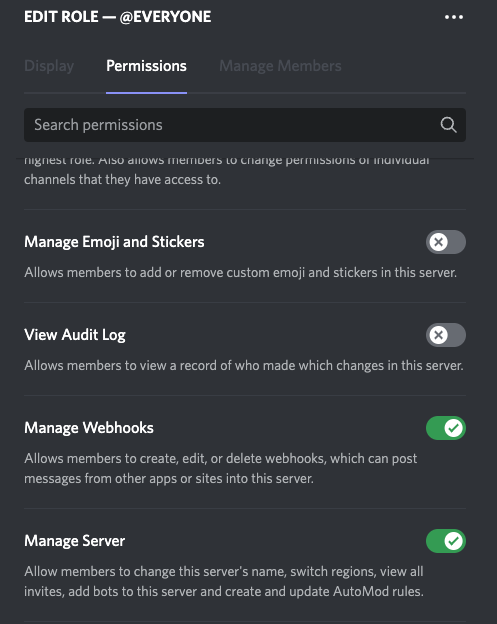
Authorize your account
- Manage Webhooks
- Manage Server
Connect Discord server(s)
Usage
Bridge a room
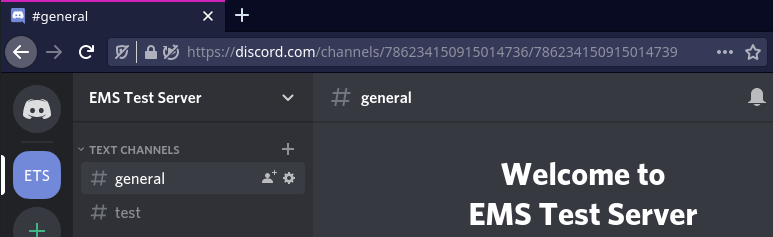
- In a web browser, navigate to the Discord room you wish to bridge. The URL includes the server ID (also called guild ID) and the channel ID. The URL format is
https://discord.com/channels/GUILD_ID/CHANNEL_ID.

- In a Matrix room you want to bridge, invite
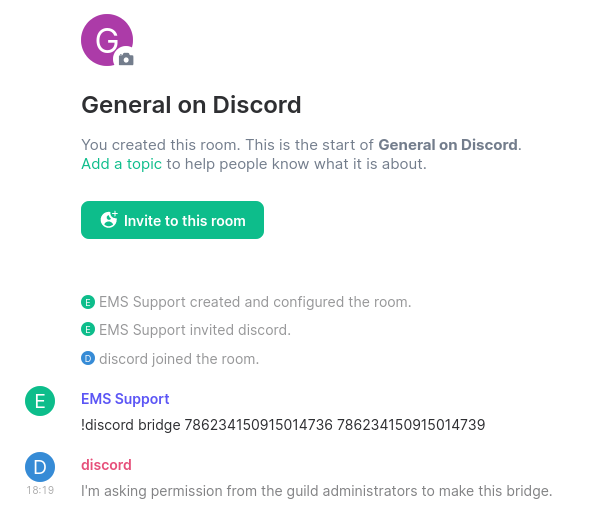
@discord:example.ems.host(replace the domain with the one of your homeserver). - Post the message
!discord bridge GUILD_ID CHANNEL_IDafter replacing the two placeholders.

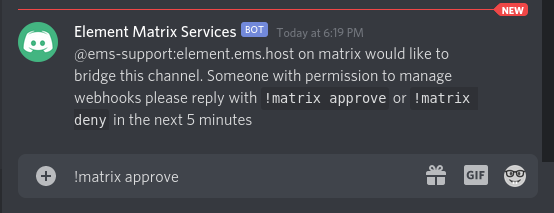
- A privileged Discord user will need to approve the bridge request by responding with
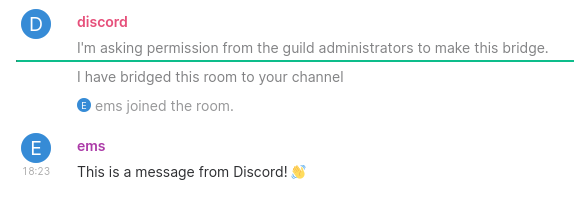
!matrix approve

- Messages from Discord are now bridged to Matrix and vice versa.

Unbridge
To unbridge a room post !discord unbridge in the Matrix room.
Private Chats
Currently, private chats are not supported by the EMS Discord bridge.
Hookshot
Dedicated Hookshot instances are available for EMS customers. To request Hookshot added to your server, please talk to Support or your Account Manager.
This guide only covers EMS-specific settings. You must review the Hookshot documentation available at https://matrix-org.github.io/matrix-hookshot/latest/hookshot.html.
This guide uses my demo server with the EMS hostname and server domain snowleopard-staging.ems.host. You must use your
.ems.host domain for all fields, even if your server uses Custom DNS. Replace snowleopard-staging with your
hostname.
GitHub
Use the following settings for your GitHub app:
- GitHub App name: This can be anything
- Homepage URL: This can be any valid URL
- Callback URL:
https://snowleopard-staging.ems.host/hookshot/oauth/ - Setup URL:
https://snowleopard-staging.ems.host/hookshot/oauth/ - Webhook URL:
https://snowleopard-staging.ems.host/hookshot/ - Webhook secret: Generate a random secure string
- SSL verification: Enabled
- Permissions: Configure per https://matrix-org.github.io/matrix-hookshot/latest/setup/github.html#permissions
- Subscribe to events: Configure per https://matrix-org.github.io/matrix-hookshot/latest/setup/github.html#permissions
- Where can this GitHub App be installed? Only on this account
- Example config screenshot. Changes are highlighted with arrows.
Click the image to open it in a new tab to zoom in

Send the following information to your Element contact:
- App ID
- Client ID
- Client Secret
- Private Key
- Webhook Secret
Migrate to the new GitHub and Feeds bots
New versions of the GitHub and RSS bots provided by Element are now available!
The previous bots are now considered deprecated and can no longer be configured. These bots have user IDs like @_neb_rssbot_...:matrix.org or @_neb_github_...:matrix.org and will be decommissioned on April 30, 2023.
Who is this for?
These instructions are for anybody who previously set up a GitHub or RSS bot using the integration manager provided by Element.
How to migrate
You may migrate your bots using Element Web or Desktop.
-
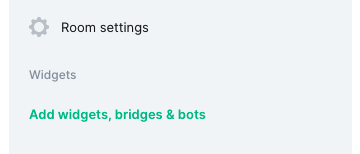
Open the Room info side panel and press Add/Edit widgets, bridges & bots.


-
Select the bot you are migrating (Feeds or GitHub).

-
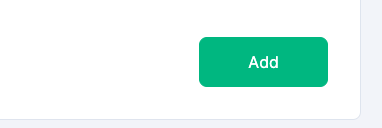
Press Add to add the new bot to the room.

-
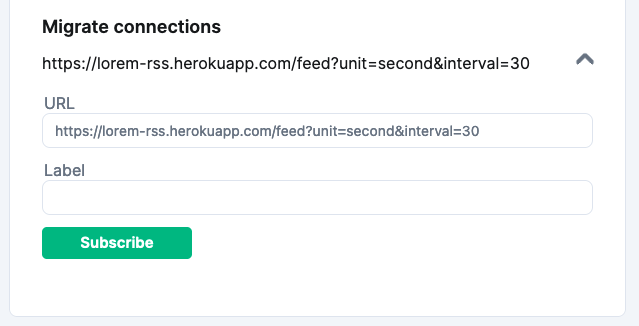
Set up the new bot. Any configurations added previously will be shown under Migrate connections.
- When migrating GitHub, it may be necesssary to log in again.

-
Kick the deprecated bot.


If you don't want to migrate
If you don't want to migrate your bots, you can just kick the GitHub or RSS Bot user from the room.
If you don't do anything
If you don't take any action, the deprecated bots will remain functional for the time being, but can no longer be configured. These bots will stop functioning fully after the date mentioned above.
If you have issues
Issues can be reported to element-hq/element-integration-manager.
Some bots won't be available anymore
The following bots will also be deprecated, but unfortunately do not have a new version available:
- Travis CI
- Giphy
- Google Image Search
- Wikipedia Search
- Imgur Image Search
Public IRC Bridges
Matrix.org (and others) host a number of IRC bridges for public networks.
A list of these networks can be found on the offical documentation.
Please note that matrix.org does not operate all of the networks listed, and is not responsible for content sent over the bridges.
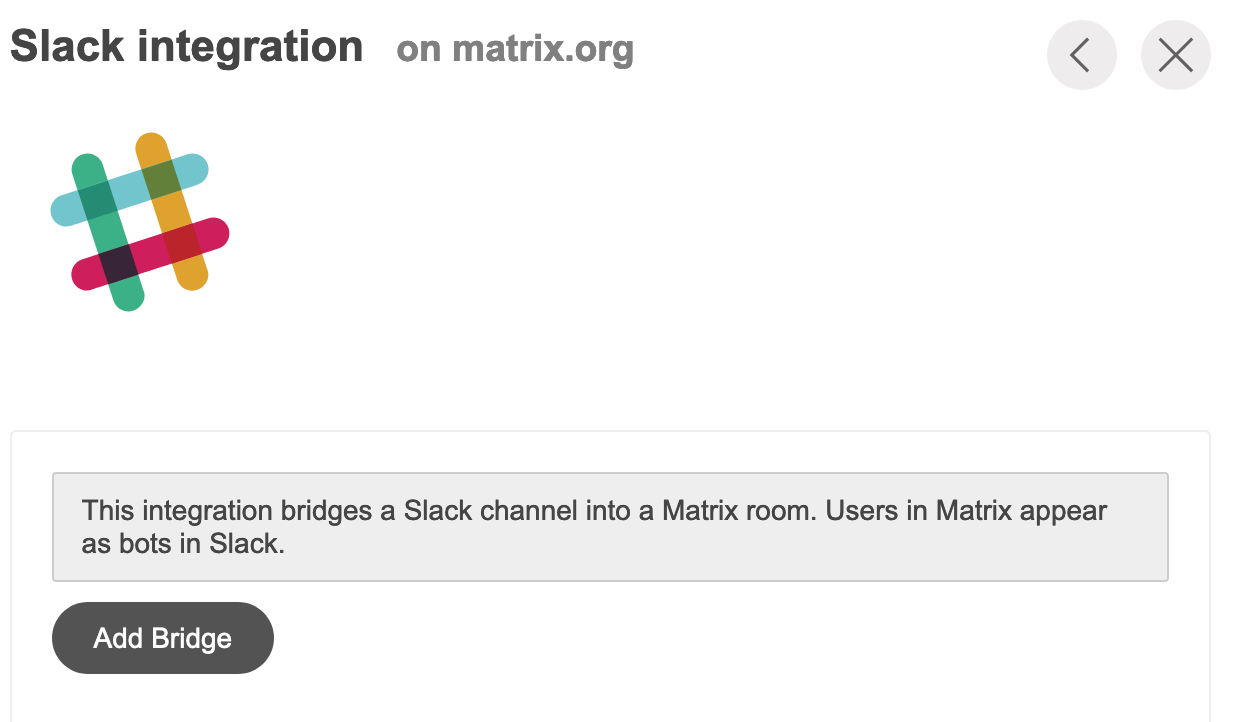
Public Slack Bridge
Matrix.org provides a public free Slack bridge, which is free to use forever but comes with some limitations:
- You can bridge to an unlimited number of channels, but only public channels.
- You must bridge to a public room.
- Matrix users cannot puppet themselves, or Direct Message other users.
This guide explains how to use the free Slack bridge from the Matrix.org Integration Manager to integrate your Matrix room with a Slack room.
- An EMS server is not required.
- It requires your homeserver to be able to federate with Matrix.org.
Setup
-
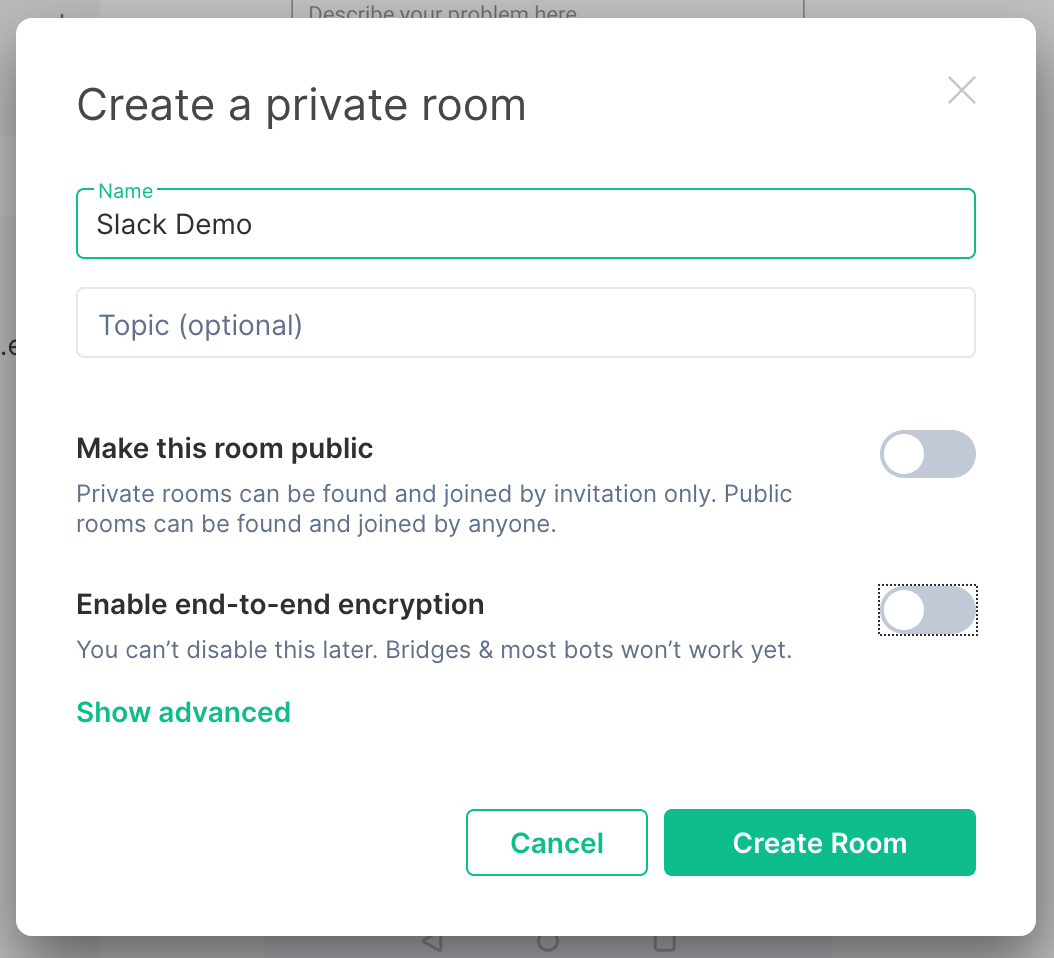
Create a new room in Matrix, with encryption off


-
Click
Room Infoin the top right corner of the room

-
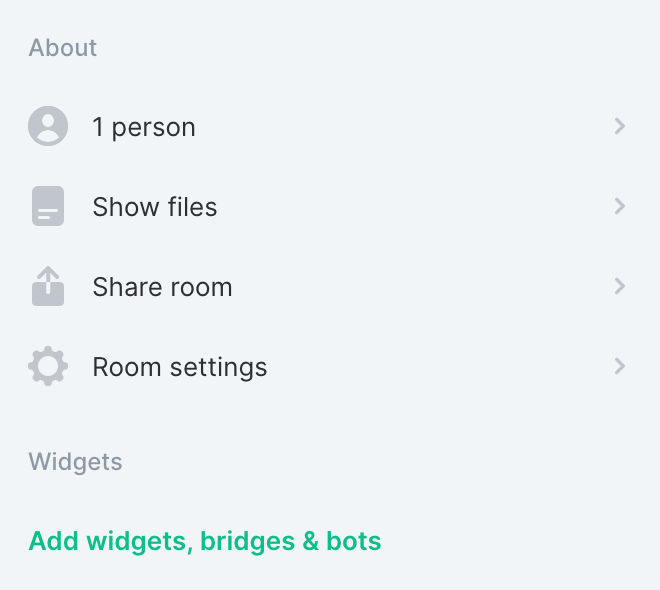
Click
Add widgets, bridges & bots

-
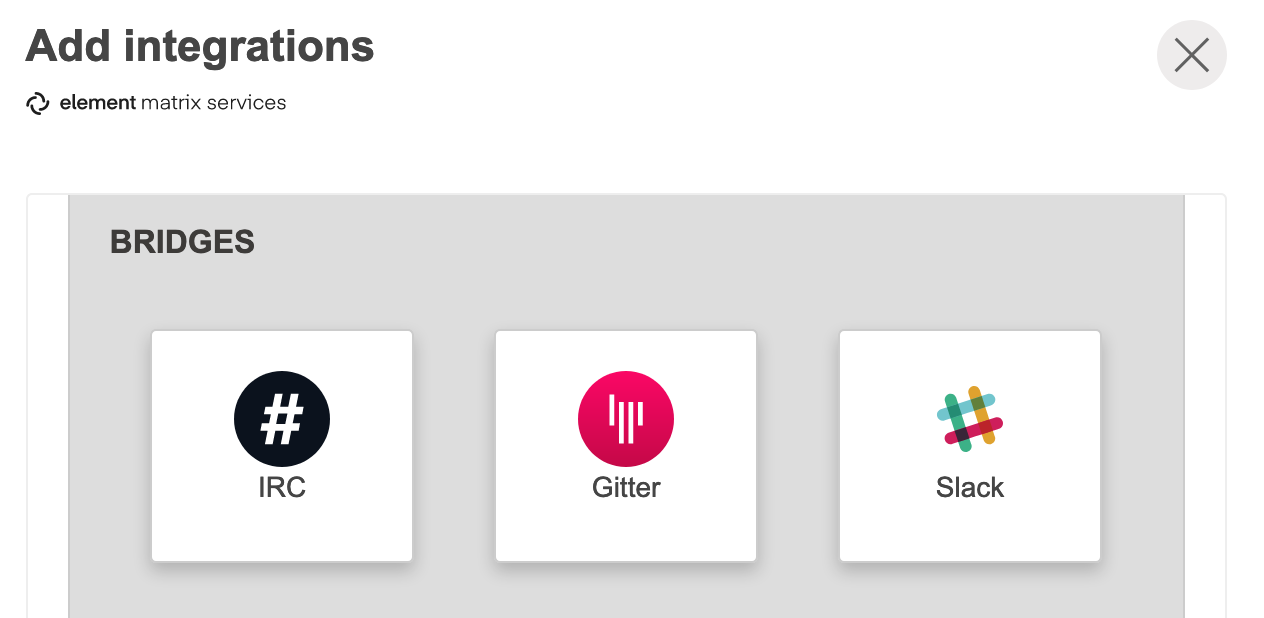
Choose
Slackfrom the list of available bridges and integrations

-
Click
Add Bridge
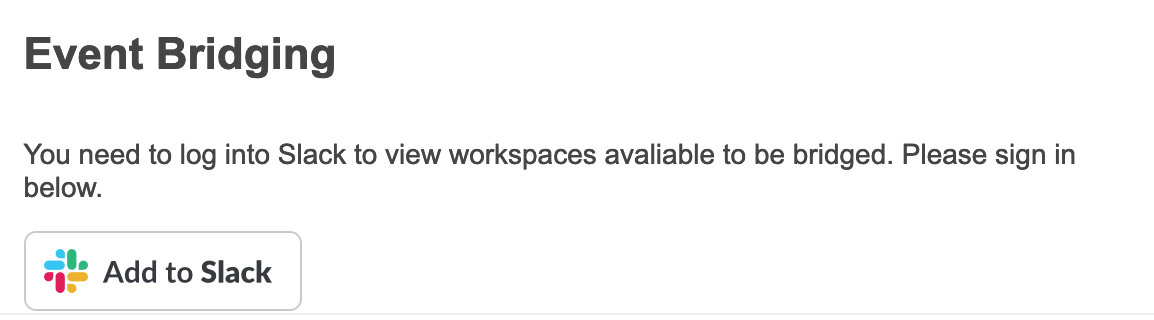
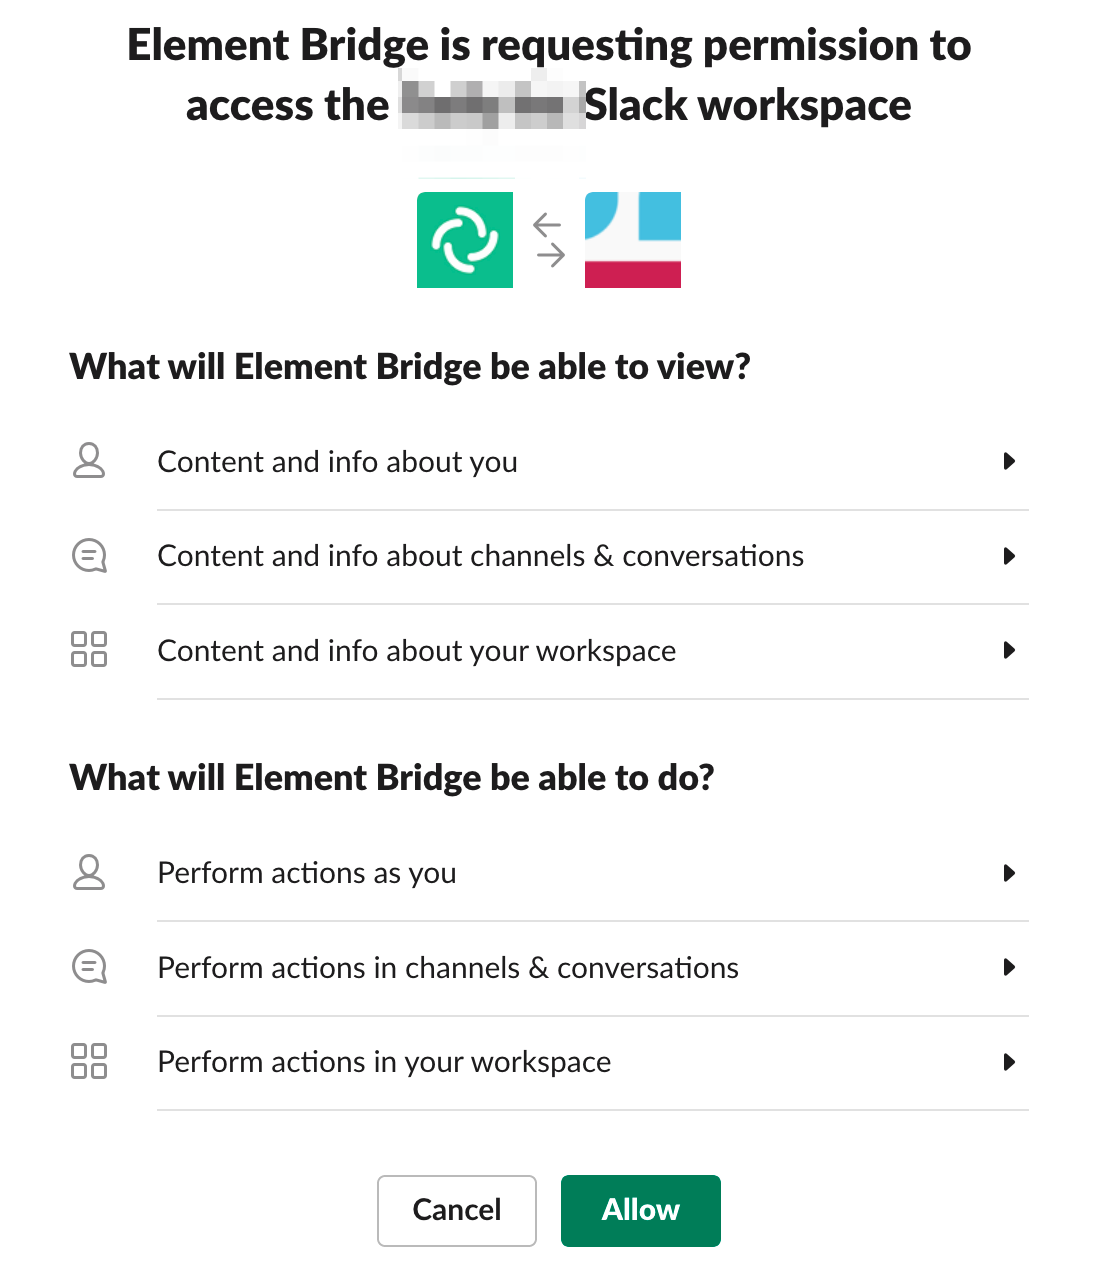
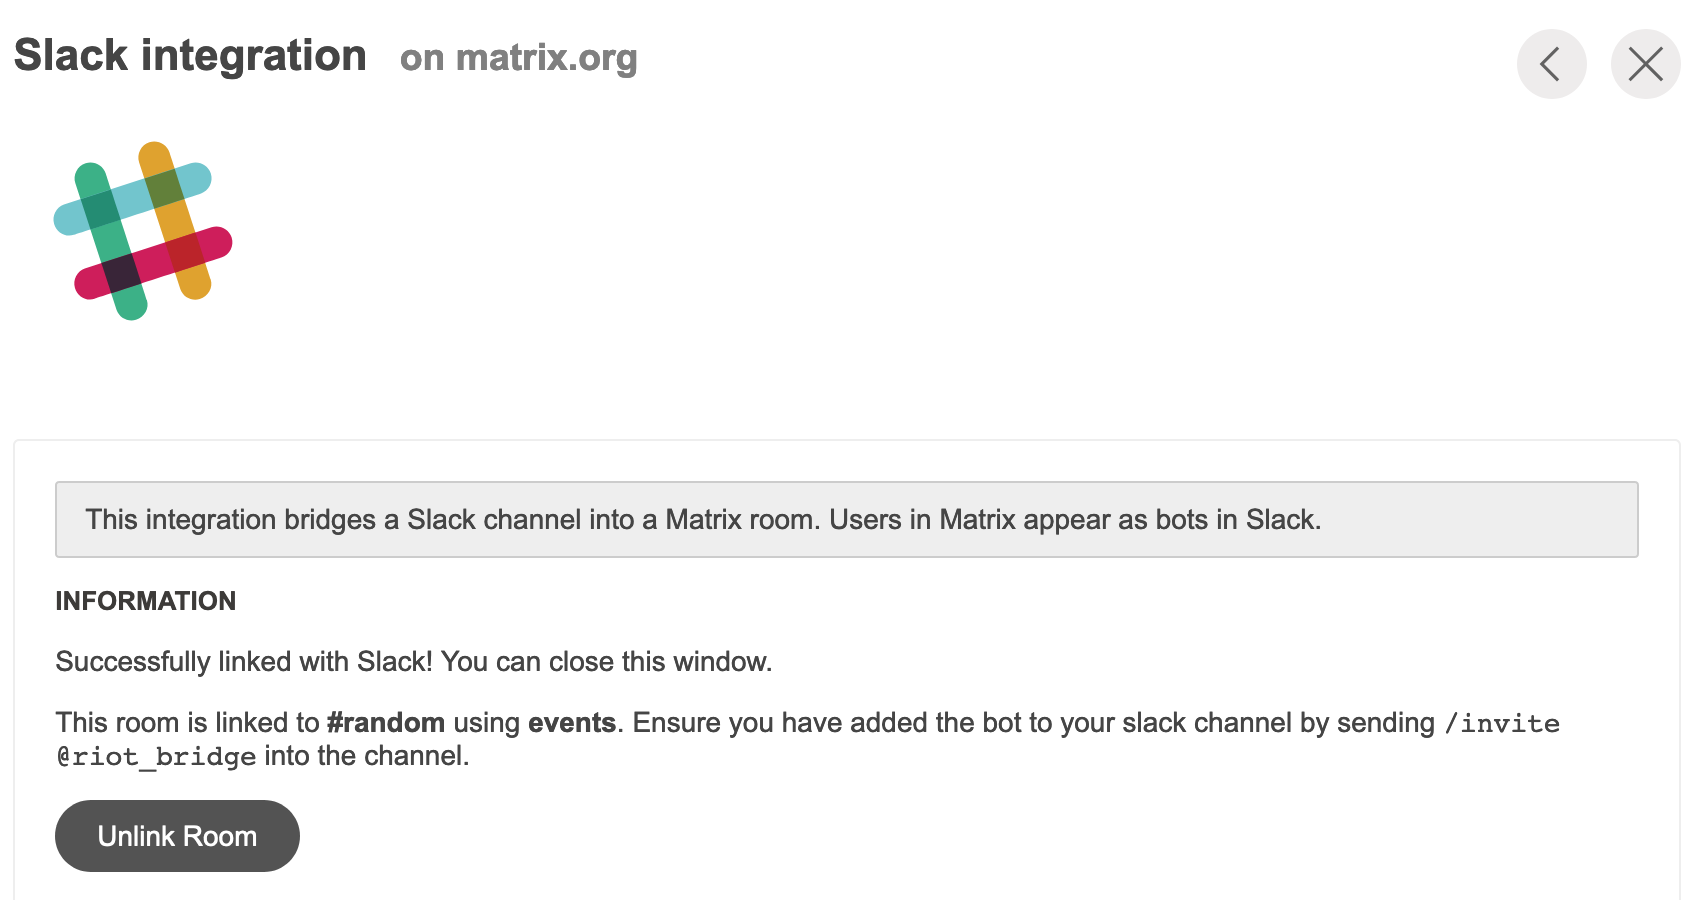
NOTE if you have purchased your Slack bridge from EMS: Ensure it saysSlack integration on <your ems domain>here.

-
Click
Add to Slack

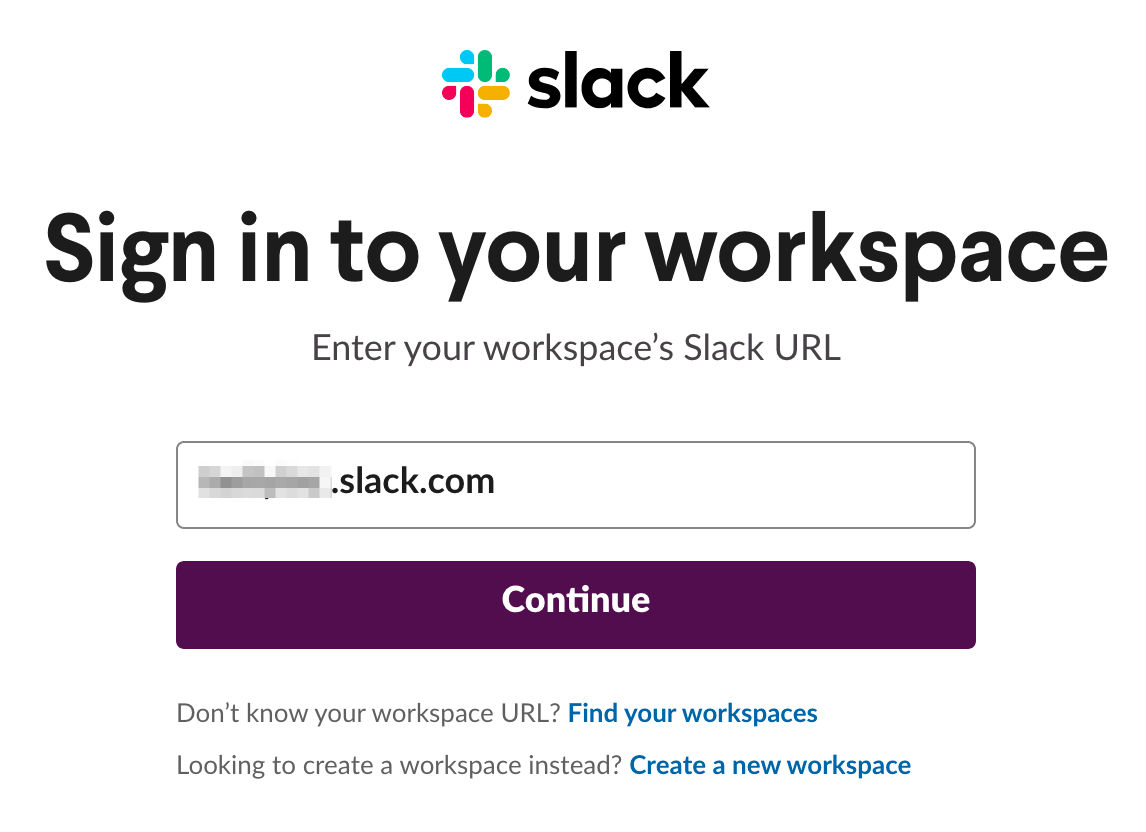
-
Enter your Slack workspace URL, and click
Continue

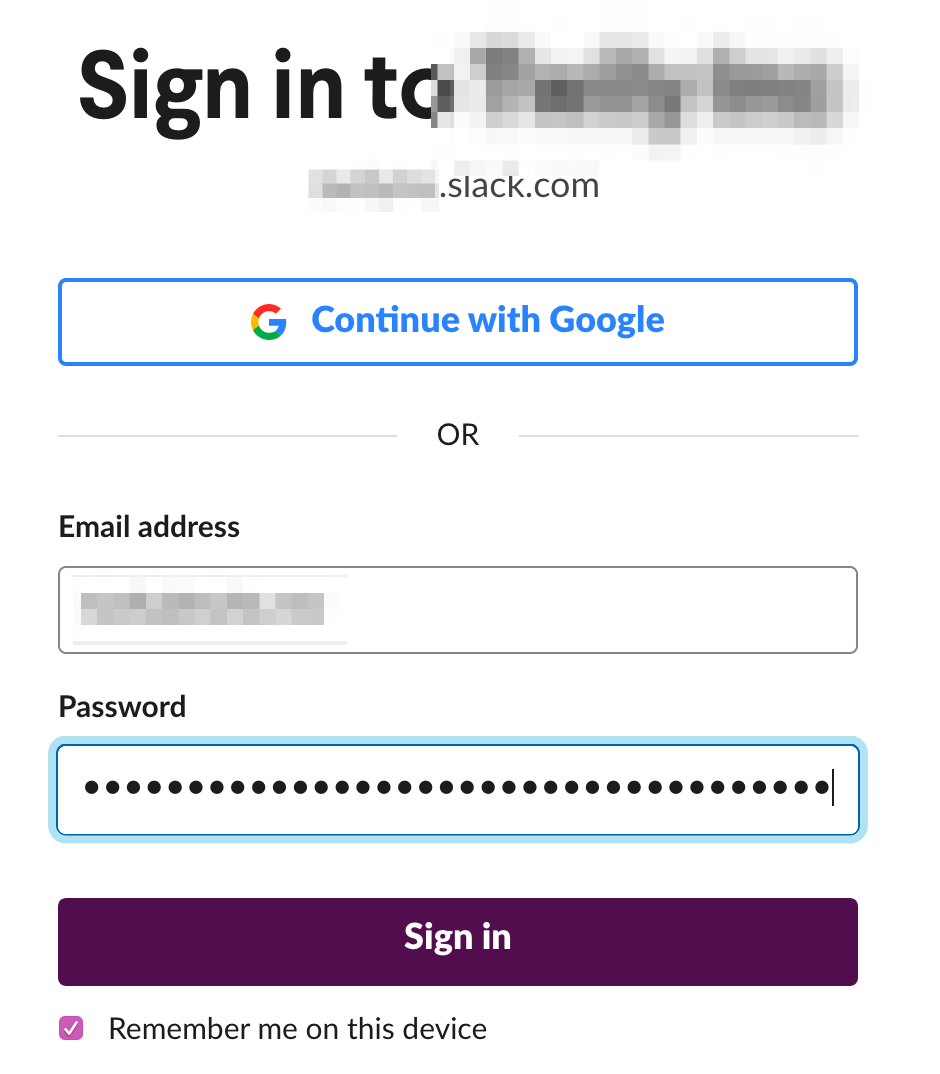
-
Enter your Slack email address and password, then click
Sign in

-
Click
Allow

-
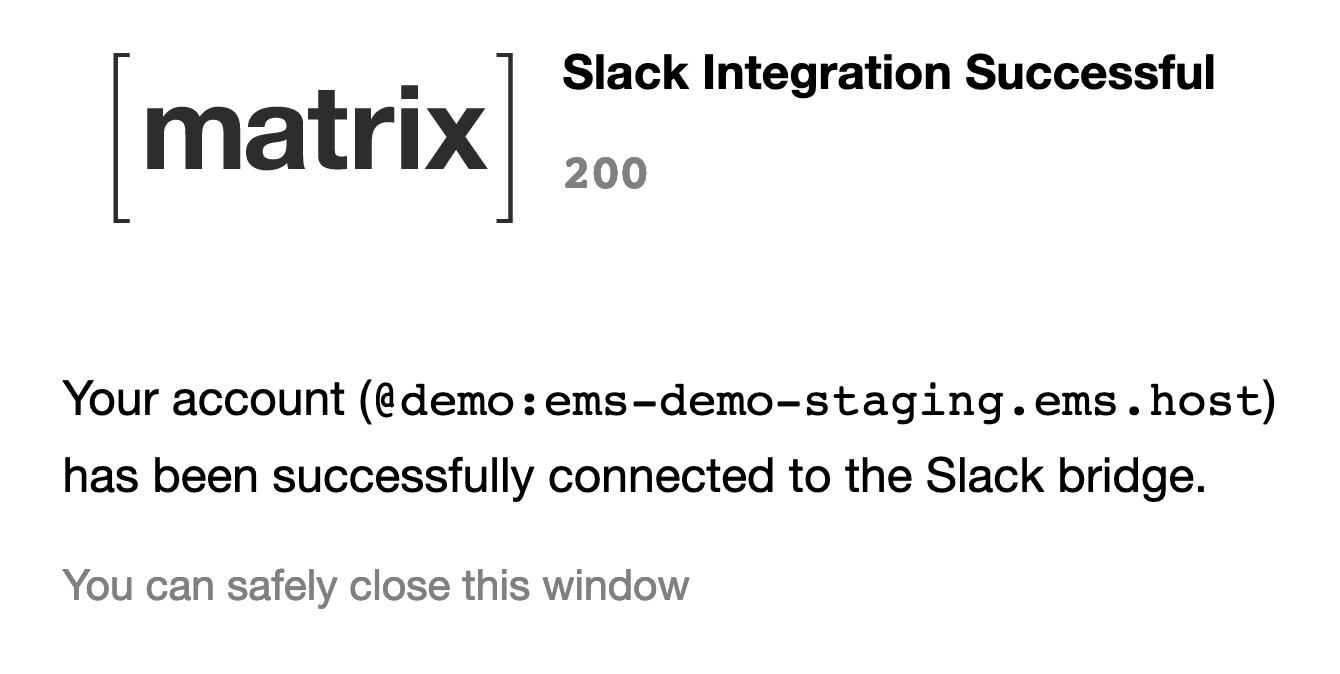
Close the Slack tab and return to Element

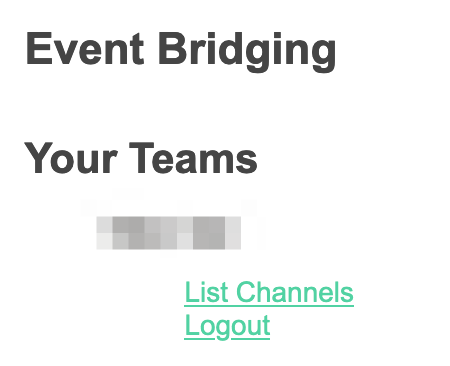
-
Click
List channels

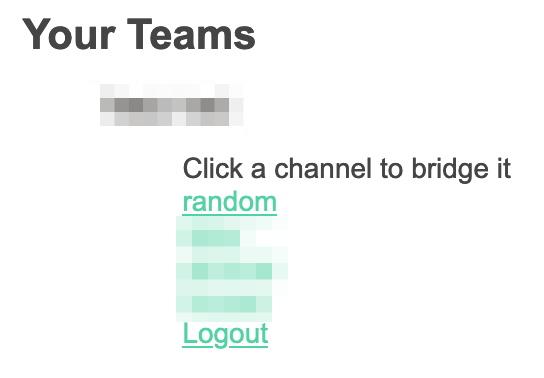
-
Click the Slack channel you want to bridge to the Matrix room

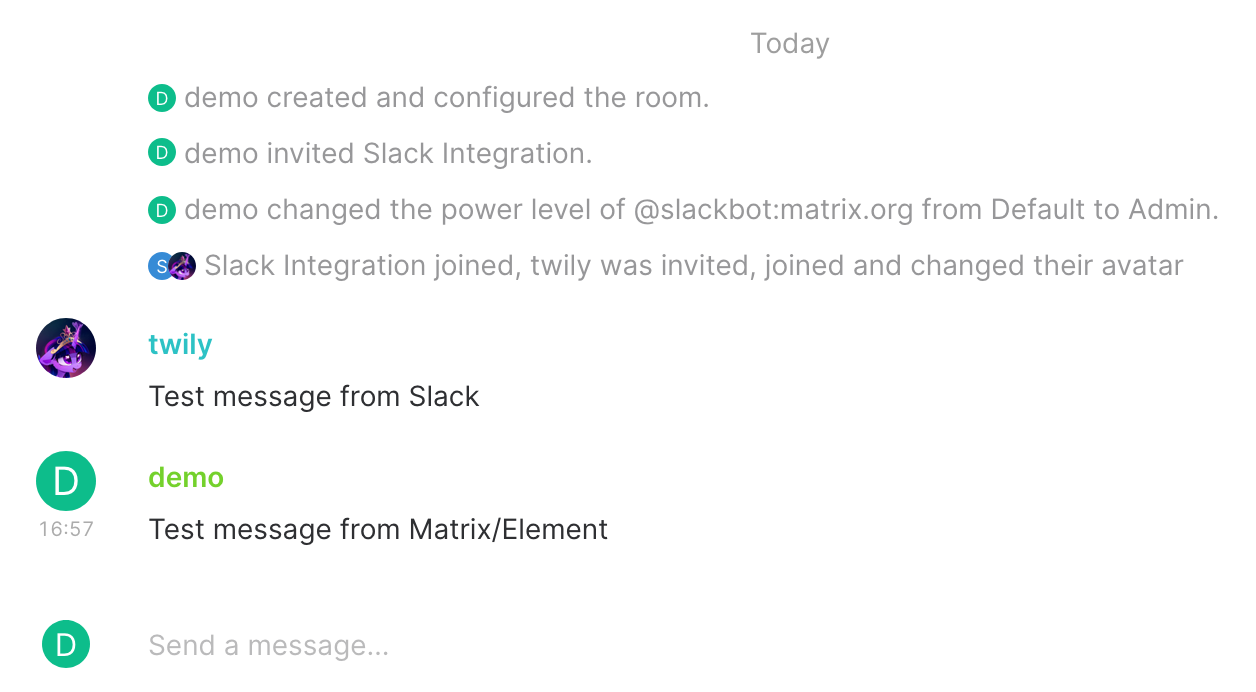
-
Slack is now added to the Matrix room

-
Go to the channel you selected on Slack, click the
invite, and selectAdd apps to this channel

-
Add the Element Bridge


-
The Matrix room and Slack channel are now bridged


Signal Bridge
This guide explains how to use the Signal bridge from the EMS Integration Manager to integrate your Signal chats with your EMS server.
It requires your EMS server to have federation on.
The following instructions are done with the Element Desktop on the Element side and on Element iOS for the Signal side. Element Android should be almost identical to Element Web.
Purchase the Signal integration
-
Open the EMS control panel at: https://ems.element.io/user/hosting
Click theIntegrationstab and if you have more than one server, select the server you wish to add the Signal integration to.

-
Click on
Signal Bridgein the list of available Bridges.
-
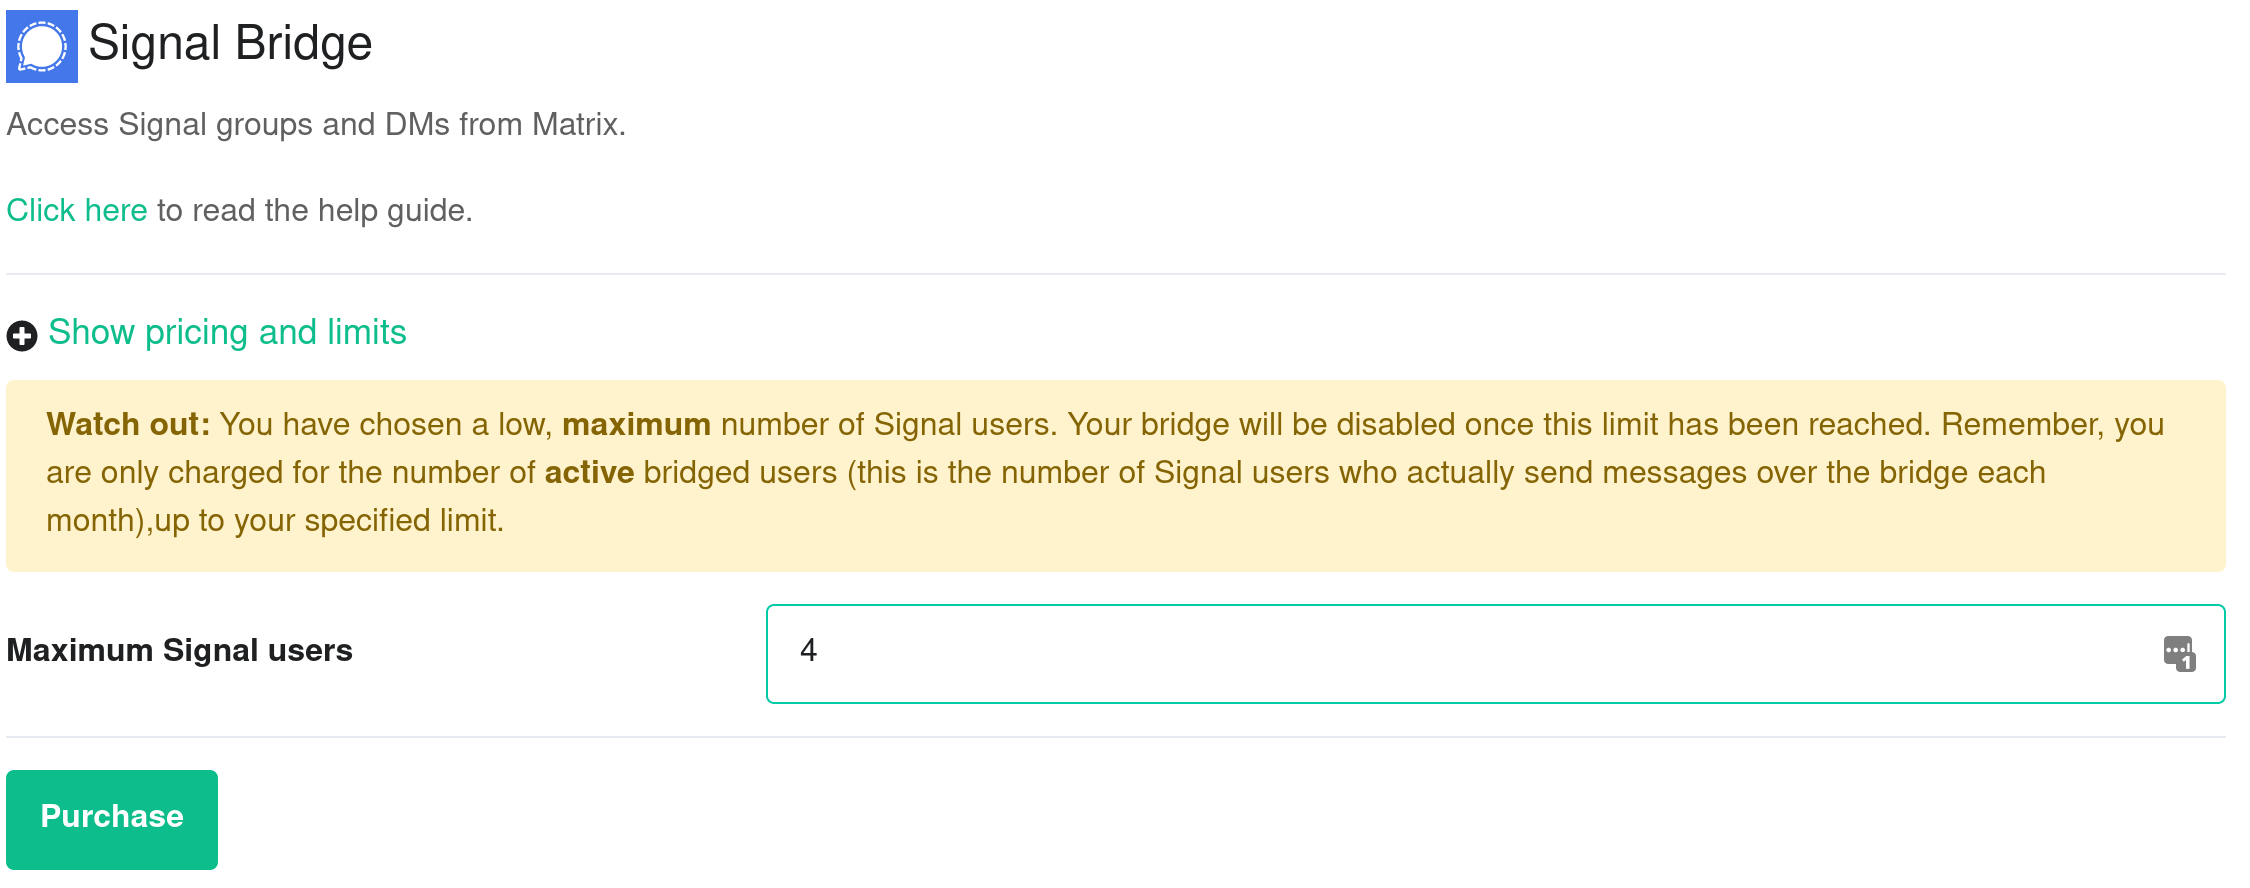
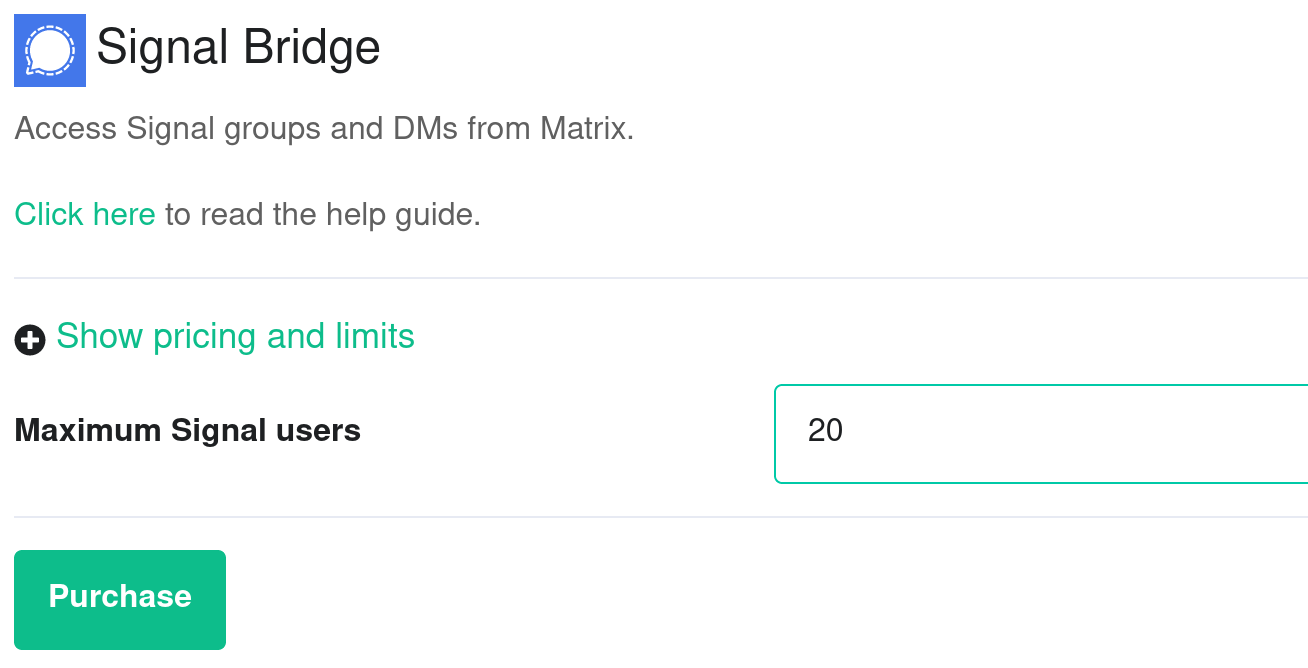
Enter the maximum number of users in
Maximum Signal users.
Please note: this is the maximum number of Signal users who actually send messages over the bridge each month. You are only billed for the number of Signal users who are active. Once you exceed the maximum, then the bridge will be disabled until you increase the maximum.
If you enter less than5, you will get a warning.

If you enter5or greater inMaximum Signal users, you will not see a warning.

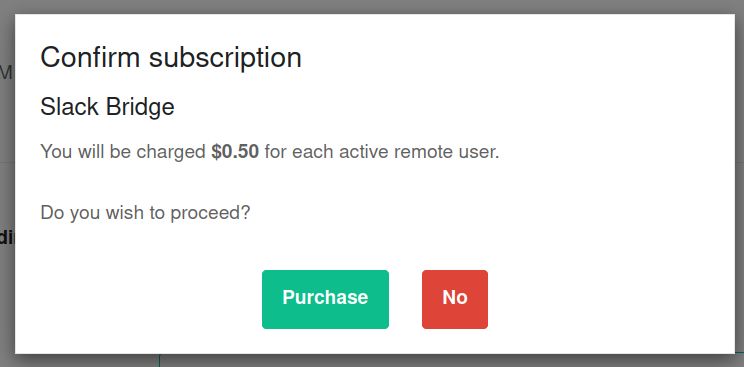
Once you have enteredMaximum Signal users, clickPurchase(remember you can always go back to this step and increase the maximum number of Signal users if you need more in the future). -
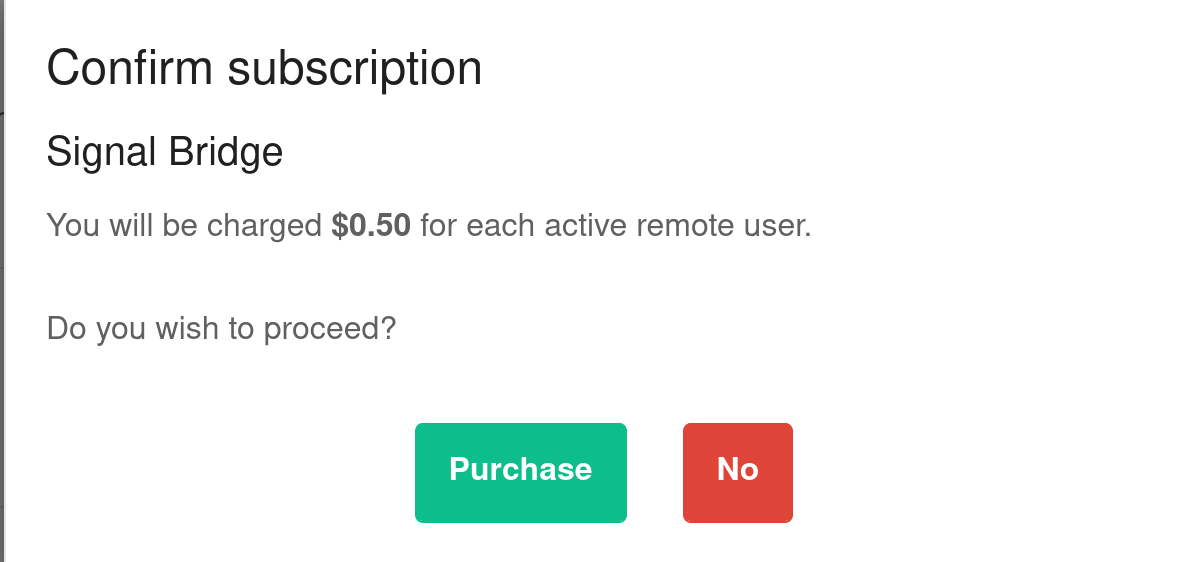
A dialogue will remind you of the price per user and ask if you wish to proceed. Click
Purchaseif you wish to proceed with the Signal Integration.

-
You will have to wait a few minutes while your host is reprovisioned with the Signal bridge. Once reprovisioning is finished, you are able to bridge Signal to your EMS server using your Element client.
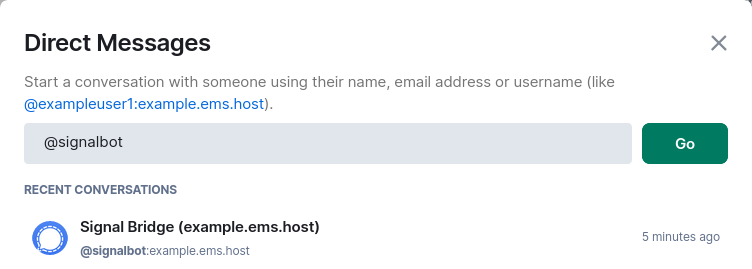
Bridge Signal to your Element account
-
Once the bridge is running, open your Element app. Click on the
+next toPeople.
-
Create a Direct Message conversation by typing
@signalbot:example.ems.host(replace the domain with the one of your homeserver). Then clickGo.

-
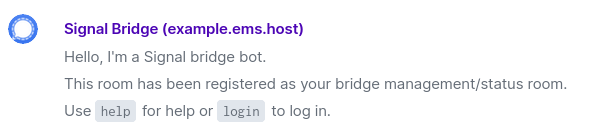
The bridge account will join your room and tell you how to use it.

-
Open Signal on your mobile device (iOS or Android) and tap on your avatar to go to
Settingsand thenLinked Devicesand then+to start the Signal QR code scanner. You will use this QR code scanner to scan a QR code displayed by your Element client in the next step.

-
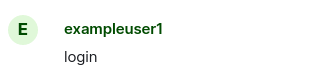
From your Element client, send a
loginmessage to the bot to connect to your Signal account.

-
A QR code will be displayed. Quickly scan the QR code with Signal on your mobile device. You have about a minute before it times out. If it times out, just send the
loginmessage again to generate another QR code. -
On your Element client, you will see
Successfully logged in as <your_phone_number> (UUID: <your_signal_id>). Once a new message arrives in one of your Signal chats, you will see an invitation for it in your Element client. Each Signal chat is a separate Matrix room. Join one or more chats and start chatting from either your Element app on desktop, iOS or Android or your Signal on mobile.


Sending a message to a Signal User
To send a message to a Signal user, you must first be connected to the bridge (see above). This currently works only for Signal users that the bridge has seen activity from.
- On your Element client, open your DM with the Signal bridge bot.
- Say
pmfollowed by the phone number for your contact. - You will be invited to a DM with that user, and can send messages to them.
Why do Signal user names show up as phone numbers?
Some signal users may appear as a phone number rather than their real name. This can because of one of the following reasons:
- The user has not spoken to you on Signal yet, and so has not sent their profile information.
- The user has not added you as a contact on their phone.
- The Signal bridge has not yet synchronized the profile information of the user from Signal (this should happen fairly soon after your first interaction).
EMS does not support the bridge as a primary device
The EMS Signal Bridge is implemented as a secondary device bridge in order to prevent Signal from ratelimiting the bridge. This means that you still need Signal installed on your iOS or Android device in order to use the bridge.
Slack Bridge
The Slack bridge is no longer available for purchase. This documentation is for existing customers of the bridge only.
The EMS Slack bridge is a paid integration for EMS homeservers. In addition to the features provided by the matrix.org bridge, it:
- Allows you to bridge to private rooms and private channels.
- Allows you to puppet your Slack identity from Matrix, appearing to send messages as if you were using Slack.
- Direct Message other Slack users
Purchase the Slack integration
-
Open the EMS control panel at: https://ems.element.io/user/hosting
-
Click the
Integrationstab and if you have more than one server, select the server you wish to add the Slack integration to
-
Click on
Slack Bridgein the list of available Bridges
-
Enter the maximum number of users in
Maximum Slack users.
Please note: this is the maximum number of Slack users who actually send messages over the bridge each month. You are only billed for the number of Slack users who are active. Once you exceed the maximum, then the bridge will be disabled until you increase the maximum.
Once you have entered Maximum Slack users, click Purchase (remember you can always go back to this step and increase the maximum number of Slack users if you need more in the future).
-
A dialogue will remind you of the price per user and ask if you wish to proceed. Click
Purchaseif you wish to proceed with the Slack Integration

-
You will have to wait a few minutes while your host is reprovisioned. Once reprovisioning is finished, you are able to bridge Slack to your EMS server using your Element client.
Setup
The setup process for the EMS Slack bridge is the same as the public Slack bridge hosted by matrix.org, explained here
Initiate a DM with a Slack user from Matrix
- Message the Slack bot user on Matrix.
- Say
login - An OAuth2 URL will be displayed. Follow it to get puppeted to the right Slack instance.
- Click a Slack user in Matrix and DM as normal
Teams Bridge
The Teams bridge is no longer available for purchase. This documentation is for existing customers of the bridge only.
Introduction
This guide explains how to set up a Teams bridge with your Element host. You will need to be an administrator of your Teams group to set the bridge up. Connecting to a Teams workspace that you do not control is currently not supported.
Setup
The setup process requires fetching a few details from your Teams workspace.
Teams Link
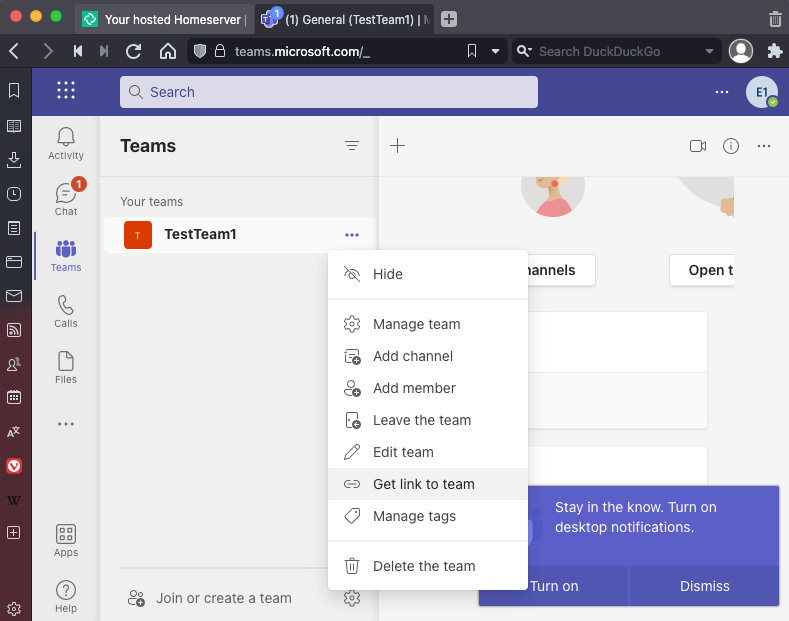
- In the Teams app, not the admin page. Click the three dots next to your Teams, then
Get link to team

- Click
Copy - Paste this link into the
Teams Linkfield on the Teams Bridge setup form on https://ems.element.io/user/hosting#/integrations - Click
Link Teams to Element - Follow the Microsoft flow and allow access
Bot Username and Password
The bridge requires a Teams user to be registered as a bot to send messages on behalf of Matrix users. You just need to allocate one user from the Teams interface to do this.
- First, you must go to the Azure Active Directory page.
- Click users.
- Click New user.
- Ensure
Create useris selected.- Enter a User name ex.
matrixbridge. - Enter a Name ex.
Matrix Bridge. - Enter an Initial password.
- Create the user.
- Optionally, set more profile details like an avatar.
- Enter a User name ex.
- You will now need to log in as this new bot user to set a permanent password (Teams requires you to reset the password on login).
- After logging in you should be prompted to set a new password.
- Enter the bot username and password into the integration form.
Welcome room
Users can be automatically prompted to link their Teams account to their Element account when they join a room bridged to a Teams channel (for instance, public rooms in the room directory). Ticking the Send a welcome message to new users of the bridge checkbox will make the bridge bot user start a DM with any new joining Element users and let them know how to get connected. If you wish to disable this behavior, leave this box unchecked.
Max Teams users
The bridge is billed based upon the number of participating Teams-side users, so you should set the maximum number of users you'd expect to see using the bridge to ensure your costs meet expectations. If the number of active Teams users exceeds this value, the bridge will be blocked, until you increase the limit. Whatever you set the limit to, you will only be charged for the number of remote users actively using the bridge.
Bot Commands
In a chat with the "Teams Bridge" bot, users can manually connect their Teams account with their EMS account by sending the login command to the bridge bot. The bot will reply with a link that users can use to login
You must authenticate with MS Teams to continue: <login.microsoftonline.com link>
After succesfully login in you should get a message like:
You are now authenticated as **Teams User**
To add a bridged Microsoft Teams team as a space in Element, this can be accomplished by sending the joinspace command.
This should add a new space to the sidebar of you Element client with the same name as the teams that you had previously setup with the Bridge, with individual channels showing up as rooms within the new space.
Other commands and option are availble via sending help to the bot. The current help text is show below:
-
help- This help text -
login- Authenticate with MS Teams to enable puppeting -
logout- Remove your MS Teams authentication -
startupnotice enable- Send a notification to this room when the bridge is restarted -
startupnotice disable- Disable startup notifiations -
joinspace- Join the space(s) for your team(s)
Known limitations
- Private channels are not supported
Telegram Bridge
This guide explains how to use the Telegram bridge from the EMS Integration Manager to integrate your Telegram chats with your EMS server.
It requires your EMS server to have federation on.
The following instructions are done with the Element Desktop on the Element side and on Element iOS for the Telegram side. Element Android should be almost identical to Element Web.
Purchase the Telegram integration
-
Open the EMS control panel at: https://ems.element.io/user/hosting
-
Click the
Integrationstab and if you have more than one server, select the server you wish to add the Telegram integration to.
-
Click on
Telegram Bridgein the list of available Bridges.
-
Enter the maximum number of users in
Maximum Telegram users.
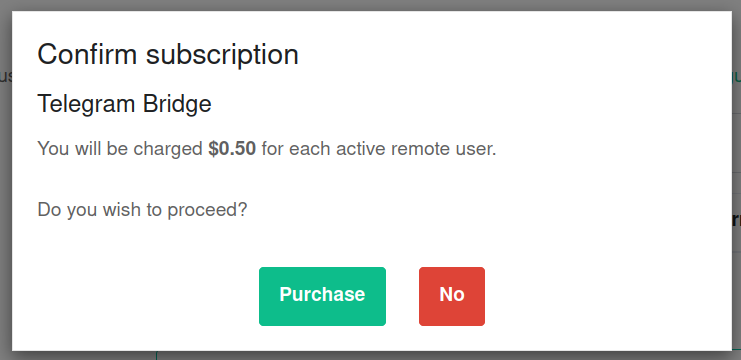
Please note: this is the maximum number of Telegram users who actually send messages over the bridge each month. You are only billed for the number of Telegram users who are active. Once you exceed the maximum, then the bridge will be disabled until you increase the maximum. -
If you wish to allow Matrix users who aren't logged in to Telegram to participate in bridged Telegram chats, follow the steps in this section.
Once you have entered Maximum Telegram users, click Purchase (remember you can always go back to this step and increase the maximum number of Telegram users if you need more in the future).
-
A dialogue will remind you of the price per user and ask if you wish to proceed. Click
Purchaseif you wish to proceed with the Telegram Integration.

-
You will have to wait a few minutes while your host is reprovisioned. Once reprovisioning is finished, you are able to bridge Telegram to your EMS server using your Element client.
Bridge Telegram to your Element account
-
Once the bridge is running, open your Element app. Click on the
+next toPeople.
-
Create a Direct Message conversation by typing
@telegram:example.ems.host(replace the domain with the one of your homeserver). Then clickGo. -
Wait for the bridge account to join your room.
-
Open Telegram on your mobile device (iOS or Android) and tap on ≡, go to
Settings, and thenDevices, and thenLink Desktop Deviceto start the Telegram QR code scanner. You will use this QR code scanner to scan a QR code displayed by your Element client in the next step. -
From your Element client, send a
login-qrmessage to the bot to connect to your Telegram account. -
A QR code will be displayed. Quickly scan the QR code with Telegram on your mobile device.
-
On your Element client, you will see
Successfully logged in as <username>, and you will see invitations for each of your Telegram channels, groups, and DMs in your Element client. Each Telegram chat is a separate Matrix room. Join one or more chats and start chatting from either your Element app on desktop, iOS or Android or your Telegram on mobile.

Sending a message to a Telegram User
To send a message to a Telegram user, you must first be connected to the bridge (see above).
-
On your Element client, open the "Telegram bridge bot" room.
-
Say
pmfollowed by the phone number or username. The phone number must exist in your Telegram contacts. -
You will be invited to a DM with that user, and can send messages to them.
Bridging Matrix users without a Telegram account
By default, a Matrix user will have to connect their Telegram account for their messages to be bridged to Telegram. If you provide a bot token, we will use this bot to relay the messages of any Matrix users to Telegram. (Note: relaying is supported for Telegram groups, but is not yet supported for Telegram channels.)
Follow these steps to register a bot account with Telegram.
-
With your Telegram account, message
@BotFather. If talking to BotFather via the bridge using Element, note that all "slash" command messages (eg./start) sent to BotFather must begin with two slashes instead of one (eg.//start). -
Create a new bot by sending the message
/newbotto BotFather. The created bot will be the Telegram relay bot used by your bridge. Follow the subsequent prompts to give your bot a display name and a username. -
Wait for BotFather to provide you a bot token.
-
Send the message
/setprivacyto BotFather and follow the prompts to set your new bot's privacy settings to "Disabled". This allows your relay bot to bridge all messages sent in a Telegram group, not just messages that mention the bot by name. -
Open the EMS control panel for your Telegram bridge and enter the token you received from BotFather in the "Bot token" field, then wait for the page to notify you when your bridge is ready.

-
In your Element client, view your DM with the Telegram bridge bot and send the
ping-botcommand. The bot should respond with the ID of your relay bot in Matrix, which indicates that the relay bot has been set up correctly. -
In your Element client, invite the Matrix relay bot to any room that bridges a Telegram group that should relay Matrix users' messages to Telegram. A convenient way to do so is to send a message of
!tg ping-botin such a room (which will be intercepted by the bridge bot & won't appear in Telegram), wait for the bridge bot to respond with a "pill" of the relay bot's Matrix ID, click on the pill, and then click "Invite" on the sidebar that appears. -
In Telegram, confirm that your Telegram relay bot has joined the group. If it hasn't, you may manually invite your bot to the group (as long as you have permissions to do so) by viewing the group's details, selecting "Add Members", and entering the username of your relay bot that you chose in step 2.
Using the Telegram bridge
See our documentation here.
WhatsApp Bridge
This guide explains how to use the WhatsApp bridge from the EMS Integration Manager to integrate your WhatsApp chats with your EMS server.
It requires your EMS server to have federation on.
The following instructions are done with the Element Desktop on the Element side and on Element iOS for the WhatsApp side. Element Android should be almost identical to Element Web.
Purchase the WhatsApp integration
-
Open the EMS control panel at: https://ems.element.io/user/hosting
-
Click the
Integrationstab and if you have more than one server, select the server you wish to add the WhatsApp integration to
-
Click on
WhatsApp Bridgein the list of available Bridges -
Enter the maximum number of users in
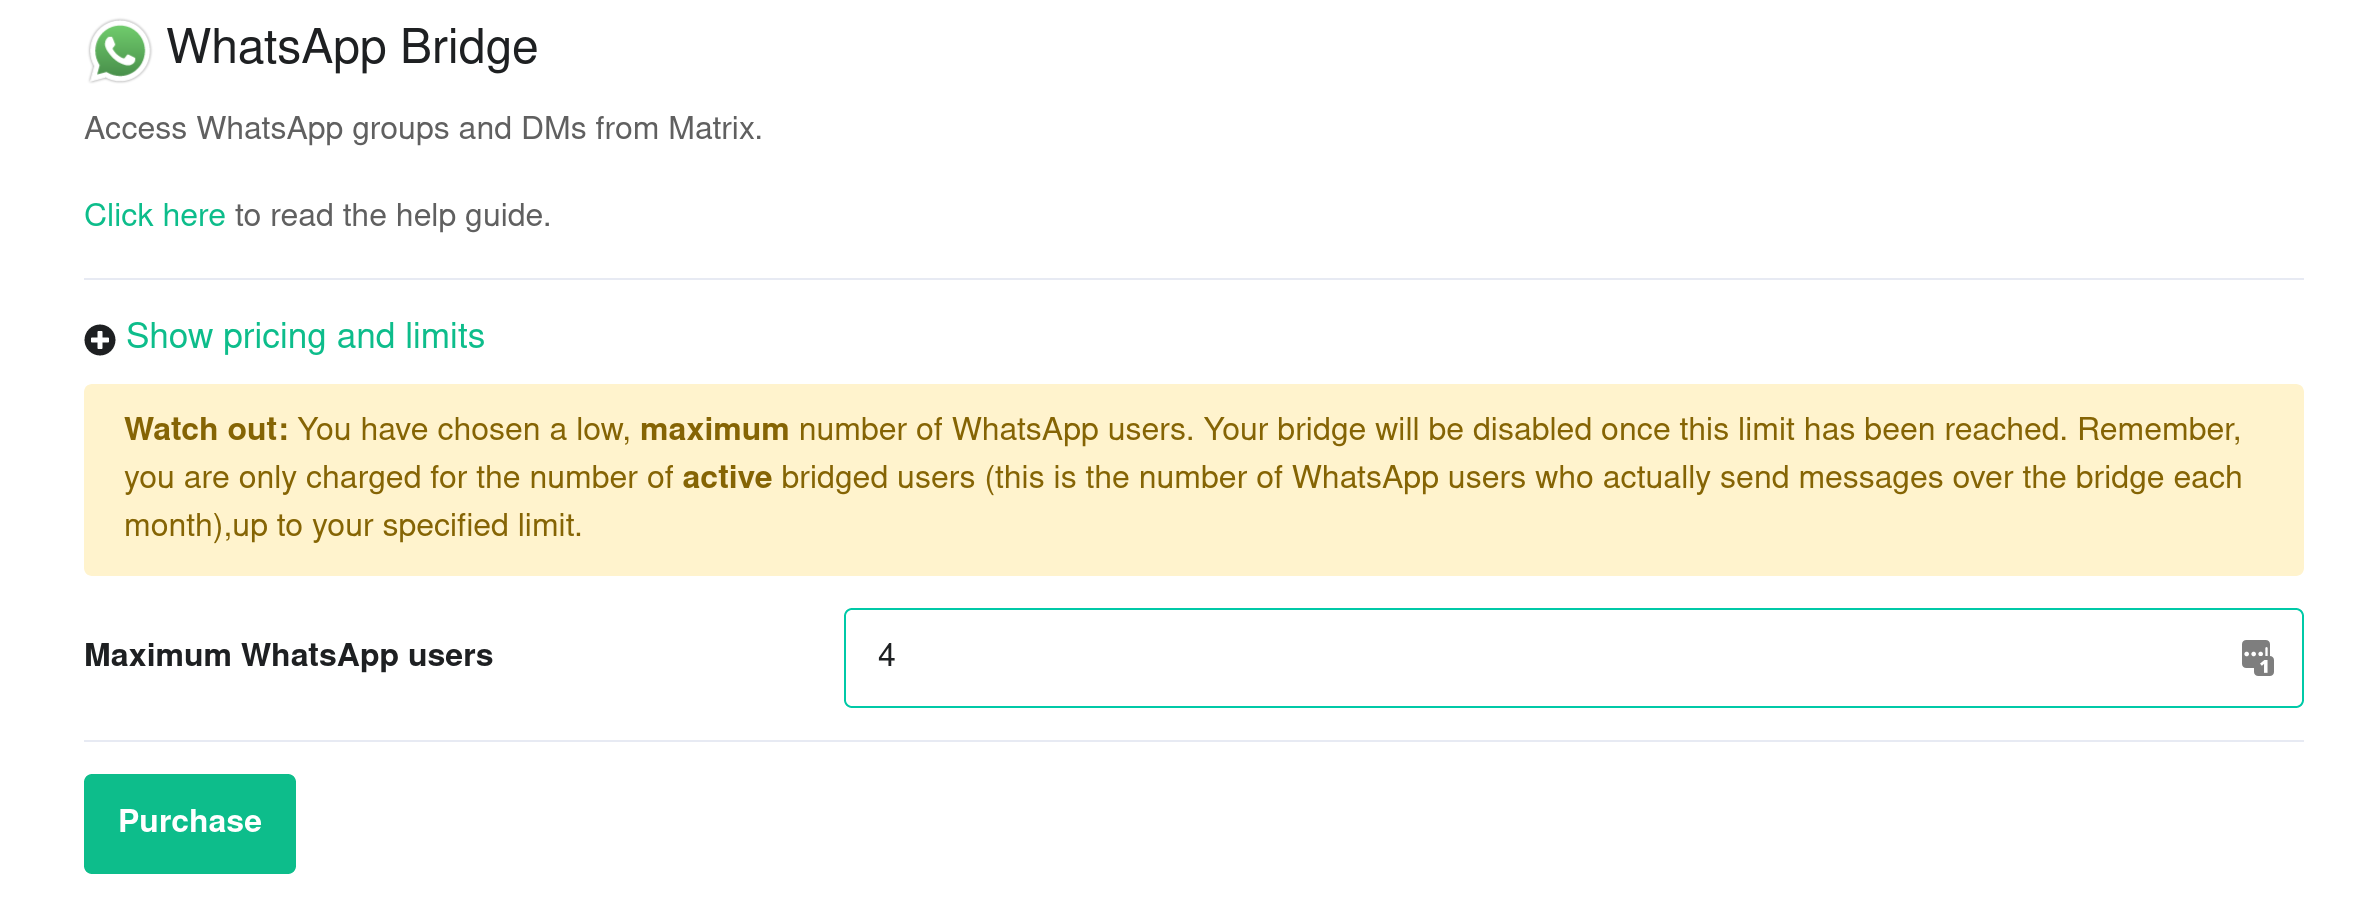
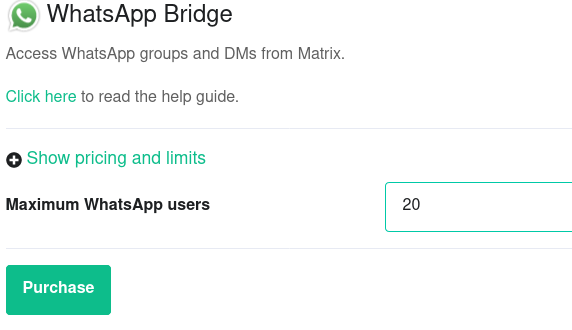
Maximum WhatsApp users.
Please note: this is the maximum number of WhatsApp users who actually send messages over the bridge each month. You are only billed for the number of WhatsApp users who are active. Once you exceed the maximum, then the bridge will be disabled until you increase the maximum.- If you enter less than
5, you will get a warning

- If you enter
5or greater inMaximum WhatsApp users, you will not see a warning

- Once you have entered
Maximum WhatsApp users, clickPurchase(remember you can always go back to this step and increase the maximum number of WhatsApp users if you need more in the future).
- If you enter less than
-
A dialogue will remind you of the price per user and ask if you wish to proceed. Click
Purchaseif you wish to proceed with the WhatsApp Integration

-
You will have to wait a few minutes while your host is reprovisioned with the WhatsApp bridge. Once reprovisioning is finished, you are able to bridge WhatsApp to your EMS server using your Element client.

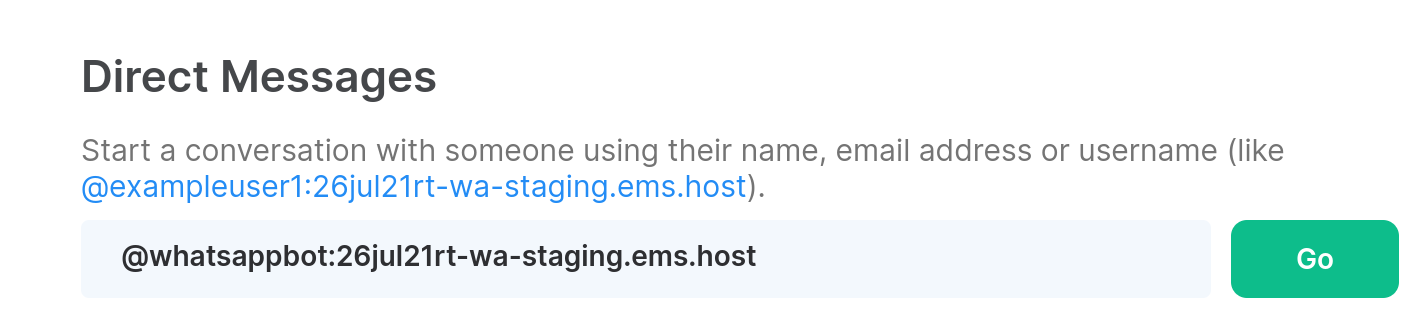
Bridge WhatsApp to your Element account
-
Once the bridge is running, open your Element app. Click on the
+next toPeople -
Create a Direct Message conversation by typing
@whatsappbot:example.ems.host(replace the domain with the one of your homeserver). Then clickGo

-
The bridge account will join your room and tell you how to use it

-
Open WhatsApp on your mobile device (iOS or Android) and go to
Settingsand thenLinked devicesand thenLink a deviceand tapOKto start the WhatsApp QR code scanner. You will use this QR code scanner to scan a QR code displayed by your Element client in the next step

-
From your Element client, send a
loginmessage to the bot to connect to your WhatsApp account

-
A QR code will be displayed. Quickly scan the QR code with WhatsApp on your mobile device. You have about a minute before it times out. If it times out, just send the login message again to generate another QR code

-
On your Element client, you will see
Successfully logged in as <phone-number> (device #<number>). -
From your Element client, send a message of
sync groups --create-portalsto the bot to bridge your existing WhatsApp chats to Matrix. You will then see invitations for each of your WhatsApp chats in your Element client. Each WhatsApp chat is a separate Matrix room. Join one or more chats and start chatting from either your Element app on desktop, iOS or Android or your WhatsApp on mobile.


Sending a message to an WhatsApp User
To send a message to a WhatsApp user, you must first be connected to the bridge (see above).
- On your Element client, open the "WhatsApp bridge bot" room.
- Say
pmfollowed by the international formatted phone number for your contact. - You will be invited to a DM with that user, and can send messages to them.
For the EMS bridge to work, you must login to WhatsApp on iOS or Android every 14 days
From WhatsApp's documentation:
Your phone won’t need to stay online to use WhatsApp on linked devices, but if you don’t use your phone for over 14 days, your linked devices will become disconnected.
This means that you cannot uninstall the iOS or Android WhatsApp app and that you must login to that app every 14 days. If you don't, the Element WhatsApp Bridge will stop working.
My contacts show as @whatsapp_[phone number]:homeserverdomain.com
Try sending the sync contacts command in your DM with the WhatsApp bridge bot.
Relay Mode is not supported
EMS does not support the WhatsApp Bridge's Relay Mode for Element Cloud, Element Enterprise Cloud or Element One.
Using the WhatsApp bridge
Please see our documentation here.