Element Matrix Services
- Add Additional Users
- Add Users
- Apply coupon/discount
- Client Look & Feel
- EMS Server With Custom Domain
- How to Get an EMS Server
- Migrate From EMS to Self-Hosted
- Migrate From Self-Hosted to EMS
- Reset User Password
- Token based registration
- Adding a Trust & Safety Contact
Add Additional Users
- Click
Your AccountandManage Serversor click this link https://ems.element.io/user/hosting. - Click the Hosts tab.
- Change
Total Monthly Active User Seatsto the number of users you want and clickSaveat the bottom.

- Note that you cannot decrease your user count later.

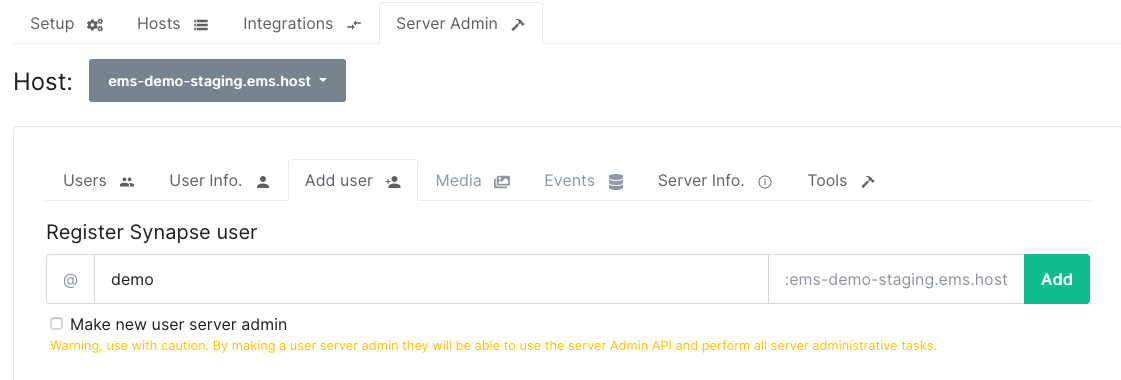
Add Users
-
Click
Your AccountandManage Serversor click this link: https://ems.element.io/user/hosting -
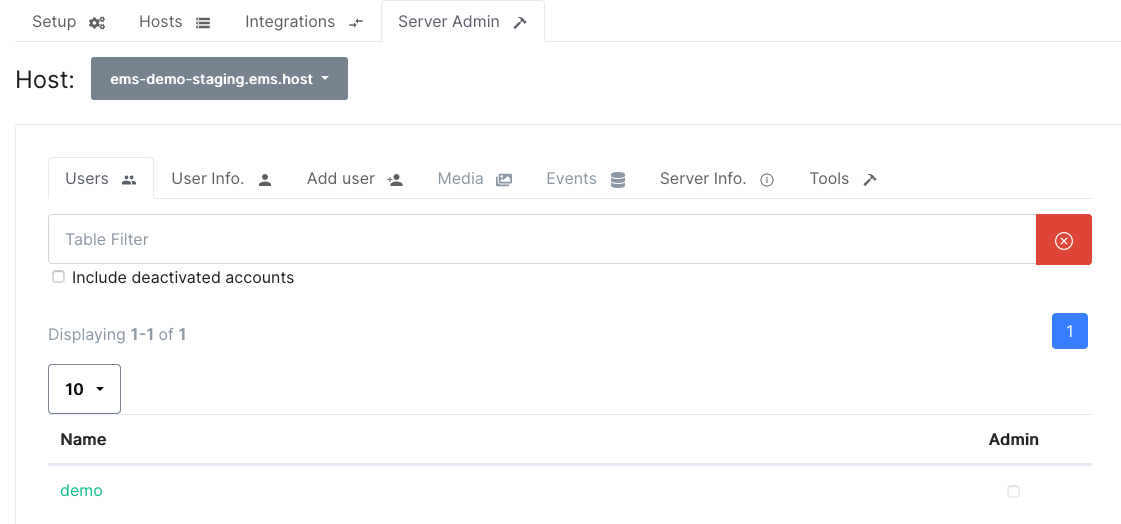
Click
Server Admin -
Select your host
-
Click
Add userEnter the username and clickAdd

-
Select
Make new user server adminif you want this user to be able to use the Synapse Admin API to perform administrative tasks on your server. Be careful with this as this option has a lot of power on your server. -
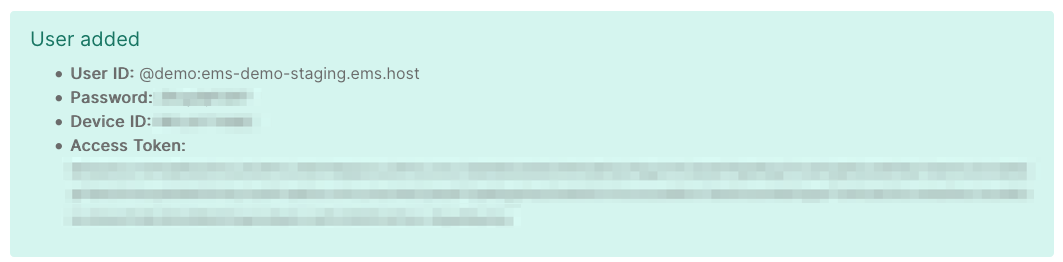
The username and password for the new user is displayed. You will only be able to see this information once so send the password to the user in a secure manner and then delete it

Apply coupon/discount
Coupons can only be applied by new customers before purchasing any products. However, if you are an existing customer and want to add a coupon, please contact support at https://ems.element.io/support.
Terms and Conditions apply. See the page for your coupon or ask your Element contact or support.
- Create your EMS account normally
- If you have agreed to pay by invoice/bank transfer, stop here and let your Element contact know you have created your account so they can enable invoice payment for you
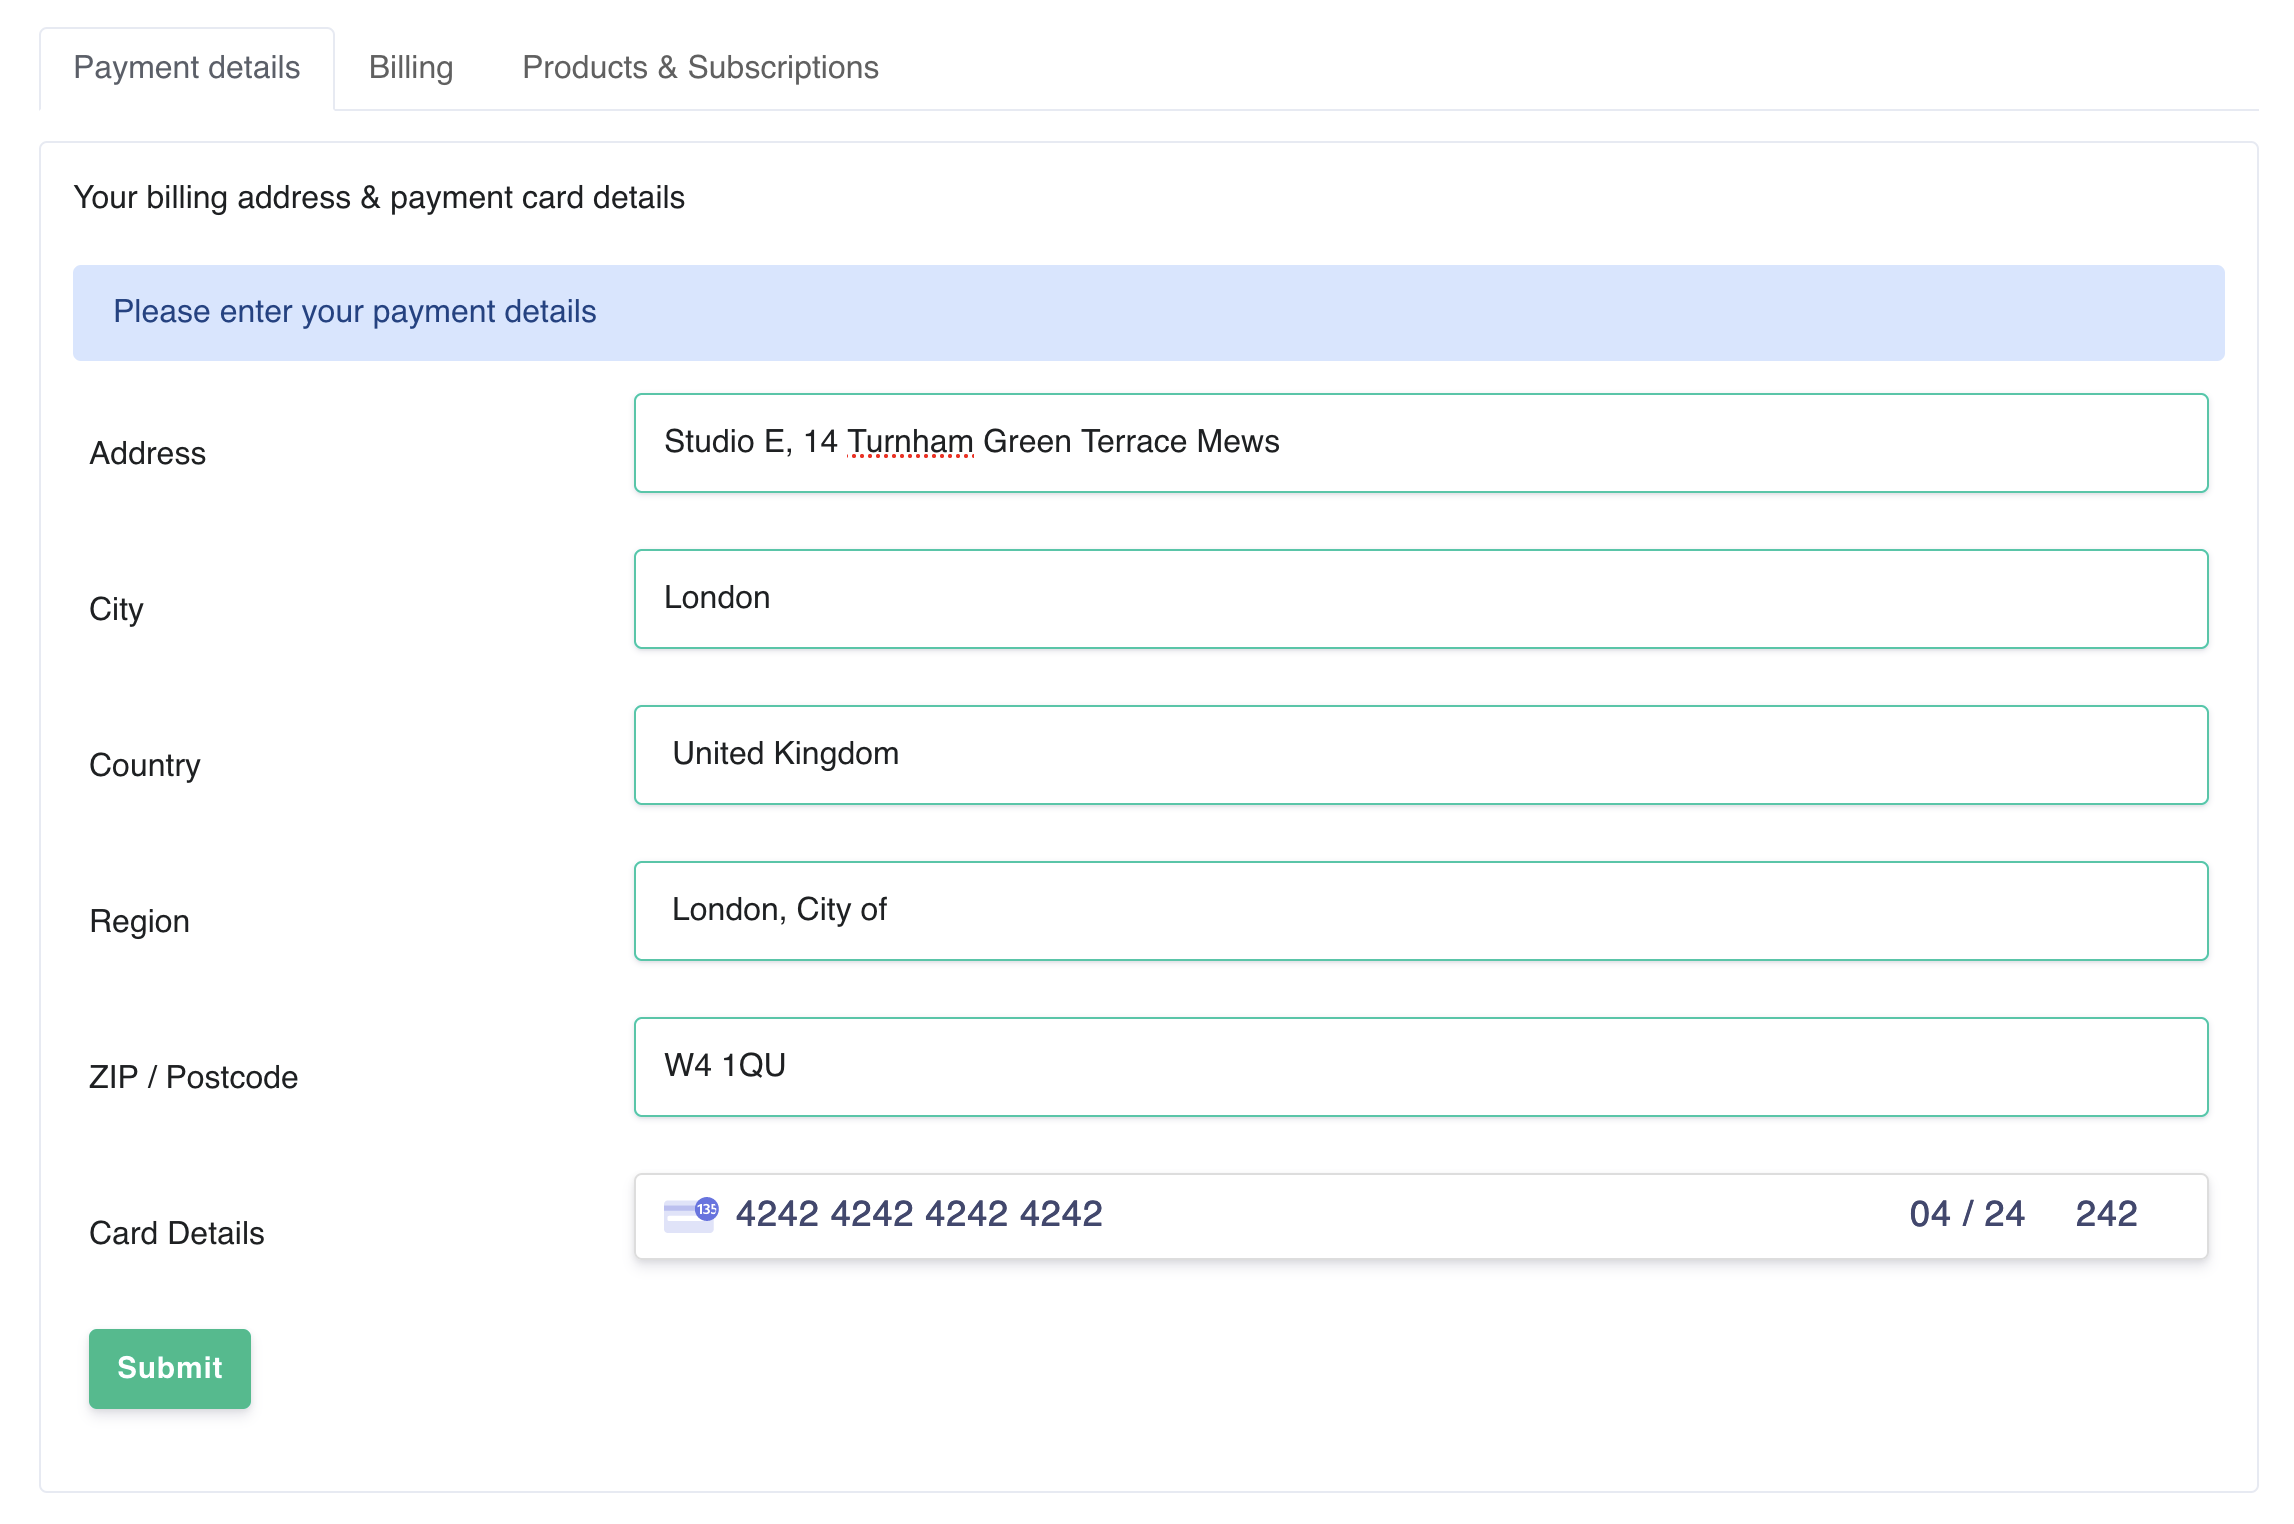
- Add your billing address and payment card on https://ems.element.io/user/billing, or click
Your Account, thenBilling

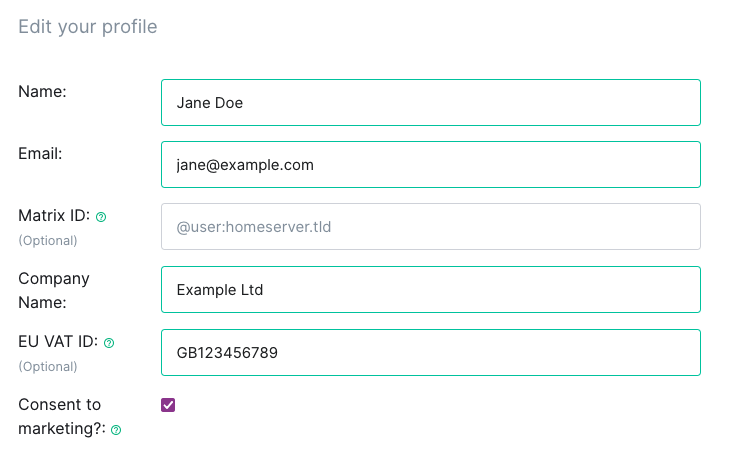
- Go to https://ems.element.io/user/account, or click
Your Account, thenAccount - If you are a business, you must enter your company name and if applicable, VAT ID here

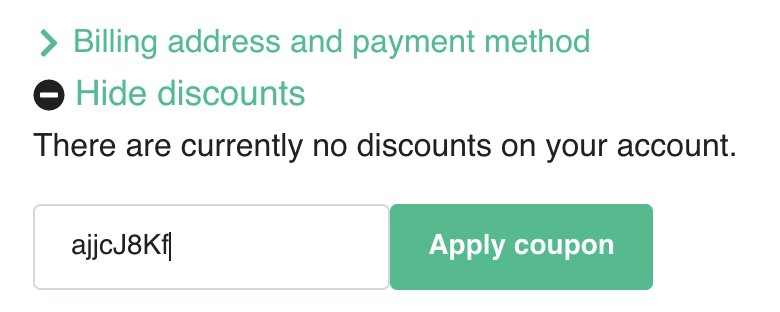
- Click
Show Discounts - Enter your coupon code and click
Apply coupon


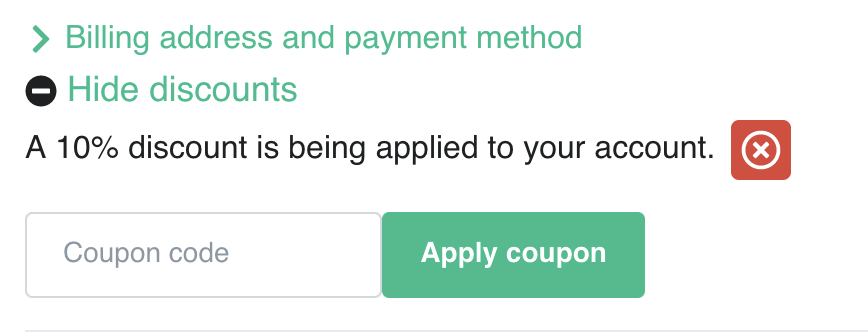
-
Continue host setup normally. The discount will automatically be applied to all applicable products


Client Look & Feel
This feature allows you to customize the home and welcome page on your EMS-provided Element Web client.
Blog posts
See also our blog posts on the subject:
- Build your own custom branded chat platform at the touch of a button!
- A white label messaging app to create your own brand messenger
Create home and login template
-
Create the files you want to use.
-
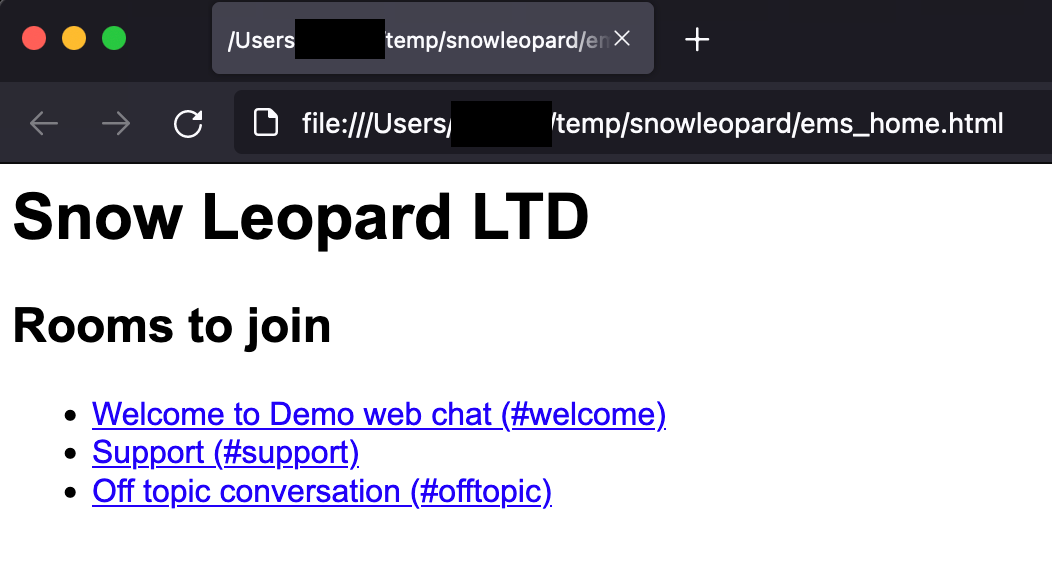
Edit
ems_home.html. This can be as simple as a couple of lines of HTML, for example:<h1>Snow Leopard LTD</h1> <h2>Rooms to join</h2> <ul> <li><a href='/#/room/#welcome:snowleopard-staging.ems.host'>Welcome to Demo web chat (#welcome)</a></li> <li><a href='/#/room/#support:snowleopard-staging.ems.host'>Support (#support)</a></li> <li><a href='/#/room/#offtopic:snowleopard-staging.ems.host'>Off topic conversation (#offtopic)</a></li> </ul>You can also add a more complex HTML and styling.
-
It looks like this in your web browser:

-
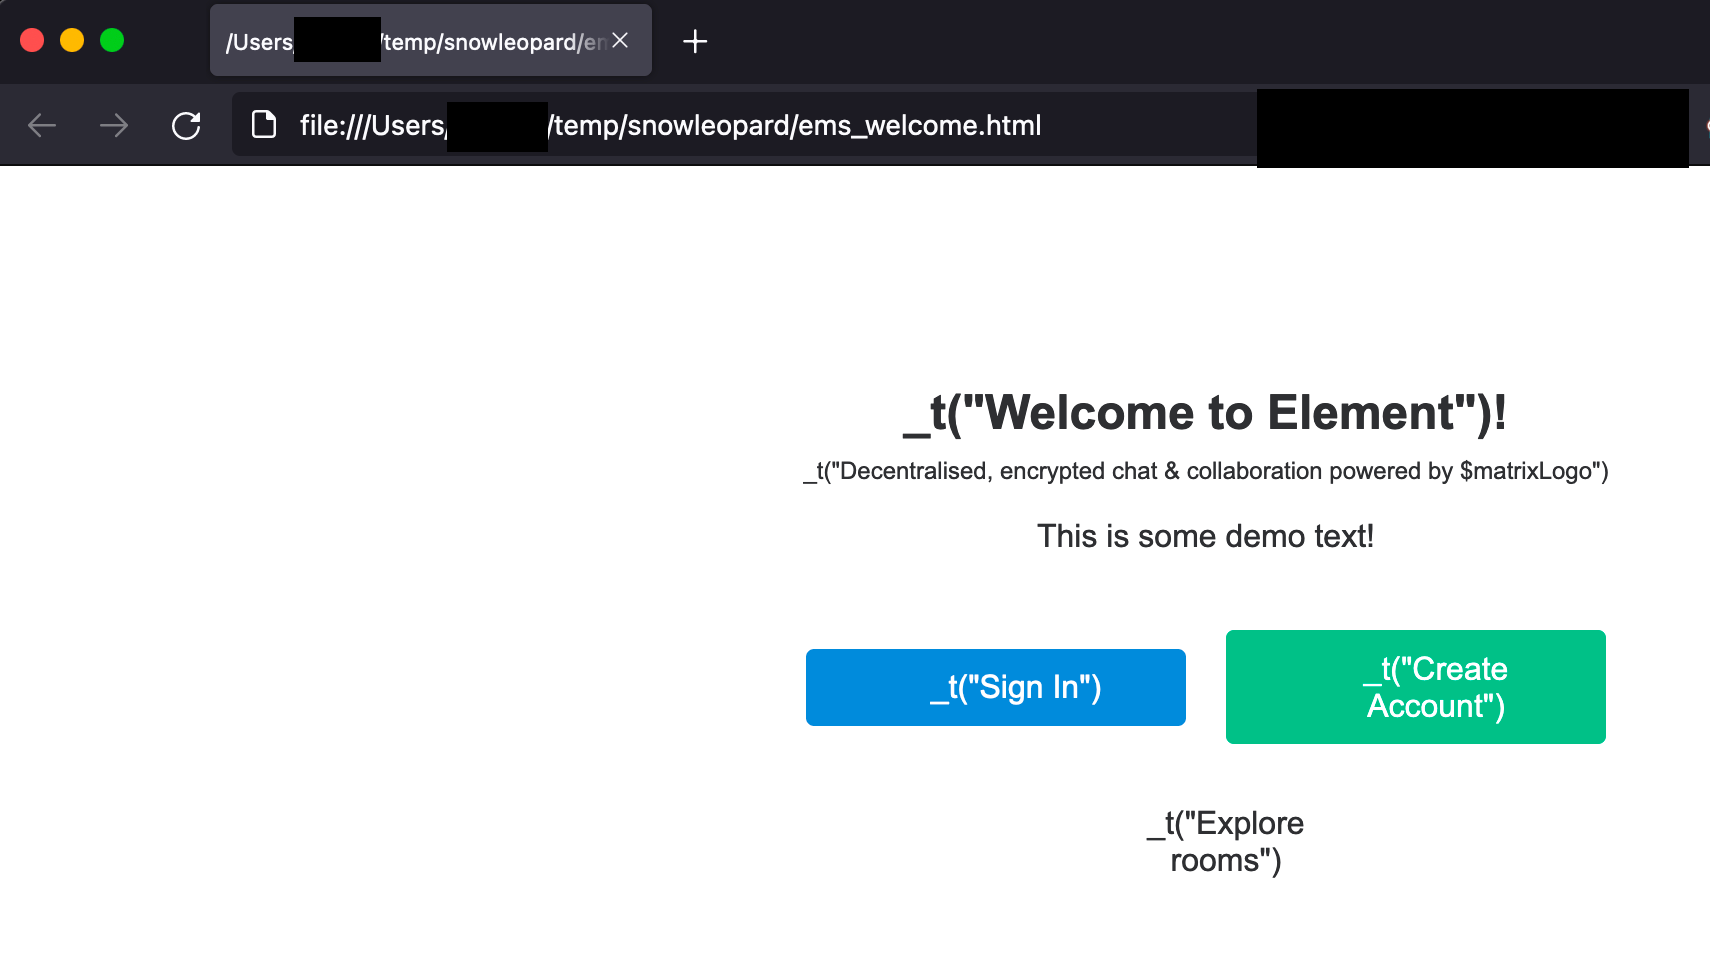
Edit
ems_welcome.html. This is a bit more complex, but it can be almost anything you want as long as it has links toLog in(/#/login) andCreate account(/#/register). The default design is based on this template. You can get creative with the CSS and the!importanttag.Click to see ems_welcome contents
The only change I made from the template is adding
<p>This is some demo text!</p>on line 177.<style type="text/css"> /* we deliberately inline style here to avoid flash-of-CSS problems, and to avoid * voodoo where we have to set display: none by default */ h1::after { content: "!"; } .mx_Parent { display: -webkit-box; display: -webkit-flex; display: -ms-flexbox; display: flex; -webkit-box-orient: vertical; -webkit-box-direction: normal; -webkit-flex-direction: column; -ms-flex-direction: column; flex-direction: column; -webkit-box-pack: center; -webkit-justify-content: center; -ms-flex-pack: center; justify-content: center; -webkit-box-align: center; -webkit-align-items: center; -ms-flex-align: center; align-items: center; text-align: center; padding: 25px 35px; color: #2e2f32; } .mx_Logo { height: 54px; margin-top: 2px; } .mx_ButtonGroup { margin-top: 10px; } .mx_ButtonRow { display: -webkit-box; display: -webkit-flex; display: -ms-flexbox; display: flex; -webkit-justify-content: space-around; -ms-flex-pack: distribute; -webkit-box-align: center; -webkit-align-items: center; -ms-flex-align: center; align-items: center; justify-content: space-between; box-sizing: border-box; margin: 12px 0 0; } .mx_ButtonRow > * { margin: 0 10px; } .mx_ButtonRow > *:first-child { margin-left: 0; } .mx_ButtonRow > *:last-child { margin-right: 0; } .mx_ButtonParent { display: -webkit-box; display: -webkit-flex; display: -ms-flexbox; display: flex; padding: 10px 20px; -webkit-box-orient: horizontal; -webkit-box-direction: normal; -webkit-flex-direction: row; -ms-flex-direction: row; flex-direction: row; -webkit-box-pack: center; -webkit-justify-content: center; -ms-flex-pack: center; justify-content: center; -webkit-box-align: center; -webkit-align-items: center; -ms-flex-align: center; align-items: center; border-radius: 4px; width: 150px; background-repeat: no-repeat; background-position: 10px center; text-decoration: none; color: #2e2f32 !important; } .mx_ButtonLabel { margin-left: 20px; } .mx_Header_title { font-size: 24px; font-weight: 600; margin: 20px 0 0; } .mx_Header_subtitle { font-size: 12px; font-weight: normal; margin: 8px 0 0; } .mx_ButtonSignIn { background-color: #368BD6; color: white !important; } .mx_ButtonCreateAccount { background-color: #0DBD8B; color: white !important; } .mx_SecondaryButton { background-color: #FFFFFF; color: #2E2F32; } .mx_Button_iconSignIn { background-image: url('welcome/images/icon-sign-in.svg'); } .mx_Button_iconCreateAccount { background-image: url('welcome/images/icon-create-account.svg'); } .mx_Button_iconHelp { background-image: url('welcome/images/icon-help.svg'); } .mx_Button_iconRoomDirectory { background-image: url('welcome/images/icon-room-directory.svg'); } /* .mx_WelcomePage_loggedIn is applied by EmbeddedPage from the Welcome component If it is set on the page, we should show the buttons. Otherwise, we have to assume we don't have an account and should hide them. No account == no guest account either. */ .mx_WelcomePage:not(.mx_WelcomePage_loggedIn) .mx_WelcomePage_guestFunctions { display: none; } .mx_ButtonRow.mx_WelcomePage_guestFunctions { margin-top: 20px; } .mx_ButtonRow.mx_WelcomePage_guestFunctions > div { margin: 0 auto; } @media only screen and (max-width: 480px) { .mx_ButtonRow { flex-direction: column; } .mx_ButtonRow > * { margin: 0 0 10px 0; } } </style> <div class="mx_Parent"> <a href="https://element.io" target="_blank" rel="noopener"> <img src="welcome/images/logo.svg" alt="" class="mx_Logo"/> </a> <h1 class="mx_Header_title">_t("Welcome to Element")</h1> <!-- XXX: Our translations system isn't smart enough to recognize variables in the HTML, so we manually do it --> <h4 class="mx_Header_subtitle">_t("Decentralised, encrypted chat & collaboration powered by $matrixLogo")</h4> <p>This is some demo text!</p> <div class="mx_ButtonGroup"> <div class="mx_ButtonRow"> <a href="#/login" class="mx_ButtonParent mx_ButtonSignIn mx_Button_iconSignIn"> <div class="mx_ButtonLabel">_t("Sign In")</div> </a> <a href="#/register" class="mx_ButtonParent mx_ButtonCreateAccount mx_Button_iconCreateAccount"> <div class="mx_ButtonLabel">_t("Create Account")</div> </a> </div> <!-- The comments below are meant to be used by Ansible as a quick way to strip out the marked content when desired. See https://github.com/element-hq/element-web/issues/8622. TODO: Strip out these comments and rely on the guest flag --> <!-- BEGIN Ansible: Remove these lines when guest access is disabled --> <div class="mx_ButtonRow mx_WelcomePage_guestFunctions"> <div> <a href="#/directory" class="mx_ButtonParent mx_SecondaryButton mx_Button_iconRoomDirectory"> <div class="mx_ButtonLabel">_t("Explore rooms")</div> </a> </div> </div> <!-- END Ansible: Remove these lines when guest access is disabled --> </div> </div> -
It looks like this in your web browser:

-
Serve the files
You must host the files somewhere where they are publickly accessible and you need to enable the CORS header Access-Control-Allow-Origin: * on the web server for these files. See https://enable-cors.org/ for instructions on how to do this.
Configure your EMS server
-
Add the URLs to the
Client look & feelsection in the EMS Control Panel. ClickSave.

Unfortunately, we have a bug in the validator affecting files hosted on Matrix. Just ignore the error.- Note if you are hosting the files on your own web server, you only need to change your EMS server configuration or reprovision if the URLs have changed. Changes to the contents of existing files are applied automatically
-
Once your host finishes reprovisioning, check your Element Web to ensure the changes are applied correctly.
-
Welcome page image and Welcome page content

-
Client logo

-
Home page content

-

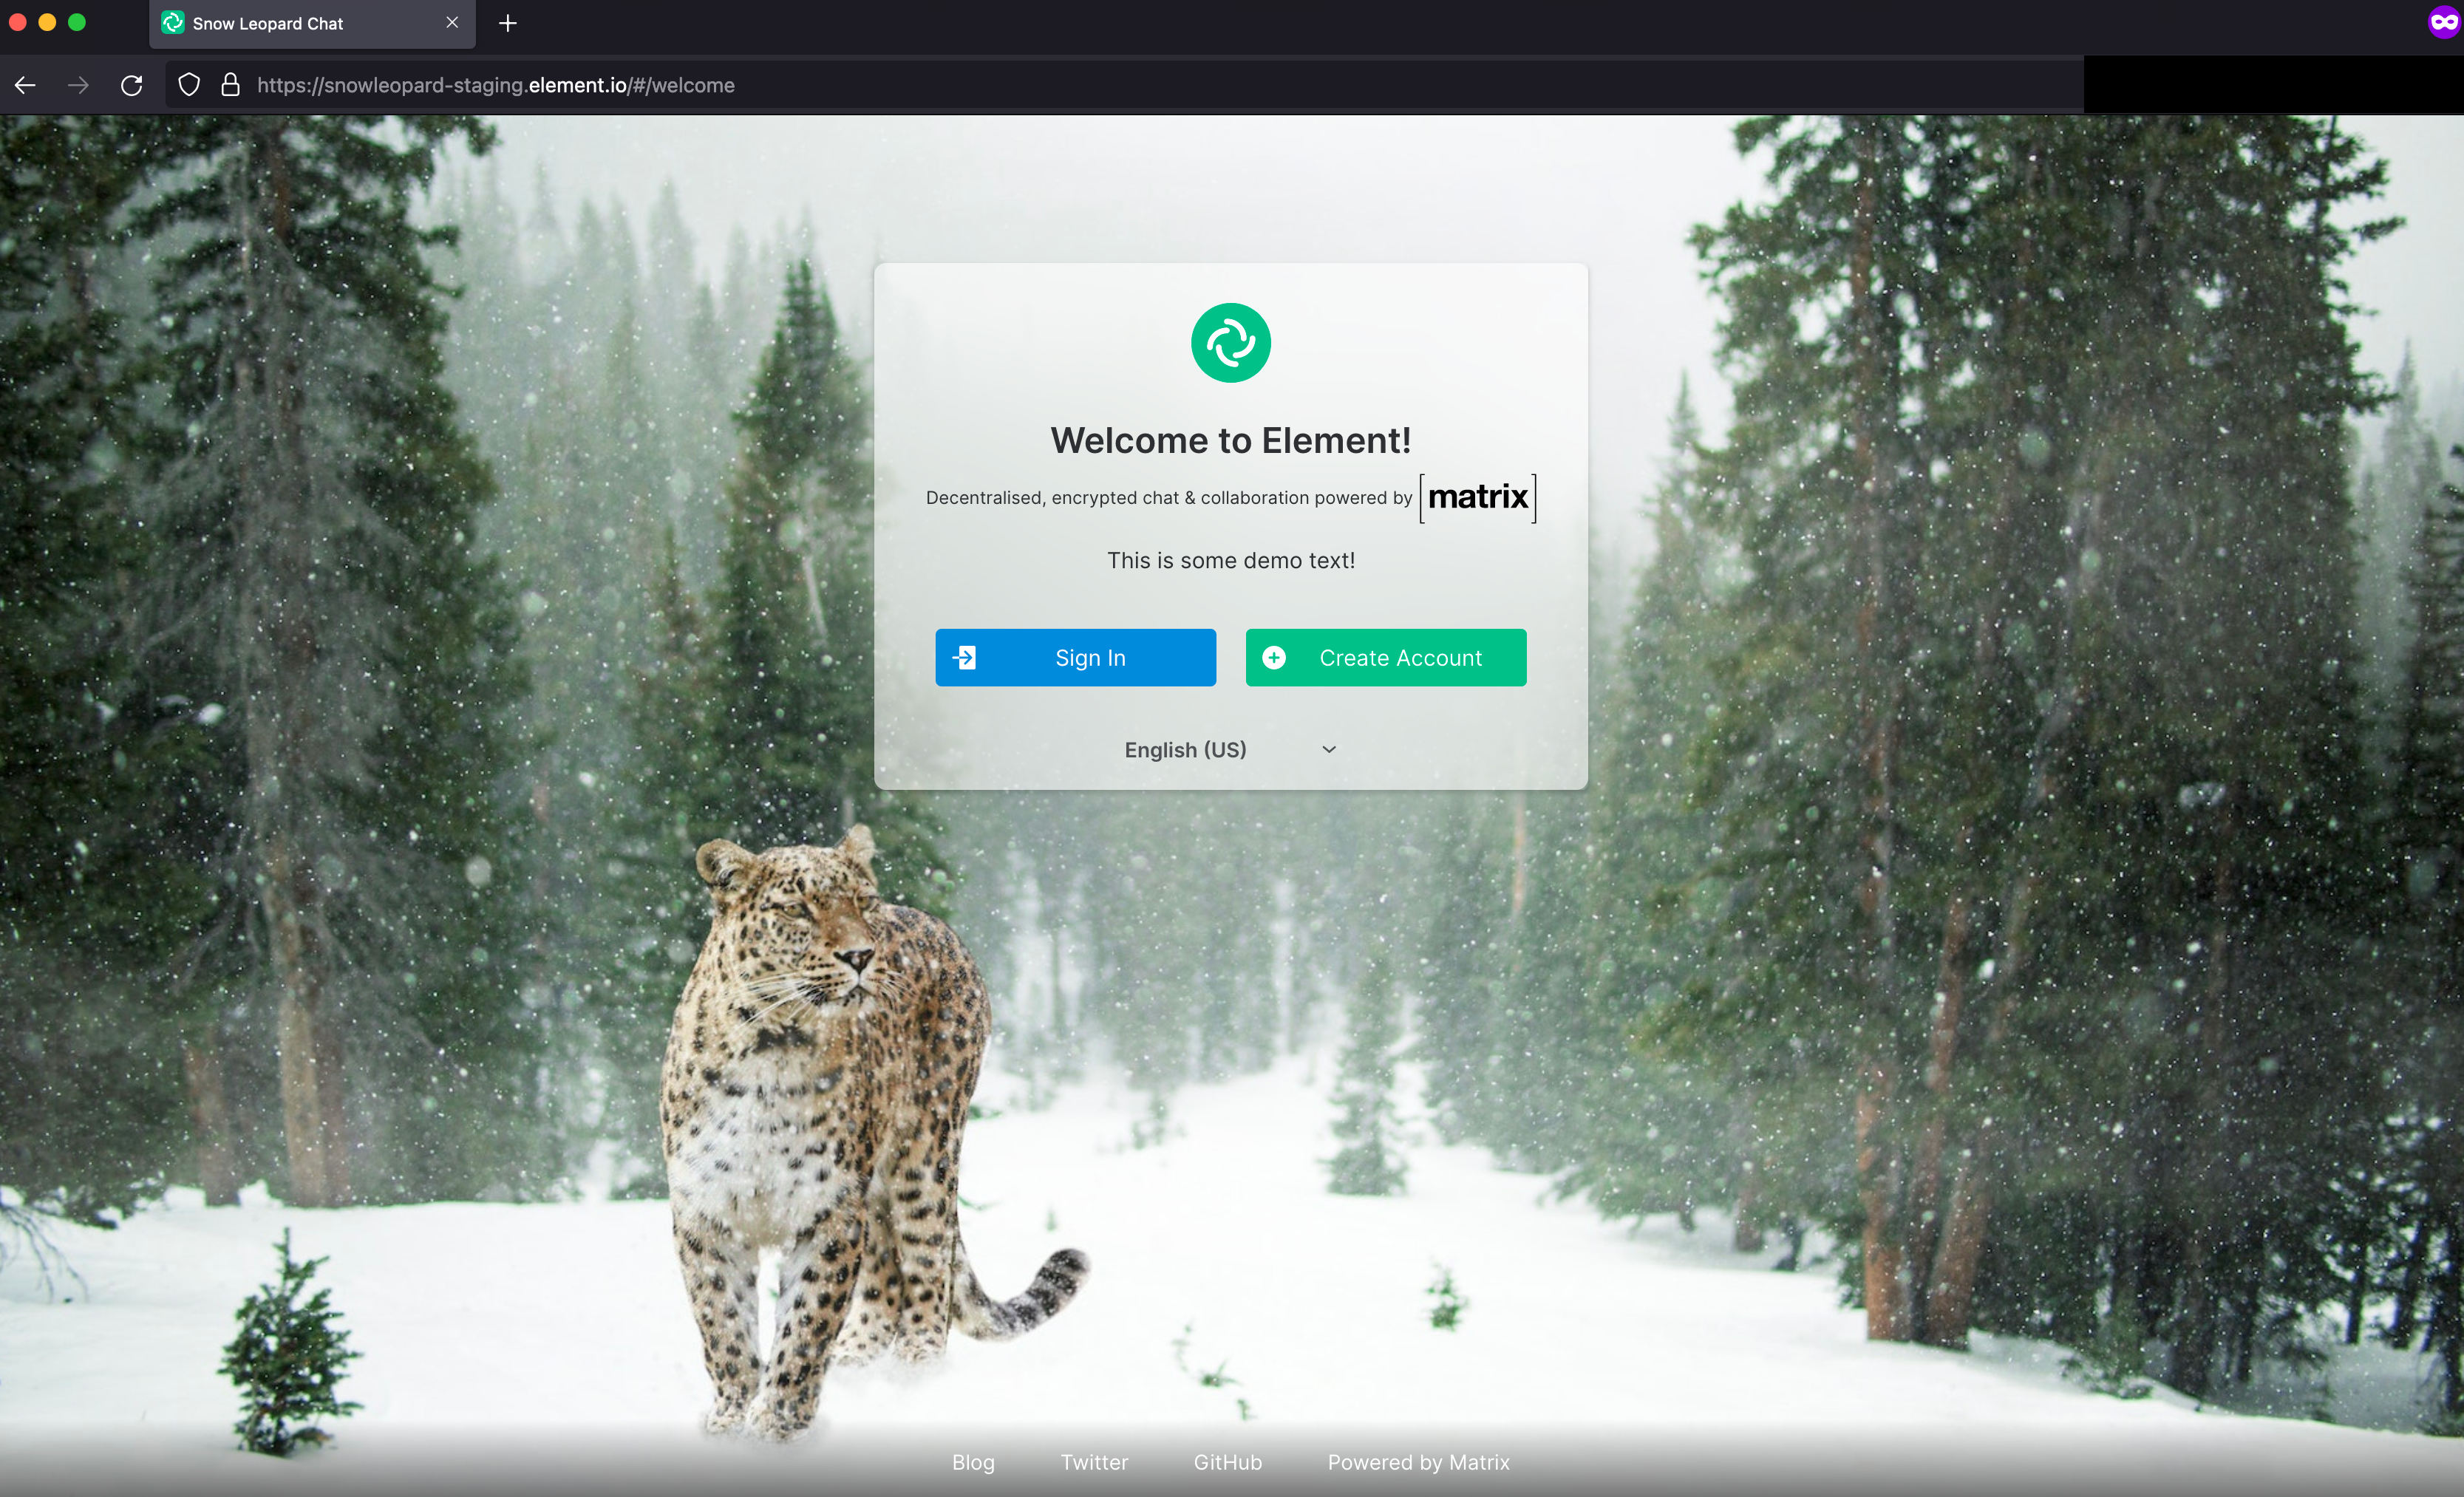
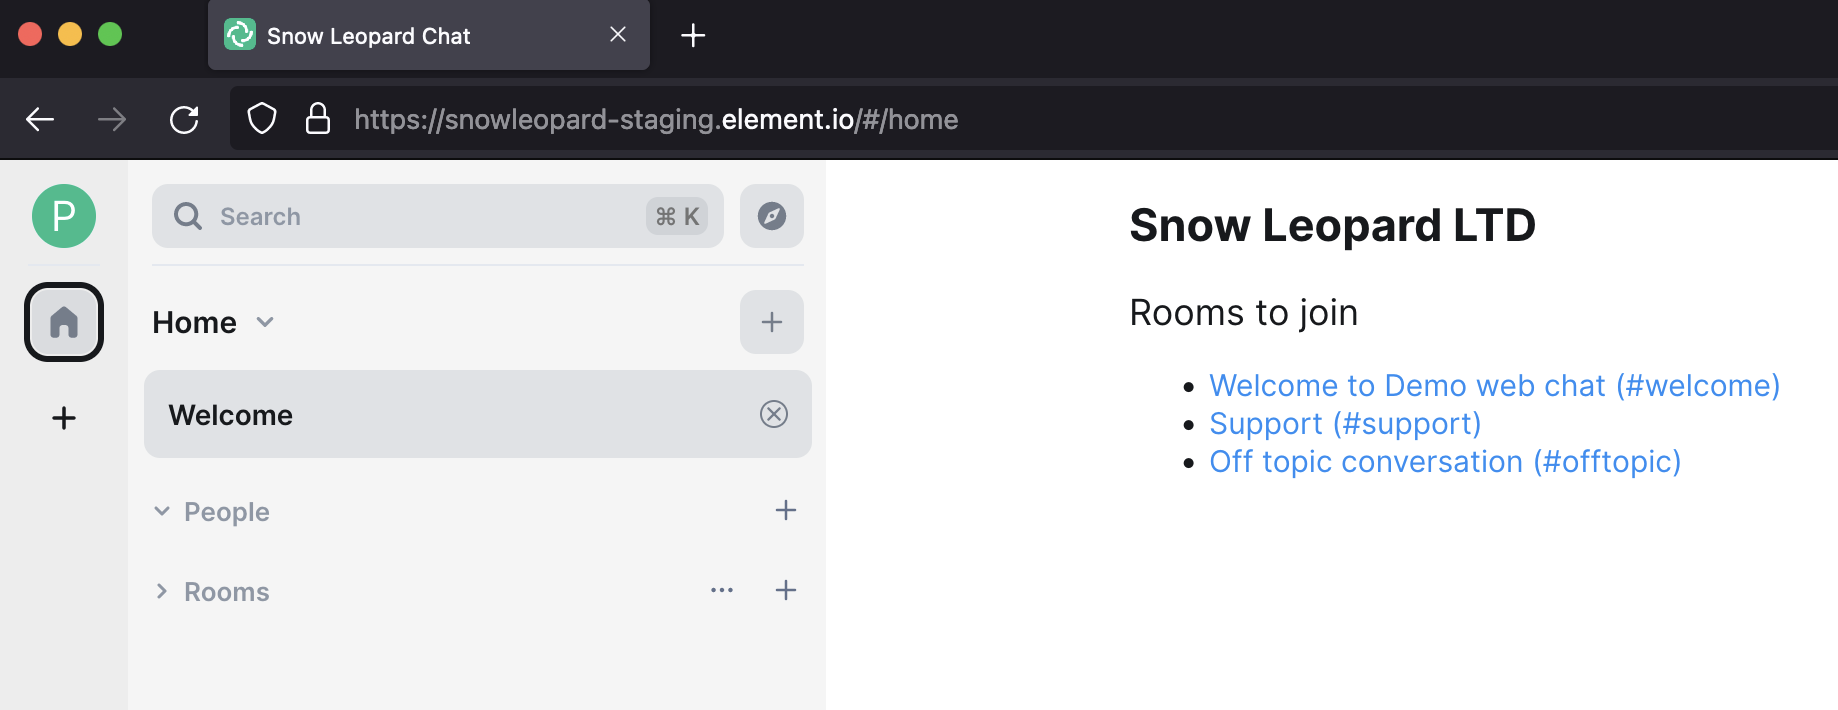
Image Credits
- Client logo image by Charles Miller used under the terms of Free to use License.
- Welcome page image by Pixabay used under the terms of Free to use (CC0) License.
EMS Server With Custom Domain
For this guide, I will be using the domain
element.io. I will set up EMS so that the
Matrix usernames becomes @someone:element.io, and the Element client will be at
https://chat.element.io/
From the guide at Get Your Own EMS Server, I will be replacing the EMS hostname
ems-demo-staging.ems.host with element.ems.host
Custom domains are only supported with Element Enterprise Cloud plans.
Prerequisites
- You own and control the domain you want to use
- If you do not have a website on the domain you want to use with your EMS server:
- You can create a CNAME DNS record for the domain. Some providers call this ALIAS or CNAME Flattening when used on
the root of the domain (domain root =
yourdomain.com, notsomething.yourdomain.com)
- You can create a CNAME DNS record for the domain. Some providers call this ALIAS or CNAME Flattening when used on
the root of the domain (domain root =
- If you have a website on the domain you want to use with your EMS server:
- Your website has HTTPS enabled using a valid certificate issued by a commonly recognized provider. For example, Comodo or LetsEncrypt.
- You can serve plain-text JSON files at these exact paths
-
https://yourdomain.com/.well-known/matrix/client -
https://yourdomain.com/.well-known/matrix/server - Note that these files do not and cannot have a file extension
-
- You can add the header
Access-Control-Allow-Origin: *to the client file on the web server
See also
- FAQ: Can I use a subdomain instead of the root domain with my EMS server?
- FAQ: Can I use EMS-hosted well-knowns with the root of my domain?
Setup
Some providers for DNS and website hosting providers need special configuration. See Provider specific instructions at the bottom for known solutions.
-
Follow steps 1 - 10 from Get Your Own EMS Server
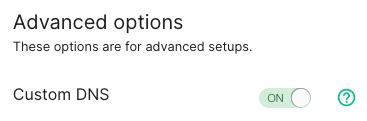
-
On step 10 from Get Your Own EMS Server, turn ON
Custom DNS

-
In the
Custom Homeserver domainfield, enterelement.io

-
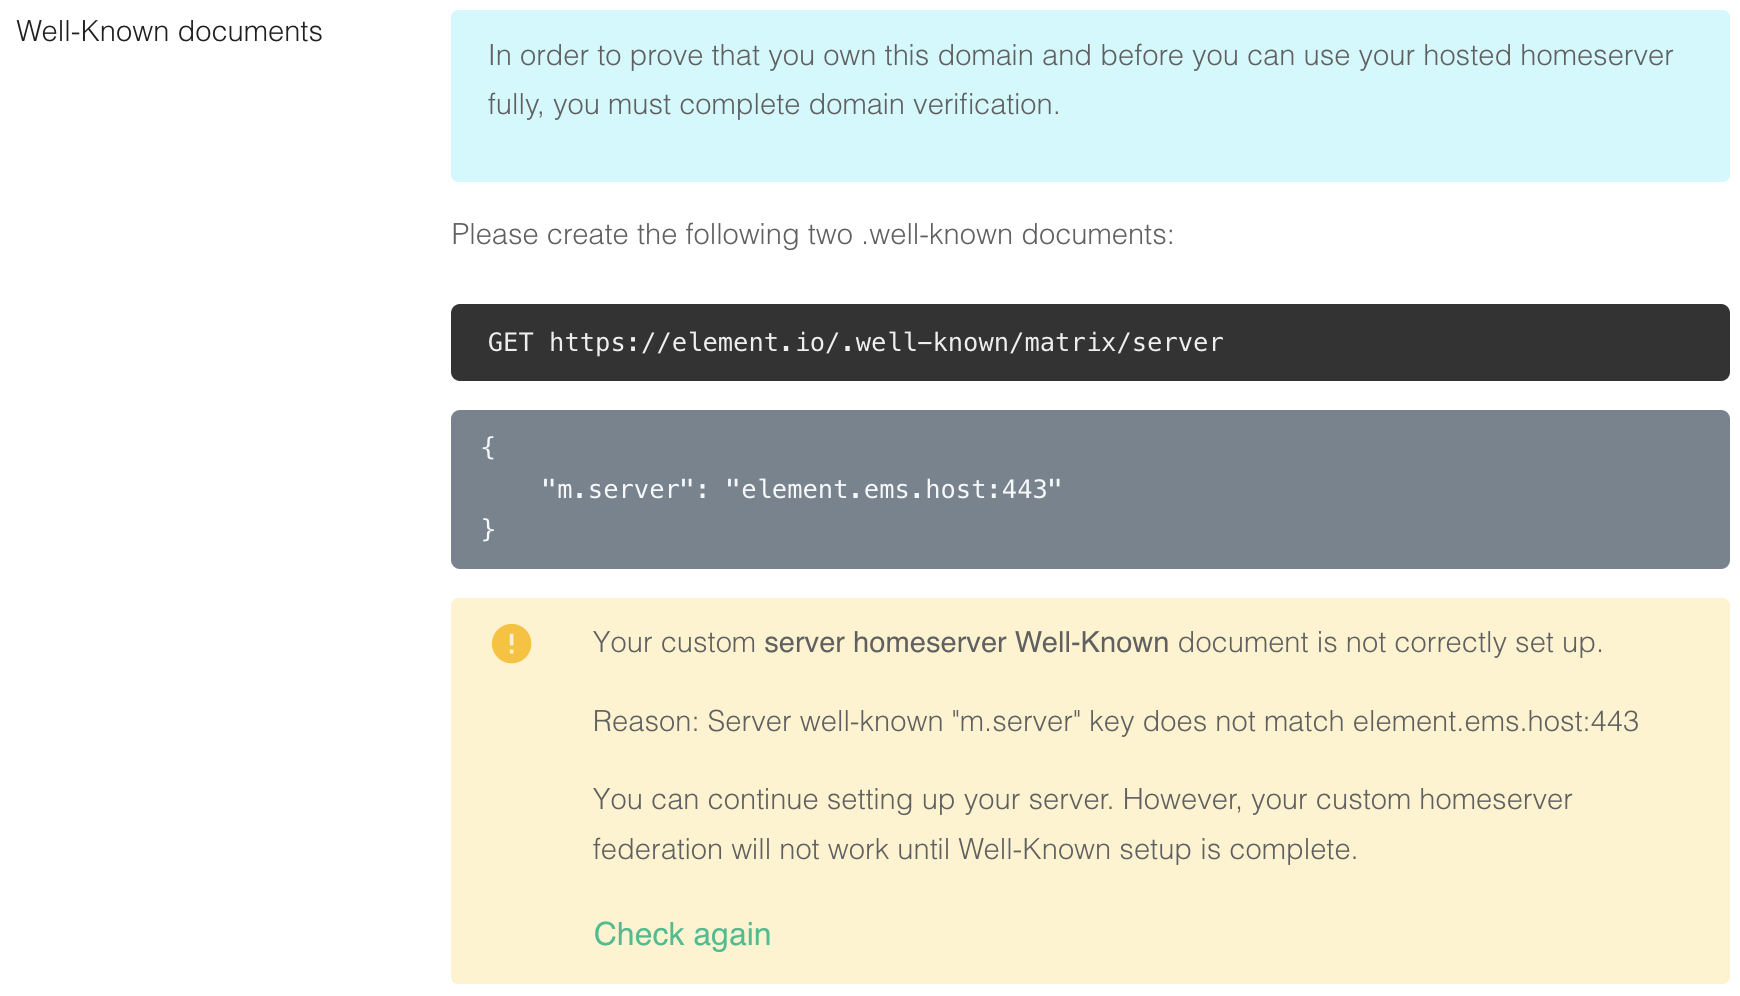
Create two files on your website according to the instructions given.
The path cannot be changed, but up to 30 redirects are supported.
While not required, you should add the headerContent-Type application/jsonto both files.-
https://element.io/.well-known/matrix/server

{ "m.server": "element.ems.host:443" } -
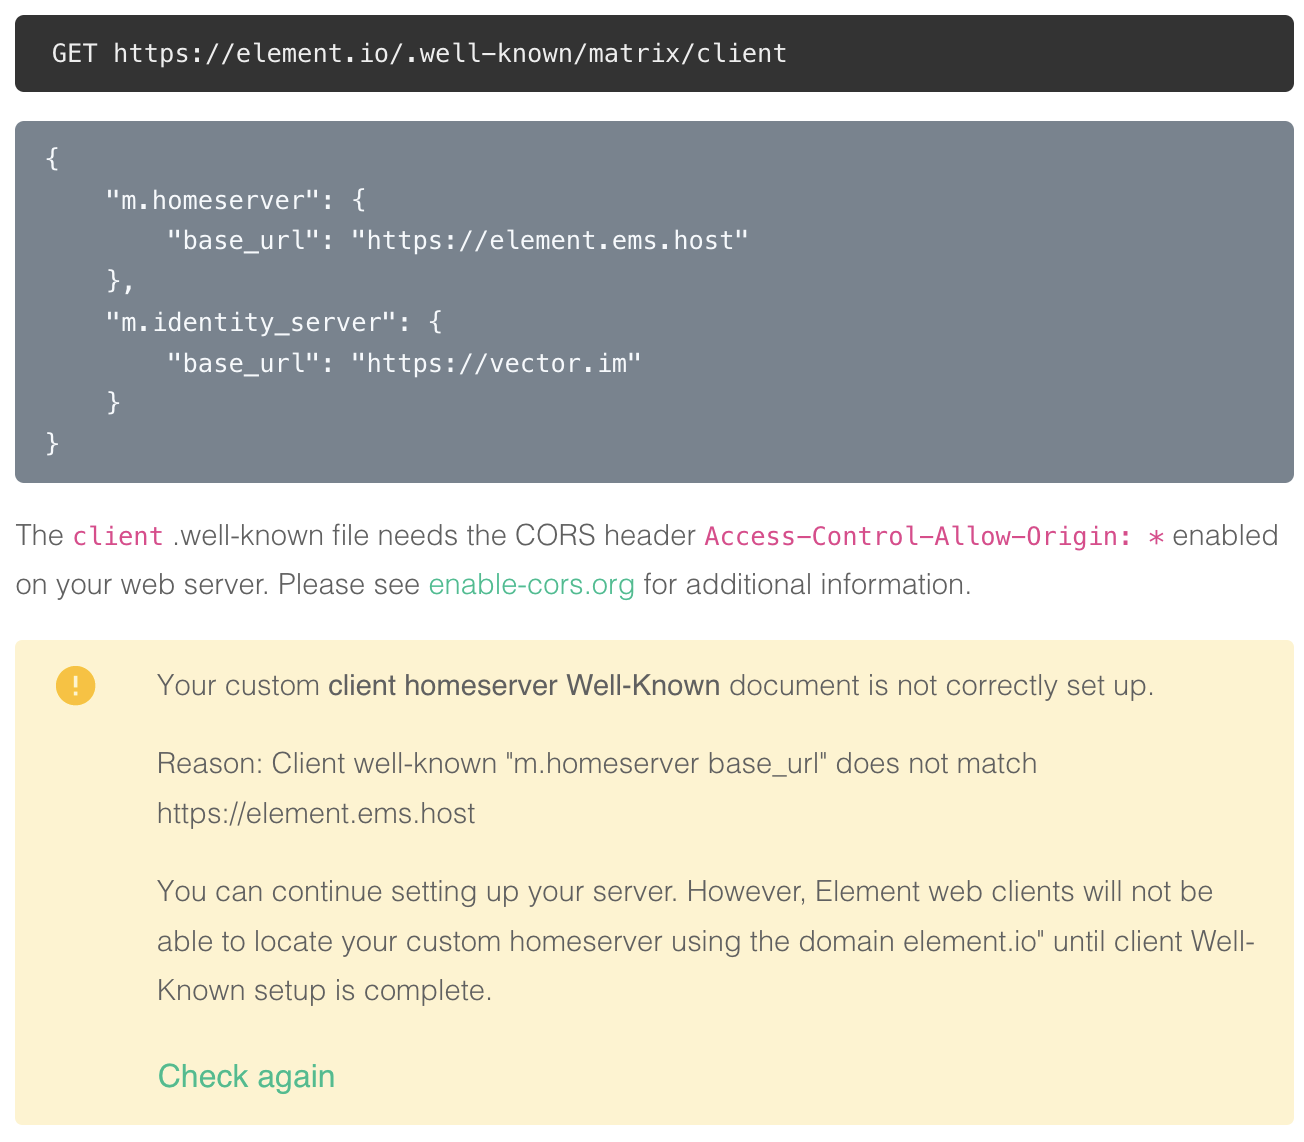
https://element.io/.well-known/matrix/client

You need to enable the CORS headerAccess-Control-Allow-Origin: *on the web server for this file. See https://enable-cors.org/ for instructions on how to do this. If you are using redicrects, the CORS headers must be set on all steps/hops.{ "m.homeserver": { "base_url": "https://element.ems.host" }, "m.identity_server": { "base_url": "https://vector.im" }, "org.matrix.msc4143.rtc_foci": [ { "type": "livekit", "livekit_service_url": "https://jwt.call.element.io" } ] }
Optional Nginx-specific configuration
If your web server is running Nginx, you can set this in the Nginx config instead of creating actual files.
server { server_name element.io ... # Matrix well-known files location /.well-known/matrix/client { return 200 '{"m.homeserver":{"base_url":"https://element.ems.host"},"m.identity_server":{"base_url":"https://vector.im"},"org.matrix.msc4143.rtc_foci":[{"type":"livekit","livekit_service_url":"https://jwt.call.element.io"}]}'; add_header Content-Type application/json; add_header 'Access-Control-Allow-Origin' '*'; } location /.well-known/matrix/server { return 200 '{"m.server": "element.ems.host:443"}'; add_header Content-Type application/json; } } -
-
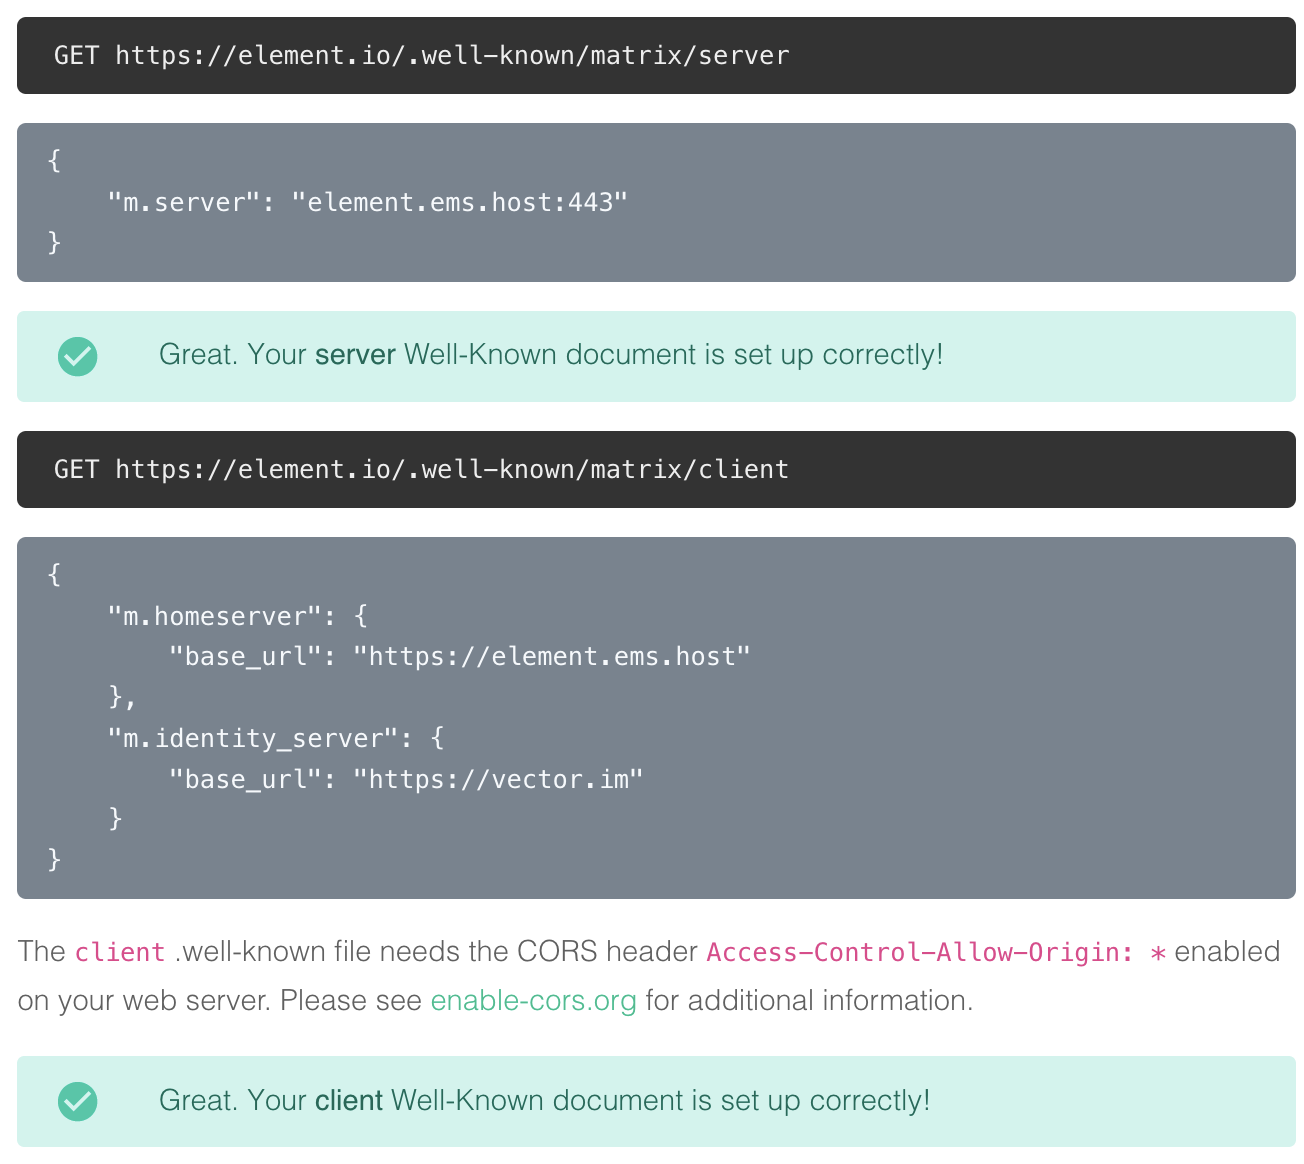
Click
Check againto verify that your.well-knownfiles are configured correctly

You can also verify your `.well-known` files from the command line
Note the lines
access-control-allow-origin: *andcontent-type: application/json-
On Mac or Linux, using the
terminal$ curl -i https://element.io/.well-known/matrix/client HTTP/2 200 date: Fri, 31 Jul 2020 09:11:21 GMT content-type: application/json content-length: 129 set-cookie: __cfduid=x...; expires=Sun, 30-Aug-20 09:11:21 GMT; path=/; domain=.element.io; HttpOnly; SameSite=Lax access-control-allow-origin: * cf-cache-status: DYNAMIC cf-request-id: 0... expect-ct: max-age=604800, report-uri="https://report-uri.cloudflare.com/cdn-cgi/beacon/expect-ct" server: cloudflare cf-ray: 5... { "m.homeserver": { "base_url": "https://element.ems.host" }, "m.identity_server": { "base_url": "https://vector.im" }, "org.matrix.msc4143.rtc_foci": [ { "type": "livekit", "livekit_service_url": "https://jwt.call.element.io" } ] } $ curl -i https://element.io/.well-known/matrix/server HTTP/2 200 date: Fri, 31 Jul 2020 09:11:25 GMT content-type: application/json content-length: 52 set-cookie: __cfduid=x...; expires=Sun, 30-Aug-20 09:11:25 GMT; path=/; domain=.element.io; HttpOnly; SameSite=Lax access-control-allow-origin: * cf-cache-status: DYNAMIC cf-request-id: 0... expect-ct: max-age=604800, report-uri="https://report-uri.cloudflare.com/cdn-cgi/beacon/expect-ct" server: cloudflare cf-ray: 5... { "m.server": "element.ems.host:443" } -
On Windows, using
PowerShellPS C:\Users\twilight> Invoke-WebRequest -Uri https://element.io/.well-known/matrix/client StatusCode : 200 StatusDescription : OK Content : { "m.homeserver": { "base_url": "https://element.ems.host" }, "m.identity_server": { "base_url": "https://vector.im" }, "org.matrix.msc4143.rtc_foci": [ { "type": "livekit", "livekit_service_url": "https://jwt.call.element.io" } ] } RawContent : HTTP/1.1 200 OK Connection: keep-alive Access-Control-Allow-Origin: * CF-Cache-Status: DYNAMIC cf-request-id: 0... Expect-CT: max-age=604800, report-uri="https://repor... Forms : {} Headers : {[Connection, keep-alive], [Access-Control-Allow-Origin, *], [CF-Cache-Status, DYNAMIC], [cf-request-id, 0...]...} Images : {} InputFields : {} Links : {} ParsedHtml : System.__ComObject RawContentLength : 129 PS C:\Users\twilight> Invoke-WebRequest -Uri https://element.io/.well-known/matrix/server StatusCode : 200 StatusDescription : OK Content : { "m.server": "element.ems.host:443" } RawContent : HTTP/1.1 200 OK Connection: keep-alive Access-Control-Allow-Origin: * CF-Cache-Status: DYNAMIC cf-request-id: 0... Expect-CT: max-age=604800, report-uri="https://repor... Forms : {} Headers : {[Connection, keep-alive], [Access-Control-Allow-Origin, *], [CF-Cache-Status, DYNAMIC], [cf-request-id, 0...]...} Images : {} InputFields : {} Links : {} ParsedHtml : System.__ComObject RawContentLength : 52
-
-
You can continue without the
.well-knownfiles in place, but your server will have limited functionality until this is fixed -
In the
Custom Client domainfield, enterchat.element.io. This can be any domain, except the same asCustom Homeserver domain

-
Create a CNAME DNS record with your DNS provider according to the instructions given
chat.element.io. CNAME element.element.io.

-
This shows how this is done with Cloudflare DNS. Depending on your DNS provider, this might be different. Consult the documentation for your provider. Note that Proxy must be turned off with Cloudflare.

-
Back on EMS, click
Check again. Note that sometimes it might take a while for your new DNS record to propagate. You can continue, but functionality will be limited. Check back with the Hosts tab on https://ems.element.io/user/hosting and clickRebuild Hostonce the DNS record is in place.

You can also verify the CNAME DNS record using the command line
-
On Mac or Linux, using the
terminal$ dig chat.element.io CNAME ; <<>> DiG 9.10.6 <<>> chat.element.io CNAME ;; global options: +cmd ;; Got answer: ;; ->>HEADER<<- opcode: QUERY, status: NOERROR, id: 57888 ;; flags: qr rd ra; QUERY: 1, ANSWER: 1, AUTHORITY: 0, ADDITIONAL: 1 ;; OPT PSEUDOSECTION: ; EDNS: version: 0, flags:; udp: 512 ;; QUESTION SECTION: ;chat.element.io. IN CNAME ;; ANSWER SECTION: chat.element.io. 299 IN CNAME element.element.io. ;; Query time: 32 msec ;; SERVER: 1.1.1.1#53(1.1.1.1) ;; WHEN: Fri Jul 31 10:21:56 BST 2020 ;; MSG SIZE rcvd: 91 -
On Windows, using
PowerShellPS C:\Users\twilight> Resolve-DnsName -Name chat.element.io -Type CNAME Name Type TTL Section NameHost ---- ---- --- ------- -------- chat.element.io CNAME 299 Answer element.element.io
-
-
Continue from step 11 on Get Your Own EMS Server


Provider-specific instructions
GitHub Pages
If you are hosting your website with GitHub Pages, add this to the Jekyll config file _config.yml
include:
- .well-known
Microsoft Azure
If you are using Microsoft 365 / Azure to manage your domain or the rest of your infrastructure, please use the following instructions to host the .well-known/matrix URI (RFC 8615).
In this section, we will configure Azure to serve https://yourdomain.com/.well-known/matrix/client and https://yourdomain.com/.well-known/matrix/client.
The summary of steps is as follows:
- prepare json files
- create a Storage account then enable a Static website
- upload the json files to .well-known/matrix/ in the
$webcontainer - create a CDN and an endpoint for this container
- create a
CNAMEDNS entry for your custom domain, pointing to your CDN endpoint - associate your custom domain to your CDN endpoint
Prepare client and server .well-known files locally
On your computer, prepare two plain text files called client and server (again, notice the lack of file extension such as ".txt") which contain the following:
client
{
"m.homeserver": {
"base_url": "https://your-tenant.ems.host"
},
"m.identity_server": {
"base_url": "https://vector.im"
},
"org.matrix.msc4143.rtc_foci": [
{
"type": "livekit",
"livekit_service_url": "https://jwt.call.your-tenant.io"
}
]
}
Remember to replace your-tenant by the name of your EMS tenant.
server
{
"m.homeserver": {
"base_url": "https://your-tenant.ems.host:443"
}
}
Remember to replace your-tenant by the name of your EMS tenant.
You will be uploading these shortly.
Create a Storage account and Static website
Storage account
In the Azure Portal, create a Storage account.
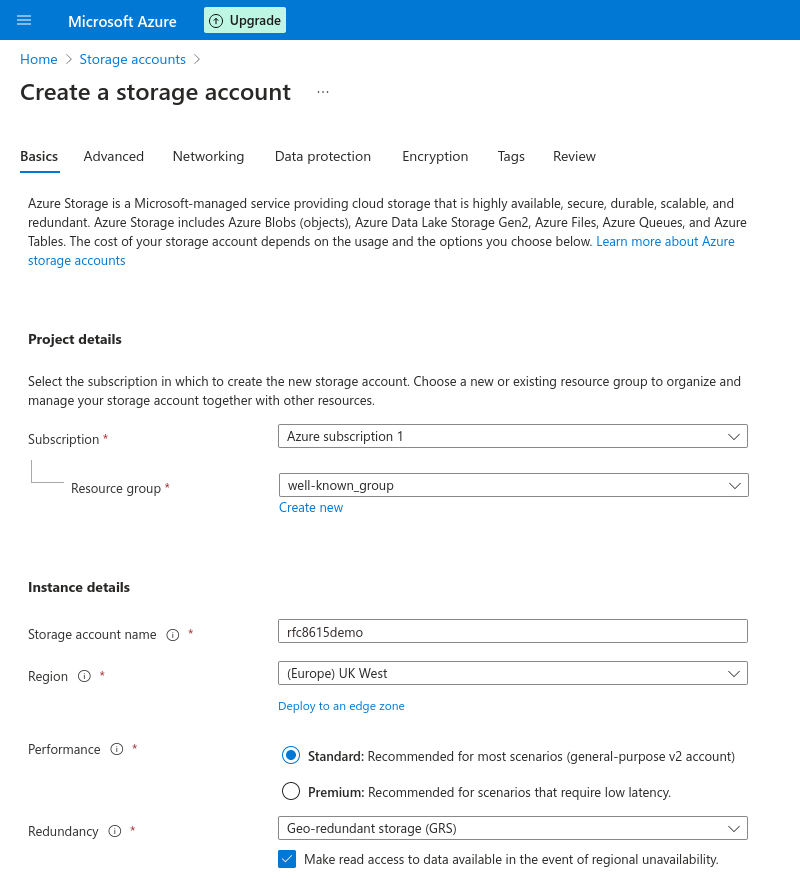
The name needs to be unique to Azure. yourdomainwellknown is an option that should work well in most scenarios.
Performarce can be left to Standard.
Redundancy should be set to Geo-redundant storage (GRS) as the .well-known URI will be a core part of your EMS deployment.
You can leave all other options to their default or change them to fit your specific deployment scenario.
Finally, click create.
Static website
Once the Storage account is created, you will need to create a Static website in this Storage account.
In the Storage account overview, choose "Static website", in the Data management section.
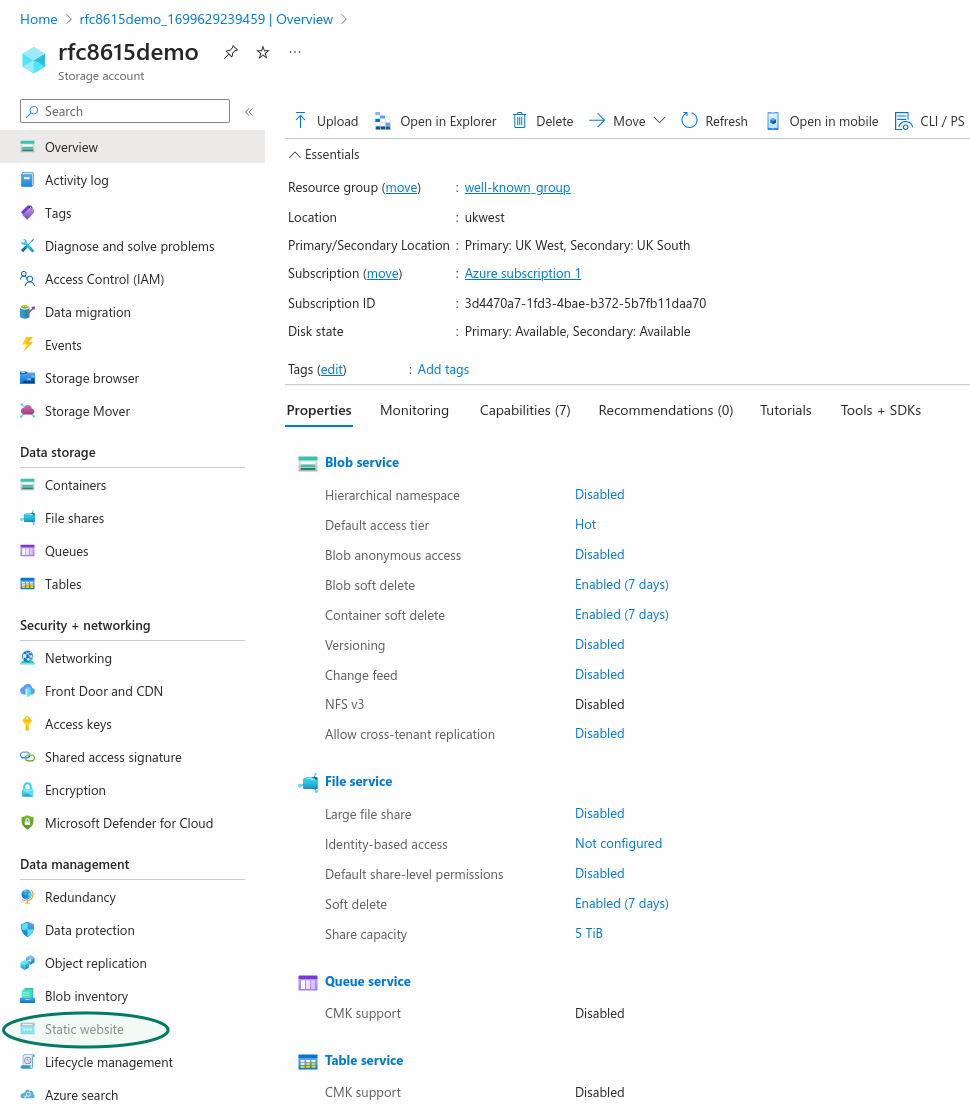
You do not need to provide a specific Index document name or Error document path.
Enabling the Static website in your Storage account will automatically create a $web storage container to which you can upload the json text files which will be served at the .well-known URI.
Go to "Containers", in the "Data storage" section, to upload the client and server files you prepered earlier.
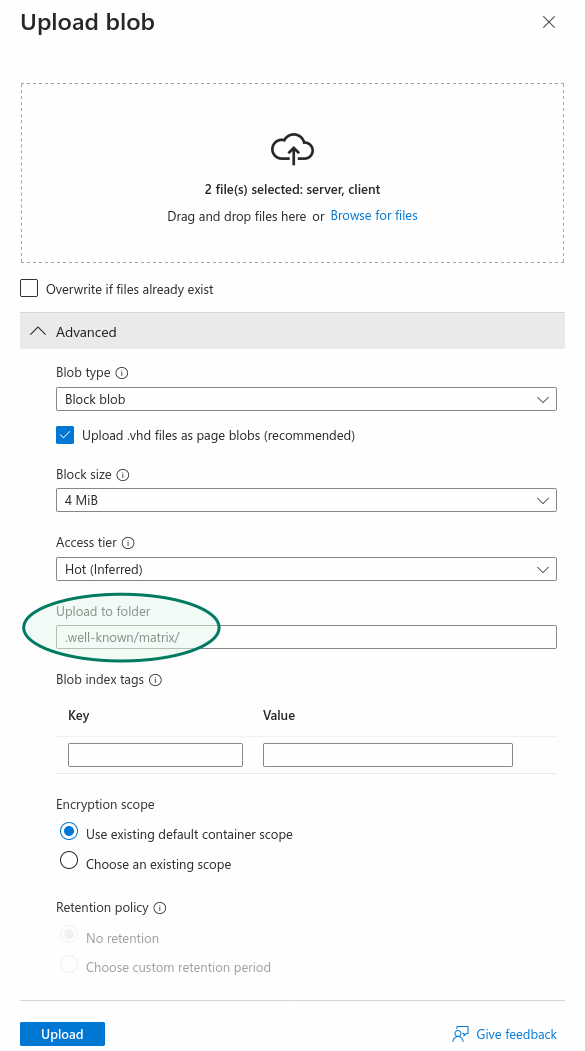
Click on the $web container, then chose "Upload", which will open a panel on the right.
When uploading the client and server files, make sure to open the "advanced" part of the upload panel and choose to upload to a specific folder: .well-known/matrix/
Create a CDN, CNAME DNS entry for your custom domain and Custom domain name for the CDN endpoint
Creating a CDN is needed because Azure does not allow serving HTTPS over a custom domain using only a Storage account Static website. To do so, a CDN is necessary.
Create a CDN endpoint
Go back to your Storage account's main view and choose "Front Door and CDN" in the Security + Networking section, to create a CDN endpoint.
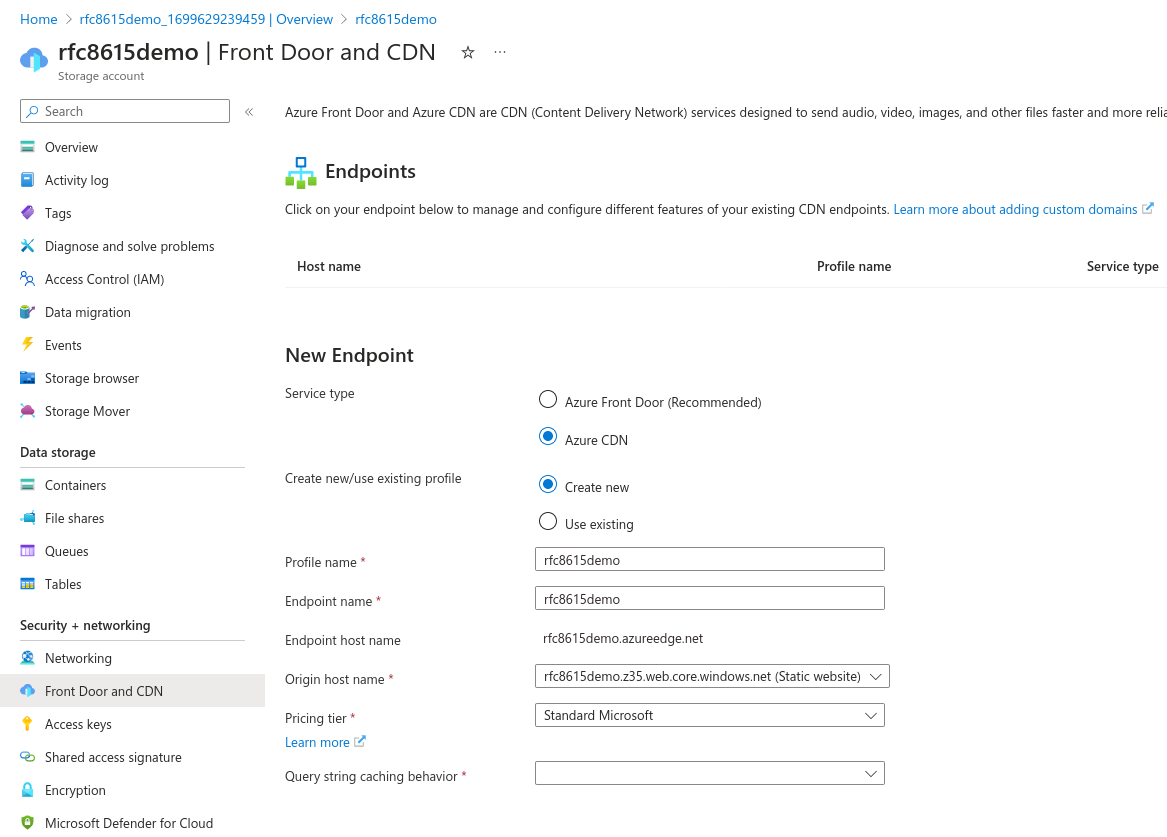
Service type: Azure CDN is sufficient, the more advanced features of Azure Front Door are not necessary here.
If you need to create a new profile, you may call the Profile name and Endpoint name as you wish.
For consistency, it is suggested to call them yourdomainwellknown as previously.
For Origin host name, pick your Static website.
For Query string caching behaviour, pick Ignore Query String, although this setting is not important in our context.
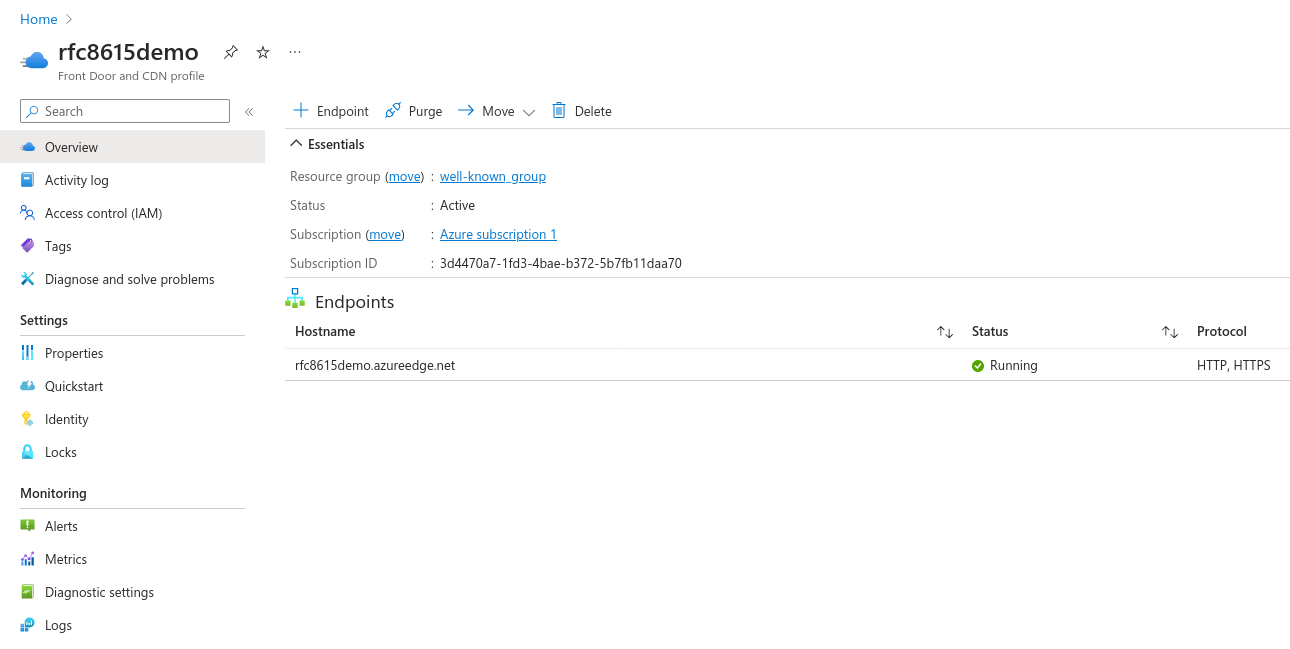
Once your endpoint is deployed, go to the resource, then go to your endpoint's further settings by clicking on it. Make note of its hostname (rfc8615demo.azureedge.net in our example) as you will need it shortly.
Create CNAME DNS entry for your custom domain
You will now create a DNS entry for your custom domain, a CNAME pointing to your Azure CDN endpoint's hostname. How to do so exactly will depend on who hosts your DNS servers. The specifics of this are beyond this documentation, but the following general information should be sufficient.
In your DNS provider's admin panel, add a DNS entry with the following details:
- Type:
CNAME - Domain: your custom domain, such as
yourdomain.com - Target: your Azure CDN Endpoint's hostname, such as
rfc8615demo.azureedge.netin our example
Once created, this DNS entry may take some time to propagate, but in most cases will be picked up quickly by Azure, as needed in the next step.
Associate your custom domain with your CDN Endpoint
In the endpoint's settings, choose "+ custom domain" to start adding your custom domain. A panel will open on the right.
Enter your custom domain: yourdomain.com and finally, click add.
If the CNAME entry can be seen by Azure, after a few minutes your custom domain should be associated with your CDN Endpoint.
Final result
https://yourdomain.com/.well-known/matrix/client and https://yourdomain.com/.well-known/matrix/server are now served over HTTPS by Azure.
You should now have the following resources in your Azure account:
- Storage account
- Front Door and CDN Profile
- Endpoint
Resources
- https://learn.microsoft.com/en-us/azure/cdn/cdn-create-a-storage-account-with-cdn
- https://learn.microsoft.com/en-us/azure/cdn/cdn-storage-custom-domain-https
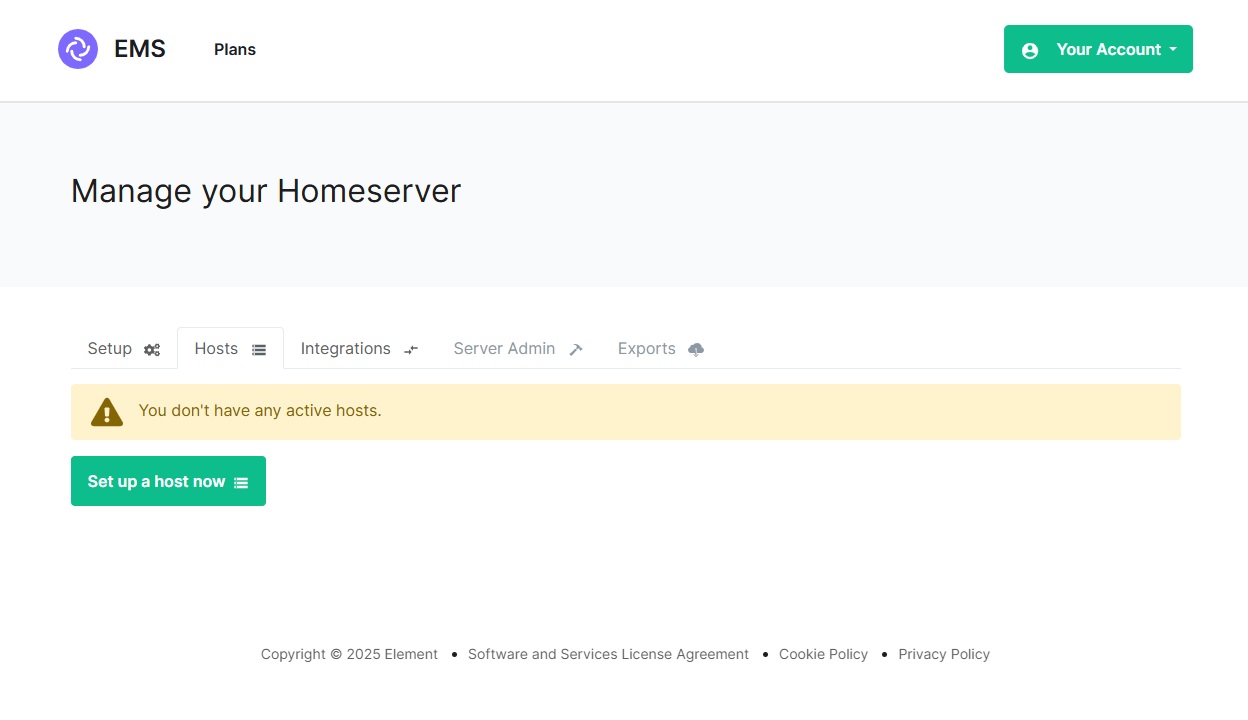
How to Get an EMS Server
-
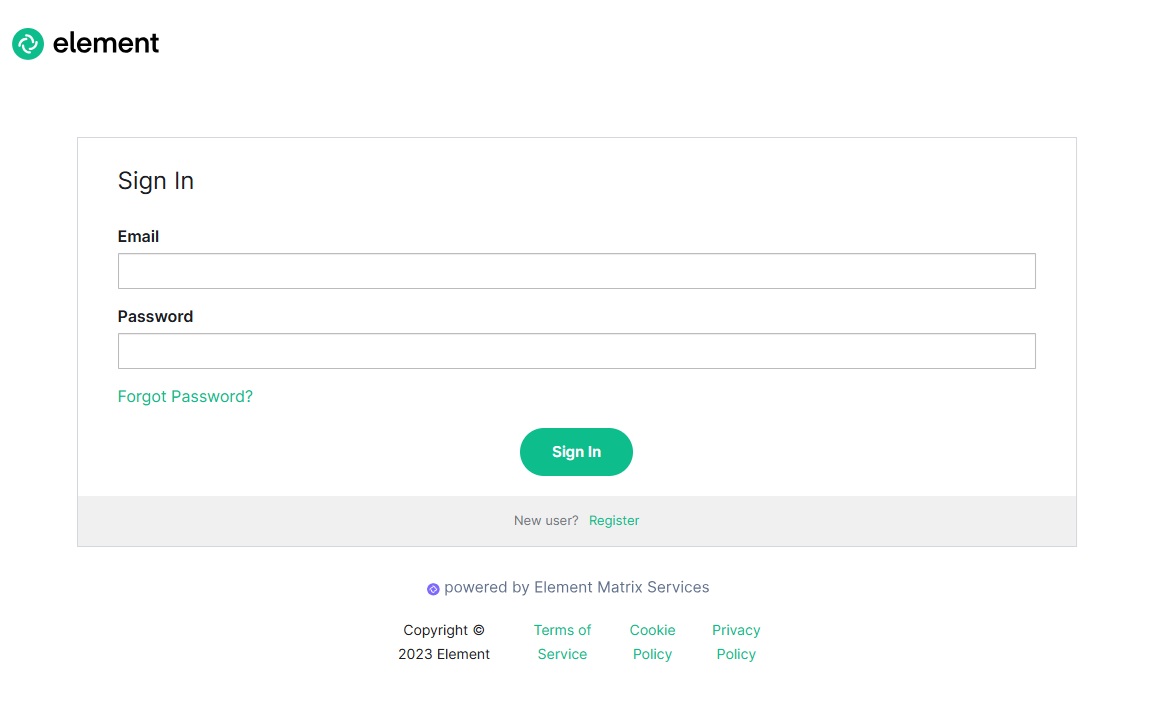
Go to https://ems.element.io/user/hosting#/hosts and click the “Register” link below the sign-in button.

-
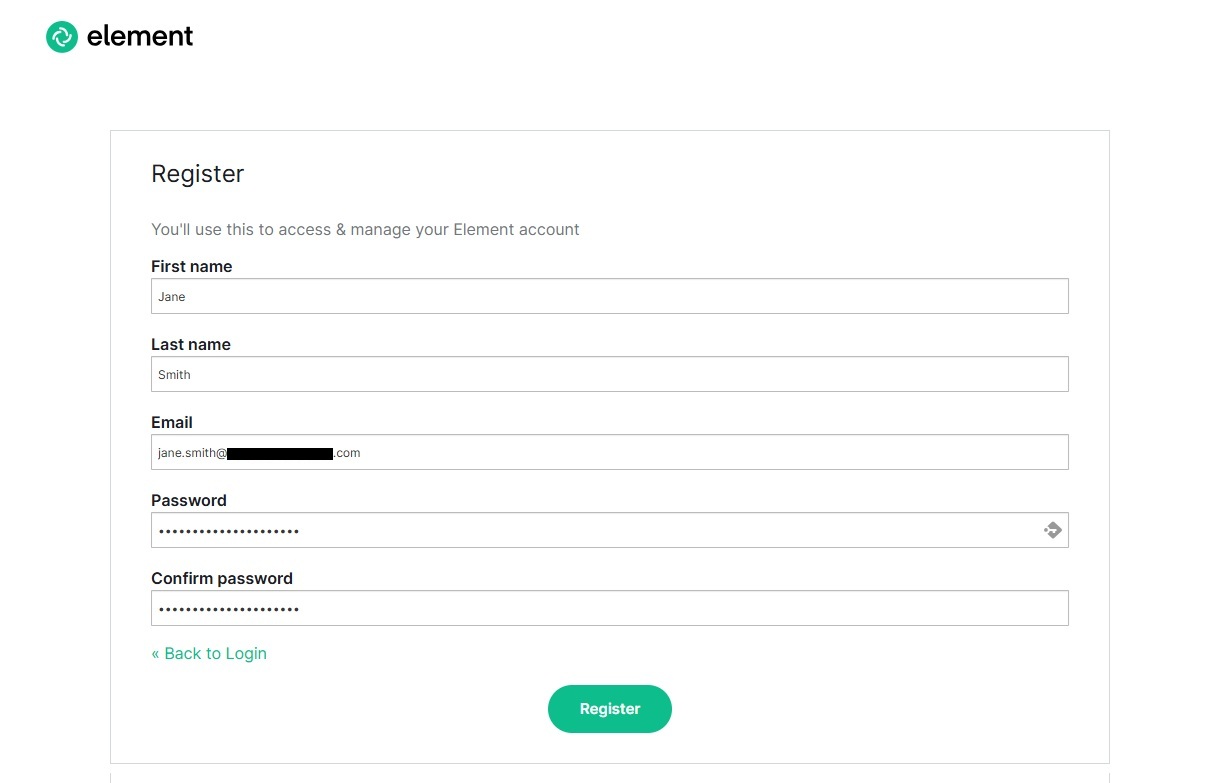
Fill in your details and click the Register button. Note: Your password must be at least 12 characters long.

-
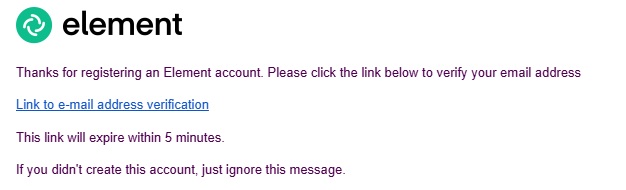
Look in your inbox for your verification email. (If it doesn’t appear after a couple of minutes - check your spam!) Click the link in the email to verify your email address.

-
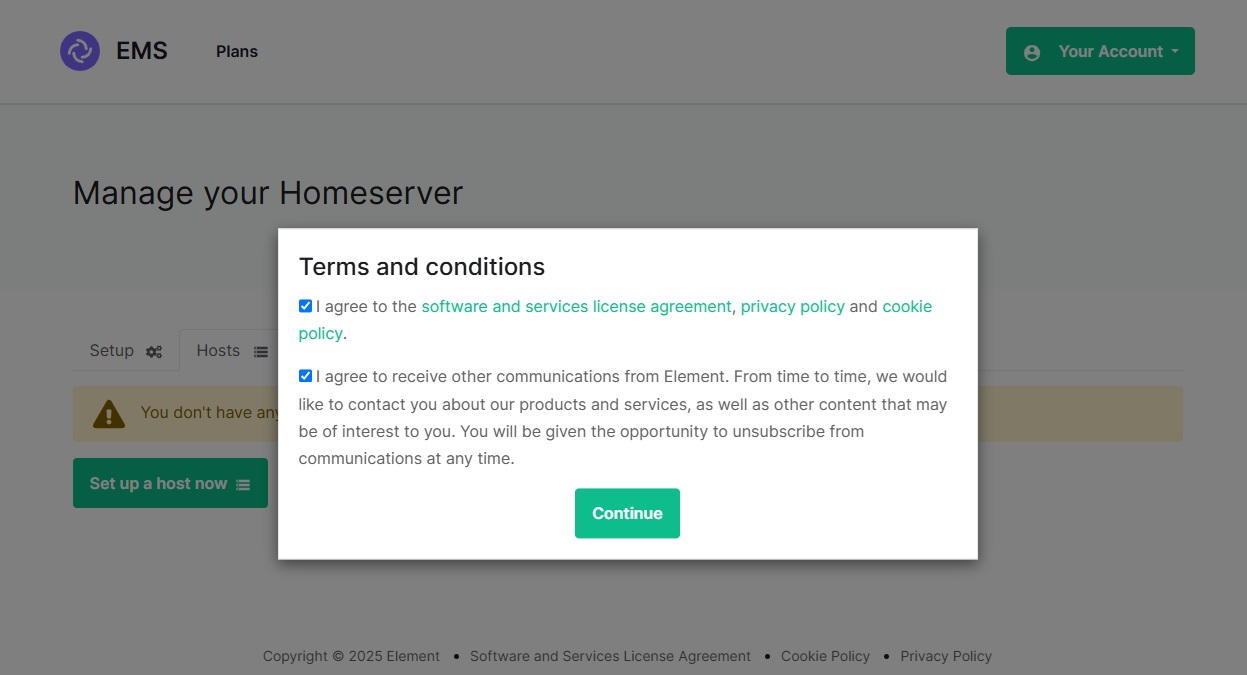
You will be automatically redirected to the EMS Hosting site. Before proceeding any further, agree to our terms and conditions.

-
Click “Set up a host now” to start setting up your first EMS server

-
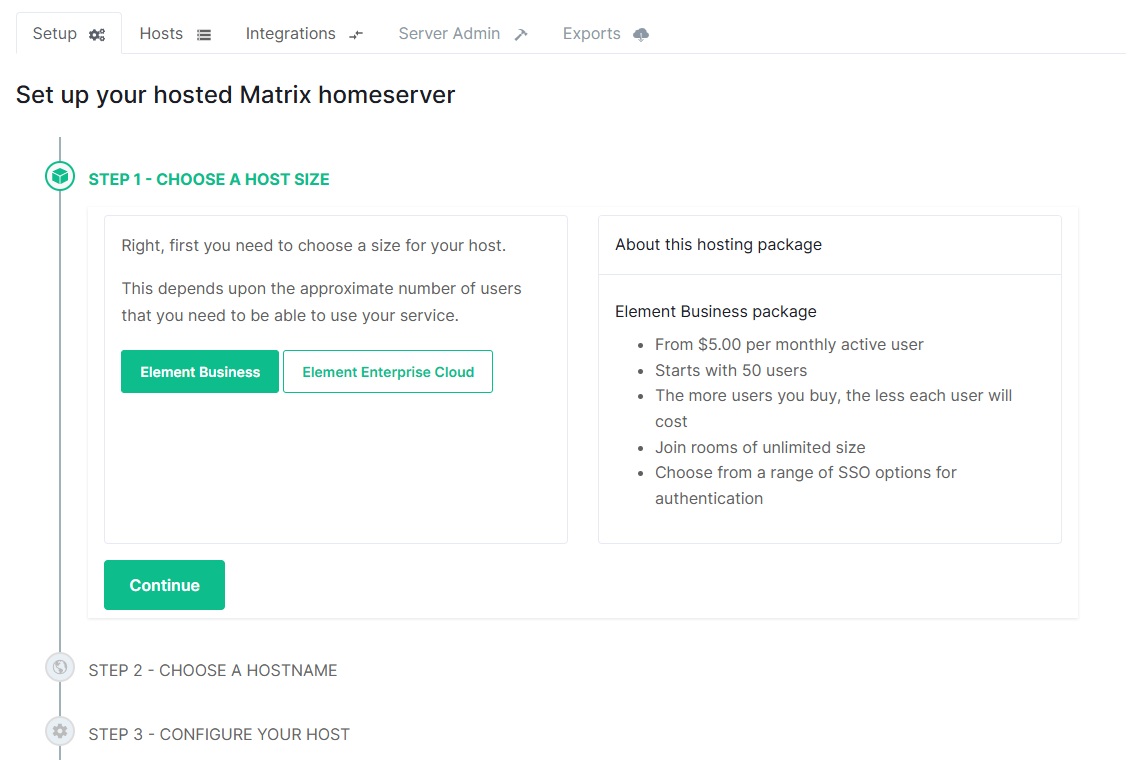
Choose your host size and click Continue.

-
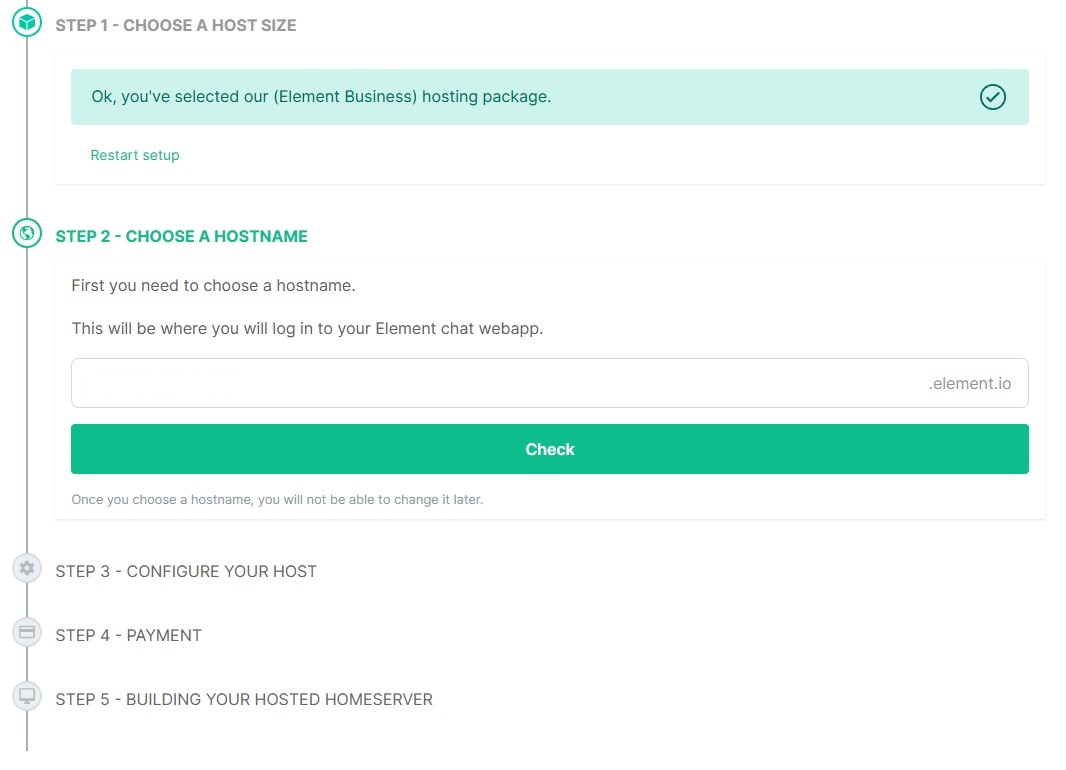
Choose a hostname and click “Check” to check availability.

-
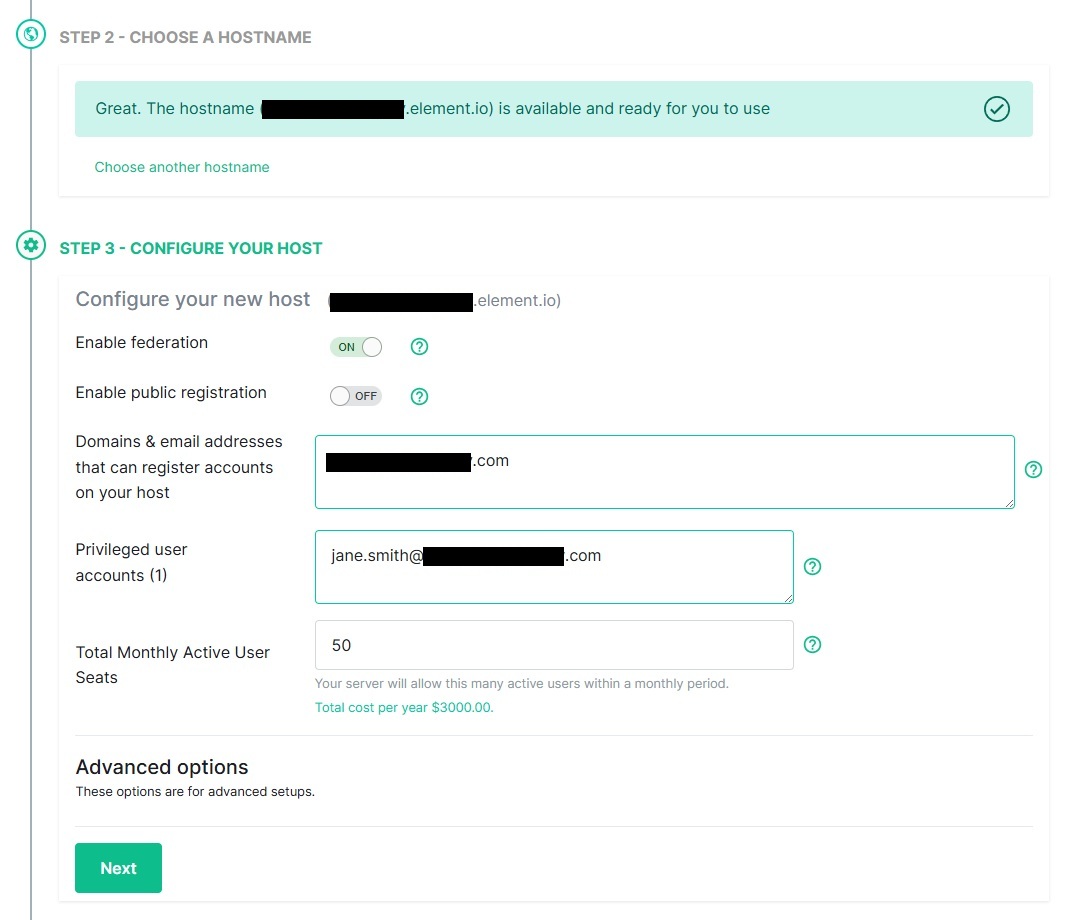
Configure your new host.

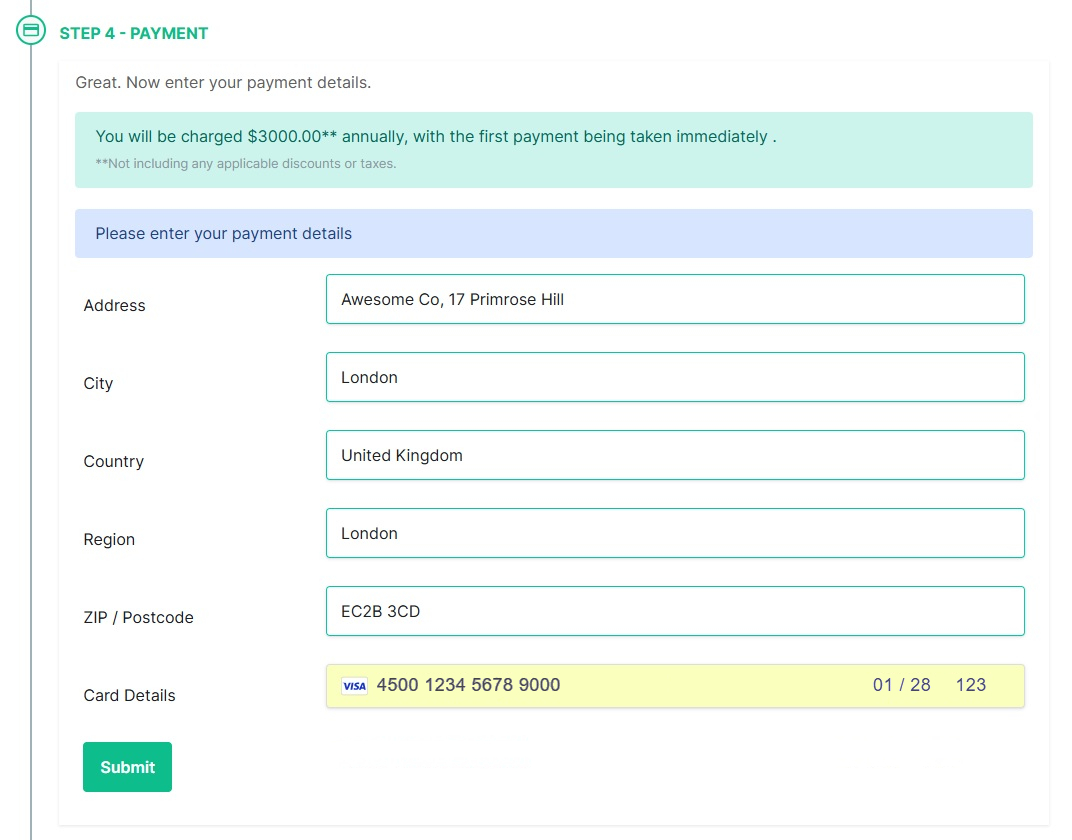
-
Set up your payment card.

-
Check your payment information and click Purchase to build the host.

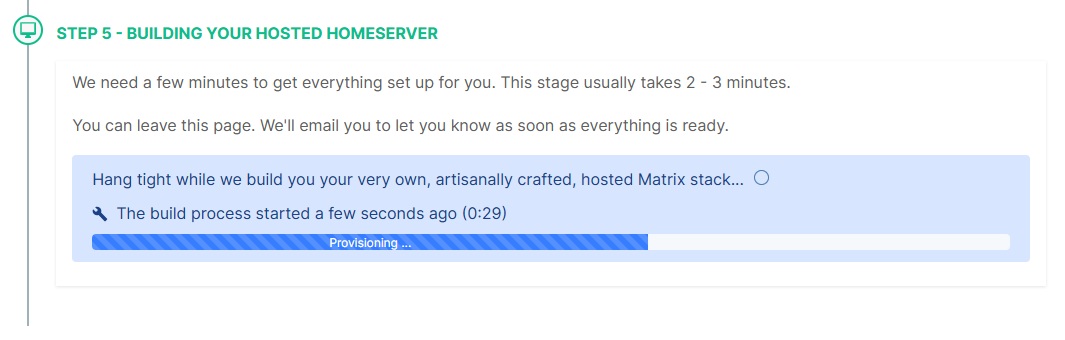
-
Sit tight for a few minutes while your server is being built

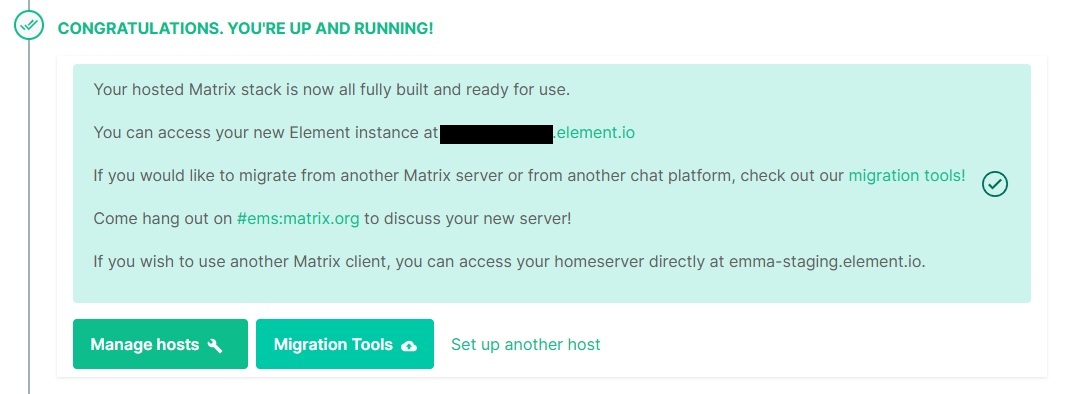
-
Once your host is ready, click Manage hosts to configure additional settings and add users.


Migrate From EMS to Self-Hosted
For support on Synapse or matrix-media-repo, ask in the Matrix rooms #synapse:matrix.org and #mediarepo:t2bot.io. For support on bridges, see the bridge documentation for each bridge's support channel.
See also this excellent blog post by Robin Riley at The Matrix.org Foundation.
Important
- It is impossible to change the domain of any Matrix server. Therefore if your EMS server is not using Custom DNS (i.e. your Matrix IDs are
@someone:hostname.ems.host), unfortunately it is not possible to import your export to your own or another environment.- You can run an export with this domain in a local environment if you set up your own DNS and self-signed certificates. But you will not be able to federate with the public Matrix federation.
- Do not cancel your EMS server until you have downloaded your export and verified its content. Canceling your server will erase your data.
- You will experience some downtime as your server will be stopped while the export is running. The EMS export tool will estimate the actual downtime when initiated.
- Ensure all your users have key backup configured and working before starting the export and migration. All clients need to log out and in again after the migration. See the Cross Signing section for more information about key backup.
- It is impossible to read encrypted messages or media from the export. Encrypted data in Matrix can only be decrypted by the user in their client when they have the required decryption keys.
Export data
- Go to https://ems.element.io/user/hosting#/exports
- Select the server you want to export from in the drop-down box, then click
Create export - Wait for the export of your config, database, and media to complete
- Once all exports have completed, download all files provided
Import process
For all components, you must install the same version as your EMS server is running. Version information is provided in the hostname-config.md file. If a newer version is available, once the import is completed and verified, follow the official upgrade documentation for each component to upgrade.
All required configuration values are provided in the hostname-config.md file.
- Following official documentation, install and configure
- PostgreSQL. Refer to the Synapse PostgreSQL documentation for database setup
- Synapse
- Optional (see media step below): matrix-media-repo
- When generating your Synapse configuration file, you MUST use the same domain as your EMS server
- Do not start Synapse yet
- In the Synapse config file (usually
homeserver.yaml), set:- pepper. If you do not do this, you have to reset all passwords
- Signing key. This is stored in a file. See this config file option for path. Alternatively, add the public key for your EMS hosted server to
old_signing_keys. If your EMS server is still running, you can find your public signing key at https://yourHostname.ems.host/_matrix/key/v2/server - macaroon_secret_key
- Import the Synapse database
- Create a new database per the Synapse PostgreSQL documentation
- Or, if your Synapse database is not empty, empty it
WARNING - THIS WILL IMMEDIATELY AND IRRECOVERABLY DELETE DATA, PLEASE TAKE CARE. WE ACCEPT NO RESPONSIBILITY IF YOU DELETE THE WRONG DATABASE OR DATA
Connect to the database withpsql, then run the following queries:
Enter the commandDO $$ DECLARE r RECORD; BEGIN FOR r IN (SELECT tablename FROM pg_tables WHERE schemaname = current_schema()) LOOP EXECUTE 'DROP TABLE ' || quote_ident(r.tablename) || ' CASCADE'; END LOOP; END $$; DROP sequence cache_invalidation_stream_seq; DROP sequence state_group_id_seq; DROP sequence user_id_seq; DROP sequence account_data_sequence; DROP sequence application_services_txn_id_seq; DROP sequence device_inbox_sequence; DROP sequence device_lists_sequence; DROP sequence e2e_cross_signing_keys_sequence; DROP sequence event_auth_chain_id; DROP sequence events_backfill_stream_seq; DROP sequence events_stream_seq; DROP sequence presence_stream_sequence; DROP sequence push_rules_stream_sequence; DROP sequence pushers_sequence; DROP sequence receipts_sequence; DROP sequence un_partial_stated_event_stream_sequence; DROP sequence un_partial_stated_room_stream_sequence;\dand make sure no tables or sequences remain.
Disconnect from the database - Extract the database dump
unzip emsHostname-synapse-database.zip - Import the database dump
pg_restore \ --username USERNAME \ --host HOSTNAME \ --dbname DATABASE_NAME \ --no-owner \ /path/to/id-emsHostname-synapse-database.dir/ - Verify that sequence was set correctly. Connect to the database and run the query
SELECT * FROM state_group_id_seq;last_valueshould be greater than 1
- Import media into matrix-media-repo according to documentation here or import media into Synapses built-in media repository using the
import_to_synapseexecutable available from the latest matrix-media-repo release - Start Synapse and ensure everything is working as expected
- Optionally, install Element Web or use another Matrix client
-
If you have any bridges, please see the documentation for each bridge
Discord | Hookshot | IRC | Signal | Slack | Telegram | Whatsapp- The process for importing the bridge databases is the same as with Synapse
- Cancel your EMS server. See this FAQ document for instructions. Note, this cannot be undone and all your data will be lost. Ensure your imported server is working as expected before doing this
Migrate From Self-Hosted to EMS
Notes
Before starting with this guide, please contact EMS support from https://ems.element.io/support or by emailing ems-support@element.io
- Except where specified, you should be able to just copy-paste each command in succession.
- Please do not change any file names anywhere.
Preparation
This section outlines what you should do ahead of the migration in order to ensure the migration goes as quickly as possible and without issues.
- At the latest 48 hours before your migration is scheduled, set the TTL on any DNS records that need to be updated to the lowest allowed value.
- Upgrade your Synapse to the same version as EMS is running. Generally this will be the latest stable release. https://element.ems.host/_matrix/federation/v1/version is a good indicator, but confirm version with your EMS contact.
- This is not required, but if your Synapse version is not the same as the EMS version, your migration will take longer.
- Check the size of your database and report to your EMS contact:
- PostgreSQL: Connect to your database and issue the command
\l+ - SQLite:
ls -lah /path/to/homeserver.db
- PostgreSQL: Connect to your database and issue the command
- Check the size of your media repository and report to your EMS contact.
- Synapse Media Store:
du -hs /path/to/synapse/media_store/ - Matrix Media Repo: https://github.com/turt2live/matrix-media-repo/blob/master/docs/admin.md#per-server-usage
- Synapse Media Store:
- If you are using SQLite instead of PostgreSQL, you should port your database to PostgreSQL by following this guide before dumping your database and sending to your EMS contact.
- This step is not required, but will speed up your migration.
SSH to your matrix server
You might want to run everything in a tmux or a screen session to avoid disruption in case of a lost SSH connection.
Generate password for gpg encryption
pwgen -s 64 1
Alternatively, you can use our GPG key. element-support-public.pgp
GPG
If gpg is being uncooperative, use the command gpgconf --kill gpg-agent.
Create a folder to store everything
mkdir -p /tmp/synapse_export
cd /tmp/synapse_export
The guide from here on assumes your current working directory is /tmp/synapse_export.
Set restrictive permissions on the folder
If you are working as root: (otherwise set restrictive permissions as needed):
chmod 000 /tmp/synapse_export
Copy Synapse config
Copy the following files and send to EMS Support:
- Your Synapse configuration file (usually
homeserver.yaml) - Your message signing key.
- This is stored in a separate file. See the Synapse config file for the path. The variable is
signing_key_pathhttps://element-hq.github.io/synapse/latest/usage/configuration/config_documentation.html#signing_key_path
- This is stored in a separate file. See the Synapse config file for the path. The variable is
Stop Synapse
DO NOT START IT AGAIN AFTER THIS
Doing so can cause issues with federation and inconsistent data for your users.
While you wait for the database to export or files to transfer, you should edit or create the well-known files and DNS records to point to your EMS host. This can take a while to update so should be done as soon as possible in order to ensure your server will function properly when the migration is complete.
Database export
PostgreSQL
Dump, compress and encrypt
Replace:
-
<dbhost>(ip or fqdn for your database server) -
<dbusername>(username for your synapse database) -
<dbname>(the name of the database for synapse)
pg_dump -O -h <dbhost> -U <dbusername> -d <dbname> | gzip > customer_db_export.sql.gz
gpg --symmetric --no-symkey-cache customer_db_export.sql.gz
rm customer_db_export.sql.gz
If required, split into smaller files
Please only do this if you have a slow connection and are worried about transferring a single large file.
split -b 100m customer_db_export.sql.gz.gpg customer_db_export.sql.gz.gpg.part-
rm customer_db_export.sql.gz.gpg
SQLIte
Compress and encrypt
tar -zcvf homeserver.db.tar.gz /path/to/homeserver.db
gpg --symmetric --no-symkey-cache homeserver.db.tar.gz
rm homeserver.db.tar.gz
If required, split into smaller files
Please only do this if you have a slow connection and are worried about transferring a single large file.
split -b 100m homeserver.db.tar.gz homeserver.db.tar.gz.part-
rm homeserver.db.tar.gz
Media export
If you are using SQLIte as database
Skip ahead to and follow Backup media export.
Download the export tool
Download the latest version of export_synapse_for_import-linux-x64 (or export_synapse_for_import-win-x64.exe) from https://github.com/turt2live/matrix-media-repo/releases
wget https://github.com/turt2live/matrix-media-repo/releases/download/vx.x.x/export_synapse_for_import-linux-x64
chmod +x export_synapse_for_import-linux-x64
Run the export
Replace:
-
<dbhost>(ip or fqdn for your database server) -
<dbname>(the name of the database for synapse) -
<dbusername>(username for your synapse database) -
/path/to/synapse/media_store(the path to where synapse stores your media) -
<yourdomain.tld>(the domain for your server. this is the part that is in your usernames)
./export_synapse_for_import-linux-x64 -h
./export_synapse_for_import-linux-x64 -dbHost <dbhost> -dbPort 5432 -dbName <dbname> -dbUsername <dbusername> -mediaDirectory /path/to/synapse/media_store -serverName <yourdomain.tld> -destination ./customer_media_export
mv logs customer_media_export
mv media-repo.yaml customer_media_export
rm export_synapse_for_import-linux-x64
Compress and encrypt
tar -zcvf customer_media_export.tar.gz customer_media_export
gpg --symmetric --no-symkey-cache customer_media_export.tar.gz
rm customer_media_export.tar.gz
rm -r customer_media_export
If required, split into smaller files
Please only do this if you have a slow connection and are worried about transferring a single large file.
split -b 100m customer_media_export.tar.gz.gpg customer_media_export.tar.gz.gpg.part-
rm customer_media_export.tar.gz.gpg
Backup media export
Compress and encrypt
Replace * /path/to/synapse/media_store (the path to where synapse stores your media)
tar -zcvf customer_backup_media_export.tar.gz /path/to/synapse/media_store
gpg --symmetric --no-symkey-cache customer_backup_media_export.tar.gz
rm customer_backup_media_export.tar.gz
If required, split into smaller files
Please only do this if you have a slow connection and are worried about transferring a single large file.
split -b 100m customer_backup_media_export.tar.gz.gpg customer_backup_media_export.tar.gz.gpg.part-
rm customer_backup_media_export.tar.gz.gpg
Transfer
Download the files, then upload to the Google Drive folder shared by EMS or a location as agreed with your EMS contact.
On your local computer:
scp -r -P 1234 -i ~/.ssh/matrix-server youruser@1.2.3.4:/tmp/synapse_export /some/local/folder
Cleanup
We strongly recommend that you leave the export and Synapse untouched until the import is finished and everything is verified working.
Note on users and Element
Element does have support for changing the delegated homeserver URL. All your users will have to sign out and sign in again to Element. You should ensure everyone has Key Backup configured and working.
Your users will not be able to decrypt messages send in their encrypted rooms while your server is offline for the migration.
Force logout of old sessions after migration
If you do not log out all sessions for your users before the migration, you can force this later. Below is a sample config file for nginx that tells all clients trying to connect to it to sign out.
Note that the headers are important, otherwise this will not work one one or more of the Element clients. Valid HTTPS is required.
This is not tested on any other Matrix clients, but it should work in theory if the client follows the Matrix Spec.
server {
listen [::]:443 ssl http2;
listen 443 ssl http2;
server_name old.delegated.url.com;
location / {
if ($request_method = 'OPTIONS') {
add_header 'Access-Control-Allow-Origin' '*';
add_header 'Access-Control-Allow-Methods' 'GET, POST, OPTIONS';
add_header 'Access-Control-Allow-Headers' 'authorization,DNT,User-Agent,X-Requested-With,If-Modified-Since,Cache-Control,Content-Type,Range';
add_header 'Access-Control-Max-Age' 1728000;
add_header 'Content-Type' 'text/plain; charset=utf-8';
add_header 'Content-Length' 0;
return 204;
}
if ($request_method = 'POST') {
add_header 'Access-Control-Allow-Origin' '*' always;
add_header 'Access-Control-Allow-Methods' 'GET, POST, OPTIONS' always;
add_header 'Access-Control-Allow-Headers' 'authorization,DNT,User-Agent,X-Requested-With,If-Modified-Since,Cache-Control,Content-Type,Range' always;
add_header 'Access-Control-Expose-Headers' 'Content-Length,Content-Range' always;
}
if ($request_method = 'GET') {
add_header 'Access-Control-Allow-Origin' '*' always;
add_header 'Access-Control-Allow-Methods' 'GET, POST, OPTIONS' always;
add_header 'Access-Control-Allow-Headers' 'authorization,DNT,User-Agent,X-Requested-With,If-Modified-Since,Cache-Control,Content-Type,Range' always;
add_header 'Access-Control-Expose-Headers' 'Content-Length,Content-Range' always;
}
default_type application/json;
return 401 '{"errcode":"M_UNKNOWN_TOKEN","error":"Server moved, please log in again."}';
}
ssl_session_timeout 1d;
ssl_session_cache shared:MozSSL:10m; # about 40000 sessions
ssl_session_tickets off;
ssl_protocols TLSv1.3;
ssl_prefer_server_ciphers on;
add_header Strict-Transport-Security "max-age=63072000" always;
ssl_stapling on;
ssl_stapling_verify on;
error_log /var/log/nginx/old.delegated.url.com.error.log;
access_log /var/log/nginx/old.delegated.url.com.access.log;
ssl_certificate /etc/letsencrypt/live/old.delegated.url.com/fullchain.pem;
ssl_certificate_key /etc/letsencrypt/live/old.delegated.url.com/privkey.pem;
}
# Redirect HTTP to HTTPS
server {
listen 80;
listen [::]:80;
server_name old.delegated.url.com;
if ($host = old.delegated.url.com) {
return 301 https://$host$request_uri;
}
return 404;
}
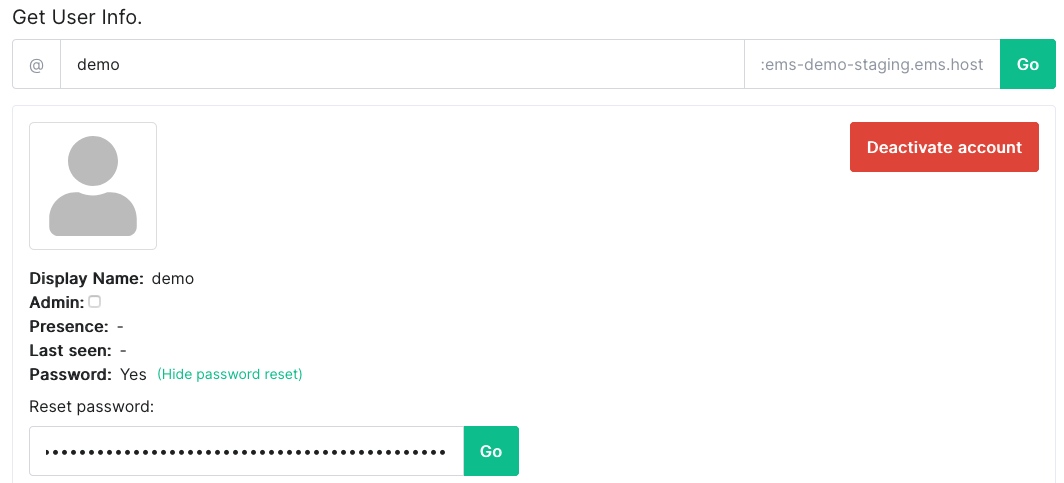
Reset User Password
Resetting an account password will log out all sessions. Before doing this, make sure that
- all sessions are connected to key backup,
- all sessions have backed up all their keys. See Check Status, and
- the correct key backup passphrase is available.
-
Click
Your AccountandManage Serversor click this link https://ems.element.io/user/hosting. -
Click
Server Admin, select your host, thenUsers -
Click the user you want to manage

-
Click
Reset password, enter a new password and clickGo

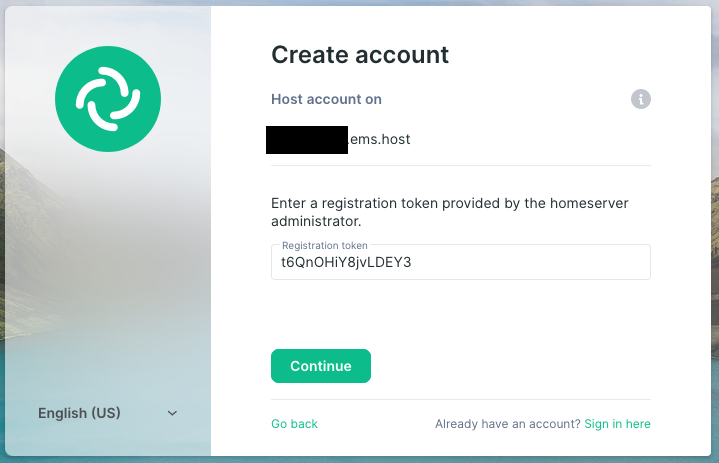
Token based registration
Create a new registration token using the Synapse Admin API. Give this to your users.
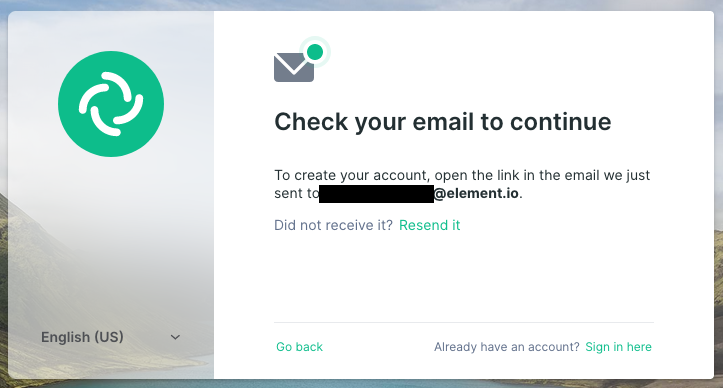
The registration flow looks like this:
-
Enter username, password and email as normal. Click
Register

-
Enter the registration token and click
Continue

-
Continue registration like normal


Adding a Trust & Safety Contact
- Click
Your AccountandManage Serversor click this link https://ems.element.io/user/hosting. - Click the Hosts tab.
- Add an email address to the
Trust and Safety contactfield and clickSaveat the bottom.
This contact should be a user with access to respond to content takedown notices and other trust & safety concerns (such as deactivating users).