Cross Signing
- Check Status
- Export and Import E2E Room Keys
- Reset Cross Signing
- Set up Cross Signing
- Verify new Login
Check Status
-
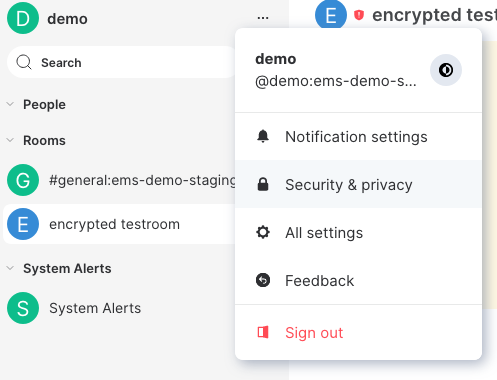
Go to Element
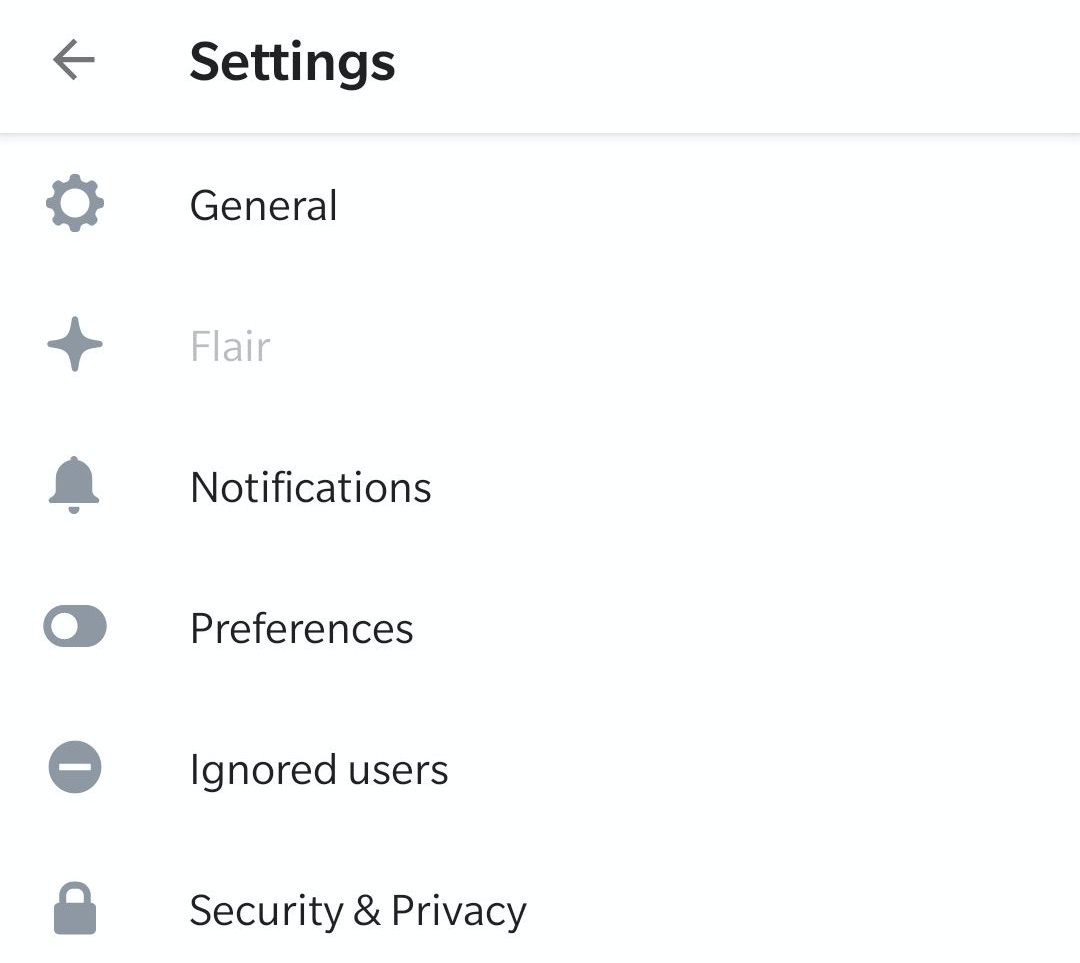
Security & Privacysettings

-
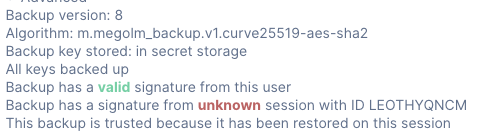
Expand the
Advancedsection

-
Look for
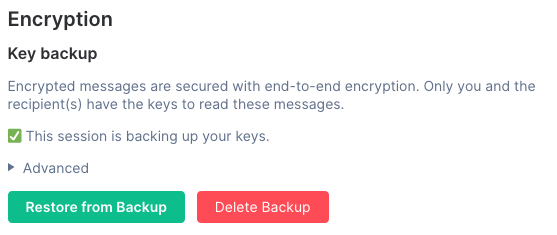
All keys backed up

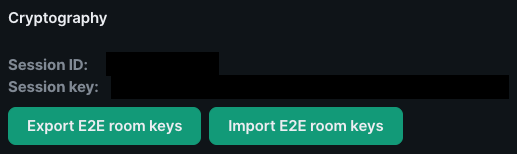
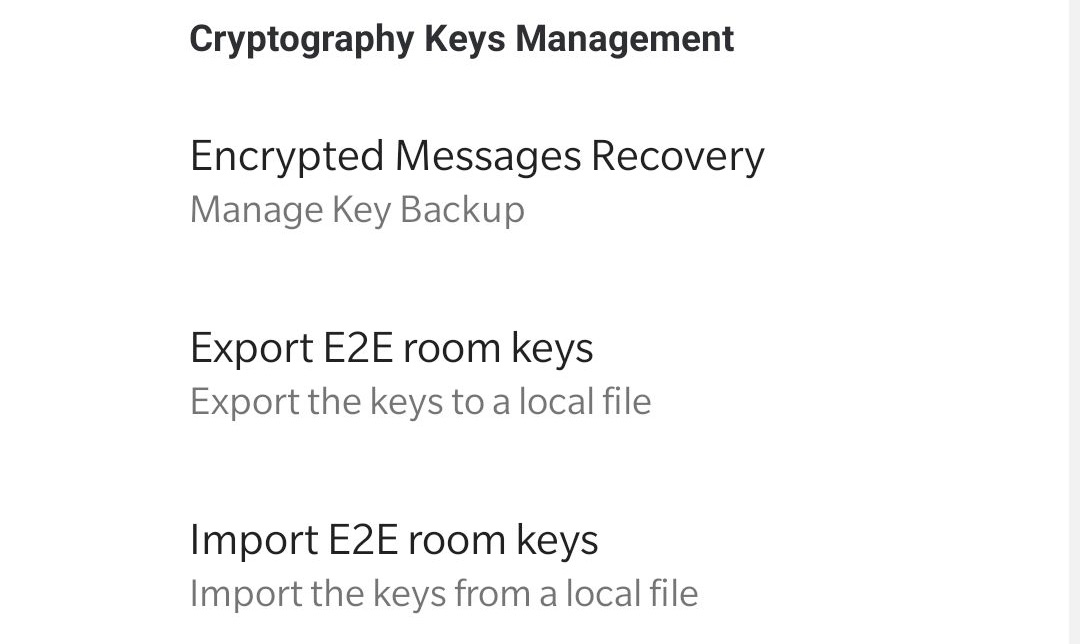
Export and Import E2E Room Keys
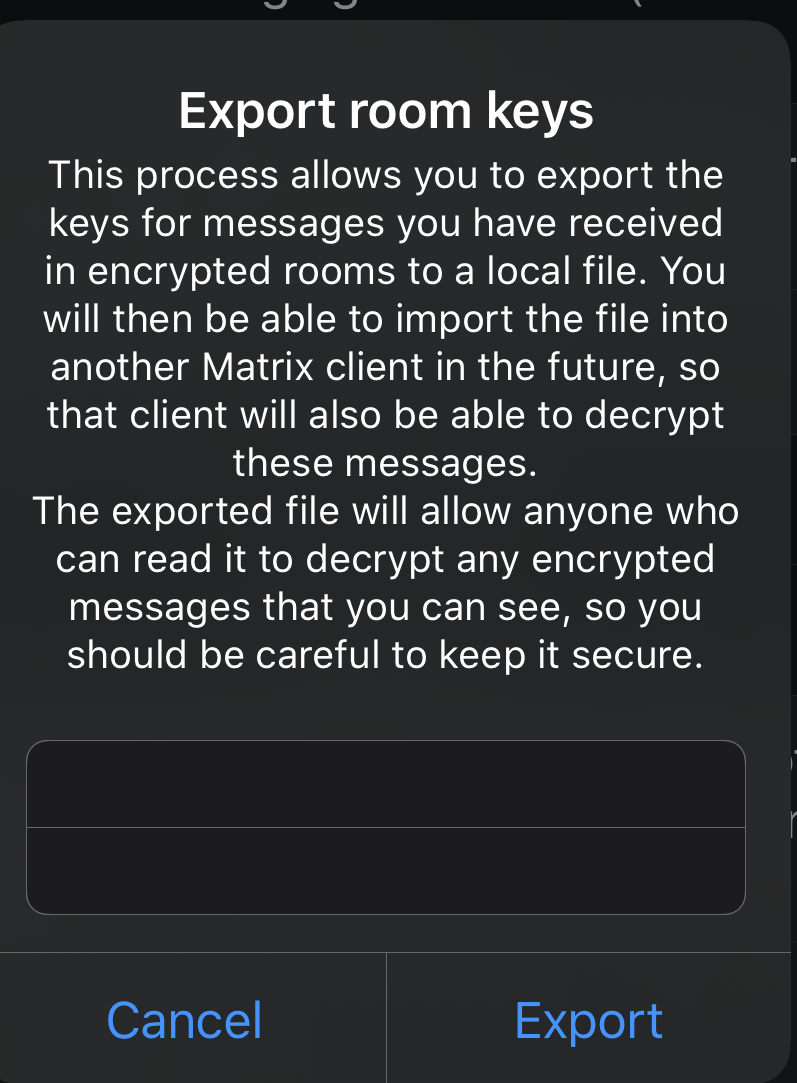
Element Web and Desktop
Export
-
Go to Element
Security & Privacysettings
-
Click
Export E2E room keys

-
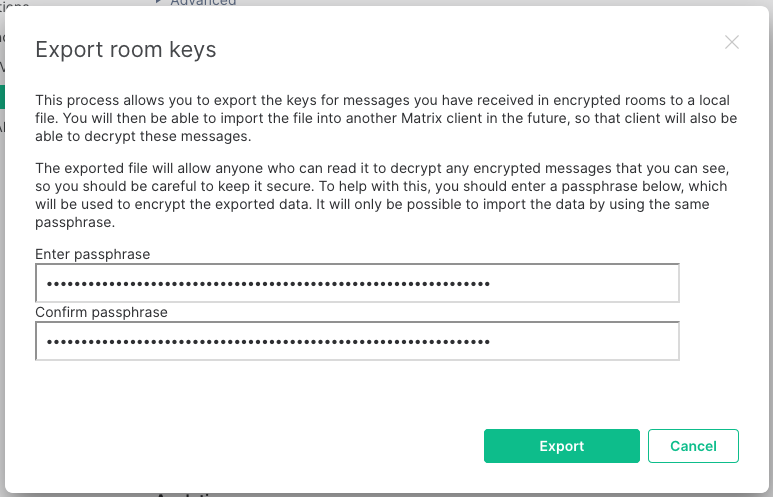
Enter a secure passphrase and click
Export

-
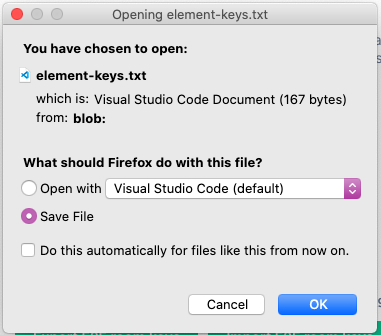
Choose to save the file

-
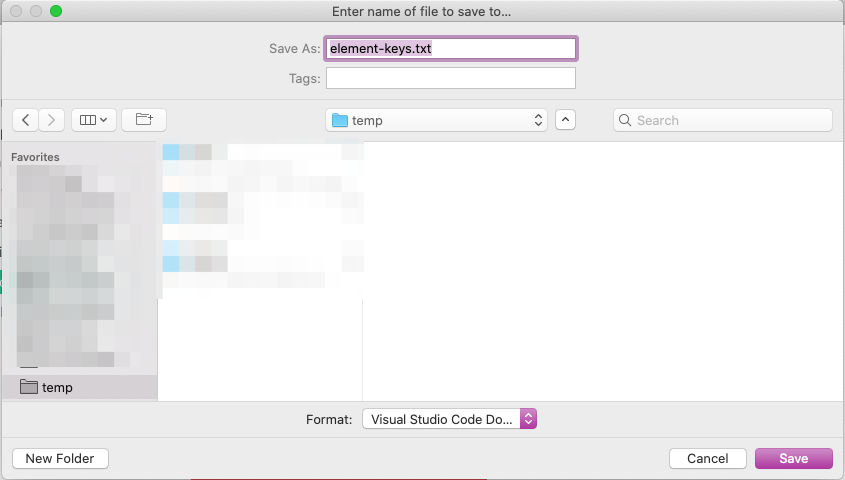
Select a directory on your computer

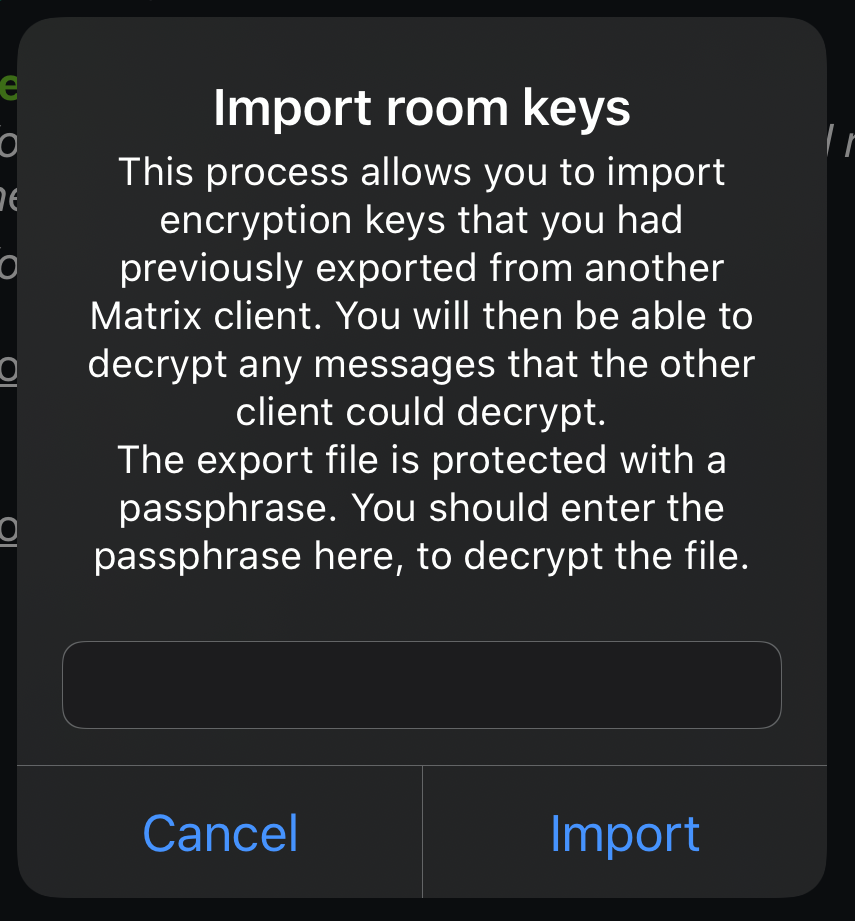
Import
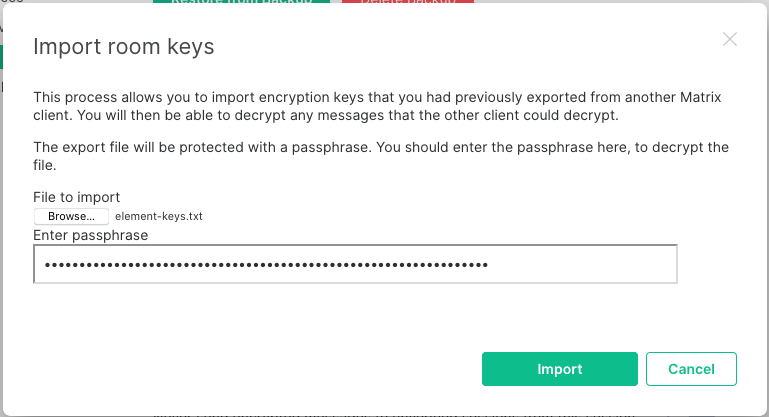
-
Go to Element
Security & Privacysettings
-
Click
Import E2E room keys
-
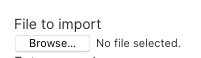
Click
Browse

-
Select your export

-
Enter your passphrase and click
Import


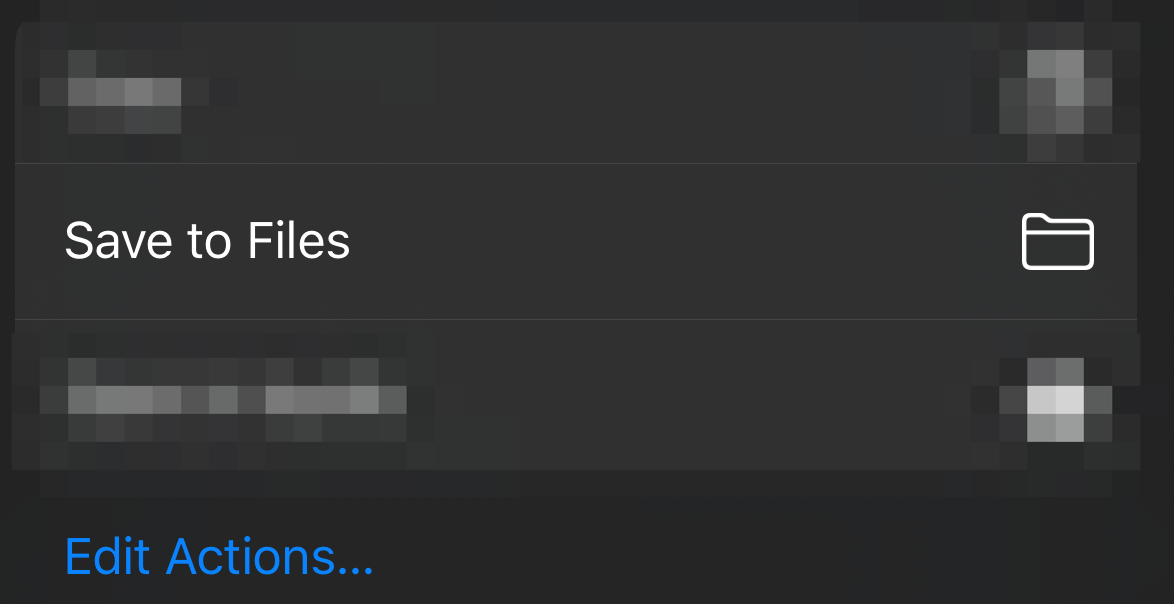
Element iOS
Export
-
Tap the cog in the top left of Element
-
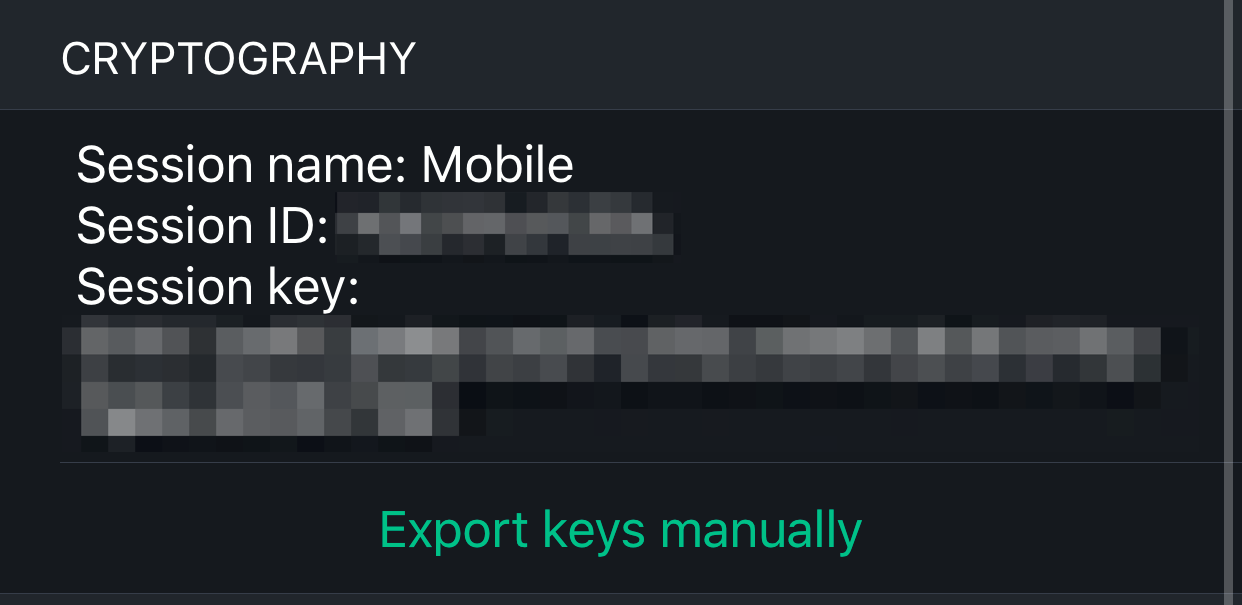
Tap
Security

-
Tap
Export keys manually

-
Enter a secure passphrase and tap
Export

-
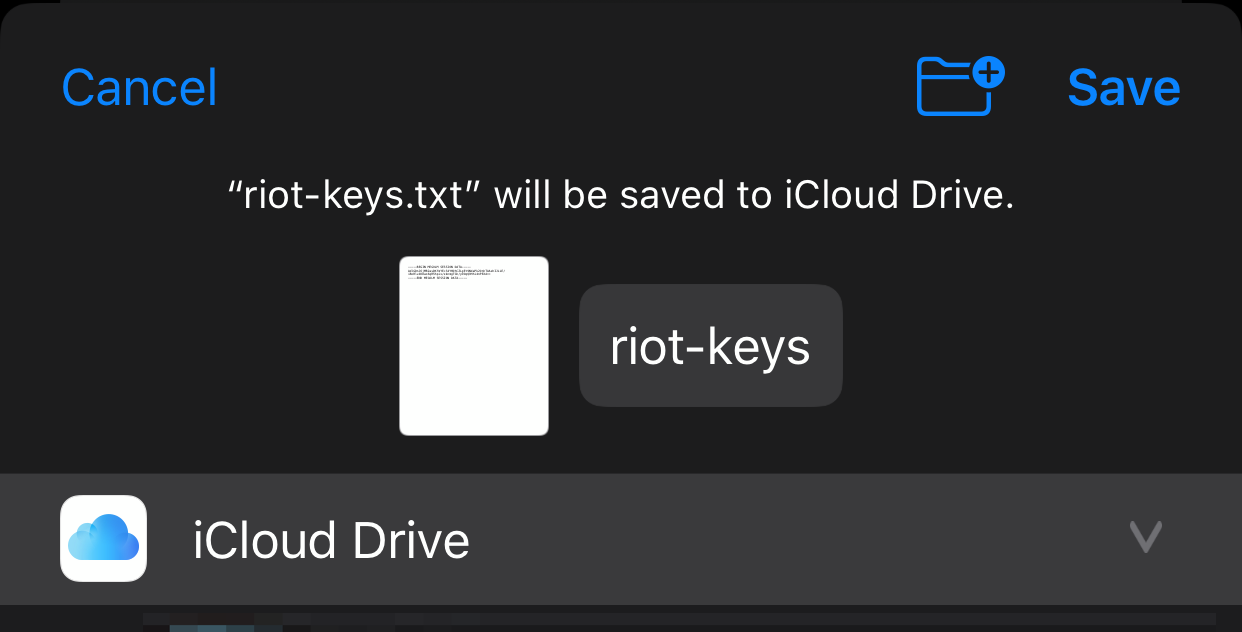
Choose
Save to Files

-
Choose a location then tap
Save

Import
This is a temporary solution until this issue is resolved
-
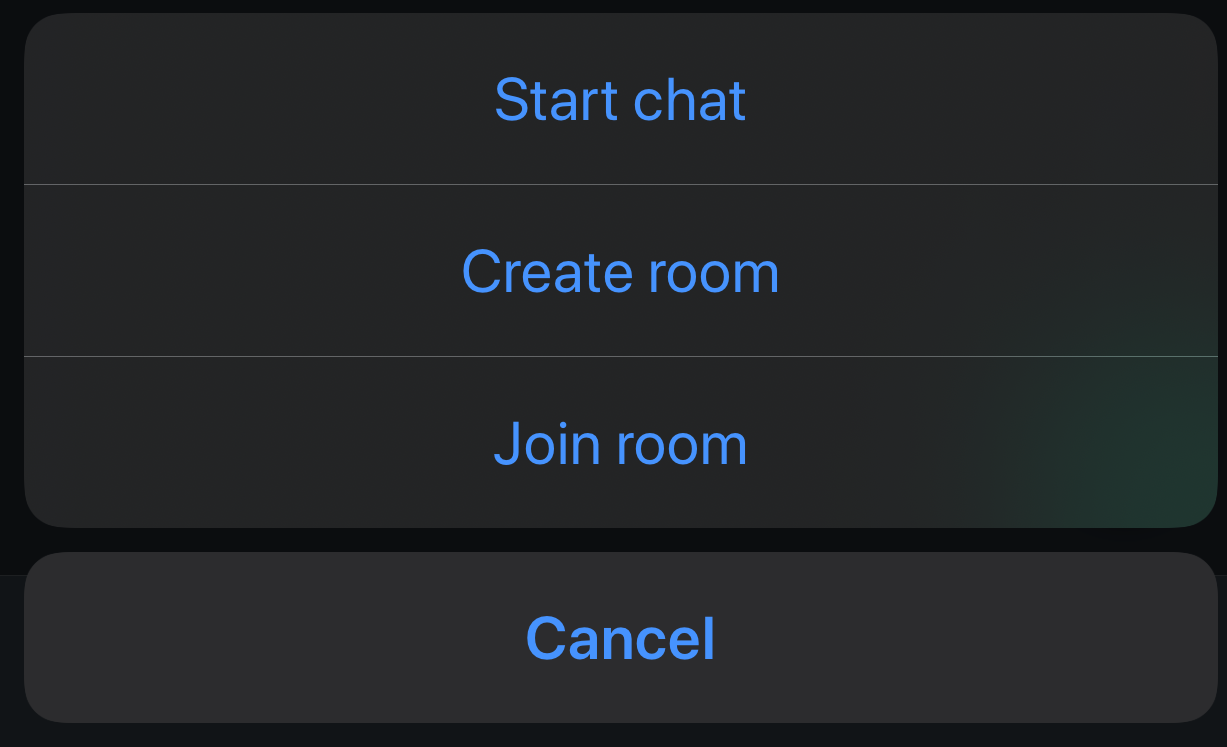
Tap the

-
Tap
Create room

-
Tap the room name (Empty room) at the top

-
Tap the room name again

-
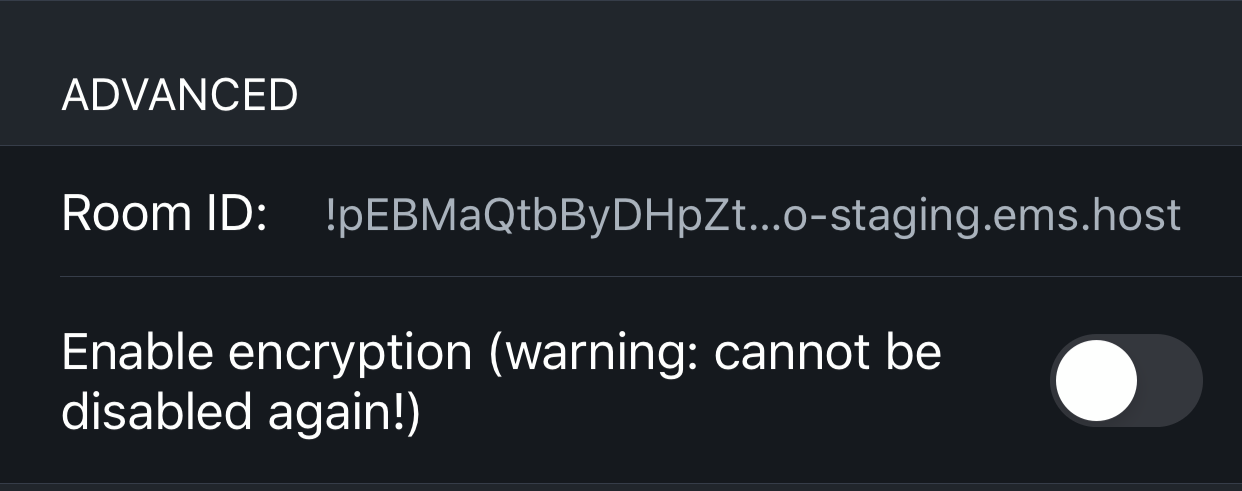
Under Advances, enable encryption

-
Tab
Donein the top right

-
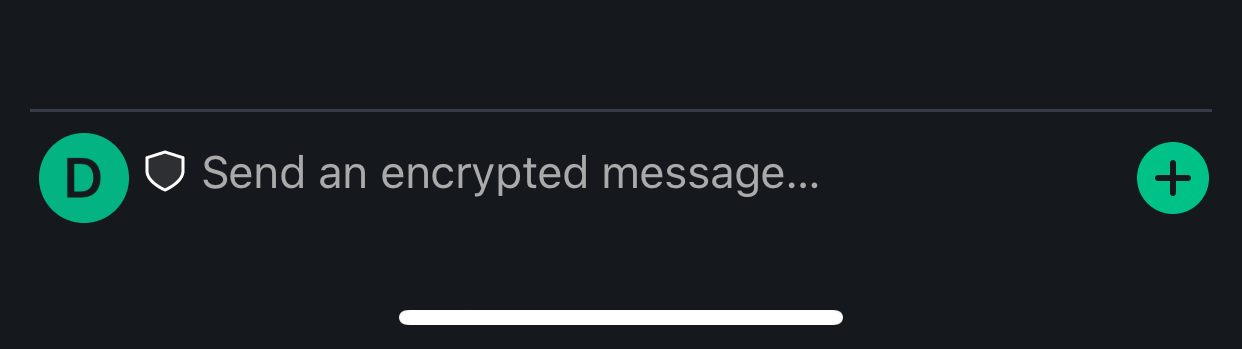
Tab the

-
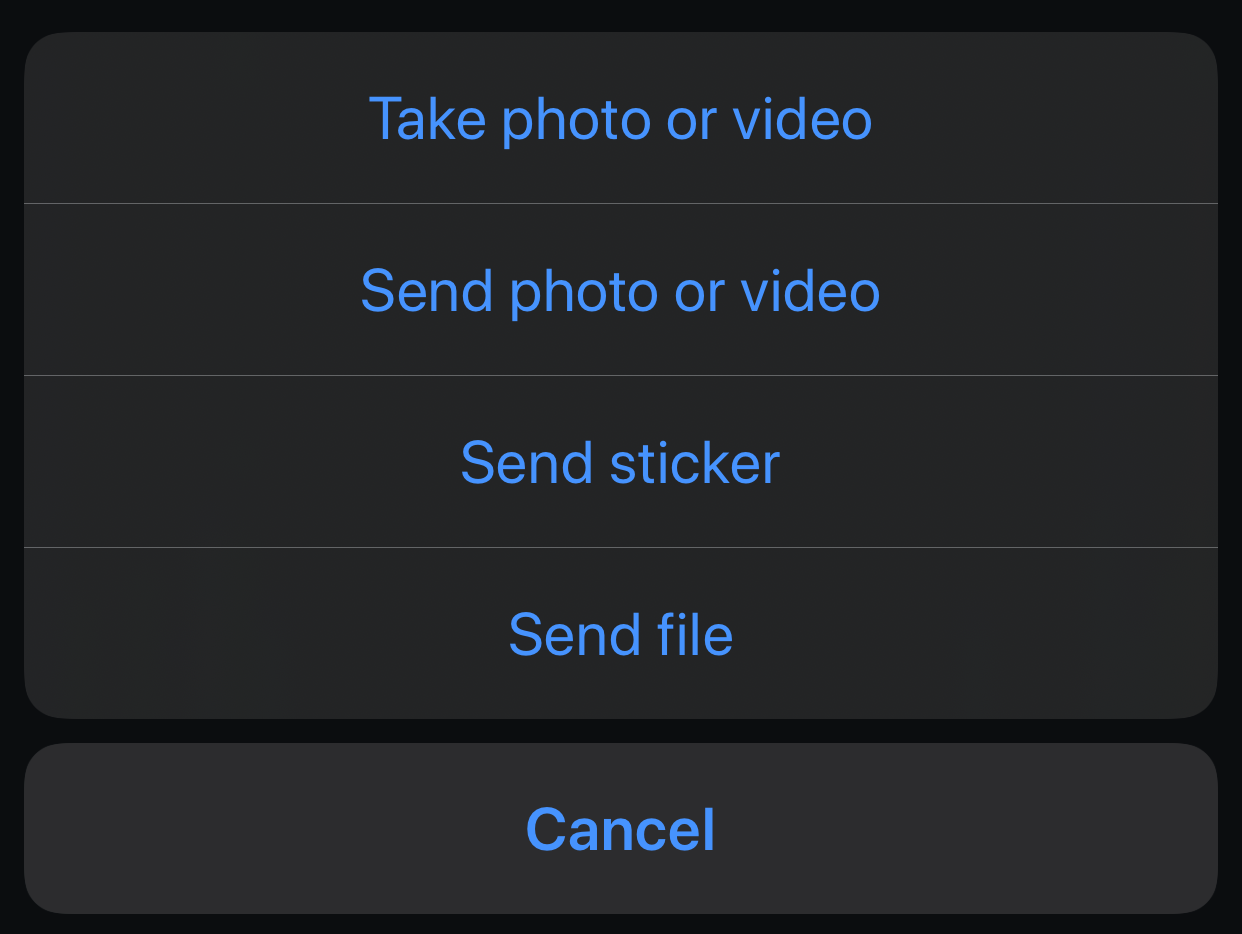
Tap
Send file

-
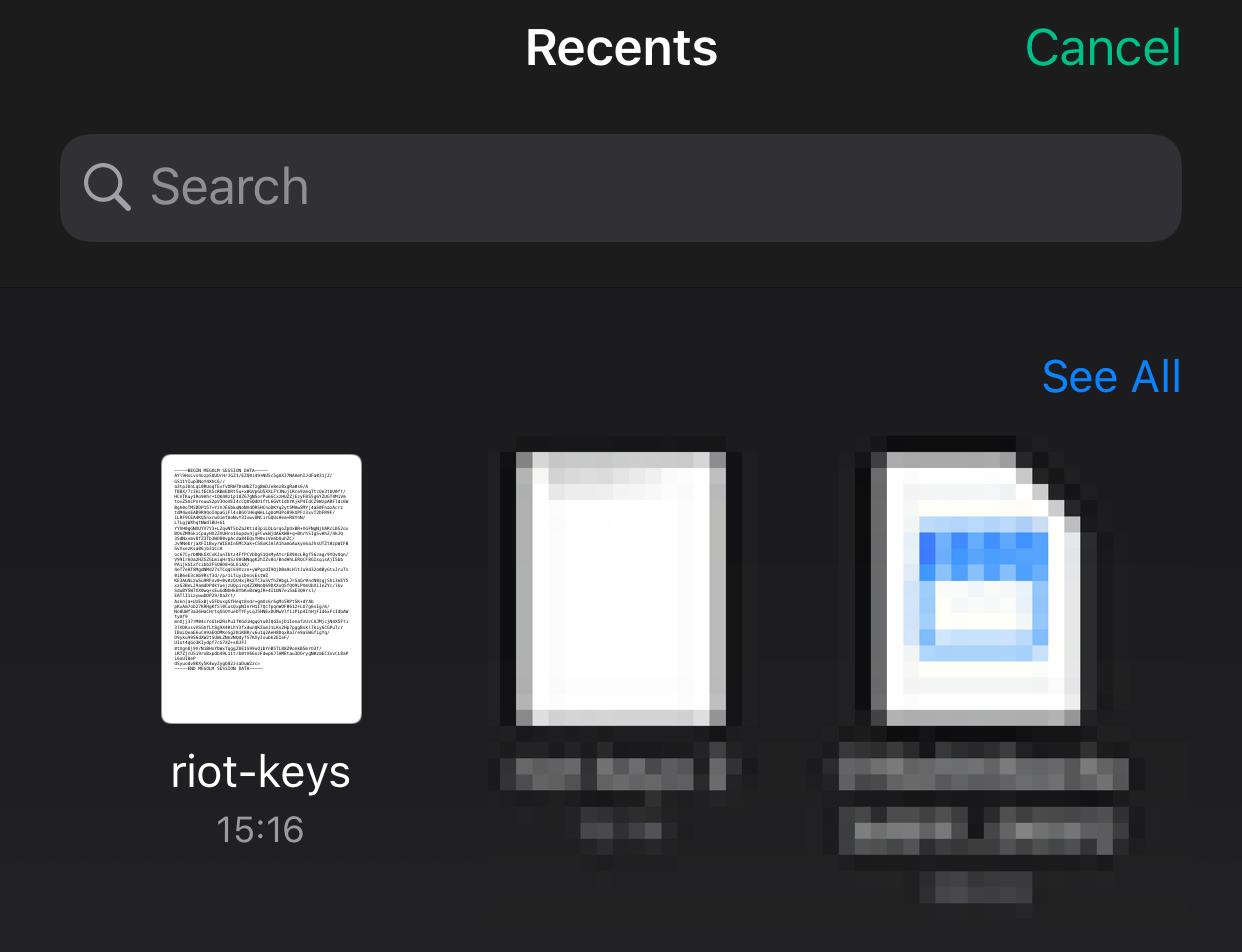
Browse to and select your export

-
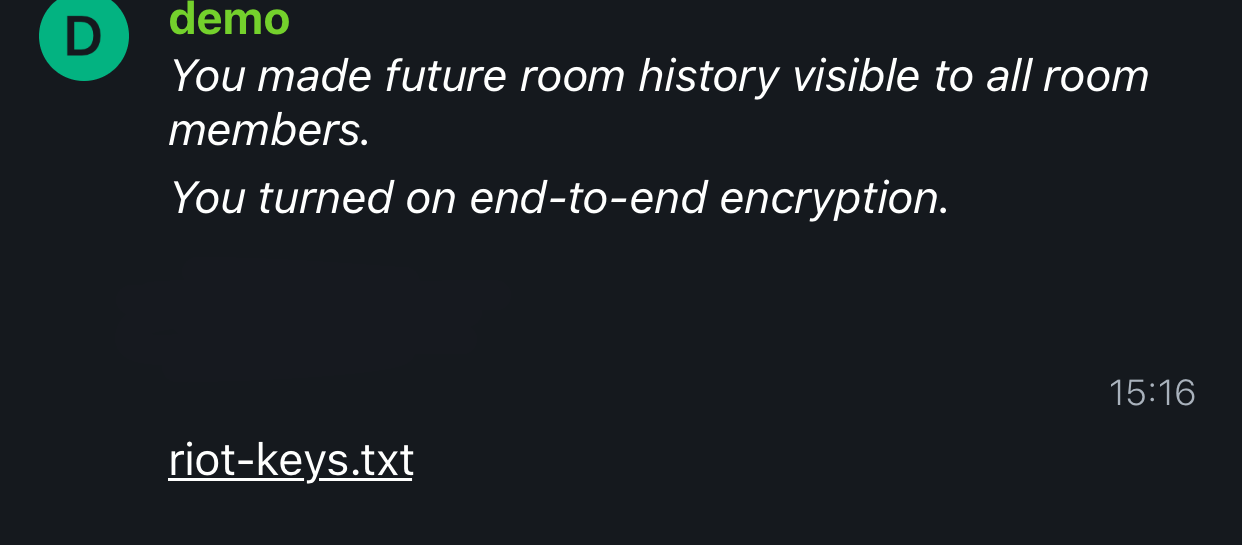
Tap the file you just sent

-
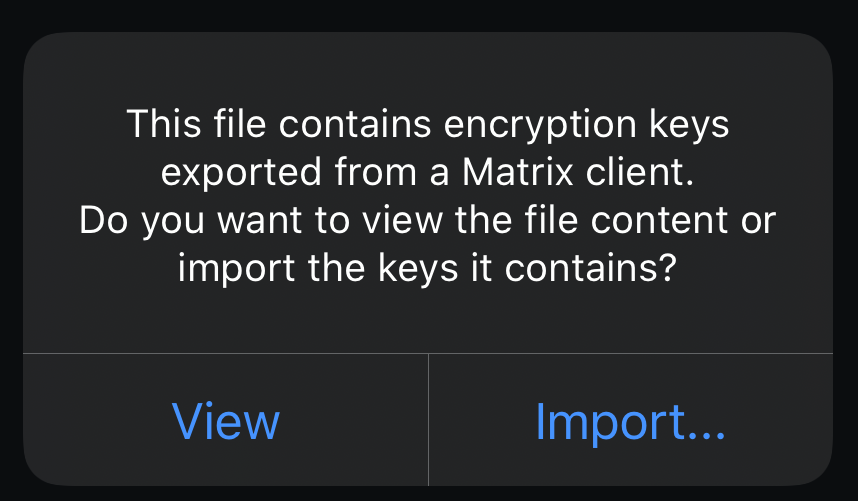
Tap
Import

-
Enter your passphrase and tap
Import


Element Android
Export
-
Tap your user picture in the top right
-
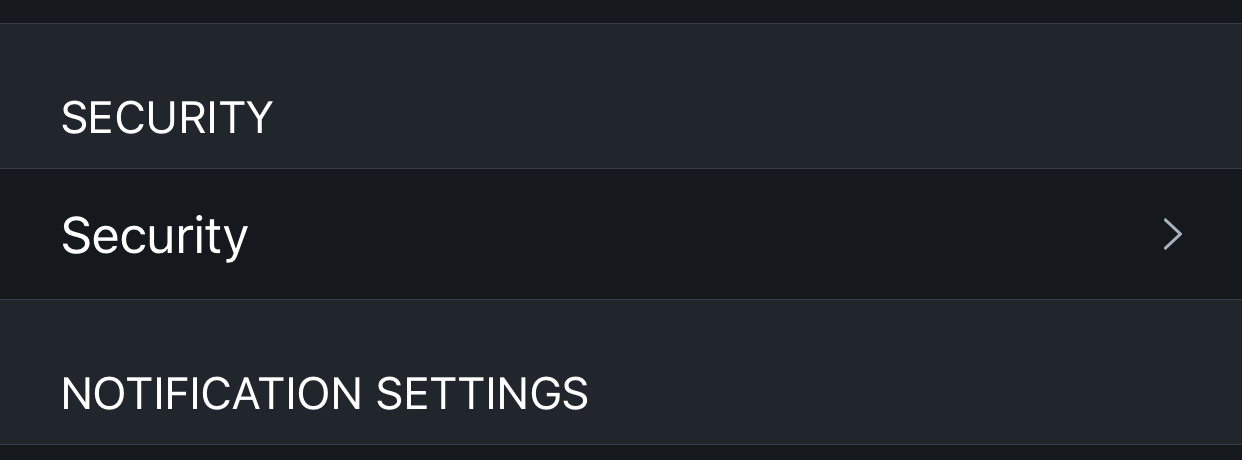
Tap the cog

-
Tap
Security & Privacy

-
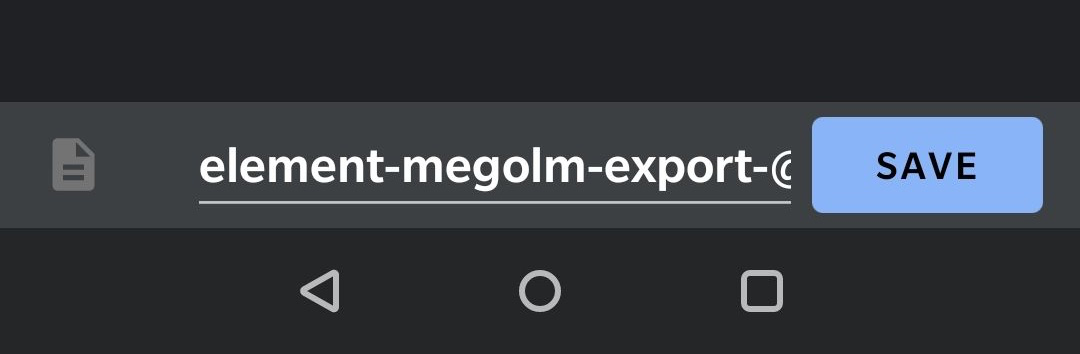
Tap
Export E2E room keys

-
Select a location and a file name, then tap
SAVE

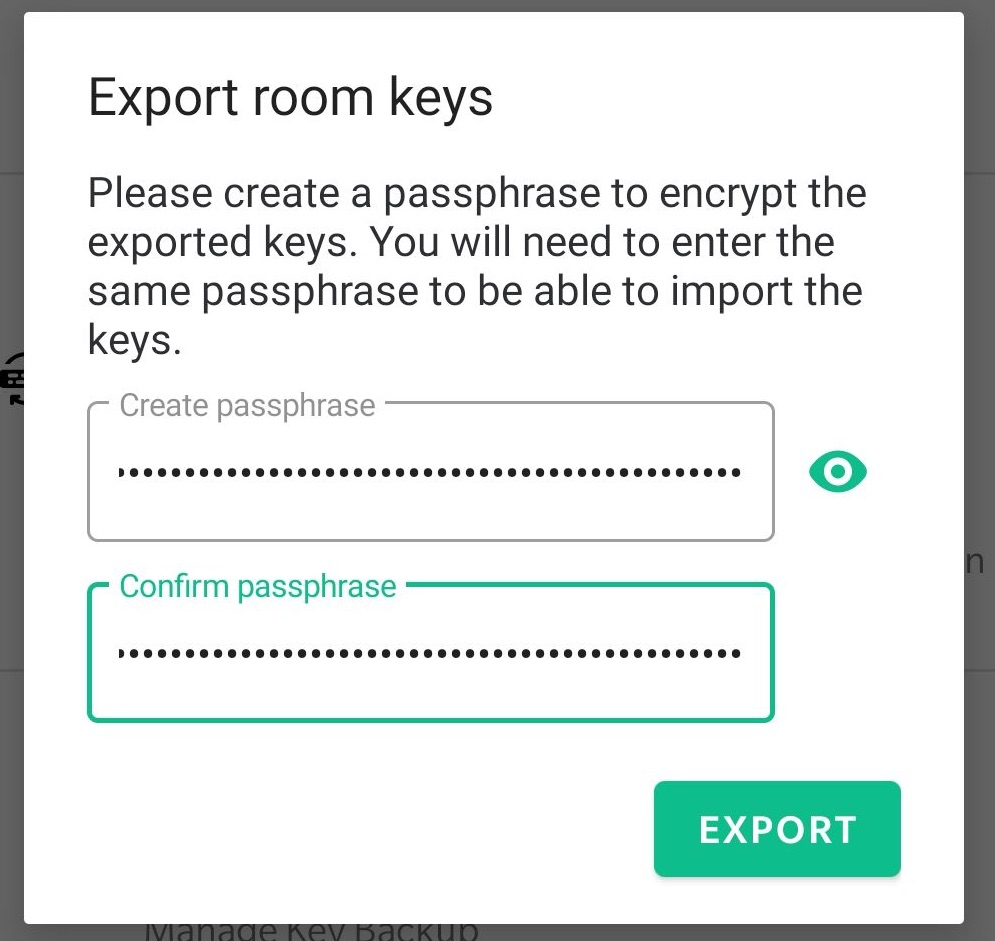
-
Enter a secure passphrase, then tap
EXPORT

Import
-
Tap your user picture in the top right
-
Tap the cog
-
Tap
Security & Privacy
-
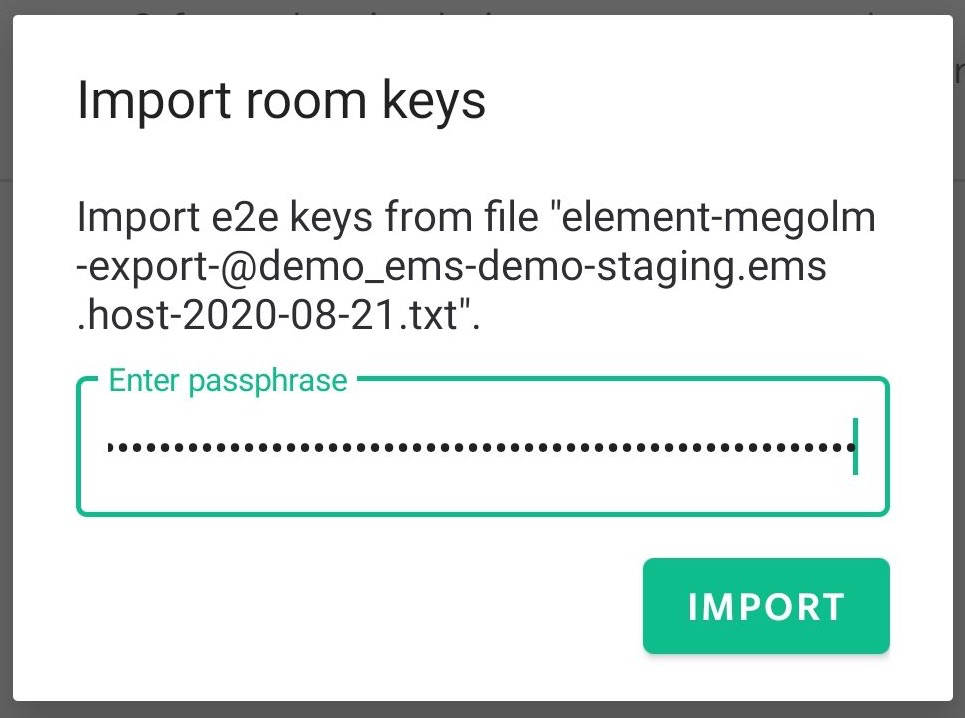
Tap
Import E2E room keys
-
Browse to and select your export

-
Enter your passphrase and tap
IMPORT

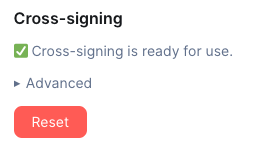
Reset Cross Signing
Only do this if you have forgotten or lost your cross signing backup passphrase.
Please read through the entire document before starting to make sure you understand the consequences of doing this.
If you have an active session
-
You may wish to backup your keys before doing this just to be on the safe side if something goes wrong: See Export and Import E2E Room Keys
-
Click
Resetin theCross-signingsection

-
Click
Clear cross-signing keys -
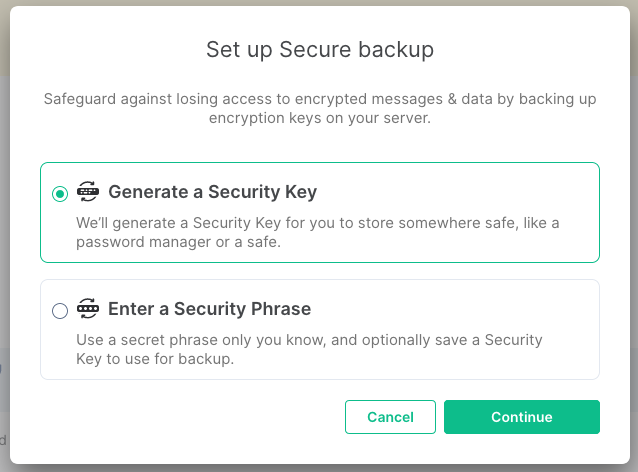
Click
Generate a Security KeyorEnter a Security Phrase. ThenContinue

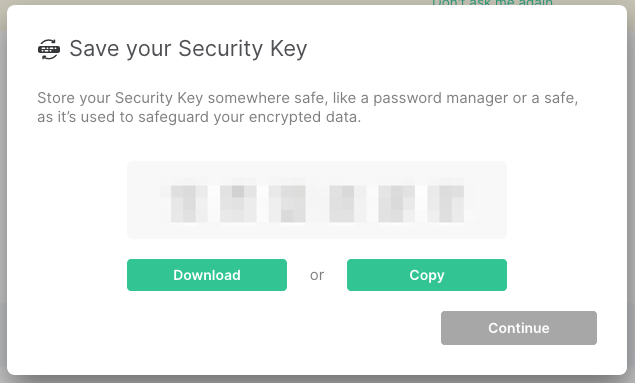
-
Take note of your key then click
Continue

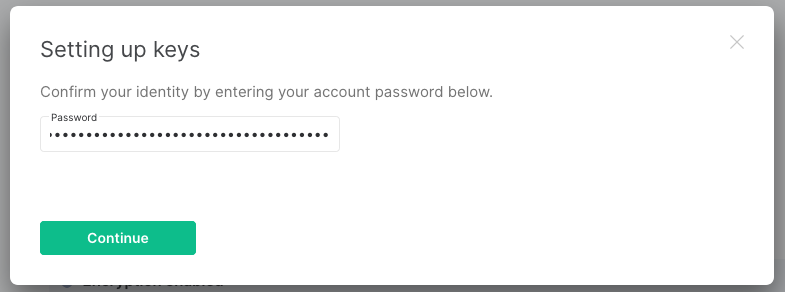
-
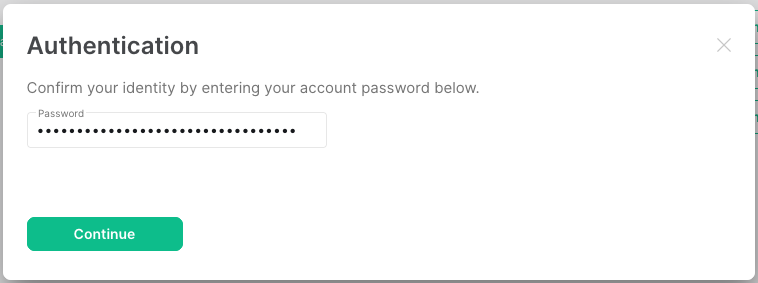
Enter your account password and click
Continue

-
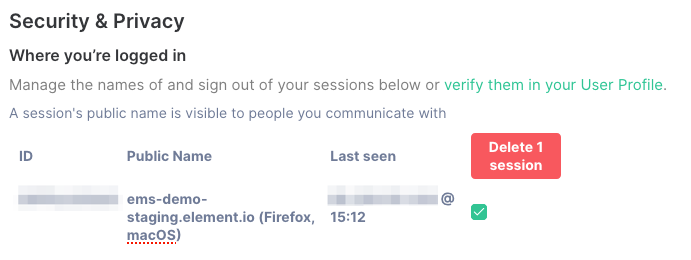
You can delete any untrusted sessions in Element
Security & Privacysettings. Select the sessions you want to remove and clickDelete 1 session

-
Optionally, Sign out old devices no longer needed
If you DO NOT have an active session
Doing this will destroy all your keys and you will NOT be able to access any historical encrypted messages.
-
Log in to Element

-
Click
Skip

-
Click
Skipagain

-
Do not connect to Key Backup or verify session when asked
-
Note that you will not be able to decrypt any previous messages after doing this

-
Follow the steps from If you have an active session
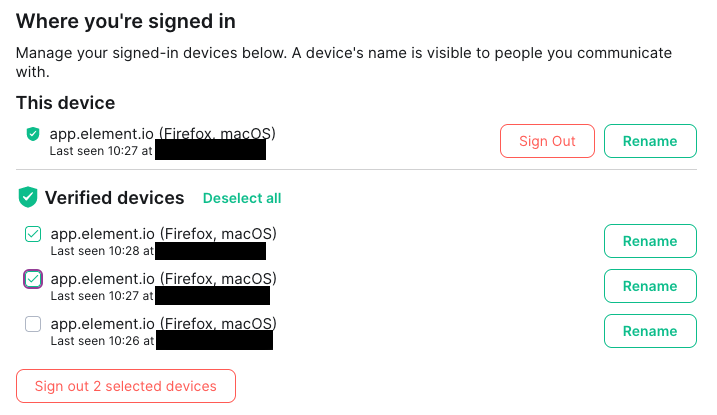
Sign out old devices
-
Go to Element
Security & Privacysettings -
Select the devices you wish to sign out

-
Click
Sign out n selected devices -
Authenticate with your Matrix account password or via SSO

Set up Cross Signing
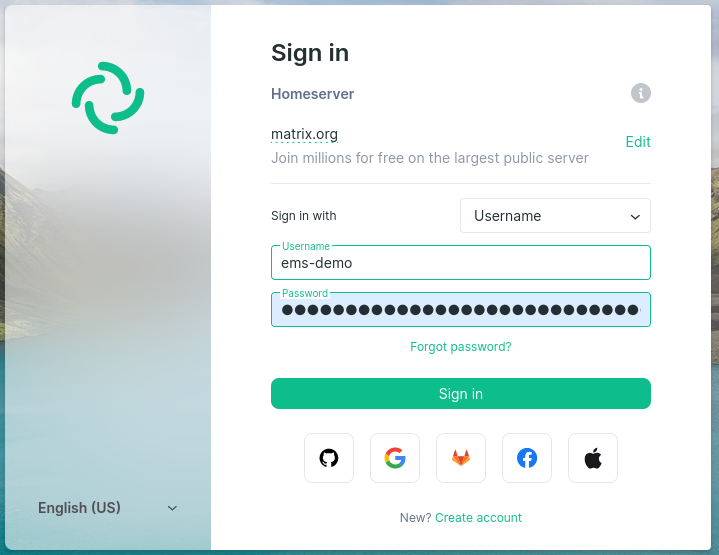
On first login to a new account
-
Sign up or log in
-
Click
Generate a Security KeyorEnter a Security Phrase. Then clickContinue -
Take note of your key, then click
Continue
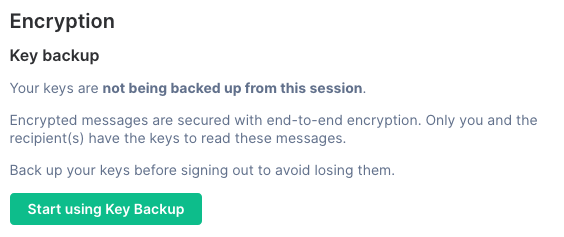
If you did not set it up on first login, or if you did not get asked
-
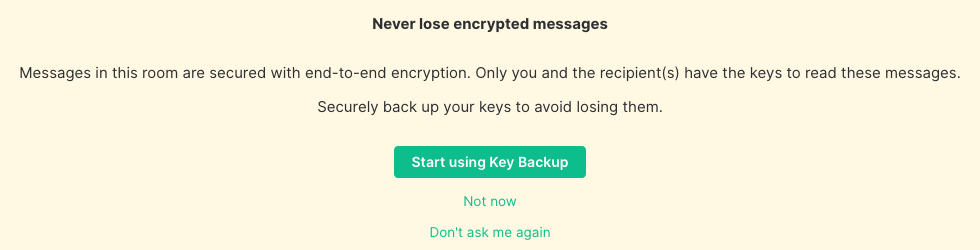
If you do not have key backup configured, you will be asked to set it up the first time you enter an encrypted room. Click
Start using Key Backup

-
Click
Generate a Security KeyorEnter a Security Phrase. ThenContinue -
Take note of your key, then click
Continue -
Enter your account password, then click
Continue
If you clicked Don't ask me again
-
Go to Element
Security & Privacysettings -
Click
Start using Key Backup

-
Click
Generate a Security KeyorEnter a Security Phrase. ThenContinue -
Take note of your key, then click
Continue -
Enter your account password, then click
Continue
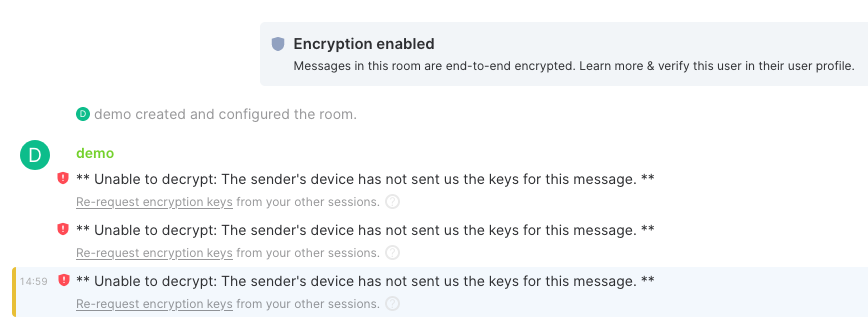
Verify new Login
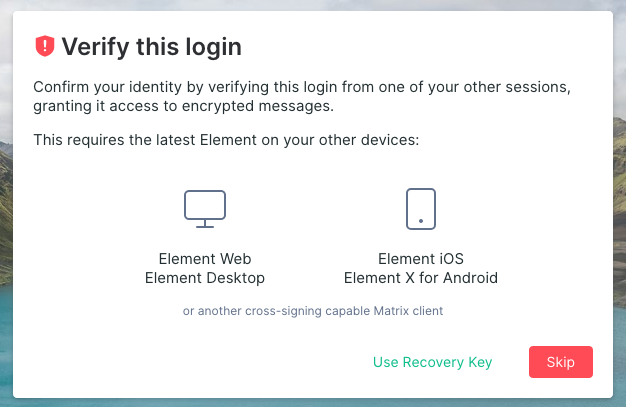
When you log in to a new device/session, you must verify the login and connect it to cross signing and secret storage to access your backed up encryption keys for historical messages. This assumes you already have configured cross signing, see Set up Cross Signing.
-
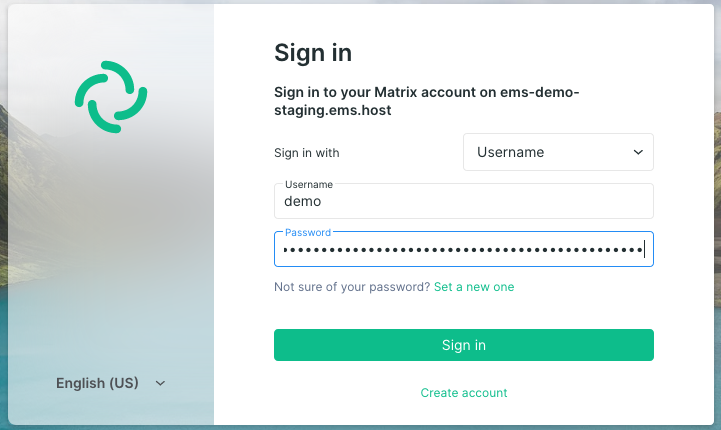
Log in to Element with your username and password

-
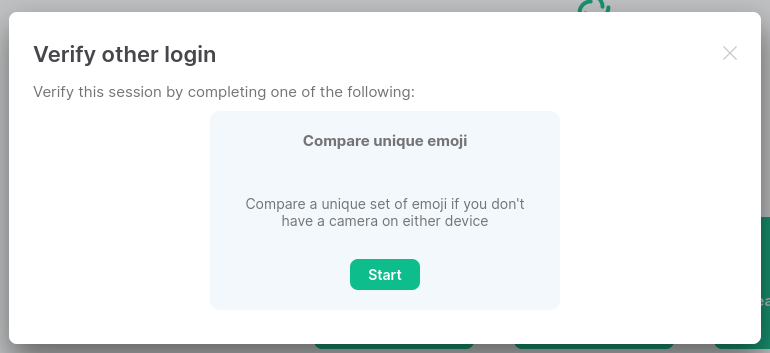
Choose one of the methods below for cross signing
Compare emojis using another login
- Click
Use another login

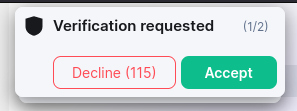
- On another device/session that is connected to cross signing, click
Accept

- Click
Start

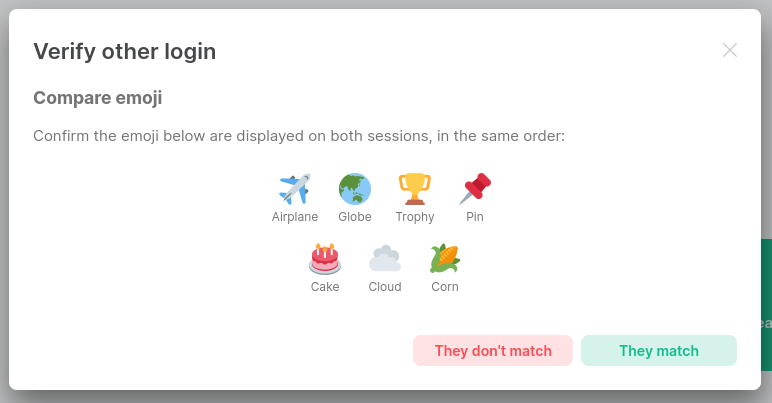
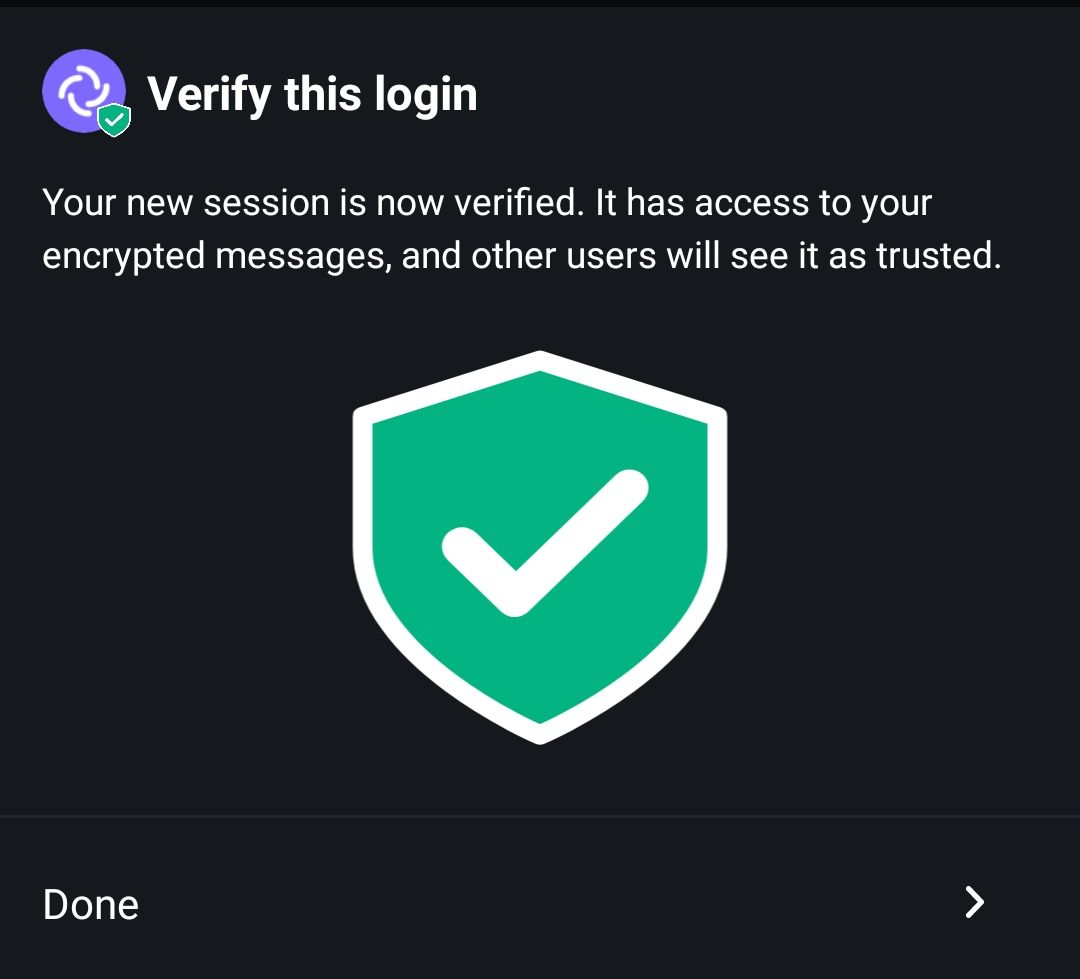
- Compare the emojis on your new and old sessions. They should be the same emojis and in the same order. Click
They matchon both sessions

- If all was successful, you should get this green shield on both sessions. Click
Got it. Your new device/session is now verified and will download your backed up message encryption keys
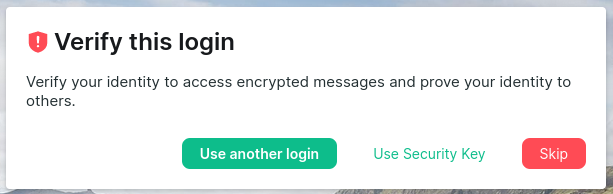
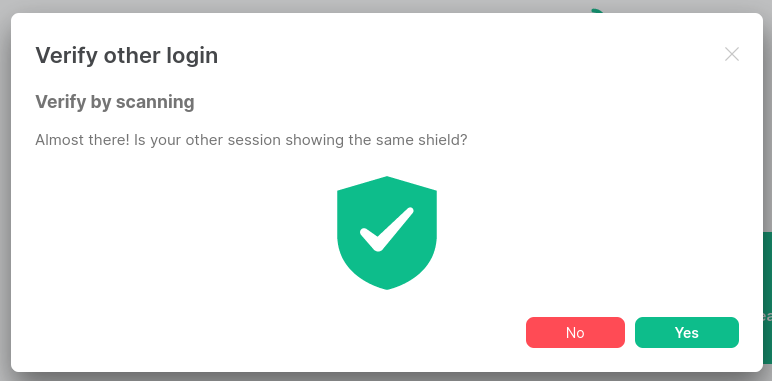
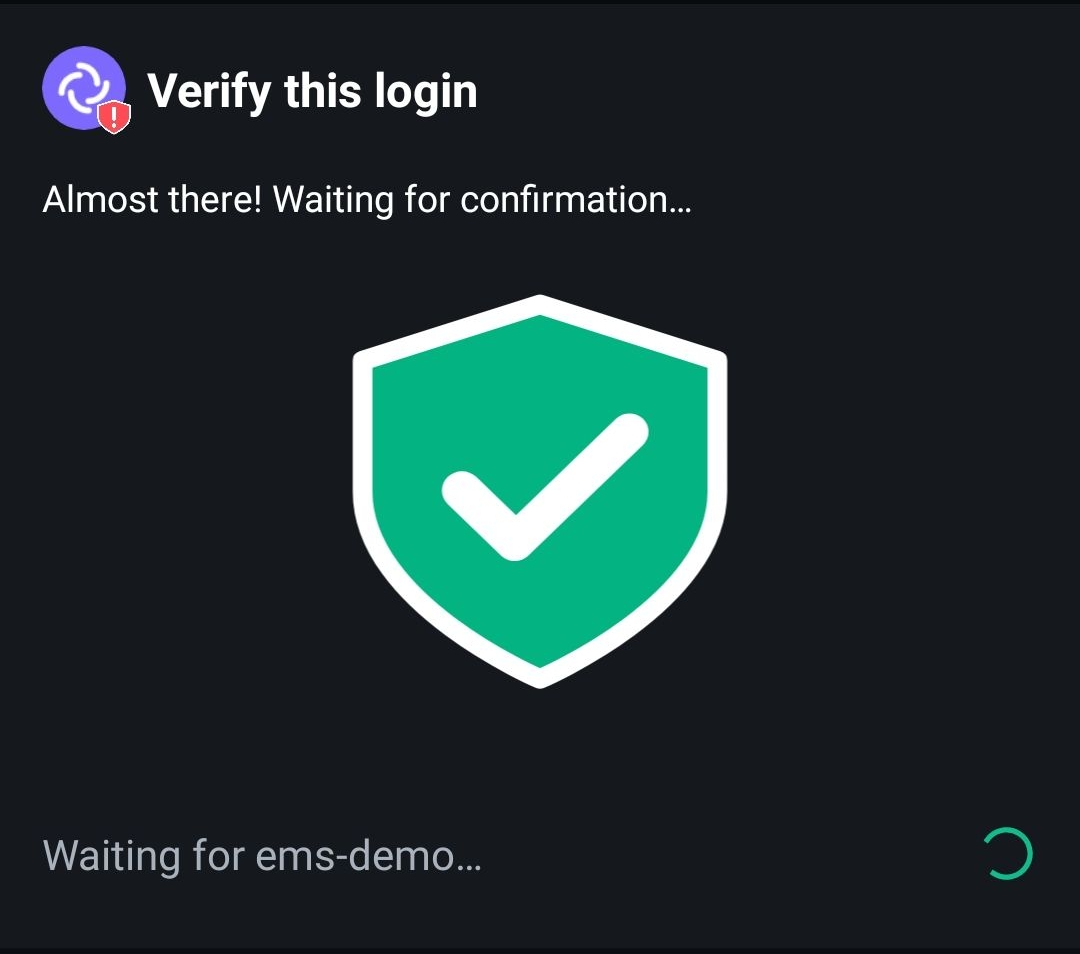
Scan QR code on another login
Login is here demonstrated on Element Android
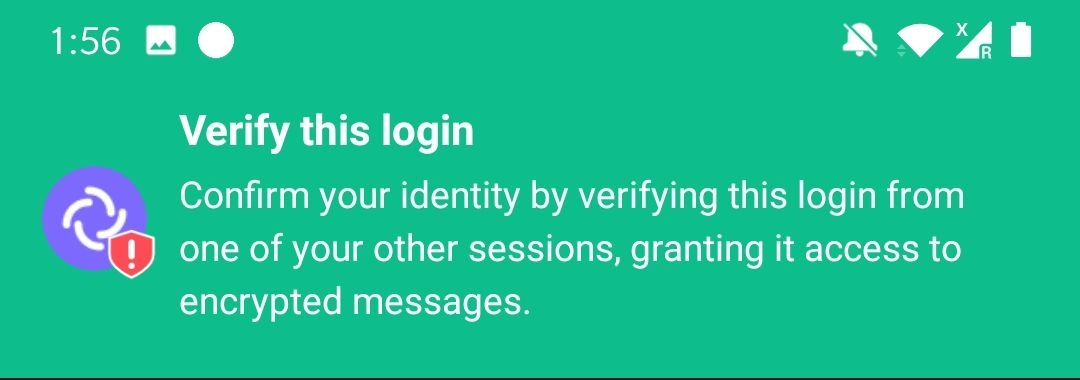
- On your phone, tap
Verify this login

- Your phone is now waiting for you to accept from another device
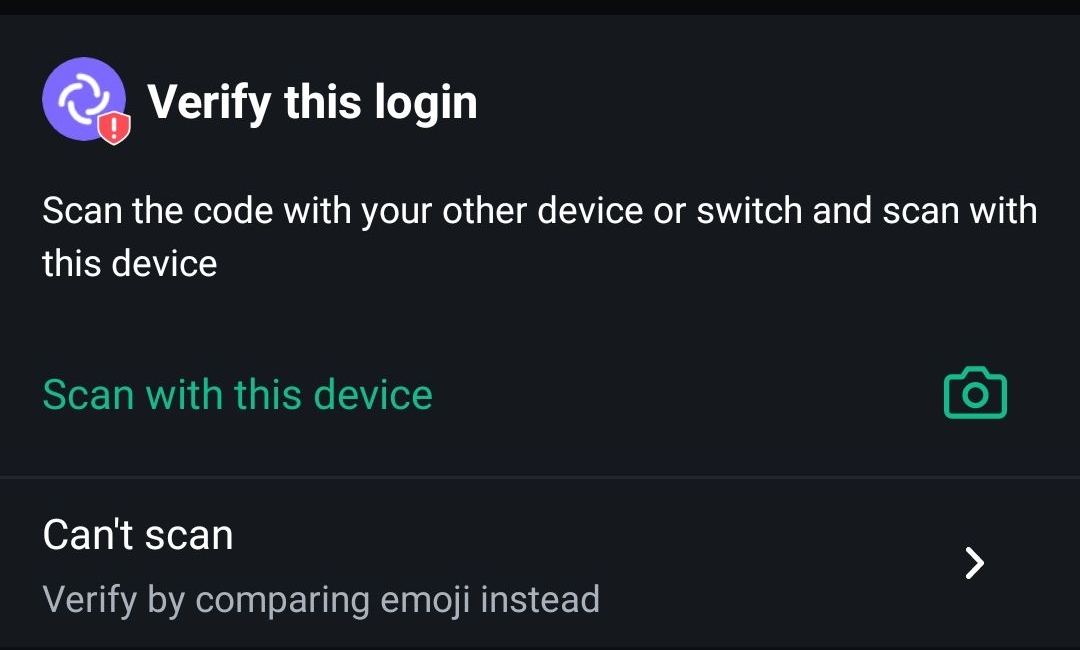
- On another device/session that is connected to cross signing, click
Accept - On your phone, tab
Scan with this device

- Using your phone, scan the QR code shown on your other session


- Your phone waits for you to confirm green shield on your other session. Click
Yes


- Tap
Doneon your phone

- If all was successful, you should get this green shield on both sessions. Click
Got it. Your new device/session is now verified and will download your backed up message encryption keys


Using your Security Key
- Click
Use Security Key - Enter your Security key when prompted and click
Continue
- If all was successful, you should get this green shield on both sessions. Click
Got it. Your new device/session is now verified and will download your backed up message encryption keys