Your airgapped machine will still require access to airgapped linux repositories depending on your OS. If using Red Hat Enterprise Linux, you will also need access to the [EPEL Repository](https://docs.fedoraproject.org/en-US/epel/) in your airgapped environment.
If you are going to be installing into an airgapped environment, you will need a subscription including airgapped access and to then download the airgapped dependencies `element-enterprise-installer-airgapped-**Disclaimer:** This tool is intended for guidance only and should be used alongside expert judgment to ensure accurate results. For professional assistance with sizing, please contact our team to arrange a sizing workshop.
Kubernetes Deployment Note
If you are performing a Kubernetes deployment and have multiple kubernetes clusters configured in your kubeconfig, you will have to export the `K8S_AUTH_CONTEXT` variable before running the installer, as per the [Operating System](https://ems-docs.element.io/books/classic-element-server-suite-documentation-lts-2410/page/requirements-and-recommendations#bkmrk-operating-system) notes from the [Requirements and Recommendations](https://ems-docs.element.io/books/classic-element-server-suite-documentation-lts-2410/page/requirements-and-recommendations) page: ``` export K8S_AUTH_CONTEXT=kube_context_name ```Upon loading this address for the first time, you may be greeted with a message informing you that your connection isn't private, this is due to the installer initially using a self-signed certificate. Once you have completed deployment, the installer will use a certificate you specify or the certficate supplied for the admin domain on the [Domains Section](https://ems-docs.element.io/books/classic-element-server-suite-documentation-lts-2410/page/domains-section). To proceed, click 'Advanced' then 'Continue', exact wording may vary across browsers.
[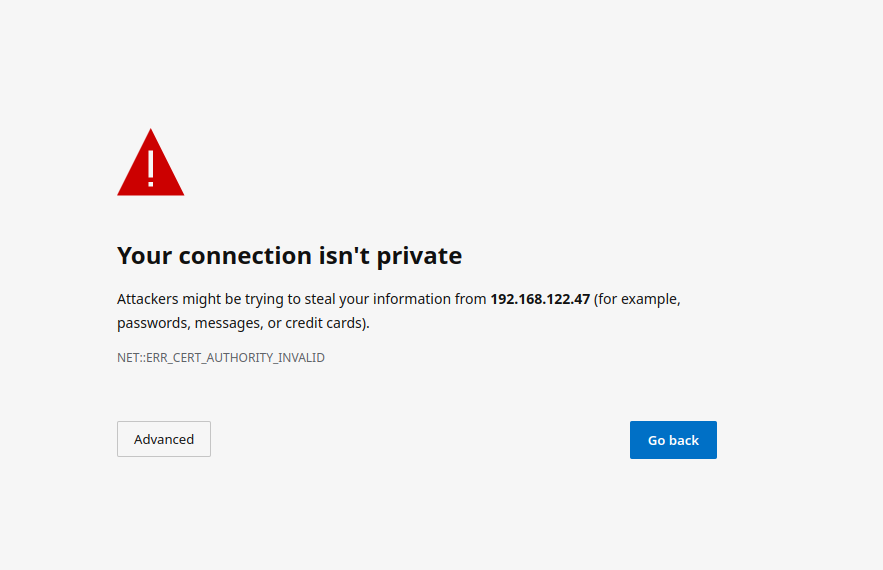](https://ems-docs.element.io/uploads/images/gallery/2023-02/not-private.png) #### The Installer With the installer running, you will initially be presented with a 'Welcome to Element!' screen, from here you can click the 'Let's Go!' button to start configuring your ESS deployment. The installer has a number of sections to work through to configure your config before starting deployment, below will detail each section and what you can configure. You can click on any sections' header, or the provided link below it, to visit that sections' detailed breakdown page which runs through what each specific option in that section does - however do please note that not all setups will require changing from the default settings. #### [Host Section](https://ems-docs.element.io/books/classic-element-server-suite-documentation-lts-2410/page/host-section). The first section of the ESS installer GUI is the Host section, here you will configure essential details of how ESS will be installed including; deployment type; subscription credentials; PostgreSQL to use; and whether or not your setup is airgapped. [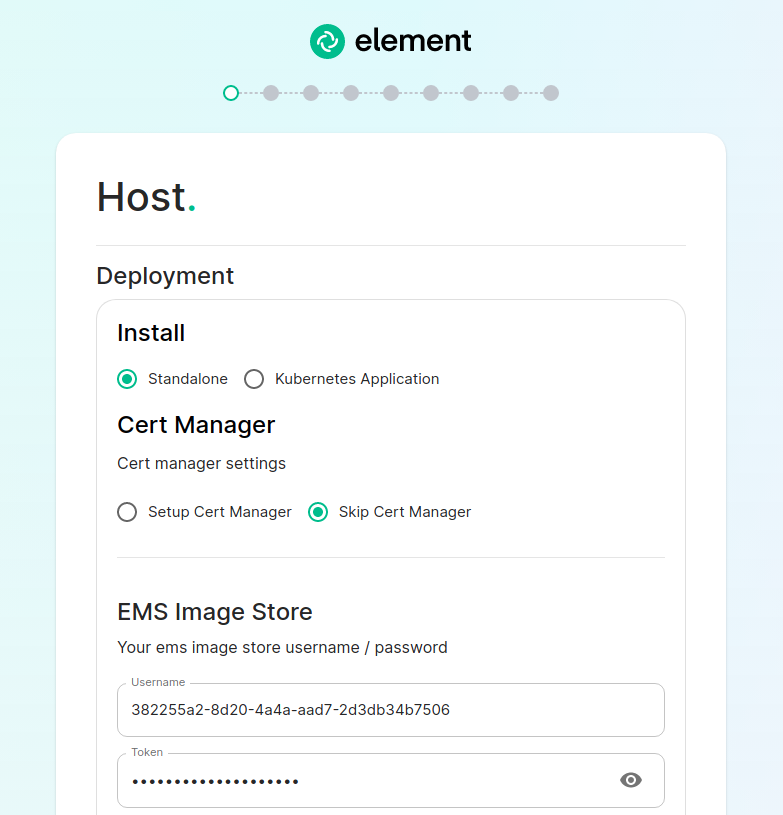](https://ems-docs.element.io/uploads/images/gallery/2023-08/host-page1.png) For detailed guidance / details on each config option, check the [Detailed Section Overview](https://ems-docs.element.io/books/classic-element-server-suite-documentation-lts-2410/page/host-section). Specifically for airgapped deployments, see the [Airgapped](https://ems-docs.element.io/books/classic-element-server-suite-documentation-lts-2410/page/host-section#bkmrk-airgapped) notes. ##### Standalone Deployment Ensure `Standalone` is selected, then if you are using LetsEncrypt for your certificates, you will want to make sure that you select `Setup Cert Manager` and enter an email address for LetsEncrypt to associate with your certificates. If you are using custom certificates or electing to manage SSL certificates yourself, then you will want to select `Skip Cert Manager`. Provide your EMS Image Store Username and Token associated with your subscription, which you can find at [https://ems.element.io/on-premise/subscriptions](https://ems.element.io/on-premise/subscriptions). By default, microk8s will set up persistent volumes in `/data/element-deployment` and will allow 20GB of space to do this; ESS will configure the default DNS resolvers to Google (8.8.8.8 and 8.8.4.4); and a PostgreSQL database will be created for you. These defaults are suitable for most setups however change as needed i.e. if you need to use your company's DNS servers. If you elect to setup your own PostgreSQL database, make sure it is configured per the [Requirements and Recommendations](https://ems-docs.element.io/books/classic-element-server-suite-documentation-lts-2410/page/requirements-and-recommendations#bkmrk-postgresql). ##### Kubernetes Deployment Ensure `Kubernetes Application` is selected, then specify the Kubernetes context name for which you are deploying into. You can use `kubectl config view` to see which contexts you have access to. You can opt to skip the update setup or the operator setup, but unless you know why you are doing that, you should leave those options as default. Provide your EMS Image Store Username and Token associated with your subscription, which you can find at [https://ems.element.io/on-premise/subscriptions](https://ems.element.io/on-premise/subscriptions). ##### Airgapped If you are installing in an airgapped environment, you'll either need to authenticate against your own container repository or download the airgapped package alongside the gui installer. If you choose our airgapped package, extract this somewhere on your system and enter the path to the extracted directory. ```bash user@airgapped:~$ cd /home/user/Downloads/ user@airgapped:~/Downloads$ ls -l total 7801028 -rwxr-xr-x 1 user user 129101654 Nov 7 15:51 element-installer-enterprise-edition-If you're running in Standalone mode, and opted for the installer deployed postgres, you will not see this section.
[](https://ems-docs.element.io/uploads/images/gallery/2023-08/database.png) Make sure you've read the [Requirements and Recommendations](https://ems-docs.element.io/books/classic-element-server-suite-documentation-lts-2410/page/requirements-and-recommendations) page so your environment is ready for installation. Specifically for PostgreSQL, ensure you have followed the guidance specific to your deployment: - [Standalone Deployment PostgreSQL Requirements](https://ems-docs.element.io/books/classic-element-server-suite-documentation-lts-2410/page/requirements-and-recommendations#bkmrk-postgresql) - [Kubernetes Deployment PostgreSQL Requirements](https://ems-docs.element.io/books/classic-element-server-suite-documentation-lts-2410/page/requirements-and-recommendations#bkmrk-postgresql-1) On this page you simply need to specify the database name, the database host name, the port to connect to, the SSL mode to use, and finally, the username and password to connect with. Once you have completed this section, simply click continue.For Standalone Deployments, if your database is installed on the same server you are installing ESS to, esnure that the servers' public IP address is used. As the container is not sharing the host network namespace, entering `127.0.0.1` will resolve to the container itself and cause the installation failure.
For detailed guidance / details on each config option, check the [Detailed Database Section Overview](https://ems-docs.element.io/books/classic-element-server-suite-documentation-lts-2410/page/database-section) #### [Media Section](https://ems-docs.element.io/books/classic-element-server-suite-documentation-lts-2410/page/media-section). The fifth section of the ESS installer GUI is the Media section, here you will configure where media will be saved as well as the maximum media upload size. [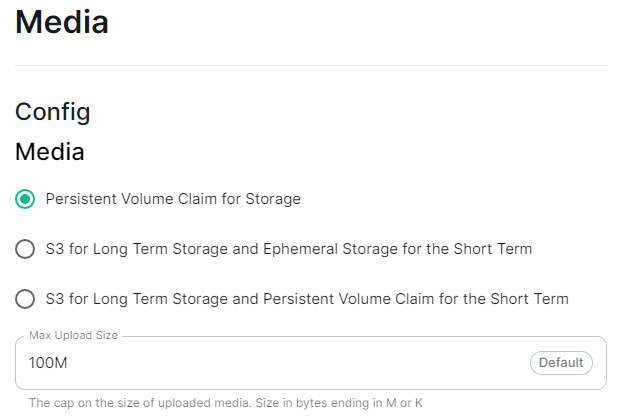](https://ems-docs.element.io/uploads/images/gallery/2024-08/image-1722519803209.png) You can opt to use either a Persistent Volume Claim (default) or if you wish to use an S3 bucket. Selecting S3 will then require you to provide your S3 connection details and authentication credentials. You will also be able to adjust the maximum media upload size for your homeserver. For detailed guidance / details on each config option, check the [Detailed Media Section Overview](https://ems-docs.element.io/books/classic-element-server-suite-documentation-lts-2410/page/media-section) #### [Cluster Section](https://ems-docs.element.io/books/classic-element-server-suite-documentation-lts-2410/page/cluster-section). The sixth section of the ESS installer GUI is the Cluster section, here you will configure settings specific to the cluster in which Element Deployment will run on top of. [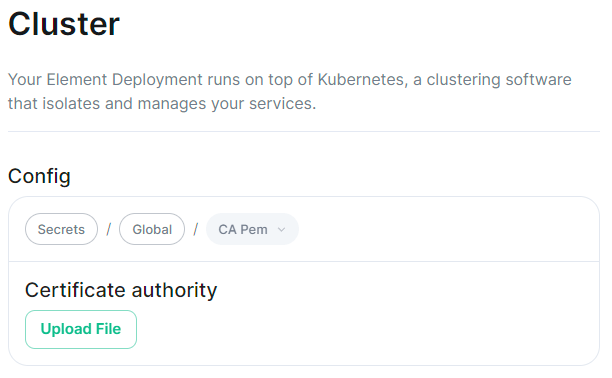](https://ems-docs.element.io/uploads/images/gallery/2024-08/image-1722520830048.png) On standard setups, no options need configuring here so you can click continue. For setups where on the certificates section, you uploaded certificates signed by you own private Certificate Authority, you will need to upload it's certificate in PEM encoded format. This should be a full chain certificate, like those upload in the Certificates section, including the Root Certificate Authority as well as any Intermediate Certificate Authorities. If you are in an environment where you have self-signed certificates, you will want to disable TLS verification, by clicking `Advanced` and then scrolling down and unchecking `Verify TLS`. Please bear in mind that disabling TLS verification and using self-signed certificates is not recommended for production deployments. If your host names are not DNS resolvable, you need to use host aliases and this can be set up here. You will also click "Advanced" and scroll down to the "Host Aliases" section in "k8s". In here, you will click "Add Host Aliases" and then you will specify an IP and host names that resolve to that IP: [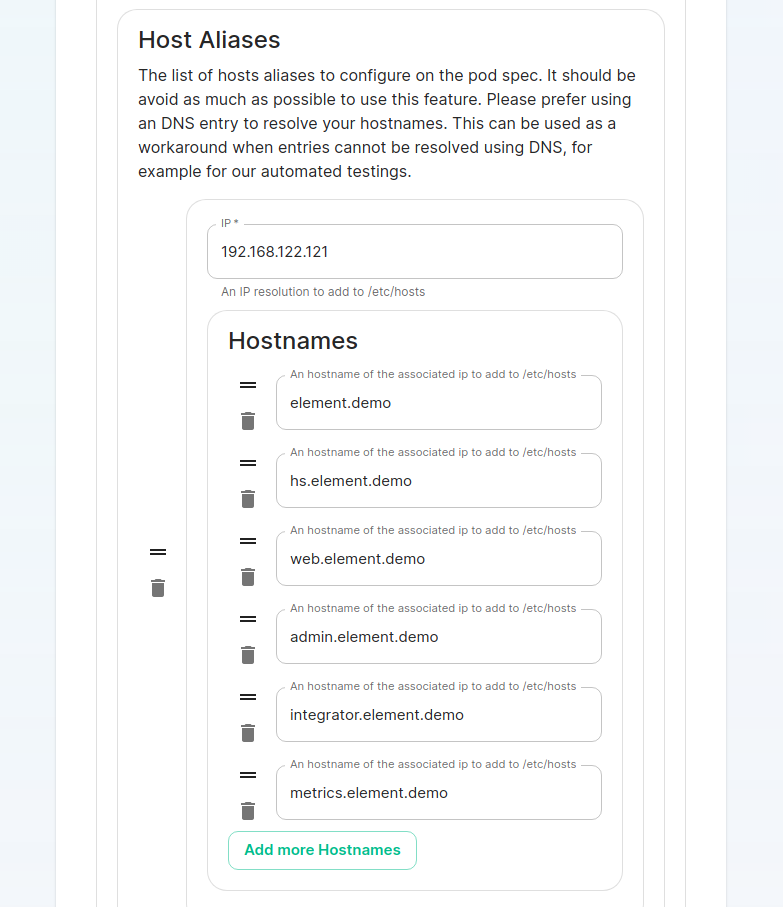](https://ems-docs.element.io/uploads/images/gallery/2023-08/hostaliases.png) For detailed guidance / details on each config option, check the [Detailed Cluster Section Overview](https://ems-docs.element.io/books/classic-element-server-suite-documentation-lts-2410/page/cluster-section) ##### Kubernetes Deployment If you are not using OpenShift, you will need to set `Force UID GID` and `Set Sec Comp` to `Enable` under the section `Security Context` so that it looks like: [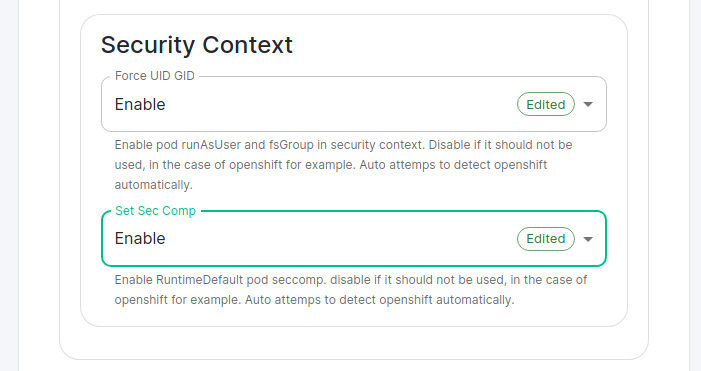](https://ems-docs.element.io/uploads/images/gallery/2023-05/seccontext-enable.png) If you are using OpenShift, you should leave the values of `Force UID GID` and `Set Sec Comp` set to `Auto`. #### [Synapse Section](https://ems-docs.element.io/books/classic-element-server-suite-documentation-lts-2410/page/synapse-section). #### Authentication Section. For first-time installation, it is recommended to leave the defaults on this page and reconfigure as required following a successful deployment. #### Matrix Authentication Service. For first-time installation, it is recommended to leave the defaults on this page and reconfigure as required following a successful deployment. Please note, however, that you will need to provide the Fully-Qualified Domain Name (FQDN) for the Matrix Authentication Service (MAS) and confirm the TLS configuration. [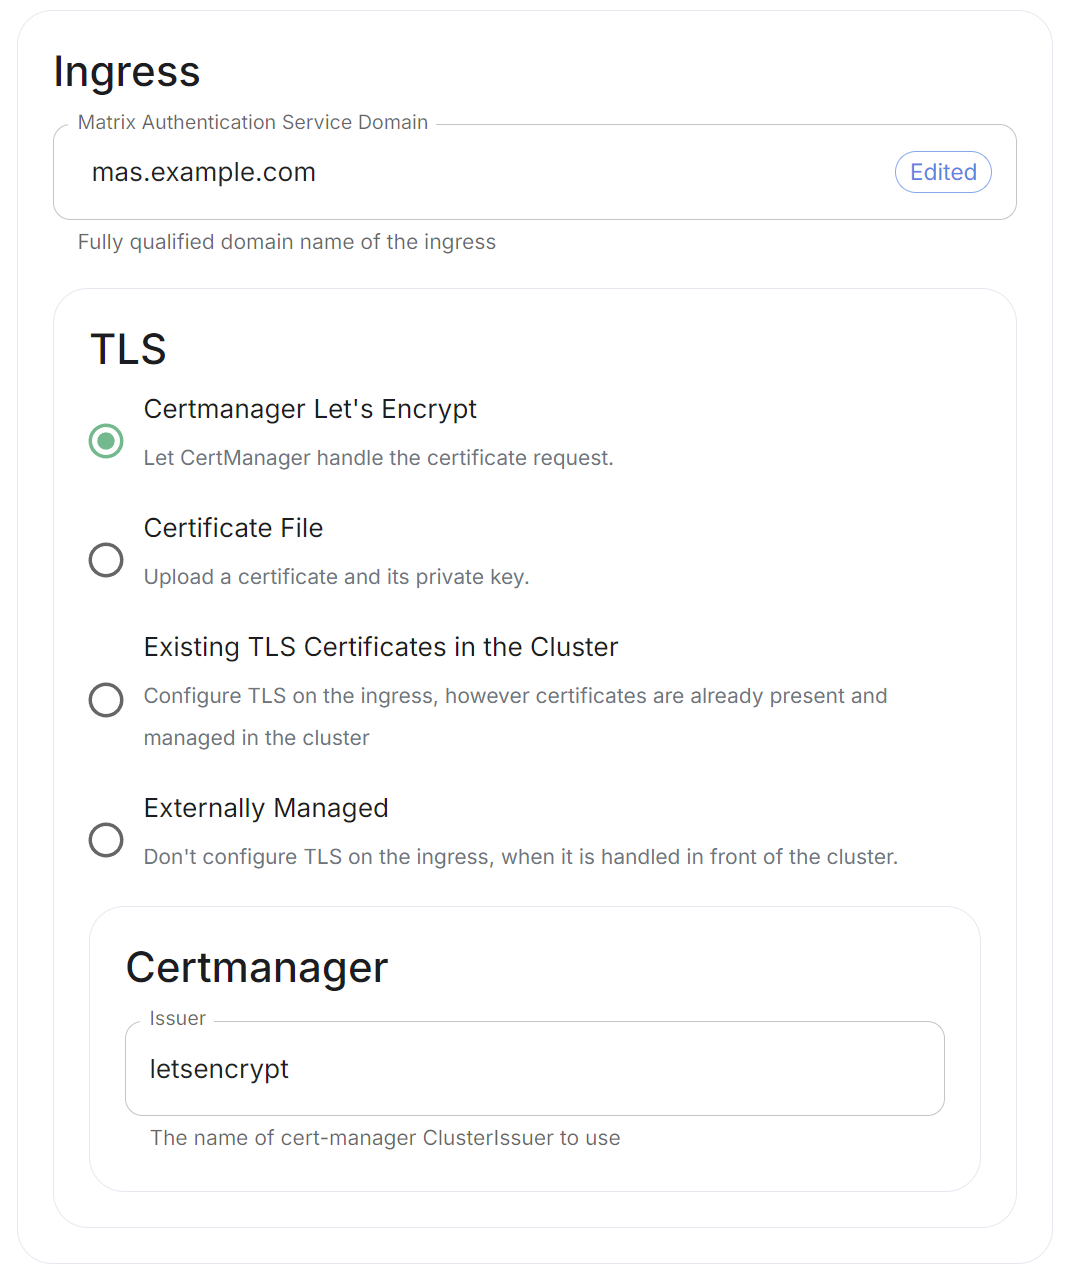](https://ems-docs.element.io/uploads/images/gallery/2025-01/image-1736265453886.png) #### [Synapse Section](https://ems-docs.element.io/books/classic-element-server-suite-documentation-lts-2410/page/synapse-section). The seventh section of the ESS installer GUI is the Synapse section, here you will configure settings specific to your homeserver. [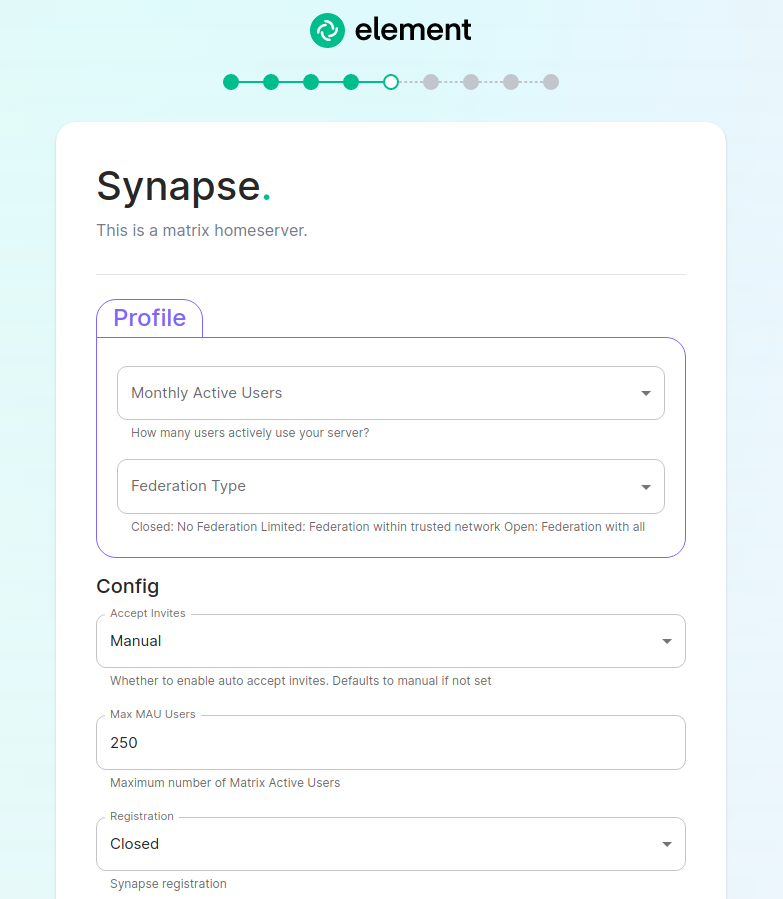](https://ems-docs.element.io/uploads/images/gallery/2023-08/synapse-page.png)While there are lots of options that can be configured in the section, it is generally recommended to complete the first-time setup before toggling on additional features i.e. Delegated Authentication, Data Retention etc. Re-running the installer and configuring these individually after first-time setup is recommend to make troubleshooting easier should something in this section be mis-configured.
Generally speaking, for first-time setup the default options here can be left as-is, as they can be altered as needed post-deployment. Simply click continue to advance, however see below for details on some options you may wish to alter. The first setting that you will come to is our built in performance profiles. Select the appropriate answers for `Monthly Active Users` and `Federation Type` to apply our best practices based on years of running Matrix homeservers.Setting of `Monthly Active Users`aka MAU and `Federation Type` within the Profile section does not directly set the maximum monthly active users or open/close Federation. These options will simply auto-configure the number of underlying pods deployed to handle the advised values. You will be able to directly configure your desired maximum MAU and Federation in dedicated sections.
The next setting that you will see is whether you want to auto accept invites. The default of `Manual` will fit most use cases, but you are welcome to change this value. The next setting is the maximum number of monthly active users (MAU) that you have purchased for your server. Your server will not allow you to go past this value. If you set this higher than your purchased MAU and you go over your purchased MAU, you will need to true up with Element to cover the cost of the unpaid users. The next setting concerns registration. A server with open registration on the open internet can become a target, so we default to closed registration. You will notice that there is a setting called `Custom` and this requires explicit custom settings in the additional configuration section. Unless instructed by Element, you will not need the `Custom` option and should instead pick `Closed` or `Open` depending on your needs. After this, you will see that the installer has generated a random admin password for you. You will want to use the eye icon to view the password and copy this down as you will use this with the user `onprem-admin-donotdelete` to log into the admin panel after installation. [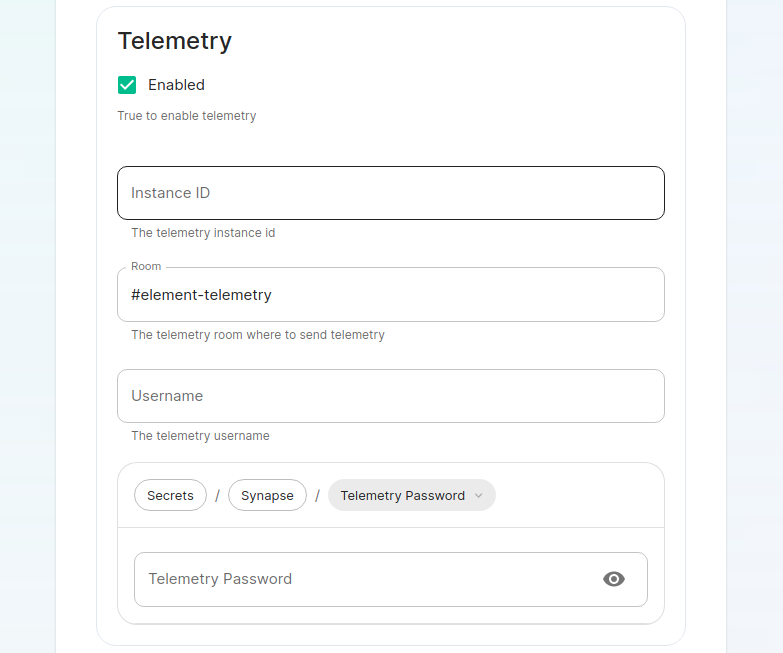](https://ems-docs.element.io/uploads/images/gallery/2023-08/synapse-page2.png) Continuing, we see telemetry. You should leave this enabled as you are required to report MAU to Element. In the event that you are installing into an enviroment without internet access, you may disable this so that it does not continue to try talking to Element. That said, you are still required to generate an MAU report at regular intervals and share that with Element. For more information on the data that Element collects, please see: [What Telemetry Data is Collected by Element?](https://ems-docs.element.io/books/classic-element-server-suite-documentation-lts-2410/page/synapse-section#bkmrk-what-telemetry-data-) As mentioned above, there are a lot of options that can be configured here, it is recommended to run through the detailed guidance / details on each config option available on the [Detailed Synapse Section Overview](https://ems-docs.element.io/books/classic-element-server-suite-documentation-lts-2410/page/synapse-section) ##### [Delegated Auth](https://ems-docs.element.io/books/classic-element-server-suite-documentation-lts-2410/page/synapse-section-delegated-auth). A sub-section of the Synapse section is Delegated Authentication, which allows deferring to OIDC, SAML and LDAP Identity Providers for authentication. It is not recommended to set this up on first-time install, however should you wish please refer to the dedicated [Detailed Delegated Auth Section Overview](https://ems-docs.element.io/books/classic-element-server-suite-documentation-lts-2410/page/synapse-section-delegated-auth) page. [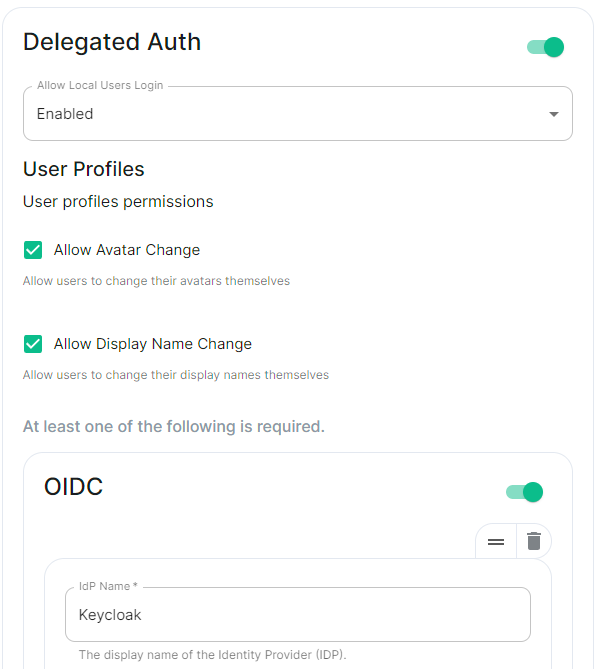](https://ems-docs.element.io/uploads/images/gallery/2024-08/image-1722522903330.png) ##### [Federation](https://ems-docs.element.io/books/classic-element-server-suite-documentation-lts-2410/page/synapse-section-federation). A sub-section of the Synapse section is Federation, found under `Advanced`, which allows configuration of how your homeserver should federate with other homeservers. It is not recommended to set this up on first-time install, however should you wish please refer to the dedicated [Detailed Federation Section Overview](https://ems-docs.element.io/books/classic-element-server-suite-documentation-lts-2410/page/synapse-section-federation) page. [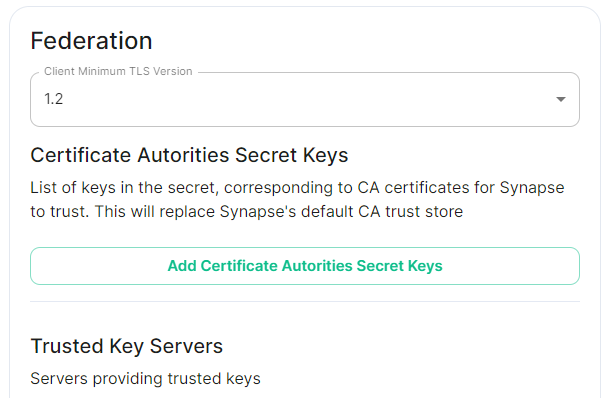](https://ems-docs.element.io/uploads/images/gallery/2024-08/image-1722523174484.png) #### [Element Web Section](https://ems-docs.element.io/books/classic-element-server-suite-documentation-lts-2410/page/element-web-section). The eighth section of the ESS installer GUI is the Element Web section, here you can configure settings specific to the deployed Element Web client. First almost all setups, nothing needs to be configured, simply click continue. For airgapped environments you should click `Advanced` then enable `Use Own URL for Sharing Links`: [](https://ems-docs.element.io/uploads/images/gallery/2024-08/image-1722523623991.png) For detailed guidance / details on each config option, check the [Detailed Section Overview](https://ems-docs.element.io/books/classic-element-server-suite-documentation-lts-2410/page/element-web-section) #### [Homeserver Admin Section](https://ems-docs.element.io/books/classic-element-server-suite-documentation-lts-2410/page/homeserver-admin-section). The ninth section of the ESS installer GUI is the Homeserver Admin section, here you can configure settings specific to the deployed Admin Console. [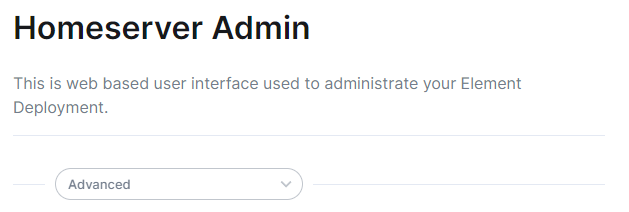](https://ems-docs.element.io/uploads/images/gallery/2024-08/image-1722524205280.png) Unless advised by Element, you will not need to configure anything in this section, you will be able to access the homeserver admin via the admin domain specified in the Domains section, logging in with the built-in default Synapse Admin user `onprem-admin-donotdelete` whose password is defined in the Synapse section.If you have enabled Delegated Authentication, the built-in Synapse Admin user `onprem-admin-donotdelete` will be unable to login unless `Allow Local Users Login` has been set to `Enabled`. See the [Delegated Authentication](https://ems-docs.element.io/books/classic-element-server-suite-documentation-lts-2410/page/homeserver-admin-section#bkmrk-delegated-authentica) notes for how to promote a user from your Identity Provider to Synapse Admin
For detailed guidance / details on each config option, check the [Detailed Section Overview](https://ems-docs.element.io/books/classic-element-server-suite-documentation-lts-2410/page/homeserver-admin-section) #### [Integrator Section](https://ems-docs.element.io/books/classic-element-server-suite-documentation-lts-2410/page/integrator-section). The final section of the ESS installer GUI when running for the first-time is the Integrator section, here you can configure settings specific to the integrator which is used to send messages to external services. [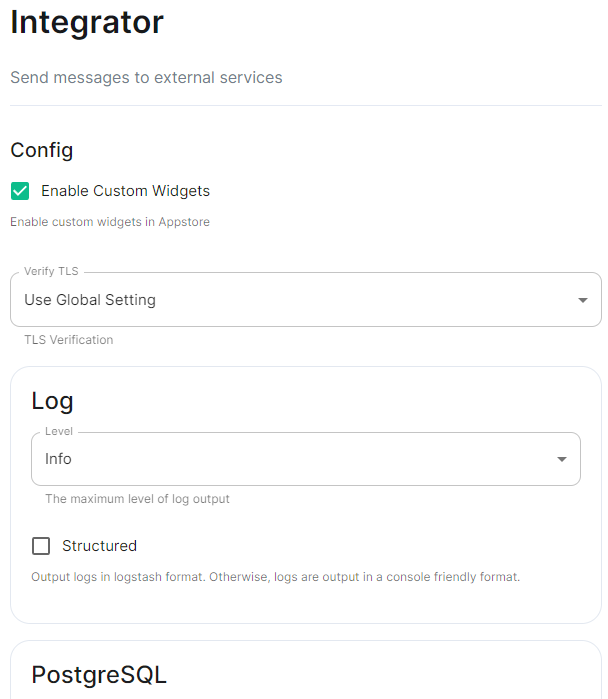](https://ems-docs.element.io/uploads/images/gallery/2024-08/image-1722524274161.png) On first-time setup only PostgreSQL will need to be configured for Standalone Deployments where you are using an external PostgreSQL or Kubernetes Deployments where an external PostgreSQL is required. For Standalone Deployments where the installer is deploying PostgreSQL for you, you will not need to configure anything. For detailed guidance / details on each config option, check the [Detailed Section Overview](https://ems-docs.element.io/books/classic-element-server-suite-documentation-lts-2410/page/integrator-section) #### The Installation Screen After all sections you will finally be ready to begin the installation, simply click Install to begin. [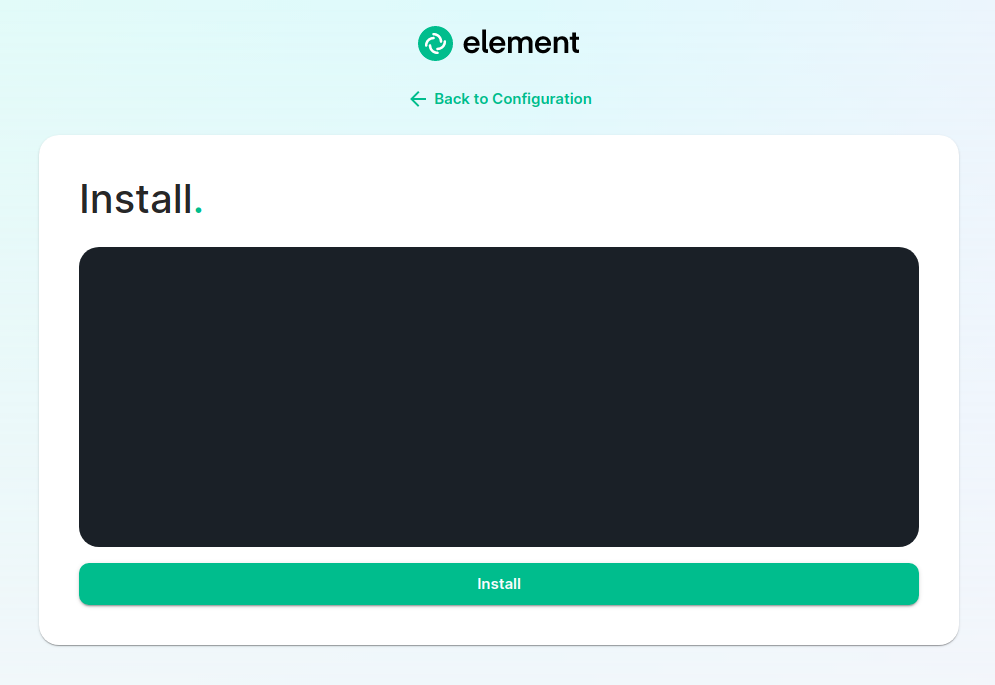](https://ems-docs.element.io/uploads/images/gallery/2023-08/installscreen.png) Depending on your OS setup, you may notice the installer hang, or directly ask for a password. Simply go back to the terminal where you are running the installer, you will see that you are being asked for the sudo password: [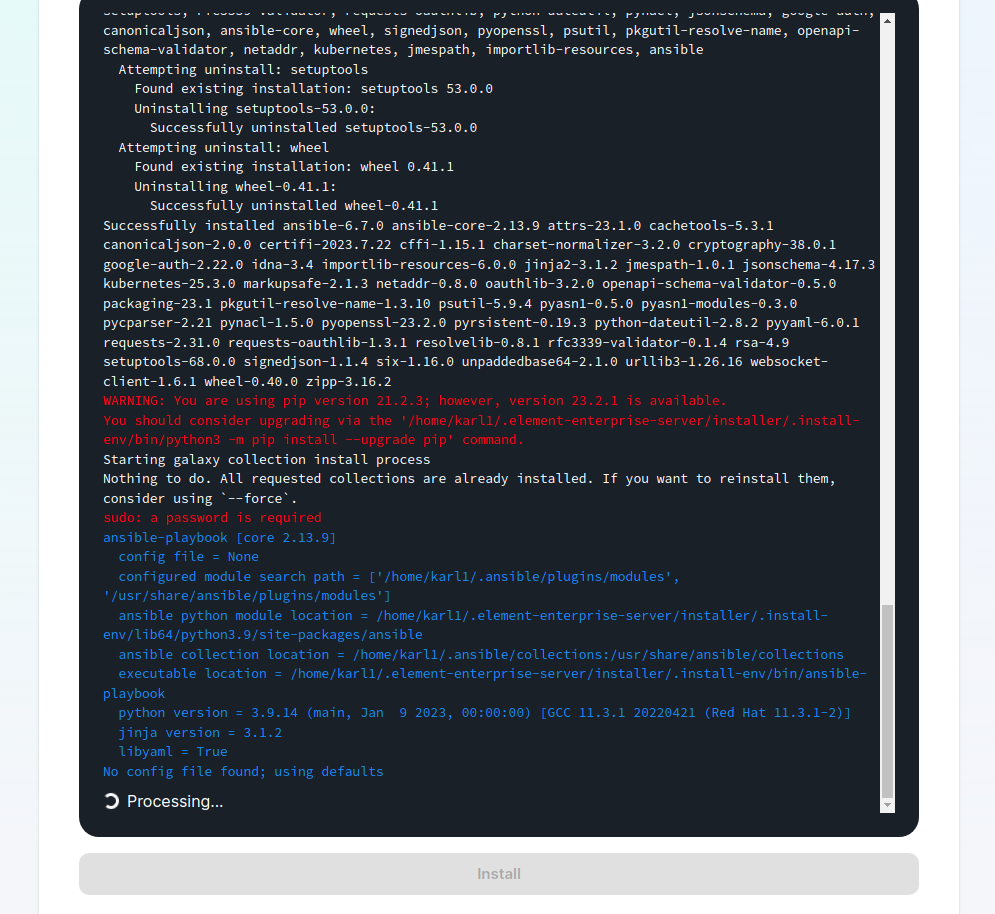](https://ems-docs.element.io/uploads/images/gallery/2023-08/installstart.png) [](https://ems-docs.element.io/uploads/images/gallery/2023-02/sudoask.png) Provide your sudo password and the installation will continue. You will know the installer has finished when you see the Play Recap, as long as nothing failed the install was a success.For Standalone Deployments, when running the installer for the first-time, you will be prompted to log out and back in again to allow Linux group membership changes to be refreshed. It is advised to simply cancel the running installer `CTRL + C` then reboot i.e. `sudo reboot now`. Then re-run the installer, return to the Installation Screen and click Install again. You will only have to perform this step once per server.
#### Verifying Your Installation Once the installation has finished, it can take as much as 15 minutes on a first run for everything to be configured and set up. You can use: ```bash watch kubectl get pods -n element-onprem ``` This will show the status of all pods, simply wait until all pods have come up and stablised showing as `Ready`. You can also keep track of the `Current Deployment Status` on the Installation Screen, once fully ready you should see: [](https://ems-docs.element.io/uploads/images/gallery/2024-08/image-1722525932639.png) #### What's Next? Once your installation has been verified you should stop the running installer with `CTRL + C` then re-run it. You should notice instead of an IP you are given a URL matching the Synapse Admin domain you configured on the Domains section but on port `8443`. When the installer detects a successful installation, it will change from the first-time run interface to the Admin Console UI. Here you can: - Run through any section previously configured and adjust your settings - Access a new section called `Integrations` to setup additional components like Bridges, VOIP, Monitoring etc. - Use the Admin tab to administer your homeserver (also deployed without requiring running the installer at the Synapse Admin Domain) [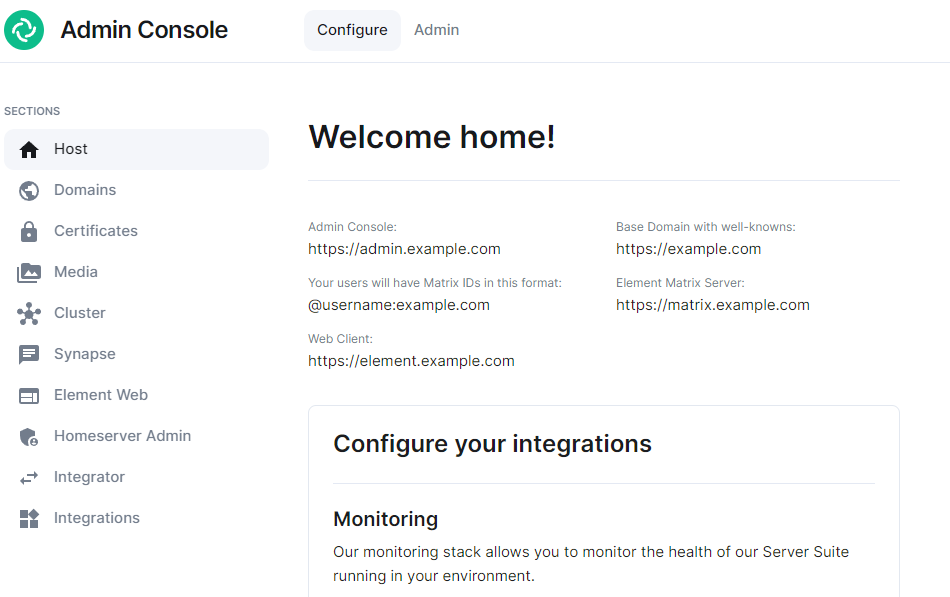](https://ems-docs.element.io/uploads/images/gallery/2024-08/image-1722598587776.png) Check out the [Post-Installation Essentials](https://ems-docs.element.io/books/classic-element-server-suite-documentation-lts-2410/page/post-installation-essentials) for additional information and resources. ##### Core Component Sections You already run through all these sections, however you may wish to dive deeper into each to fine-tune your configuration as required. You can find detailed breakdowns of each config option for these sections in the [Installation of Core Components](https://ems-docs.element.io/books/classic-element-server-suite-documentation-lts-2410/chapter/installation-of-core-components) chapter, as well more advanced options detailed within the [Advanced Configuration](https://ems-docs.element.io/books/classic-element-server-suite-documentation-lts-2410/chapter/advanced-configuration) chapter. ##### The Integrations Section This new section allows you to install new integrations to your deployment, you can find detailed installation instructions for each integration in the [Integrations](https://ems-docs.element.io/books/classic-element-server-suite-documentation-lts-2410/chapter/integrations) chapter. [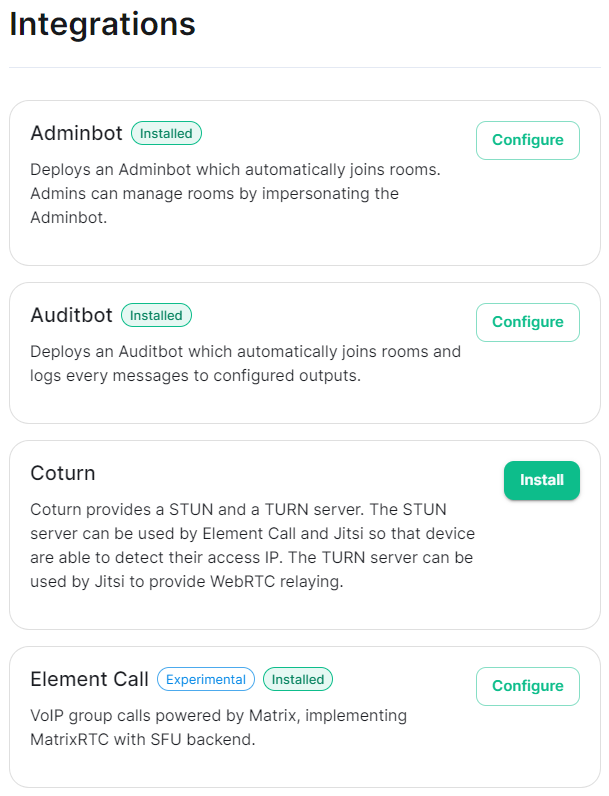](https://ems-docs.element.io/uploads/images/gallery/2024-08/image-1722599074625.png) You can find a full list of integrations available from the [Introduction to Element Server Suite](https://ems-docs.element.io/books/classic-element-server-suite-documentation-lts-2410/page/introduction-to-element-server-suite#bkmrk-components) page. ### Reconfiguring an existing Installation Simply re-run the installer and run through any sections you wish to adjust your config on. Make sure to hit `Save` at the bottom of any changed sections, then hit `Deploy` and `Start Deployment`| [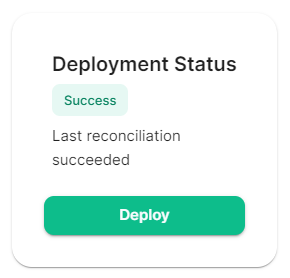](https://ems-docs.element.io/uploads/images/gallery/2024-08/image-1722596949967.png) | [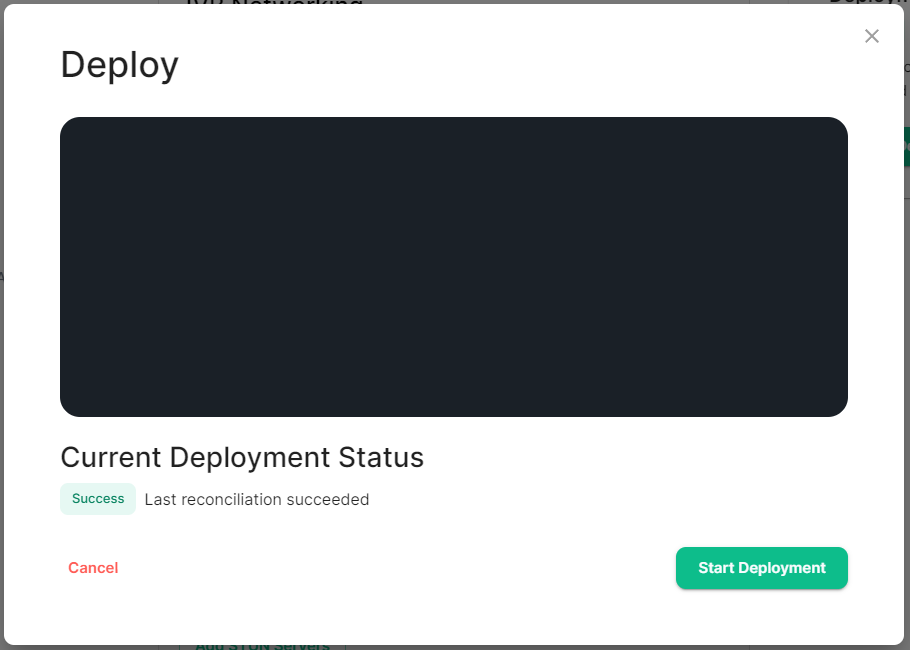](https://ems-docs.element.io/uploads/images/gallery/2024-08/image-1722596962079.png) |
If upgrading from an older LTS to a newer one, it is highly recommended to first upgrade to the latest version of the LTS you are currently running. Then perform another upgrade to the latest version of the next LTS.
Next, download the latest version of the installer, transfer it to the device where your `.element-enterprise-server` configuration exists and make it executable using `chmod +x`.When you first run a new version of the installer, your config may be upgraded. It is highly recommended to make a backup of your config directory. See [Where are the Installer Configuration Files](https://ems-docs.element.io/books/classic-element-server-suite-documentation-lts-2410/page/post-installation-essentials#bkmrk-where-are-the-instal) for more information.
On first run of a new version of the installer, your config may be upgraded, once this is complete you will be able to access the installer UI. Simply go through all sections within the installer, **re-confirm all options**1 (making sure to save any changes / click save on any pages that do not have it greyed out), then hit Deploy. 1 Changes to how specific settings are configured may not automatically be upgraded as part of this step. To avoid issues, it is highly recommended to run through each section of the installer and hit the `Save` button on each. #### Performing upgrades with GroupSync installed If you have the GroupSync integration installed, please ensure you enable `Dry Run` mode. [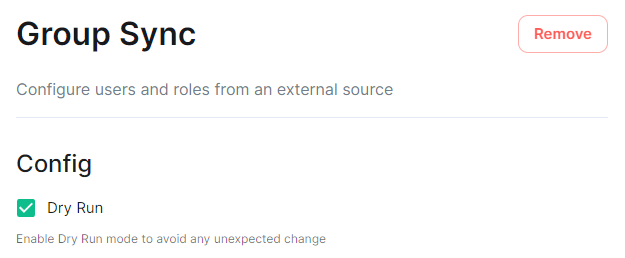](https://ems-docs.element.io/uploads/images/gallery/2024-08/image-1722597927265.png) Once deployment is complete, you can confirm via the GroupSync pod logs that everything is running as expected: ```bash # Confirm the GroupSync Pod Name kubectl get pods -n element-onprem | grep group # Replace POD_NAME in the command below kubectl logs POD_NAME -n element-onprem ``` If everything looks as expected, please re-deploy with `Dry Run` disabled to resume GroupSync functionality. # Post-Installation Essentials You've installed Element Server Suite, what do you need to know? Check here for some essentials. ### End-User Documentation After completing the installation you can share our [User Guide PDF](https://static.element.io/pdfs/element-user-guide.pdf) to help orient and onboard your users to Element! Or visit the [Element Support](https://ems-docs.element.io/books/element-support) book. ### Where are the Installer Configuration Files Everything that you have configured via the Element Server Suite installer is saved to configuration files placed in the `.element-enterprise-server` directory, found in the home directory of the user who ran the installer. In this directory, you will find a subdirectory called `config` that contains the actual configuration files - keep these backed up. ### Running the Installer unattended It is possible to run the installer without using the GUI provided that you have a valid set of configuration files in the `.element-enterprise-server/config` directory. Using this method, you could use the GUI as a configuration editor and then take the resulting configuration and modify it as needed for further installations. This method also makes it possible to set things up once and then run future updates without having to use the GUI. See the [Running the installer unattended](https://ems-docs.element.io/books/classic-element-server-suite-documentation-lts-2410/page/automating-ess-deployment#bkmrk-running-the-installe) section from the [Automating ESS Deployment](https://ems-docs.element.io/books/classic-element-server-suite-documentation-lts-2410/page/automating-ess-deployment) doc. ### Manually creating your first user It is highly recommended to use the Admin Console to create new users, you can see the [Using the Admin Tab](https://ems-docs.element.io/books/classic-element-server-suite-documentation-lts-2410/page/using-the-admin-tab) page for more details, specifically the [Adding Users](https://ems-docs.element.io/books/classic-element-server-suite-documentation-lts-2410/page/using-the-admin-tab#bkmrk-adding-users) section. [](https://ems-docs.element.io/uploads/images/gallery/2023-11/image-1699362765678.png) However you can also create users from your terminal, by running the following command: ```bash $ kubectl --namespace element-onprem exec --stdin --tty \ first-element-deployment-synapse-main-0 \ -- register_new_matrix_user --config /config/rendered/instance.yaml New user localpart: your_username Password: Confirm password: Make admin [no]: yes Sending registration request... Success! ``` Make sure to enter `yes` on `Make admin` if you wish to use this user on the installer or standalone Admin page. Please note, you should be using the [Admin page](https://ems-docs.element.io/books/classic-element-server-suite-documentation-lts-2410/page/using-the-admin-tab) or the [Synapse Admin API](https://ems-docs.element.io/books/element-support/page/getting-started-using-the-admin-api) instead of `kubectl`/`register_new_matrix_user` to create subsequent users. ### Standalone Deployment `microk8s` Specifics #### Cleaning up images cache The installer, from version 24.02, comes with the tool `crictl` which lets you interact with microk8s containerd daemon. After upgrading, once all pods are running, you might want to run the following command to clean-up old images : ```bash ~/.element-enterprise-server/installer/.install-env/bin/crictl -r unix:///var/snap/microk8s/common/run/containerd.sock rmi --prune ``` #### Upgrading microk8s ##### Prior to versions 24.04.05 Upgrading microk8s rely on uninstalling, rebooting the machine, and reinstalling ESS on the new version. It thus involves a downtime. To upgrade microk8s, please run the installer with : `./Initial configuration options specific to the installer, including how ESS should be deployed.
The first section of the ESS installer GUI is the Host section, here you will configure essential details of how ESS will be installed including; deployment type; subscription credentials; PostgreSQL to use; and whether or not your setup is airgapped. Settings configured via the UI in this section will mainly be saved to your `cluster.yml`. If performing a Kubernetes deployment, you will also be able to config Host Admin settings which will save configuration into both `internal.yml` and `deployment.yml`. Depending on your environment you will need to select either `Standalone` or `Kubernetes Application`. `Standalone` will install `microk8s` locally on your machine, and deploy to it so all pods are running locally on the host machine. `Kubernetes Application` will deploy to your Kubernetes infrastructure in a context you will need to have already setup via your kube config. ### Deployment (Standalone) #### Install [](https://ems-docs.element.io/uploads/images/gallery/2024-02/image-1708075153739.png)
Config Example
```yml spec: connectivity: dockerhub: password: example username: example install: emsImageStore: password: example username: example webhooks: caPassphrase: example # Options unique to selecting Standalone certManager: adminEmail: example@Dexample.com microk8s: dnsResolvers: - 8.8.8.8 - 8.8.4.4 postgresInCluster: hostPath: /data/postgres passwordsSeed: example operatorUpdaterDebugLogs: false useLegacyAuth: false ```An example of the cluster.yml config generated when selecting Standalone, note that no specific flag is used within the config to specify selecting between Standalone or Kubernetes. If you choose to manually configure ESS bypassing the GUI, ensure only config options specific to how you wish to deploy are provided.
Config Example
```yml spec: install: operatorUpdaterDebugLogs: false ```Config Example
```yml spec: install: useLegacyAuth: false ```Once you have deployed for the first time, you cannot enable / disable Legacy Auth. Ensure if you require SAML delegated authentication, or wish to use the GroupSync integration, you enable Legacy Authentication prior to deployment.
Config Example
```yml spec: install: # certManager: {} # When 'Skip Cert Manager' selected certManager: adminEmail: example@example.com ```Config Example
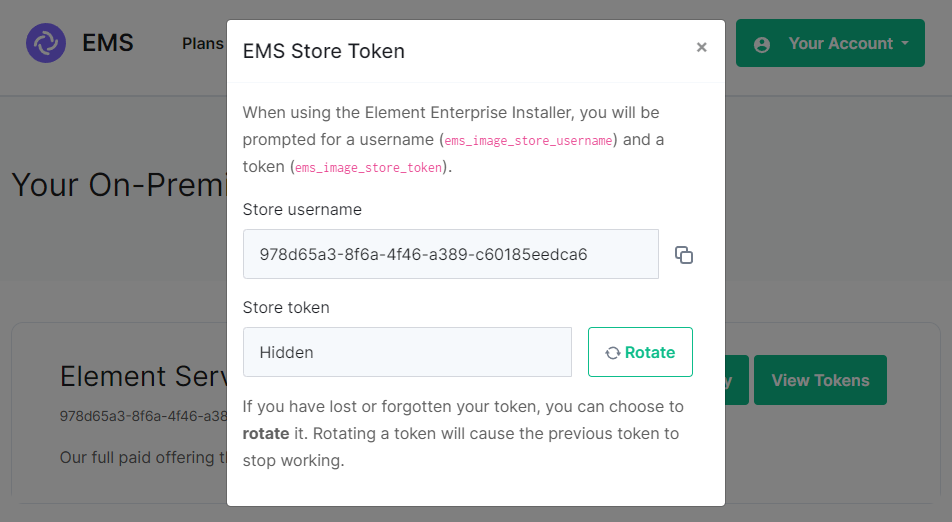
```yml spec: install: emsImageStore: password: token username: test ```If you forget your token and hit 'Refresh' in the EMS Control Panel, you will need to ensure you redeploy your instance with the new token - otherwise subsequent deployments will fail.
[](https://ems-docs.element.io/uploads/images/gallery/2024-08/image-1722600415206.png)Config Example
```yml spec: install: microk8s: persistentVolumesPath: /data/element-deployment registrySize: 25Gi ```Config Example
```yml spec: install: microk8s: dnsResolvers: - 8.8.8.8 - 8.8.4.4 ```Config Example
```yml spec: install: microk8s: # Not present when disabled nginxExtraConfiguration: custom-http-errors: '"404"' server-snippet: >- error_page 404 /404.html; location = /404.html { internal; return 200 "Hello World!
"; } ```The below example is for demonstration purposes only, you should follow the linked guidance before adding extra configuration.
For example, if you wanted to replace the standard 404 error page, you could do this using both [`custom-http-errors`](https://kubernetes.github.io/ingress-nginx/user-guide/nginx-configuration/configmap/#custom-http-errors) and [`server-snippet`](https://kubernetes.github.io/ingress-nginx/user-guide/nginx-configuration/configmap/#server-snippet). To configure via the installer, simply add the specify `custom-http-errors` as the `Name` and click `Add to Nginx Extra Configuration`, then provide the required value in the newly created field: [](https://ems-docs.element.io/uploads/images/gallery/2024-02/image-1708078830743.png) Repeat for `server-snippet`: [](https://ems-docs.element.io/uploads/images/gallery/2024-02/image-1708078877553.png)The above example is used to explain how to configure the Nginx Extra Configuration, and so is for demonstration purposes only, it is not recommended to use this example config. Ideally your web server should manage traffic that would otherwise hit a 404 being served by ESS.
#### PostgreSQL in Cluster [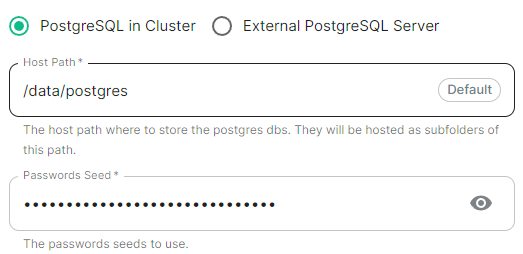](https://ems-docs.element.io/uploads/images/gallery/2024-04/image-1714496148674.png)Config Example
```yml spec: install: microk8s: # postgresInCluster: {} # If 'External PostgreSQL Server' selected postgresInCluster: hostPath: /data/postgres passwordsSeed: example ```Config Example
```yml spec: install: webhooks: caPassphrase: YpiNQMMzBjalfVPQqxcxO4e211YFR5 ```Config Example
```yml spec: connectivity: dockerhub: password: example username: example install: emsImageStore: password: example username: example webhooks: caPassphrase: example # Options unique to selecting Standalone clusterDeployment: true kubeContextName: example namespaces: {} skipElementCrdsSetup: false skipOperatorSetup: false skipUpdaterSetup: false operatorUpdaterDebugLogs: false useLegacyAuth: false ```An example of the cluster.yml config generated when selecting Kubernetes, note that no specific flag is used within the config to specify selecting between Standalone or Kubernetes. If you choose to manually configure ESS bypassing the GUI, ensure only config options specific to how you wish to deploy are provided.
Config Example
```yml spec: install: clusterDeployment: true ```Config Example
```yml spec: install: kubeContextName: example ```Config Example
```yml spec: install: skipElementCrdsSetup: false skipOperatorSetup: false skipUpdaterSetup: false ```Config Example
```yml spec: install: # namespaces: {} # When left as default namespaces # namespaces: # When `Create Namespaces` is disabled # createNamespaces: false namespaces: # When custom namespaces are provided elementDeployment: element-example # Omit any that should remain as default operator: operator-example updater: updater-example ```Preparing the Cluster
**Installing the Helm Chart Repositories** The first step is to start on a machine with helm v3 installed and configured with your kubernetes cluster and pull down the two charts that you will need. First, let's add the element-updater repository to helm: ``` helm repo add element-updater https://registry.element.io/helm/element-updater --username ems_image_store_username --password 'ems_image_store_token' ``` Replace `ems_image_store_username` and `ems_image_store_token` with the values provided to you by Element. Secondly, let's add the element-operator repository to helm: ``` helm repo add element-operator https://registry.element.io/helm/element-operator --username ems_image_store_username --password 'ems_image_store_token' ``` Replace `ems_image_store_username` and `ems_image_store_token` with the values provided to you by Element. Now that we have the repositories configured, we can verify this by: ``` helm repo list ``` and should see the following in that output: ``` NAME URL element-operator https://registry.element.io/helm/element-operator element-updater https://registry.element.io/helm/element-updater ```**Deploy the CRDs** Write the following `values.yaml` file: ``` clusterDeployment: true deployCrds: true deployCrdRoles: true deployManager: false ``` To install the CRDs with the helm charts, simply run: ``` helm install element-updater element-updater/element-updater -f values.yaml helm install element-operator element-operator/element-operator -f values.yaml ``` Now at this point, you should have the following two CRDs available: ``` [user@helm ~]$ kubectl get crds | grep element.io elementwebs.matrix.element.io 2023-10-11T13:23:14Z wellknowndelegations.matrix.element.io 2023-10-11T13:23:14Z elementcalls.matrix.element.io 2023-10-11T13:23:14Z hydrogens.matrix.element.io 2023-10-11T13:23:14Z mautrixtelegrams.matrix.element.io 2023-10-11T13:23:14Z sydents.matrix.element.io 2023-10-11T13:23:14Z synapseusers.matrix.element.io 2023-10-11T13:23:14Z bifrosts.matrix.element.io 2023-10-11T13:23:14Z lowbandwidths.matrix.element.io 2023-10-11T13:23:14Z synapsemoduleconfigs.matrix.element.io 2023-10-11T13:23:14Z matrixauthenticationservices.matrix.element.io 2023-10-11T13:23:14Z ircbridges.matrix.element.io 2023-10-11T13:23:14Z slidingsyncs.matrix.element.io 2023-10-11T13:23:14Z securebordergateways.matrix.element.io 2023-10-11T13:23:14Z hookshots.matrix.element.io 2023-10-11T13:23:14Z matrixcontentscanners.matrix.element.io 2023-10-11T13:23:14Z sygnals.matrix.element.io 2023-10-11T13:23:14Z sipbridges.matrix.element.io 2023-10-11T13:23:14Z livekits.matrix.element.io 2023-10-11T13:23:14Z integrators.matrix.element.io 2023-10-11T13:23:14Z jitsis.matrix.element.io 2023-10-11T13:23:14Z mautrixwhatsapps.matrix.element.io 2023-11-15T09:03:48Z synapseadminuis.matrix.element.io 2023-10-11T13:23:14Z synapses.matrix.element.io 2023-10-11T13:23:14Z groupsyncs.matrix.element.io 2023-10-11T13:23:14Z pipes.matrix.element.io 2023-10-11T13:23:14Z elementdeployments.matrix.element.io 2023-10-11T13:34:25Z chatterboxes.matrix.element.io 2023-11-21T15:55:59Z ```
**Namespace-scoped role** In the namespace where the ESS deployment will happen, to give a user permissions to deploy ESS, please create the following role and roles bindings: - User role: ``` apiVersion: rbac.authorization.k8s.io/v1 kind: Role metadata: name: ess-additional rules: - apiGroups: - apiextensions.k8s.io resources: - customresourcedefinitions verbs: - list - watch - get - apiGroups: - project.openshift.io resources: - projects verbs: - get - list - watch ``` - User roles bindings: ``` apiVersion: rbac.authorization.k8s.io/v1 kind: RoleBinding metadata: name: ess-additional roleRef: apiGroup: rbac.authorization.k8s.io kind: Role name: ess-additional subjects: # role subjects which maps to the user or its groups ```
``` apiVersion: rbac.authorization.k8s.io/v1 kind: RoleBinding metadata: name: ess roleRef: apiGroup: rbac.authorization.k8s.io kind: ClusterRole name: edit subjects: # role subjects which maps to the user or its groups ```
Unchecked - **Skip Updater Setup****.**
Unchecked - **Skip Element CRDs Setup****.**
Checked - **Cluster Deployment****.**
Unchecked - **Kube Context Name****.**
Set to `user_kube_context_name` - **Namespaces****.** - **Create Namespaces****.**
Unchecked - **Operator****.**
Set to `namespace_to_deploy_ess` - **Updater****.**
Set to same as Operator, `namespace_to_deploy_ess` - **Element Deployment****.**
Set to same as Operator, `namespace_to_deploy_ess` #### Internal Webhooks [](https://ems-docs.element.io/uploads/images/gallery/2024-05/image-1716365980592.png)
Config Example
```yml spec: install: webhooks: caPassphrase: YpiNQMMzBjalfVPQqxcxO4e211YFR5 ```Config Example
```yml spec: connectivity: ```Config Example
```yml spec: connectivity: # dockerhub: {} # When Username & Password is disabled per default dockerhub: password: password username: test ```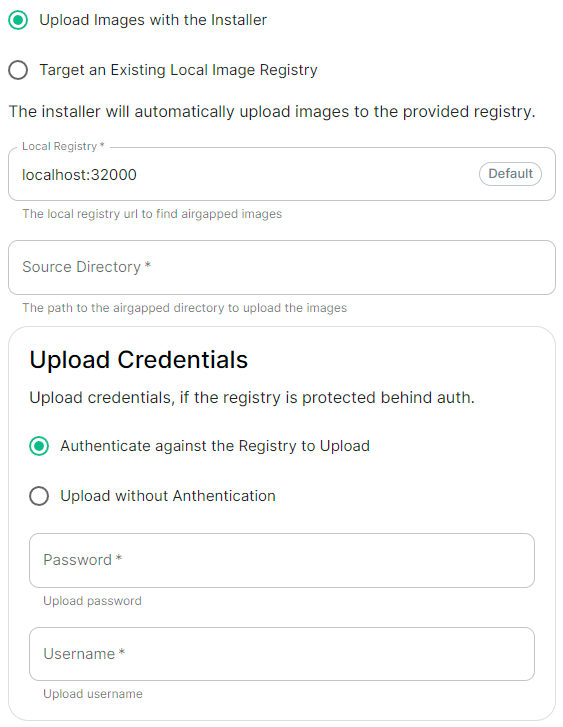 |
 |
Config Example
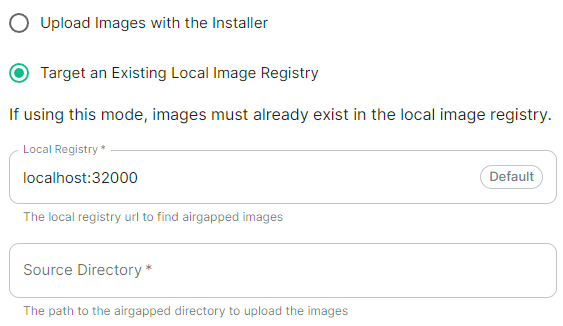
```yml spec: connectivity: airgapped: localRegistry: localhost:32000 sourceDirectory: /home/ubuntu/airgapped/ # uploadCredentials not present if `Target an Existing Local Image Registry` selected # uploadCredentials: {} # If 'Upload without Authentication' uploadCredentials: password: example username: example ```Your airgapped machine will still require access to airgapped linux repositories depending on your OS. If using Red Hat Enterprise Linux, you will also need access to the EPEL repository in your airgapped environment.
### Host Admin [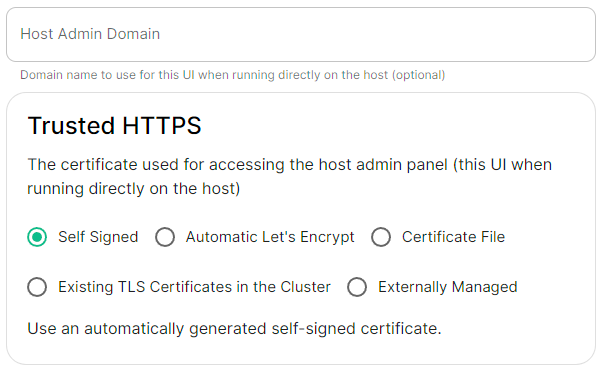](https://ems-docs.element.io/uploads/images/gallery/2024-04/image-1714496264422.png)Config Example
- `internal.yml` ```yml spec: fqdn: admin.example.com tls: # When selecting `Self Signed` # mode: self-signed # When selecting `Automatic Let's Encrypt` mode: automatic automatic: adminEmail: example@example.com # When selecting `Certificate File` # mode: certfile # certificate: # certFile: "example" # Base64 encoded string from certificate # privateKey: "example" # Base64 encoded string from certificate key # When selecting `Exsiting TLS Certificates in the Cluster` # mode: existing # secretName: example # When selecting `Externally Managed` # mode: external ``` - `deployment.yml` ```yml spec: components: synapseAdmin: config: hostOrigin: >- https://admin.example.com,https://admin.example.com:8443 ```Configure the domains ESS should use for the main components deployed by ESS.
The second section of the ESS installer GUI is the Domains section, here you will configure the fully-qualified domain names for each of the main components that will be deployed by ESS.
The domain names configured via the UI in this section will be saved to your deployment.yml under each of the components' k8s: ingress: configuration.
Config Example
```yml spec: components: elementWeb: k8s: ingress: fqdn: element.example.com integrator: k8s: ingress: fqdn: integrator.example.com matrixAuthenticationService: k8s: ingress: fqdn: mas.example.com synapse: k8s: ingress: fqdn: synapse.example.com synapseAdmin: k8s: ingress: fqdn: admin.example.com global: config: domainName: example.com ```Configure and/or provide the certificates that should be used for each domain served by ESS.
The third section of the ESS installer GUI is the Domains section, here you will configure the certificates to use for each previously specified domain name.
Certificate details configured via the UI in this section will be saved to your deployment.yml under each of the components' k8s: ingress: configuration with the cert contents (if manually uploaded) being saved to a secrets.yml in Base64.
Config Example
- `deployment.yml` ```yml spec: components: elementWeb: k8s: ingress: tls: # Selecting `Certmanager Let's Encrypt` certmanager: issuer: letsencrypt mode: certmanager secretName: element-web integrator: k8s: ingress: tls: # Selecting `Certificate File` certificate: certFileSecretKey: integratorCertificate privateKeySecretKey: integratorPrivateKey mode: certfile secretName: integrator matrixAuthenticationService: k8s: ingress: fqdn: mas.kieranml.ems-support.element.dev tls: certmanager: issuer: letsencrypt mode: certmanager secretName: matrix-authentication-service synapse: k8s: ingress: tls: # Selecting `Existing TLS Certificates in the Cluster` mode: existing secretName: example secretName: synapse synapseAdmin: k8s: ingress: tls: # Selecting `Externally Managed` mode: external secretName: synapse-admin wellKnownDelegation: k8s: ingress: tls: mode: external secretName: well-known-delegation ``` - `secrets.yml` ```yml apiVersion: v1 kind: Secret metadata: name: element-web namespace: element-onprem data: elementWebCertificate: >- exampleBase64EncodedString elementWebPrivateKey: >- exampleBase64EncodedString --- apiVersion: v1 kind: Secret metadata: name: integrator namespace: element-onprem data: certificate: >- exampleBase64EncodedString privateKey: >- exampleBase64EncodedString --- apiVersion: v1 kind: Secret metadata: name: matrix-authentication-service namespace: element-onprem data: certificate: >- exampleBase64EncodedString privateKey: >- exampleBase64EncodedString --- apiVersion: v1 kind: Secret metadata: name: synapse namespace: element-onprem data: synapseCertificate: >- exampleBase64EncodedString synapsePrivateKey: >- exampleBase64EncodedString --- apiVersion: v1 kind: Secret metadata: name: synapse-admin namespace: element-onprem data: synapseAdminUICertificate: >- exampleBase64EncodedString synapseAdminUIPrivateKey: >- exampleBase64EncodedString --- apiVersion: v1 kind: Secret metadata: name: well-known-delegation namespace: element-onprem data: wellKnownDelegationCertificate: >- exampleBase64EncodedString wellKnownDelegationPrivateKey: >- exampleBase64EncodedString ```Config Example
```yml spec: components: componentName: # `elementWeb`, `integrator`, `synapse`, `synapseAdmin`, `wellKnownDelegation` k8s: ingress: tls: certmanager: issuer: letsencrypt mode: certmanager secretName: component # Not used with 'Certmanager Let's Encrypt' ```Config Example
- `deployment.yml` ```yml spec: components: componentName: # `elementWeb`, `integrator`, `synapse`, `synapseAdmin`, `wellKnownDelegation` k8s: ingress: tls: mode: certfile certificate: certFileSecretKey: componentCertificate privateKeySecretKey: componentPrivateKey secretName: component ``` - `secrets.yml` ```yml apiVersion: v1 kind: Secret metadata: name: component namespace: element-onprem data: componentCertificate: >- exampleBase64EncodedString componentPrivateKey: >- exampleBase64EncodedString --- ```Config Example
```yml spec: components: componentName: # `elementWeb`, `integrator`, `synapse`, `synapseAdmin`, `wellKnownDelegation` k8s: ingress: tls: mode: existing secretName: example secretName: component # Not used with 'Existing TLS Certificates in the Cluster' ```Config Example
```yml spec: components: componentName: # `elementWeb`, `integrator`, `synapse`, `synapseAdmin`, `wellKnownDelegation` k8s: ingress: tls: mode: external secretName: component # Not used with 'Externally Managed' ```Config Example
```yaml apiVersion: v1 data: client: |- { "m.homeserver": { "base_url": "https://synapse.example.com" } } server: |- { "m.server": "synapse.example.com:443" } kind: ConfigMap metadata: creationTimestamp: "2024-06-13T09:32:52Z" labels: app.kubernetes.io/component: matrix-delegation app.kubernetes.io/instance: first-element-deployment-well-known app.kubernetes.io/managed-by: element-operator app.kubernetes.io/name: well-known app.kubernetes.io/part-of: matrix-stack app.kubernetes.io/version: 1.24-alpine-slim k8s.element.io/crdhash: 9091d9610bf403eada3eb086ed2a64ab70cc90a8 name: first-element-deployment-well-known namespace: element-onprem ownerReferences: - apiVersion: matrix.element.io/v1alpha1 kind: WellKnownDelegation name: first-element-deployment uid: 24659493-cda0-40f0-b4db-bae7e15d8f3f resourceVersion: "3629" uid: 7b0082a9-6773-4a28-a2a9-588a4a7f7602 ```Configuration options for how ESS can communicate with your PostgreSQL database.
This section of the ESS installer GUI will only be present if you are using the Kubernetes deployment option or you have opted to use your own PostgreSQL for a Standalone deployment. If you have not yet set up your PostgreSQL, you should ensure you have done so before proceeding, see the relevant PostgreSQL section from the [Requirements and Recommendations](https://ems-docs.element.io/books/classic-element-server-suite-documentation-lts-2410/page/requirements-and-recommendations) page: - [Standalone Deployment PostgreSQL Prerequisites](https://ems-docs.element.io/books/classic-element-server-suite-documentation-lts-2410/page/requirements-and-recommendations#bkmrk-postgresql) - [Kubernetes Deployment PostgreSQL Prerequisites](https://ems-docs.element.io/books/classic-element-server-suite-documentation-lts-2410/page/requirements-and-recommendations#bkmrk-postgresql-1)
All settings configured via the UI in this section will be saved to your deployment.yml, with the contents of secrets being saved to secrets.yml. You will find specific configuration examples in each section.
Config Example
- `deployment.yml` ```yml spec: components: synapse: config: postgresql: ``` - `secrets.yml` ```yml apiVersion: v1 kind: Secret metadata: name: synapse namespace: element-onprem data: postgresPassword: ```By default, if you do not change any settings on this page, defaults will be added to your configuration file/s (see example below).
Config Example
```yml spec: components: synapse: config: postgresql: database: synapse host: db.example.com passwordSecretKey: postgresPassword user: test-username ```Config Example
```yml spec: components: synapse: config: postgresql: database: synapse ```Config Example
```yml spec: components: synapse: config: postgresql: host: db.example.com ```Config Example
```yml spec: components: synapse: config: postgresql: # port not present when left as default 5432 port: 5432 ```Config Example
```yml spec: components: synapse: config: postgresql: # sslMode not present when left as default `require` sslMode: require # sslMode: disable # sslMode: allow # sslMode: prefer # sslMode: verify-ca # sslMode: verify-full ```Config Example
```yml spec: components: synapse: config: postgresql: user: test-username ```Config Example
- `secrets.yml` ```yml apiVersion: v1 kind: Secret metadata: name: synapse namespace: element-onprem data: postgresPassword: dGVzdC1wYXNzd29yZA== ```Config Example
```yml spec: components: synapse: config: postgresql: # connectionPool not present when left as default connectionPool: maxConnections: 10 minConnections: 5 ```Configuration options relating to how Media uploaded to your homeserver is handled by ESS.
The Media section allows you to customise where media uploaded to your homeserver should be stored and the maximum upload size. By default this is to a Persistent Volume Claim (PVC) however you can also configure options for using S3.
All settings configured via the UI in this section will be saved to your deployment.yml, with the contents of secrets being saved to secrets.yml. You will find specific configuration examples in each section.
Config Example
- `deployment.yml` ```yml metadata: annotations: ui.element.io/layer: | components: synapse: config: media: spec: components: synapse: config: media: ``` - `secrets.yml` ```yml kind: Secret metadata: name: synapse namespace: element-onprem data: ```By default, if you do not change any settings on this page, defaults will be added to your configuration file/s (see example below).
Config Example
- `deployment.yml` ```yml spec: components: synapse: config: media: maxUploadSize: 100M volume: size: 50Gi ```Config Example
```yml spec: components: synapse: config: media: volume: # Present if you select either Persistent Volume Claim option size: 50Gi ```Config Example
```yml spec: components: synapse: config: media: s3: bucket: example_bucket_name prefix: example_prefix storageClass: STANDARD # Not present if left as default ```Config Example
- `secrets.yml` ```yml apiVersion: v1 kind: Secret metadata: name: synapse namespace: element-onprem data: mediaS3StorageAccessKeyId: ZXhhbXBsZWFjY2Vzc2tleWlk mediaS3StorageSecretKey: ZXhhbXBsZXNlY3JldGFjY2Vzc2tleQ== ```Config Example
```yml spec: components: synapse: config: media: s3: region: eu-central-1 # Not present if disabled ```Config Example
```yml spec: components: synapse: config: media: s3: endpointUrl: https://example-endpoint.url # Not present if disabled ```Config Example
```yml spec: components: synapse: config: media: s3: # Not present if disabled # localCleanup: {} # If defaults left as-is localCleanup: frequency: 2h # Only present if changed from default threshold: 2d # Only present if changed from default ```Config Example
```yml spec: components: synapse: config: media: maxUploadSize: 100M ```A detailed look at Delegated Authentication options available and setup examples.
This is a new section introduced in LTS 24.10 which replaces the previous Delegated Authentication options found within the Synapse section. Your previous configuration will be upgraded on first-run of the newer LTS.
In the Authentication section you will find options to configure settings specific to Authentication. Regardless of if you are using the Matrix Authentication Server, or have enabled Legacy Auth, the settings on this page will remain the same. However please note, MAS does not support delegated authentication with SAML or GroupSync - if you wish to enable either of these you will need to return to the Host section and enable [Legacy Auth](https://ems-docs.element.io/books/classic-element-server-suite-documentation-lts-2410/page/host-section#bkmrk-legacy-auth).All settings configured via the UI in this section will be saved to your deployment.yml, with the contents of secrets being saved to secrets.yml. You will find specific configuration examples in each section.
Config Example
- `deployment.yml` ```yml metadata: annotations: ui.element.io/layer: | components: synapse: spec: components: synapse: config: delegatedAuth: ``` - `secrets.yml` ```yml kind: Secret metadata: name: synapse namespace: element-onprem data: ```By default, if you do not change any settings on this page, defaults will be added to your configuration file/s (see example below).
Config Example
- `deployment.yml` ```yml metadata: annotations: ui.element.io/layer: | components: spec: synapse: config: delegatedAuth: localPasswordDatabase: enableRegistration: false # Note, if you deploy without any authentication methods enabled, the installer will default to Local Accounts. ``` - `secrets.yml` ```yml apiVersion: v1 kind: Secret metadata: data: ldapBindPassword: examplePassword ```Config Example
```yml spec: components: synapse: config: delegatedAuth: userProfiles: allowAvatarChange: true # Not present if left as default allowDisplayNameChange: true # Not present if left as default allowEmailChange: true # Not present if left as default ```Config Example
```yml spec: components: synapse: config: delegatedAuth: oidc: - ```Config Example
```yml spec: components: synapse: config: delegatedAuth: oidc: idpName: example_name # Required ```Config Example
```yml spec: components: synapse: config: delegatedAuth: oidc: idpId: 01JDS2WKNYTQS21GFAKM9AKD9R # Required ```Config Example
```yml spec: components: synapse: config: delegatedAuth: oidc: idpBrand: example_brand ```Config Example
```yml spec: components: synapse: config: delegatedAuth: oidc: issuer: https://issuer.example.com/ # Required ```Config Example
```yml spec: components: synapse: config: delegatedAuth: oidc: clientAuthMethod: client_secret_basic # If no `clientAuthMethod` defined, will default to `client_secret_basic` # clientAuthMethod: client_secret_post # clientAuthMethod: none ```Config Example
```yml spec: components: synapse: config: delegatedAuth: oidc: clientId: example_client_id ```Config Example
- `deployment.yml` ```yml spec: components: synapse: config: delegatedAuth: oidc: clientSecretSecretKey: oidcClientSecret ``` - `secrets.yml` ```yml apiVersion: v1 kind: Secret metadata: name: synapse namespace: element-onprem data: oidcClientSecret: U2VjdXJlT0lEQ0NsaWVudFNlY3JldA== ```Config Example
```yml spec: components: synapse: config: delegatedAuth: oidc: ```Config Example
```yml spec: components: synapse: config: delegatedAuth: oidc: scopes: - openid - profile - email ```Config Example
```yml spec: components: synapse: config: delegatedAuth: oidc: userMappingProvider: ```Config Example
```yml spec: components: synapse: config: delegatedAuth: oidc: userMappingProvider: subjectTemplate: '{{ user.subject }}' ```Config Example
```yml spec: components: synapse: config: delegatedAuth: oidc: userMappingProvider: localpartTemplate: '{{ user.preferred_username }}' ```Config Example
```yml spec: components: synapse: config: delegatedAuth: oidc: userMappingProvider: displayNameTemplate: '{{ user.name }}' ```Config Example
```yml spec: components: synapse: config: delegatedAuth: oidc: userMappingProvider: emailTemplate: '{{ user.email }}' ```Config Example
```yml spec: components: synapse: config: delegatedAuth: oidc: - clientId: synapsekieranml clientSecretSecretKey: oidcClientSecret endpointsDiscovery: skipVerification: false idpId: 01JDS2WKNYTQS21GFAKM9AKD9R idpName: Keycloak issuer: https://keycloak.ems-support.element.dev/realms/matrix scopes: - openid - profile - email userMappingProvider: displayNameTemplate: '{{ user.name }}' emailTemplate: '{{ user.email }}' ```Config Example
```yml spec: components: synapse: config: delegatedAuth: oidc: - clientId: synapsekieranml clientSecretSecretKey: oidcClientSecret endpointsDiscovery: skipVerification: false idpId: 01JDS2WKNYTQS21GFAKM9AKD9R idpName: Keycloak issuer: https://keycloak.ems-support.element.dev/realms/matrix scopes: - openid - profile - email userMappingProvider: displayNameTemplate: '{{ user.name }}' emailTemplate: '{{ user.email }}' ```The Matrix Authentication Service does not support configuring Backchannel Logout. You can only configure Backchannel logout if you have enabled Legacy Auth from the Host Section.
Config Example
```yml spec: components: synapse: config: delegatedAuth: oidc: - clientId: synapsekieranml clientSecretSecretKey: oidcClientSecret endpointsDiscovery: skipVerification: false idpId: 01JDS2WKNYTQS21GFAKM9AKD9R idpName: Keycloak issuer: https://keycloak.ems-support.element.dev/realms/matrix scopes: - openid - profile - email userMappingProvider: displayNameTemplate: '{{ user.name }}' emailTemplate: '{{ user.email }}' ```The Matrix Authentication Service does not support SAML and it is recommended to switch to OIDC. You can only enable SAML authentication if you have enabled Legacy Auth from the Host Section.
Settings specific to the environment which you are deploying ESS into such as CA.
In the Cluster section you will find options to configure settings specific to the cluster which Element Deployment will run on top of. Initially only one option is presented, however some additional options are presented under 'Advanced'. By default, it is unlikely you should need to configure anything on this page.
All settings configured via the UI in this section will be saved to your deployment.yml, with the contents of secrets being saved to secrets.yml. You will find specific configuration examples in each section.
Config Example
```yml metadata: annotations: ui.element.io/layer: | global: config: adminAllowIps: _value: defaulted k8s: ingresses: tls: certmanager: _value: defaulted spec: components: synapseAdmin: config: hostOrigin: >- https://admin.example.com,https://admin.example.com:8443 global: config: adminAllowIps: - 0.0.0.0/0 - '::/0' k8s: ingresses: tls: certmanager: issuer: letsencrypt mode: certmanager ```Config Example
- `secrets.yml` ```yml apiVersion: v1 kind: Secret metadata: name: global namespace: element-onprem data: # Added to the `global`, `element-onprem` secret as `ca.pem` under the `data` section. Other values may also be present here. ca.pem: >- base64encodedCAinPEMformatString ```Config Example
- `deployment.yml` ```yml metadata: annotations: ui.element.io/layer: | global: config: imagesDigestsConfigMap: {} # Remove if no longer defined in `spec`, `global`, `config` spec: global: config: imagesDigestsConfigMap: example # Remove if no longer required ```Config Example
- `deployment.yml` ```yml metadata: annotations: ui.element.io/layer: | global: config: supportDnsFederationDelegation: {} # Remove if no longer defined in `spec`, `global`, `config` spec: global: config: # supportDnsFederationDelegation: false # Default value when not defined supportDnsFederationDelegation: true ```It is highly discouraged from enabling support for DNS Federation Delegation, a significant number of features across ESS components are configured via .well-known files deployed by WellKnownDelegation. Enabling this will prevent those features from working so you may have a degraded experience.
Config Example
- `deployment.yml` ```yml metadata: annotations: ui.element.io/layer: | global: config: verifyTls: {} # Remove if no longer defined in `spec`, `global`, `config` spec: global: config: # verifyTls: true # Default value when not defined verifyTls: false ```Config Example
- `secrets.yml` ```yml apiVersion: v1 kind: Secret metadata: name: global namespace: element-onprem data: # Added to the `global`, `element-onprem` secret as `genericSharedSecret` under the `data` section. Other values may also be present here. genericSharedSecret: QmdrWkVzRE5aVFJSOTNKWVJGNXROTG10UTFMVWF2 ```Config Example
- `deployment.yml` ```yml metadata: annotations: ui.element.io/layer: | global: config: adminAllowIps: # _value: defaulted # Default value '0': {} '1': {} spec: global: config: # adminAllowIps: # Default values # - 0.0.0.0/0 # - '::/0' adminAllowIps: - 192.168.0.1/24 - 127.0.0.1/24 ```The Synapse configuration options for your Matrix Homeserver incl. registration & encryption.
Synapse is the Matrix homeserver that powers ESS, in this section you will be customising settings relating to your homeserver, analogous with settings you'd set in the `homeserver.yml` if configuring Synapse manually.
All settings configured via the UI in this section will be saved to your deployment.yml, with the contents of secrets being saved to secrets.yml. You will find specific configuration examples in each section.
Config Example
- `deployment.yml` ```yml metadata: annotations: ui.element.io/layer: | components: synapse: spec: components: synapse: ``` - `secrets.yml` ```yml kind: Secret metadata: name: synapse namespace: element-onprem data: ```By default, if you do not change any settings on this page, defaults will be added to your configuration file/s (see example below).
Config Example
- `deployment.yml` ```yml metadata: annotations: ui.element.io/layer: | components: synapse: config: _value: defaulted k8s: haproxy: _value: defaulted redis: _value: defaulted synapse: _value: defaulted spec: components: synapse: config: maxMauUsers: 250 media: volume: size: 50Gi urlPreview: config: acceptLanguage: - en k8s: haproxy: workloads: resources: limits: memory: 200Mi requests: cpu: 100m memory: 100Mi redis: workloads: resources: limits: memory: 50Mi requests: cpu: 50m memory: 50Mi synapse: workloads: resources: limits: memory: 4Gi requests: cpu: 100m memory: 100Mi ``` - `secrets.yml` ```yml apiVersion: v1 kind: Secret metadata: name: synapse namespace: element-onprem data: adminPassword: exampleAdminPassword macaroon: exampleMacaroon registrationSharedSecret: exampleRegistrationSharedSecret signingKey: >- exampleBase64EncodedSigningKey ```For example, you may wish for your server to be able to handle greater than 500 Monthly Active Users, so you select 2500 users. When you later define the [`Max MAU Users`](https://ems-docs.element.io/books/classic-element-server-suite-documentation-lts-2410/page/synapse-section#bkmrk-max-mau-users) in the Config section below, you can choose any number you wish.
The same applies with Federation, you can optimise your deployment to suit Open Federation but opt to close it in the dedicated Federation section. #### Monthly Active Users [](https://ems-docs.element.io/uploads/images/gallery/2024-08/image-1724313947283.png)
Config Example
```yml metadata: annotations: ui.element.io/profile: | components: synapse: _subvalues: mau: 500 # mau: 2500 # mau: 10000 ```Config Example
```yml metadata: annotations: ui.element.io/profile: | components: synapse: _subvalues: fed: closed # fed: limited # fed: open ```Config Example
```yml spec: components: synapse: config: acceptInvites: manual # acceptInvites: auto # acceptInvites: auto_dm_only ```Config Example
```yml spec: components: synapse: config: maxMauUsers: 250 ```Config Example
```yml spec: components: synapse: config: registration: open # registration: custom # registration: closed ```Open or Closed registration will not affect the creation of new Matrix Accounts via Delegated Authentication. New users via Delegated Authentication i.e. LDAP, SAML or OIDC, who have yet to login to the homeserver and technically do not yet have a created Matrix ID, will still have one created when they successfully authenticate regardless of if registration is Closed.
#### Admin Password [](https://ems-docs.element.io/uploads/images/gallery/2024-02/image-1707395849132.png)Config Example
- `deployment.yml` ```yml spec: components: synapse: config: adminPasswordSecretKey: adminPassword ``` - `secrets.yml` ```yml data: adminPassword: ExampleAdminPasswordBase64EncodedString ```If you are experiencing issues with accessing the Admin Console following a wipe and reinstall, ensure you do not have the previous install credentials cached. You can clear them via your browsers' settings, then refresh the page (you will be provided with a new link via the Installer CLI) to resolve.
### Log Unlike with most other sections, logging values set here are analogous to creating a `Config Example
```yml spec: components: synapse: config: log: rootLevel: Info # rootLevel: Debug # rootLevel: Warning # rootLevel: Error # rootLevel: Critical ```It is not advised to leave your Logging Level at anything other than the default, as more verbose logging may expose information that should otherwise not be accessible. When sharing logs, remember to redact any sensitive information you do not wish to share.
#### Sentry DSN [](https://ems-docs.element.io/uploads/images/gallery/2024-02/image-1707396003419.png)Config Example
```yml spec: components: synapse: config: log: sentryDsn: https://publickey:secretkey@sentry.io/projectid ```Config Example
```yml spec: components: synapse: config: log: levelOverrides: synapse.storage.SQL: Info # synapse.storage.SQL: Debug # synapse.storage.SQL: Error # synapse.storage.SQL: Warning # synapse.storage.SQL: Critical ```Config Example
```yml spec: components: synapse: config: security: defaultRoomEncryption: auto_all # defaultRoomEncryption: auto_invite # defaultRoomEncryption: forced_all # defaultRoomEncryption: forced_invite # defaultRoomEncryption: not_set ```This option will only affect rooms created after it is set and will not affect rooms created by other servers.
- `auto_all` - Automatically enables encryption for all rooms created on the local server if all present integrations support it. - `auto_invite` - Automatically enables encryption for private rooms and private messages if all present integrations support it. - `forced_all` - Enforces encryption for all rooms created on the local server, regardless of the integrations supporting encryption. - `forced_invite` - Enforces encryption for private rooms and private messages, regardless of the integrations supporting encryption. - `not_set` - Does not enforce encryption, leaving room encryption configuration choice to room admins. #### Password Policy [`password_config`](https://element-hq.github.io/synapse/latest/usage/configuration/config_documentation.html#password_config) [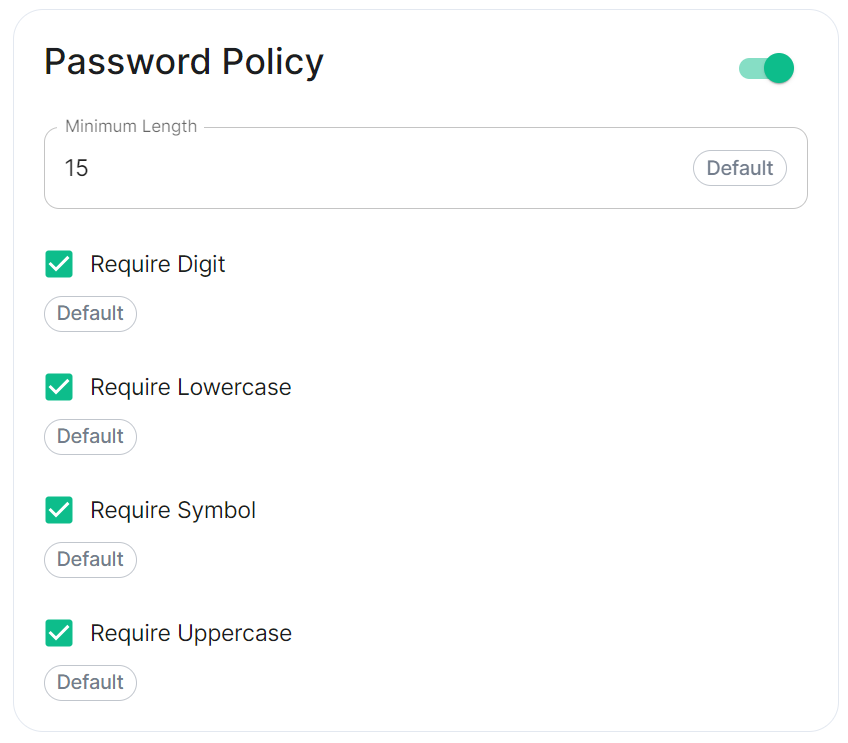](https://ems-docs.element.io/uploads/images/gallery/2024-02/image-1707243135026.png)Config Example
```yml spec: components: synapse: config: security: # Not present when disabled # passwordPolicy: # {} When enabled with default settings passwordPolicy: # Only configured like so when values changed from thier defaults minimumLength: 20 # Default: 15 requireDigit: false # Default: true requireLowercase: false # Default: true requireSymbol: false # Default: true requireUppercase: false # Default: true ```You may notice that despite this not being enabled, users are required when registering to set secure passwords when doing do via the Element Web client. This is because the client itself enforces secure passwords, this setting is required should you wish to ensure all accounts have enforces password requirements, as other Matrix clients may not themselves enforce secure passwords.
### Telemetry [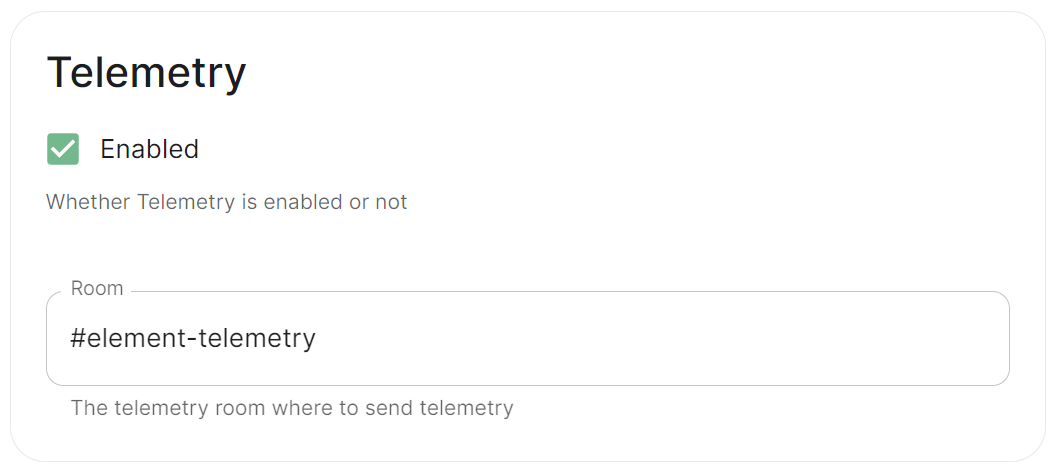](https://ems-docs.element.io/uploads/images/gallery/2024-01/image-1706547000728.png)Config Example
```yml spec: components: synapse: config: telemetry: enabled: true passwordSecretKey: telemetryPassword room: '#element-telemetry' ```Config Example
``` { "_id" : ObjectId("6363bdd7d51c84d1f10a8126"), "onPremiseSubscription" : ObjectId("62f14dd303c67b542efddc4f"), "payload" : { "data" : { "activeUsers" : { "count" : 1, "identifiers" : { "native" : [ "5d3510fc361b95a5d67a464a188dc3686f5eaf14f0e72733591ef6b8da478a18" ] }, "period" : { "end" : 1667481013777, "start" : 1666970260518 } } }, "generationTime" : 1667481013777, "hostname" : "element.demo", "instanceId" : "bd3bbf92-ac8c-472e-abb5-74b659a04eec", "type" : "synapse", "version" : 1 }, "request" : { "clientIp" : "71.70.145.71", "userAgent" : "Synapse/1.65.0" }, "schemaVersion" : 1, "creationTimestamp" : ISODate("2022-11-03T13:10:47.476Z") } ```Config Example
```yml spec: components: synapse: config: telemetry: matrixNetworkStats: endpoint: https://test.endpoint.url ```Config Example
```yml spec: components: synapse: config: urlPreview: {} # {} When disabled, otherwise enabled with config as detailed in sections below. ```Enabling or disabling URL previews can impact the amount of information displayed in the chat interface, and it can also have privacy implications as fetching URL previews involves making requests to external servers to retrieve metadata.
#### Default Blacklist When enabling URL Preview, a default blacklist using [`url_preview_ip_range_blacklist`](https://element-hq.github.io/synapse/latest/usage/configuration/config_documentation.html#url_preview_ip_range_blacklist) is configured for all private networks (see ranged below) to avoid leaking information by asking for preview of links pointing to private paths of the infrastructure. While this blacklist cannot be changed, you can whitelist specific ranges using [IP Range Allowed](#bkmrk-ip-range-allowed).Config Example
```yml url_preview_ip_range_blacklist: - '192.168.0.0/16' - '100.64.0.0/10' - '192.0.0.0/24' - '169.254.0.0/16' - '192.88.99.0/24' - '198.18.0.0/15' - '192.0.2.0/24' - '198.51.100.0/24' - '203.0.113.0/24' - '224.0.0.0/4' - '::1/128' - 'fe80::/10' - 'fc00::/7' - '2001:db8::/32' - 'ff00::/8' - 'fec0::/10' ```Config Example
```yml spec: components: synapse: config: urlPreview: config: acceptLanguage: - en ```Config Example
```yml spec: components: synapse: config: urlPreview: config: ipRangeAllowed: - 10.0.0.0/24 ```Config Example
```yml spec: components: synapse: config: userDirectory: # Not present when left as default, `true` # searchAllUsers: true searchAllUsers: false ```Config Example
- `deployment.yml` ```yml spec: components: synapse: config: # Not present if disabled # stun: {} # If `Internal Coturn Server` selected stun: sharedSecretSecretKey: stunSharedSecret turnUris: - turn:turn.example.com - turns:turns.example.com ``` - `secrets.yml` ```yml data: stunSharedSecret: ExampleSTUNSharedSecretBase64EncodedString ```Config Example
```yml spec: components: synapse: config: # Not present if disabled # identityServer: {} # If enabled but `autoBind` not selected identityServer: autoBind: true ```Config Example
```yml spec: components: synapse: config: httpProxy: httpProxy: http_proxy.example.com httpsProxy: https_proxy.example.com ```Config Example
```yml spec: components: synapse: config: httpProxy: noProxy: - no_proxy.example.com # Hostname example - 192.168.0.123 # IP example - 192.168.1.1/24 # IP range example ```Config Example
```yml spec: components: synapse: config: dataRetention: messageLifetime: 1 ```Config Example
```yml spec: components: synapse: config: dataRetention: mediaLifetime: 1 ```Config Example
```yml spec: components: synapse: config: dataRetention: deleteRoomsAfterInactivity: 1w ```Config Example
- `secrets.yml` ```yml data: macaroon: ExampleMacaroonBase64EncodedString ```Config Example
- `secrets.yml` ```yml data: registrationSharedSecret: ExampleRegistrationSharedSecretBase64EncodedString ```Config Example
- `secrets.yml` ```yml data: signingKey: >- ExampleSigningKeyBase64EncodedString ```We strongly advise against including any config not configurable via the UI as it will most likely interfere with settings automatically computed by the updater. Additional configuration options are not supported so we encourage you to first raise your requirements to Support where we can best advise on them.
An `Additional Config` section, which allows including config not currently configurable via the UI from the [Configuration Manual](https://element-hq.github.io/synapse/latest/usage/configuration/config_documentation.html), is available under the 'Advanced' section of this page. See the dedicated page on additional Synapse configuration, [Synapse Section: Additional Config](https://ems-docs.element.io/books/classic-element-server-suite-documentation-lts-2410/page/synapse-section-additional-config) # Synapse Section: FederationDetailed information on configuring homeserver Federation including Trusted Key Servers.
Federation is the process by which users on different servers can participate in the same room. For this to work, all servers participating in a room must be able to talk to each other. When Federation is `Open`, you will not need to configure anything further, however to privately federate you will need to make use of the `Federation` section found under `Advanced`. [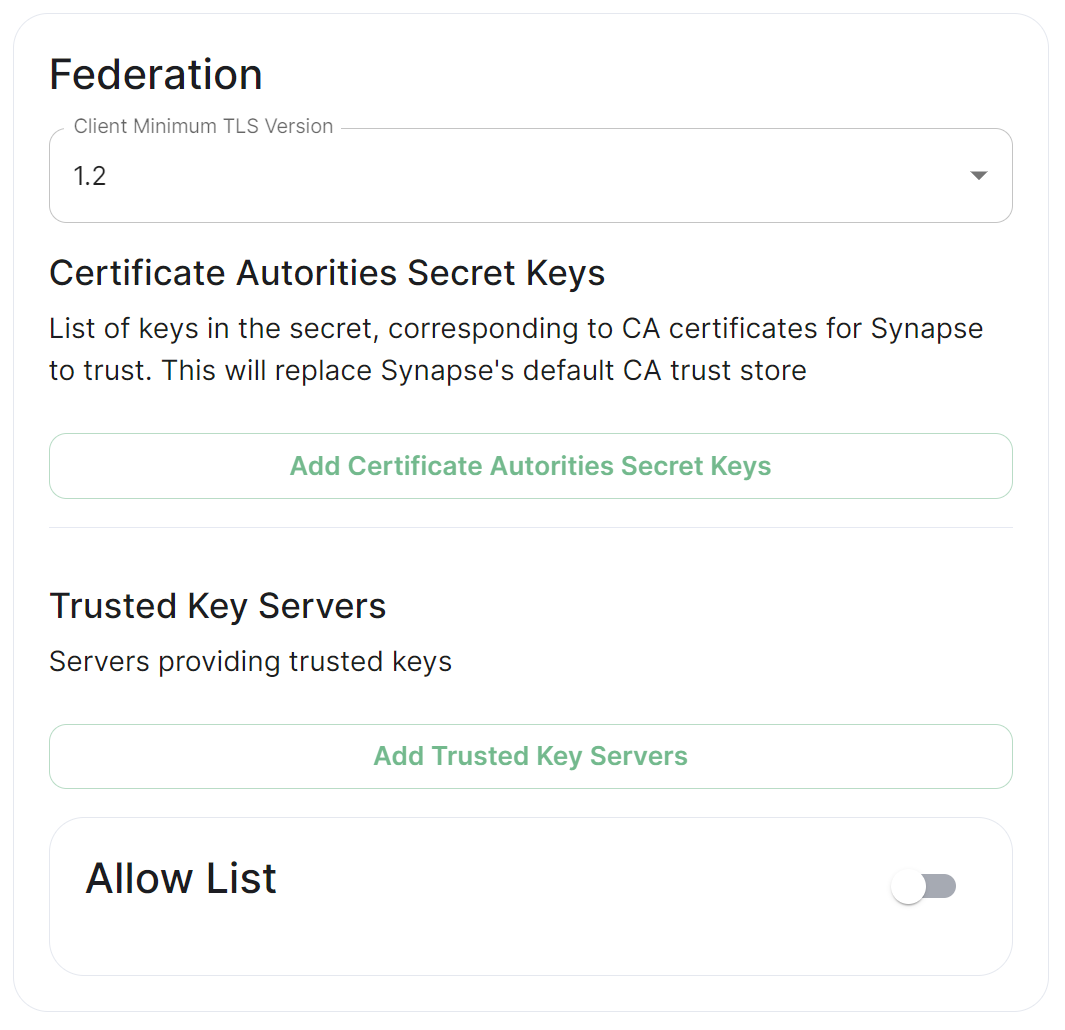](https://ems-docs.element.io/uploads/images/gallery/2024-01/image-1706542780463.png) ## How do I turn Federation On / Off? How Federation is enabled is automatic based on how you configure it within this Federation section. By default Federation is enabled, to close Federation simply enable the Allow List without adding any allowed servers. ### Federation Profile At the top of the [Synapse Section](https://ems-docs.element.io/books/classic-element-server-suite-documentation-lts-2410/page/synapse-section#bkmrk-federation-type) you can configure a Federation Type. This Profile section specifically configures the performance profile of your deployed homeserver. As such, setting this to `Open` will automatically configure [Synapse Workers](https://ems-docs.element.io/books/classic-element-server-suite-documentation-lts-2410/page/synapse-section-workers) for Federation Endpoints to better support an openly federating server. This should not be confused with the Federation section detailed in this document. [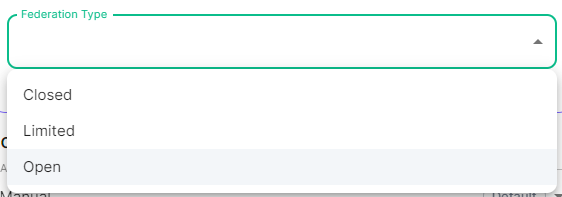](https://ems-docs.element.io/uploads/images/gallery/2024-05/image-1715244469299.png)
Previous setups may have used the Synapse Additional config. Configuration of Federation settings via Additional Config, that are in conflict with any set via the UI, will not override the UI set values. As such, we do not advise including them or any related settings within the Additional Config as they are of increased risk to causing issues with your deployment and are not supported.
## Client Minimum TLS Version [`federation_client_minimum_tls_version`](https://element-hq.github.io/synapse/latest/usage/configuration/config_documentation.html#federation_client_minimum_tls_version) [](https://ems-docs.element.io/uploads/images/gallery/2024-01/image-1706544124637.png) Allows you to choose the minimum TLS version that will be used for outbound federation requests. Defaults to "1.2". Configurable to "1.2" or "1.3".Setting this value higher than "1.2" will prevent federation to most of the public Matrix network: only configure it to "1.3" if you have an entirely private federation setup and you can ensure TLS 1.3 support.
## Certificate Autorities Secret Keys [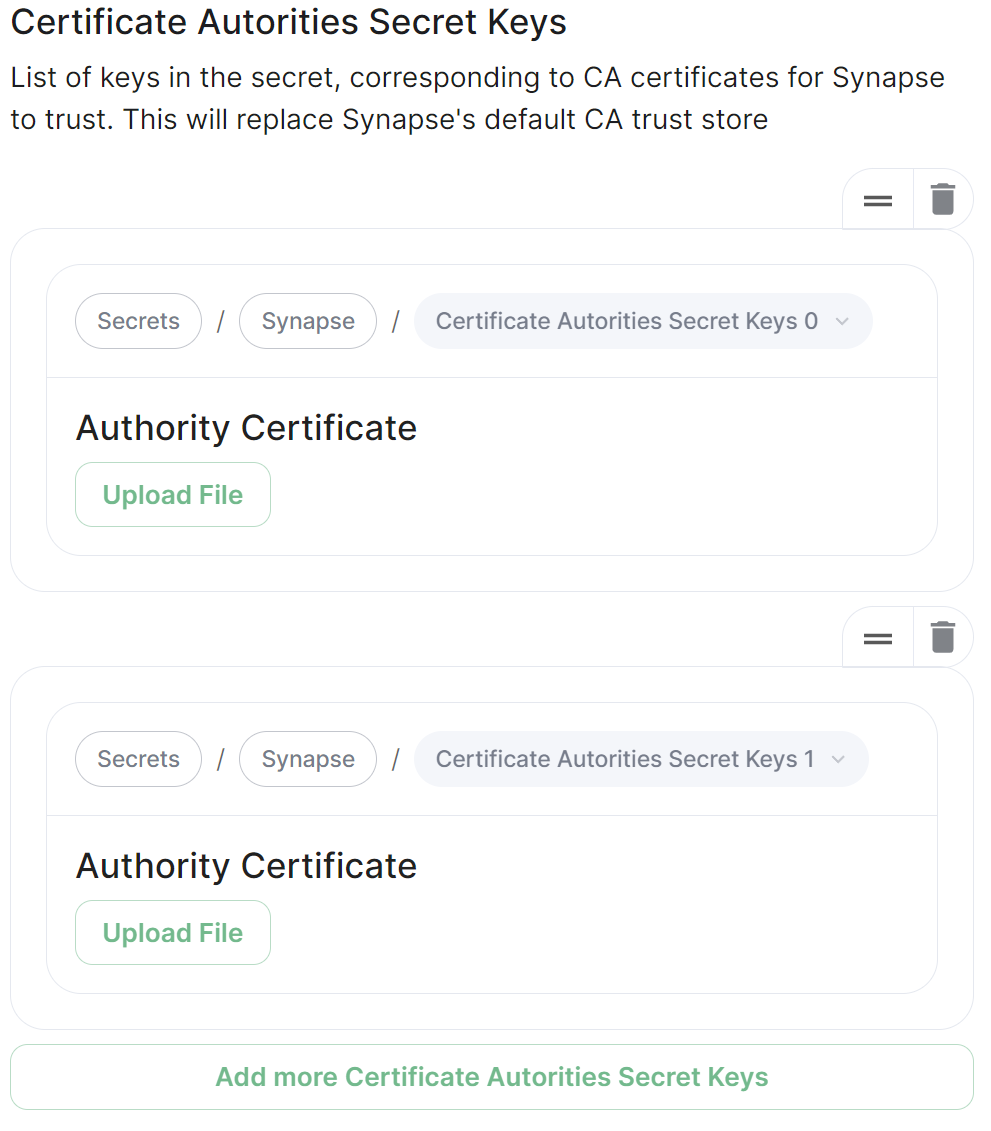](https://ems-docs.element.io/uploads/images/gallery/2024-01/image-1706543999452.png) Configure when you are federating between homeservers' whose certificates are signed by different Certificate Authorities, click the `Add Certificate Authorities Secret Keys` / `Add More Certificate Authorities Secret Keys` button to reveal the option to upload your CA certificate.Uploaded certificates should be PEM encoded and include the full chain of intermediate CAs and the root CA. You can simply concatenate these files prior to uploading.
## Trusted Key Servers [`trusted_key_servers`](https://element-hq.github.io/synapse/latest/usage/configuration/config_documentation.html#trusted_key_servers) [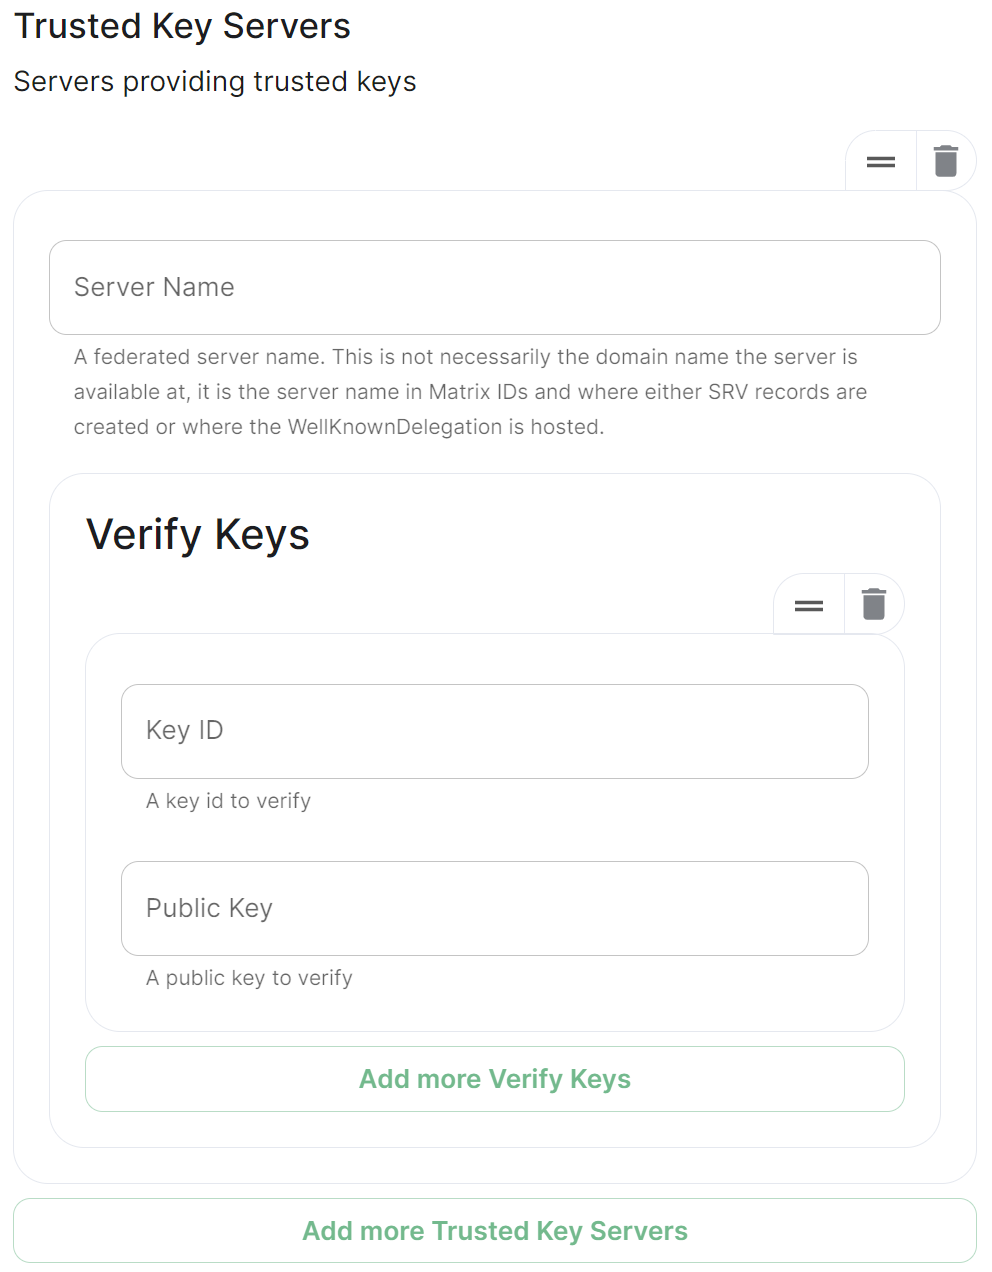](https://ems-docs.element.io/uploads/images/gallery/2024-01/image-1706544582026.png) Used to specify the trusted servers to download signing keys from. When synapse needs to fetch a signing key, each server is tried in parallel. Normally, the connection to the key server is validated via TLS certificates. Verify keys provide additional security by making synapse check that the response is signed by that key. Click `Add Trusted Key Servers` / `Add More Trusted Key Servers` to add a new key server, then provide the homeservers' federated server name, i.e. the base domain of the homeserver you with to federate with. Under `Verify Keys` for the server, you will need to provide it's `Key ID` and `Public Key`. ### Getting a Homeservers' `Key ID` and `Public Key` from your browser Simply access the Synapse endpoint `GET /_matrix/key/v2/server`. You must use the domain where your Synapse is exposed, this might be different than the domain you have in your Matrix IDs. For example `https://matrix.yourcomapany.com/_matrix/key/v2/server`. For the element.io homeserver,We recommend also firewalling your federation listener to limit inbound federation traffic as early as possible, rather than relying purely on this application-layer restriction.
This does not stop a server from joining rooms that servers not on the whitelist are in. As such, this option is really only useful to establish a "private federation", where a group of servers all whitelist each other and have the same whitelist.
Please also note that by default an [`ip_range_blacklist`](https://element-hq.github.io/synapse/latest/usage/configuration/config_documentation.html#ip_range_blacklist) is configured to block all private IP address ranges. If your servers require communicating on any of the below ranges, you will need to configure [`ip_range_whitelist`](https://element-hq.github.io/synapse/latest/usage/configuration/config_documentation.html#ip_range_whitelist). See [Allowing Private Federation via `ip_range_whitelist`](https://ems-docs.element.io/books/classic-element-server-suite-documentation-lts-2410/page/synapse-section-additional-config) for information on configuring this. # Element Web SectionConfiguration options relating to the deployed Element Web instance provided by ESS.
Element Web is the web-based client for the Matrix communication protocol. Element Web serves as a user interface for accessing Matrix homeservers, allowing users to send messages, join rooms, share files, and participate in group chats.
All settings configured via the UI in this section will be saved to your deployment.yml, with the contents of secrets being saved to secrets.yml. You will find specific configuration examples in each section.
Config Example
```yml spec: components: elementWeb: ```By default, if you do not change any settings on this page, default Element Web pod CPU and Memory requirements will be added to your configuration file/s (see example below).
Config Example
```yml spec: components: elementWeb: k8s: workloads: resources: limits: memory: 200Mi requests: cpu: 50m memory: 50Mi ```Config Example
```yml spec: components: elementWeb: config: # Not present if disabled useOwnUrlForSharingLinks: true ```Config Example
```yml spec: components: elementWeb: config: additionalConfig: |- "setting_defaults": { "custom_themes": [ { "name": "Electric Blue", "is_dark": false, "fonts": { "faces": [ { "font-family": "Inter", "src": [{"url": "/fonts/Inter.ttf", "format": "ttf"}] } ], "general": "Inter, sans", "monospace": "'Courier New'" }, "colors": { "accent-color": "#3596fc", "primary-color": "#368bd6", "warning-color": "#ff4b55", "sidebar-color": "#27303a", "roomlist-background-color": "#f3f8fd", "roomlist-text-color": "#2e2f32", "roomlist-text-secondary-color": "#61708b", "roomlist-highlights-color": "#ffffff", "roomlist-separator-color": "#e3e8f0", "timeline-background-color": "#ffffff", "timeline-text-color": "#2e2f32", "timeline-text-secondary-color": "#61708b", "timeline-highlights-color": "#f3f8fd", "username-colors": ["#ff0000", ...] "avatar-background-colors": ["#cc0000", ...] } } ] } ```Configuration options relating to the deployed Homeserver Admin instance provided by ESS.
Homeserver Admin is the web-based client for the Synapse Admin API. Homeserver Admin serves as a user interface for administering Synapse homeservers, allowing management of users, rooms, federation and more.
All settings configured via the UI in this section will be saved to your deployment.yml, with the contents of secrets being saved to secrets.yml. You will find specific configuration examples in each section.
Config Example
```yml spec: components: synapseAdmin: ```By default, if you do not change any settings on this page, default Homeserver Admin pod CPU and Memory requirements will be added to your configuration file/s (see example below).
Config Example
```yml spec: components: synapseAdmin: k8s: workloads: resources: limits: memory: 500Mi requests: cpu: 50m memory: 50Mi ```Config Example
```yml spec: components: synapseAdmin: # Not present if 'Use Global Setting' selected config: # verifyTls: useGlobalSetting # verifyTls: force verifyTls: disable ```Configuration options relating to the Integrator provided by ESS.
In the Integrator section you will find options to configure settings specific to the integrator which is used to send messages to external services. By default, it is unlikely you should need to configure anything on this page, unless you wish to enable the use of Custom Widgets.
All settings configured via the UI in this section will be saved to your deployment.yml, with the contents of secrets being saved to secrets.yml. You will find specific configuration examples in each section.
Config Example
```yml apiVersion: matrix.element.io/v1alpha2 kind: ElementDeployment metadata: annotations: ui.element.io/layer: | integrator: spec: components: integrator: ```By default, if you do not change any settings on this page, defaults will be added to your configuration file/s (see example below).
Config Example
```yml apiVersion: matrix.element.io/v1alpha2 kind: ElementDeployment metadata: annotations: ui.element.io/layer: | integrator: k8s: workloads: _value: defaulted spec: components: integrator: k8s: workloads: resources: appstore: limits: memory: 400Mi requests: cpu: 50m memory: 100Mi integrator: limits: memory: 350Mi requests: cpu: 100m memory: 100Mi modularWidgets: limits: memory: 200Mi requests: cpu: 50m memory: 50Mi scalarWeb: limits: memory: 200Mi requests: cpu: 50m memory: 50Mi ```Config Example
```yml spec: components: integrator: config: # Not present if 'false' is selected # enableCustomWidgets: false enableCustomWidgets: true ```Config Example
```yml spec: components: integrator: # Not present if 'Use Global Setting' selected config: # verifyTls: useGlobalSetting # verifyTls: force verifyTls: disable ```Config Example
```yml spec: components: integrator: config: log: # Not present if left at default 'info' level: info # level: debug # level: warning # level: error ```It is not advised to leave your Logging Level at anything other than the default, as more verbose logging may expose information that should otherwise not be accessible. When sharing logs, remember to redact any sensitive information you do not wish to share.
#### Structured [](https://ems-docs.element.io/uploads/images/gallery/2024-06/image-1718018012799.png)Config Example
```yml spec: components: integrator: config: log: # Not present if left at default 'false' # structured: false structured: true ```Config Example
```yml spec: components: integrator: config: postgresql: database: integrator ```Config Example
```yml spec: components: integrator: config: postgresql: host: db.example.com ```Config Example
```yml spec: components: integrator: config: postgresql: # port not present when left as default 5432 port: 5432 ```Config Example
```yml spec: components: integrator: config: postgresql: # sslMode not present when left as default `require` sslMode: require # sslMode: disable # sslMode: no-verify # sslMode: verify-full ```Config Example
```yml spec: components: integrator: config: postgresql: user: test-username ```Config Example
- `secrets.yml` ```yml apiVersion: v1 kind: Secret metadata: name: integrator namespace: element-onprem data: postgresPassword: dGVzdC1wYXNzd29yZA== ```Config Example
```yml spec: components: integrator: config: jitsiDomain: https://jitsi.example.com ```[](https://ems-docs.element.io/uploads/images/gallery/2023-04/OGQscreenshot-2023-04-28-at-14-05-43.png) The distinguished name can be displayed by selecting `View`/`Advanced Features` in the Active Directory console and then, right-clicking on the object, selecting `Properties`/`Attributes Editor`. The DN is `OU=Demo corp,DC=olivier,DC=sales-demos,DC=element,DC=io`. - `Mapping attribute for room name`: LDAP attribute used to give an internal ID to the space (visible when setting the log in debug mode) - `Mapping attribute for username`: LDAP attribute like `sAMAccountName` used to map the localpart of the mxid against the value of this attribute.
If `@bob:my-domain.org` is the mxid, `bob` is the localpart and groupsync expects to match this value in the LDAP attribute `sAMAccountName`. - `LDAP Bind DN`: the distinguished name of the LDAP account with read access. - `Check interval in seconds`: the frequency Group sync refreshes the space mapping in Element. - `LDAP Filter`: an [LDAP filter](https://ldap.com/ldap-filters/) to filter out objects under the LDAP Base DN. **The filter must be able to capture Users, Groups and OUs used in the space mapping.** - `LDAP URI`: the URI of your LDAP server. - `LDAP Bind Password`: the password of the LDAP account with read access. ### MS Graph (Azure AD) - You need to create an `App registration`. You'll need the `Tenant ID` of the organization, the `Application (client ID)` and a secret generated from `Certificates & secrets` on the app. - For the bridge to be able to operate correctly, navigate to API permissions and ensure it has access to Group.Read.All, GroupMember.Read.All and User.Read.All. Ensure that these are Application permissions (rather than Delegated). - Remember to grant the admin consent for those. - To use MSGraph source, select MSGraph as your source. - `msgraph_tenant_id`: This is the "Tenant ID" from your Azure Active Directory Overview - `msgraph_client_id`: Register your app in "App registrations". This will be its "Application (client) ID" - `msgraph_client_secret` : Go to "Certificates & secrets", and click on "New client secret". This will be the "Value" of the created secret (not the "Secret ID"). ## Space Mapping The space mapping mechanism allows us to configure spaces that Group Sync will maintain, beyond the ones that you can create manually. It is optional – the configuration can be skipped but if you enable Group Sync, you have to edit the Space mapping by clicking on the `EDIT` button and rename the `(unnamed space)`to something meaningful.
You can then map an external ID (the LDAP distinguished name) against a power level. Every user belonging to this external ID is granted the power level set in the interface. This external ID that can be any LDAP object like an OrgUnit, a Group or a Security Group. **The external ID is case-sensitive**
A power level 0 is a default user that can write messages, react to messages and delete his own messages.
A power level 50 is a moderator that can creates rooms, delete messages from members.
A power level 100 is an administrator but since GroupSync manages spaces, invitations to the rooms, it does not make sense to map a group against a power level 100.
Custom power levels other than 0 and 50 are not supported yet. ## Users allowed in every GroupSync room
This is useful for things like auditbot if Audibot has been enabled.
Patterns listed here will be wrapped in ^ and $ before matching. ## Defaults Rooms
[](https://ems-docs.element.io/uploads/images/gallery/2023-08/image-1692620742637.png)
- If you don't already have one, per the instructions provided in the section itself, you should generate this file by running the following command from within the IRC Bridges' config directory:
```bash openssl genpkey -out passkey.pem -outform PEM -algorithm RSA -pkeyopt rsa_keygen_bits:2048 ``` ### The `Bridge.yml` Section The `Bridge.yml` is the complete configuration of the Matrix IRC Bridge. It points to a private key file (Private Key Settings), and both configures the bridges' own settings and functionality (Bridge Settings), and the specific IRC services you want it to connect with (IRC Settings). #### Private Key Settings ```yml key_file: passkey.pem ``` By default this is the first line in the `Bridge.yml` config, it refers to the file either moved into the IRC Bridges' config directory, or generated in there using `openssl`. If moved into the directory ensure the file was correctly renamed to `passkey.pem`. #### Bridge Settings The rest of the configuration sits under the `bridged_irc_servers:` section: ```yml bridged_irc_servers: ``` You'll notice all entries within are initially indented (` `) so all code blocks will include this indentation. Focusing on settings relating to the bridge itself (and not any specific IRC connection) covers everything except the `address:` and associated `parameters:` sections, by default found at the end of the `Bridge.yml`. ##### Postgres If you are using `postgres-create-in-cluster` you can leave this section as-is, the default `ircbridge-postgres` / `ircbridge` / `postgres_password` values will ensure your setup works correctly. ```yml - postgres_fqdn: ircbridge-postgres postgres_user: ircbridge postgres_db: ircbridge postgres_password: postgres_password ``` Otherwise you should edit as needed to connect to your existing Postgres setup: - `postgres_fqdn:` Provide the URL to your Postgres setup - `postgres_user:` Provide the user that will be used to connect to the database - `postgres_db:` Provide the database you will connect to - `postgres_password:` Provide the password of the user specified above You can uncomment the following to use as needed, note if unspecified some of these will default to the advised values, you do not need to uncomment if you are happy with the defaults. - `postgres_data_path:` This can be used to specify the path to the postgres db on the host machine - `postgres_port:` This can be used to specify a non-standard port, this defaults to `5432`. - `postgres_sslmode:` This can be used to specify the sslmode for the Postgres connection, this defaults to `'disable'`, however `'no-verify'` and `'verify-full` are available options For example, your Postgres section might instead look like the below: ```yml - postgres_fqdn: https://db.example.com postgres_user: example-user postgres_db: matrixircbridge postgres_password: example-password # postgres_data_path: "/mnt/data/
- `enable_presence:` Set to `true` if presence is required. - This should be kept as `false` if presence is disabled on the homeserver to avoid excess traffic.
- `drop_matrix_messages_after_seconds:` Specify after how many seconds the bridge should drop Matrix messages, by default this is `0` meaning no messages will be dropped. - If the bridge is down for a while, the homeserver will attempt to send all missed events on reconnection. These events may be hours old, which can be confusing to IRC users if they are then bridged. This option allows these old messages to be dropped. - **CAUTION:** This is a very coarse heuristic. Federated homeservers may have different clock times which may be old enough to cause *all* events from the homeserver to be dropped.
- `bot_username:` Specify the Matrix User ID of the the bridge bot that will facilitate the creation of rooms and can be messaged by admins to perform commands.
- `rmau_limit:` Set this to the maximum number of remote monthly active users that you would like to allow in a bridged IRC room.
- `users_prefix:` Specify the prefix to be used on the Matrix User IDs created for users who are communicating via IRC.
- `alias_prefix:` Specify the prefix to be used on room aliases when created via the `!join` command. The defaults are usually best left as-is unless a specific need requires changing these, however for troubleshooting purposes, switching `logging_level` to `debug` can help identify issues with the bridge. ```yml logging_level: debug enable_presence: false drop_matrix_messages_after_seconds: 0 bot_username: "ircbridgebot" rmau_limit: 100 users_prefix: "irc_" alias_prefix: "irc_" ``` ##### Advanced Additional Configuration You can find more advanced configuration options by checking the config.yaml sample provided on the Matrix IRC Bridge repository. You can ignore the `servers:` block as config in that section should be added under the `parameters:` section associated with `address:` that will be setup per the below section. If you copy any config, ensure the indentation is correct, as above, all entries within are initially indented (` `), so they are under the `bridged_irc_servers:` section. #### IRC Settings The final section of `Bridge.yml`, here you specify the IRC network(s) you want the bridge to connect with, this is done using `address:` and `parameter:` formatted like so: - `address:` Specify your desired IRC Network ```yml address: irc.example.com parameters: ``` Aside from the address of the IRC Network, everything is configured within the `parameters:` section, and so is initially indented ` `, all code blocks will include this indentation. ##### Basic IRC Network Configuration At a minimum, you will need to specify the `name:` of your IRC Network, as well as some details for the bots configuration on the IRC side of the connection, you can use the below to get up and running. - `name:` The server name to show on the bridge. - `botConfig:` - `enabled:` Keep this set as `true` - `nick:` Specify the nickname of the bot user within IRC - `username:` Specify the username of the bot user within IRC - `password:` Optionally specify the password of the bot to give to NickServ or IRC Server for this nick. You can generate this by using the `pwgen 32 1` command ```yml name: "Example IRC" botConfig: enabled: true nick: "MatrixBot" username: "matrixbot" password: "some_password" ``` ##### Advanced IRC Network Configuration (Load Balancing, SSL, etc.) For more fine-grained control of the IRC connection, there are some additional configuration lines you may wish to make use of. As these are not required, if unspecified some of these will default to the advised values, you do not need to include any of these if you are happy with the defaults. You can use the below config options, in addition to those in the section above, to get more complex setups up and running. - `additionalAddresses:` Specify any additional addresses to connect to that can be used for load balancing between IRCDs - Specify each additional address within the `[]` as comma-separated values, for example: - `[ "irc2.example.com", "irc3.example.com" ]` - `onlyAdditionalAddresses:` Set to `true` to exclusively use additional addresses to connect to servers while reserving the main address for identification purposes, this defaults to `false` - `port:` Specify the exact port to use for the IRC connection - `ssl:` Set to `true` to require the use SSL, this defaults to `false` - `sslselfsign:` Set to `true` if the IRC network is using a self-signed certificate, this defaults to `false` - `sasl:` Set to `true` should the connection attempt to identify via SASL, this defaults to `false` - `allowExpiredCerts:` Set to `true` to allow expired certificates when connecting to the IRC server, this defaults to `false` - `botConfig:` - `joinChannelsIfNoUsers:` Set to `false` to prevent the bot from joining channels even if there are no Matrix users on the other side of the bridge, this defaults to `true` so doesn't need to be specified unless `false` is required. If you end up needing any of these additional configuration options, your `parameters:` section may look like the below example: ```yml name: "Example IRC" additionalAddresses: [ "irc2.example.com" ] onlyAdditionalAddresses: false port: 6697 ssl: true sslselfsign: false sasl: false allowExpiredCerts: false botConfig: enabled: true nick: "MatrixBot" username: "matrixbot" password: "some_password" joinChannelsIfNoUsers: true ``` ##### Mapping IRC user modes to Matrix power levels You can use the configuration below to map the conversion of IRC user modes to Matrix power levels. This enables bridging of IRC ops to Matrix power levels only, it does not enable the reverse. If a user has been given multiple modes, the one that maps to the highest power level will be used. - `modePowerMap:` Populate with a list of IRC user modes and there respective Matrix Power Level in the formate of `IRC_USER_MODE: MATRIX_POWER_LEVEL` ```yml modePowerMap: o: 50 v: 1 ``` ##### Configuring DMs between users By default private messaging is enabled via the bridge and Matrix Direct Message rooms can be federated. You can customise this behaviour using the `privateMessages:` config section. - `enabled:` Set to `false` to prevent private messages to be sent to/from IRC/Matrix, defaults to `true` - `federate:` Set to `false` so only users on the homeserver attached to the bridge to be able to use private message rooms, defaults to `true` ```yml privateMessages: enabled: true federate: true ``` ##### Mapping IRC Channels to Matrix Rooms Whilst a user can use the `!join` command (if Dynamic Channels are enabled) to manually connect to IRC Channels, you can specify mappings of IRC Channels to Matrix Rooms, 1 Channel can be mapped to multiple Matrix Rooms, up-front. The Matrix Room must already exist, and you will need to include it's Room ID within the configuration - you can get this ID by using the `3-dot menu` next to the room, and opening `Settings`. [](https://ems-docs.element.io/uploads/images/gallery/2023-08/image-1692627296903.png) [](https://ems-docs.element.io/uploads/images/gallery/2023-08/image-1692627399561.png) - `mappings:` Under here you will need to specify an IRC Channel, then within that you will need to list out the required `roomIds:` in `[]` as a comma-separated list and provide a `key:` if there is a Channel key / password to us. If provided Matrix users do not need to know the channel key in order to join it. ```yml mappings: "#IRC_CHANNEL_NAME": roomIds: ["!ROOM_ID_THREE:HOMESERVER", "!ROOM_ID_TWO:HOMESERVER"] key: "secret" ``` See the below example configuration for mapping the #welcome IRC Channel: ```yml mappings: "#welcome": roomIds: ["!exampleroomidhere:example.com"] ``` ##### Allowing `!join` with Dynamic Channels If you would like for users to be able to use the `!join` command to join any allowed IRC Channel you will need to configure `dynamicChannels:`.
You may remember you set an alias prefix in the Miscellaneous section above. If you wish to fully customise the format of aliases of bridged rooms you should remove that `alias_prefix:` line. However the only benefit to this would be to add a suffix to the Matrix Room alias so is not recommended.
- `enabled:` Set to `true` to allow users to use the `!join` command to join any allowed IRC Channel, defaults to `false` - `createAlias:` Set to `false` if you do not want an alias to be created for any new Matrix rooms created using `!join`, defaults to `true` - `published:` Set to `false` to prevent the created Matrix room via `!join` from being published to the public room list, defaults to `true` - `useHomeserverDirectory:` Set to `true` to publish room to your Homeservers' directory instead of one created for the IRC Bridge, defaults to `false` - `joinRule:` Set to `"invite"` so only users with an invite can join the created room, otherwise this defaults to `"public"`, so anyone can join the room - `whitelist:` Only used if `joinRule:` is set to `invite`, populate with a list of Matrix User IDs that the IRC bot will send invites to in response to a `!join` - `federate:` Set to `false` so only users on the homeserver attached to the bridge to be able to use these rooms, defaults to `true` - `aliasTemplate:` Only used if `createAlias:` is set to `true`. Set to specify the alias for newly created rooms from the `!join` command, defaults to `"#irc_$CHANNEL"` - You should not include this line if you do not need to add a suffix to your Matrix Room alias. Using `alias_prefix:`, this will default to `#PREFIX_CHANNEL_NAME:HOMESERVER` - If you are specifying this line, you can use the following variables within the alias: - `$SERVER` => The IRC server address (e.g. `"irc.example.com"`) - `$CHANNEL` => The IRC channel (e.g. `"#python"`), this must be used within the alias - `exclude:` Provide a comma-separated list of IRC Channels within `[]` that should be prevented from being mapped under any circumstances In addition you could also specify the below, though it is unlikely you should need to specify the exact Matrix Room Version to use. - `roomVersion:` Set to specify the desired Matrix Room Version, if unspecified, no specific room version is requested. - If the homeserver doesn't support the room version then the request will fail. ```yml dynamicChannels: enabled: true createAlias: true published: true useHomeserverDirectory: true joinRule: invite federate: true aliasTemplate: "#irc_$CHANNEL" whitelist: - "@foo:example.com" - "@bar:example.com" exclude: ["#foo", "#bar"] ``` ##### Exclude users from using the bridge Using the `excludedUsers:` configuration you can specify Regex to identify users to be kicked from any IRC Bridged rooms. - `regex:` Set this to any Regex that should match on users' Matrix User IDs - `kickReason:` Set to specify the reason provided to users when kicked from IRC Bridged rooms ```yml excludedUsers: - regex: "@.*:evilcorp.com" kickReason: "We don't like Evilcorp" ``` ##### Syncing Matrix and IRC Membership lists To manage and control how Matrix and IRC membership lists are synced you will need to include `membershipLists:` within your config. - `enabled:` Set to `true` to enable the syncing of membership lists between IRC and Matrix, defaults to `false` - This can have a significant effect on performance on startup as the lists are synced - `floodDelayMs:` Syncing membership lists at startup can result in hundreds of members to process all at once. This timer drip feeds membership entries at the specified rate, defaults to `10000` (10 Seconds) Within `membershipLists:` are the following sections, `global:`, `rooms:`, `channels:` and `ignoreIdleUsersOnStartup:`. For `global:`, `rooms:`, `channels:` you can specify `initial:`, `incremental:` and `requireMatrixJoined:` which all default to `false`. You can configure settings globally, using `global:`, or specific to Matrix Rooms with `rooms:` or IRC Channels via `channels:`. - What does setting `initial:` to `true` do? - For `ircToMatrix:` this gets a snapshot of all real IRC users on a channel (via NAMES) and joins their virtual matrix clients to the room - For `matrixToIrc:` this gets a snapshot of all real Matrix users in the room and joins all of them to the mapped IRC channel on startup- What does setting `incremental:` to `true` do? - For `ircToMatrix:` this makes virtual matrix clients join and leave rooms as their real IRC counterparts join/part channels - For `matrixToIrc:` this makes virtual IRC clients join and leave channels as their real Matrix counterparts join/leave rooms
- What does setting `requireMatrixJoined:` to `true` do? - This controls if the bridge should check if all Matrix users are connected to IRC and joined to the channel before relaying messages into the room. This is considered a safety net to avoid any leakages by the bridge to unconnected users but given it ignores all IRC messages while users are still connecting it's likely not required. The last section is `ignoreIdleUsersOnStartup:` which determines if the bridge should ignore users which are not considered active on the bridge during startup. - `enabled:` Set to `true` to allow ignoring of idle users during startup - `idleForHours:` Set to configure how many hours a user has to be idle for before they can be ignored - `exclude:` Provide Regex matching on Matrix User IDs that should be excluded from being marked as ignorable ```yml membershipLists: enabled: false floodDelayMs: 10000 global: ircToMatrix: initial: false incremental: false requireMatrixJoined: false matrixToIrc: initial: false incremental: false rooms: - room: "!fuasirouddJoxtwfge:localhost" matrixToIrc: initial: false incremental: false channels: - channel: "#foo" ircToMatrix: initial: false incremental: false requireMatrixJoined: false ignoreIdleUsersOnStartup: enabled: true idleForHours: 720 exclude: "foobar" ``` ##### Configuring how IRC users appear in Matrix As part of the bridge IRC users and their messages will appear in Matrix as Matrix users, you will be able to click on their profiles perform actions just like any other user. You can configure how they are display using `matrixClients:`.
You may remember you set a user name prefix in the Miscellaneous section above. If you wish to fully customise the format of your IRC users' Matrix User IDs you should remove that `users_prefix:` line. However the only benefit to this would be to add a suffix to the Matrix User ID so is not recommended.
- `userTemplate:` Specify the template Matrix User ID that IRC users will appear as, it must start with an `@` and feature `$NICK` within, `$SERVER` is usable - You should not include this line if you do not need to add a suffix to your IRC users' Matrix IDs. Using `users_prefix:`, this will default to `@PREFIX_NICKNAME:HOMESERVER` - `displayName:` Specify the Display Name of IRC Users that appear within Matrix, it must contain `$NICK within`, `$SERVER` is usable - `joinAttempts:` Specify the number of tries a client can attempt to join a room before the request is discarded. Set to `-1` to never retry or `0` to never give up, defaults to `-1` ```yml matrixClients: userTemplate: "@irc_$NICK" displayName: "$NICK" joinAttempts: -1 ``` ##### Configuring how Matrix users appear in IRC As part of the bridge Matrix users and their messages will appear in IRC as IRC users, you will be able to perform IRC actions on them like any other user. You can configure how this functions using `ircClients:`. - `nickTemplate:` Set this to the template how Matrix users' IRC client nick name is set, defaults to `"$DISPLAY[m]"` - You can use the following variables within the template, you must use at least one of these. - $LOCALPART => The user ID localpart (e.g. `"alice"` in `@alice:localhost`) - $USERID => The user ID (e.g. `@alice:localhost`) - $DISPLAY => The display name of this user, with excluded characters (e.g. space) removed. - If the user has no display name, this falls back to $LOCALPART. - `allowNickChanges:` Set to `true` to allow users to use the `!nick` command to change their nick on the server - `maxClients:` Set the max number of IRC clients that will connect - If the limit is reached, the client that spoke the longest time ago will be disconnected and replaced, defaults to `30` - `idleTimeout:` Set the maximum amount of time in seconds that a client can exist without sending another message before being disconnected. - Use `0` to not apply an idle timeout, defaults to `172800` (48 hours) - This value is ignored if this IRC server is mirroring matrix membership lists to IRC. - `reconnectIntervalMs:` Set the number of millseconds to wait between consecutive reconnections if a client gets disconnected. - Set to `0` to disable scheduling i.e. it will be scheduled immediately, defaults to `5000` (5 seconds) - `concurrentReconnectLimit:` Set the number of concurrent reconnects if a user has been disconnected unexpectedly - Set this to a reasonably high number so that bridges are not waiting an eternity to reconnect all its clients if we see a massive number of disconnect. - Set to 0 to immediately try to reconnect all users, defaults to `50` - `lineLimit:` Set the number of lines of text to allow being sent as from matrix to IRC, defaults to `3` - If the number of lines that would be sent is > lineLimit, the text will instead be uploaded to Matrix and the resulting URI is treated as a file. A link will be sent to the IRC instead to avoid spamming IRC. - `realnameFormat:` Set to either `"mxid"` or `"reverse-mxid"` to define the format used for the IRC realname. - `kickOn:` - `channelJoinFailure:` Set to `true` to kick a Matrix user from a bridged room if they fail to join the IRC channel - `ircConnectionFailure:` Set to `true` to kick a Matrix user from ALL rooms if they are unable to get connected to IRC - `userQuit:` Set to `true` to kick a Matrix user from ALL rooms if they choose to QUIT the IRC network You can also optionally configure the following, they do not need to be included in your config if you are not changing their default values. - `ipv6:` - `only:` Set to `true` to force IPv6 for outgoing connections, defaults to `false` - `userModes:` Specify the required IRC User Mode to set when connecting, e.g. `"RiG"` to set `+R`, `+i` and `+G`, defaults to `""` (No User Modes) - `pingTimeoutMs:` Set the minimum time to wait between connection attempts if the bridge is disconnected due to throttling. - `pingRateMs:` Set the rate at which to send pings to the IRCd if the client is being quiet for a while. - Whilst IRCd *should* sending pings to the bridge to keep the connection alive, sometimes it doesn't and ends up ping timing out the bridge. ```yml ircClients: nickTemplate: "$DISPLAY[m]" allowNickChanges: true maxClients: 30 # ipv6: # only: false idleTimeout: 10800 reconnectIntervalMs: 5000 concurrentReconnectLimit: 50 lineLimit: 3 realnameFormat: "mxid" # pingTimeoutMs: 600000 # pingRateMs: 60000 kickOn: channelJoinFailure: true ircConnectionFailure: true userQuit: true ``` ### Deploying the IRC Bridge Once you have make the required changes to your `Bridge.yml` configuration, make sure you find and click the `Save` button at the bottom of the IRC Bridge configuration page to ensure your changes are updated. [](https://ems-docs.element.io/uploads/images/gallery/2023-08/image-1692624783061.png) You will then need to re-Deploy for any changes to take effect, as above ensure all changes made are saved then click `Deploy`. [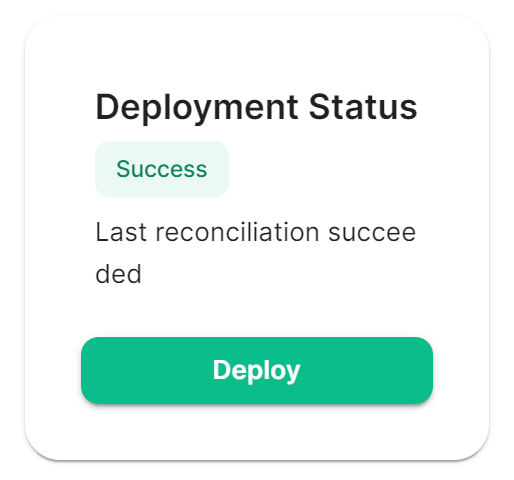](https://ems-docs.element.io/uploads/images/gallery/2023-08/image-1692624827468.png) ## Using the Bridge For usage of the IRC Bridge via it's bot user see [Using the Matrix IRC Bridge](https://ems-docs.element.io/books/element-support/page/using-the-matrix-irc-bridge) documentation, or for end user focused documentation see [Using the Matrix IRC Bridge as an End User](https://ems-docs.element.io/books/element-support/page/using-the-matrix-irc-bridge-as-an-end-user). If you have setup mapping of rooms in your `Bridge.yml`, some rooms will already be connected IRC, users need only join the bridged room and start messaging. IRC users should see Matrix users in the Channel and be able to communicate with them like any other IRC user. # Setting Up the SIP Bridge # Configuring SIP bridge ## Basic config From the Installer's Integrations page, click "Install" under "SIP Bridge" For the provided sipbridge.yml, please see the following documentation: - `postgres_create_in_cluster`: `true` to create the postgres db into the k8s cluster. On a standalone deployment, it is necessary to define the `postgres_data_path`. - `postgres_fqdn`: The fqdn of the postgres server. If using `postgres_create_in_cluster`, you can choose the name of the workload. - `postgres_data_path`: "/mnt/data/sipbridge-postgres" - `postgres_port`: 5432 - `postgres_user`: The user to connect to the db. - `postgres_db`: The name of the db. - `postgres_password`: A password to connect to the db. - `port_type`: `HostPort` or `NodePort` depending on which kind of deployment you want to use. On standalone deployment, we advise you to use `HostPort` mode. - `port`: The port on which to configure the SIP protocol. On `NodePort` mode, it should be in kubernetes range: - `enable_tcp`: `true` to enable TCP SIP. - `pstn_gateway`: The hostname of the PSTN Gateway. - `external_address`: The external address of the SIP Bridge - `proxy` : The address of the SIP Proxy - `user_agent`: A user agent for the sip bridge. - `user_avatar`: An MXC url to the sip bridge avatar. Don't define it if you have not uploaded any avatar. - `encryption_key`: A 32 character long secret used for encryption. Generate this with `pwgen 32 1` # Setting Up the XMPP Bridge ## Configuring the XMPP Bridge The XMPP bridge relies on the xmpp "component" feature. It is an equivalent of matrix application services. You need to configure an XMPP Component on an XMPP Server that the bridge will use to bridge matrix and xmpp user. ### On the hosting machine From the Installer's Integrations page, click "Install" under "XMPP Bridge". ### Examples In all the examples below the following are set: - The `domain_name` is your homeserver domain ( the part after : in your MXID ) : `example.com` - XMPP Server FQDN: xmpp.example.com - XMPP External Component/`xmpp_domain`: `matrix.xmpp.example.com` #### Prosody Example If you are configuring prosody, you need the following component configuration (for the sample xmpp server, `matrix.xmpp.example.com`): ``` Component "matrix.xmpp.example.com" ssl = { certificate = "/etc/prosody/certs/tls.crt"; key = "/etc/prosody/certs/tls.key"; } component_secret = "eeb8choosaim3oothaeGh0aequiop4ji" ``` And then with that configured, you would pass the following into `xmpp.yml`: ``` xmpp_service: xmpp://xmpp.example.com:5347 xmpp_domain: "matrix.xmpp.example.com" # external component subdomain xmpp_component_password: eeb8choosaim3oothaeGh0aequiop4ji # xmpp component password ``` Note: We've used `pwgen 32 1` to generate the `component_secret`. #### Joining an XMPP Room Once you have the XMPP bridge up, you need to map an XMPP room to a Matrix ID. For example, if the room on XMPP is named: `#welcome@conference.xmpp.example.com`, where `conference` is the FQDN of the component hosting rooms for your XMPP instance, then on Matrix, you would join: ``` #_xmpp_welcome_conference.xmpp.example.com:example.com ``` So you can simply send the following command in your Element client to jump into the XMPP room via Matrix ``` /join #_xmpp_welcome_conference.xmpp.example.com:example.com ``` #### Joining a Matrix room from XMPP If the Element/Matrix room is public you should be able to query the room list at the external component server address (Ex: `matrix.xmpp.example.com`) The Matrix room at alias `#roomname:example.com` maps to `#roomname#example.com@matrix.xmpp.example.com` on the XMPP server `xmpp.example.com` if your `xmpp_domain: matrix.xmpp.example.com` **Note:** If the Matrix room has users with the same name as yor XMPP account, you will need to edit you XMPP nickname to be unique in the room | Element | | XMPP | |------| ---- | ------ | |#**roomname**:element.local (native Matrix room)| → | #**roomname**#element.local@element.xmpp.example.com (bridged into XMPP)| |#_xmpp\_**roomname**_conference.xmpp.example.com:element.local (bridged into Matrix/Element) | ← | #**roomname**@conference.xmpp.example.com (native XMPP room) | ## Using the bridge as an end user For end user documentation you can visit the [Using the Matrix XMPP Bridge as an End User](https://ems-docs.element.io/books/element-support/page/using-the-matrix-xmpp-bridge-as-an-end-user) documentation. # Setting up Location Sharing ## Overview The ability to send a location share, whether static or live, is available without any additional configuration. However, when *receiving* a location share, in order to display it on a map, the client must have access to a tile server. If it does not, the location will be displayed as text with coordinates. By default, location sharing uses a MapTiler instance and API key that is sourced and paid for by Element. This is provided free, primarily for personal EMS users and those on Matrix.org. If no alternate tileserver is configured either on the HomeServer or client then the mobile and desktop applications will fall back to Element's MapTiler instance. Self-hosted instances of Element Web will not fall back, and will show an error message. ## Using Element's MapTiler instance Customers should be advised that our MapTiler instance is not intended for commercial use, it does not come with any uptime or support SLA, we are not under any contractual obligation to provide it or continue to provide it, and for the most robust privacy customers should either source their own cloud-based tileserver or self-host one on-premises. However, if they wish to use our instance with Element Web for testing, demonstration or POC purposes, they can configure the map_style_url by adding extra configurations in the advanced section of the Element Web page in the installer: ```plaintext { "map_style_url": "https://api.maptiler.com/maps/streets/style.json?key=fU3vlMsMn4Jb6dnEIFsx" } ``` ## Using a different tileserver If the customer sources an alternate tileserver, whether from MapTiler or elsewhere, you should enter the tileserver URL in the `extra_client` section of the Well-Known Delegation Integration accessed from the Integrations page in the Installer: ```plaintext { ... other info ... "m.tile_server": { "map_style_url": "http://mytileserver.example.com/style.json" } ``` ## Self-hosting a tileserver Customers can also host their own tileserver if they wish to dedicate the resources to doing so. Detailed information on how to do so is available [here](https://matrix.org/docs/guides/map-tile-server). ## Changing permissions for live location sharing By default live location sharing is restricted to moderators of rooms. In direct messages, both participants are admins by default so this isn't a problem. However this does impact public and private rooms. To change the default permissions for new rooms the following Synapse additional configuration should be set ```yaml default_power_level_content_override: private_chat: events: "m.beacon_info": 0 "org.matrix.msc3672.beacon_info": 0 "m.room.name": 50 "m.room.power_levels": 100 "m.room.history_visibility": 100 "m.room.canonical_alias": 50 "m.room.avatar": 50 "m.room.tombstone": 100 "m.room.server_acl": 100 "m.room.encryption": 100 # Not strictly necessary as this is used for direct messages, however if additional users are later invited into the room they won't be administrators trusted_private_chat: events: "m.beacon_info": 0 "org.matrix.msc3672.beacon_info": 0 "m.room.name": 50 "m.room.power_levels": 100 "m.room.history_visibility": 100 "m.room.canonical_alias": 50 "m.room.avatar": 50 "m.room.tombstone": 100 "m.room.server_acl": 100 "m.room.encryption": 100 public_chat: events: "m.beacon_info": 0 "org.matrix.msc3672.beacon_info": 0 "m.room.name": 50 "m.room.power_levels": 100 "m.room.history_visibility": 100 "m.room.canonical_alias": 50 "m.room.avatar": 50 "m.room.tombstone": 100 "m.room.server_acl": 100 "m.room.encryption": 100 ``` # Removing Legacy Integrations Today, if you remove a Yaml integration's config, its components will not be removed from the cluster automatically. You will also need to manually remove the custom resources from the Kubernetes cluster. ## Removing Monitoring stack You need to delete first the VMSingle and the VMAgent from the namespace : ``` kubectl delete vmsingle/monitoring -nWe strongly advise against including any config not configurable via the UI as it will most likely interfere with settings automatically computed by the updater. Additional configuration options are not supported so we encourage you to first raise your requirements to Support where we can best advise on them.
[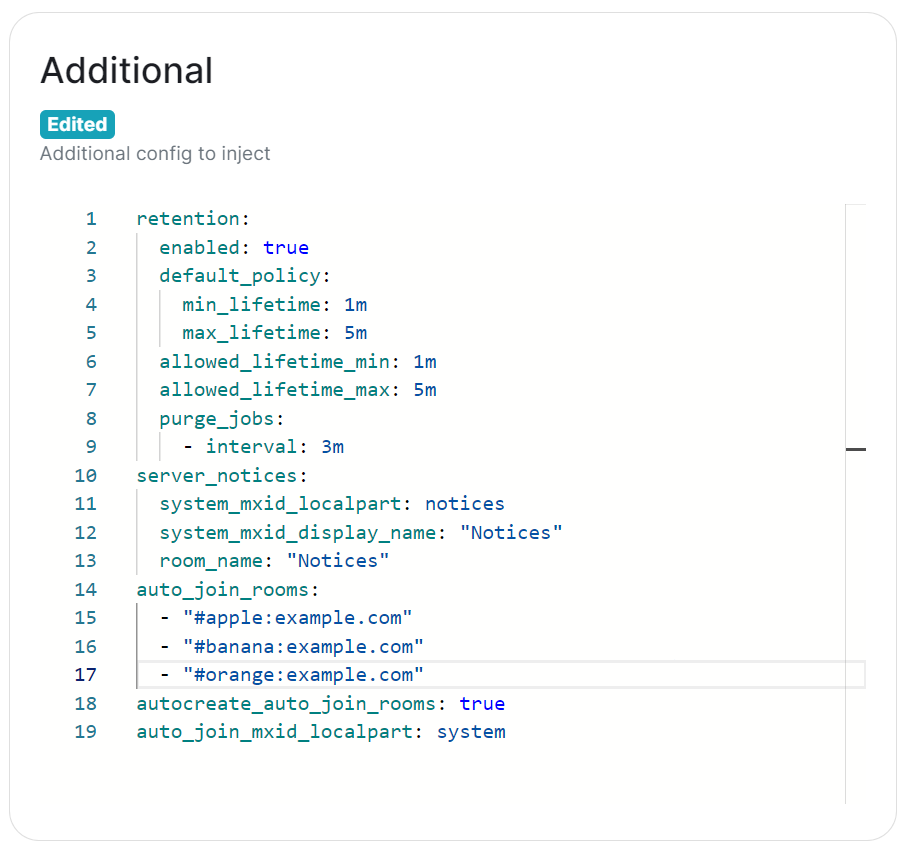](https://ems-docs.element.io/uploads/images/gallery/2024-02/image-1707403377252.png) Configuration should follow the same format as supplied by the [Configuration Manual](https://element-hq.github.io/synapse/latest/usage/configuration/config_documentation.html), if you include options that have otherwise been configured via the UI they will be overridden with the exception of MAU, Federation and Data Retention (see [Nonoverridable Config](#bkmrk-max_mau_value%2C-limit)). Though as noted above, any additional config carries the risk that it will most likely interfere with settings automatically computed by the updater. ### What version of Synapse am I running?Remember to set the configuration manual page to the version of Synapse deployed by the installer, otherwise you may see configuration options / guidance not applicable to the version of Synapse you have deployed.
You can determine the version of Synapse you have deployed by using `kubectl describe pod first-element-deployment-synapse-main-0 -n element-onprem | grep version`, changing the pod name as needed. This will output something like `app.kubernetes.io/version=v1.93.0-lts.1-base`, as such when you visit any link to the Configuration Manual, you should update the page to see the correct information for your version. [](https://ems-docs.element.io/uploads/images/gallery/2024-02/image-1707910732938.png) [](https://ems-docs.element.io/uploads/images/gallery/2024-02/image-1707910771900.png) ### Known Issues #### [`max_mau_value`](https://element-hq.github.io/synapse/latest/usage/configuration/config_documentation.html#max_mau_value), [`limit_usage_by_mau`](https://element-hq.github.io/synapse/latest/usage/configuration/config_documentation.html#limit_usage_by_mau), [`federation`](https://element-hq.github.io/synapse/latest/usage/configuration/config_documentation.html#federation-1) and [`retention`](https://element-hq.github.io/synapse/latest/usage/configuration/config_documentation.html#retention) Configuration of these via `Additional Config`, that are in conflict with those set via the UI, will not override the UI set values. As such, we do not advise including them or any related settings within the `Additional Config` as they are of increased risk to causing issues with your deployment. #### [`auto_join_rooms`](https://element-hq.github.io/synapse/latest/usage/configuration/config_documentation.html#auto_join_rooms) Due to how the installer sets up Synapse, the `auto_join_rooms` option will only work when configured as required on the first deployment. Should you configure this on an existing deployment, or change the rooms on a subsequent deployment, it will not function and you'll receive various errors within the Synapse pod logs. To resolve you will need to manually create the rooms and specify `auto_join_mxid_localpart` in your config. If you're using AdminBot / AuditBot, either would be a perfect candidate for the specified MXID as you can be sure they will be in any room you specify. Therefore in order to get this setup, you'll need to follow these steps: - For a brand new "fresh" install, simply specify with config per the manual, on the first user registration, they will create and join the specified rooms and all subsequent users will also auto-join. ```yml auto_join_rooms: - "#exampleroom:example.com" - "#anotherexampleroom:example.com" ``` - For existing installs, or when you wish to adjust the auto-join room list, you will need to: 1. Manually create the rooms and assign the desired alias. (Room Settings -> Local Addresses) 2. Add the following config, making sure to set the localpart to a user present within the rooms specified. This could be the room creator, someone invited who has joined, or something like Admin/Audit Bot. ```yml auto_join_mxid_localpart: adminbot ``` 3. Redeploy, wait for the synapse pod to restart 4. Newly registered users will now auto-join the specified rooms As usual, with `auto_join_rooms`, the caveat is that changing the rooms will not automatically join previously registered users to the updated rooms. To automate this you will likely need to make use of the Admin API, see [Using Python with the Admin + Client-Server APIs](https://ems-docs.element.io/books/element-support/page/using-python-with-the-admin-client-server-apis), specifically [Example #1: Join Users to Rooms](https://ems-docs.element.io/link/458#bkmrk-example-%231%3A-join-use) would be a good starting point. ### Exceptions While use of Additional Config is not recommended, there are certain circumstances built-in to the UI that will allow you to defer to configuration options you will need to specify within the Additional Config block. These exceptions will be covered here, however please be advised, using them still carries risk of instability so we'd recommend sticking with options fully supported by the UI itself. #### `Custom` Registration Within the Synapse section of the installer, as part of the registration configuration, you can select `Custom`. When doing so, configuration of [Registration](https://element-hq.github.io/synapse/latest/usage/configuration/config_documentation.html#registration) should be done via Additional Config, allowing you more control. Options that can be configured can be found at the linked [Registration](https://element-hq.github.io/synapse/latest/usage/configuration/config_documentation.html#registration) section of the Synapse Configuration Manual, but include: - [`enable_registration`](https://element-hq.github.io/synapse/latest/usage/configuration/config_documentation.html#enable_registration) - [`enable_registration_without_verification`](https://element-hq.github.io/synapse/latest/usage/configuration/config_documentation.html#enable_registration_without_verification) - [`registrations_require_3pid`](https://element-hq.github.io/synapse/latest/usage/configuration/config_documentation.html#registrations_require_3pid) - [`registration_requires_token`](https://element-hq.github.io/synapse/latest/usage/configuration/config_documentation.html#registration_requires_token) - [`registration_shared_secret`](https://element-hq.github.io/synapse/latest/usage/configuration/config_documentation.html#registration_shared_secret) #### Allowing Private Federation via [`ip_range_whitelist`](https://element-hq.github.io/synapse/latest/usage/configuration/config_documentation.html#ip_range_whitelist) By default private IP ranges are blacklisted, per [`ip_range_blacklist`](https://element-hq.github.io/synapse/latest/usage/configuration/config_documentation.html#ip_range_blacklist). So when looking to privately federate between two homeservers, where they'd communicate over one of these private ranges, without specifying said range using `ip_range_whitelist` it will fail showing errors like the below: ``` synapse.http.federation.well_known_resolver - 259 - INFO - GET-369 - Fetching https://server2.example.com/.well-known/matrix/server synapse.http.client - 199 - INFO - sentinel - Blocked 172.20.8.127 from DNS resolution to server2.example.com ``` To resolve this, you will need to add the following to the Additional config: ```yml ip_range_whitelist: - '172.16.0.0/12' ``` ### Config Example When setting additional config via the UI, the following would be added to the your `deployment.yml`: [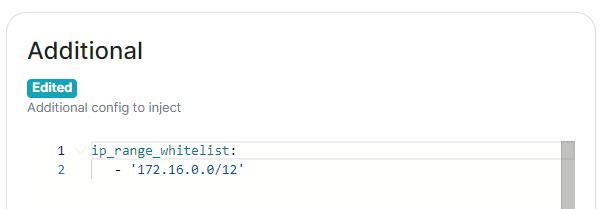](https://ems-docs.element.io/uploads/images/gallery/2024-05/image-1716546562058.png) ```yml spec: components: synapse: config: additional: |- ip_range_whitelist: - '172.16.0.0/12' ``` # Synapse Section: Workers The `Workers` section, which allows you to configure [Synape Workers](https://element-hq.github.io/synapse/latest/workers.html), is available under the 'Advanced' section of the `Synapse` page. ### What are Synapse Workers Synapse is built on Python, an inherent limitation of which is only being able to execute one thread at a time (due to the GIL). To allow for horizontal scaling Synapse is built to split out functionality into multiple separate python processes. While for small instances it is recommended to run Synapse in the default monolith mode, for larger instances where performance is a concern it can be helpful to split out functionality into these separate processes, called Workers.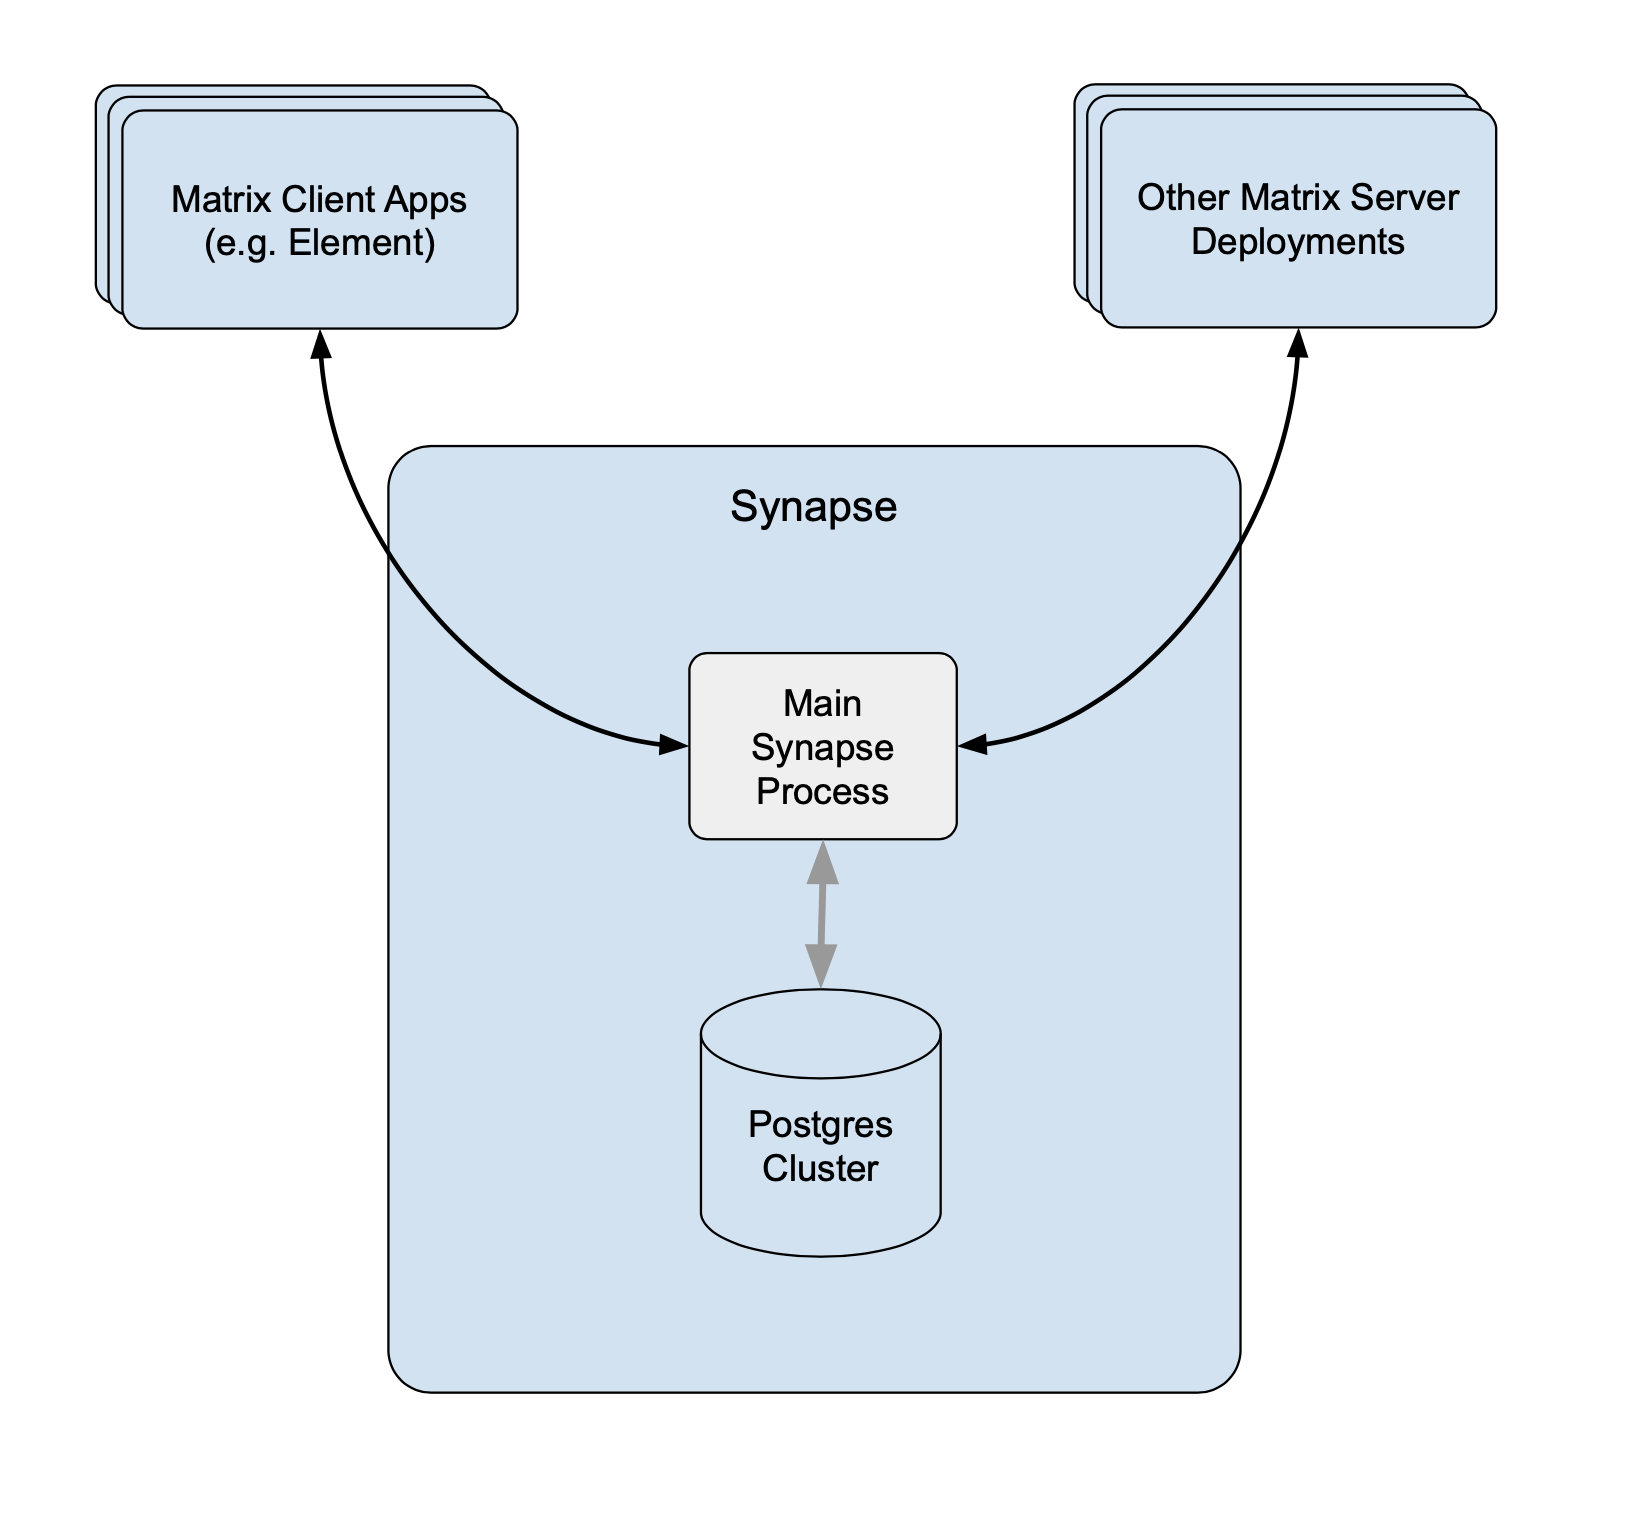 Without Workers Without Workers |
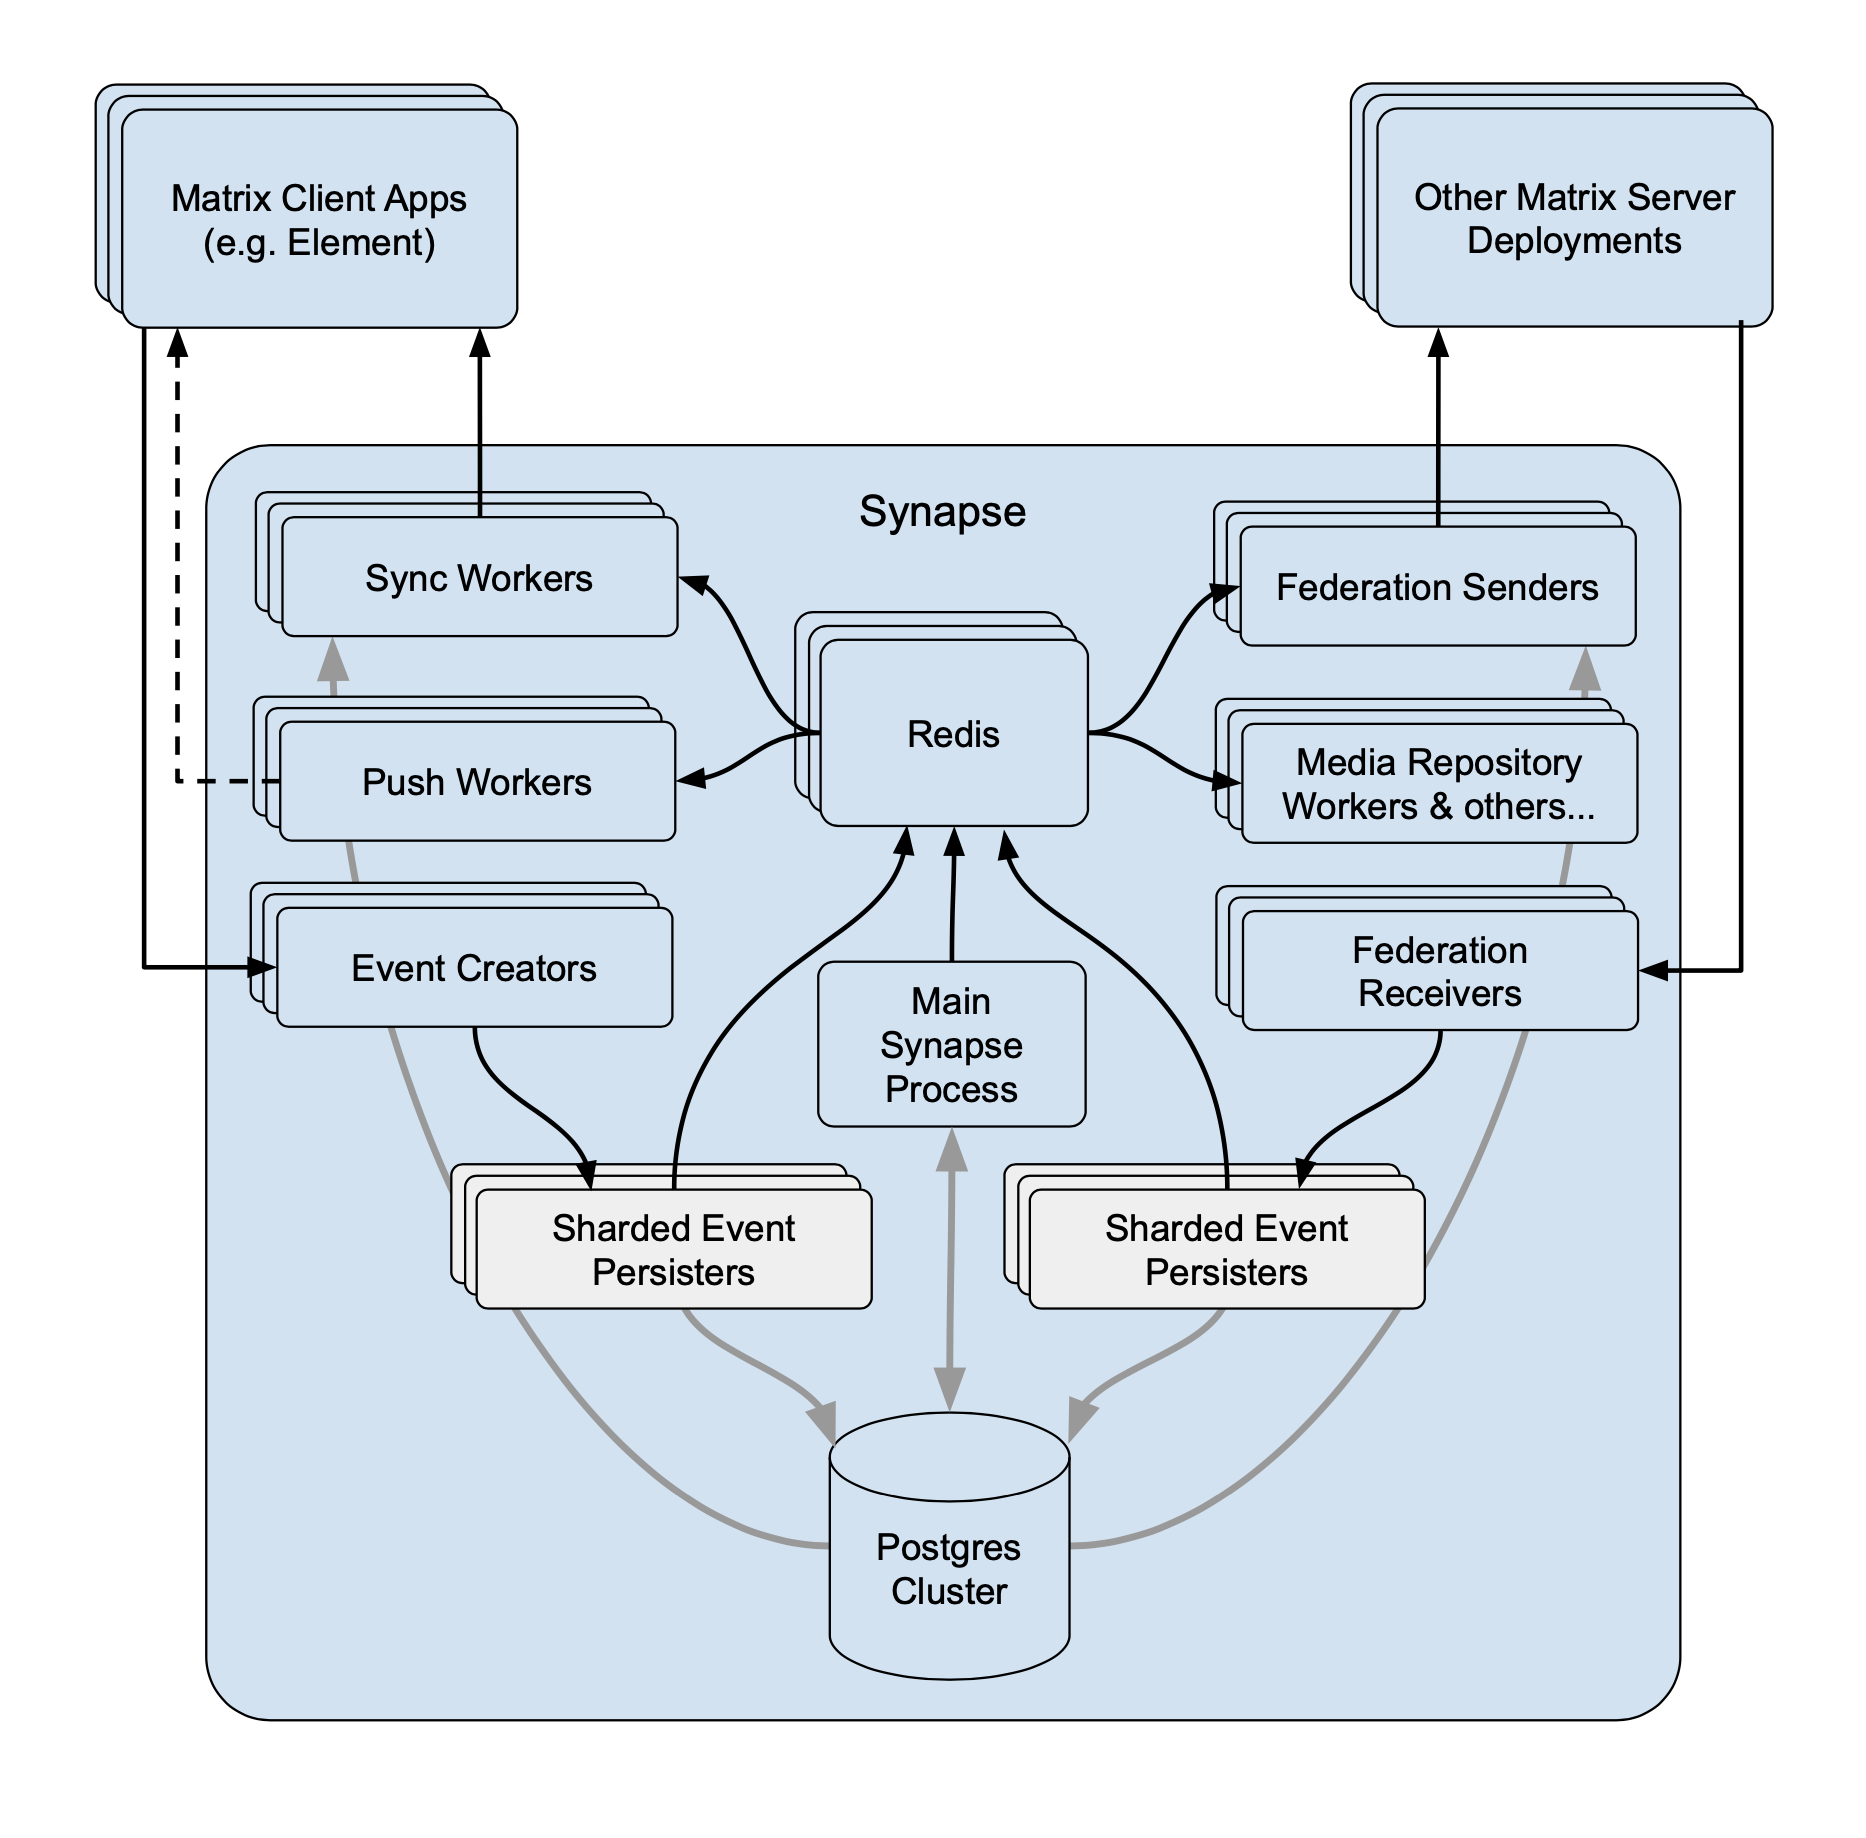 With Workers With Workers |
If you experience slowness with notifications sending to clients - **Client-Reader****.**
If you experience slowness when clients login and sync their chat rooms - **Synchrotron****.**
If you experience slowness when rooms are active - **Federation-x****.**
If you are working in a federated setup, you might want to dedicate federation to workers. If you are experiencing resources congestion, you can try to reduce the resources requested by each worker. Be aware that - If the node gets full of memory, it will try to kill containers which are consuming more than what they requested - If a container consumes more than its memory limit, it will be automatically killed by the node, even if there is free memory left. You will need to re-run the installer after making these changes for them to take effect. #### Worker Types The ESS Installer has a number of Worker Types, see below for a breakdown of what they are and how they work. ##### Appservice - **Purpose****.** Handles interactions with Application Services (appservices) which are third-party applications integrated with the Matrix ecosystem. - **Functions****.** Manages the sending and receiving of events to/from appservices, such as bots or bridges to other messaging systems. ##### Background - **Purpose****.** Executes background tasks that are not time-sensitive and can be processed asynchronously. - **Functions****.** Includes tasks like database cleanups, generating statistics, and running periodic maintenance jobs. ##### Client Reader - **Purpose****.** Serves read requests from clients, which typically includes retrieving room history and state. - **Functions****.** Offloads read-heavy operations from the main process to improve performance and scalability. ##### Encryption - **Purpose****.** Manages encryption-related tasks, ensuring secure communication between clients. - **Functions****.** Handles encryption and decryption of messages, key exchanges, and other cryptographic operations. ##### Event Creator - **Purpose****.** Responsible for creating new events, such as messages or state changes within rooms. - **Functions****.** Handles the generation and initial processing of events before they are persisted in the database. ##### Event Persister - **Purpose****.** Handles the storage of events in the database. - **Functions****.** Ensures that events are correctly and efficiently written to the storage backend. ##### Federation Inbound - **Purpose****.** Manages incoming federation traffic from other Matrix homeservers. - **Functions****.** Handles events and transactions received from federated servers, ensuring they are processed and integrated into the local server’s state. ##### Federation Reader - **Purpose****.** Serves read requests related to federation. - **Functions****.** Manages queries and data retrieval requests that are part of the federation protocol, improving performance for federated operations. ##### Federation Sender - **Purpose****.** Handles outgoing federation traffic to other Matrix homeservers. - **Functions****.** Manages sending events and transactions to federated servers, ensuring timely and reliable delivery. ##### Initial Synchrotron - **Purpose****.** Provides the initial sync for clients when they first connect to the server or after a long period of inactivity. - **Functions****.** Gathers the necessary state and history to bring the client up to date with the current room state. ##### Media Repository - **Purpose****.** Manages the storage and retrieval of media files (images, videos, etc.) uploaded by users. - **Functions****.** Handles media uploads, downloads, and caching to improve performance and scalability. ##### Presence Writer - **Purpose****.** Manages user presence updates (e.g., online, offline, idle). - **Functions****.** Ensures that presence information is updated and propagated to other users and servers efficiently. ##### Pusher - **Purpose****.** Manages push notifications for users. - **Functions****.** Sends notifications to users about new events, such as messages or mentions, to their devices. ##### Receipts Account - **Purpose****.** Handles read receipts from users indicating they have read certain messages. - **Functions****.** Processes and stores read receipts to keep track of which messages users have acknowledged. ##### Sso Login - **Purpose****.** Manages Single Sign-On (SSO) authentication for users. - **Functions****.** Handles authentication flows for users logging in via SSO providers. ##### Synchrotron - **Purpose****.** Handles synchronization (sync) requests from clients. - **Functions****.** Manages the process of keeping clients updated with the latest state and events in real-time or near real-time. ##### Typing Persister - **Purpose****.** Manages typing notifications from users. - **Functions****.** Ensures typing indicators are processed and stored, and updates are sent to relevant clients. ##### User Dir - **Purpose****.** Manages the user directory, which allows users to search for other users on the server. - **Functions****.** Maintains and queries the user directory, improving search performance and accuracy. ##### Frontend Proxy - **Purpose****.** Acts as a reverse proxy for incoming HTTP traffic, distributing it to the appropriate worker processes. - **Functions****.** Balances load and manages connections to improve scalability and fault tolerance. # Kubernetes Override Sections [](https://ems-docs.element.io/uploads/images/gallery/2024-02/image-1706791299674.png) Found in under `Advanced` in any section where you configure a component of the installer, under the `Kubernetes` heading. Here you can override Kubernetes configuration for each component. ### Common [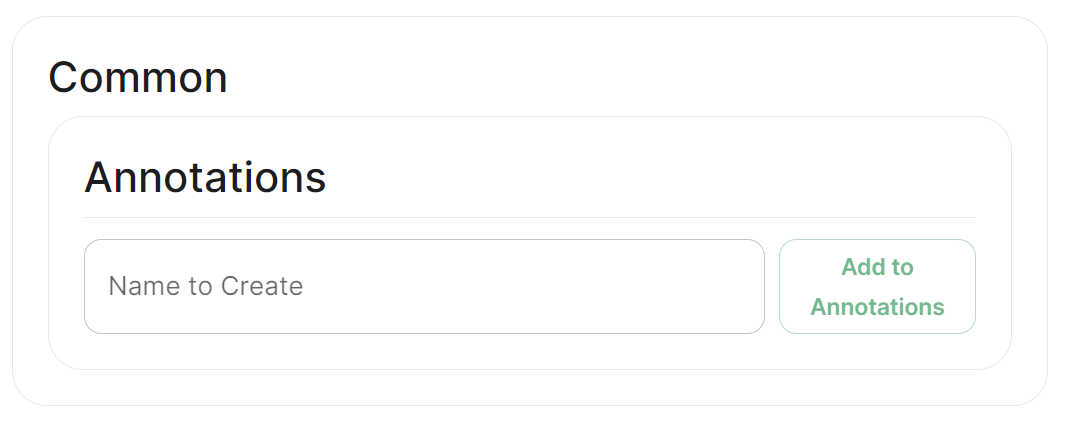](https://ems-docs.element.io/uploads/images/gallery/2024-02/image-1706791551167.png) #### Annotations In Kubernetes, annotations are key-value pairs associated with Kubernetes objects like pods, services, and nodes. Annotations are meant to be used for non-identifying metadata and are typically used to provide additional information about the objects. Unlike labels, which are used for identification and organization, annotations are more free-form and can contain arbitrary data. Annotations are often used for various purposes, such as: - **Documentation****.**
Providing additional information about a resource that might be useful for administrators or developers. - **Tooling Integration****.**
Integrating with external tools or automation systems that rely on specific metadata. - **Customisation****.**
Storing configuration information that affects the behaviour of controllers, operators, or custom tooling. - **Audit Trailing****.**
Capturing additional information for audit or tracking purposes. ### Ingress
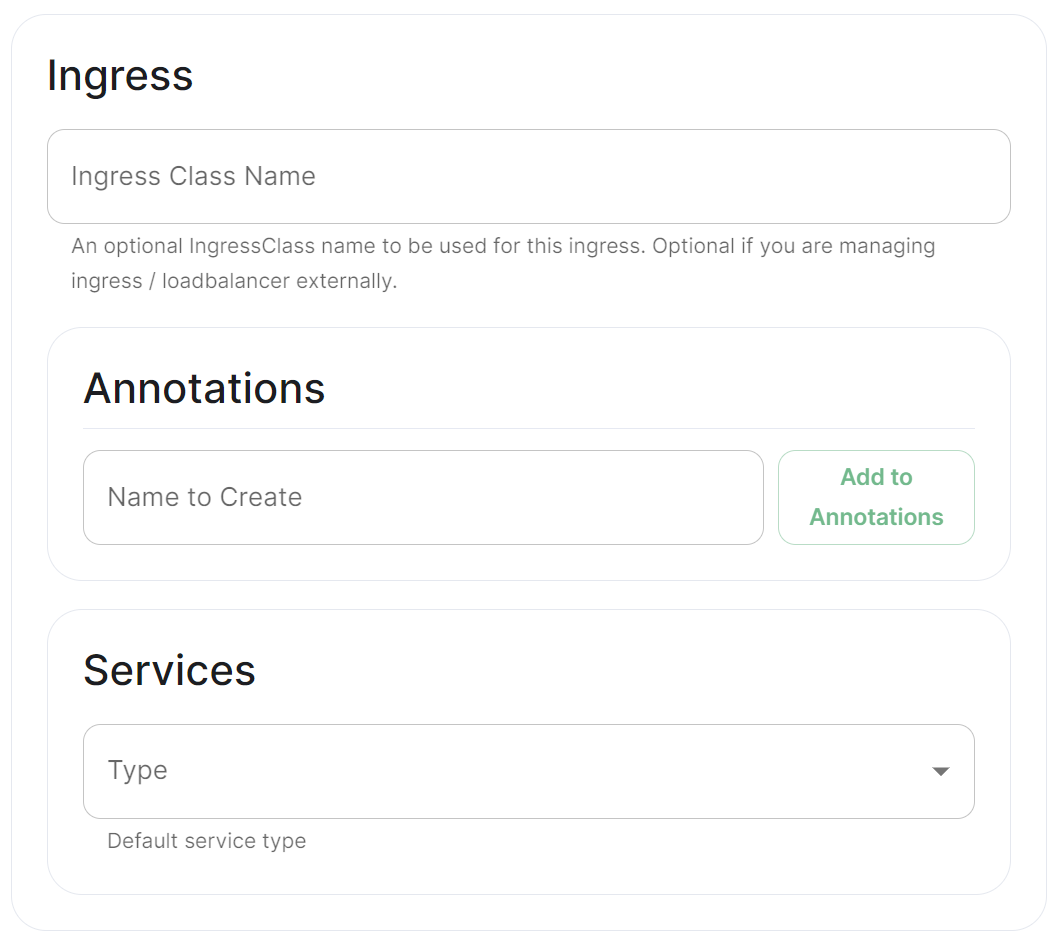 |
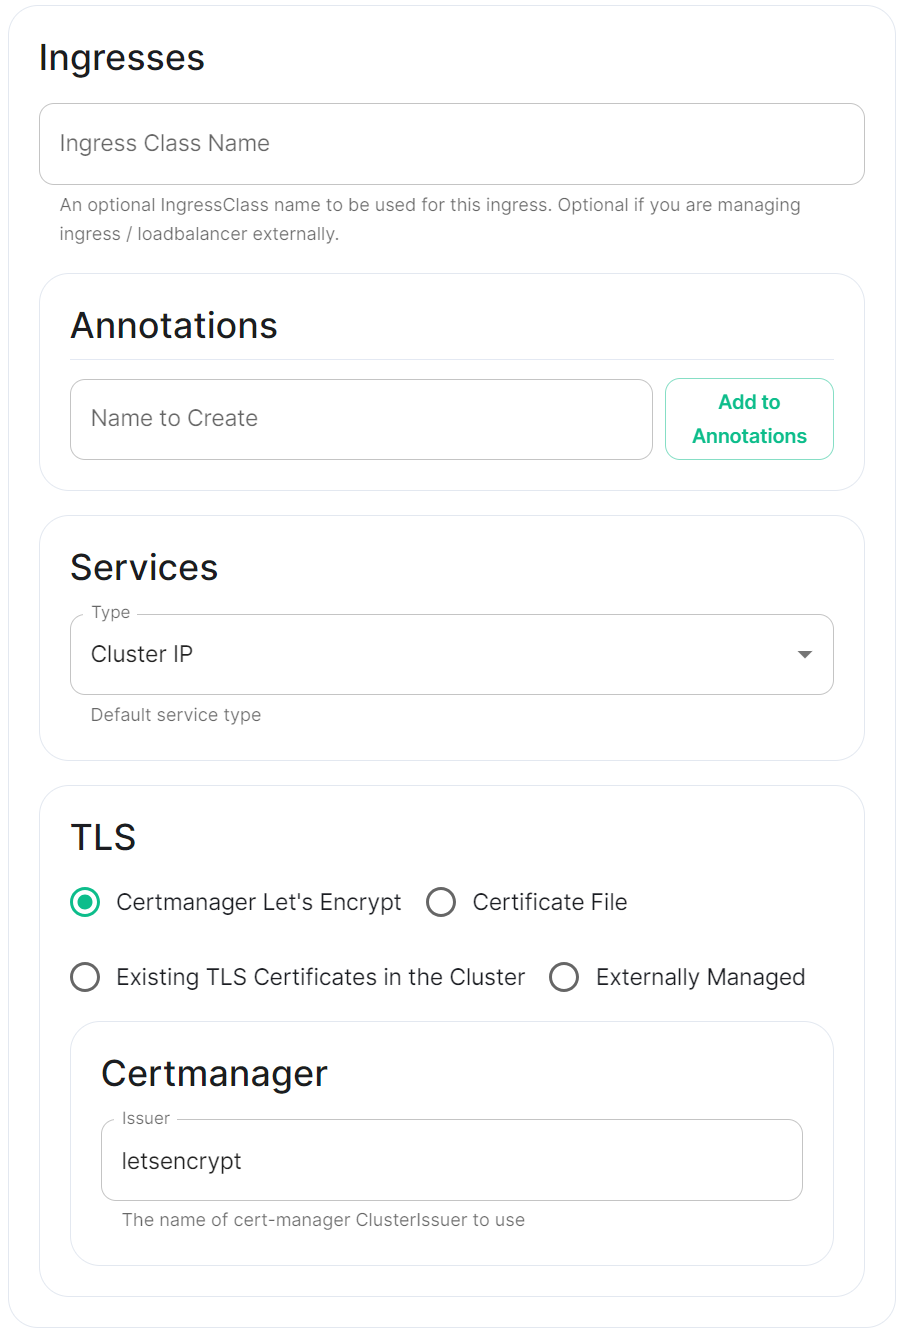 |
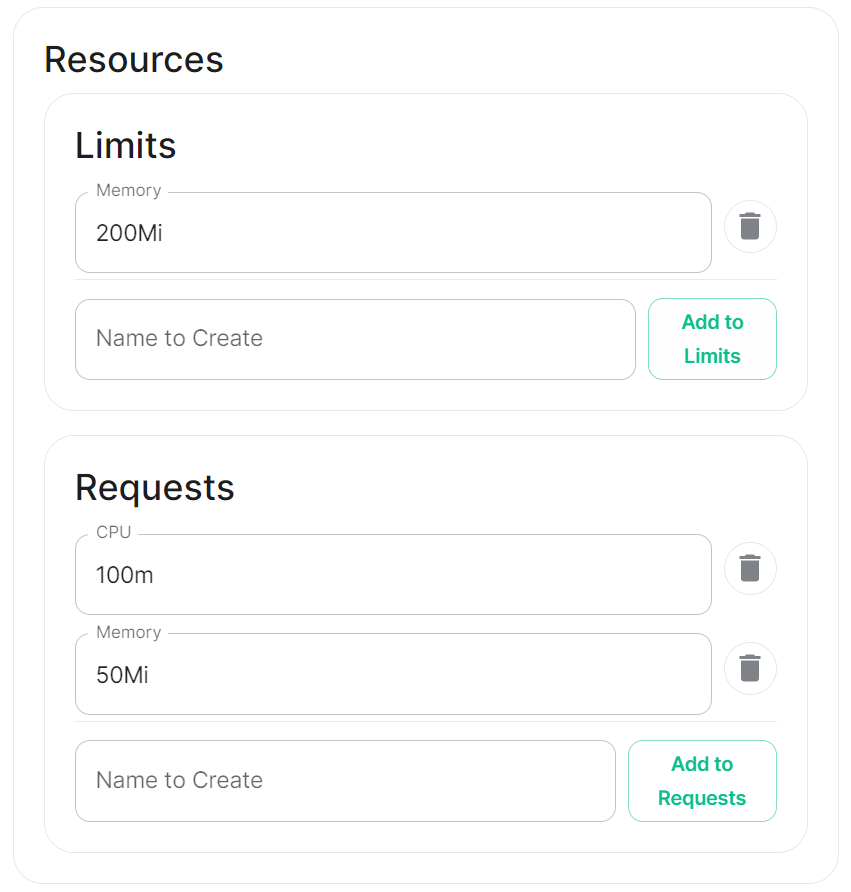 |
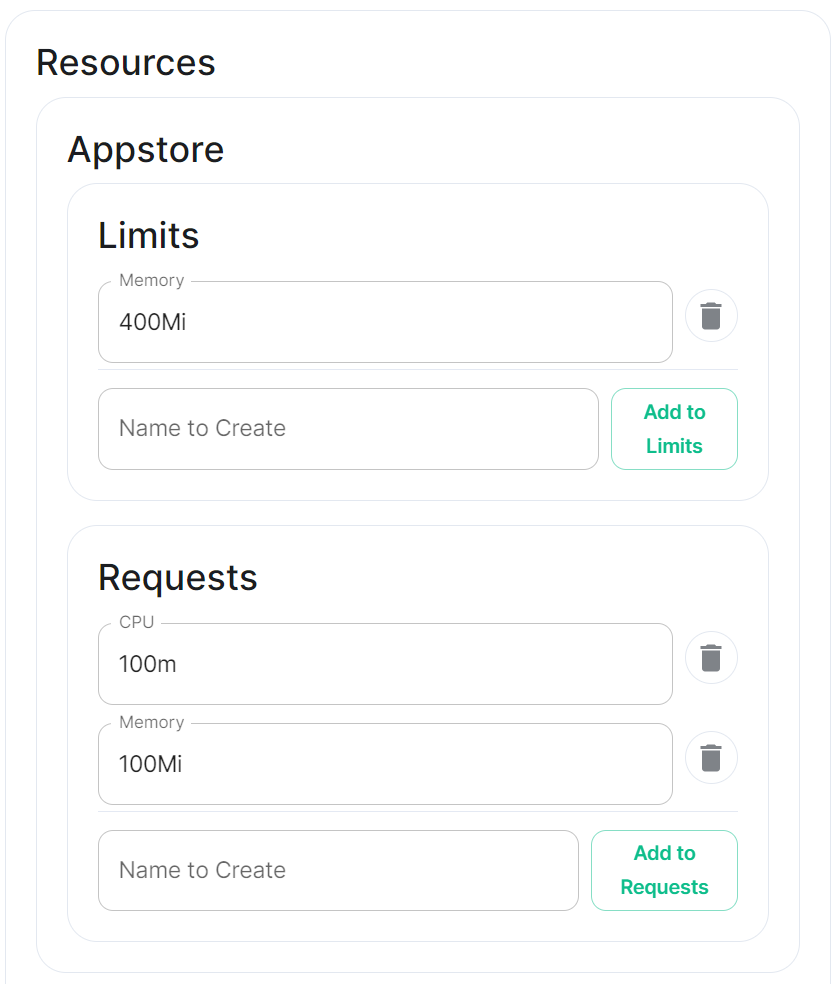 |
How to change an image used by a container deployed by ESS.
In specific use cases you might want to change the image used for a specific pod, for example, to add additional contents, change web clients features, etc. In general the steps to do this involve: - Creating a new ConfigMap definition with the overrides you need to configure, then injecting it into the cluster. - Configuring the installer to use the new Images Digests Config Map. - Generating a secret for the registry (if it requires authentication) and adding it to ESS.
We strongly advise against customising any pods. Customised containers are not supported and may break your setup so we encourage you to first raise your requirements to Support where we can best advise on them.
The built-in Synapse container image uses a Synapse build with our proprietary modules included, if you choose to replace this, you will no longer have access to these modules.
### Non-Airgapped Environments #### Creating the new Images Digests Config Map In order to override images used by ESS during the install, you will need to inject a new ConfigMap which specifies the image to use for each component. To do that, you will need to inject a ConfigMap. It's structure maps the components of the ESS, all of them can be overridden :Config Example
```yaml data: images_digests: |# Copyright 2023 New Vector Ltd adminbot: access_element_web: haproxy: pipe: auditbot: access_element_web: haproxy: pipe: element_call: element_call: sfu: jwt: redis: element_web: element_web: groupsync: groupsync: hookshot: hookshot: hydrogen: hydrogen: integrator: integrator: modular_widgets: appstore: irc_bridges: irc_bridges: jitsi: jicofo: jvb: prosody: web: sysctl: prometheus_exporter: haproxy: user_verification_service: matrix_authentication_service: init: matrix_authentication_service: secure_border_gateway: secure_border_gateway: sip_bridge: sip_bridge: skype_for_business_bridge: skype_for_business_bridge: sliding_sync: api: poller: sydent: sydent: sygnal: sygnal: synapse: haproxy: redis: synapse: synapse_admin: synapse_admin: telegram_bridge: telegram_bridge: well_known_delegation: well_known_delegation: xmpp_bridge: xmpp_bridge: ```Config Example
```yaml apiVersion: v1 kind: ConfigMap metadata: name: config_map_name namespace: namespace_of_your_deployment data: images_digests: | element_web: element_web: image_repository_path: mycompany/custom-element-web image_repository_server: docker.io image_tag: v2.1.1-patched ```Find out more about the Secrets block found under each Sections' Advanced configuration options
Under 'Advanced' in each section, you may find a block listing all the associated secrets configured as part of this section. This directly correlates to your `secrets.yml` and will allow you to remove secrets no longer required. For example, on the Cluster Section you may have uploaded a Certificate Authority CA.pem, you can use this block to remove it should it no longer be required. It is not however advised to modify the contents of secrets from this view, you should always do so via the associated UI that configures it in the first place, see the below example from the Cluster section. [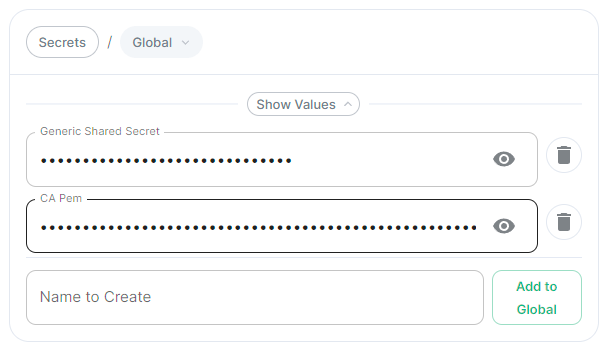](https://ems-docs.element.io/uploads/images/gallery/2024-05/image-1716368370442.png) ##### CA Pem
Config Example
- `secrets.yml` ```yml apiVersion: v1 kind: Secret metadata: name: global namespace: element-onprem data: # Added to the `global`, `element-onprem` secret as `ca.pem` under the `data` section. Other values may also be present here. ca.pem: >- base64encodedCAinPEMformatString ```Config Example
- `secrets.yml` ```yml apiVersion: v1 kind: Secret metadata: name: global namespace: element-onprem data: # Added to the `global`, `element-onprem` secret as `genericSharedSecret` under the `data` section. Other values may also be present here. genericSharedSecret: QmdrWkVzRE5aVFJSOTNKWVJGNXROTG10UTFMVWF2 ```You should first consider using an existing webserver before installing and maintaining an additional webserver for these requirements.
The following guide describes the steps to setup the Bitnami Apache helm chart in the Standalone `microk8s` cluster setup by Element Server Suite. **Requirements:** - a DNS entry pages.BASEDOMAIN. - a Certificate (private key + certificate) for pages.BASEDOMAIN - an installed standalone Element Server Suite setup - access to the server on the command line **Results:** - a web server that runs in the `mircok8s` cluster - a directory `/var/www/apache-content` to place and modify web content like homepage, backgrounds and guides.This guide is applicable to the Single Node deployment of Element Server Suite but can be used for guidance on how to host a webserver in other Kubernetes Clusters as well.
You can use any webserver that you like, in this example we will user the Bitnami Apache chart. We need helm version 3. You can follow [this Guide](https://helm.sh/docs/intro/install/) or ask `microk8s` to install `helm3`. ### Installing Prerequisites #### Enabling Helm3 with microk8s ```bash $ microk8s enable helm3 Infer repository core for addon helm3 Enabling Helm 3 Fetching helm version v3.8.0. % Total % Received % Xferd Average Speed Time Time Time Current Dload Upload Total Spent Left Speed 100 12.9M 100 12.9M 0 0 17.4M 0 --:--:-- --:--:-- --:--:-- 17.4M Helm 3 is enabled ``` Let's check if it is working ```bash $ microk8s.helm3 version version.BuildInfo{Version:"v3.8.0", GitCommit:"d14138609b01886f544b2025f5000351c9eb092e", GitTreeState:"clean", GoVersion:"go1.17.5"} ``` Create and Alias for helm ```bash echo alias helm=microk8s.helm3 >> ~/.bashrc source ~/.bashrc ``` #### Enable the Bitnami Helm Chart repository Add the bitnami repository ```bash helm repo add bitnami https://charts.bitnami.com/bitnami ``` Update the repo information ```bash helm repo update ``` ### Preparation and Configuration #### Prepare the Web-Server Content Create a directory to supply content: ``` sudo mkdir /var/www/apache-content ``` Create a homepage `home.html`, i.e.: ```html
Welcome to the Element Chat Server.
You can find a Getting Started Guide here
Powered by Matrix, provided by Element.
Create a Key Backup & Passphrase now!
(see Getting Started Guite p. 5)
Authentication configuration examples for LDAP, OpenID on Azure and SAML.
Provided below are some configuration examples covering how you can set up various types of Delegated Authentication. For a more detailed look at what each configuration option does, please refer to the [Authentication Section](https://ems-docs.element.io/books/classic-element-server-suite-documentation-lts-2410/page/authentication-section) detailed document. ### LDAP on Windows AD
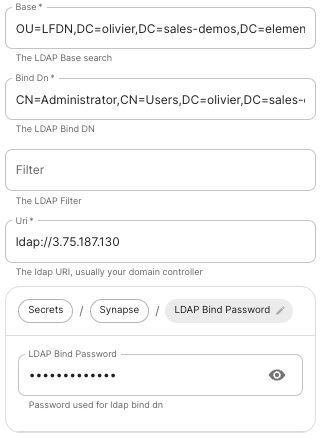 |
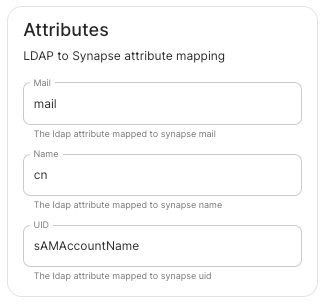 |
The distinguished name of the root level Org Unit in your LDAP directory. - The distinguished name can be displayed by selecting `View` / `Advanced Features` in the Active Directory console and then, right-clicking on the object, selecting `Properties` / `Attributes Editor`. - **Bind DN****.**
The distinguished name of the LDAP account with read access. - **Filter****.**
A [LDAP filter](https://ldap.com/ldap-filters/) to filter out objects under the LDAP Base DN. - **URI****.**
The URI of your LDAP server `ldap://dc.example.com`. - This is often your Domain Controller, can also pass in `ldaps://` for SSL connectivity. - The following are the typical ports for Windows AD LDAP servers: - `ldap://ServerName:389` - `ldaps://ServerName:636` - **LDAP Bind Password****.**
The password of the AD account with read access. - **LDAP Attributes****.**
- **Mail****.**
`mail` - **Name****.**
`cn` - **UID****.**
`sAMAccountName` ### OpenID on Microsoft Azure Before configuring within the installer, you have to configure Microsoft Azure Active Directory. #### Set up Microsoft Azure Active Directory - You need to create an `App registration`. - You have to select `Redirect URI (optional)` and set it to the following, where `matrix` is the subdomain of Synapse and `example.com` is your base domain as configured on the Domains section: ``` https://matrix.example.com/_synapse/client/oidc/callback ``` [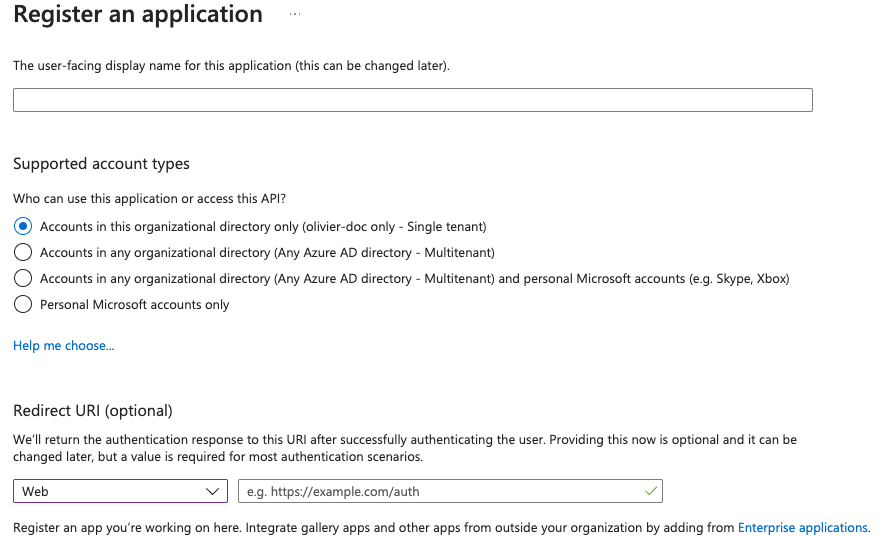](https://ems-docs.element.io/uploads/images/gallery/2023-05/screenshot-2023-05-03-at-16-30-06.png) For the bridge to be able to operate correctly, navigate to API permissions, add Microsoft Graph APIs, choose Delegated Permissions and add: - `openid` - `profile` - `email` Remember to grant the admin consent for those. To setup the installer, you'll need: - The `Application (client) ID` - The `Directory (tenant) ID` - A secret generated from `Certificates & Secrets` on the app. #### Configure the installer
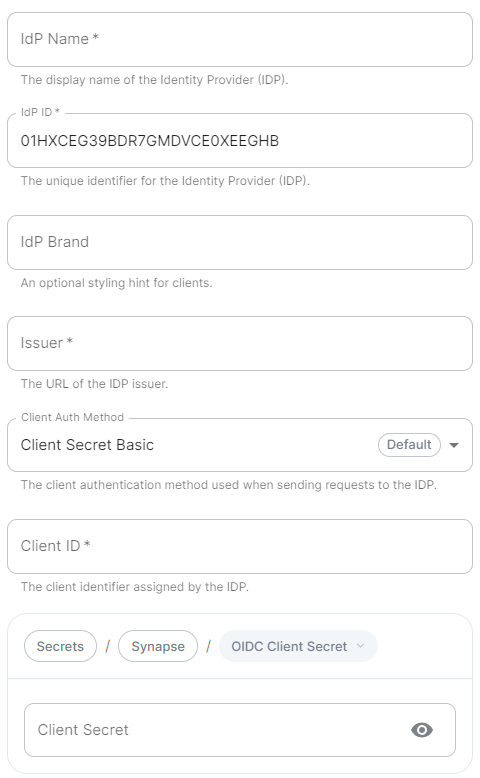 |
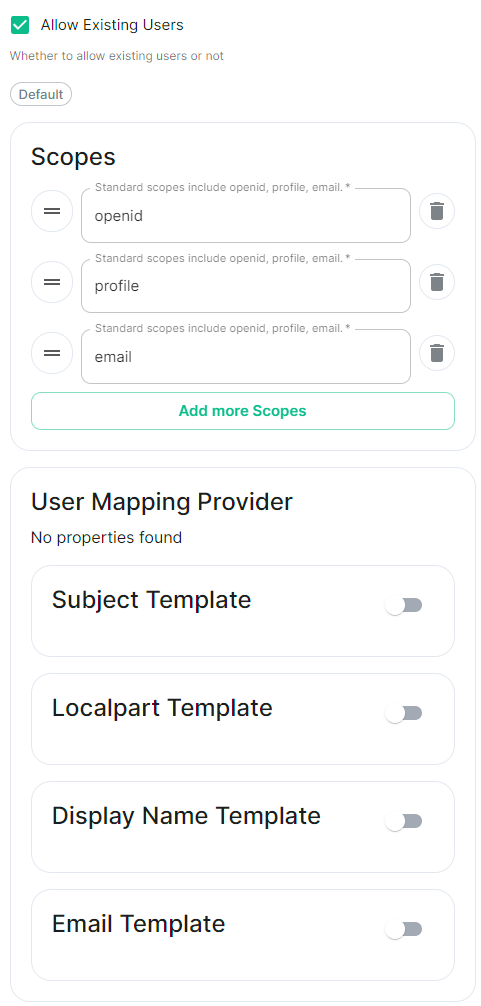 |
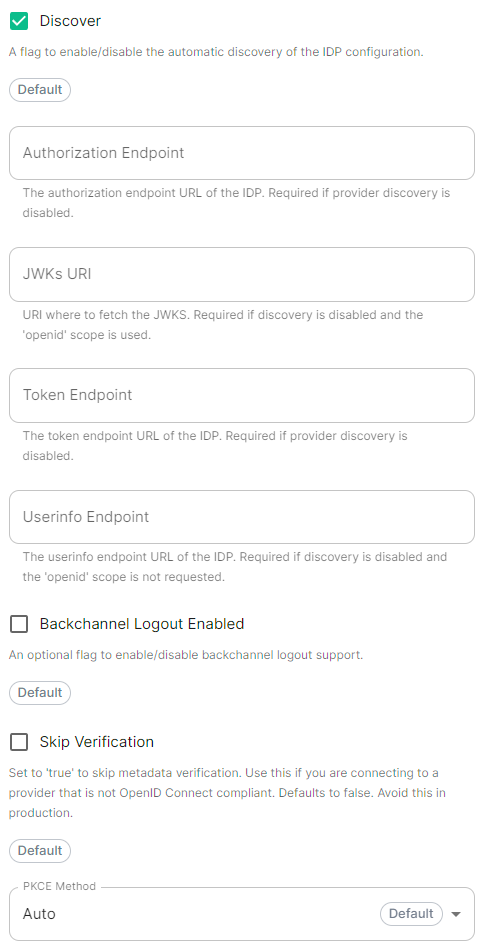 |
A user-facing name for this identity provider, which is used to offer the user a choice of login mechanisms in the Element UI. - **IdP ID****.**
A string identifying your identity provider in your configuration, this will be auto-generated for you (but can be changed). - **IdP Brand****.**
An optional brand for this identity provider, allowing clients to style the login flow according to the identity provider in question. - **Issuer****.**
The OIDC issuer. Used to validate tokens and (if discovery is enabled) to discover the provider's endpoints. Use `https://login.microsoftonline.com/DIRECTORY_TENNANT_ID/v2.0` replacing `DIRECTORY_TENNANT_ID`. - **Client Auth Method****.**
Auth method to use when exchanging the token. Set it to `Client Secret Post` or any method supported by your IdP. - **Client ID****.**
Set this to your `Application (client) ID`. - **Client Secret****.**
Set this to the secret value defined under "Certificates and secrets". - **Scopes****.**
By default `openid`, `profile` and `email` are added, you shouldn't need to modify these. - **User Mapping Provider****.**
Configuration for how attributes returned from a OIDC provider are mapped onto a matrix user. - **Localpart Template****.**
Jinja2 template for the localpart of the MXID.
Set it to `{{ user.preferred_username.split('@')[0] }}` if using Legacy Auth, or `{{ (user.preferred_username | split('@'))[0] }}` if using MAS. - **Display Name Template****.**
Jinja2 template for the display name to set on first login.
If unset, no display name will be set. Set it to `{{ user.name }}`. - **Discover****.**
Enable / Disable the use of the OIDC discovery mechanism to discover endpoints. - **Backchannel Logout Enabled****.**
Synapse supports receiving OpenID Connect Back-Channel Logout notifications. This lets the OpenID Connect Provider notify Synapse when a user logs out, so that Synapse can end that user session. This property has to bet set to `https://matrix.example.com/_synapse/client/oidc/backchannel_logout`in your identity provider, where `matrix` is the subdomain of Synapse and `example.com` is your base domain as configured on the Domains section. ### OpenID on Microsoft AD FS #### Install Microsoft AD FS Before starting the installation, make sure: - your Windows computer name is correct since you won't be able to change it after having installed AD FS - you configured your server with a static IP address - your server joined a domain and your domain is defined under Server Manager > Local server - you can resolve your server FQDN like computername.my-domain.com
You can find a checklist [here](https://learn.microsoft.com/en-us/windows-server/identity/ad-fs/deployment/checklist--setting-up-a-federation-server).
Steps to follow: - Install AD CS (Certificate Server) to issue valid certificates for AD FS. AD CS provides a platform for issuing and managing public key infrastructure [PKI] certificates. - Install AD FS (Federation Server) ##### Install AD CS You need to install the AD CS Server Role. - Follow this [guide](https://learn.microsoft.com/en-us/windows-server/networking/core-network-guide/cncg/server-certs/install-the-certification-authority).
##### Obtain and Configure an SSL Certificate for AD FS Before installing AD FS, you are required to generate a certificate for your federation service. The SSL certificate is used for securing communications between federation servers and clients. - Follow this [guide](https://learn.microsoft.com/en-us/previous-versions/windows/it-pro/windows-server-2012-R2-and-2012/dn781428(v=ws.11)). - Additionally, this [guide](https://learn.microsoft.com/en-us/windows-server/networking/core-network-guide/cncg/server-certs/configure-the-server-certificate-template) provides more details on how to create a certificate template. ##### Install AD FS You need to install the AD FS Role Service. - Follow this [guide](https://learn.microsoft.com/en-us/windows-server/identity/ad-fs/deployment/install-the-ad-fs-role-service). ##### Configure the federation service AD FS is installed but not configured. - Click on `Configure the federation service on this server` under `Post-deployment configuration` in the `Server Manager`. - Ensure `Create the first federation server in a federation server farm` and is selected [](https://ems-docs.element.io/uploads/images/gallery/2023-06/screenshot-2023-06-22-at-15-55-57.png) - Click `Next` [](https://ems-docs.element.io/uploads/images/gallery/2023-06/screenshot-2023-06-22-at-15-57-41.png) - Select the SSL Certificate and set a Federation Service Display Name [](https://ems-docs.element.io/uploads/images/gallery/2023-06/screenshot-2023-06-22-at-15-59-27.png) - On the Specify Service Account page, you can either Create a Group Managed Service Account (gMSA) or Specify an existing Service or gMSA Account [](https://ems-docs.element.io/uploads/images/gallery/2023-06/screenshot-2023-06-22-at-16-04-13.png) - Choose your database [](https://ems-docs.element.io/uploads/images/gallery/2023-06/screenshot-2023-06-22-at-16-05-50.png) - Review Options , check prerequisites are completed and click on `Configure` - Restart the server ##### Add AD FS as an OpenID Connect identity provider To enable sign-in for users with an AD FS account, create an Application Group in your AD FS.
To create an Application Group, follow theses steps: - In `Server Manager`, select `Tools`, and then select `AD FS Management` - In AD FS Management, right-click on `Application Groups` and select `Add Application Group` - On the Application Group Wizard `Welcome` screen - Enter the Name of your application - Under `Standalone applications` section, select `Server application` and click `Next` [](https://ems-docs.element.io/uploads/images/gallery/2023-06/screenshot-2023-06-22-at-16-39-52.png) - Enter `https://
https://login.microsoftonline.com/ Understand your ESS configuration files and how you can automate ESS deployment(s). Config examples included on this page may not up-to-date and are solely provided for demonstration purposes. It is highly recommended to run the version of the installer you wish to install to generate and configure config files that work with that version. Once these config files have been created by the installer, you should refer to the up-to-date config examples available in the installation documentation to understand how each config option can be modified. As integrations are upgraded to the new format this example (IRC) may become outdated, however the process remains identical for any integrations still using the legacy format. Make sure to check via the installer if the integration you are looking for is configured in this way. An ESS Administrators focused guide on backing up and restoring Element Server Suite. Synapse media and db backups should be considered sensitive. Adminbot PV backup should be considered sensitive. Auditbot PV backup should be considered sensitive. Sliding-Sync DB Backups should be considered sensitive. Sydent DB Backups should be considered sensitive. Matrix Authentication Service DB Backups should be considered sensitive. IRC Bridge DB Backups should be considered sensitive.
Take great care when modifying and running queries in your database. Ensure you understand what the queries do and double check that your query is correct.
This document is currently work-in-progress and might not be accurate. Please speak with your Element contact if you have any questions. Once Synapse is stopped, do not start it again after this The following command will erase the existing Synapse Database without warning or confirmation. Please ensure that is is the correct database and there is no production data on it. AKA the Installer GUI, a quick overview of the Configure and Admin tabs and the sections within. What's supported and how to get in touch! Some changes added to non-LTS monthly releases are backported into older LTS releases if required. As such, some of the below features may already be present in a previous LTS. You can check the associated LTS books' respective changelog page to compare.
Checked
- **Attribute Map****.**
Select `URN:Oasis:Names:TC:SAML:2.0:Attrname Format:Basic` as the `Identifier`
- **Mapping****.**
Set the following mappings:
- From: `Primary Email` To: `email`
- From: `First Name` To: `firstname`
- From: `Last Name` To: `lastname`
- **Entity****.**
- **Description****.**
- **Entity ID****.** (From Azure)
- **Name****.**
- **User Mapping Provider****.**
Set the following:
- `MXID Mapping`: `Dotreplace`
- `MXID Source Attribute`: `uid`
- **Metadata URL****.**
Add the `App Federation Metadata URL` from Azure.
### Troubleshooting
#### Redirection loop on SSO
Synapse needs to have the `X-Forwarded-For` and `X-Forwarded-Proto` headers set by the reverse proxy doing the TLS termination. If you are using a Kubernetes installation with your own reverse proxy terminating TLS, please make sure that the appropriate headers are set.
# Automating ESS Deployment
Config Example
```yml
apiVersion: ess.element.io/v1alpha1
kind: InstallerSettings
metadata:
annotations:
k8s.element.io/version: 2023-07.09-gui
name: first-element-cluster
```
Config Example
```yml
apiVersion: matrix.element.io/v1alpha1
kind: ElementDeployment
metadata:
name: first-element-deployment
namespace: element-onprem
```
Config Example
```yml
config:
acceptInvites: manual
adminPasswordSecretKey: adminPassword
externalAppservices:
configMaps: []
files: {}
federation:
certificateAutoritiesSecretKeys: []
clientMinimumTlsVersion: '1.2'
trustedKeyServers: []
log:
rootLevel: Info
macaroonSecretKey: macaroon
maxMauUsers: 250
media:
maxUploadSize: 100M
volume:
size: 50Gi
postgresql:
passwordSecretKey: postgresPassword
port: 5432
sslMode: require
registration: closed
registrationSharedSecretSecretKey: registrationSharedSecret
security:
defaultRoomEncryption: not_set
signingKeySecretKey: signingKey
telemetry:
enabled: true
passwordSecretKey: telemetryPassword
room: '#element-telemetry'
urlPreview:
config:
acceptLanguage:
- en
workers: []
```
Config Example
```yml
k8s:
common:
annotations: {}
haproxy:
workloads:
annotations: {}
resources:
limits:
memory: 200Mi
requests:
cpu: 1
memory: 100Mi
securityContext:
fsGroup: 10001
runAsUser: 10001
ingress:
annotations: {}
fqdn: synapse.example.com
services: {}
tls:
certmanager:
issuer: letsencrypt
mode: certmanager
redis:
workloads:
annotations: {}
resources:
limits:
memory: 50Mi
requests:
cpu: 200m
memory: 50Mi
securityContext:
fsGroup: 10002
runAsUser: 10002
synapse:
common:
annotations: {}
monitoring:
serviceMonitor:
deploy: auto
storage: {}
workloads:
annotations: {}
resources:
limits:
memory: 4Gi
requests:
cpu: 1
memory: 2Gi
securityContext:
fsGroup: 10991
runAsUser: 10991
secretName: synapse
```
Config Example
```yml
global:
config:
adminAllowIps:
- 0.0.0.0/0
- ::/0
certificateAuthoritySecretKey: ca.pem
domainName: example.com
genericSharedSecretSecretKey: genericSharedSecret
supportDnsFederationDelegation: false
verifyTls: true
k8s:
common:
annotations: {}
ingresses:
annotations: {}
services:
type: ClusterIP
tls:
certmanager:
issuer: letsencrypt
mode: certmanager
monitoring:
serviceMonitor:
deploy: auto
workloads:
annotations: {}
hostAliases: []
replicas: 2
securityContext:
forceUidGid: auto
setSecComp: auto
secretName: global
```
Config Example
```yml
apiVersion: v1
data:
genericSharedSecret: Q1BoVmNIaEIzWUR6VVZjZXpkMXhuQnNubHhLVVlM
kind: Secret
metadata:
name: global
namespace: element-onprem
```
Config Example
```yml
key_file: passkey.pem
bridged_irc_servers:
- postgres_fqdn: ircbridge-postgres
postgres_user: ircbridge
postgres_db: ircbridge
postgres_password: postgres_password
admins:
- "@user:example.com"
logging_level: debug
enable_presence: true
drop_matrix_messages_after_seconds: 0
bot_username: "ircbridgebot"
provisioning_room_limit: 50
rmau_limit: 100
users_prefix: "irc_"
alias_prefix: "irc_"
address: irc.example.com
parameters:
name: "Example IRC"
port: 6697
ssl: true
botConfig:
enabled: true
nick: "MatrixBot"
username: "matrixbot"
password: "some_password"
dynamicChannels:
enabled: true
mappings:
"#welcome":
roomIds: ["!MLdeIFVsWCgrPkcYkL:example.com"]
ircClients:
allowNickChanges: true
```
The free version of our Element Server Suite.
Allowing you to easily install a Synapse homeserver and hosted Element Web client.
- **Kubernetes Deployments****.**
We strongly recommend to leverage your own cluster backup solutions for effective data protection.
You'll find below a description of the content of each component data and db backup.
#### Synapse
- Synapse deployments creates a PVC named `
Users will loose their Avatars, and all photos, videos, files uploaded to the rooms wont be available anymore
- **AdminBot and AuditBot Data****.**
The bots will need to be renamed for them to start joining all rooms and logging events again
- **Sliding Sync****.**
Users will have to do an initial-sync again, and their encrypted messages will display as "Unable to decrypt" if its database cannot be recovered
- **Integrator****.**
Integrations will have to be added back to the rooms where they were configured. Their configuration will be desynced from integrator, and they might need to be reconfigured from scratch to have them synced with integrator.
### Security Considerations
Some backups will contain sensitive data, Here is a description of the type of data and the risks associated to it. When available, make sure to enable encryption for your stored backups. You should use appropriate access controls and authentication for your backup processes.
#### Synapse
Backups should be made by taking a snapshot of the PV (ideally) or rsyncing the backing directory to backup storage
- **AuditBot****.**
Backups should be made by taking a snapshot of the PV (ideally) or rsyncing the backing directory to backup storage
- **Synapse Media****.**
Backups should be made by taking a snapshot of the PV (ideally) or rsyncing the backing directory to backup storage
- **Postgres****.**
- **In Cluster:** Backups should be made by
```bash
kubectl -n element-onprem exec -it postgres-synapse-0 -- sh -c 'pg_dump --exclude-table-data e2e_one_time_keys_json -U $POSTGRES_USER $POSTGRES_DB' \
> synapse_postgres_backup_$(date +%Y%m%d-%H%M%S).sql
```
- **External:** Backup procedures as per your DBA, keeping in mind [Synapse specific details](https://element-hq.github.io/synapse/latest/usage/administration/backups.html#synapse-specfic-details)
- **Configuration****.**
Please ensure that your entire configuration directory (that contains at least `parameters.yml` & `secrets.yml` but may also include other sub-directories & configuration files) is regularly backed up.
The suggested configuration path in Element's documentation is `~/.element-onpremise-config` but could be anything. It is whatever directory you used with the installer.
# Calculate monthly active users
Incorrect queries can cause irrecoverable data loss.
We recommend you familiarize yourself with Transactions. That way, changes are not immediately written and you can undo any errors.

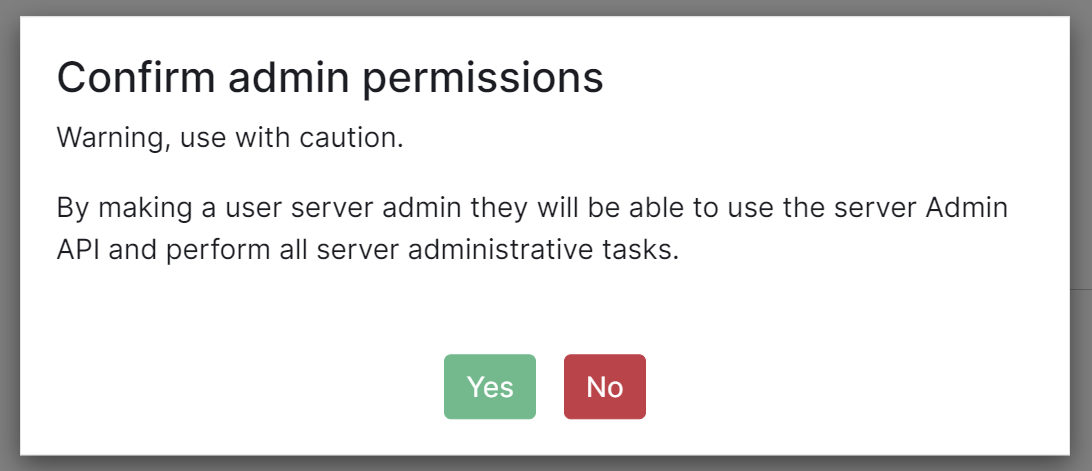


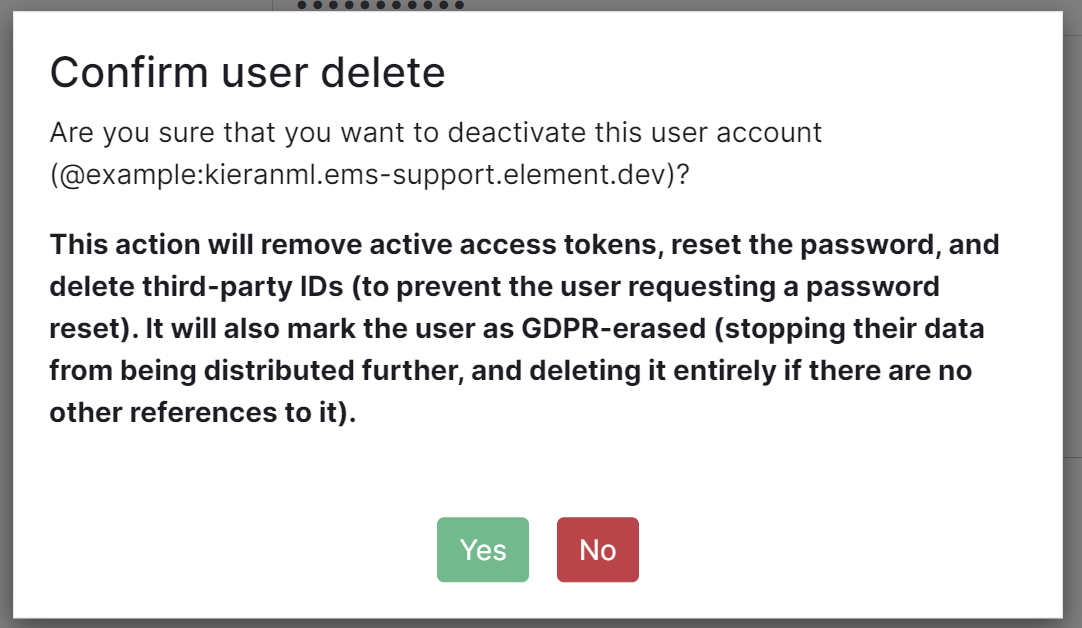


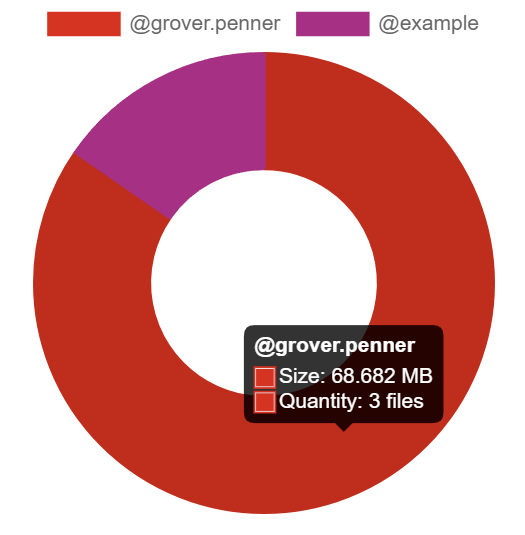
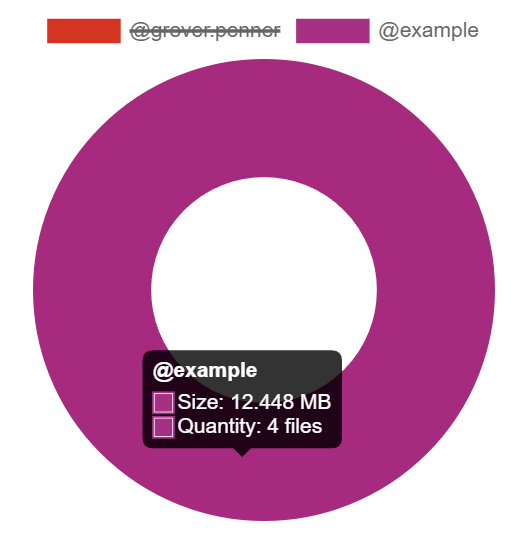
Enterprise
Sovereign
Level 1 Urgent
4 hours
2 hours
Level 2 High
8 hours
4 hours
Level 3 Medium
1 day
1 day
Level 4 Low
2 days
2 days
Click for a specific example
I had this "unknown playbook failure"
[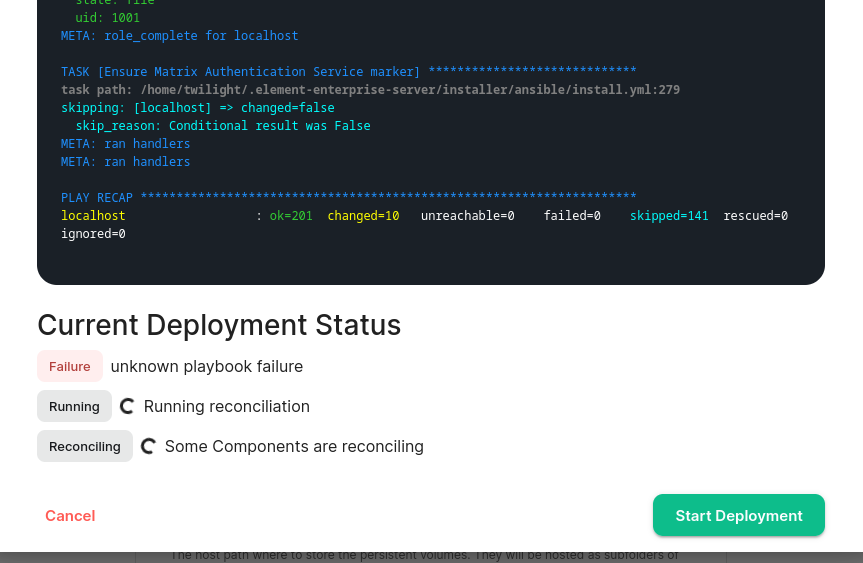](https://ems-docs.element.io/uploads/images/gallery/2024-07/image-1720802779508.png)
After enabling debug logging for the updater, I found this error telling me that my Telegram bridge is misconfigured
```plaintext
--------------------------- Ansible Task StdOut -------------------------------
TASK [Build all components manifests] ********************************
fatal: [localhost]: FAILED! => {"msg": "The task includes an option with an
undefined variable. The error was: 'dict object' has no attribute
'telegramApiId'. 'dict object' has no attribute 'telegramApiId'. 'dict object'
has no attribute 'telegramApiId'. 'dict object' has no attribute
'telegramApiId'. 'dict object' has no attribute 'telegramApiId'. 'dict object'
has no attribute 'telegramApiId'. 'dict object' has no attribute
'telegramApiId'. 'dict object' has no attribute 'telegramApiId'\n\nThe error
appears to be in '/element.io/roles/elementdeployment/tasks/prepare.yml': line
21, column 3, but may\nbe elsewhere in the file depending on the exact syntax
problem.\n\nThe offending line appears to be:\n\n\n- name: \"Build all
components manifests\"\n ^ here\n"}
```
Example output
```plaintext
table_schema | table_name | data_size
--------------+---------------------------------------+-----------
public | event_json | 2090 MB
public | event_auth | 961 MB
public | events | 399 MB
public | current_state_delta_stream | 341 MB
public | state_groups_state | 294 MB
public | room_memberships | 270 MB
public | cache_invalidation_stream_by_instance | 265 MB
public | stream_ordering_to_exterm | 252 MB
public | state_events | 249 MB
public | event_edges | 208 MB
(10 rows)
```
Example output
```plaintext
room_id | count
---------------------------------+---------
!GahmaiShiezefienae:example.com | 1382242
!gutheetheixuFohmae:example.com | 1933
!OhnuokaiCoocieghoh:example.com | 357
!efaeMegazeeriteibo:example.com | 175
!ohcahTueyaesiopohc:example.com | 93
!ithaeTaiRaewieThoo:example.com | 43
!PhohkuShuShahhieWa:example.com | 39
!eghaiPhetahHohweku:example.com | 37
!faiLeiZeefirierahn:example.com | 29
!Eehahhaepahzooshah:example.com | 27
(10 rows)
```
In this instance something unusual might be going on in `!GahmaiShiezefienae:example.com` that warrants further investigation.
Click to see commands for installers prior to version 2023-05.05
For installers prior to 2022-05.06, use:
```bash
kubectl describe cm -n element-onprem first-element-deployment-synapse-shared
```
For the 2022-05.06 installer and later, use:
```bash
kubectl -n element-onprem get secret synapse-secrets -o yaml 2>&1 | grep shared.yaml | awk -F 'shared.yaml: ' '{print $2}' - | base64 -d
```
### 24.10.02-gui
#### Security Issues
24.10.01-gui
The required Python versions are now 3.10, 3.11, 3.12.
As a result, Ubuntu 24.04 is now supported but Ubuntu 20.04 support is dropped. Please consult the Ubuntu documentation for upgrading between Ubuntu LTS versions.
The installer will attempt to install the required packages in some scenarios.
Airgapped customers should ensure that Python 3.12 packages are available in their package mirrors.
Alternatively, Python 3.10, 3.11, or 3.12 can be preinstalled on the server in all situations.
#### Bug Fixes
Enterprise
Upgrade Element Web to v1.11.85, fixes CVE-2024-50336, CVE-2024-51749 and CVE-2024-51750.
#### Deprecations
Enterprise
When setting securityContext for pods, also set runAsGroup.
### 24.10.01-gui
#### Release Summary
The required Python versions are now 3.10, 3.11, 3.12. As a result, Ubuntu 24.04 is now supported but Ubuntu 20.04 support is dropped. Please consult the Ubuntu documentation for upgrading between Ubuntu LTS versions. The installer will attempt to install the required packages in some scenarios. Airgapped customers should ensure that Python 3.12 packages are available in their package mirrors. Alternatively, Python 3.10, 3.11, or 3.12 can be preinstalled on the server in all situations.
#### New Features
Starter
Starter Edition is deprecated, and will not be released anymore.
#### Upgrade Notes
Enterprise
XMPP Bridge and IRC Bridge both support Authenticated Medias. Their signing key is generated automatically by the installer UI. Enterprise / Starter
Authenticated Media is now enforced by default. All components but Matrix Content Scanner are compatible with it. If you need to disable it, please add `enable_authenticated_media: false` to Synapse -> Additional YAML. Enterprise / Starter
Add the possibility to allow/deny rooms and log events for Auditbot. Enterprise / Starter
Support overriding just the server and path in the image digest ConfigMap. Enterprise / Starter
Support Element Call in Element X. Enterprise / Starter
Matrix Authentication Service and Synapse only use internal paths to communicate, removing the need for `hostAliases` setup between the two. Enterprise
All ESS Images are now hosted behind `registry.element.io`. Enterprise
Synapse workers supporting multiple replicas can now be configured for automatic horizontal scaling. Enterprise / Starter
Expose `images_digests.yml` file in the Download screen for Airgapped customers who want to sync their registry directly with `registry.element.io`.
#### Security Issues
Enterprise / Starter
Upgrade to cert-manager 1.15.3. Enterprise / Starter
Operator - Upgrade Python to 3.12, Ansible to 2.17. Enterprise / Starter
Upgrade Synapse to v1.116.0. Enterprise / Starter
Upgrade Element Web to v1.11.82. Enterprise
Update XMPP Bridge to 2.0.1. Enterprise
Update Adminbot and Auditbot to 6.3.1. Enterprise
Update IRC Bridge to 3.0.2. Enterprise
Update Hydrogen to 0.5.0. Enterprise / Starter
Update Admin Console to v16.105.4. Enterprise / Starter
Upgrade microk8s to 1.31.
As per 24.10 releases, the standalone installer only supports upgrading microk8s installed from 23.10 releases.
As per 23.10.35/24.04.05/24.05.01, the standalone installer now upgrades microk8s automatically. The microk8s upgrade procedure does not involve an uninstall/reinstall of microk8s anymore. It now will automatically upgrade microk8s to the expected version, and as such, the `--upgrade-cluster` flag has been removed.
Any customization to CNI Configuration in `/var/snap/microk8s/current/args/cni-network/cni.yaml` will have to be reconfigured.
During the upgrade, microk8s & workloads will restart several times. Managed addons that require upgrading will be temporarily disabled to be upgraded.
This all will induce a small downtime of a couple of minutes. Enterprise / Starter
The installer now makes sure the upgrade comes from a supported version.
#### Bug Fixes
Enterprise / Starter
Upgrade to Ansible 9 for security fixes and Python compatibility.
#### Deprecations
Enterprise
Allow only one VoIP platform (Jitsi or Element Call) to be enabled. Enterprise
Fix migration of authentication settings from <24.07.01 with Matrix Authentication Service installed. Enterprise / Starter
Fix an issue where, after update, the installer UI would ask to save for changes on the Host screen when the user actually did not click anything. Enterprise
Fix monitoring integration tab not rendering. Enterprise
Fix Auditbot logs viewer when Matrix Authentication Service is setup.
### Non-LTS Monthly Release Changes
This section summarises all the changes between the previous LTS and this one during the monthly non-LTS releases. Duplicate entries where individual components received upgrades have been removed so only the latest version is mentioned.
You can then compare the below changelog against the above LTS releases for an accurate overall changelog if upgrading from a previous LTS.
Starter
Matrix Content Scanner is not available anymore in Starter Edition.
#### New Features
Enterprise
This release adds the possibility to enable Matrix Authentication Service during initial setup. Enabling Matrix Authentication Service is experimental; a couple of features do not work yet with it (Auditbot, Adminbot, Element Call, GroupSync, Admin UI). Enabling MAS allows you to use Element X with OIDC or LDAP login. Enterprise
This release now makes ESS ElementX ready by default. Any new installation will deploy Matrix Authentication Service. Existing setups will not profit from this change, migration paths are planned later in the future.
#### Upgrade Notes
General
Support knocking with `generic_worker` federation. Enterprise / Starter
**Major Change:** The standalone installer now upgrades microk8s gracefully and automatically. The microk8s upgrade procedure no longer involves an uninstall/reinstall of microk8s. It now automatically upgrades microk8s to the expected version, and the `--upgrade-cluster` flag has been removed.
Any customization to CNI Configuration in `/var/snap/microk8s/current/args/cni-network/cni.yaml` will need to be reconfigured. During the upgrade, microk8s will restart, and addons will be disabled to force an upgrade. This process may induce a small downtime of a couple of minutes. Enterprise
Status watchers are now golang containers, reducing resources used by the operator and updater. Enterprise
Allow configuration of Synapse database connection pool sizes. Enterprise
Add a ServiceMonitor to scrape metrics of microk8s ingress. Enterprise
Expose Operator & Updater metrics. Enterprise
Add support for Outbound webhooks in Hookshot. Enterprise
Synapse OIDC support attribute requirements. Enterprise
Add a new experimental feature to enable Matrix Authentication Service during ESS bootstrap. Enterprise
Simplification of the OIDC provider configuration. After upgrading, please make sure that your OIDC settings were properly migrated to the new view. Enterprise
It is now possible to enable the new Matrix Authentication Service when bootstrapping a new ESS setup. It is an experimental feature, incompatible with Groupsync, Element Call, Auditbot, and Adminbot at this time. It is required to try out Element X with OIDC login. Enterprise
It is now possible to use LDAP with Matrix Authentication Service. Enterprise / Starter
Properly enforce patterns check in UI inputs under cards that can be enabled/disabled. Enterprise
Display deployment availability in the UI, in addition to the reconciliation status. Enterprise
Element Call is now MAS-Compatible. Enterprise
Add the possibility to configure a matrix stats endpoint. Enterprise
Setup the onprem-admin user as a MAS admin. Enterprise
Allow configuration of empty (no) disallowed IP ranges in Hookshot. Enterprise
Validate Synapse Telemetry is consistently set. Enterprise / Starter
Synapse improve worker configuration. Enterprise / Starter
Allow blocking of non-scanned media. Enterprise
Adminbot/Auditbot + MAS compatibility. Enterprise / Starter
The UI now properly marks secrets as required when necessary. Enterprise / Starter
The reconciliation process now ensures that all secrets are present and shows missing secrets if necessary. Enterprise
Add Hookshot permissions configuration. Enterprise
Add the possibility to manage Federation dynamically from the Admin Console when Secure Border Gateway is enabled. Enterprise / Starter
Speed up initial Synapse deployment. Enterprise
Add the possibility to configure user deprovisioning and room cleanup in GroupSync. Enterprise
Synapse auto invite: use Synapse native feature, run on background worker if it exists. Enterprise
Allow to override a container image without configuring a new digest. Enterprise / Starter
Support MSC4186 / Simplified Sliding Sync natively in Synapse. Enterprise / Starter
Support authenticated media APIs (MSC3916) in Synapse. Enterprise / Starter
Scrape Synapse HAProxy metrics. Enterprise
Scrape Adminbot and Auditbot HAProxy metrics. Enterprise
Set default volume sizes for Matrix Content Scanner volumes. Enterprise
Set default volume sizes for Adminbot, Auditbot & Sydent volumes. Enterprise / Starter
The administration interface can now manage users on deployments using Matrix OIDC. Enterprise
Administrators can now configure the SBG allowlist within the Admin UI. Enterprise / Starter
The user management page now allows admins to toggle the locked status of users. Enterprise / Starter
The user management page now displays the primary email address of users. Enterprise / Starter
The user management page will now default to showing locked and deactivated users when searching by name. Enterprise
Enabling MAS is not experimental anymore, and is now the default setup mode. Enterprise
Allow to override a container image without configuring a new digest. Enterprise / Starter
Allow configuration of the operator and updater with debug logs. Enterprise / Starter
Check for supported Python versions when starting a deployment run. Recreate the virtual environment if it is using the wrong Python version. Enterprise / Starter
The installer now makes sure that the microk8s version on the host is supported before starting the upgrade process. Enterprise / Starter
Speed improvements in the operator/updater reconciliation process.
#### Security Issues
Enterprise
Upgrade Telegram bridge to 0.15.1-mod-1. Enterprise
Upgrade WhatsApp bridge to 0.10.7-mod-1. Enterprise
Upgrade Sygnal to 0.14.3 to support the latest Firebase API. Enterprise
Update Synapse Admin to v16.92.0. Enterprise
Update Adminbot to Pipe 6.1.1. Enterprise / Starter
Matrix Content Scanner upgrade to 1.0.8. Enterprise / Starter
On RHEL and derived platforms, it now requires `python 3.11` installed. Enterprise
Upgrade SecureBorderGateway to v1.2.0. Enterprise
Upgrade Auditbot to 6.1.2 to improve overall request handling efficiency, especially at high-loads. Enterprise / Starter
Upgrade to Synapse 1.114.0. Enterprise
Upgrade to Element Call 0.6.3 with improved call layout. Enterprise
Upgrade to Matrix Authentication Service 0.11.0 and support password auth. Enterprise
Synapse registration and password policy settings are now moved to Authentication configuration, under Local Password Database mode. Enterprise
Upgrade Hydrogen to v0.4.1-fix. Enterprise / Starter
Upgrade to cert-manager 1.12.13. Enterprise / Starter
Upgrade ElementWeb to v1.11.81. Enterprise / Starter
Services got renamed, `-headless` suffixes are all removed. If you are using Network Policies, those will need to be upgraded to the new names. Enterprise
Global upgrade of the monitoring stack. Victoria Metrics is now on version 1.101. Enterprise
Now that Synapse brings native Sliding Sync protocol, the Sliding Sync proxy has been discontinued. Its PostgreSQL cluster instance is being cleaned-up.
#### Bug Fixes
Enterprise
Previous update might have enabled unexpectedly outbound webhooks in Hookshot. If you don't need this feature, make sure that it is disabled in Hookshot integration, under Generic Webhooks settings. Enterprise
Better image signatures, enterprise is now published to sigstore. Enterprise / Starter
Upgrade to Ansible 8 for security fixes.
#### Deprecations
Enterprise / Starter
Fix Remove button not working for some integrations. Enterprise / Starter
Fix cert-manager upgrade failing to remove old resources. Enterprise / Starter
Fix operator and updater having permissions issues under Openshift. Enterprise / Starter
Fix Jitsi JVB failing to get ready when STUN servers list is empty and Coturn is not deployed. Starter
Fix upgrade failing. Enterprise
Fix missing storage class on some Monitoring PVCs. Enterprise
Fix media screen on standalone setup. Enterprise / Starter
Remove `--upgrade-cluster` parameter as microk8s is now upgraded gracefully. Enterprise
Fix inconsistent behavior when switching between S3/Persistent volume option under the media tab. Enterprise / Starter
Fix watchers to avoid triggering unneeded reconciliation loops. Enterprise
GroupSync: Fix issue when LDAP identities contain commas in their names. Enterprise
Configuring monitoring stack persistent volumes properly in microk8s requires recreating their statefulsets. Starter / Enterprise
Fix haproxy failing on IPv4-only nodes. Enterprise / Starter
The installer no longer flakes between bootstrap and installer view when the Kubernetes cluster is intermittently unreachable. Enterprise
Fix an Ansible error when installing the telemetry script on the local host when user GID != UID. Enterprise / Starter
Allow well-known delegation to omit configuration of the ingress entirely without triggering unknown variable errors. Enterprise / Starter
Allow configuration of Matrix Content Scanner without a storage class name. Enterprise / Starter
Mark Postgres configuration as required for all components that use a Postgres database. Enterprise
Mark the source for GroupSync as required. Enterprise
Remove workloads and dependent CRs from statuses when they're no longer deployed. Enterprise
Fix provisioning of users that are not rate-limited. Enterprise
Better identification for the Telegram and WhatsApp bridges in their respective apps. Enterprise / Starter
Fix an issue where the cert-manager issuer would try to be created but the cert-manager webhook would not be ready. Starter / Enterprise
Fix haproxy failing on IPv4-only nodes. Enterprise
Fix monitoring of kube etcd and kube scheduler on microk8s. Enterprise
Don't include cert-manager in the airgapped tarball. ESS doesn't install or manage cert-manager in airgapped deploys. Enterprise
Avoid leaking Postgres connections when there are issues provisioning Synapse users. Enterprise
SIPBridge - Disable Virtual rooms. Enterprise
Attempt to detect OpenShift and configure operator & updater installation values appropriately. Enterprise / Starter
Fix an issue preventing setup when a proxy is configured on the host. Enterprise
Fix a critical issue which would prevent users from accessing Adminbot and Auditbot UI. Enterprise
Fixes an issue where Auditbot UI would fail to open because tokens were unable to refresh. Enterprise
Revert change of 24.04.07 which prevented Adminbot and Auditbot from doing an initial sync. Enterprise
Create new devices for Adminbot and Auditbot to work with the new Rust SDK cryptographic libraries. Enterprise
Reduce secrets leaks from operator & updater logs. If you need, for debugging purposes, to enable secrets logging, you must edit the operator & updater deployments and set the environment variable `DEBUG_MANIFESTS=1`. Enterprise / Starter
Refactor Synapse config files to own the priority of each setting managed by ESS. Enterprise
Sygnal upgrade to 0.15.0 for further Firebase API fixes. Enterprise
Adminbot and Auditbot are currently incompatible with MAS. Enterprise
Synapse - Override botocore CA bundle to allow pushing against non-AWS S3 providers. Enterprise
Add support for Element Call configuration in Element Well Known file. Enterprise
Matrix Authentication Service - Fix UI configuration of certificates for ingresses. Enterprise
Minor speed up to initial setup of Synapse. Starter
Fix MAU Limit, which was configured at 250 instead of 200. Enterprise
Prevent users from manually editing the Auditbot/Adminbot passphrase. Enterprise
Fix display of the status of the reconciliation. Enterprise
Fix Coturn page causing a memory leak. Enterprise / Starter
Ensure the `nf_conntrack` module is loaded in the kernel when deploying in standalone mode. Enterprise / Starter
Fix microk8s services subnet parsing. Enterprise / Starter
Fix some CVEs in the operator/updater/conversion webhook. Enterprise / Starter
Fix Matrix Content Scanner not working as expected. Enterprise
Configure max upload size in Secure Border Gateway request body size limit. Enterprise
Prevent users from editing Auditbot and Adminbot passphrases in the UI. Enterprise
Enforce pattern checks against inputs under options. Enterprise / Starter
Increase Matrix Content Scanner ClamAV startup reliability. Enterprise / Starter
Reduce false positives from Matrix Content Scanner. Enterprise / Starter
On RHEL and derived platforms, the installer should not rely on `platform-python` for tasks other than Firewalld and SELinux tasks for microk8s setup. Enterprise / Starter
Fix proxy variables configuration check preventing the installer to go through. Enterprise / Starter
Fix an issue preventing setup when a proxy is configured on the host. On a proxy configuration errors, the installer will now continue the setup process after displaying the verification error message. Enterprise / Starter
Enable MSC 3967 on Synapse to avoid some device verification issues. Enterprise
Setup the onprem-admin user as a MAS admin. Enterprise / Starter
Fix pulling operator & updater images from behind a proxy. Enterprise / Starter
Expired sessions are now automatically logged out of the admin interface. Enterprise / Starter
OIDC sessions are now refreshed correctly when the token expires. Enterprise
An error is now displayed when the standalone admin UI cannot load the audit/admin interface configuration. Enterprise
Ensure operator and updater metrics are correctly scraped. Enterprise
Ensure Telemetry room permissions are consistent. Enterprise
Ensure component settings for storageClassName override the global setting. Enterprise / Starter
Removing an item from a list field will now only delete one item. Enterprise
Setup the onprem-admin user as a MAS admin. Enterprise / Starter
Fix Synapse being stuck with registration closed even if explicitly allowed. Enterprise / Starter
Improve reliability of changing the Postgres password in cluster if the password seed changes. Enterprise / Starter
Fix potential permissions issues during microk8s upgrades. Enterprise
Construct storage for Matrix Content Scanner if deploying on ESS managed microk8s. Enterprise
Correctly import airgapped registry settings when upgrading from before 24.04. Enterprise / Starter
Remove unneeded reconciliations due to bad orphan detection. Enterprise / Starter
Fix updater metrics scraping. Enterprise / Starter
Improve reliability of setting up CoreDNS. Enterprise / Starter
Validate that the node IP is excluded from an HTTP Proxy if one is configured. Enterprise
Fix empty dashboards (NGinx, Kubernetes Workloads, etc) in Grafana. Enterprise
Fix missing VMAlert component which is required to gather record metrics. Enterprise / Starter
Fix microk8s stop command not stopping running containers. Enterprise / Starter
Improve reliability of some microk8s interactions.
Enterprise
Element Call participants limits feature is deprecated. The option has been removed from the UI. Enterprise
Jitsi and Element Call can not be deployed together.